Using a Content Upgrade Popup to Boost Your Email List
To be able to capture data for first-time visitors, collect additional information for current customers and grow your email database.
Prefer a shortcut? 16 free tools do parts of this for you.

Aim: To be able to capture data for first-time visitors, collect additional information for current customers and grow your email database.
Optimal Outcome: After learning how to use a content upgrade pop-up, you can now maximize digital marketing campaigns while adding potential customers to your email list.
What do you need to start: To start this SOP, you need to install Klaviyo in your Shopify account. You also need to plan ahead what promotions and content upgrades you want to include in your pop-up.
Why is this SOP Important: Pop-ups are more important in the success of any marketing campaign. Potential customers are presented with pop-ups as they browse your website. Pop-up marketing is among the most efficient strategies to increase growth. Customers' attention can change in a matter of seconds, therefore you need to establish a connection through a pop-up engagement.
When and Where to execute: You can use pop-up marketing strategy when you want to increase your email subscription, offer discounts and promotions, or gather customer data. You can utilize pop-ups in your websites but in this SOP, you will learn how to use pop-ups in your shopify account.
Who Should Be Doing This: Persons in charge of digital marketing
What is a Pop-up?
A pop-up is a message that appears in your website while visitors are browsing. This message is automated and triggered to appear on the website screen. The goal of any pop-up is to compel visitors to engage further by using explicit calls to action. Pop-ups solicit email addresses from website visitors in exchange for a desirable benefit, such as a discount or exclusive content access.
Pop-ups are displayed to potential customers at a critical decision-making point in their exploration of your company's website. A pop-up marketing strategy is one of the most effective ways to increase growth through online business platforms.
Resources/Tools & Set up
-
You need to log in to your Shopify account. If you don’t have an account yet, click create and start a free trial and enjoy 3 months of Shopify for $1/month on select plans.
-
You also need to install Klaviyo. The steps will be explained in detail later on this SOP. This will allow you to make and customize your pop-ups for your Shopify website.
Step 1: Go to your Shopify store.
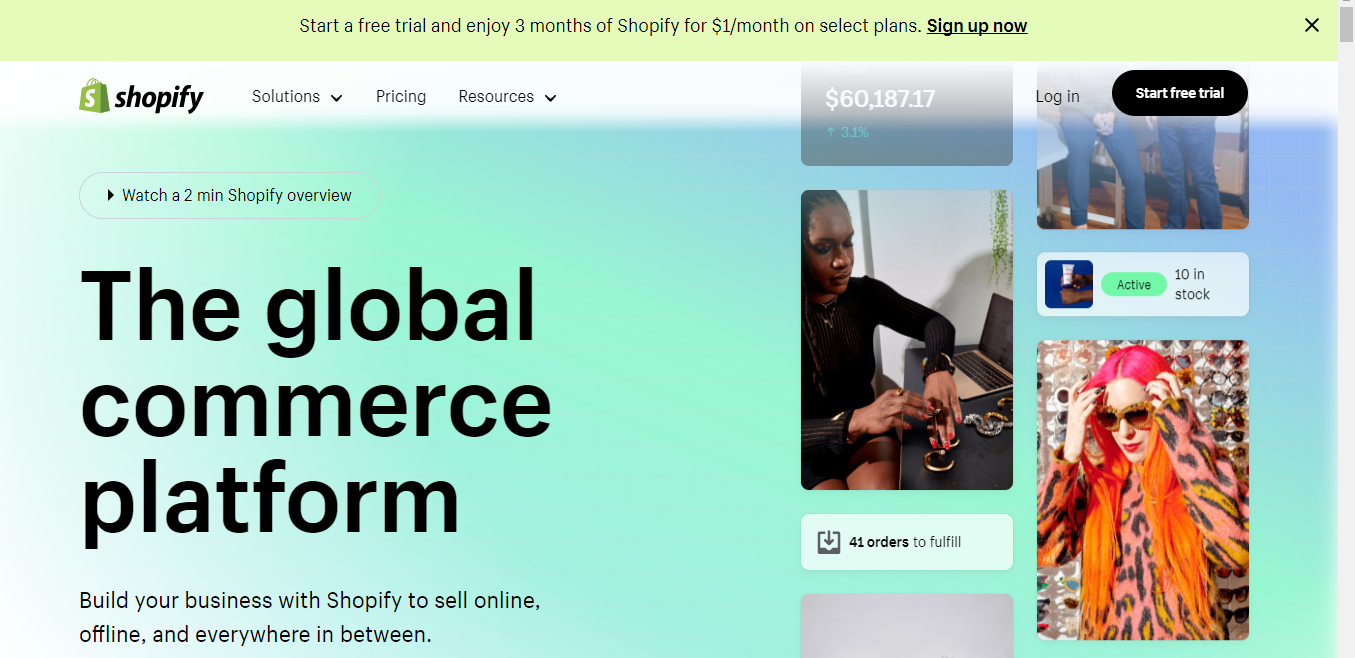
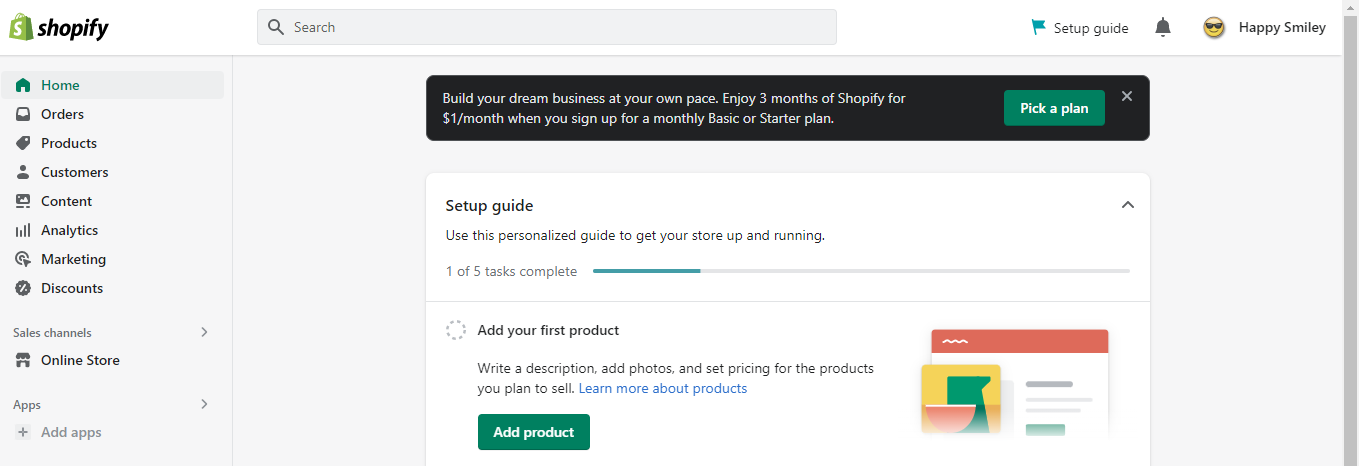
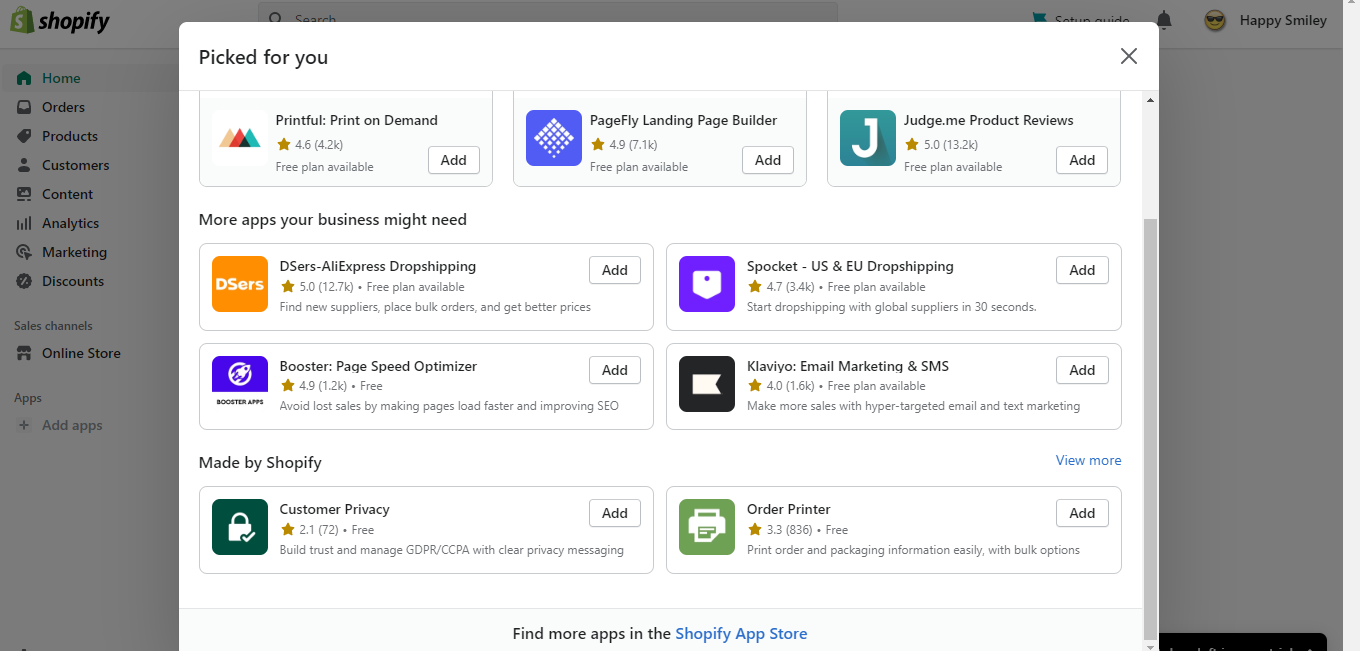
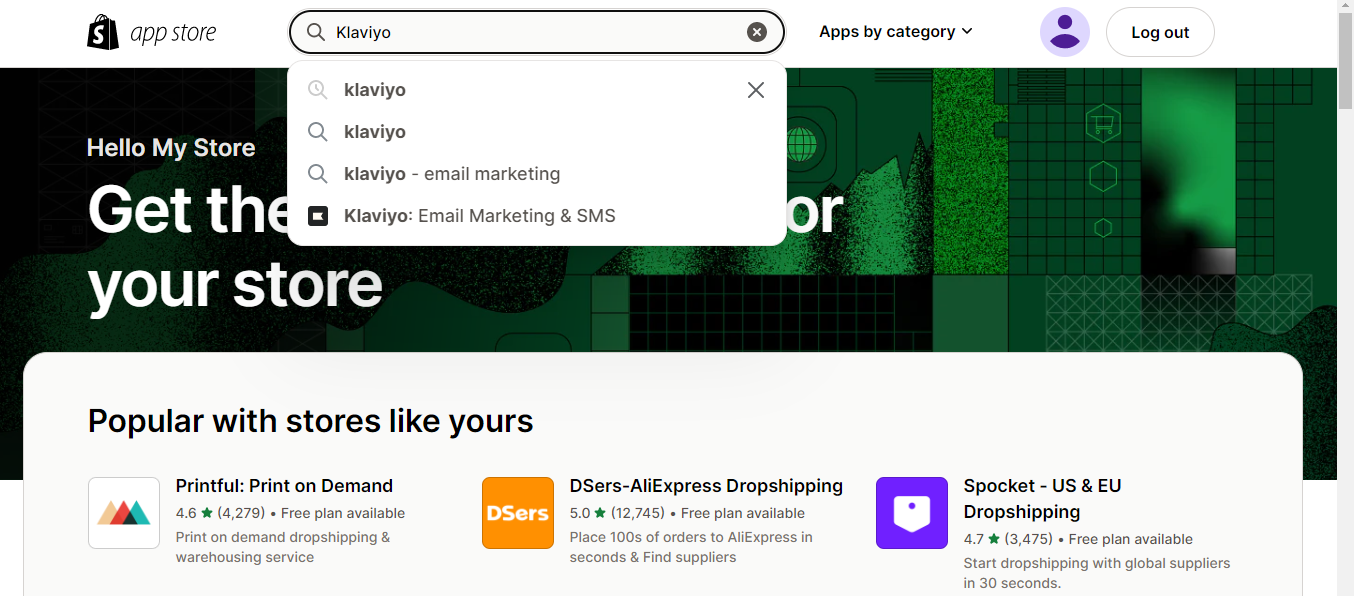
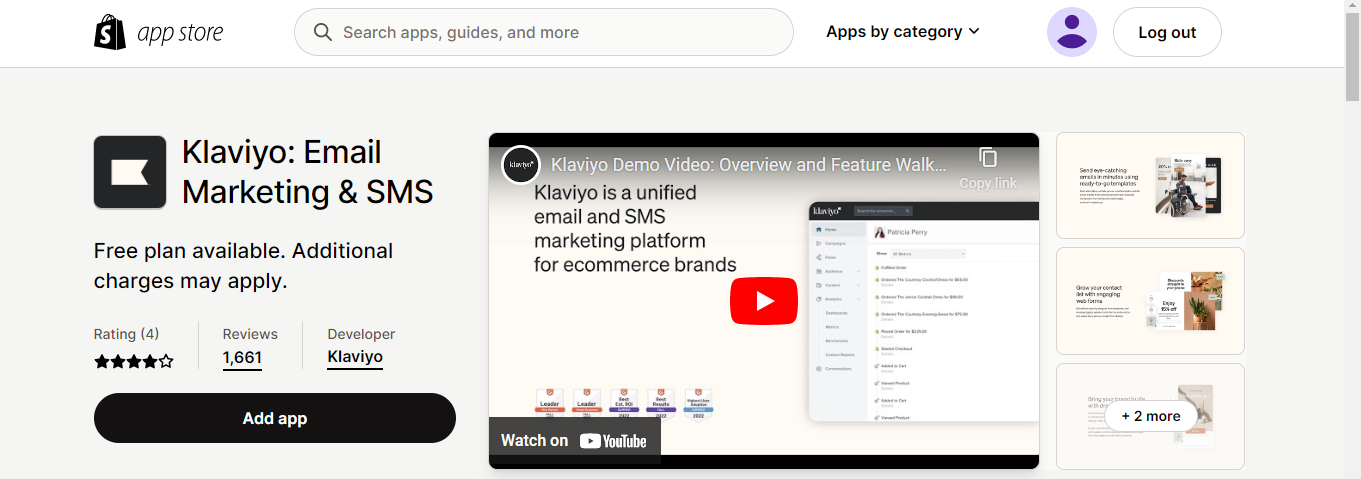
1.1. To start with, log in to your Shopify account.
1.2. Connect your Shopify store to Klaviyo,an email marketing service tool. You can do this by navigating the “Apps” tab on the left side of the screen.
1.3. You will be directed to this navigation tab. Click “Shopify App Store”.
1.4. Click the search bar and type in “Klaviyo”.
1.5. Click “Add app” to proceed.
Step 2: Install Klaviyo
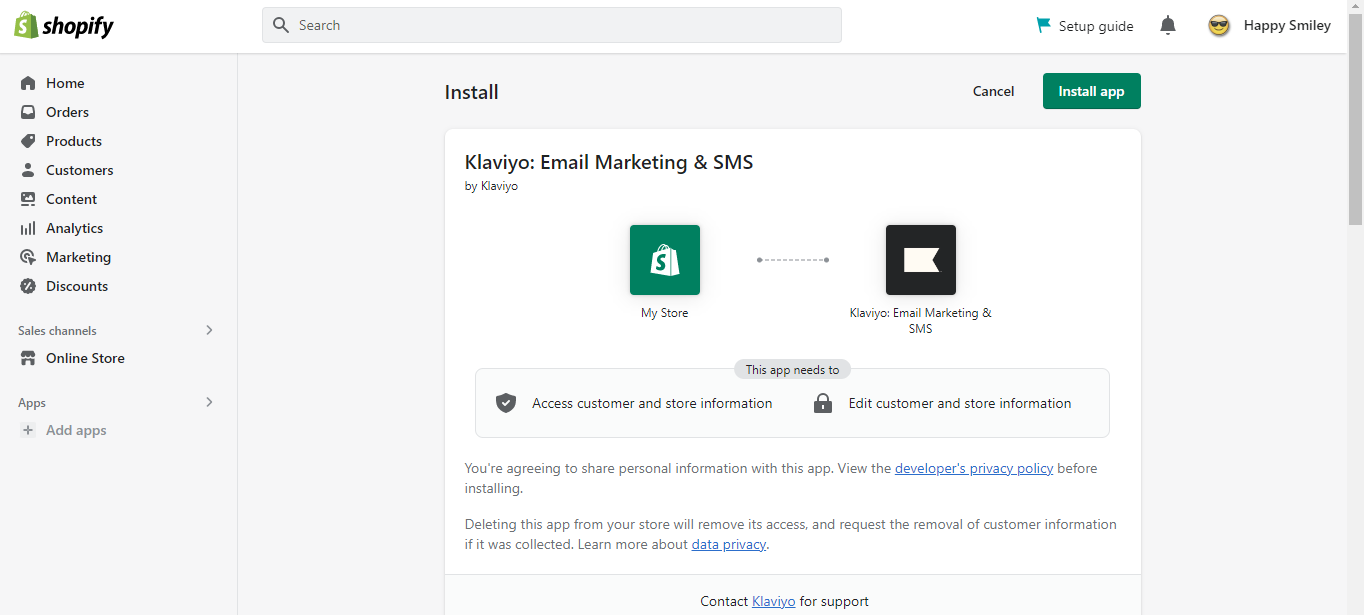
2.1. Click “Install app”.
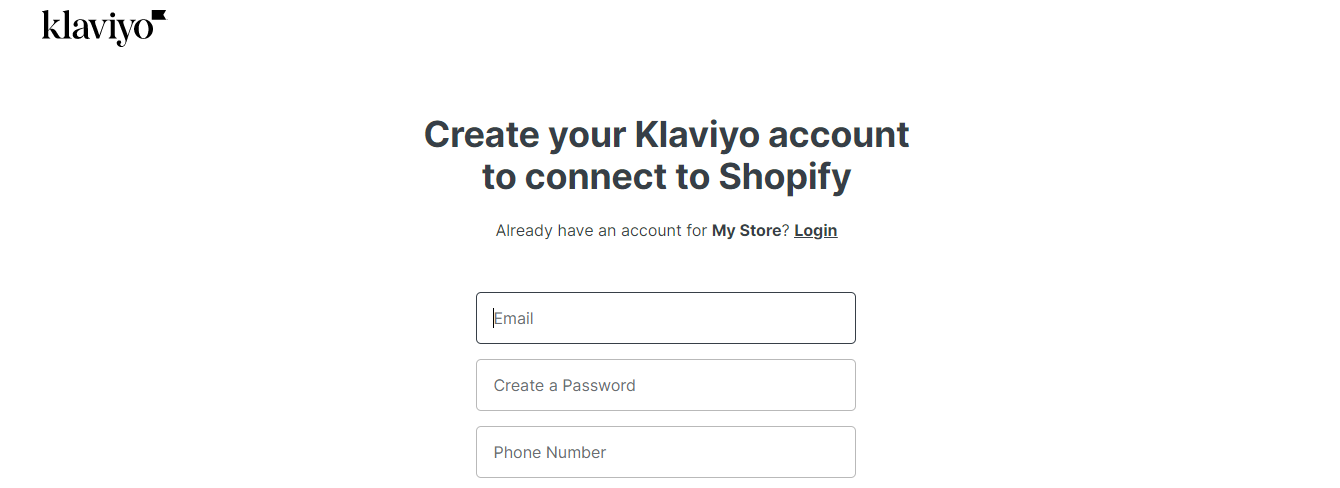
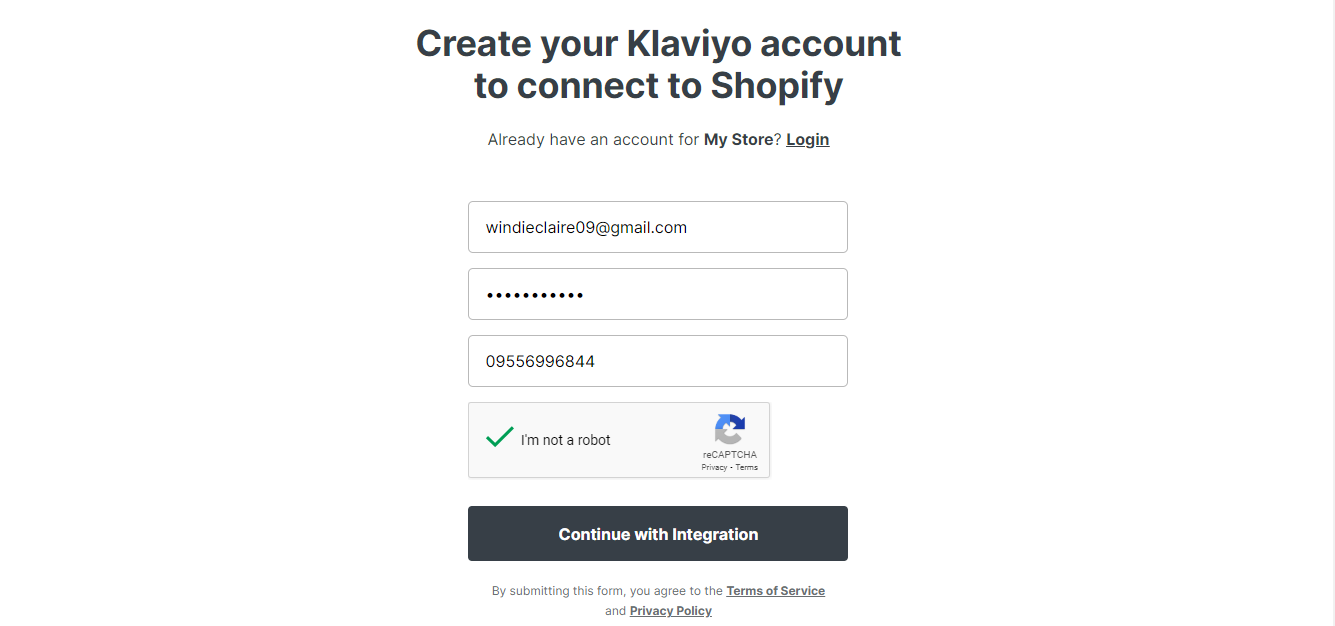
2.2. To proceed, you need to create your Klaviyo account. Use your Shopify email and create a password. Make sure to take note of your login details.
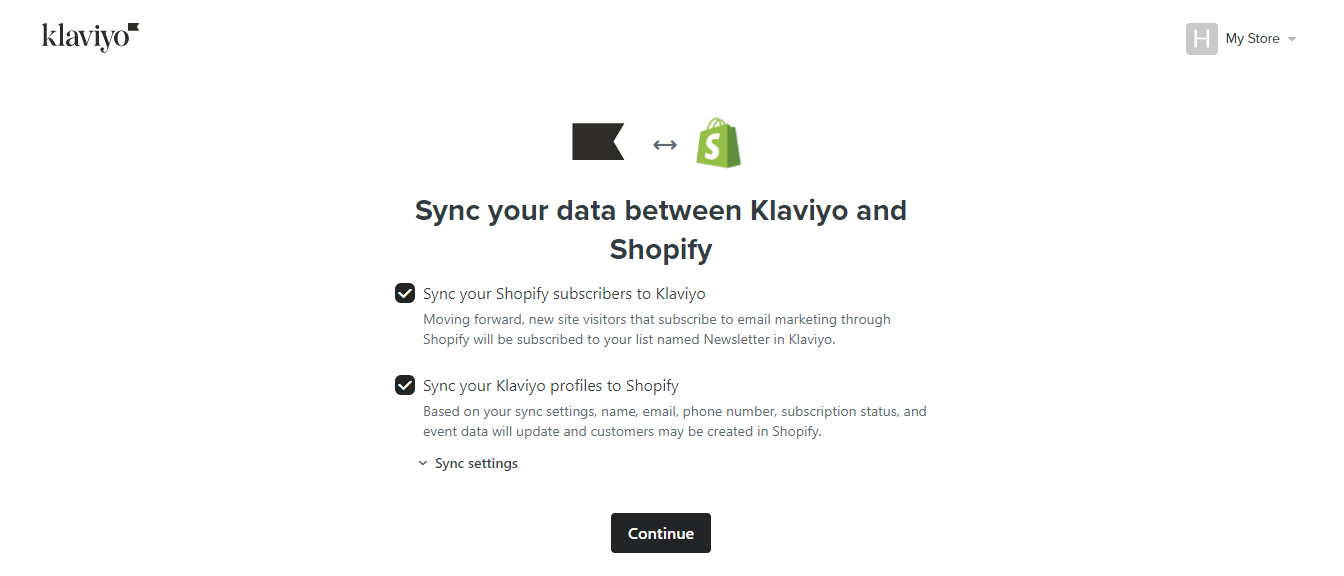
2.3. Once done, click “Continue with Integration”.
2.4. Proceed by clicking”Continue”.
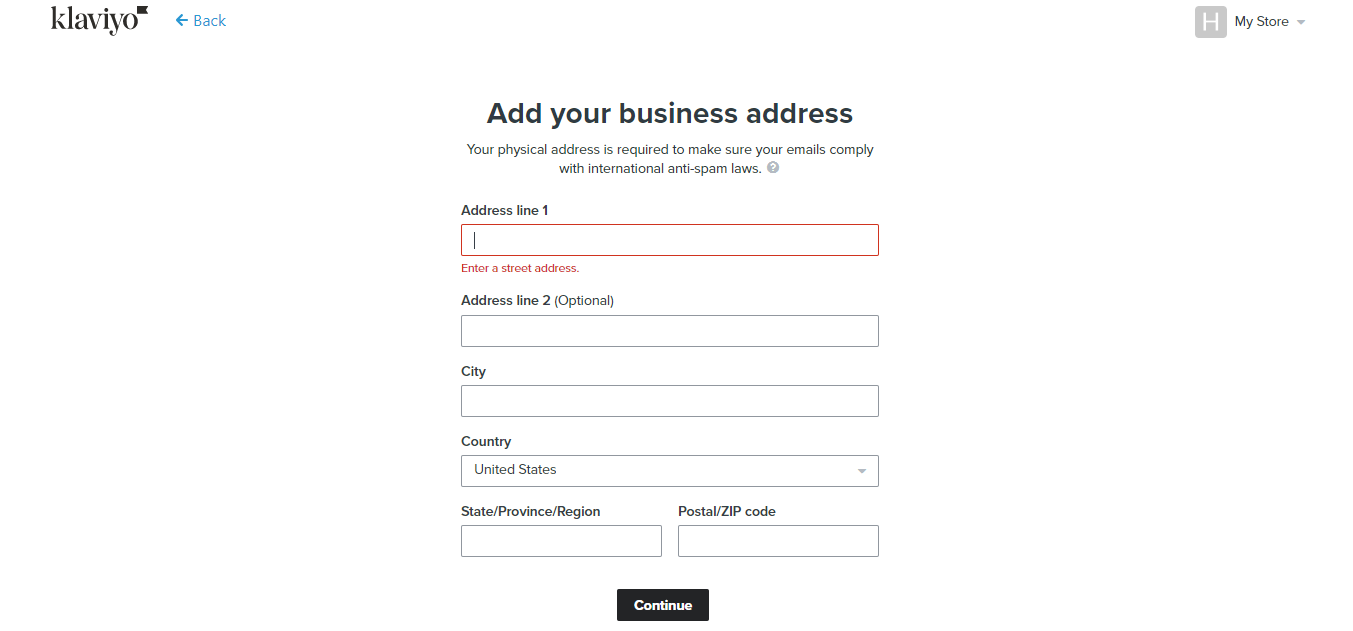
2.5. Enter your business address. You may use your address if you don’t have a physical store.
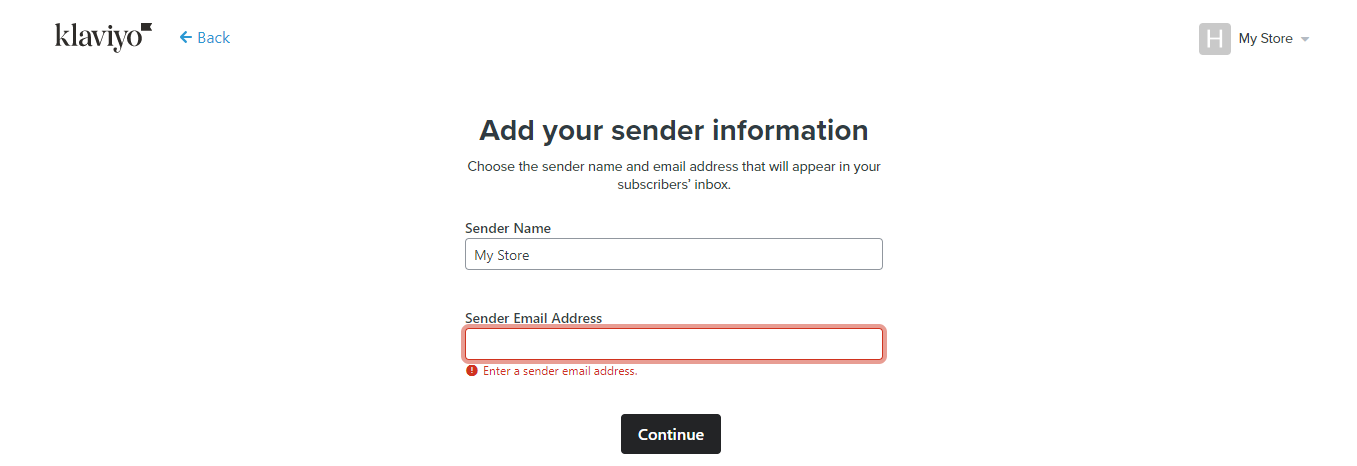
2.6. Enter store details and don’t forget the sender email. Make sure to use the one you associate with your business. If you already have a business email, it is advisable that you use it. If you don’t have one yet, no need to worry. You can update anytime. Then, click “Continue”.
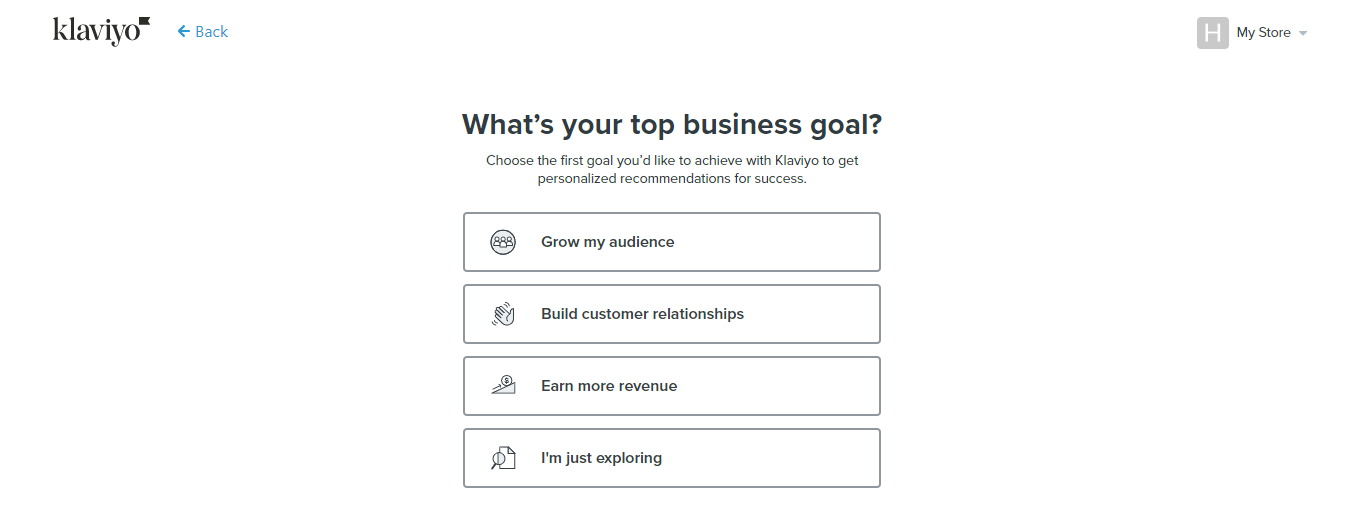
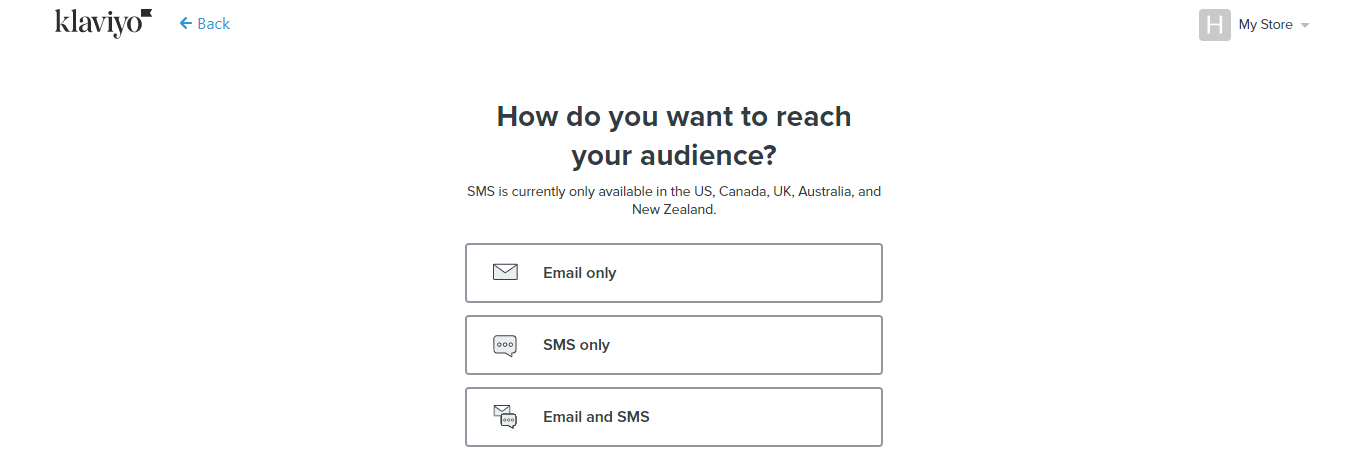
2.7. Select your top business goal. Then, choose how you want to reach your audience.
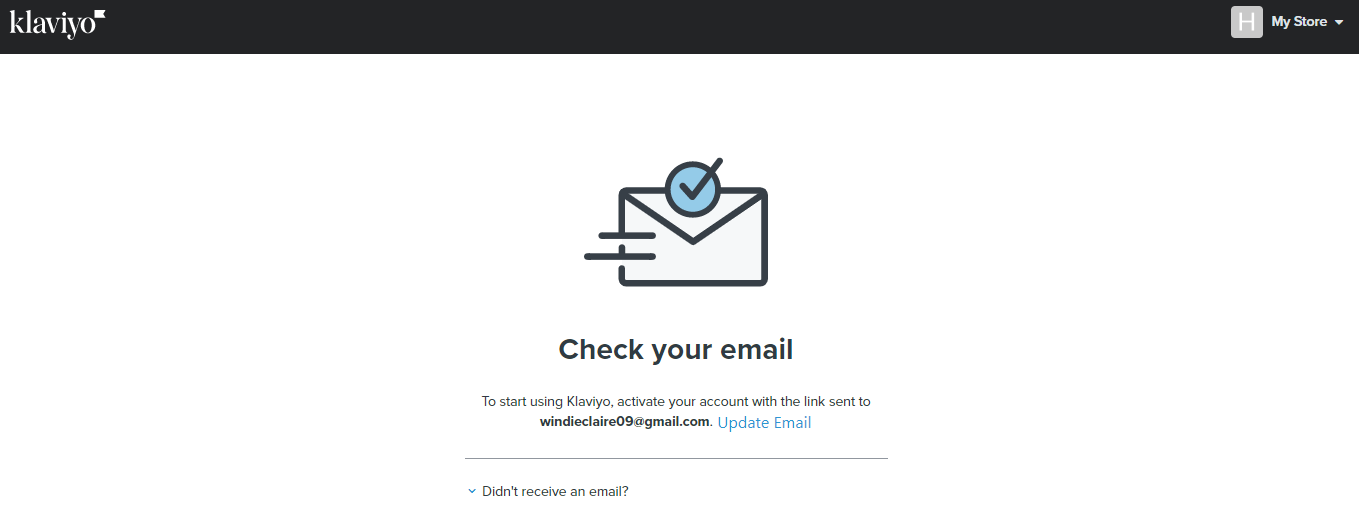
2.8. This time, you need to check your email inbox to activate your Klaviyo account.
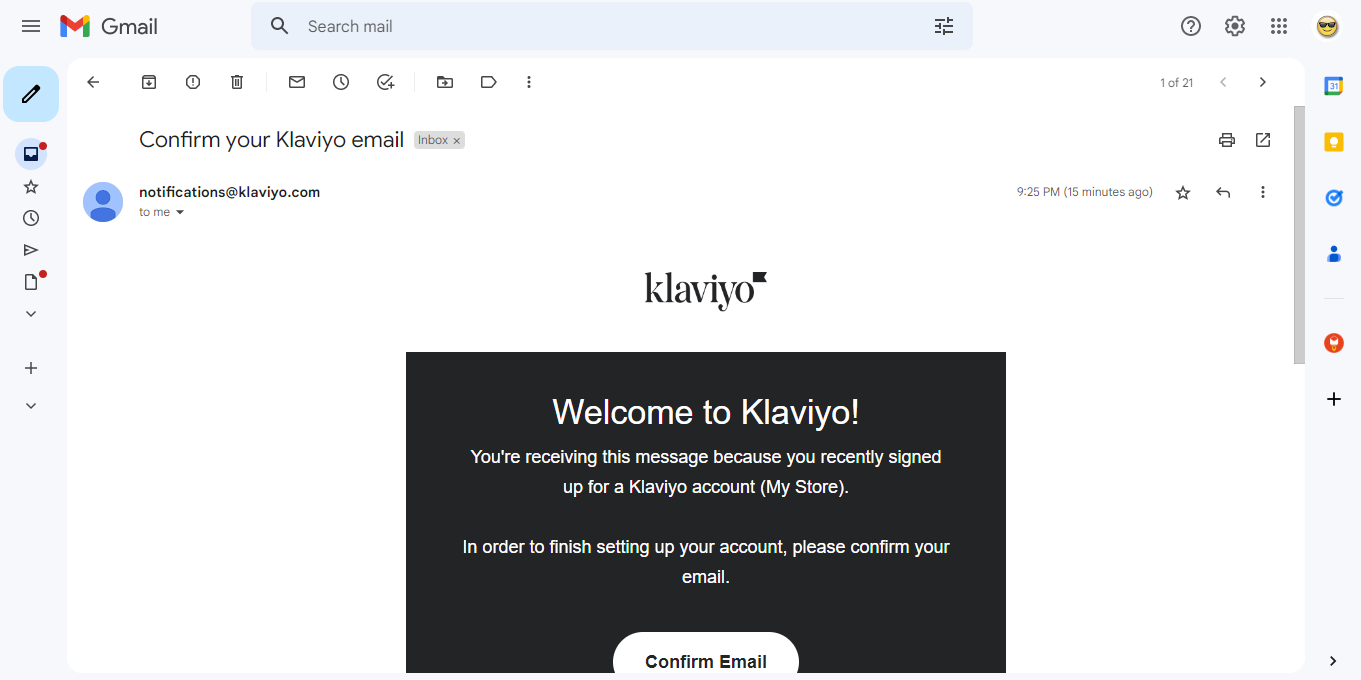
2.9. Activate your Klaviyo account by clicking “Confirm Email”.
Step 3: Generate an Email List from your Pop-up
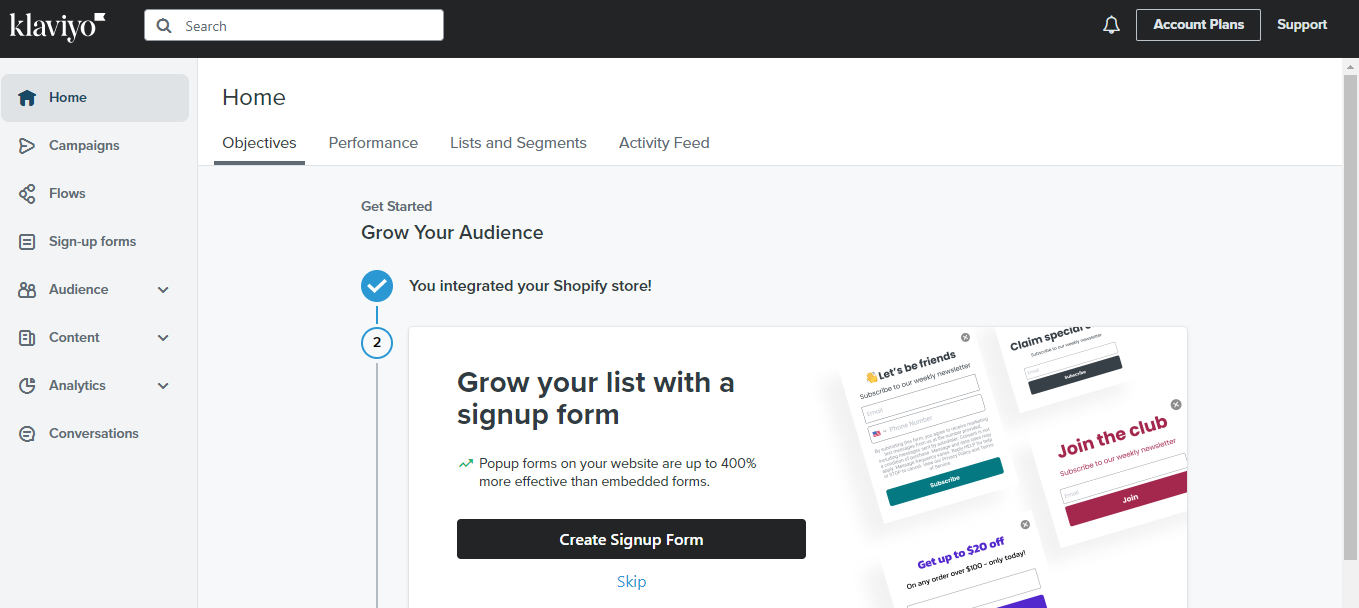
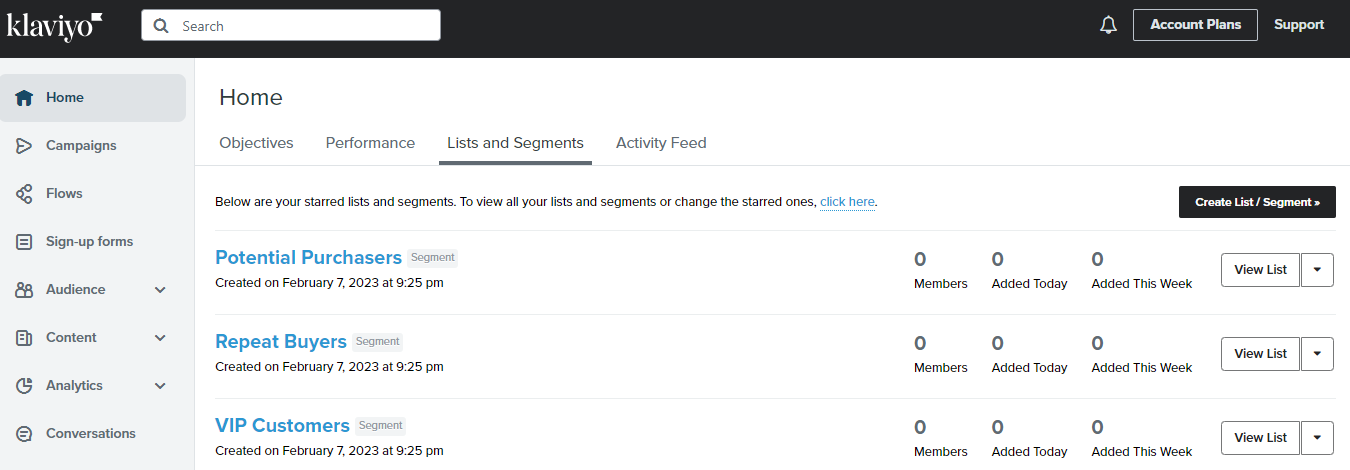
3.1. After confirming your email, you will be redirected to your Klaviyo account. Click “List and Segments” to be able to set up your automated email list from your pop-up engagements.
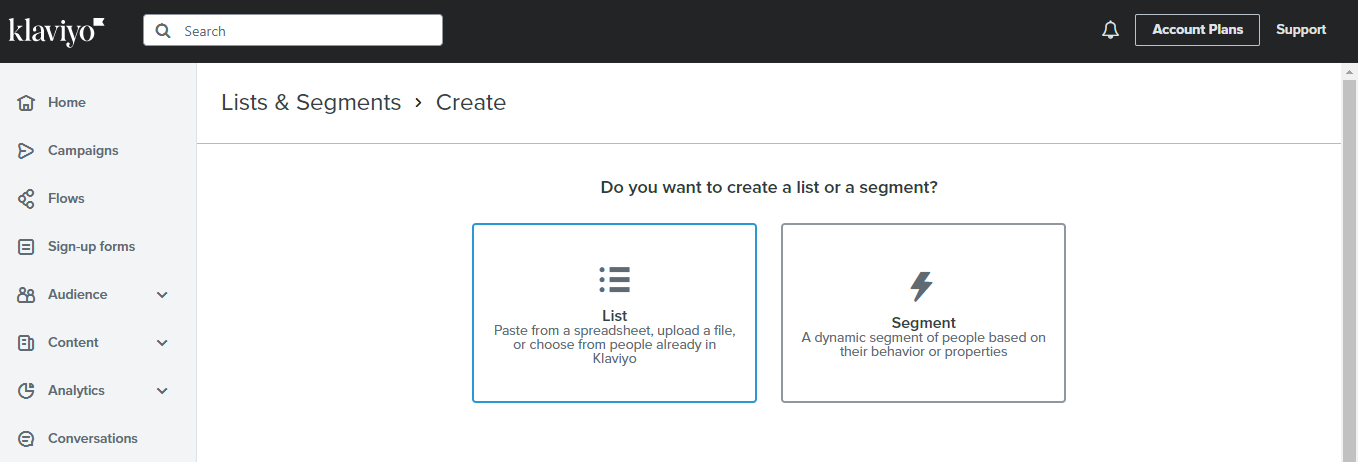
3.2. Click “Create List”.
3.3. Choose “List”.
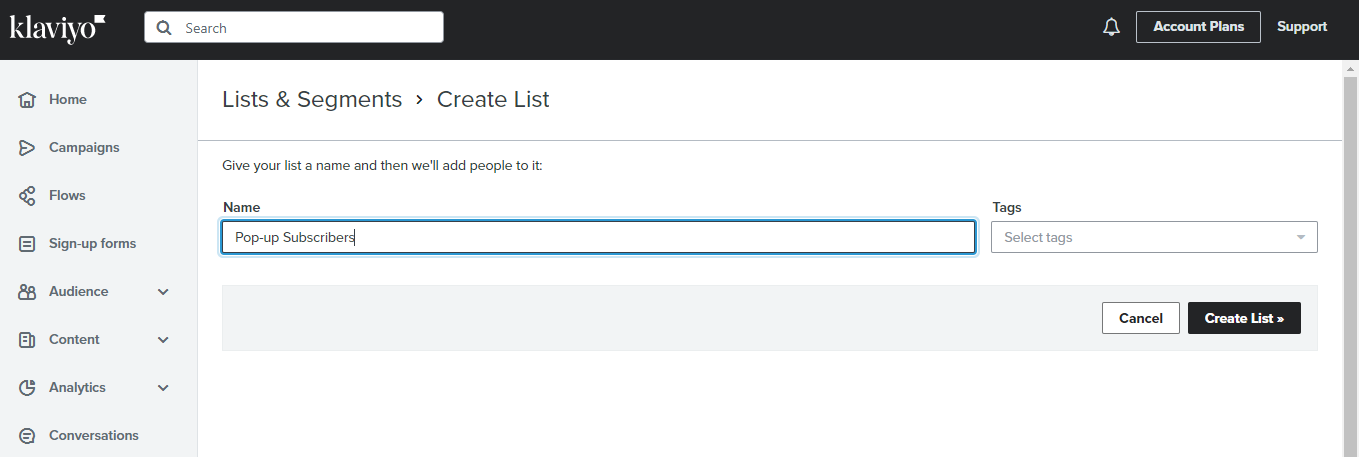
3.4. Name the list you created. On this list, we will be able to gather all the emails from the pop-up engagements. You can choose any name of your preference but on this SOP, we will name it Pop-Up Subscribers.
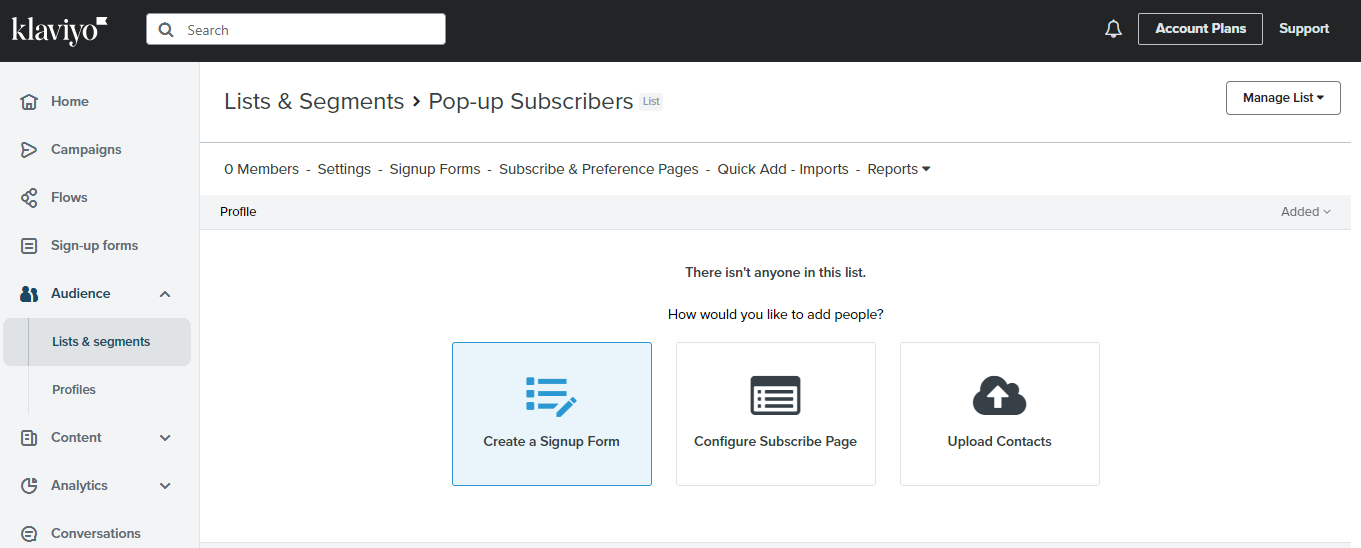
3.5. Click “Create a Signup Form”. After this, you will now proceed to creating our pop-up.
Step 4: Create your Pop-up Form
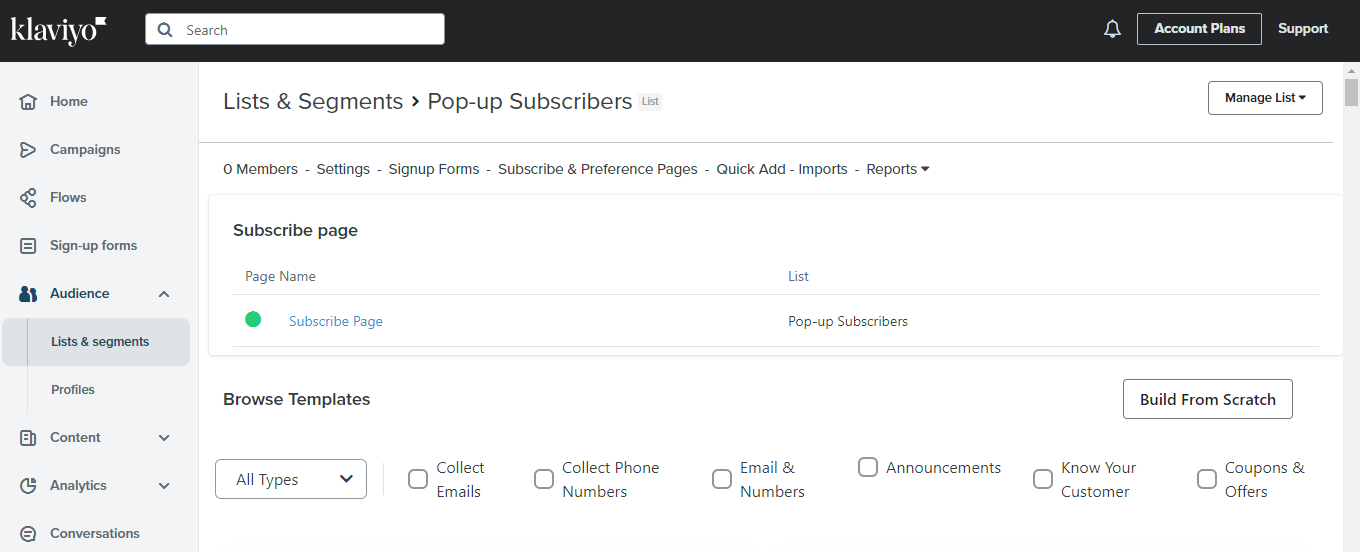
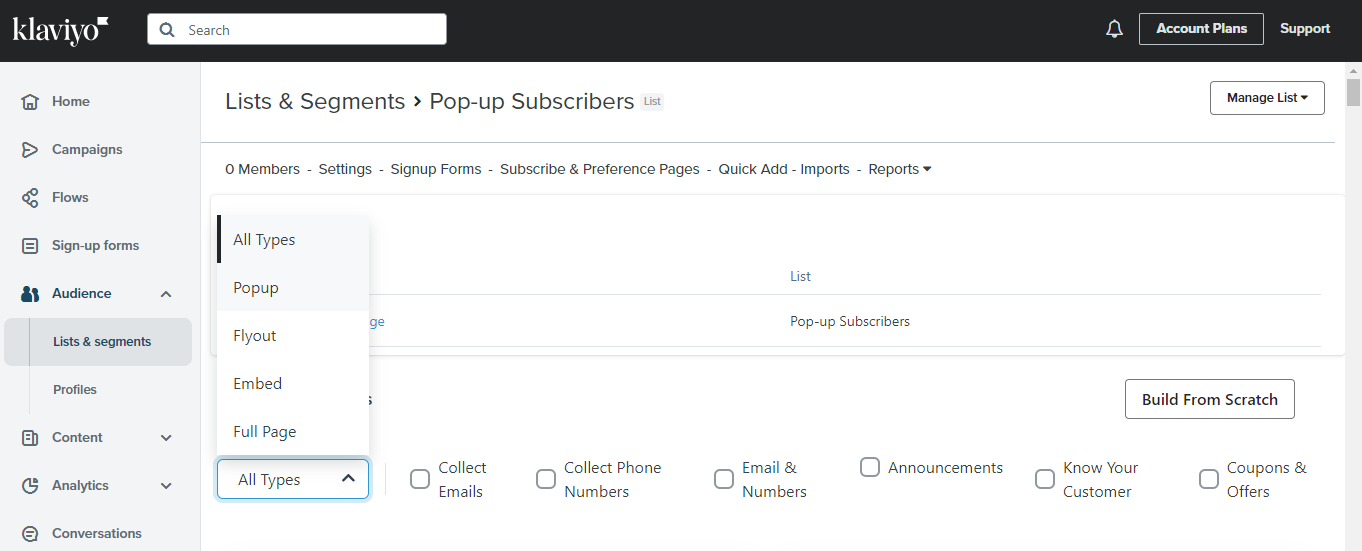
4.1. Under Browse Templates, you will find the “All Types” dropdown button. Choose “Pop-up”.
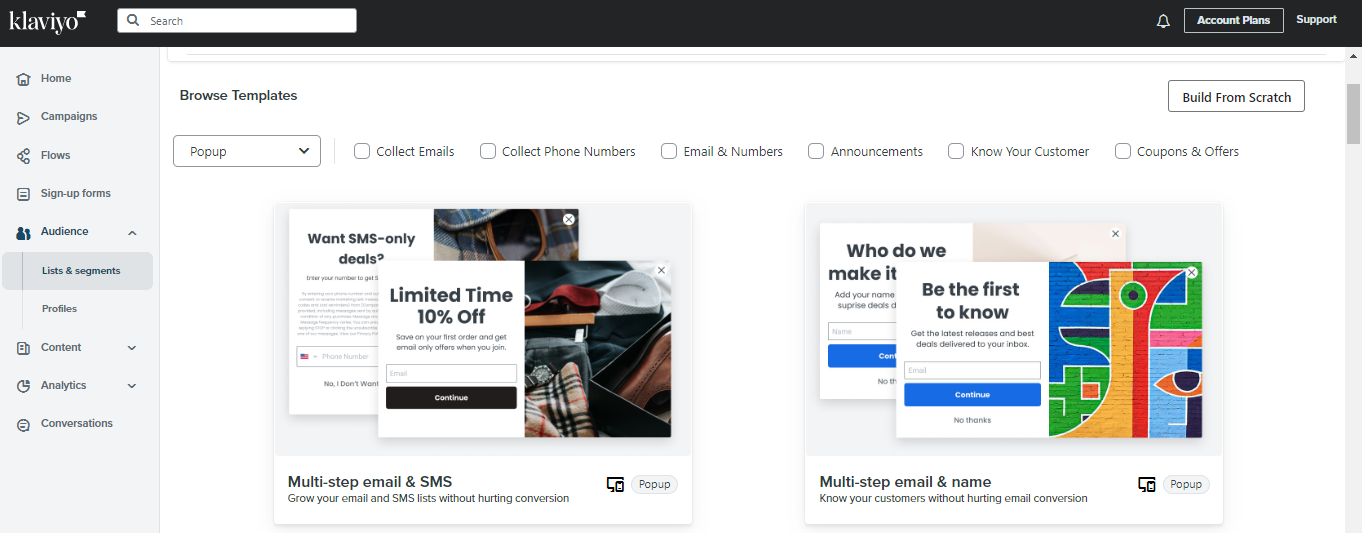
4.2. You will be presented with various templates to choose from. You can also click “Build From Scratch” if you already have a design ready.
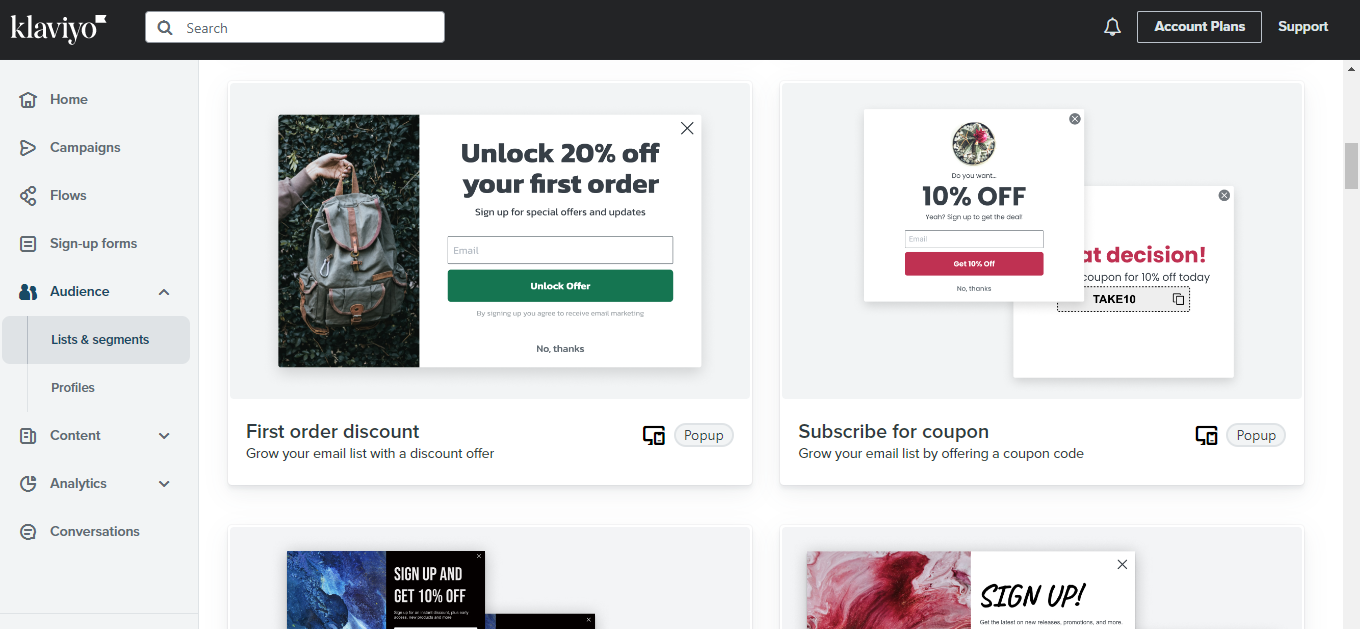
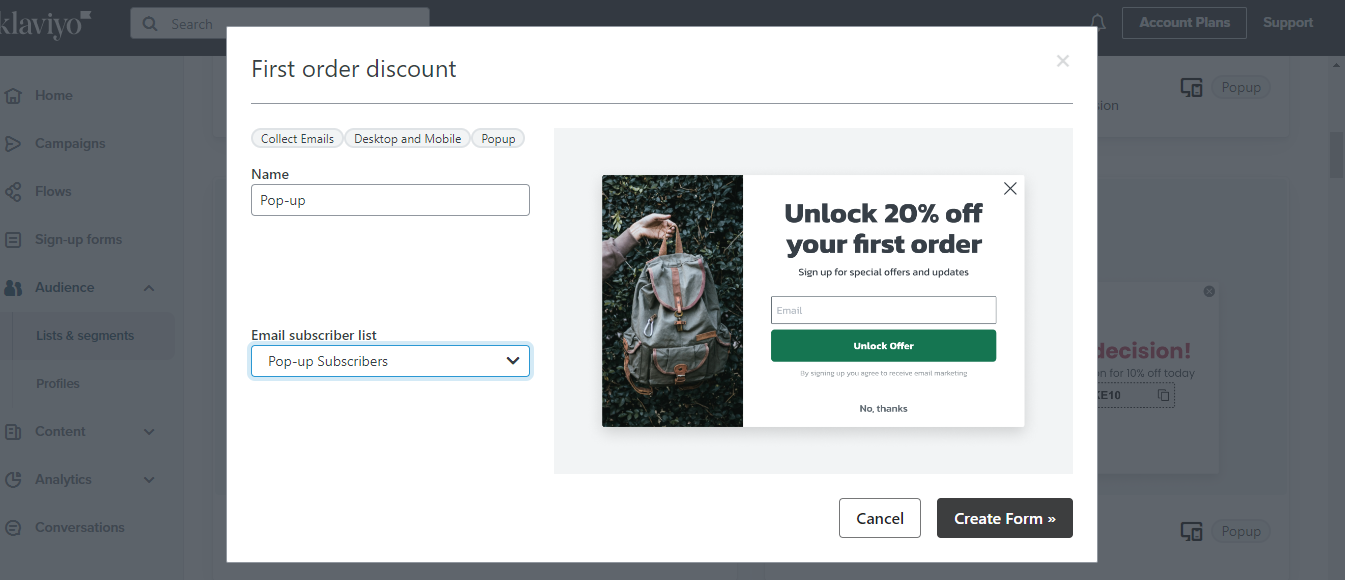
4.3. Let’s choose and click “First order discount”.
4.4. Under Email subscriber list, choose the one you have created earlier. So, for this SOP, we choose Pop-up Subscribers. Then, click “Create Form”.
Step 5: Customize your Pop-up
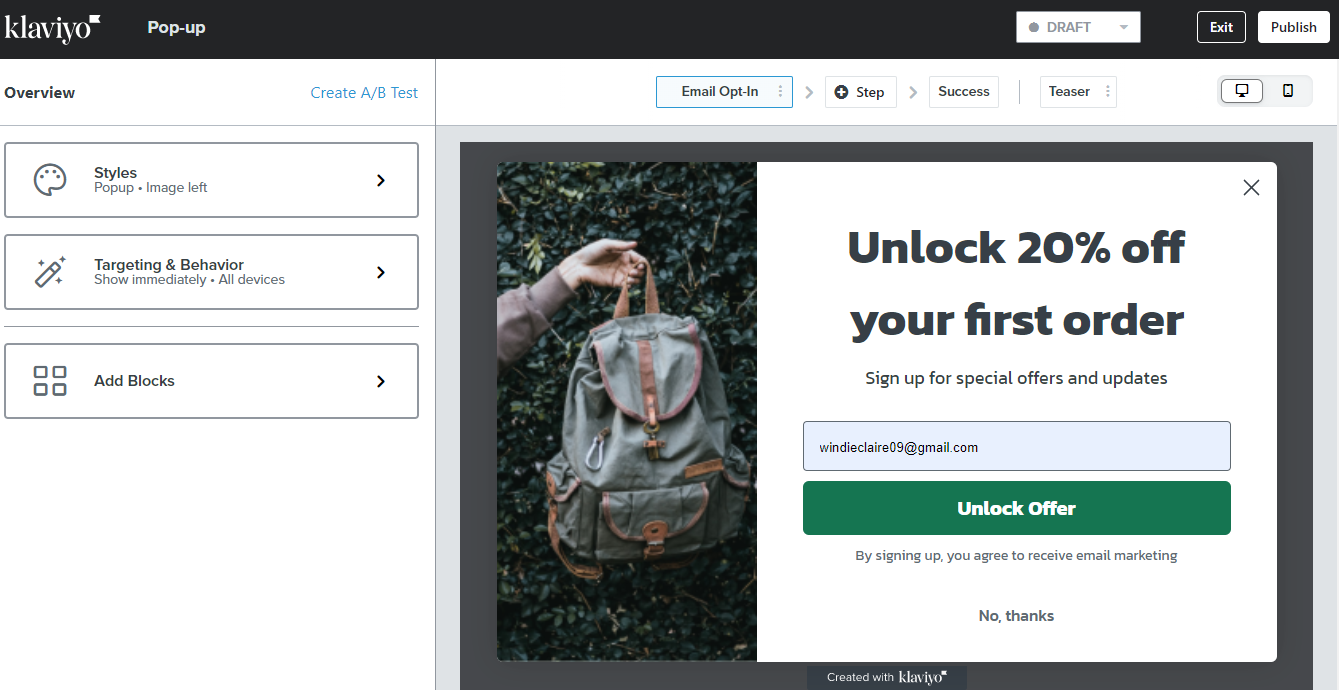
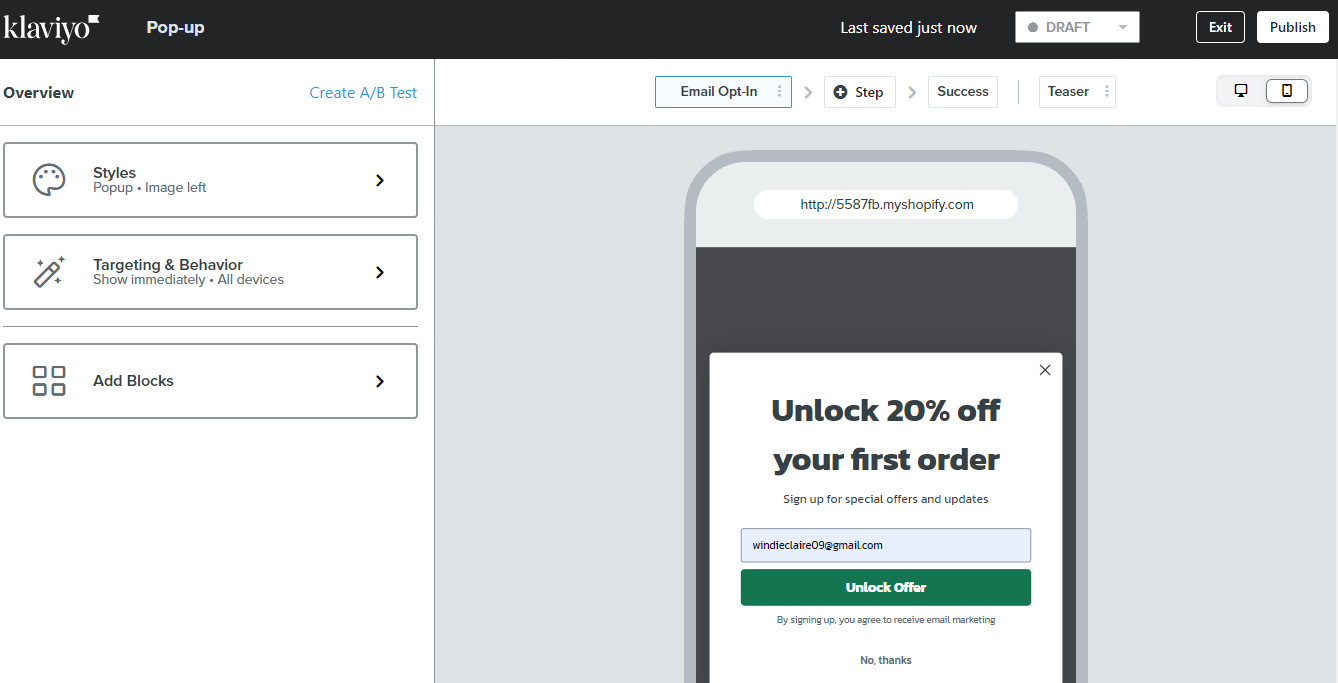
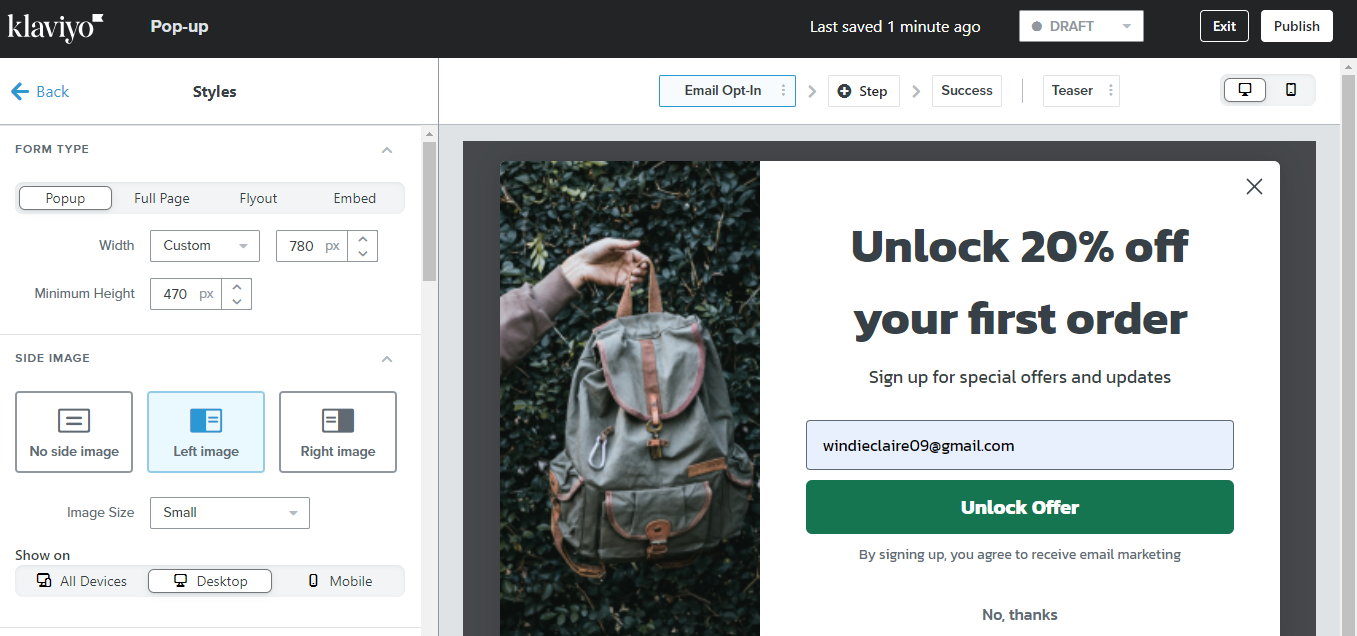
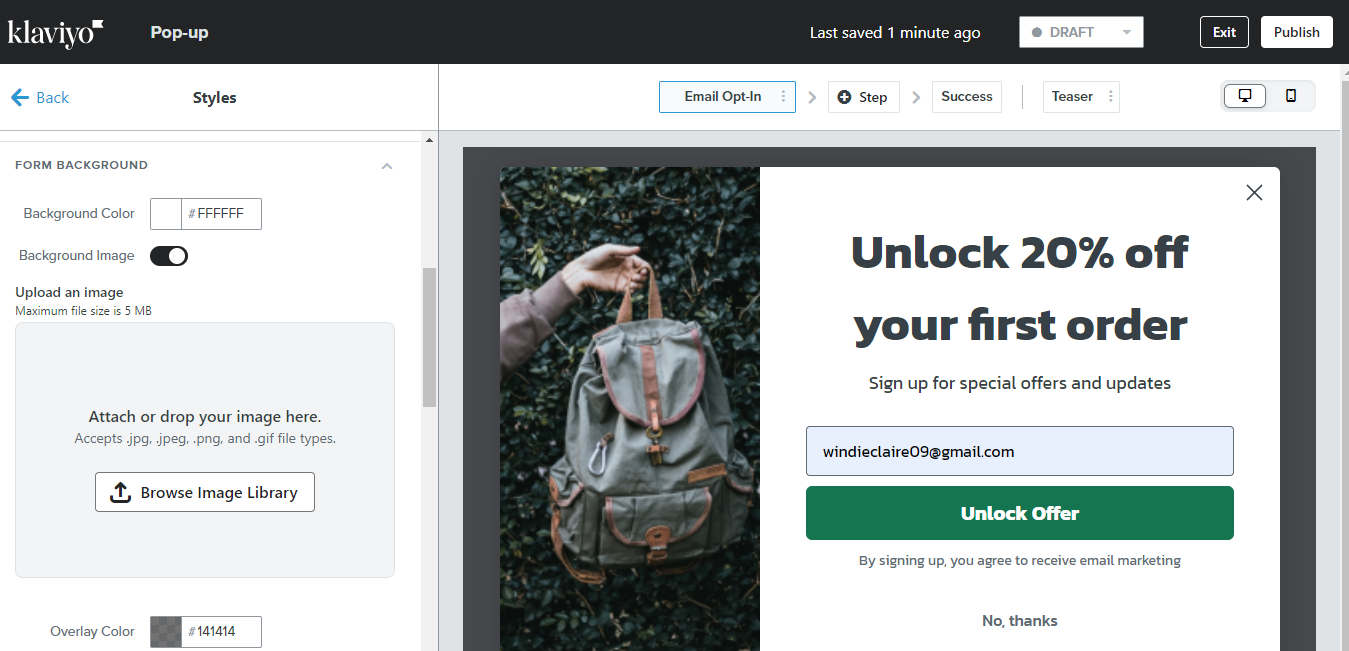
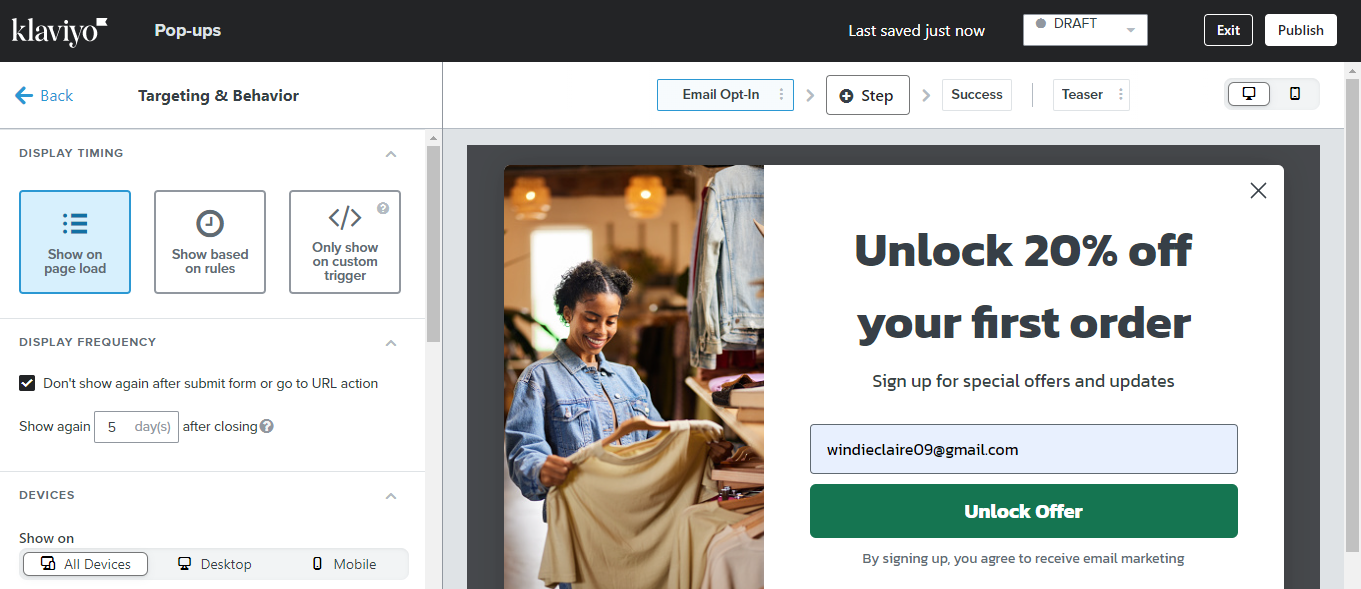
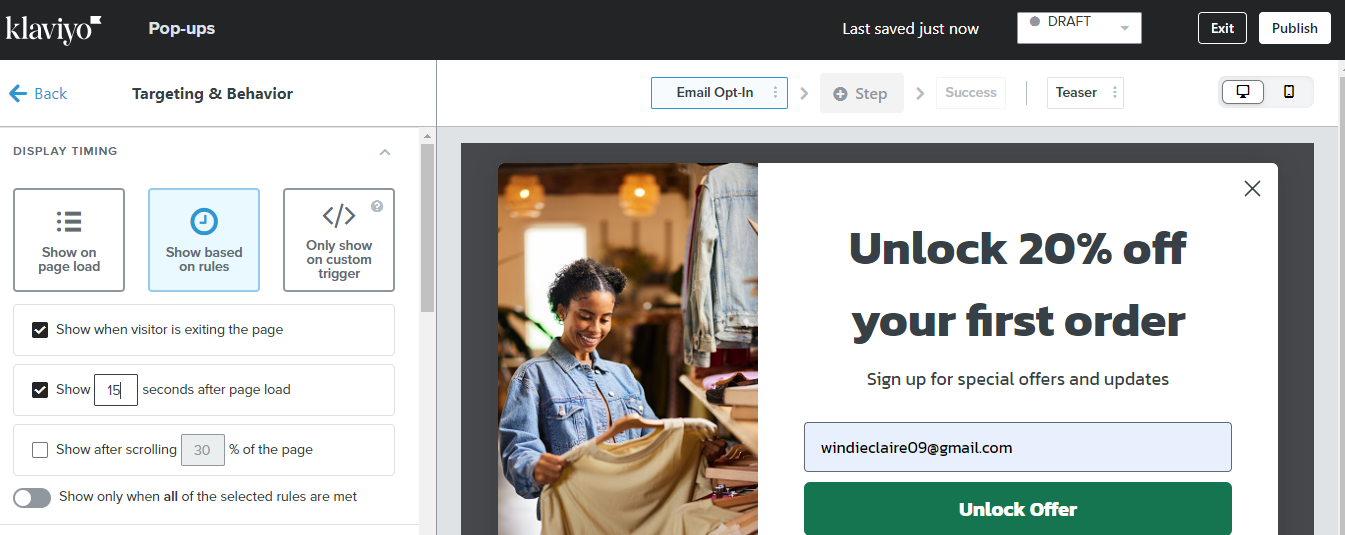
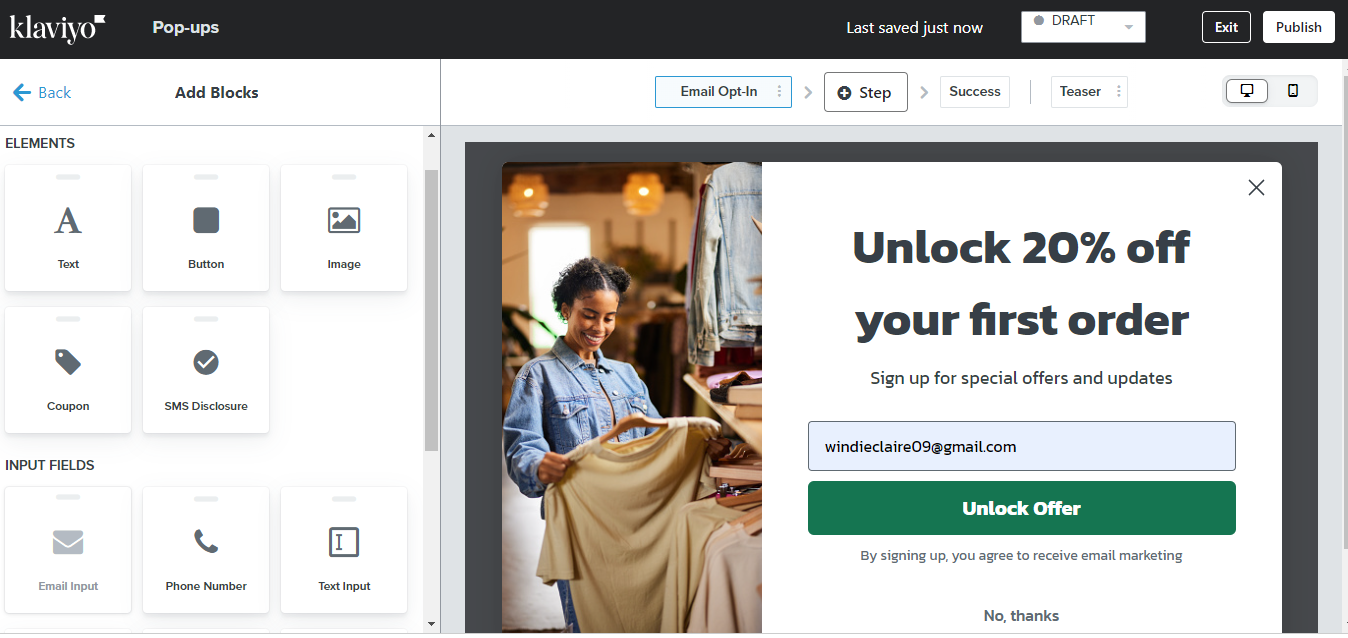
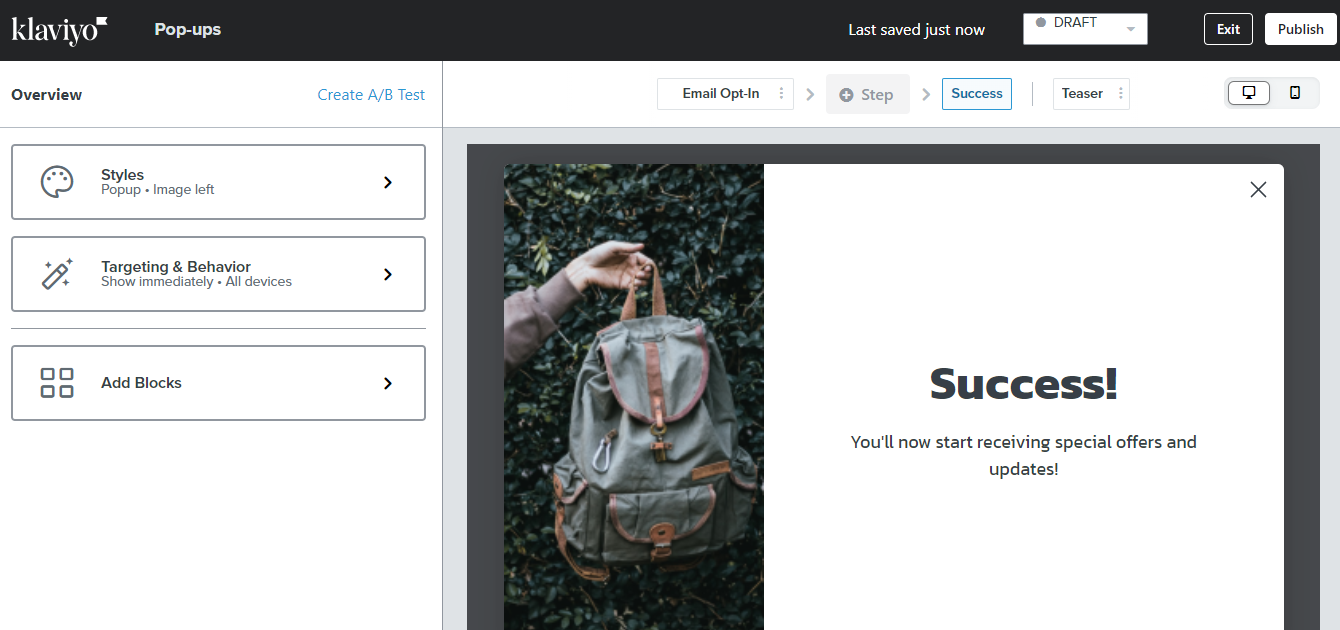
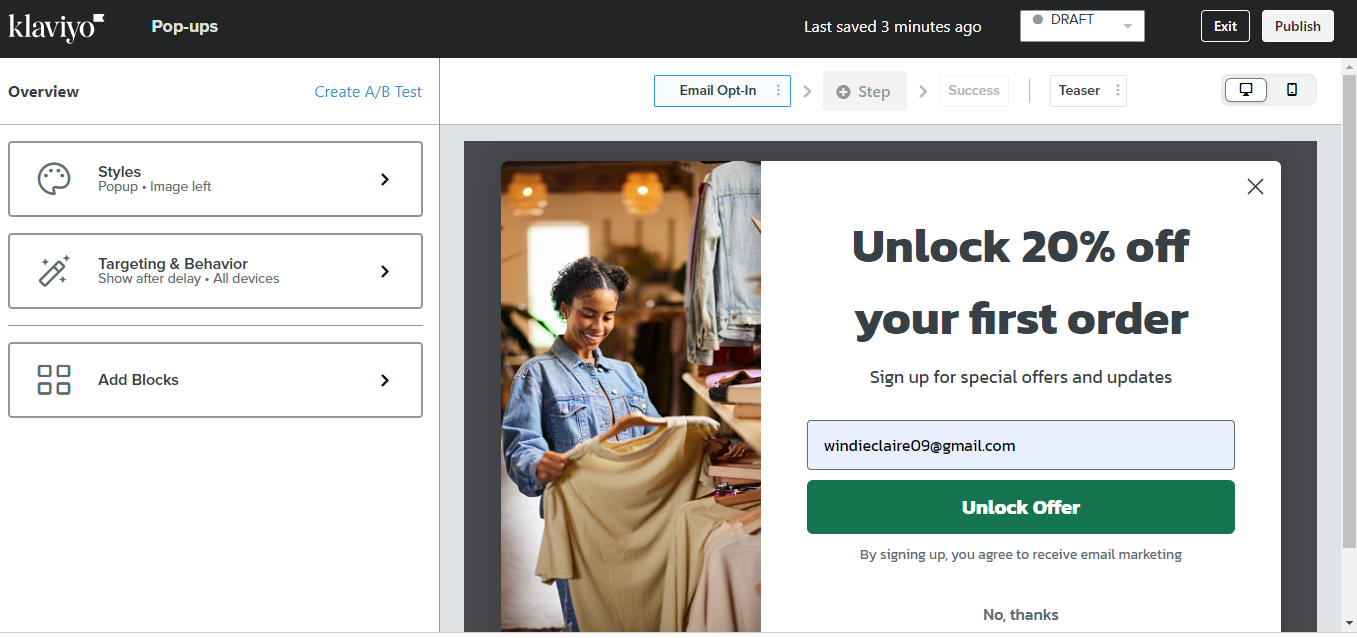
5.1 On the left side of the screen, you will find “Styles”, “Targeting & Behavior”, and “Add Blocks” under “Overview”. These options will let you customize your pop-up form.
5.2. You also have an option to take a look at your form on a desktop or mobile display.
5.3. Under “Style”, you may customize the text, font style, font size, background picture, etc.
5.4. Now, we have customized our form. Let’s proceed to “Targeting & Behavior.” Under “Show on page loan” option, you can set the display time, display frequency, and the target audience.
5.5. Under “Show based on rules”, you can decide more specifically to whom and at what particular time the pop-up will be shown.
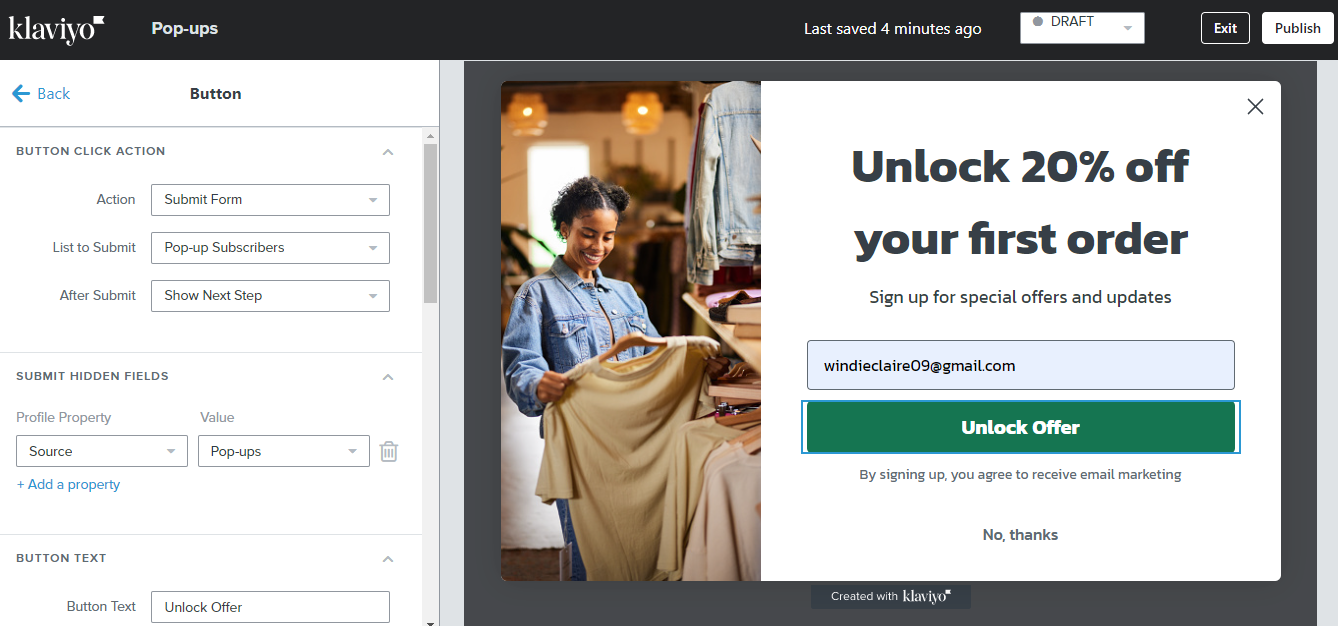
5.6. Now, let’s go to the “Add Blocks” option. Here, you modify the blocks found in your form. You may also choose what actions will be made when clicking the buttons.
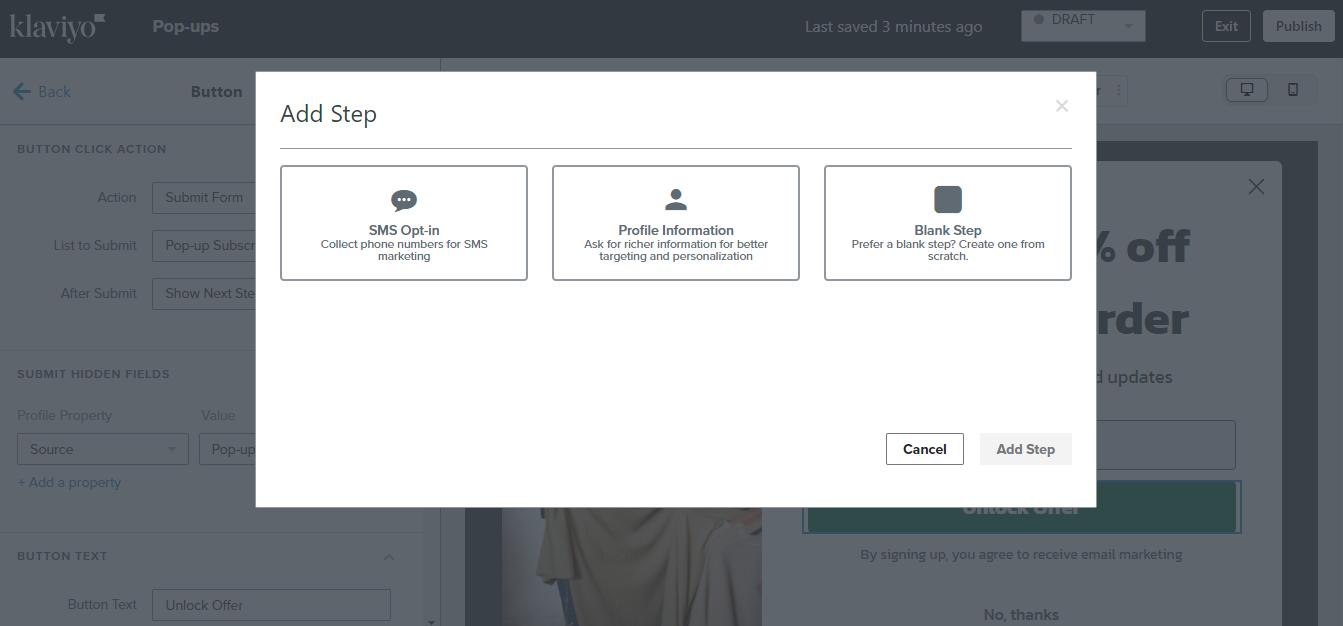
5.7. Under “Button”, you will see an option for the click action. You will also need to choose what are the click actions after submitting the forms or entering their emails. You may choose to close the form or show another step after clicking. You may add a success form after.
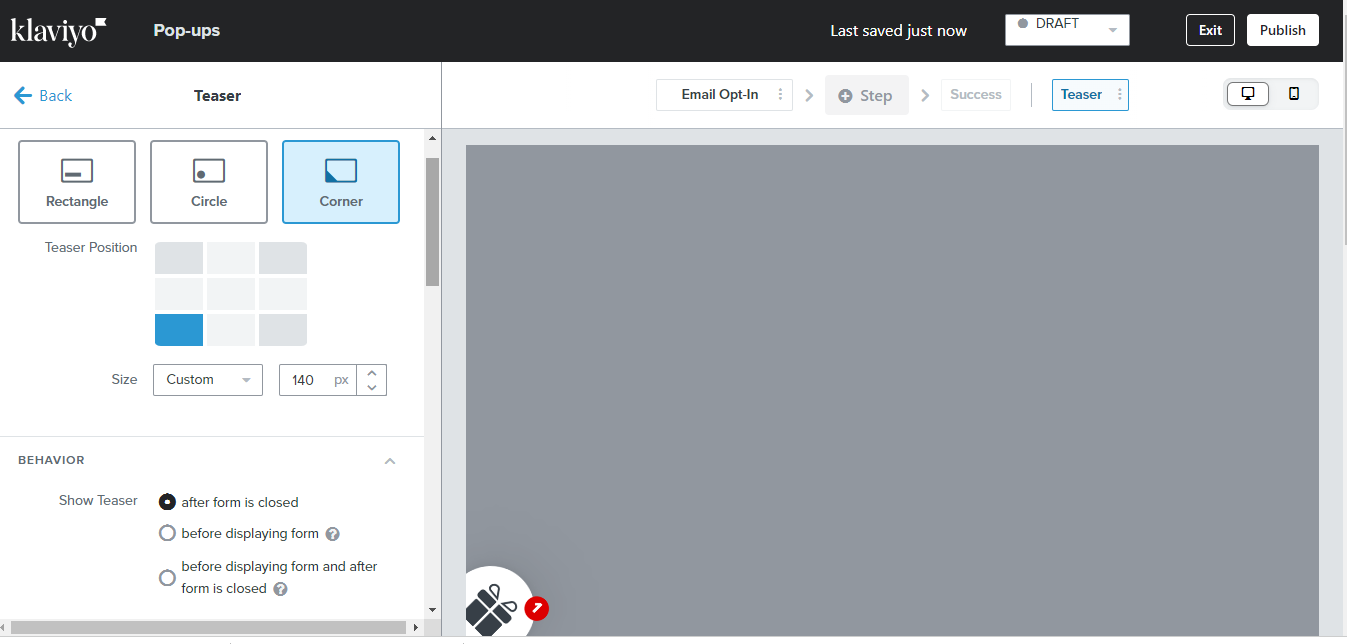
5.8. There is also an option to add a Teaser which you can also customize.
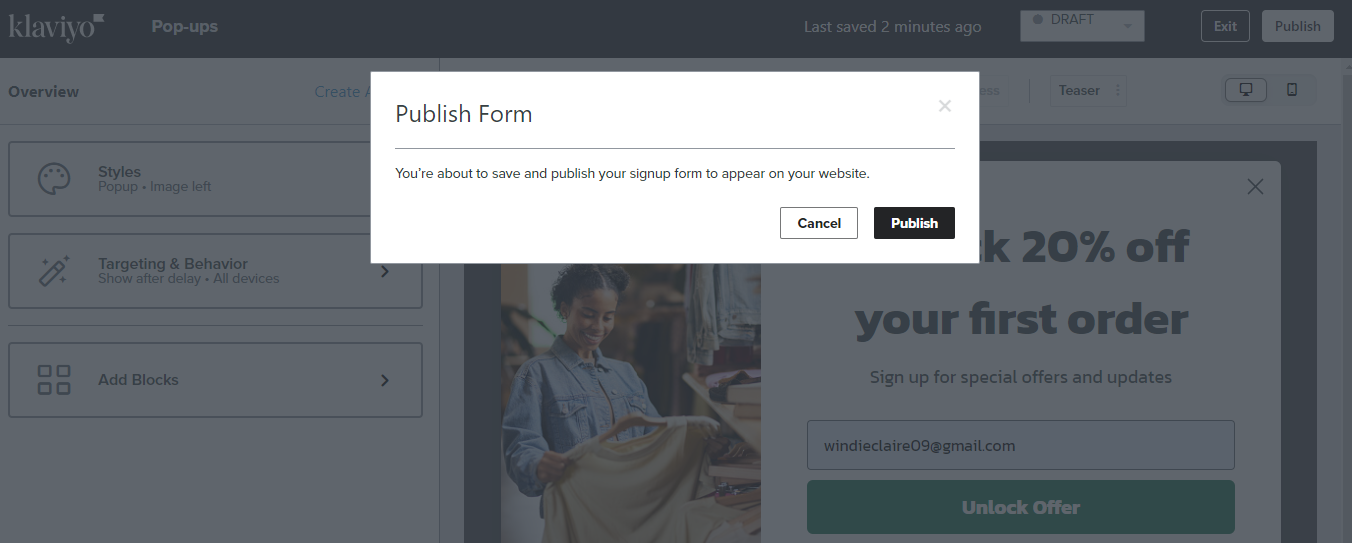
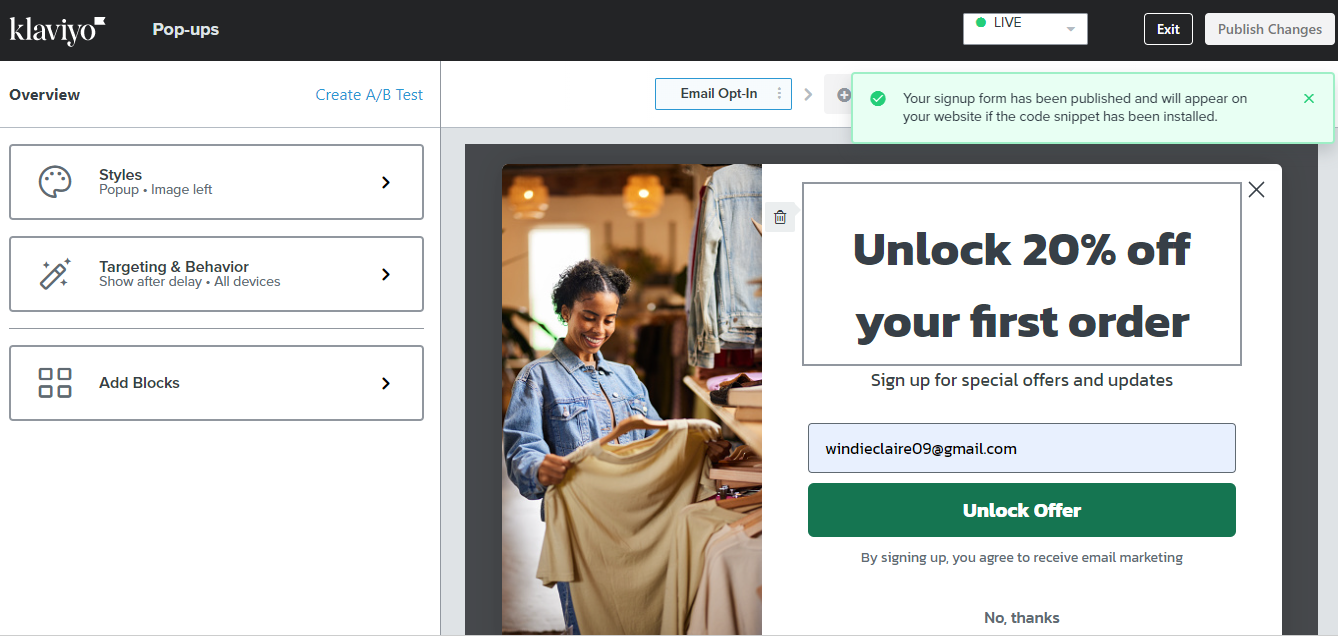
4.6. Now that your pop-up form is ready, you can now click “Publish”.
Step 6: Create Email Flow
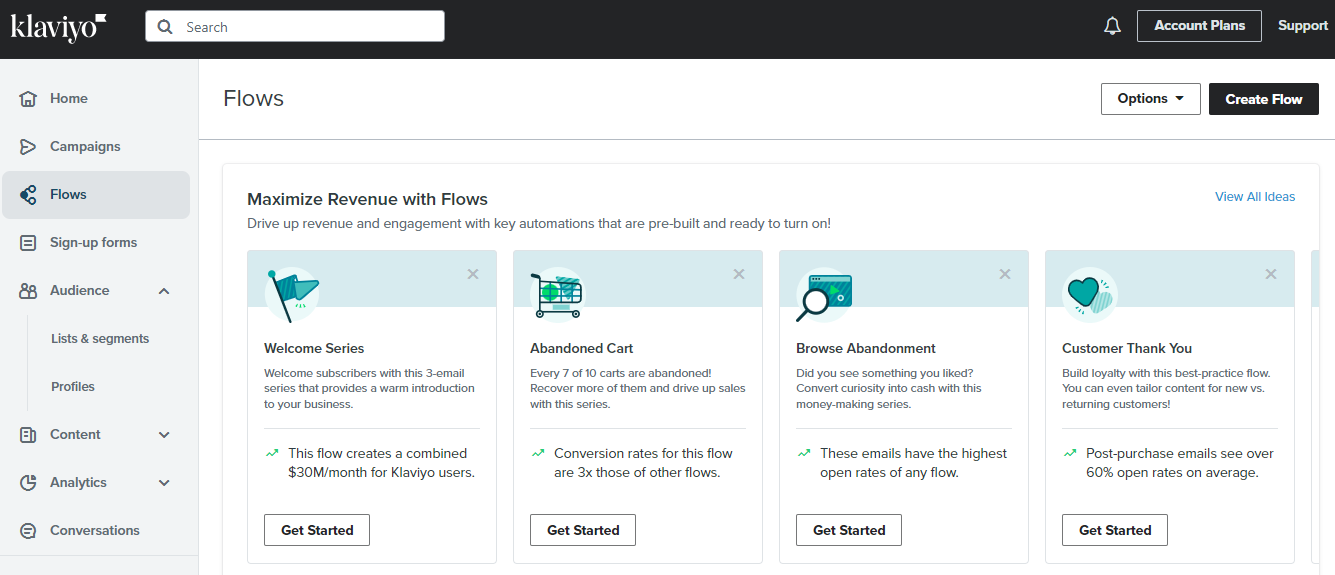
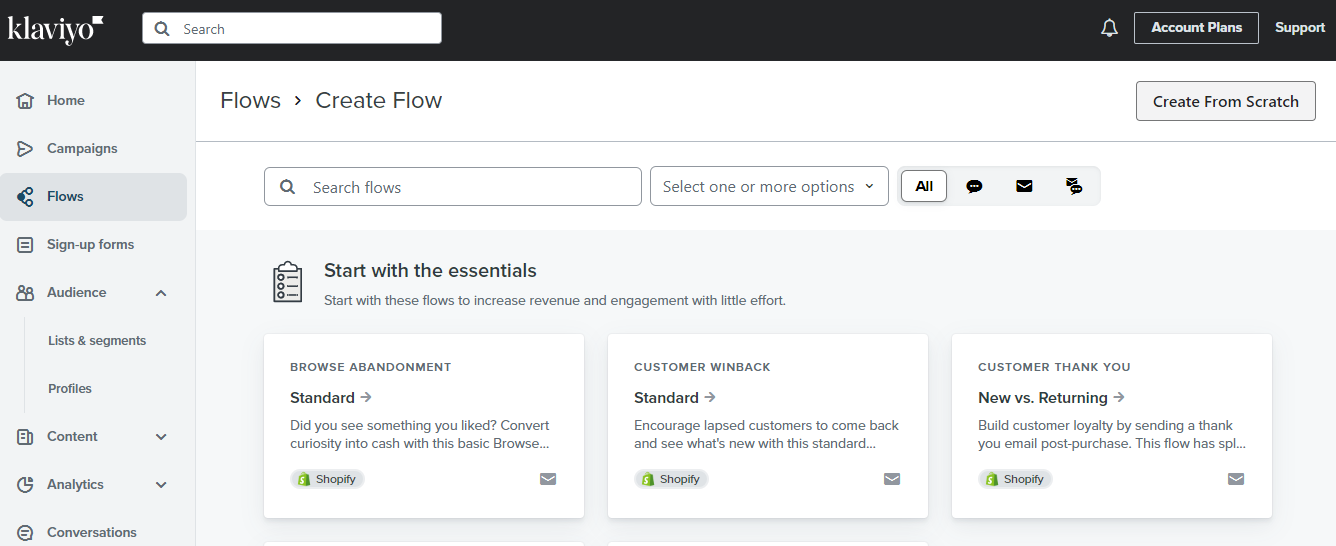
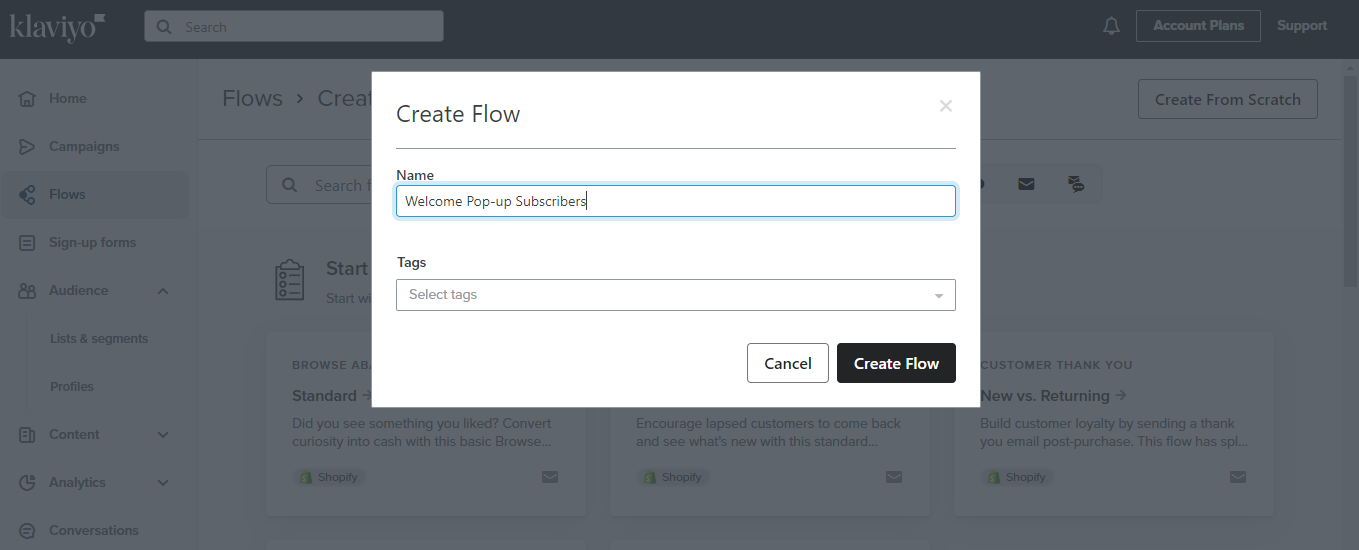
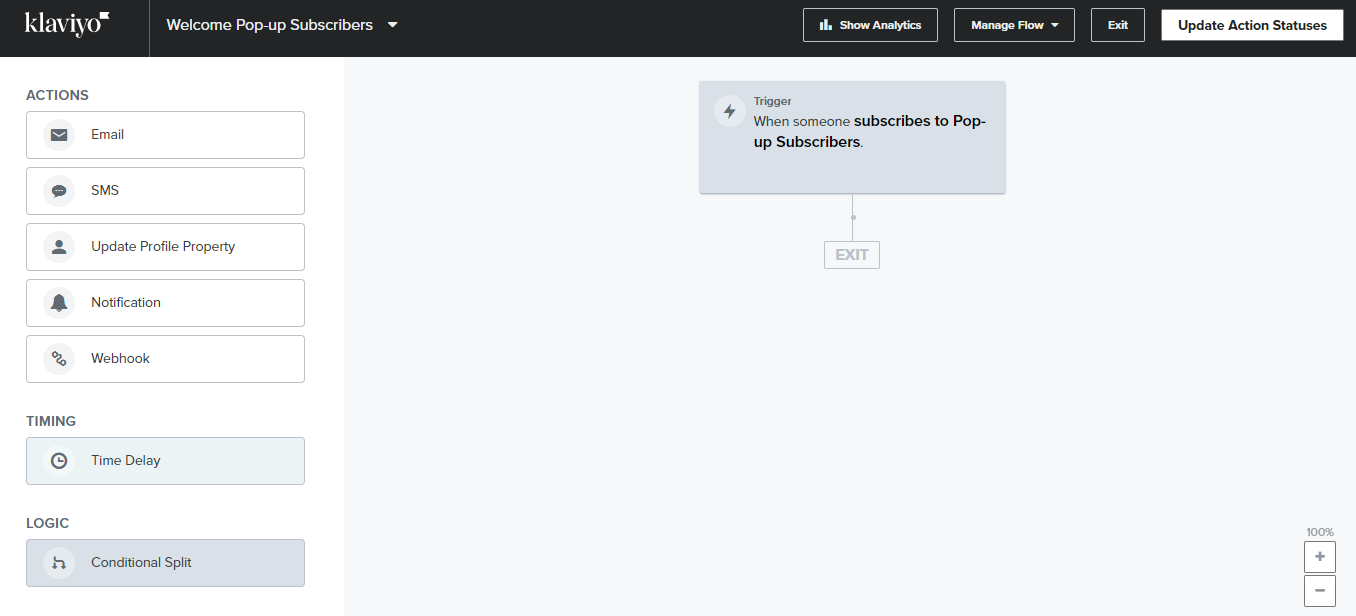
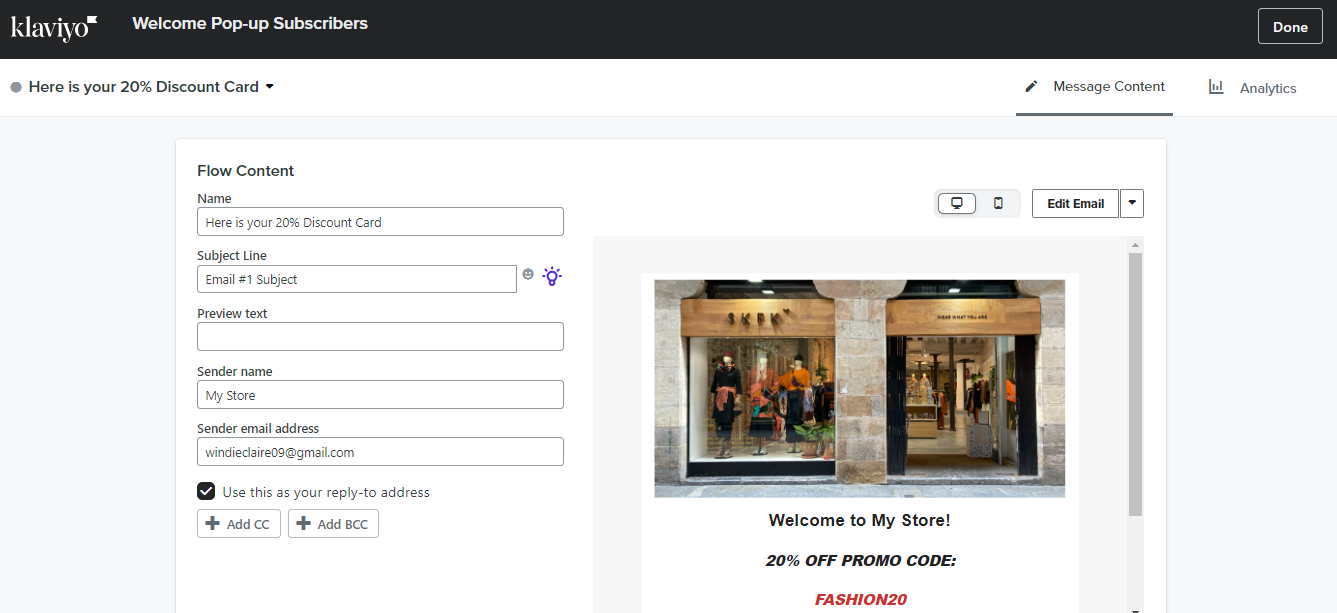
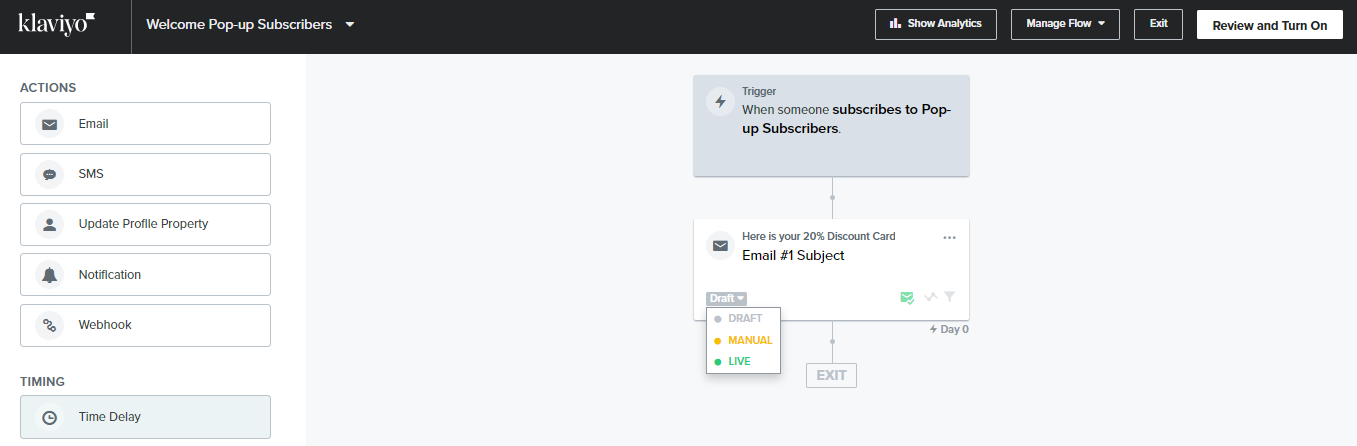
6.1. Let’s now create an email flow. To start, click “Create Flow”. Then, choose “Create From Scratch”. Choose a name for the flow you are creating.
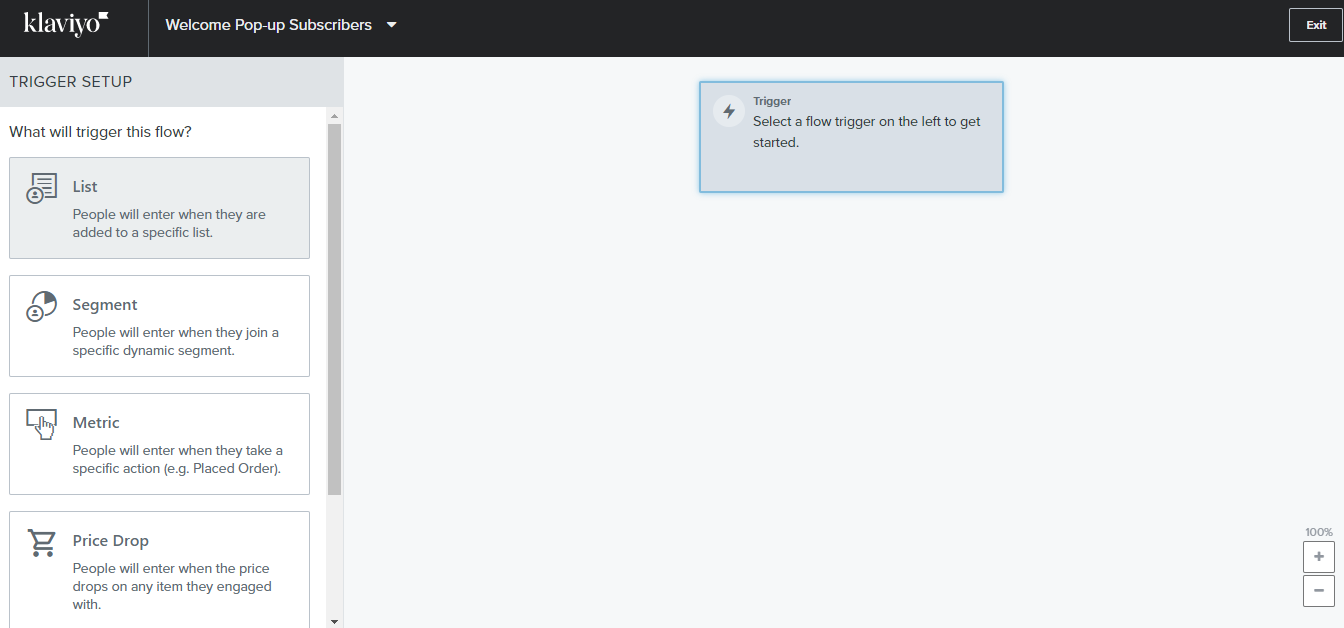
6.2. With the flow you have created, you can now set-up a trigger every time people are added to the list. Now, click “List” on the left side of the screen.
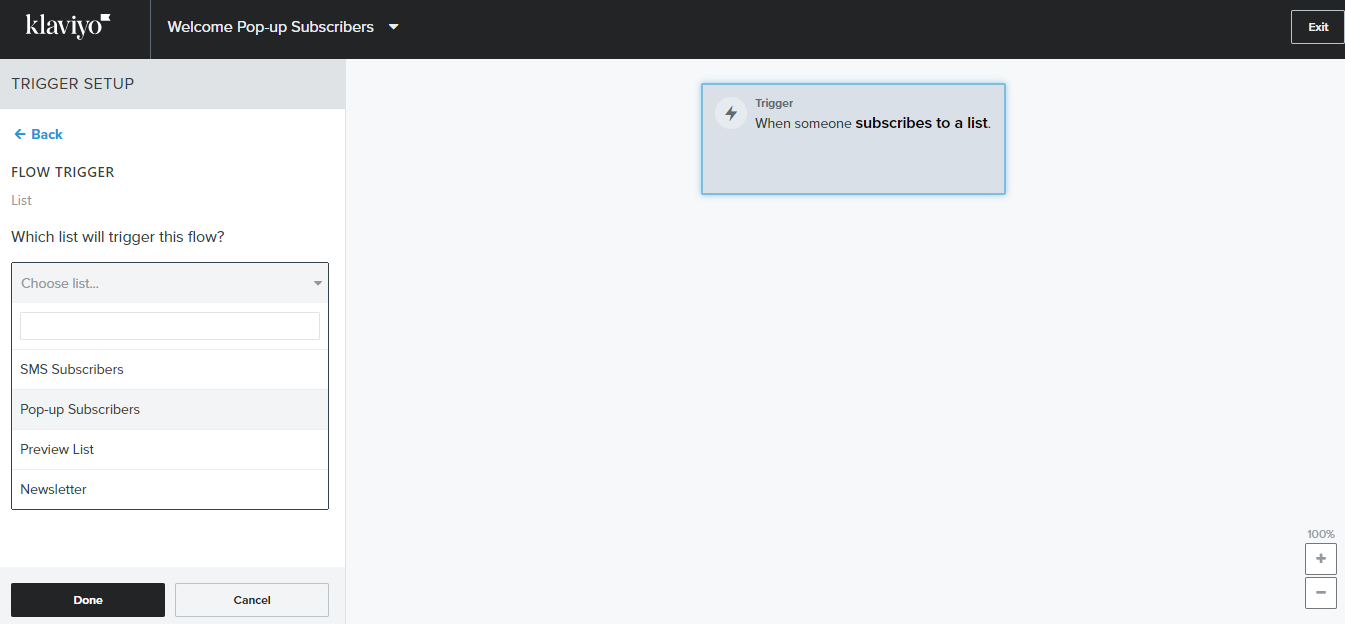
6.3. Choose the list for the email flow. Choose the one you have created earlier.
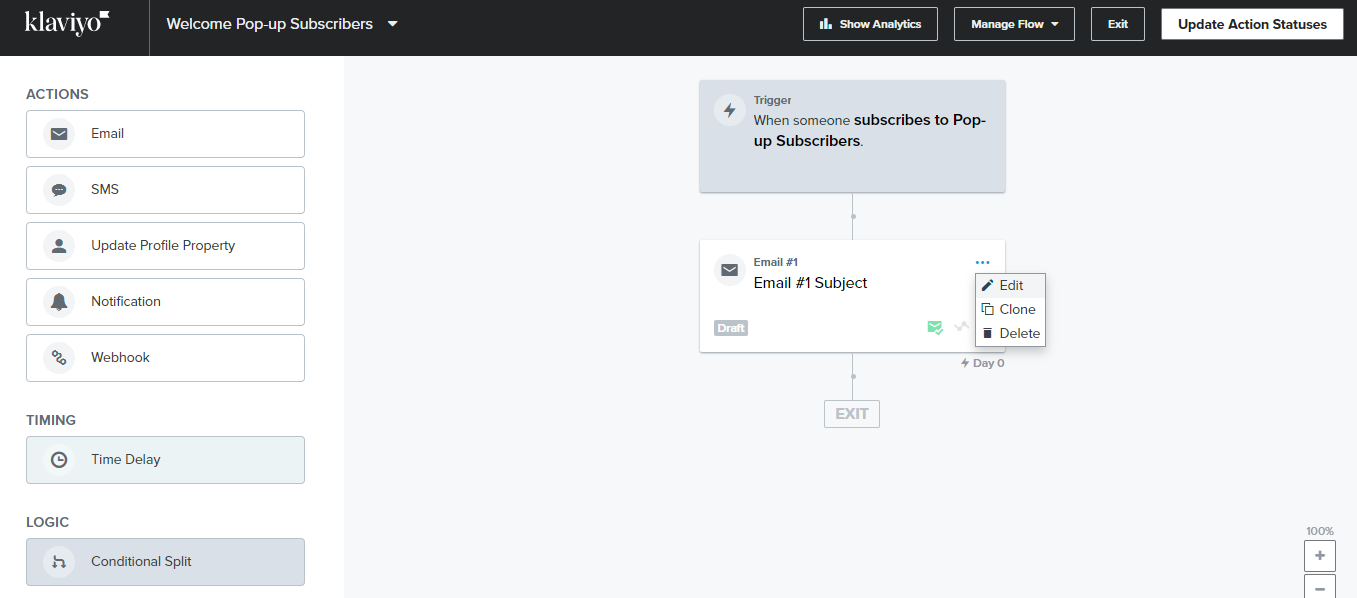
6.4. You can choose between different actions, but since we want to increase email engagements, choose “Email” and drag it below the “Trigger”.
6.5. Once the “Email” is added in the flow. You can now edit the email to be sent.
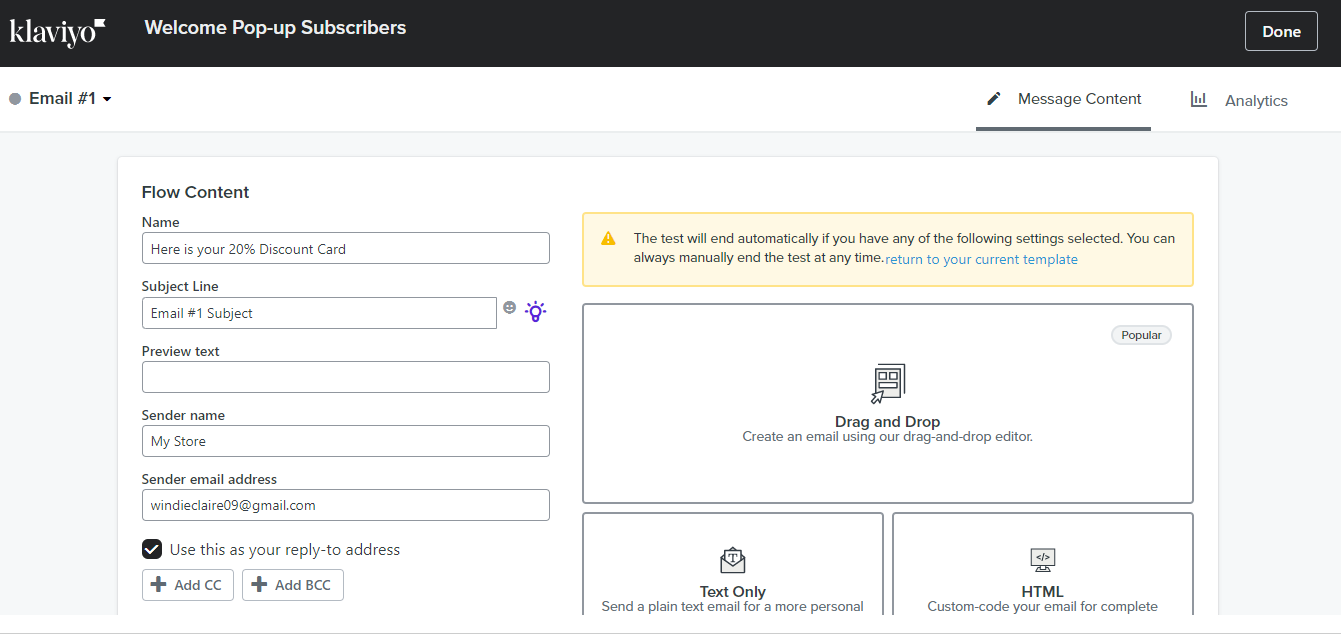
6.6. Customize the Flow Content. Change the “Name”. Then, click “Drag and Drop”.
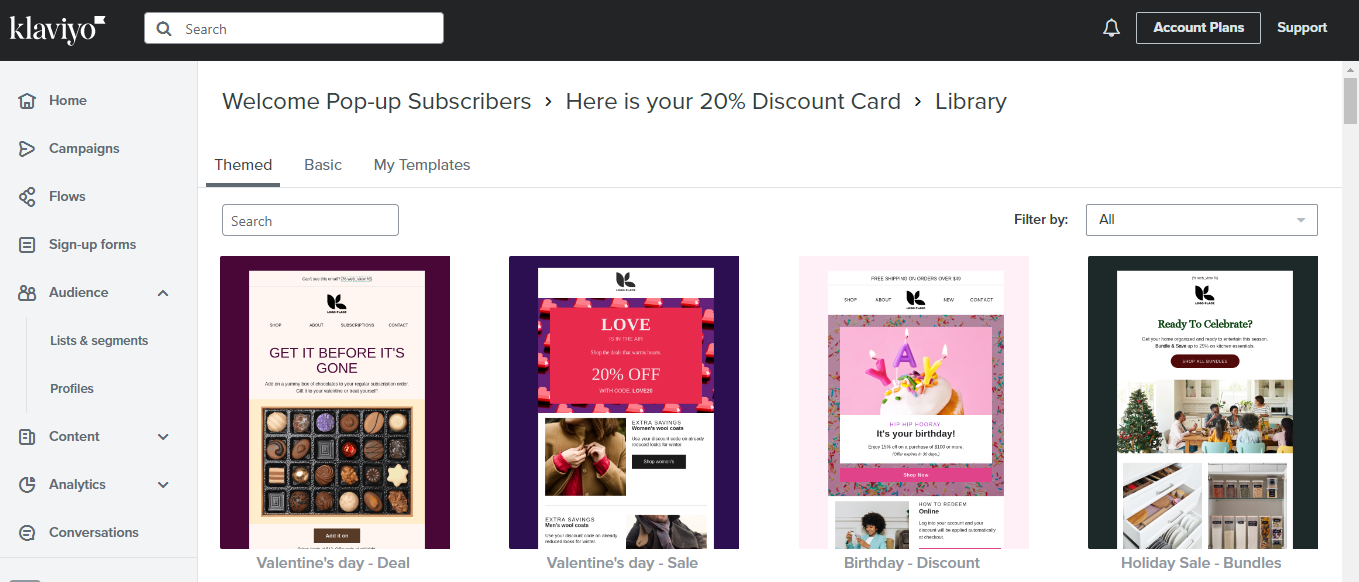
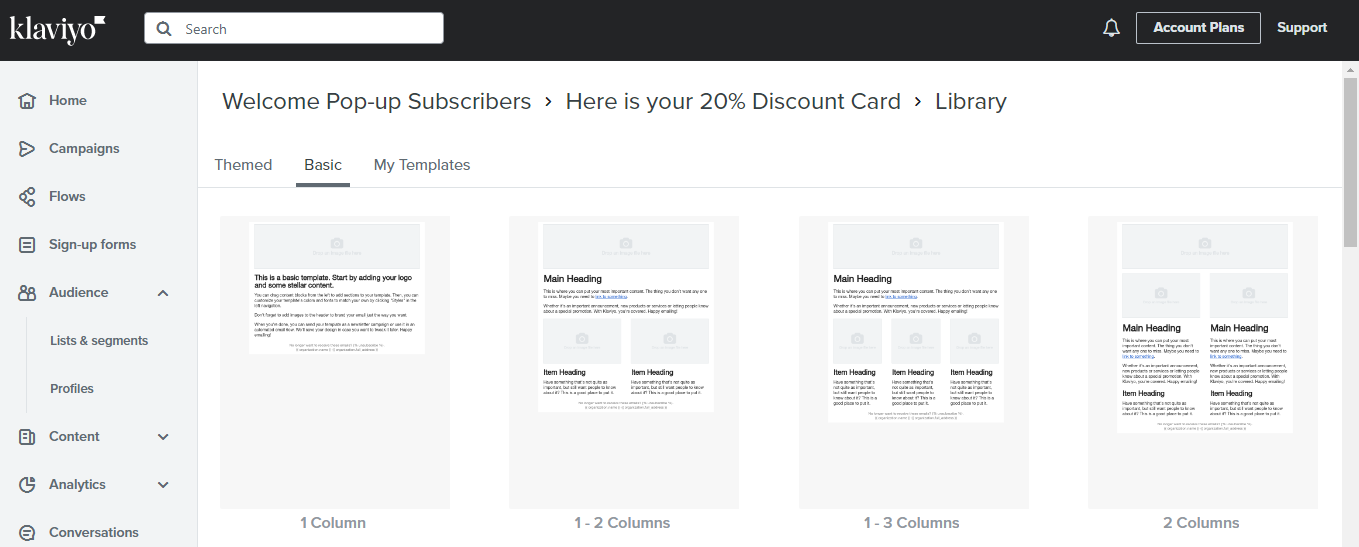
6.7. You will be redirected to a Library of email templates. Themed and basic email templates are available for you to choose from. Select and click your choice.
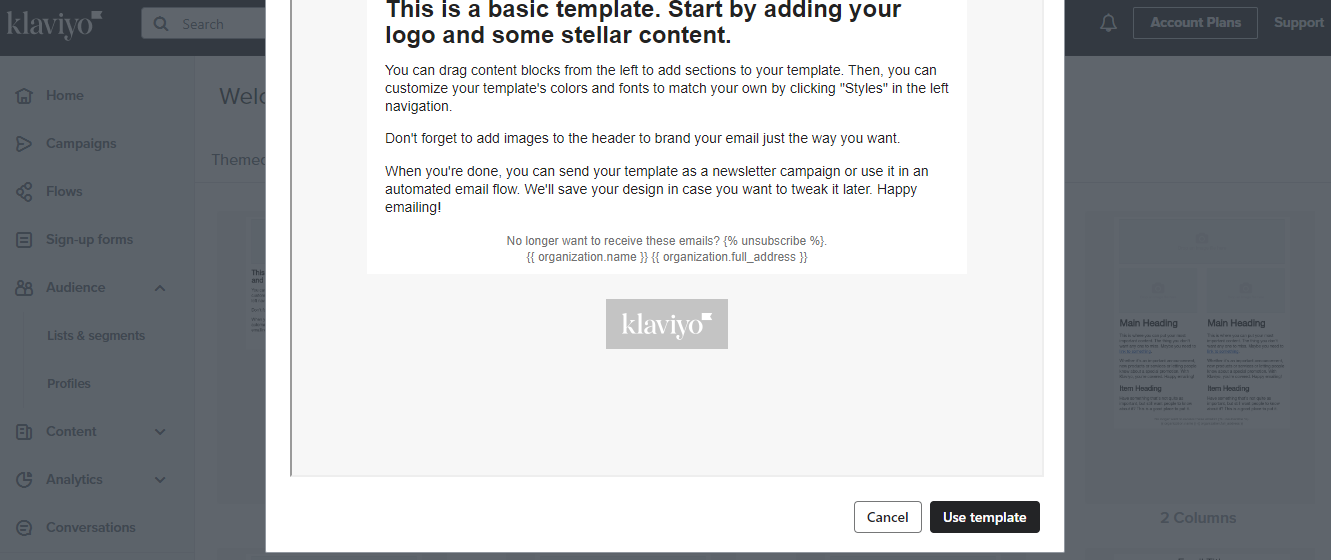
6.8. Click “Use template” to be able to customize the email.
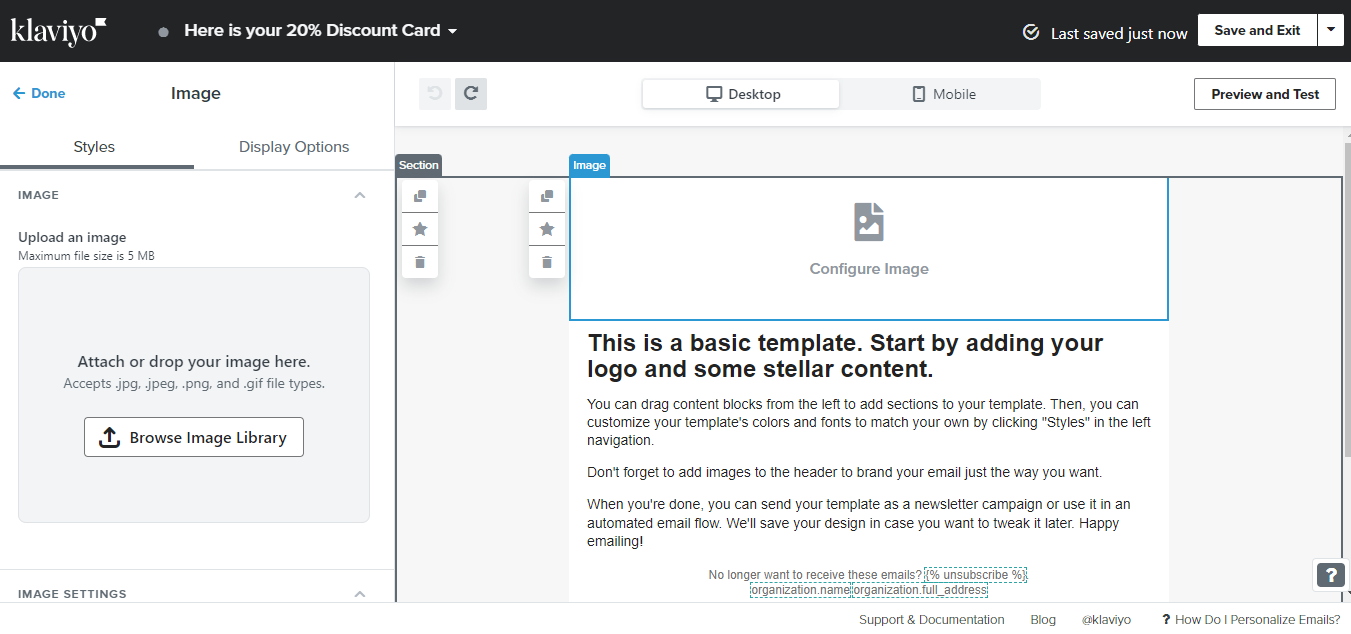
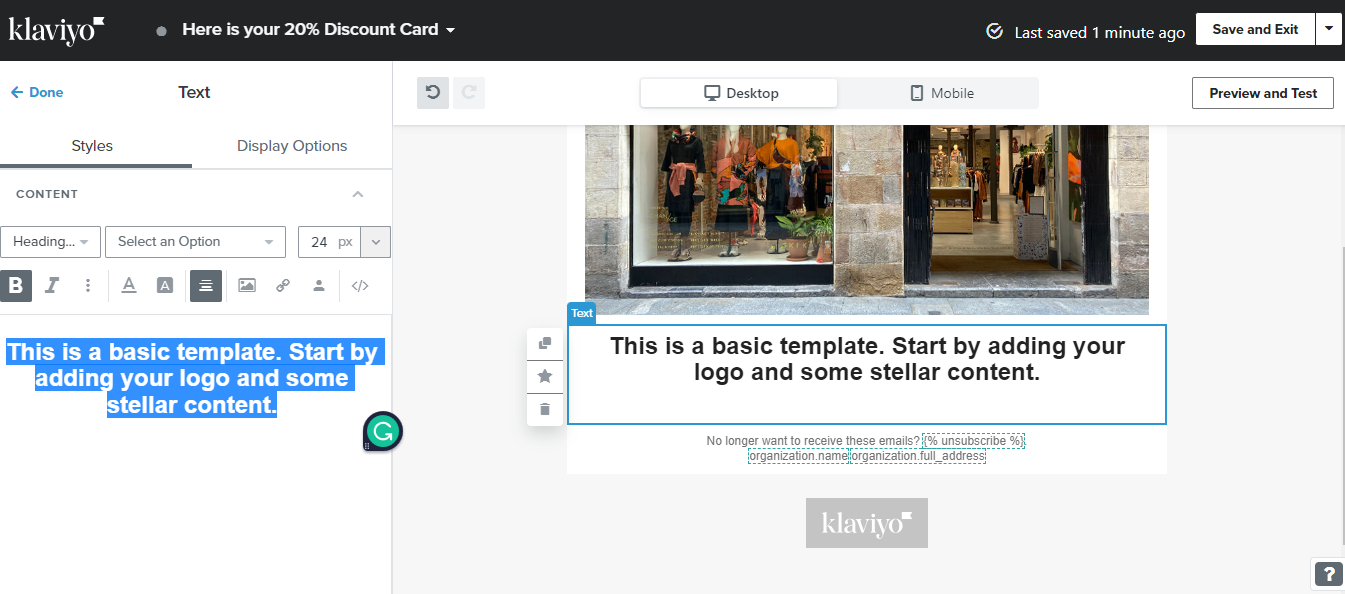
6.9. You can change the image and the text. Explore and customize.
6.10.. When everything is set with your email, click “Done”.
6.11.. After clicking “Done”, click the “Draft’ dropdown button and choose “Live”. Then, click “Review and Turn on.”
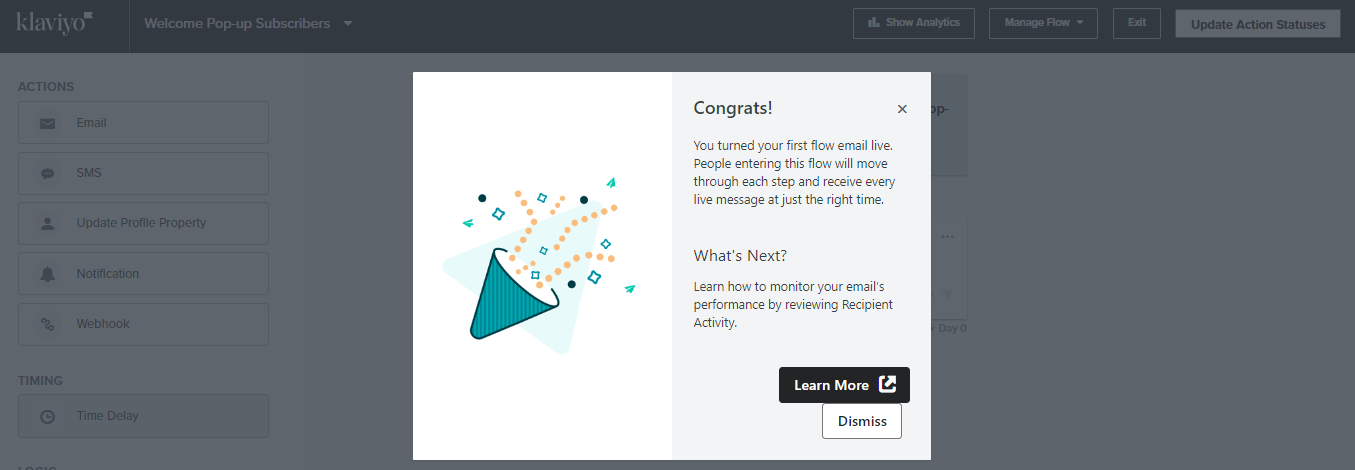
6.12. You have now turned your flow email live. You did it! Your pop-up is now ready.
Step 7: Do a Website Pop-up Check
To check how your pop-up looks like in your Shopify. You need to go to your Shopify store. Explore your website and wait for your pop-up to appear.
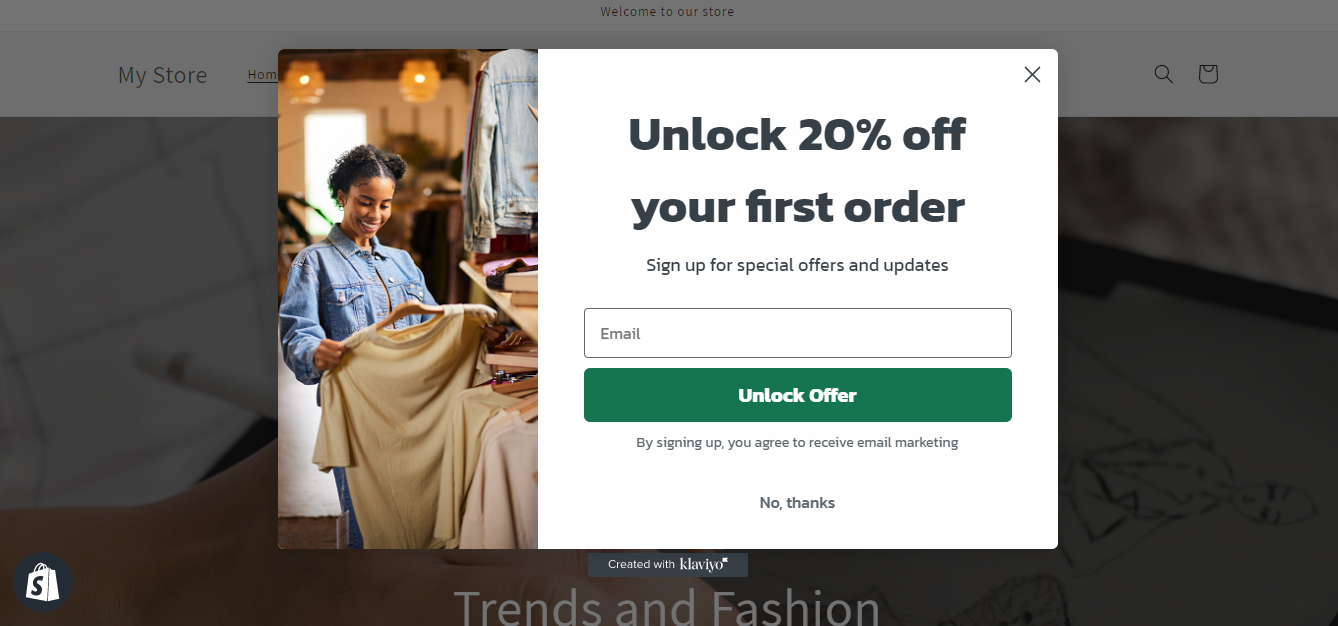
You’re done! Great job! Remember**,** when maximize the use of pop-ups for your Shopify store or your other websites, you need to consider the following best practices:
-
Pick a suitable pop-up template based on your digital marketing strategies.
-
Strategize your timing to target website visitors at a key moment.
-
Plan ahead your offers and promotions.
-
Create unique and irresistible pop-up forms.