A Guide to Segmenting Your Emails to: Engaged (30d, 60d, 90d, 120d).
To provide you with a step-by-step guide in creating audience segments based on their level of engagement.
Prefer a shortcut? 16 free tools do parts of this for you.
Aim: To provide you with a step-by-step guide in creating audience segments based on their level of engagement.
Optimal Outcome: You will have an optimized and clean audience list that you can use to effectively run your email marketing campaigns.
What do you need to start: Online store integrated with a marketing automation platform
Why is this SOP Important: Creating engaged segments for email campaigns is important as it leads to improved deliverability, increased engagement, better targeting, and higher ROI.
When and Where to execute:
Where: Marketing automation platform
When: You should do this when you’re starting on a new marketing automation platform but you should continuously evaluate your segmenting strategy.
Who Should Be Doing This: Data analyst, Marketing staff
What are audience segments?
Audience segments refer to groups of individuals who share common characteristics or behaviors that make them more likely to respond to marketing efforts in a similar way. These characteristics can include demographics like age, gender, income, and location, as well as psychographic factors like interests, values, and personality traits. By identifying and understanding these segments, marketers can create more targeted and effective campaigns that resonate with specific groups of people, leading to better engagement, higher conversion rates, and increased ROI.
Execution
Resources/Tools & Set up
Enable tracking of newsletter subscribers
-
Warming send infrastructure
-
Create engaged segments for 30D, 60D, 90D, 120D)
Enable tracking of newsletter subscribers
Connect your Shopify store to Klaviyo
-
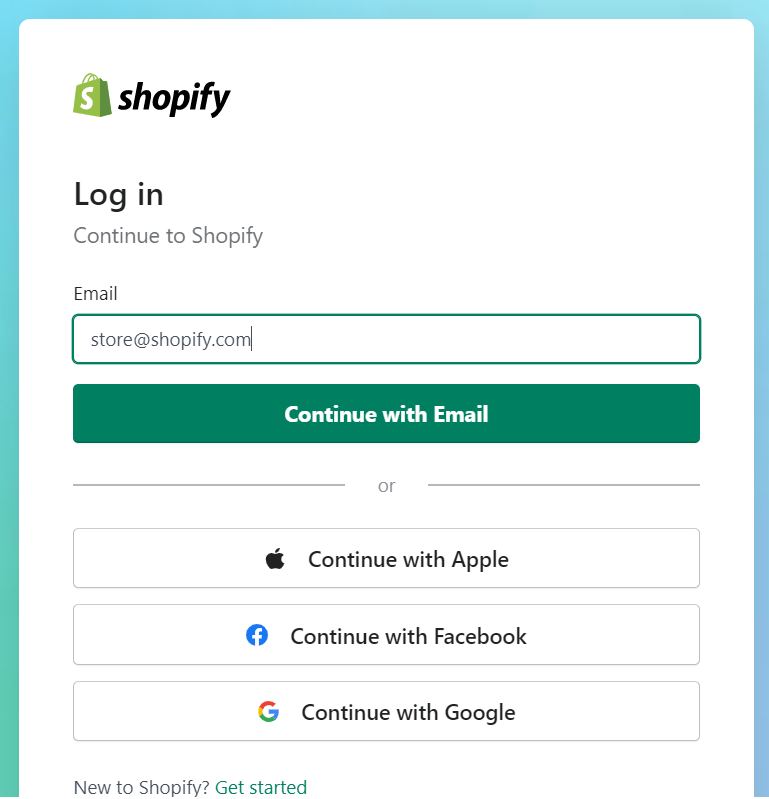
Login to your Shopify account.
-
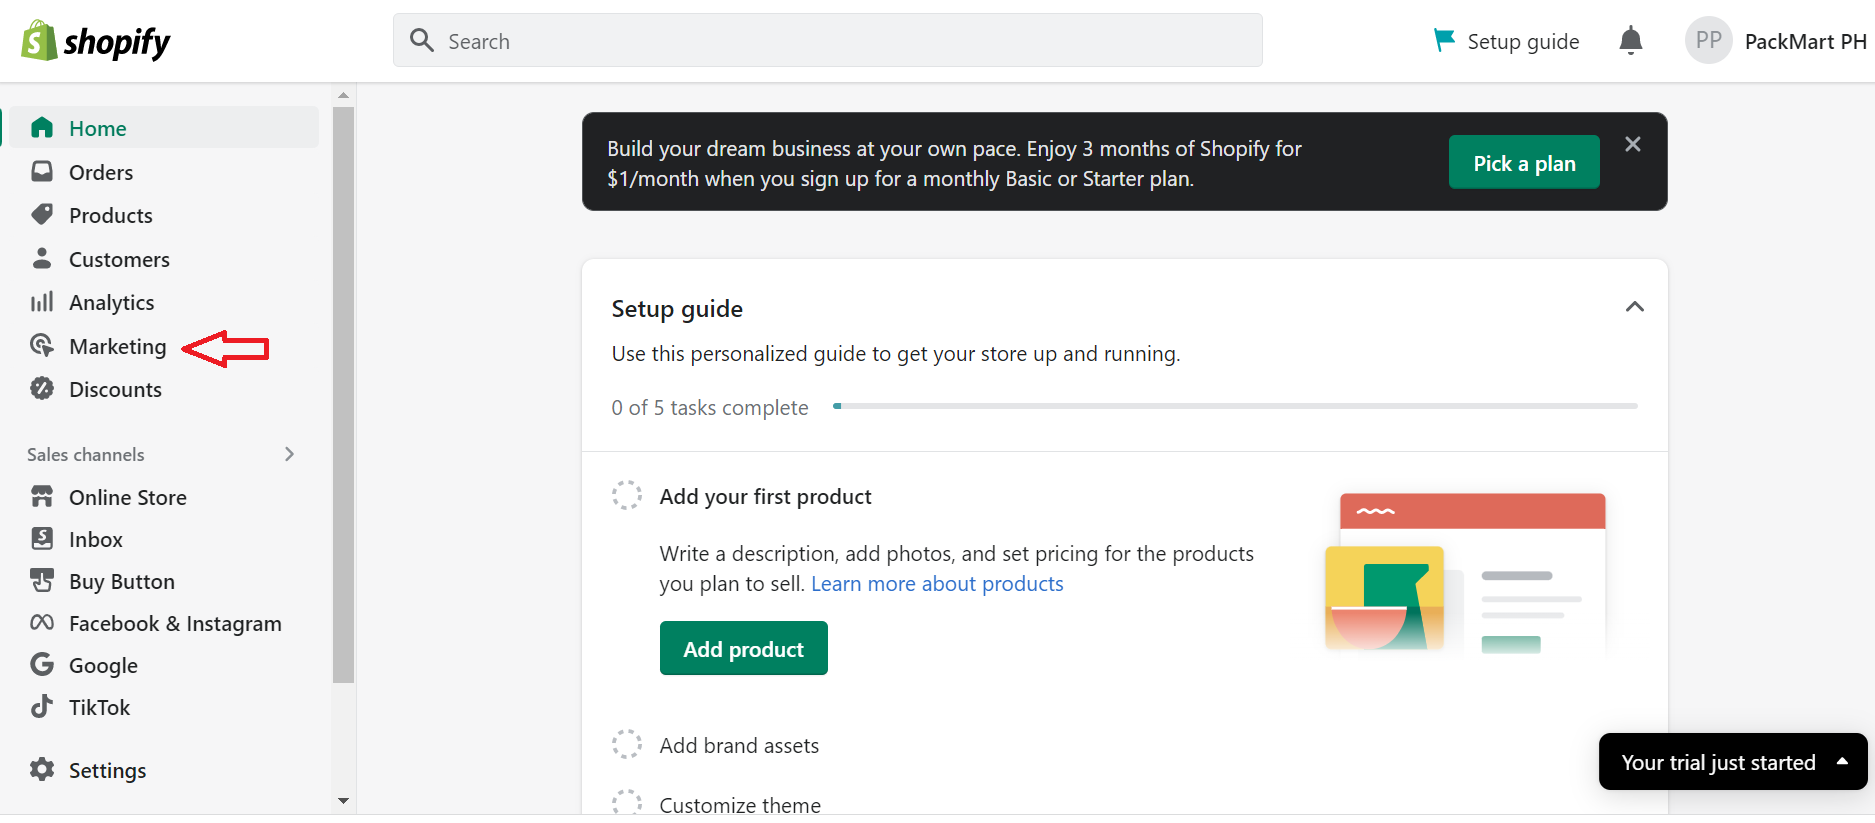
Select Marketing from the left menu.
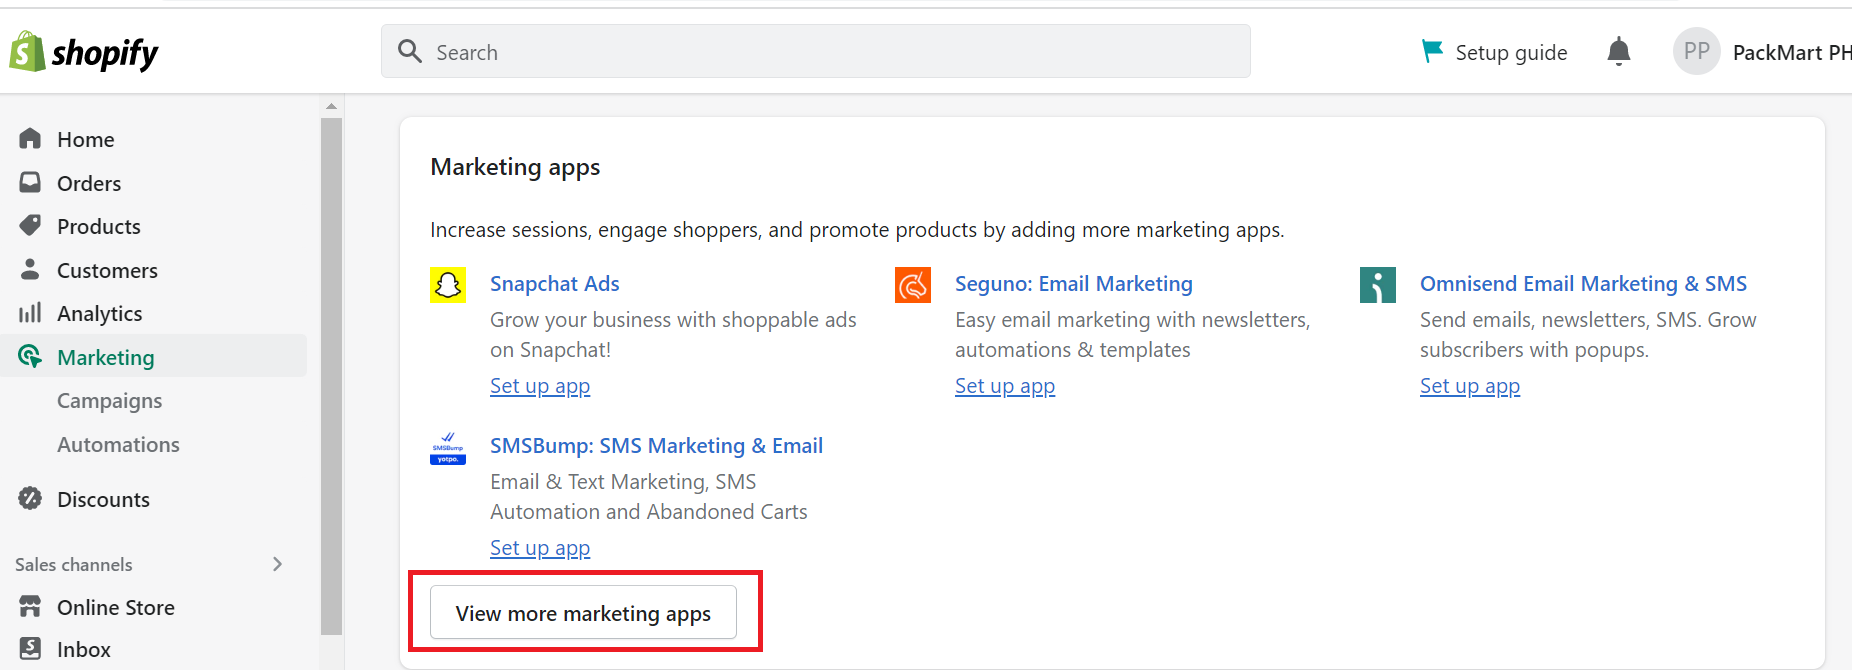
- Select View more marketing apps in the Marketing apps section.
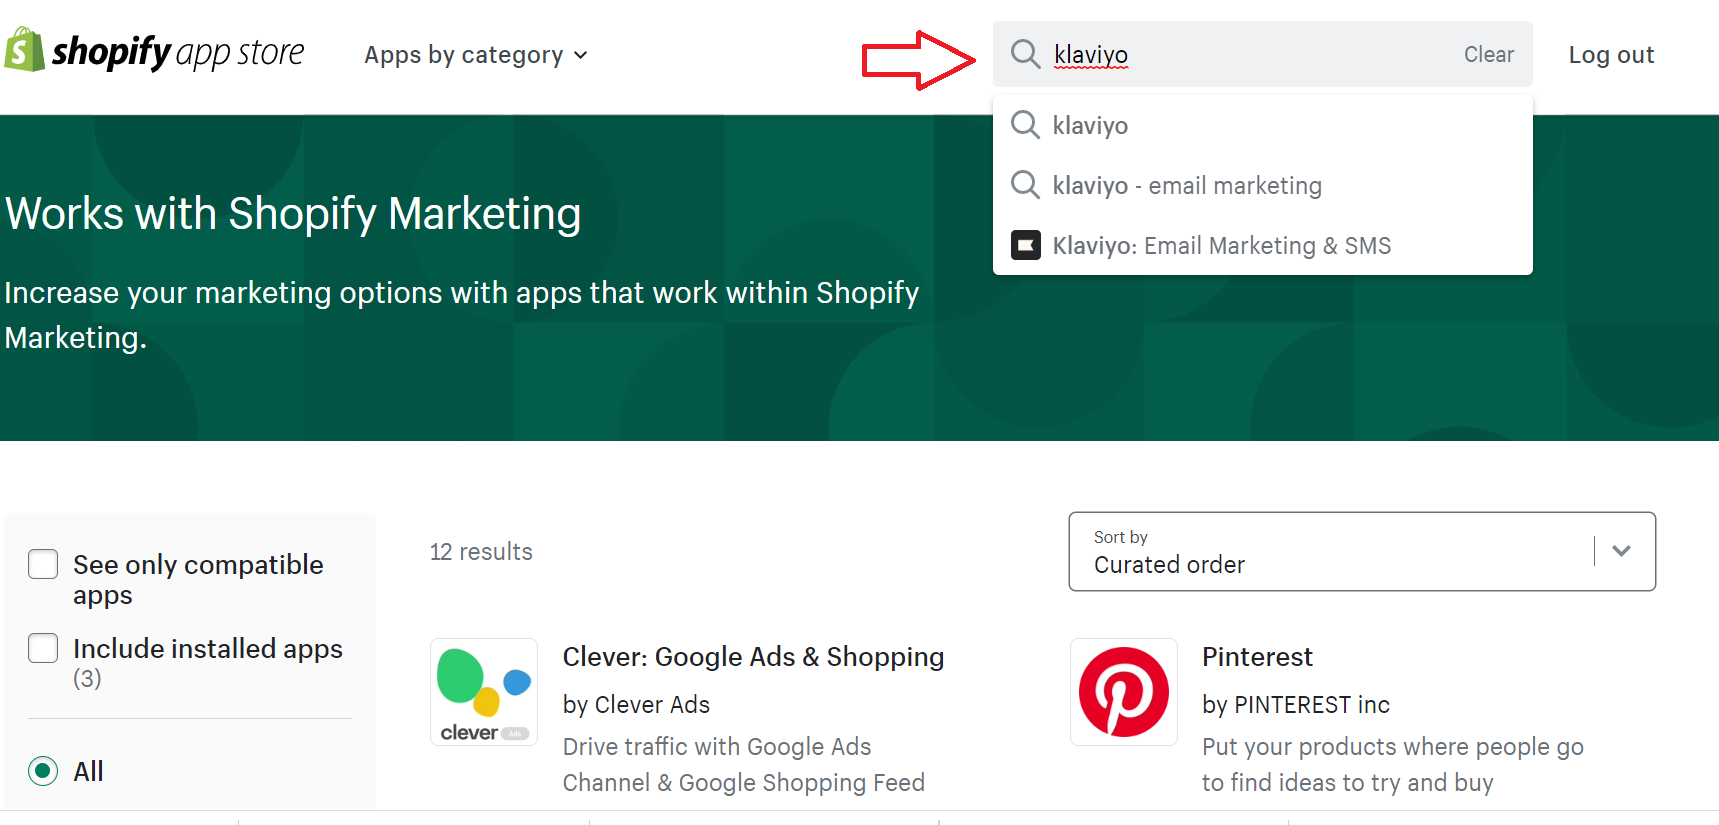
- Search Klaviyo from the search bar at the top-left section of the page.
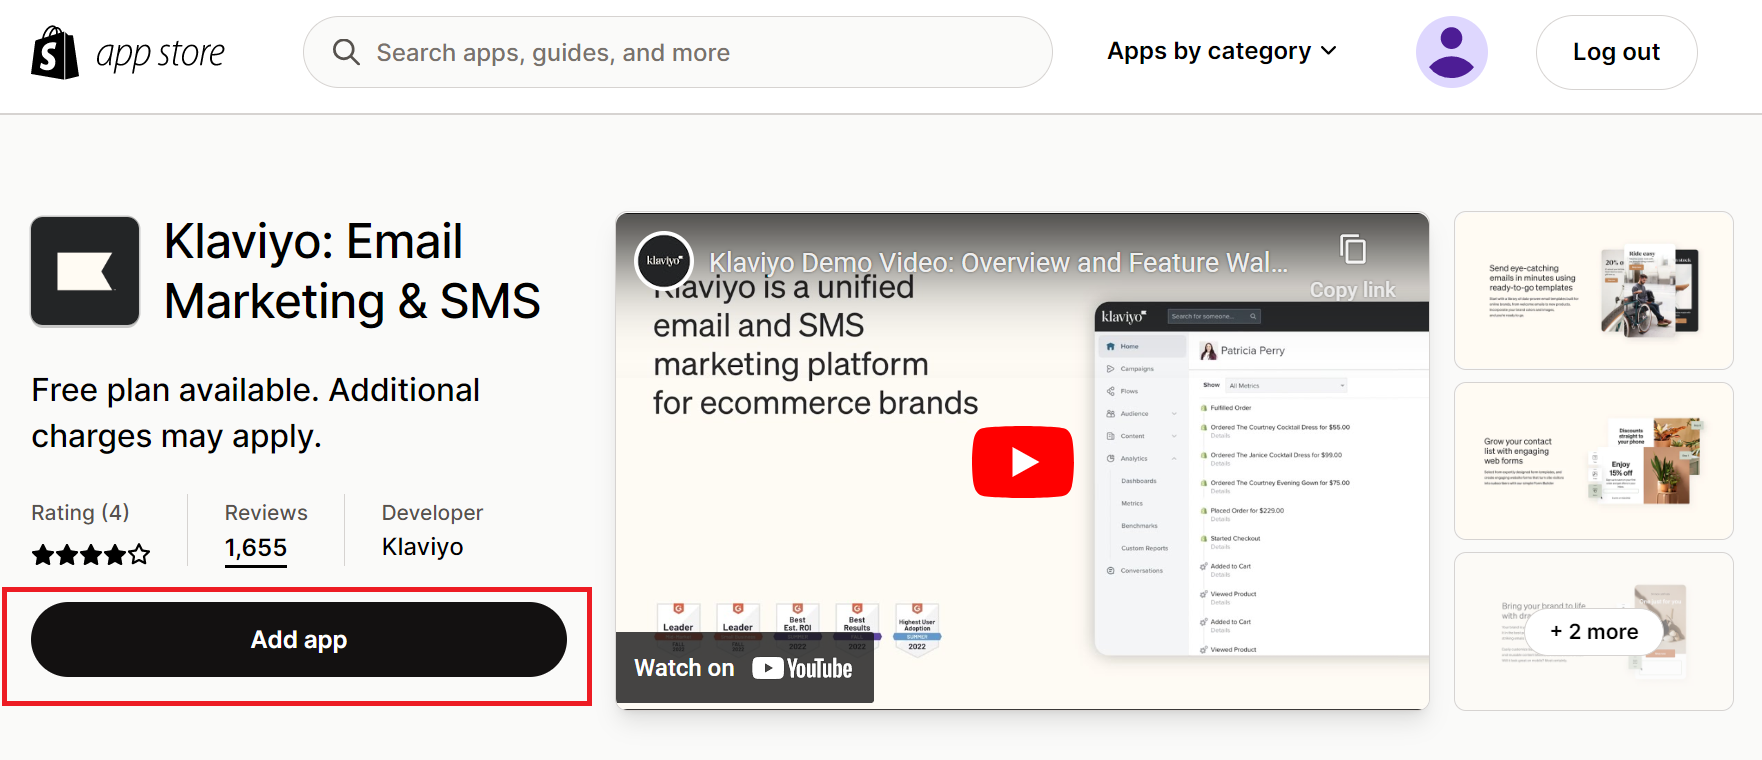
- Click on Add app.
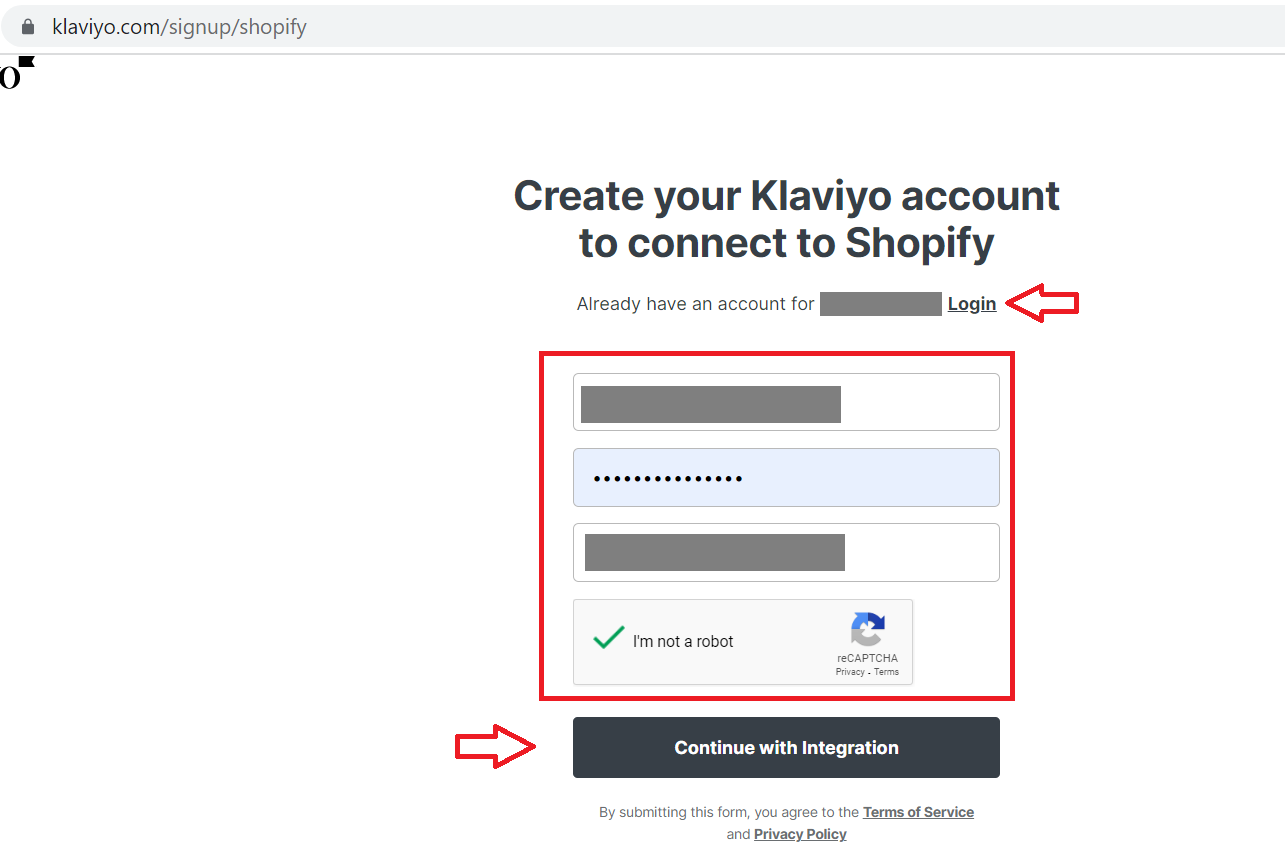
- Create or log in to your Klaviyo account, then click on Continue with Integration.
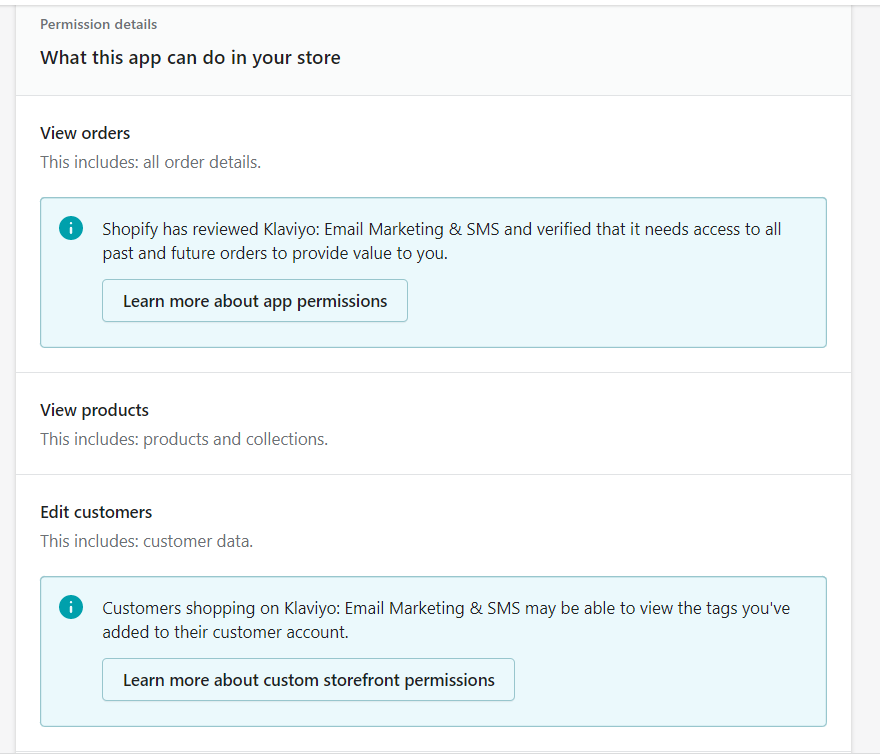
- Review permissions required.
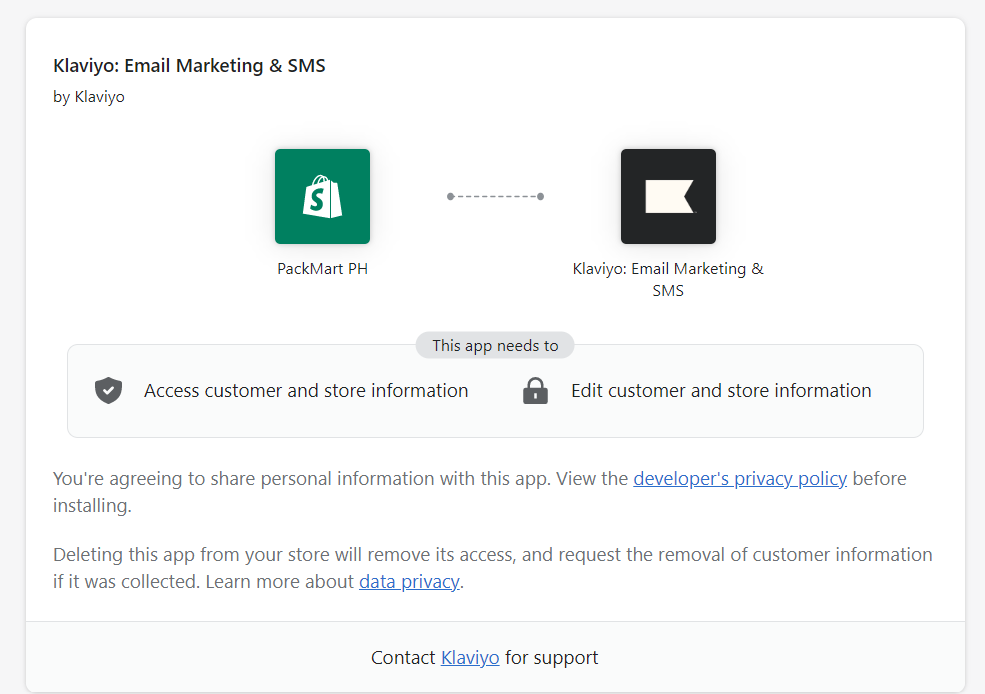
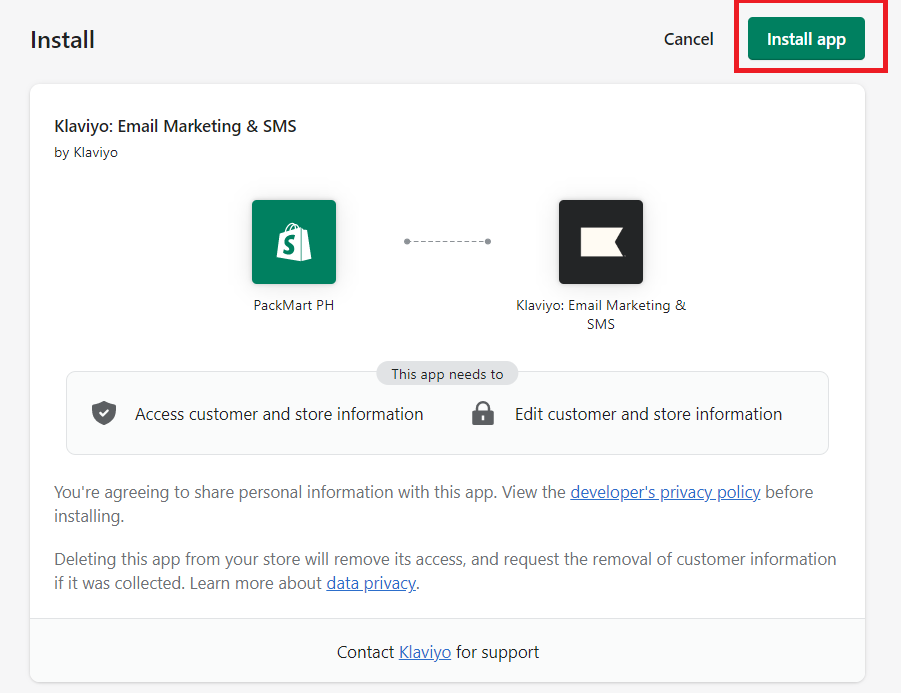
- Click the Install button at the upper-right corner of the page.
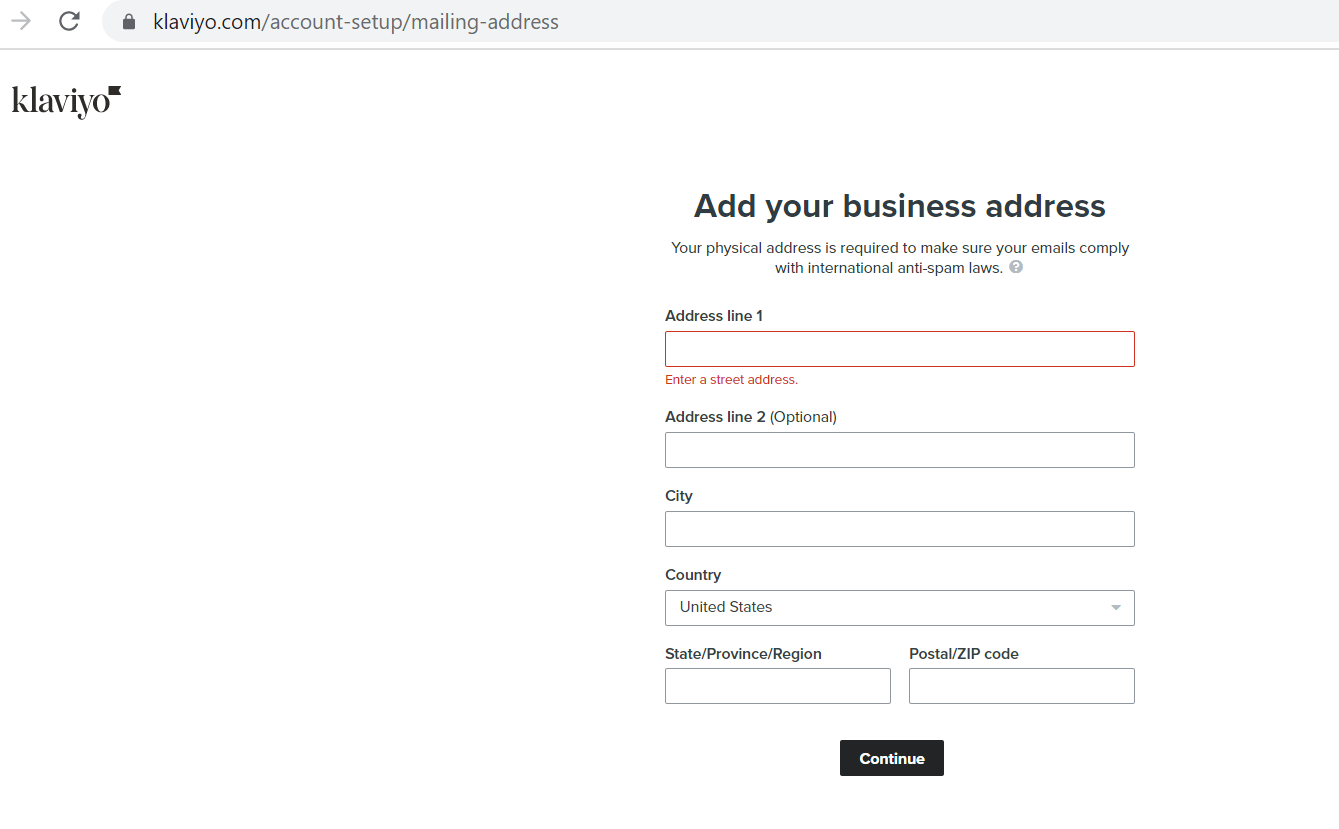
- Add your business info then click Continue.
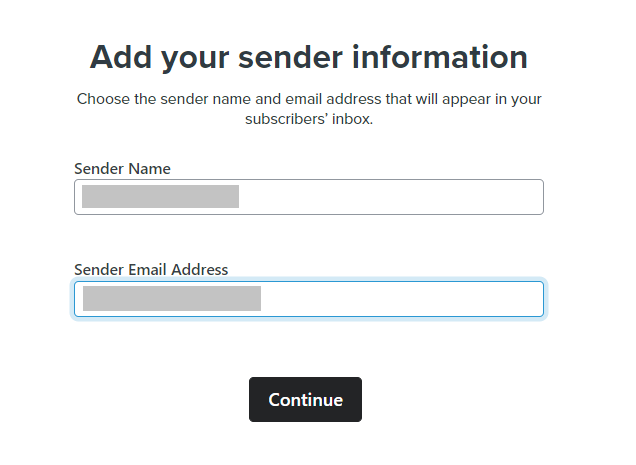
- Fill out the Sender Name and Sender Email Address. This information will appear on your subscriber’s inbox.
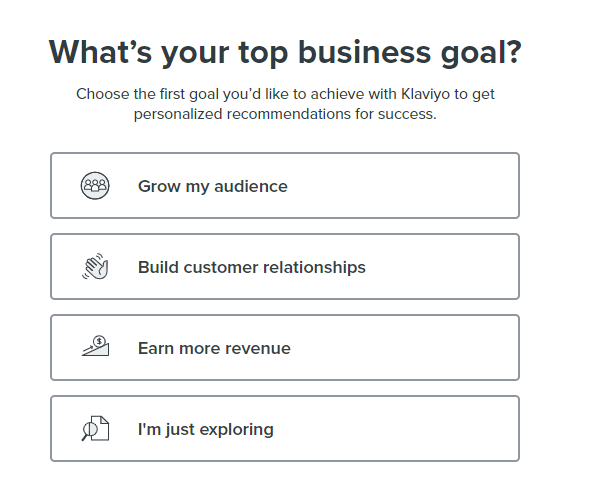
- Choose your top business goal.
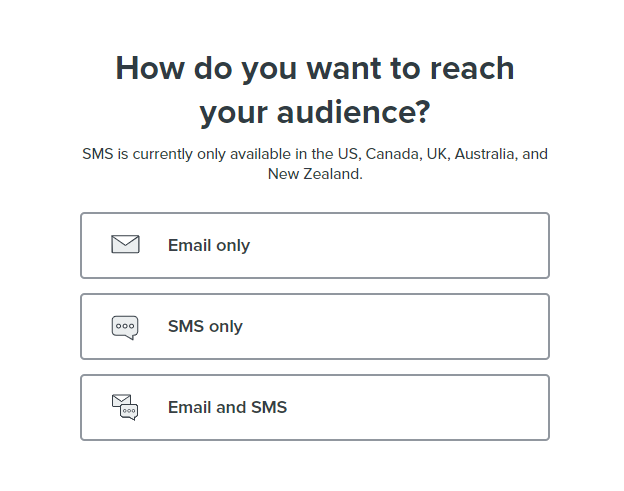
- Choose how you want to reach your audience.
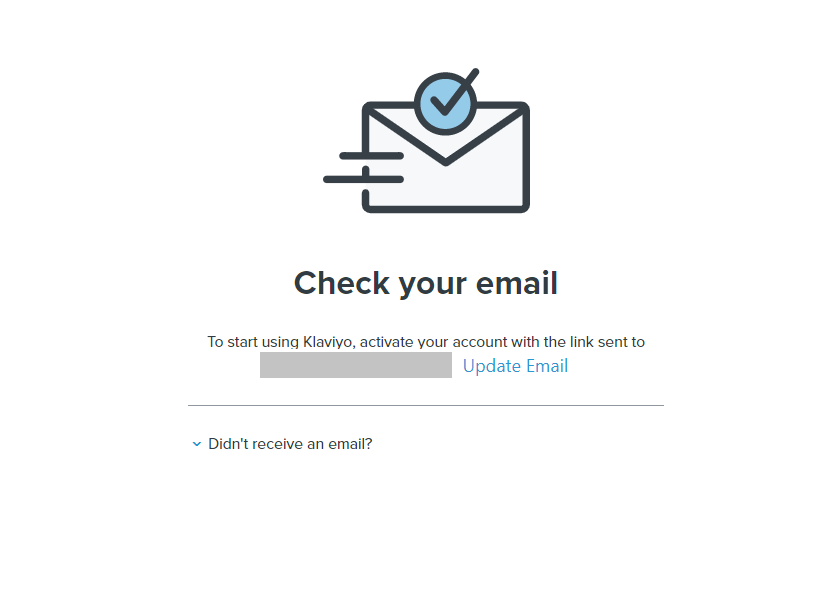
- You will then be prompted to confirm your email. Log in to your email and click the link to confirm your account.
Set up newsletter subscription tracking on Shopify
Note: Based on your Customer Privacy settings in Shopify, Klaviyo may not track onsite events (including Active on Site and Viewed Product) for visitors to your Shopify store in the EU, EEA, UK and Switzerland, unless they have provided consent.
-
Login to Klaviyo.
-
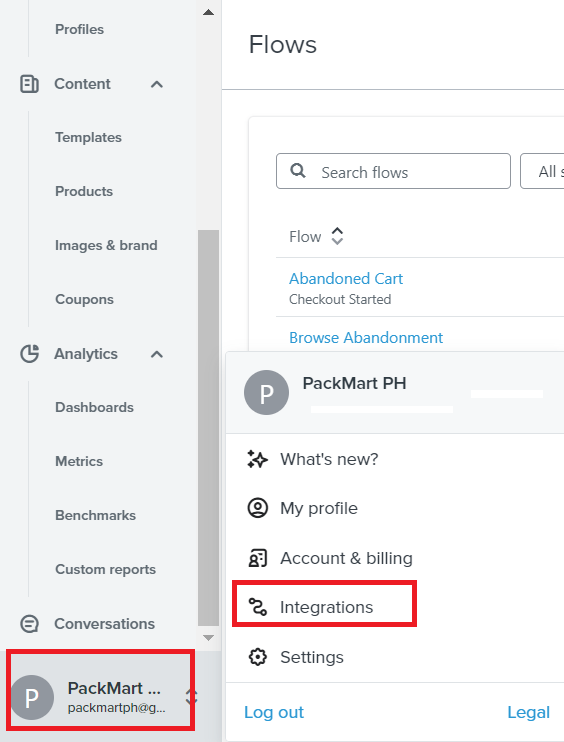
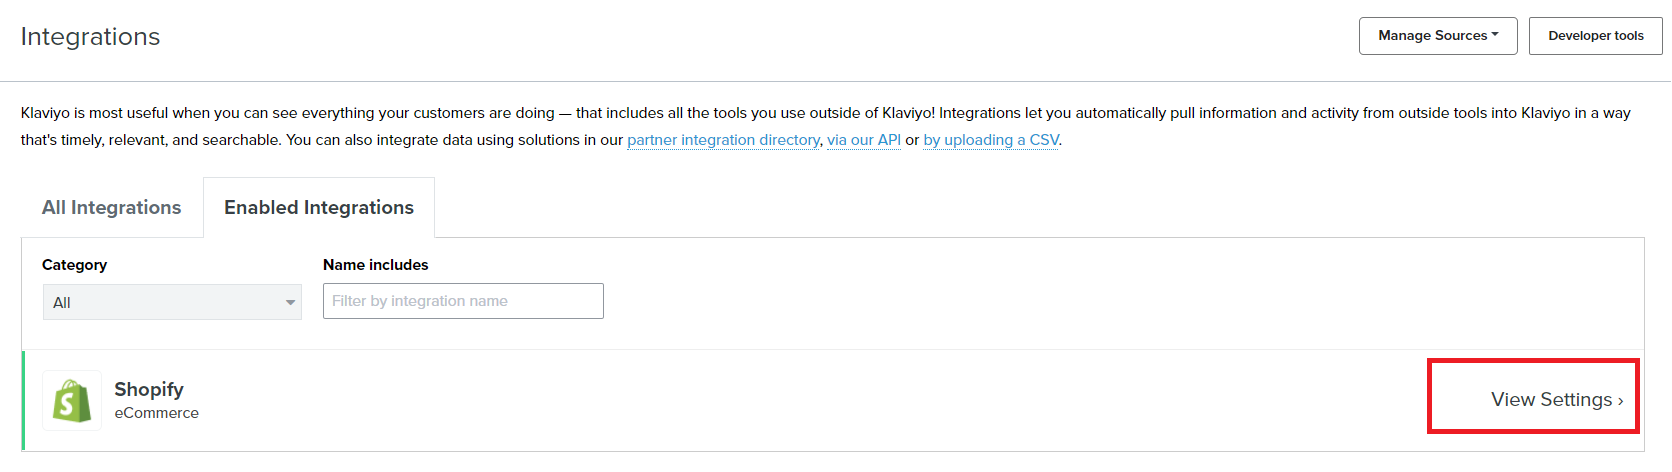
Navigate to the left menu and click your brand name, then click Integrations.
-
Choose Shopify then click View Settings.
-
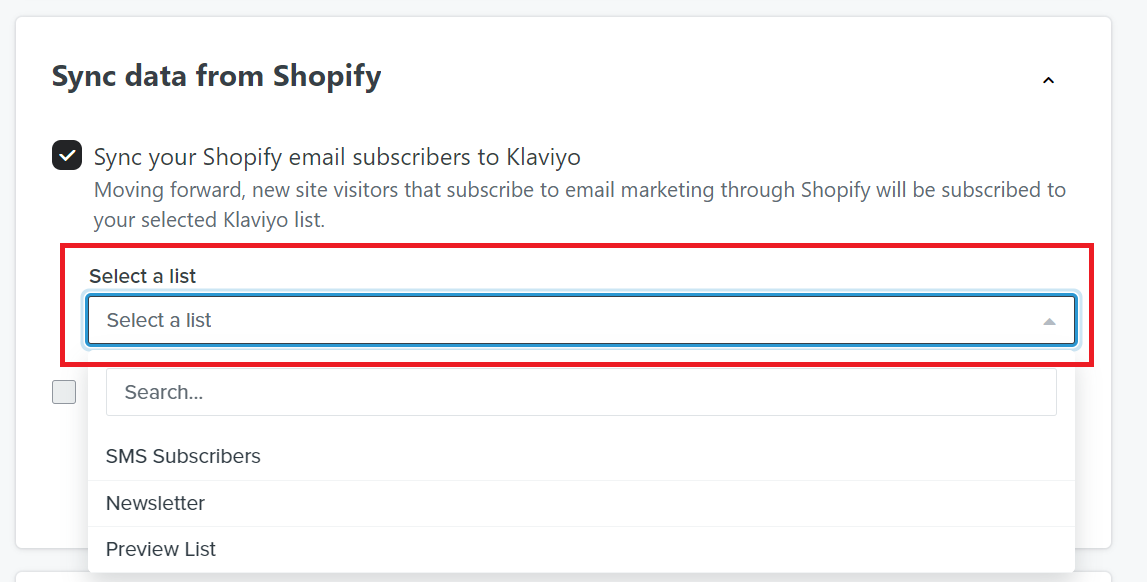
Check the box next to Sync your Shopify email subscribers to Klaviyo, then select the list that you want to sync.
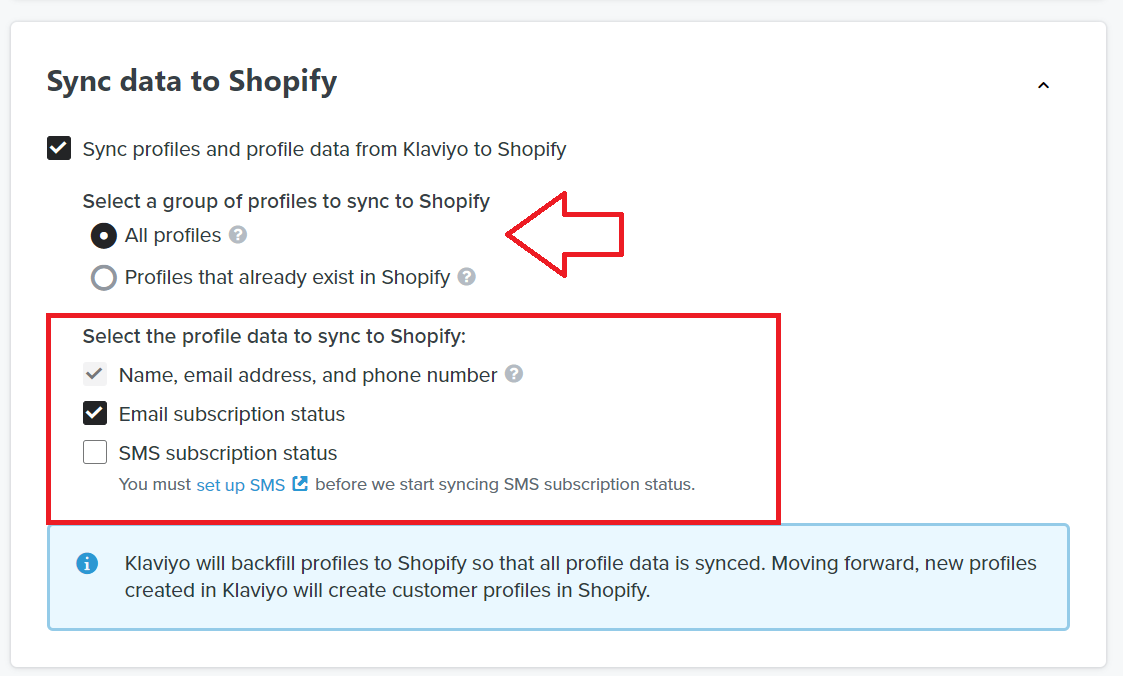
- Sync all profile data from Klaviyo to Shopify then make sure Email Subscription is also selected.
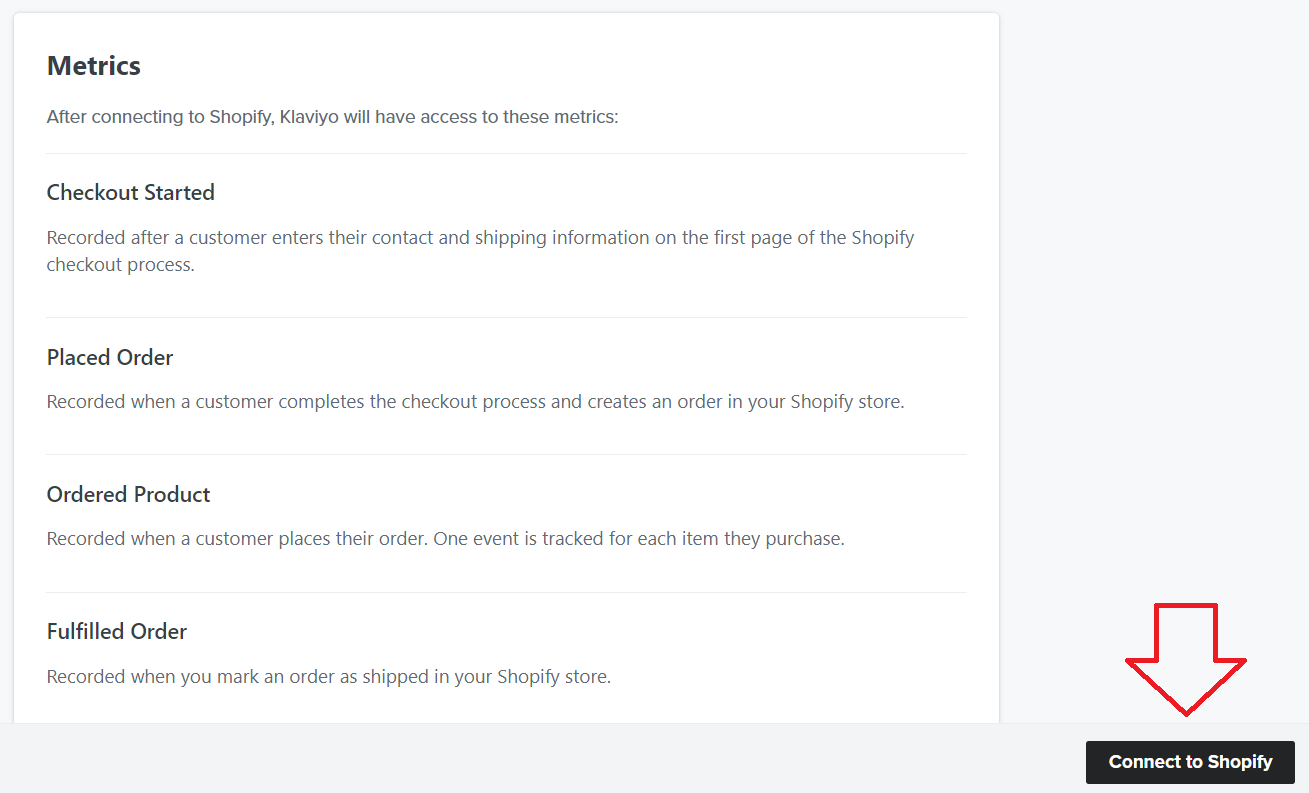
- Click Connect to Shopify. Klaviyo now has access to Shopify activities from subscribers.
Email Deliverability Explained
Definition: Email deliverability refers to the ability of an email to successfully reach its intended recipient's inbox. When an email is sent, it goes through a series of checks and filters before it is delivered to the recipient's inbox. These checks and filters are designed to prevent spam, phishing attempts, and other malicious activity.
Good email deliverability - means that a high percentage of the emails sent by the sender are successfully delivered to the recipient's inbox.
Poor email deliverability - means that a significant number of emails are rejected, filtered into spam folders, or bounced back to the sender.
Factors that can affect email deliverability:
-
Sender reputation - a sender with a good reputation is more likely to have their emails delivered to the inbox, while a sender with a poor reputation is more likely to be marked as spam.
-
Email content - emails that contain certain words or phrases, or that are overly promotional, may trigger spam filters and be marked as spam.
-
Email authentication - protocols like SPF, DKIM, and DMARC can help verify the identity of the sender and prevent spoofing, which can improve deliverability.
-
Email list quality - Sending emails to old or purchased lists can result in high bounce rates and spam complaints.
-
Engagement metrics - email providers may consider emails from senders with low engagement rates to be less relevant and more likely to be marked as spam.
-
Spam complaints - Too many spam complaints can damage a sender’s reputation and result in emails being automatically filtered into spam folders.
-
Email frequency - sending too many emails too frequently can lead to higher unsubscribe rates and spam complaints, which can negatively impact deliverability.
Email deliverability best practices:
-
Warm your sending infrastructure
-
Conduct regular list cleaning and import only clean email list - (Follow this guide, SOP 238: A Guide to Monthly Email List Cleaning and Management)
-
Use a double opt-in process and only send to those who opted in.
-
Create an engaged segment
-
Set up a dedicated sending domain - (Follow this guide, SOP 237: Setting Up a Dedicated Sending Domain to Enhance Email Deliverability)
-
Make it easy to unsubscribe
-
Create engaging contents
Warming send infrastructure
-
Migrate your historical engagement data - If you’re warming your infrastructure because you’re migrating from one email automation platform to another, make sure to import your historical engagement data from your previous provider.
-
Create engaged segments for your email campaigns - see this section.
-
Review performance metrics - If you have existing data, review the performance following flows and only turn them on if they’re able to meet engagement metrics
Metrics of high engagement flows:
-
Open rates above 40%
-
Click rates above 1%
-
Unsubscribe rates below 0.1%
-
Complaint rates below 0.1%
-
Review performance metrics - If you have existing data, review the performance following flows and only turn them on if they’re able to meet engagement metrics
Create engaged segments for 30D, 60D, 90D, 120D)
30 day segment (initial warming and daily sending)
-
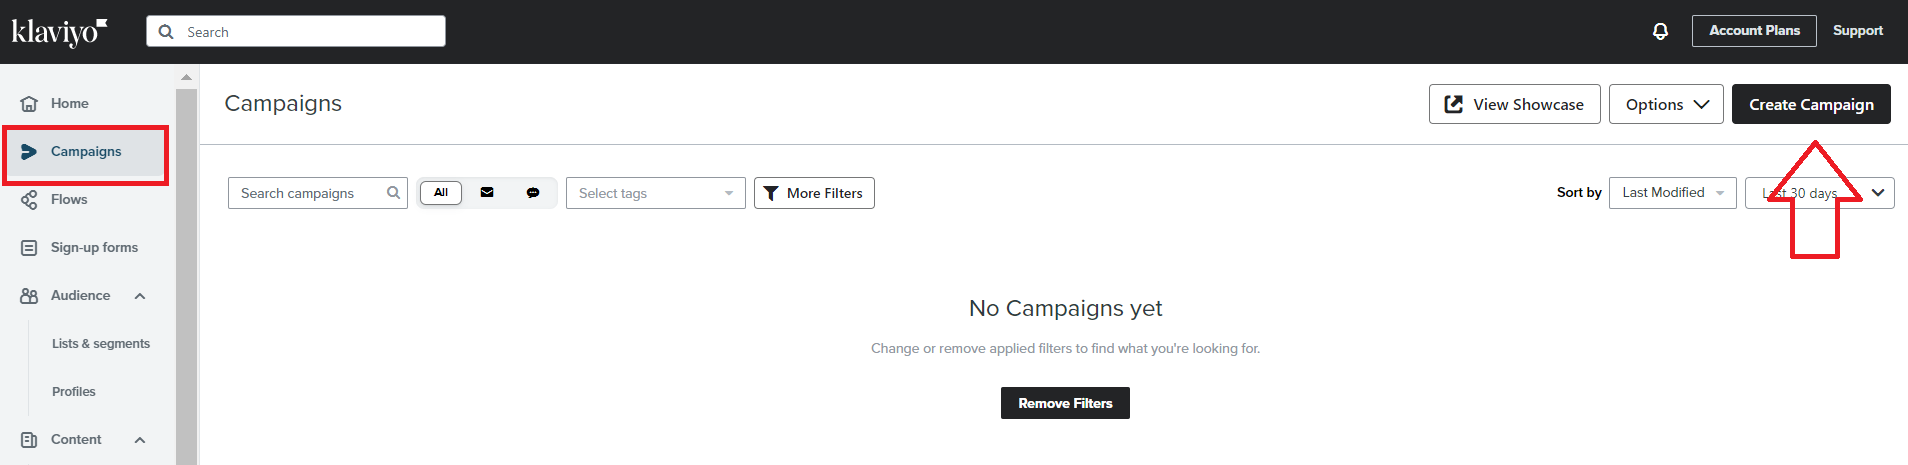
Navigate to the left menu, click Campaigns.
-
Click Create Campaign.
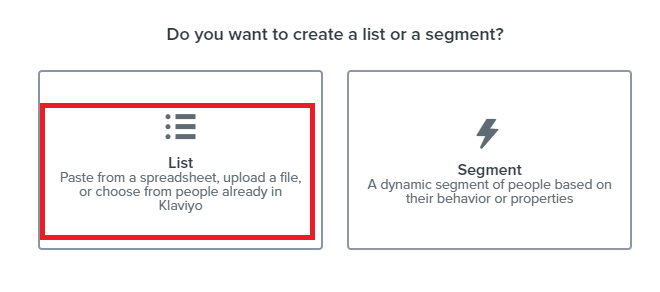
- Select List card.
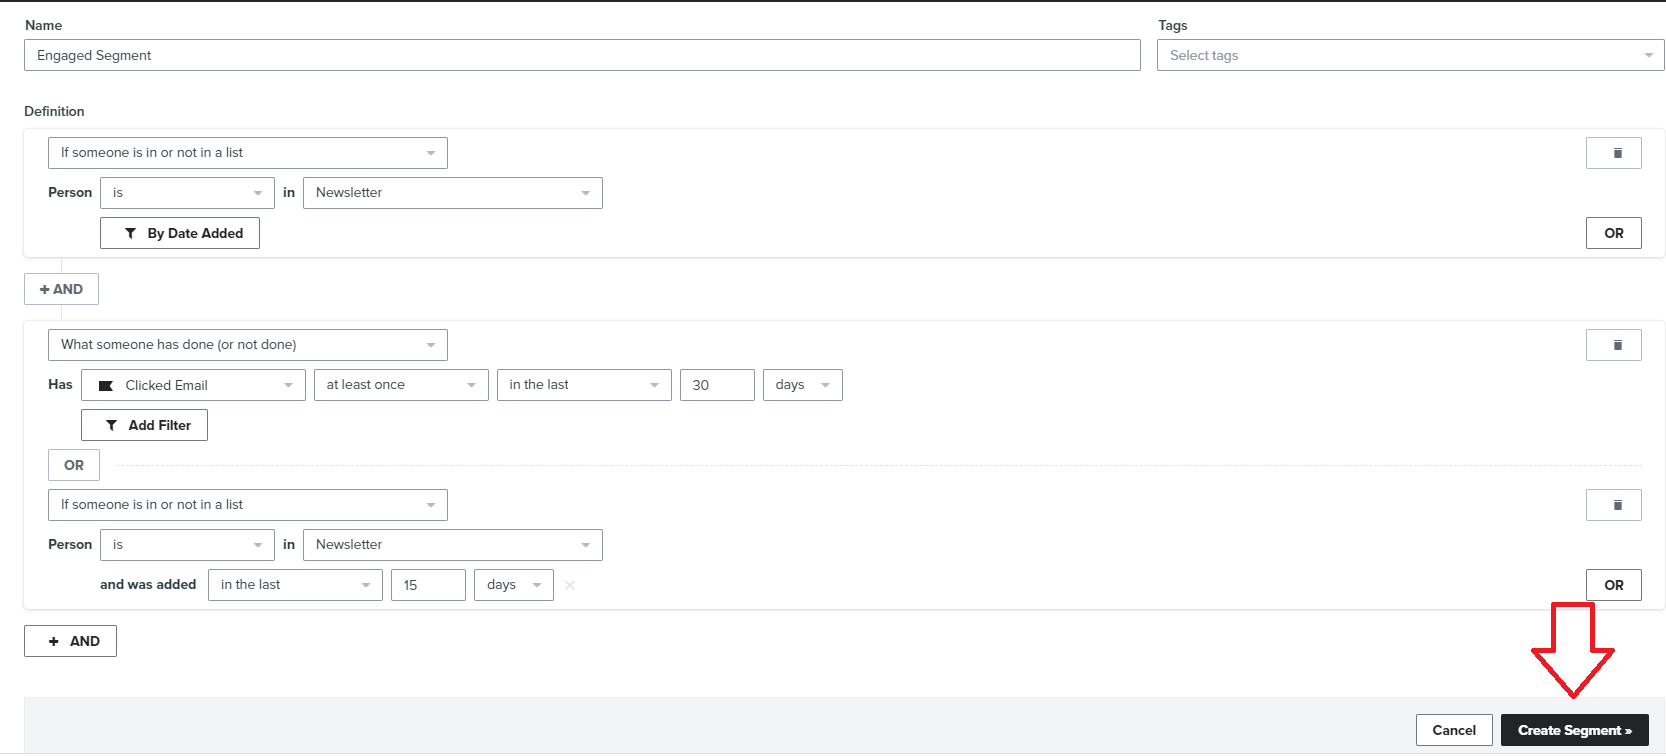
- Set up your engaged (30 day) segment using the following filters.
If someone is on the list→Newsletter and
If someone Clicked Email→at least once→in the last 30 days or
If someone is in Newsletter→and was added→in the last 15 days
60 day segment (for sending 3x a week)
Considerations:
-
Open rates should be consistently above 20% for 2 weeks after running your 30 day segment.
-
If your open rate remains below 20% continue with your 30 day segment and use A/B testing to experiment on subject lines, content, and sending times
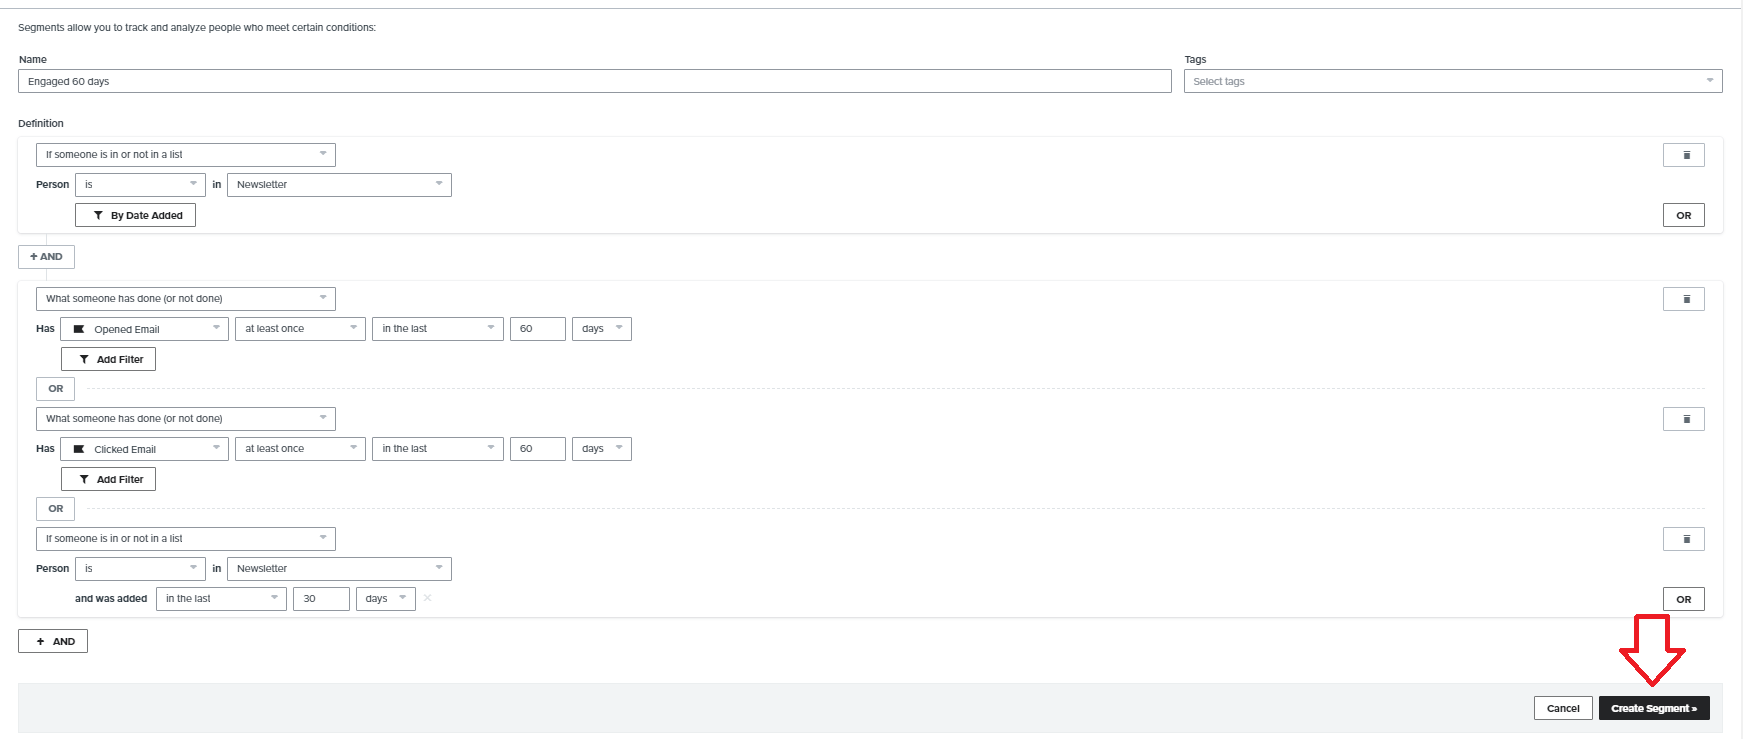
Set up your engaged (60 day) segment using the following filters.
If someone is on the list→Newsletter and
If someone Opened Email→at least once→at least once→in the last 60 days or
If someone Clicked Email→at least once→at least once→in the last 60 days or
If someone is in Newsletter→and was added→in the last 30 days
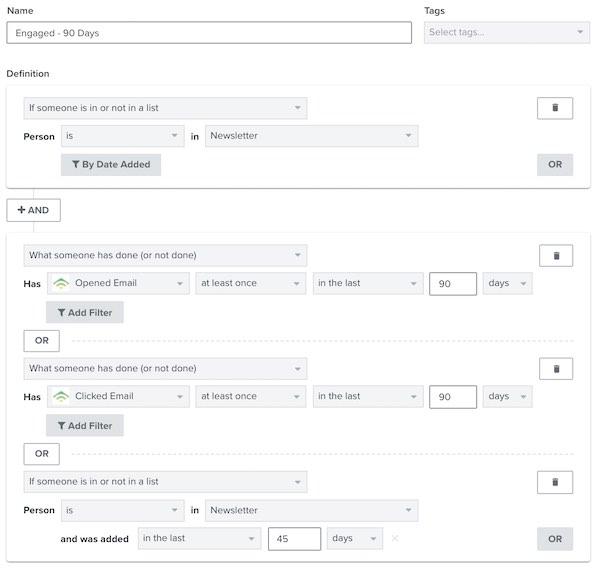
90 day segment (for sending 2x a week)
Consideration:
- If your 60 day segment are performing still above 20% open rate, you can broaden your 60 day segment to 90 day segment
If someone is on the list→Newsletter and
If someone Opened Email→at least once→at least once→in the last 90 days or
If someone Clicked Email→at least once→at least once→in the last 90 days or
If someone is in Newsletter→and was added→in the last 45 days
**
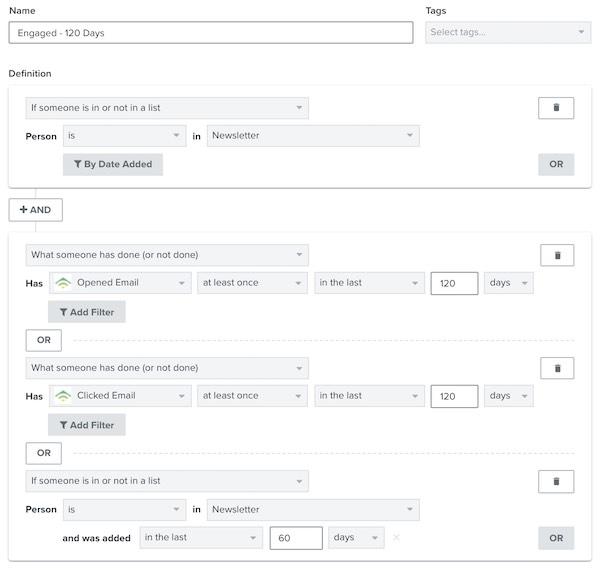
120 day segment (for sending weekly)
Considerations:
-
After you have sent your content to your engaged audience of 30-90 days for a few weeks, consider adjusting your engagement criteria to include those who have interacted with your content in the past 120 or 180 days.
-
Aim to achieve an open rate of at least 20% to ensure effective engagement.
-
If at any point on this stage, your performance goes below 20% open rate, tighten your timeline.
If someone is on the list→Newsletter and
If someone Opened Email→at least once→at least once→in the last 120 days or
If someone Clicked Email→at least once→at least once→in the last 120 days or
If someone is in Newsletter→and was added→in the last 60 days
Conclusion
That’s it! Once you’ve built your engaged segments, you can now monitor and analyze the performance of your email campaigns and continue to optimize to improve your open rates, click-through rates, and conversions.
Best Practices:
-
Run your 30 day warming segment for at least two weeks or until you see a consistent open rate of (customers opening your email) above 20% before broadening your segments. If your open rate is below 20% or it fluctuates, continue running your experiments.
-
Run A/B testing on your subject lines to determine which email subjects get your customers to open your emails.
-
Run your segments for two weeks to one month to ensure you’re getting consistent above 20% open rate before creating additional segments.
Execution Checklist:
-
Link your online store or website to your marketing automation platform.
-
Enable tracking of newsletter or email subscribers.
-
Warm your sending infrastructure by creating the 30 day engaged segment
-
Set up 60 day, 90 day, and 120 day segments based on the performance of your current segment.