Setting Up a Dedicated Sending Domain to Enhance Email Deliverability
To walk you through setting up your dedicated email domain.
Prefer a shortcut? 16 free tools do parts of this for you.

Aim: To walk you through setting up your dedicated email domain.
Optimal Outcome: To set up your own brand or organization’s domain as the sender for your outgoing emails instead of the platform you’re using.
What do you need to start:
You’ll need the following:
-
A registered domain name
-
Access to DNS settings
-
Email Service Provider (to handle the email sending process)
-
Authentication protocols (such as SF, DKIM, and DMARC)
Why is this SOP Important: Setting up a dedicated sending domain can improve email deliverability, increase brand recognition, offer better control and flexibility, provide improved analytics, and separate email streams.
When and Where to execute:
-
If you don’t have one yet, you can buy a domain from a reputable domain registrars, such as GoDaddy, Namecheap, Google Domains, and Hover.
-
To set up your dedicated sending domain, you can use an email marketing service provider (ESP), such as Klaviyo, Mailchimp, and Campaign Monitor.
Note: In this SOP, we’ll walk you through setting up your dedicated sending domain through Klaviyo.
Who Should Be Doing This: Onboarding Specialist, Customer Success Manager
What is a dedicated sending domain?
A dedicated sending domain is a unique domain name used exclusively for sending emails from a specific sender, such as a company or organization. It helps establish a positive reputation with email service providers, improving email deliverability and ensuring that emails sent are delivered to recipients' inboxes rather than marked as spam or blocked. Maintaining a positive reputation is based on factors such as email volume, frequency, and engagement metrics. By using a dedicated sending domain, email activity can be monitored and analyzed separately, providing better tracking and analytics to improve email marketing performance.
Execution
Resources/Tools & Set up
Ensure you have a clean email list. (Follow this guide: SOP 212: How to Achieve a Clean List Every Month)
- Warm your email infrastructure by setting up your 30 days, 60 days, and 120 days email segments (Follow this guide: SOP 258: A Guide to Segmenting Your Emails to: Engaged (30d, 60d, 90d, 120d)
Set up your dedicated sending domain on Klaviyo
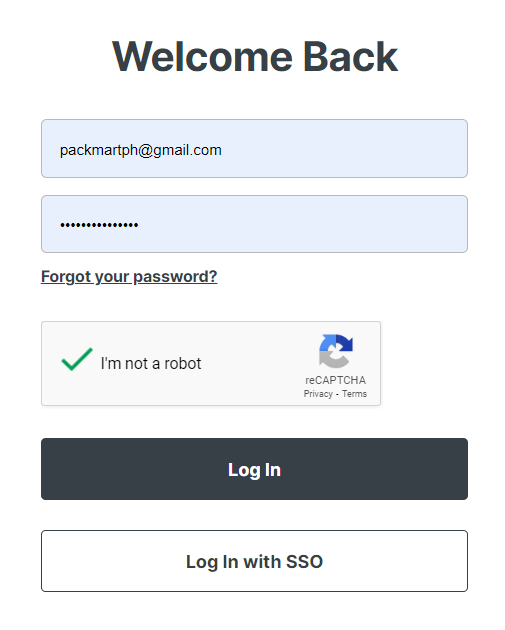
- Log in or create an account in Klaviyo.
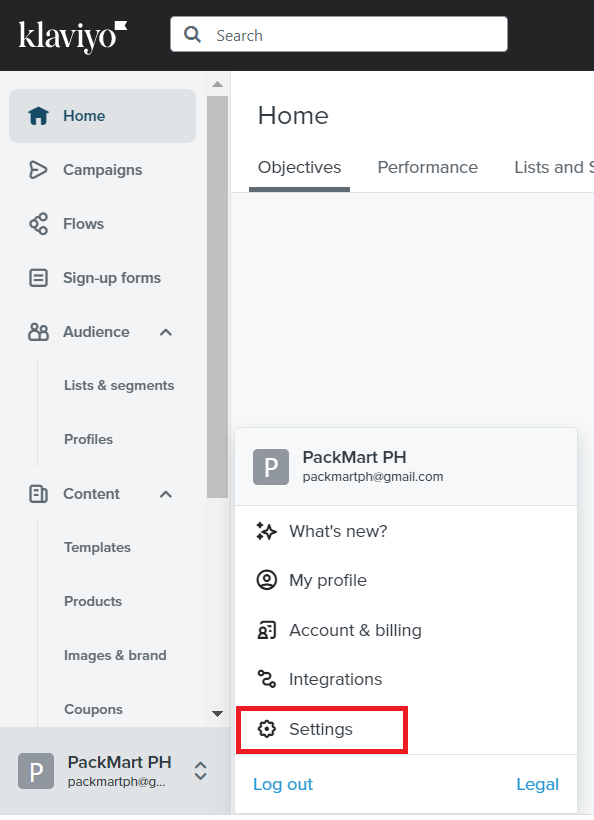
-
Navigate to the left menu and click your brand name. Then select Settings.
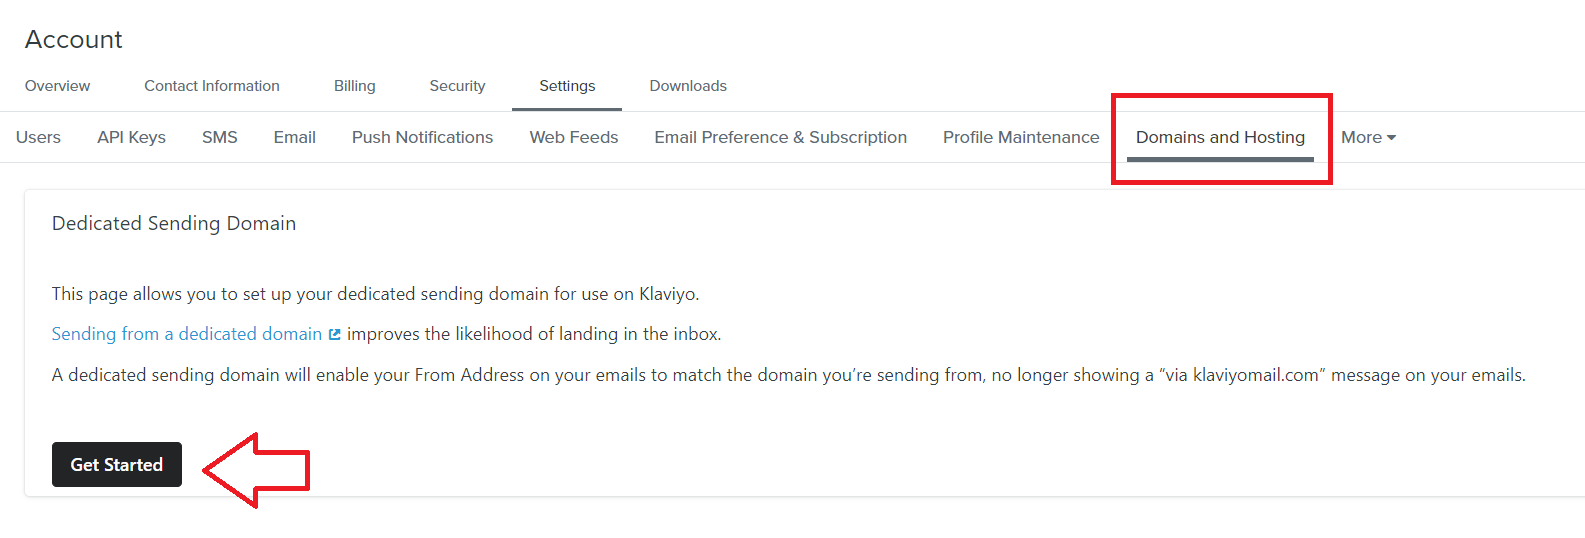
-
Select Domains and Hosting, then click Get Started.
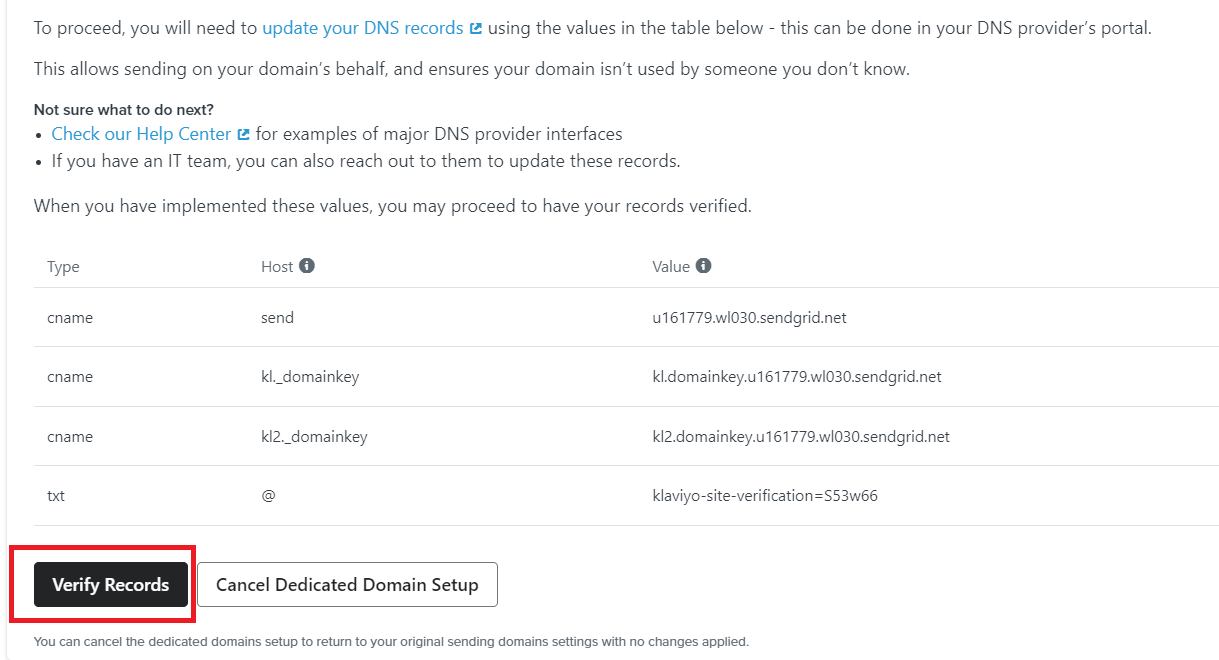
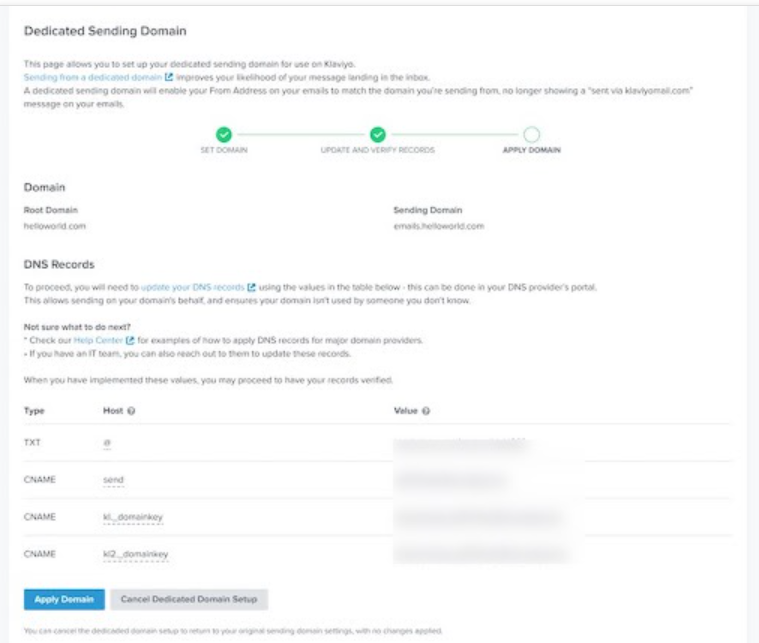
- Log in to your DNS service provider and paste your new DNS records you copied from step 2. Here are some of the most common DNS providers and steps on how to update your records.
- Once you’ve updated your DNS records, go back to Klaviyo and continue to verify your domain.
- Confirm the settings on the pop up page and click Apply Domain.
Conclusion
Execution Checklist
-
Configure your DNS records correctly for your sending domain, including SPF, DKIM, and DMARC. This will help authenticate your email messages and improve your reputation.
-
Before sending a large volume of emails, gradually increase your sending volume over time to establish a positive reputation with email providers. This process is also known as “warming up” your IP.
-
Keep an eye on your email reputation and deliverability metrics, such as bounce rates, spam complaints, and open rates. Use this information to make adjustments to your sending practices as needed.
-
Adhere to email best practices, such as sending relevant and targeted messages, avoiding spammy content and tactics, and making it easy for subscribers to opt out of your emails.
-
Regularly remove inactive or bounced email addresses from your mailing list to ensure that your messages are only sent to engaged and interested recipients.
-
Test your messages for deliverability and rendering across various email clients and devices before sending out large volumes of emails. This can help and fix any issues before they affect your deliverability.