A Guide to Automating Your Email Outreach Campaigns
To set up an automated email outreach campaign that will send marketing or advertising emails to target recipients.
Prefer a shortcut? 16 free tools do parts of this for you.

Aim: To set up an automated email outreach campaign that will send marketing or advertising emails to target recipients.
Optimal Outcome: Send out automated email outreach campaigns that can help achieve your website or online shop’s goals, especially in reaching out to existing customers and other target recipients.
What you need to start: You will need a paid Mailchimp account. You have three options: Essentials, Standard or Premium. Aside from that, you will also need an existing email list.
Why is this SOP Important: Automating your email outreach campaigns will make your email marketing efforts less tedious and time-consuming. The added convenience will also help you maintain quality and consistency in your customer communications and engagement.
When and Where to execute: You can set this up whenever you need to launch an email outreach campaign. This SOP is also going to be performed on Mailchimp.
Who Should Be Doing This: The marketing manager
What is Email Automation?
Email automation is the method of setting up a sequence of emails in advance that you can then later send to a list of target recipients automatically with the use of an email automation tool. For the purposes of this SOP, we are going to use Mailchimp. That said, there are plenty of other email marketing platforms that you can choose from.
Resources/Tools & Set up
-
An existing email list of target recipients
-
A paid Mailchimp account
Execution
Composing Your Email
You have to first make an email template before executing your email outreach campaign. Follow the following steps to do this:
You may compose an email of your own, but for the purposes of this SOP, we are going to use the message below as a template:
Hey [Name],
We have prepared a special offer for you. Please let me know if you’d like me to send you more details.
Best,
[Sender’s Name]
Setting up Your Automated Email Outreach Campaign in Mailchimp
-
Log into your MailChimp account.
-
From the left-hand panel, select Automations.
-
Select Pre-built journeys.
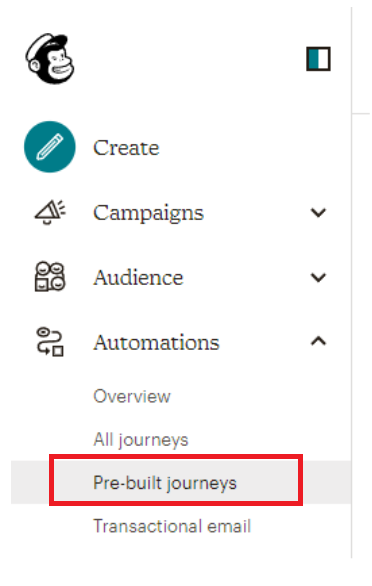
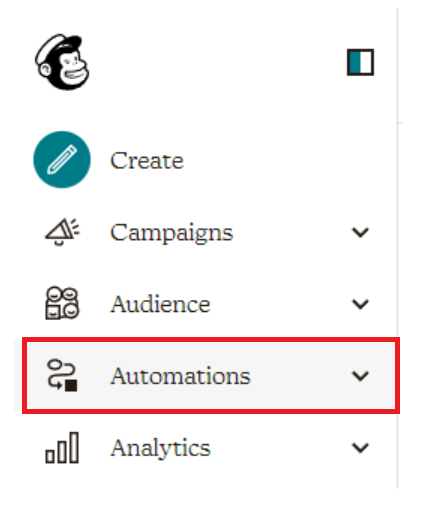
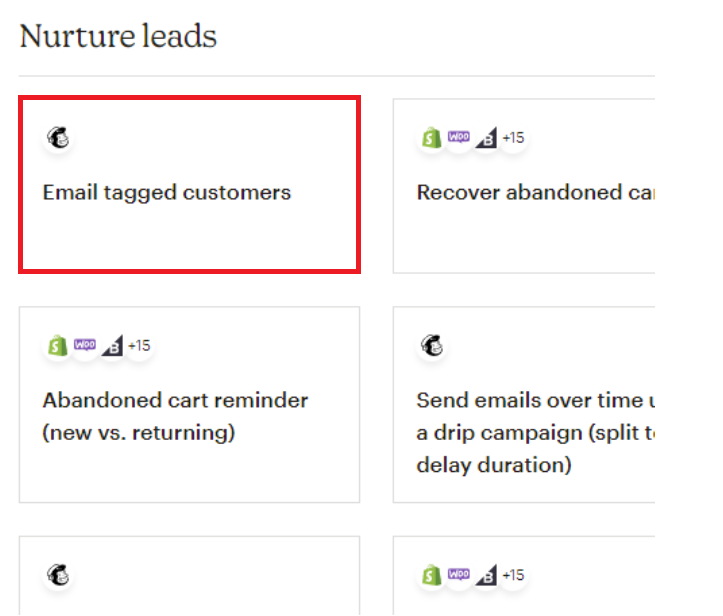
- The Pre-built Journeys window will appear. You will find the different types of email campaigns you can send with Mailchimp. For the purposes of this SOP, though, we are going to choose Email tagged customers. You will find it under the Nurture leads section.
-
The Email tagged customers window will appear. Click on Use this journey. You will find it at the upper right-hand part of the page.
-
The Set up an audience window will appear. It will confirm the email list that Mailchimp is going to use for the journey. If correct, click on Continue.
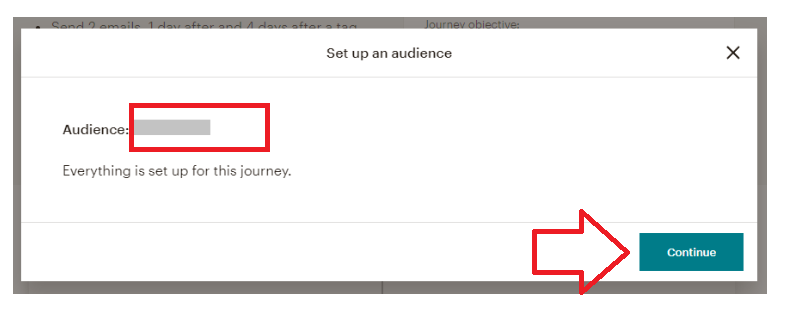
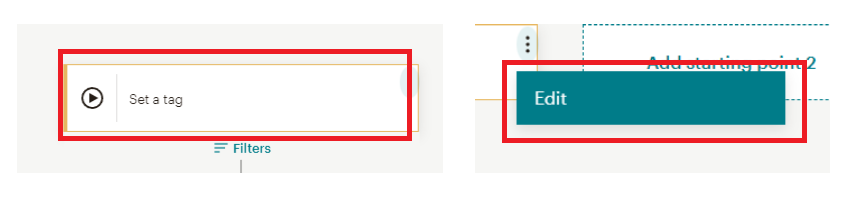
- Click on the menu beside Set a tag. Then click on Edit.
-
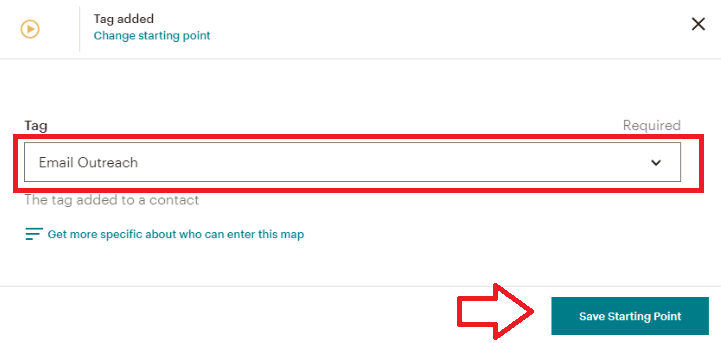
A pop-up window will appear. It will allow you to create a new tag or choose an existing one. For the purposes of this SOP, we are going to create a tag named Email Outreach. This means that our emails later on are going to be sent to the email addresses that we are going to tag as part of our email outreach campaign.
-
Click on Save Starting Point. Doing so will close the pop-up window and return you to the previous page.
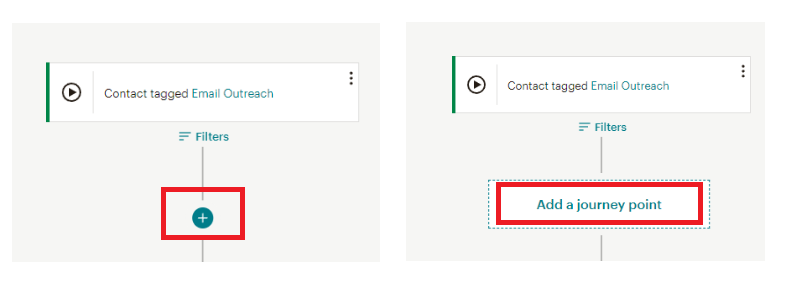
- Afterward, move your mouse to the + sign. Doing so will reveal Add a journey point. Click on that.
-
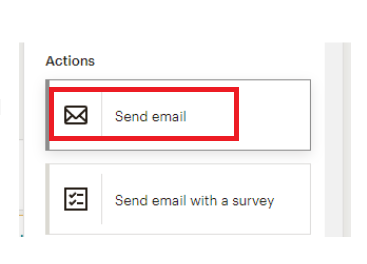
A pop-up window will appear. Select Send email.
-
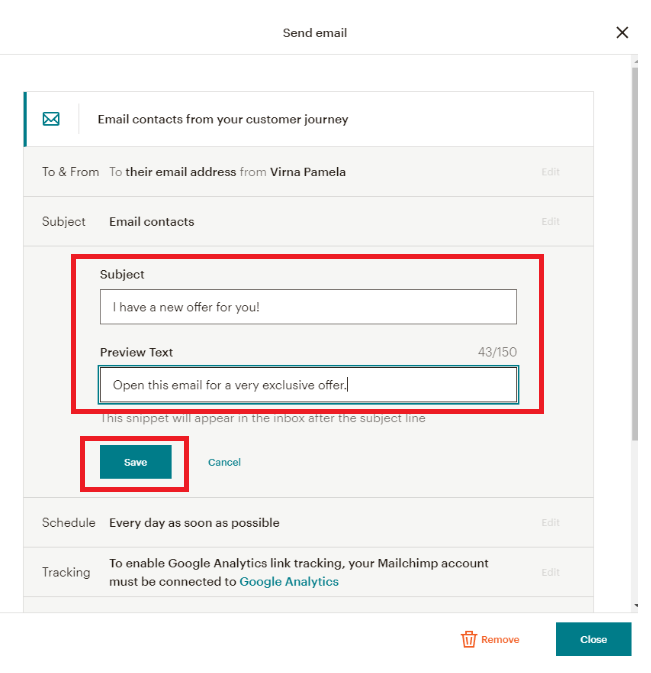
The Send email window will pop-up. Next to the subject line, select Edit.
-
Revise the preview text and email subject line. For the purposes of this SOP, we are going to type in “I have a new offer for you!” on as the Subject and “Open this email for a very exclusive offer”. Afterward, select Save.
-
Afterward, we are going to select the Classic Builder to use in creating our email template.
-
Doing so will open the Select a template window.
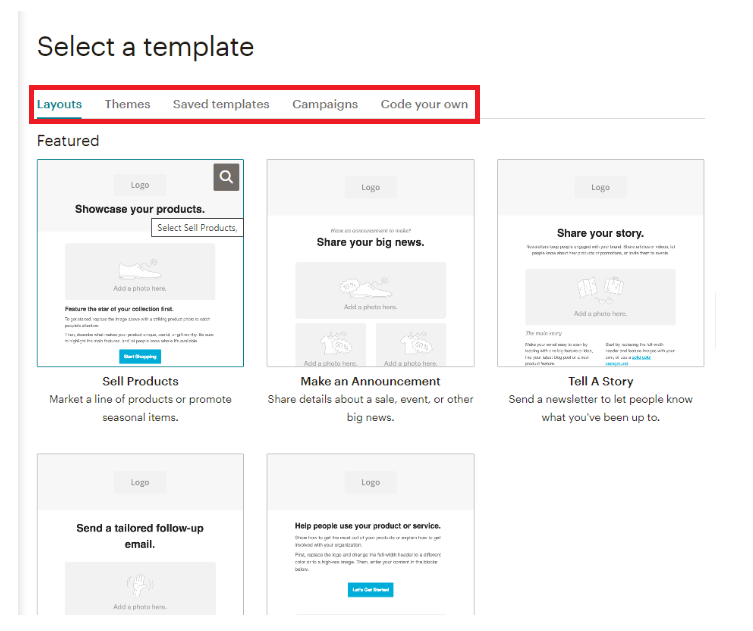
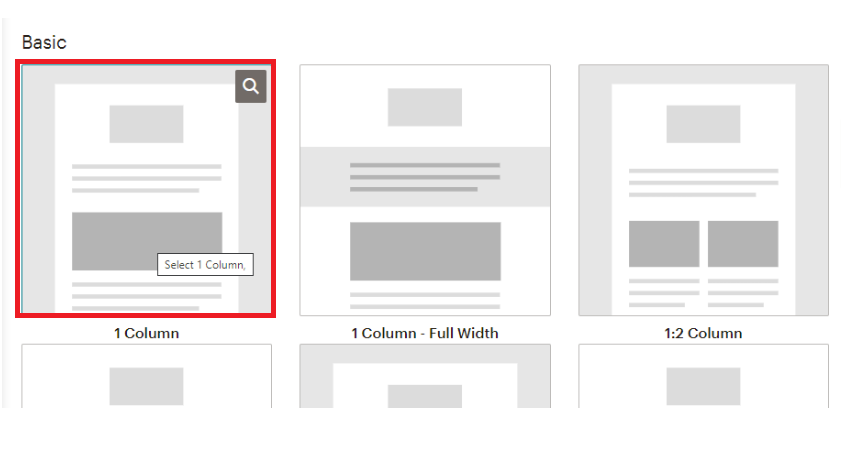
- You may choose the layout that you want. For the purposes of this SOP, we are going to scroll down to the Basic section and choose the 1 Column template.
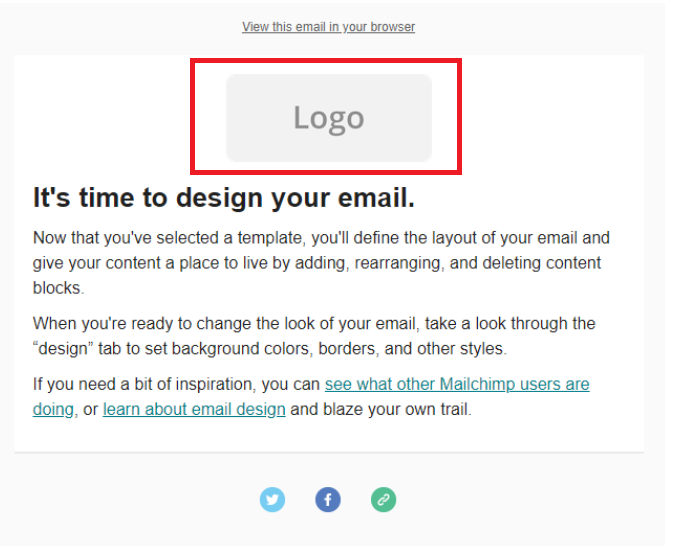
- Doing so will open the email builder. Add your website or online shop’s logo on the Logo section.
-
You will have the option to replace it with your own logo or even delete it should you not want your logo to be included in your email.
-
To edit the email, select the pencil icon on the upper right corner of the panel.
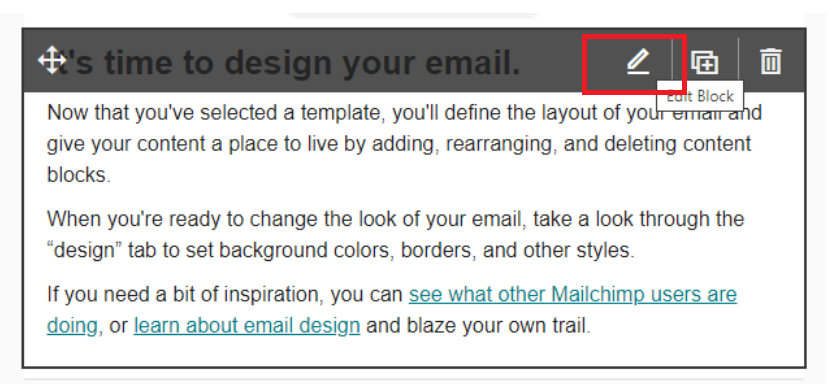
- The editing panel will appear on the right. You will see a live preview at the left.
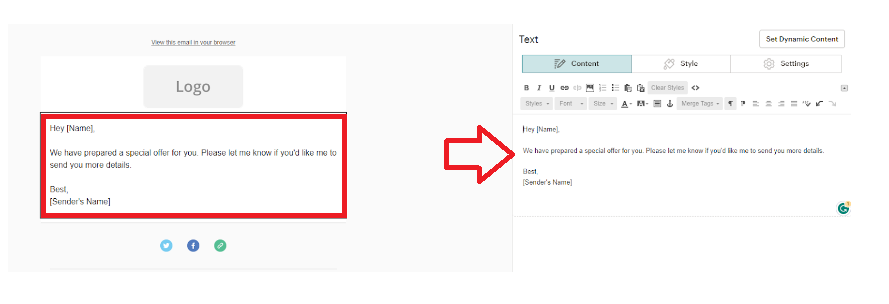
-
Once done, click on Save & Close at the bottom of the editing panel**.**
-
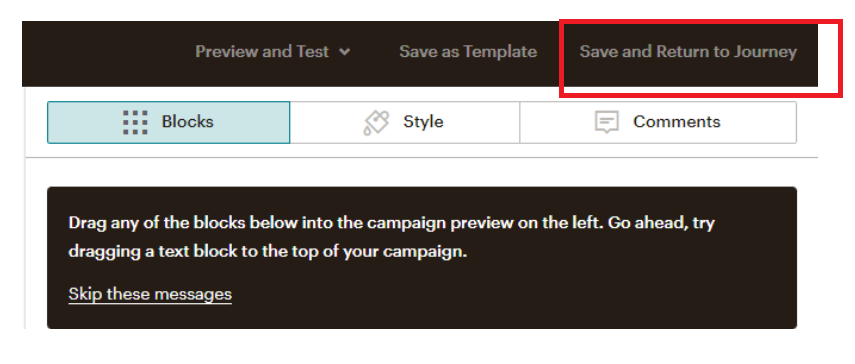
The panel will give you the option to add more blocks to your email. Once you’re content with your email, you may click on Save and Return to Journey at the upper right-hand part of the panel. It will return you to the previous page. Click on Continue.
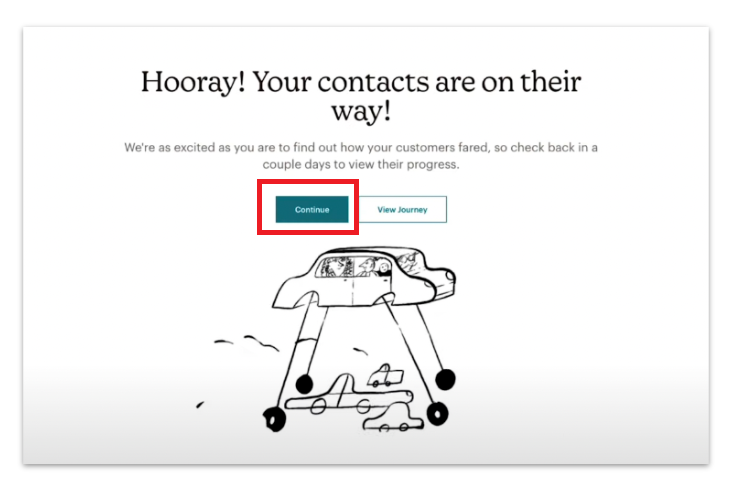
- It will then show you a confirmation message that you have successfully created an automated email campaign.
Conclusion
You’re done! Remember, automating your email campaigns will save you a lot of time and effort in reaching out to your email list. This way, you’ll be able to dedicate more time to what really matters: managing your website or online shop and meeting its goals.
-
To begin, compose the email that you want to send.
-
Head over to Mailchimp and select your preferred customer journey. This is a feature that seeks to help users create email sequences easily.
-
Select the email list that you want to send your email campaign to.
-
Add a subject line and preview text.
-
Then, select the template that you want to use.
-
Edit the template until you’re content.
-
Once done, click on Continue to send out your email campaign.