A Guide to A/B Testing Email Schedules
To provide you with a step-by-step guide on how to do A/B testing for email schedules
Prefer a shortcut? 16 free tools do parts of this for you.

Aim: To provide you with a step-by-step guide on how to do A/B testing for email schedules
Optimal Outcome: To optimize your email campaign by setting up A/B testing for when your customers receive your emails.
What do you need to start: Marketing Automation platform
Why is this SOP Important: A/B testing sending times can help you optimize your email campaigns for maximum engagement and conversion, while also improving your subscribers' experience with your brand.
When and Where to execute: You can set your A/B testing in your Marketing Automation Platform. You should set up A/B testing when you have low engagement rate, when you launched your product in a new time zone, or if you targeted a new audience set.
Who Should Be Doing This: Marketing staff, person responsible for setting up automation
What is A/B Testing in email campaigns?
A/B testing in email campaigns refers to the period in which an A/B test is conducted to compare two versions of an email and determine which one performs better. The duration of an A/B test depends on factors such as the size of the email list, the level of statistical significance desired, and the specific variable being tested. During this time, the two versions of the email are sent to random subsets of the email list, and their performance is measured to identify the better-performing version. The length of an A/B test schedule should be long enough to ensure statistically significant results and avoid overwhelming subscribers with too many emails during the testing period.
Execution
Resources/Tools & Set up
-
Create your email campaign flow. Here are some of the example SOPs to get you started:
-
SOP 229: Creating a Successful Browse Abandonment Flow on Klaviyo
-
SOP 230: Optimizing Customer Retention with a First-Time Post-Purchase Flow on Klaviyo
-
SOP 232: Regaining Lost Customers with a Win-Back Flow on Klaviyo
Setting up A/B testing for best time delay
-
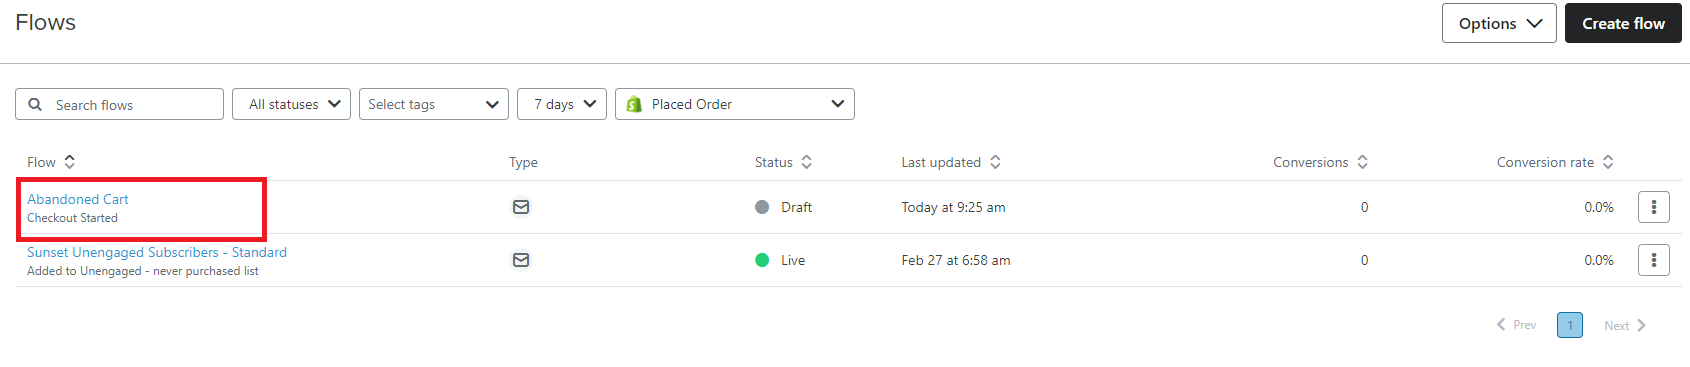
Click the flow you want to run the test for.
-
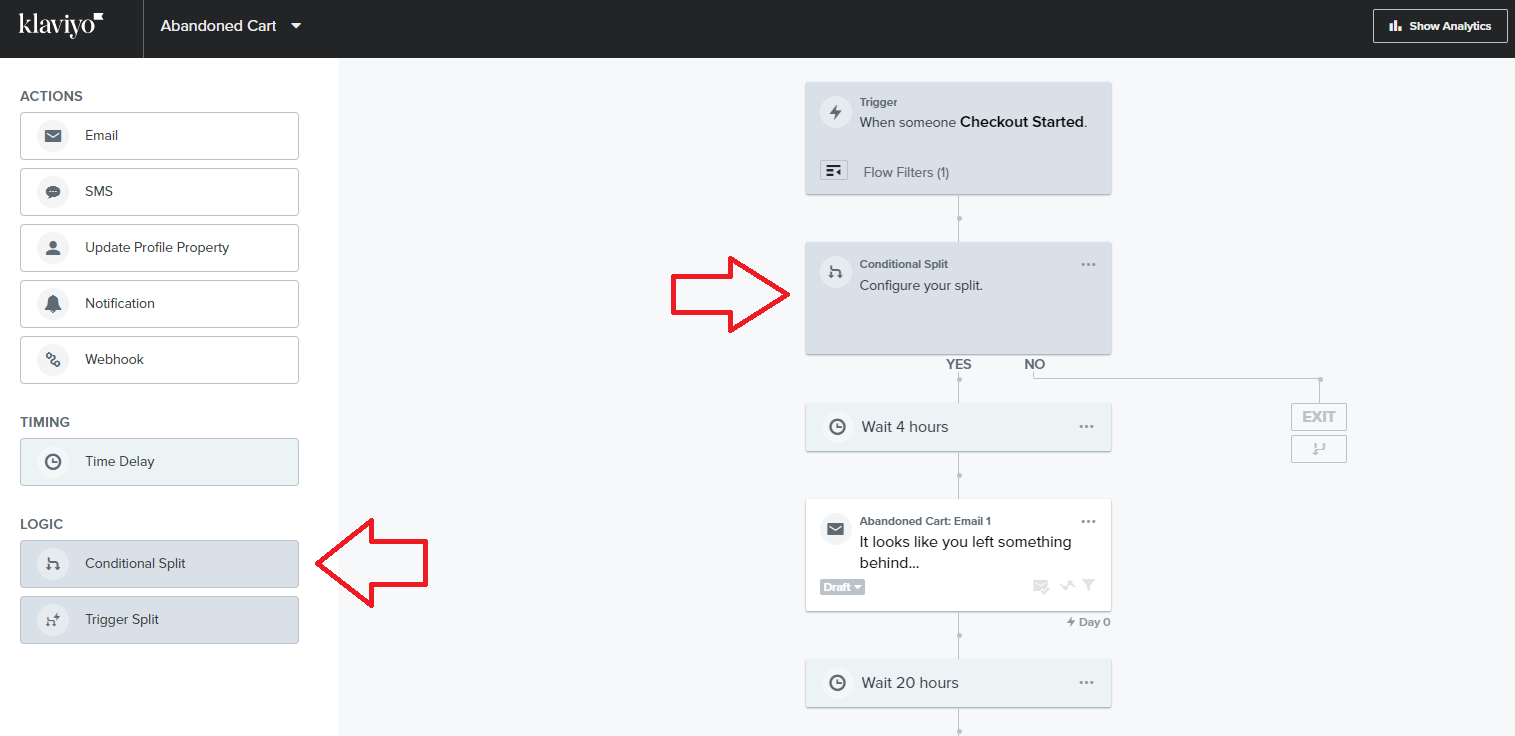
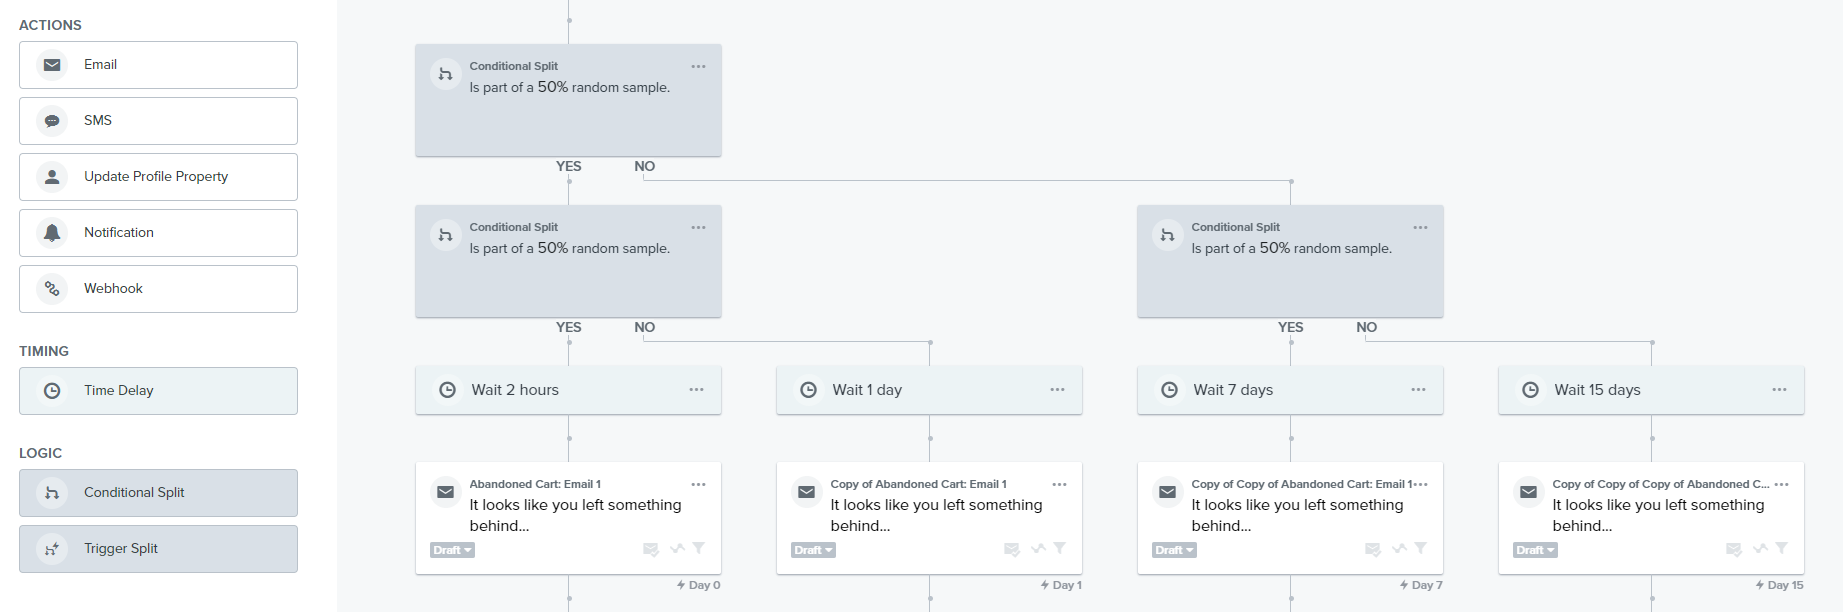
Insert Conditional Split card before the time delay.
-
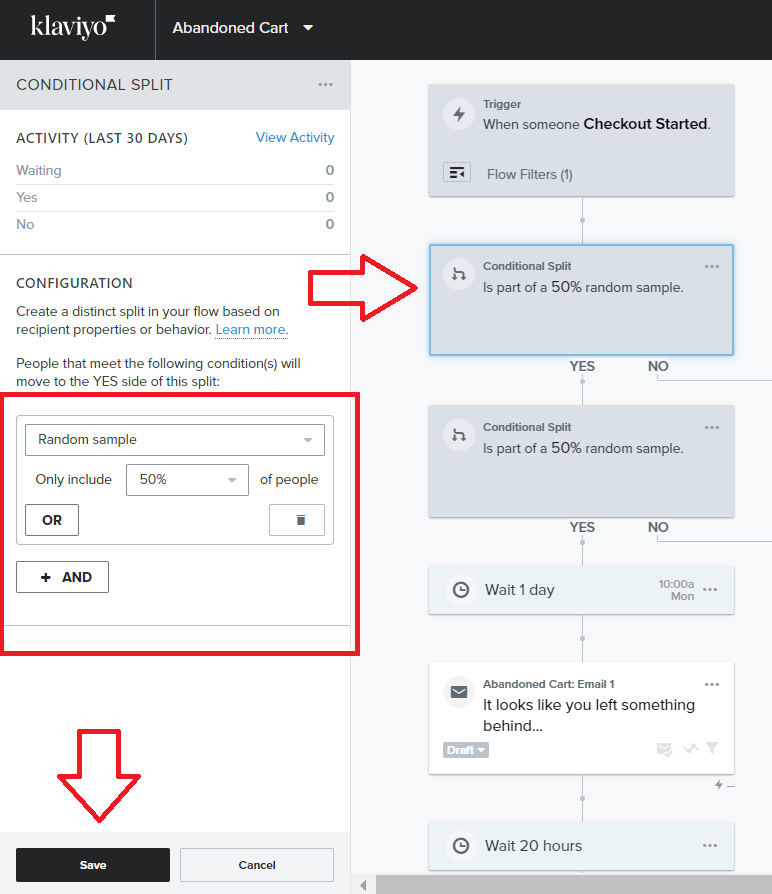
Click the Conditional Split card to configure.
Use the following configurations:
Random Sample → Only include → (% of people you want to test for this segment)
-
Continue inserting Conditional Split cards to add more variation to your test. Note: You should not have more than four segments for your test.
-
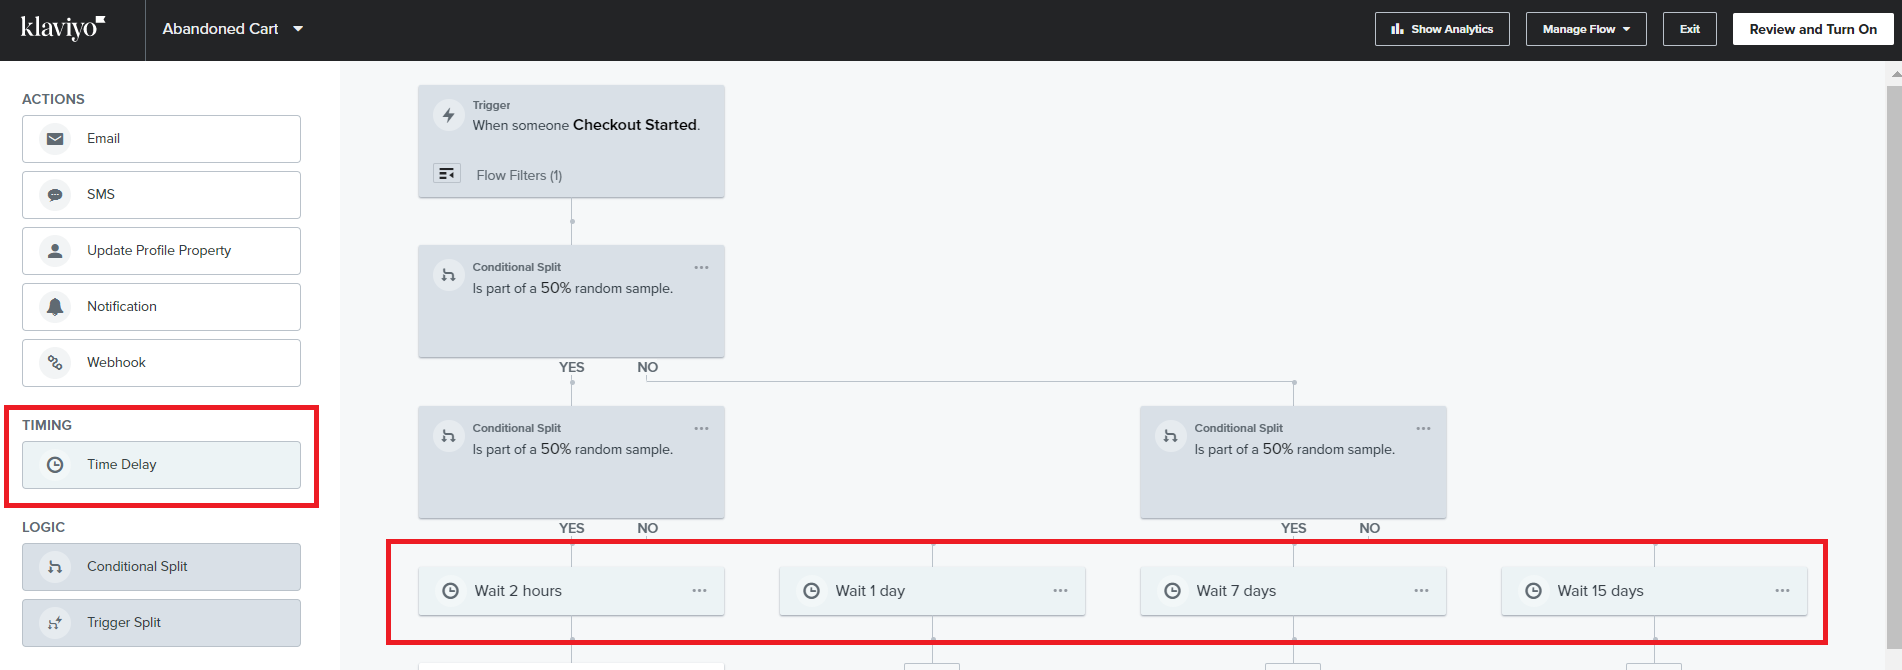
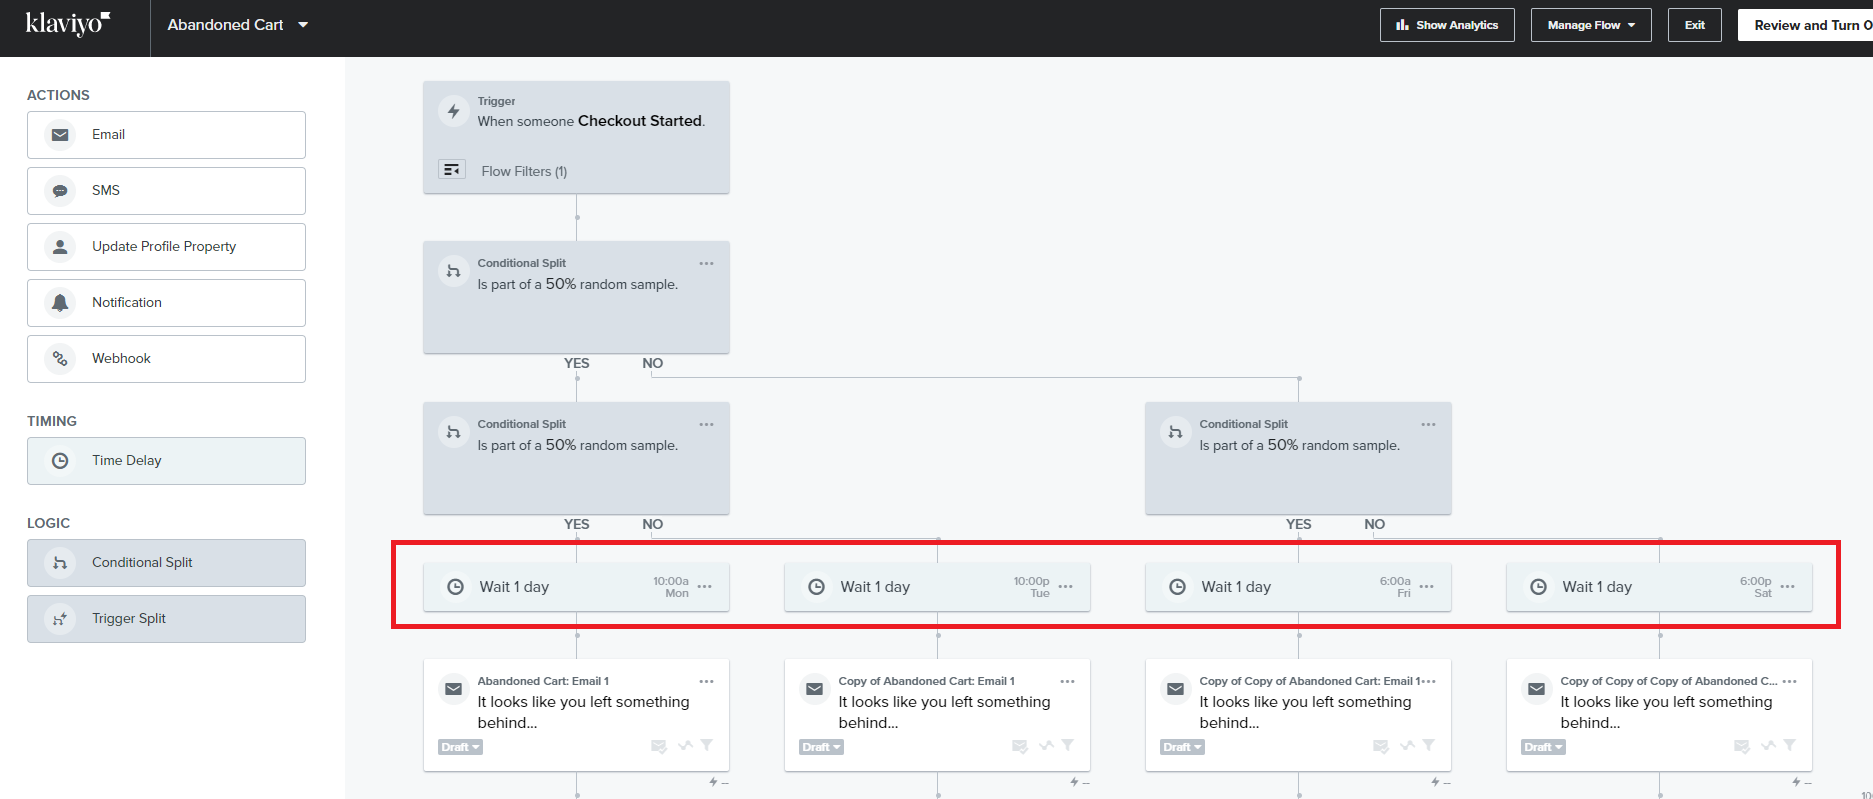
Add Time Delay cards for each Yes/No path. Configure the various time delay options based on your hypothesis.
-
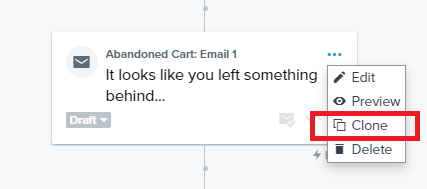
Click the email card and right click the three dots at the top right of the card. Select Clone. Add the same email card under each time delay variation.
-
Make sure to only test one variable at a time. If you’re testing time delay or sending times, do not test Subject Line at the same time.
-
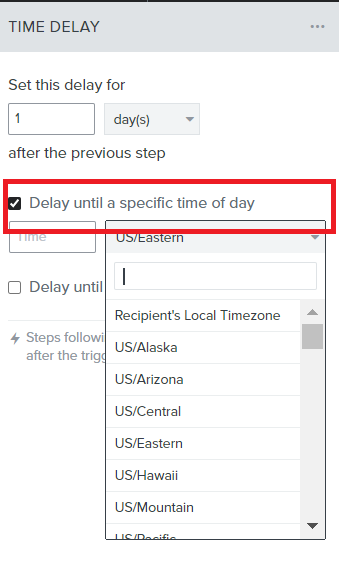
To test a specific day and/or time, select the time delay card, and check the Delay until specific time of day and/or Delay until specific day/s of the week checkboxes.
-
Set up up to four variations of your email schedule.
Understanding A/B test metrics
Before setting up your A/B tests, you have to define what you’re trying to improve about your email campaign. Choose the metric that you will use to select the ‘winner’ of your test.
Here are some examples of metrics you want to look out for:
-
Open rate → The variation with the highest open rate wins
-
Click rate → The variation with the highest click rate wins
-
Placed order rate → The variation with the highest placed order rate wins
-
Come up with your hypothesis to determine which times to test. It would help if you already have an initial data set that can give you a baseline to test with.
-
Begin by identifying the problem or opportunity you are trying to address through A/B testing. For example, if you are trying to increase the click-through rate (CTR) of your email campaigns, your problem could be that your current email subject lines are not engaging enough or maybe the timing of your email is when customers are not checking their personal emails, etc.
-
Define the specific goal you want to achieve through A/B testing. In the example above, your goal could be to increase the CTR of your email campaigns by 10%.
-
Based on your problem and goal, formulate your hypothesis. A hypothesis is a statement that describes the expected outcome of your A/B test. For example, your hypothesis could be: “If we change the email subject line to be more engaging, then the CTR of our email campaigns will increase by 10%” or “If we send our email campaigns every Tuesday at 6PM, then the CTR of our email campaigns will increase by 10%”.
-
Create your two (up to four) variations (test group) of your email campaign. Make sure to include the original or baseline parameter which will serve as your control group.
Reviewing and interpreting results
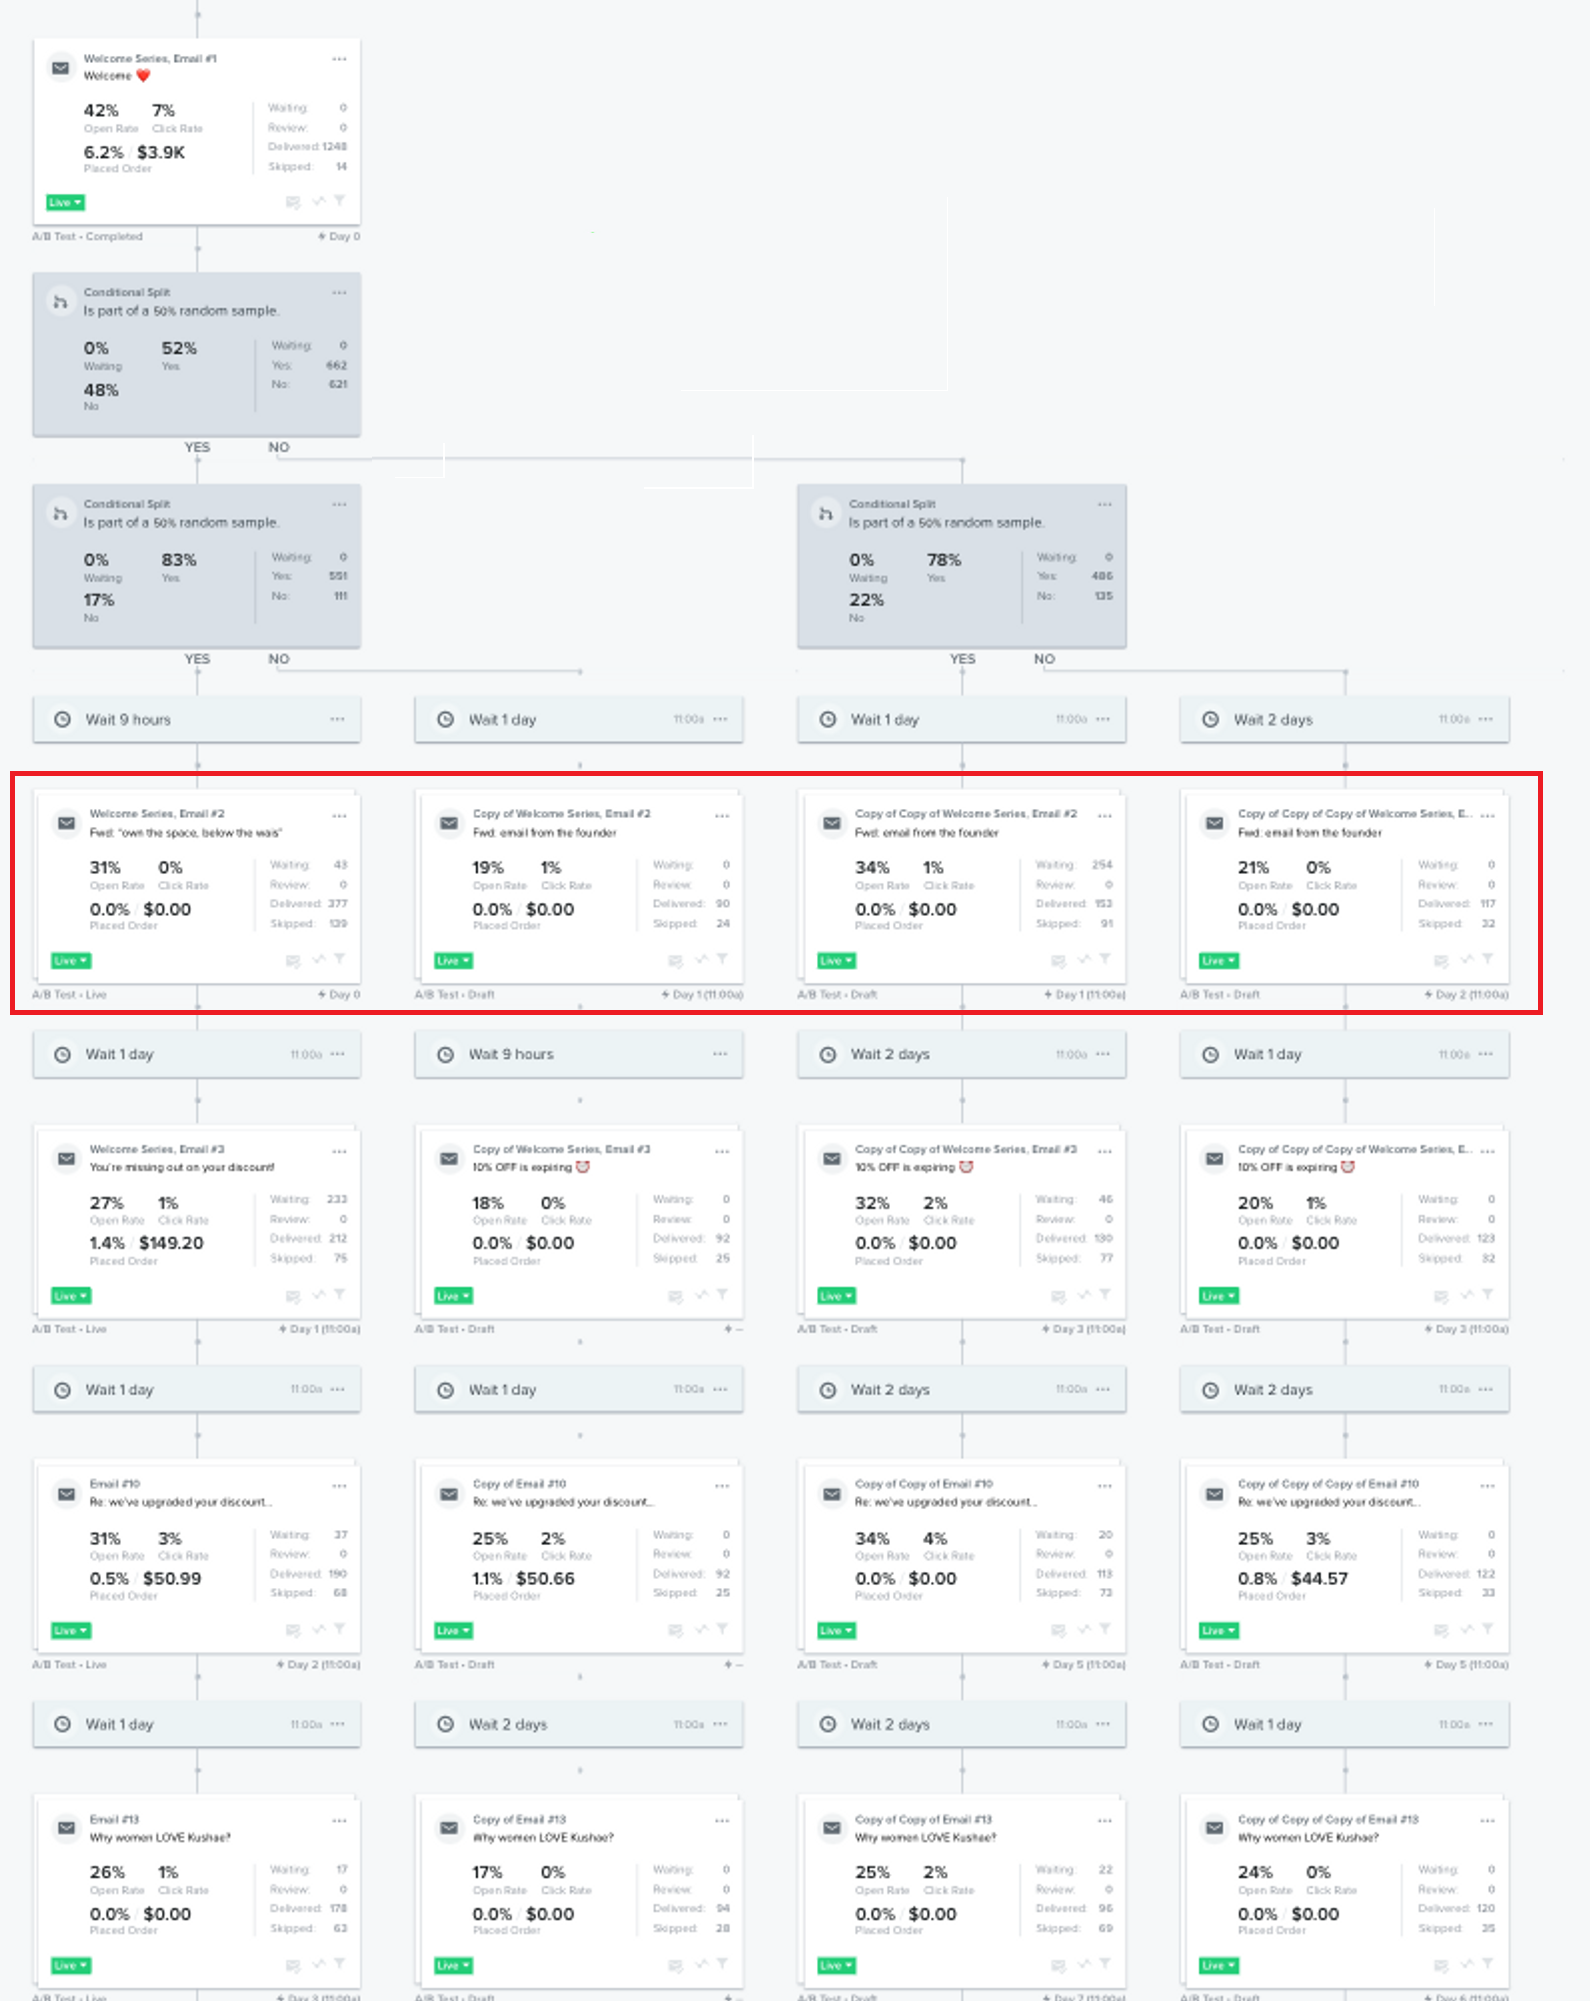
- To view and analyze the results of your A/B test, navigate to the top of the page and click Show Analytics.

- Below is an example of what the results of your A/B testing should look like.
-
Next, interpret the data from your A/B testing results. To do this, you need the following considerations:
-
Review the goal of the A/B test. What metric were you trying to improve? Were you targeting to increase open rates, click-through rates, conversions, or some other metric?
-
Compare the results of your control group (your original version) and the variations you created. Were there differences in the results? Which version showed the most improved numbers?
-
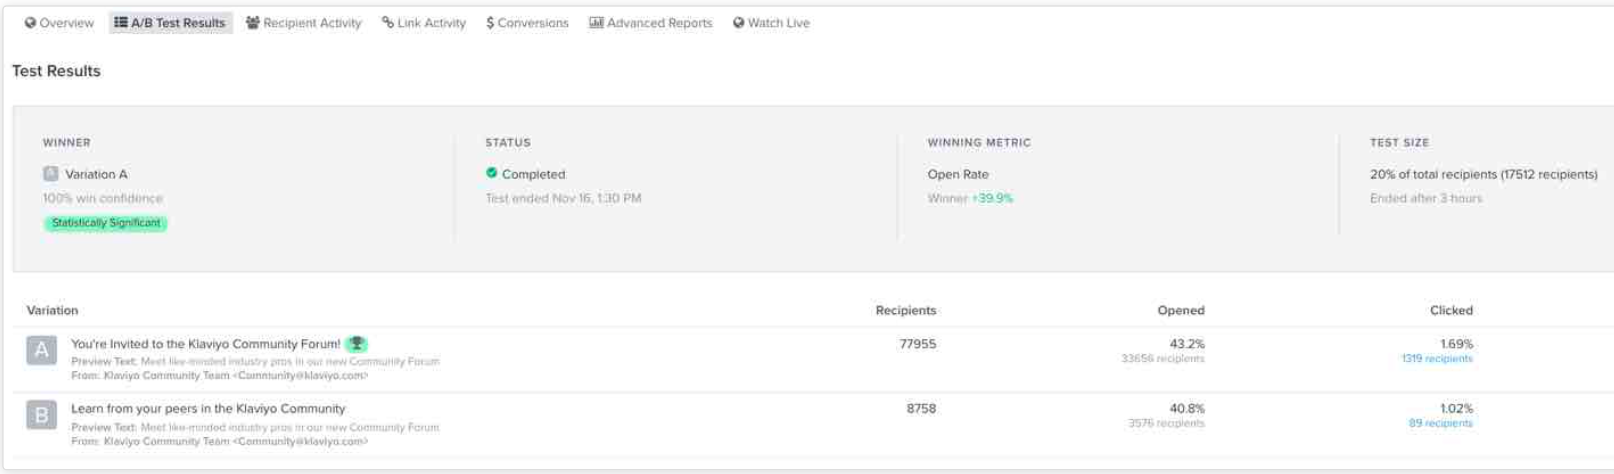
You need to determine if the results of your A/B test are statistically significant. This means that a certain variation of your test is highly likely to win over the other option(s). It also indicates that you can replicate the results and apply what you’ve learned to your future campaigns.
In the example below, the number of email recipients is large enough to make the results statistically significant.
-
Once you’ve determined statistical significance, it’s time to analyze the results. Look at the metrics you identified at the beginning of the test, and compare the performance of the test group with the control group. Identify any significant differences in performance, and evaluate what factors may have contributed to those differences.
-
Based on your analysis, draw conclusions about what worked and what didn’t work in your A/B test. Use these insights to optimize your email campaign strategy, and apply them to future campaigns.
Conclusion
That’s it! You can now run your A/B testing and continue optimizing your email marketing campaigns.
Execution Best Practices:
-
Determine the metric that you want to improve in your email campaign, such as open rates, click-through rates, conversions, or revenue.
-
Split your email list into several groups and send each group a different variation of your email.
-
Focus on testing one variable at a time to isolate its impact on the performance of your email campaign.
-
Ensure that your sample size is large enough to produce statistically significant results.
-
Analyze the performance of each version of your email, including open rates, click-through rates, and conversions.
-
Based on your results, implement the winning version of your email and continue to test and optimize.
-
A/B testing should be an ongoing process, as even small changes can make a big impact on your email campaign’s performance.