Adding Dynamic Banners to Your Emails
To give you a step-by-step guide to creating dynamic banners for your email campaigns.
Prefer a shortcut? 16 free tools do parts of this for you.

Aim: To give you a step-by-step guide to creating dynamic banners for your email campaigns.
Optimal Outcome: To improve your email open rates and conversion by making your emails personalized and more visually appealing.
What do you need to start: Marketing automation platform
Why is this SOP Important: Dynamic banners can help to improve the effectiveness of email marketing campaigns by providing a more personalized and engaging experience for the recipient.
When and Where to execute: You can execute this during the email template creation. You can use the email editor within the Marketing Automation platform that you’re using.
Who Should Be Doing This: Web developer, IT personnel
What is a dynamic banner?
A dynamic banner in email campaigns is an image or banner that changes based on variables such as recipient location, past purchases or preferences. It provides a personalized experience for the recipient and can increase the effectiveness of email campaigns by making them more relevant and engaging. Marketing automation software can be used to create dynamic banners by personalizing emails based on recipient data.
Execution
Resources/Tools & Set up
-
Definition of terms
-
Build dynamic blocks in a non-metric triggered flow
-
Build dynamic blocks in a metric-triggered flow
Definition of Terms
-
Variables - used to populate a customer’s information (Example: first name, location, or interests) in a template. In a metric-triggered flow, variables can populate details from the event that triggered the flow (Example: items in someone’s order, or a tracking number). Variables are enclosed by a pair of curly brackets { { name.email } }.
-
Template tags - used to populate things like unsubscribe links or today’s date. Template tags are surrounded by a set of curly brackets and the percent symbol, and look like this {% unsubscribe_link %}.
-
Profile variable - this is information stored in the customer’s profile such as their name, email address etc.
-
Event variable - is a specific metric or action that the person took such as added to cart, viewed a product etc.
Build dynamic blocks in a non-metric triggered flow
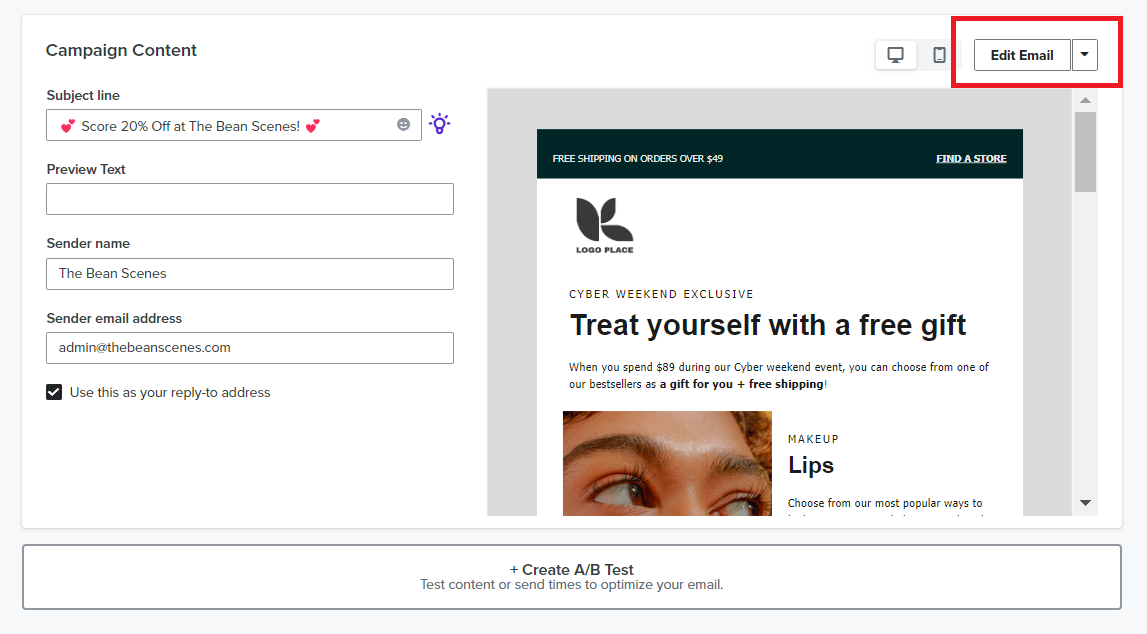
- Go to your marketing automation platform’s email editor (we’re using Klaviyo in this example). Click Edit email.
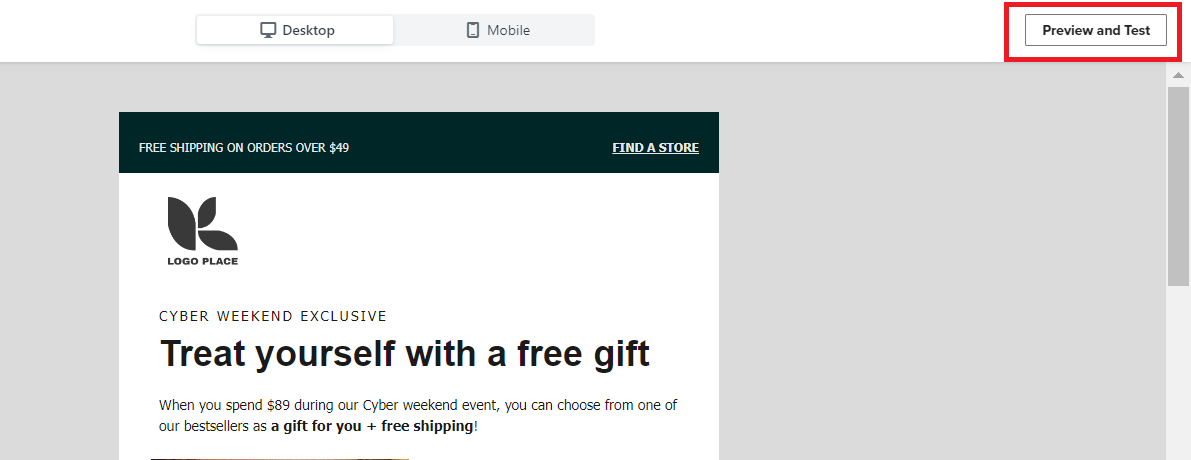
- Click Preview and Test.
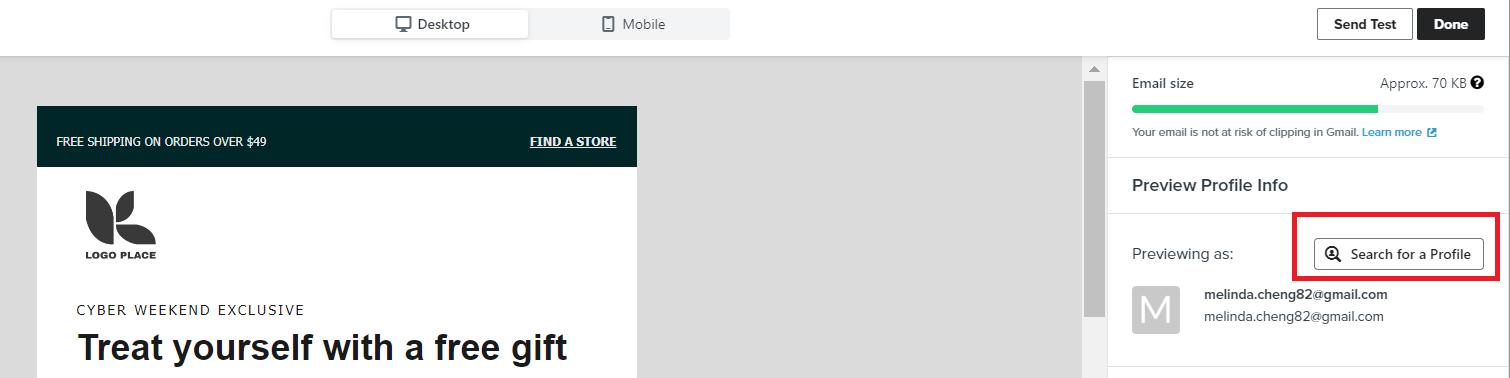
- Click Search for a Profile.
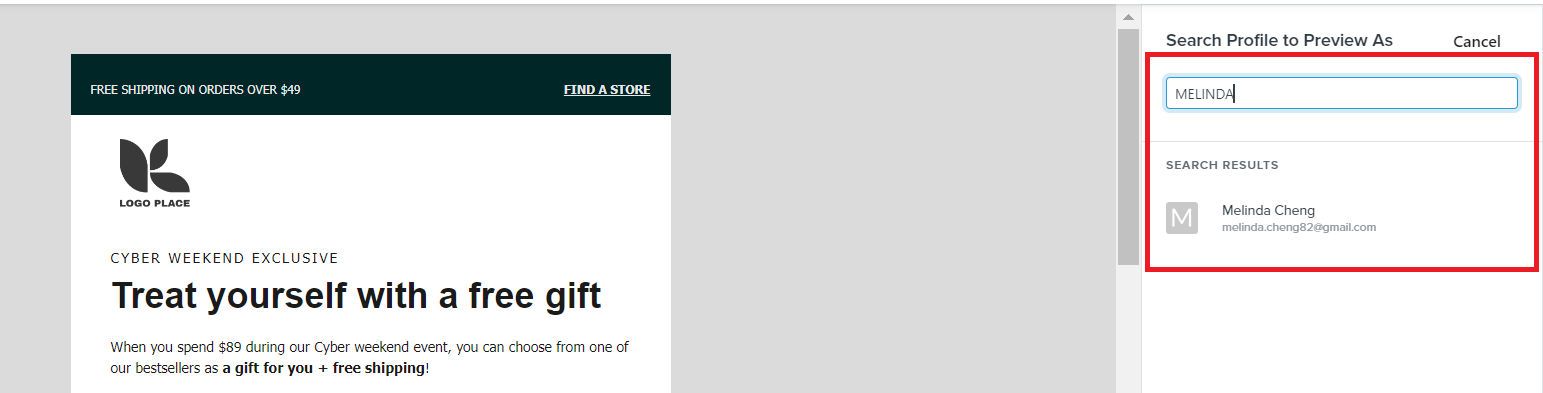
- Search for one of your customer profiles.
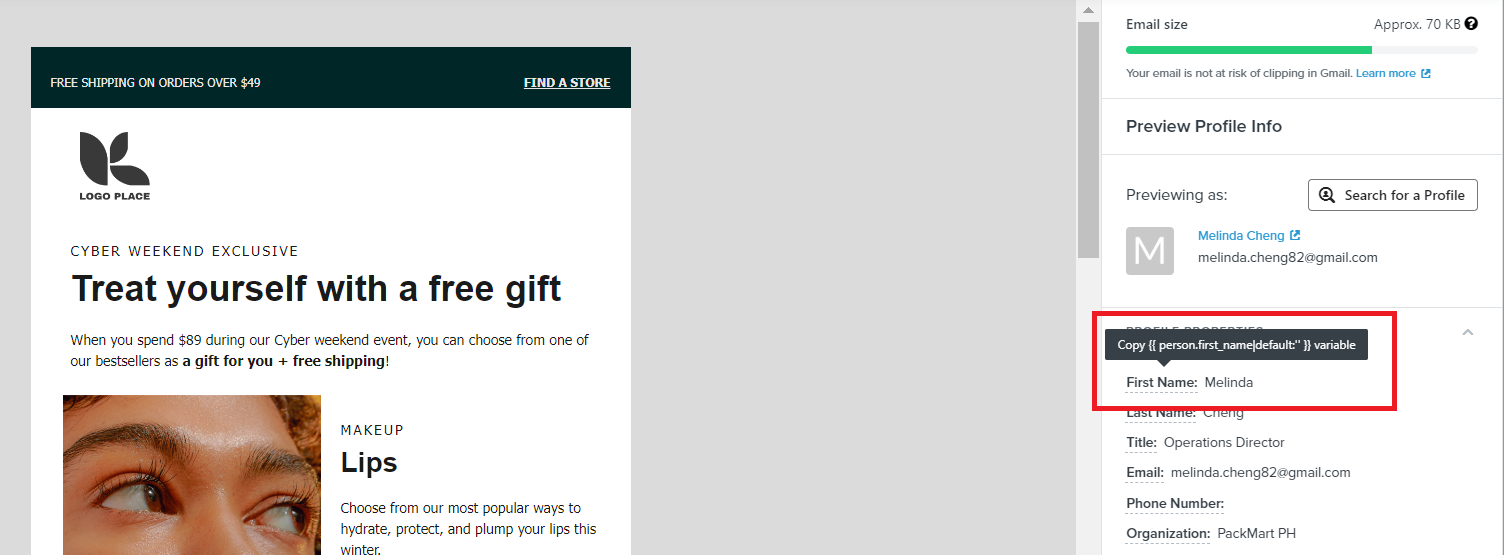
- Hover your mouse in any of the information available in your customer’s profile that you want to use on your email. In this case, we’ll use the first name.
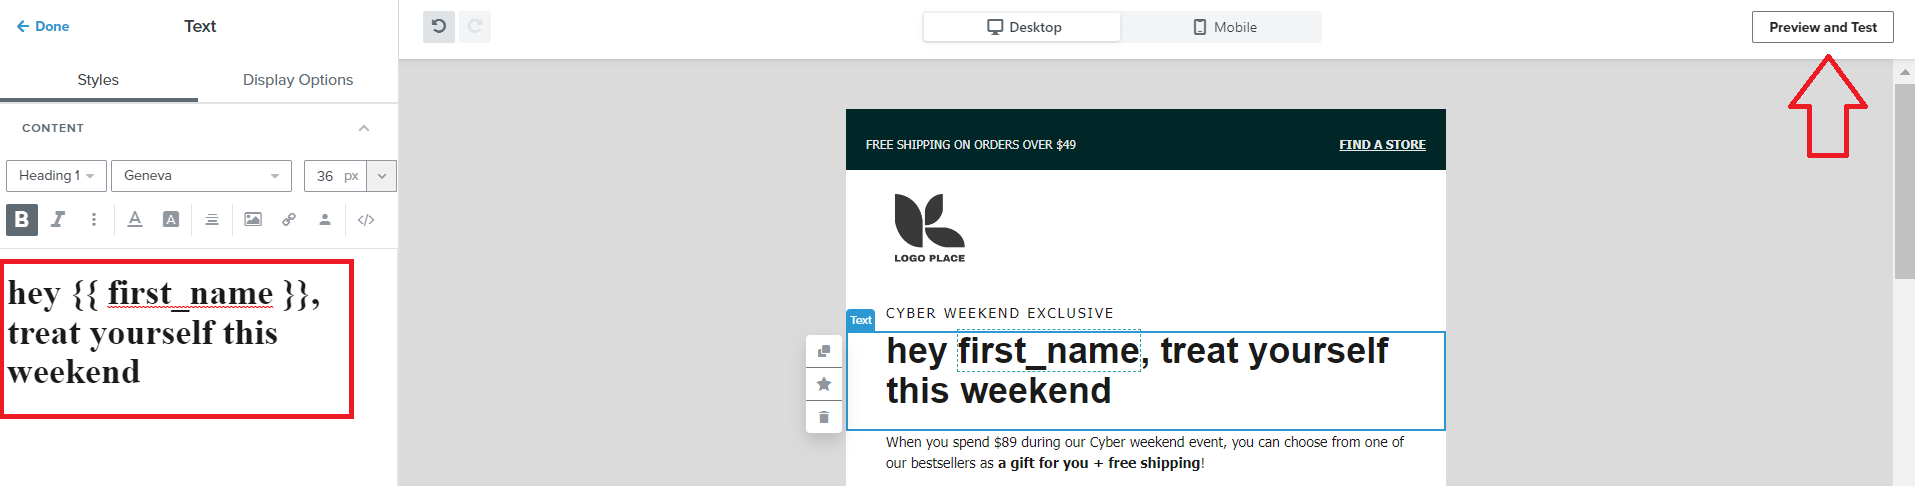
- Insert the copied script in the text where you want the variable information to appear. Once you’re done, click Preview and Test.
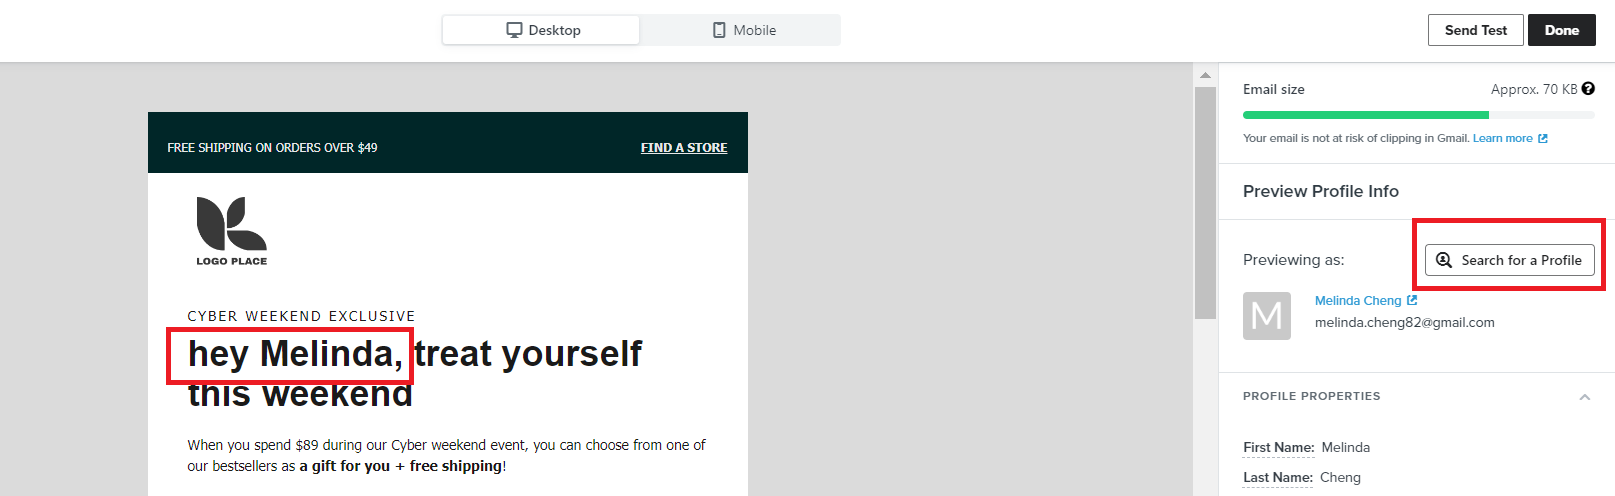
- You should now see the name of your customer reflected on the text block. Check the variable is working for other customers on your list as well, click Search for a Profile.
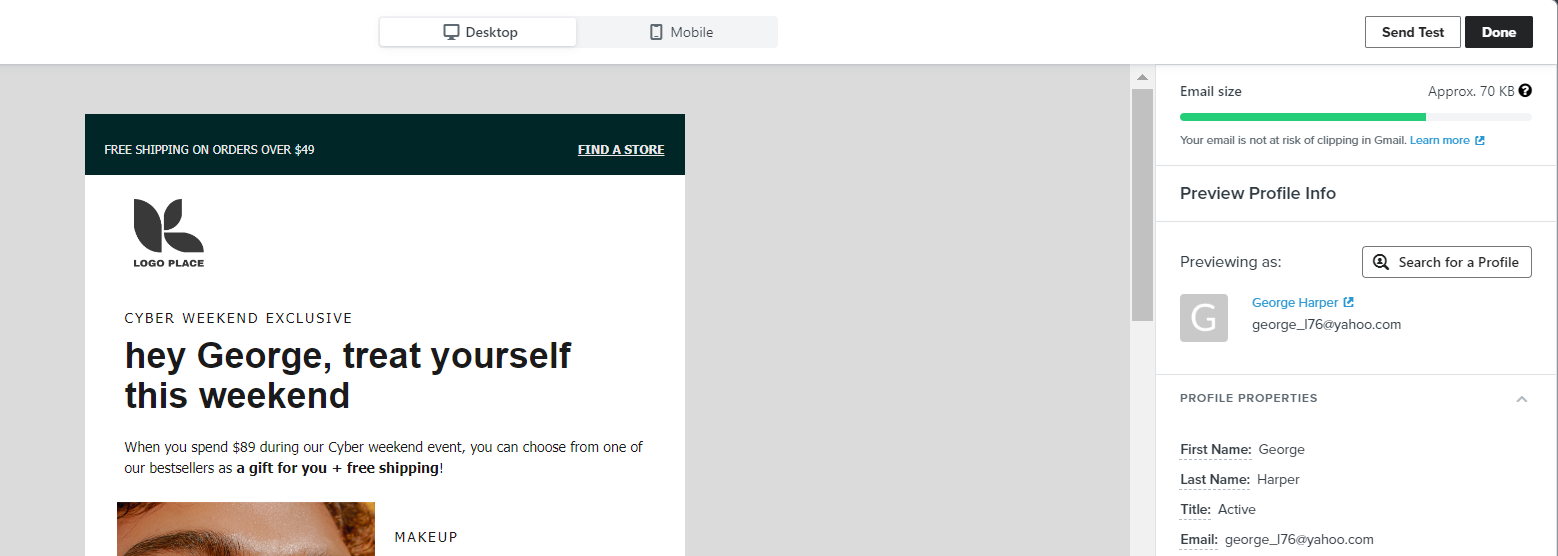
- Check to see that the name of the next customer you chose will reflect on your preview. Click Done.
Adding a template tag to a text block
- Go to your marketing automation platform’s email editor (we’re using Klaviyo in this example). Click Edit email.
- Add a text block and insert your template tag in between curly brackets. In this example, we’re adding a timer from sendtric.com to the email template.
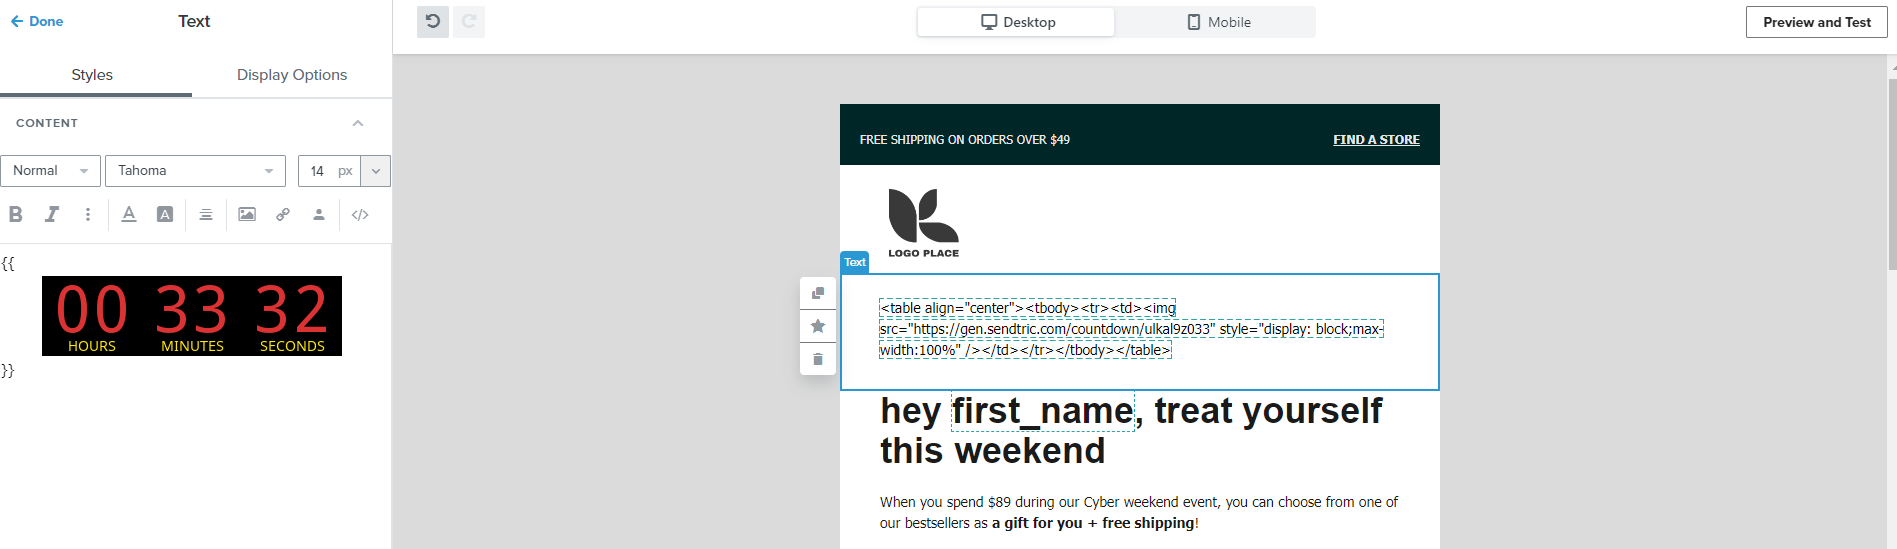
{{<table align="center"><tbody><tr><td>\
- Another example is adding an unsubscribe button which is also encased in curly brackets. Add a text block to where you want the unsubscribe button and type {% unsubscribe %}. Click Preview and Test.
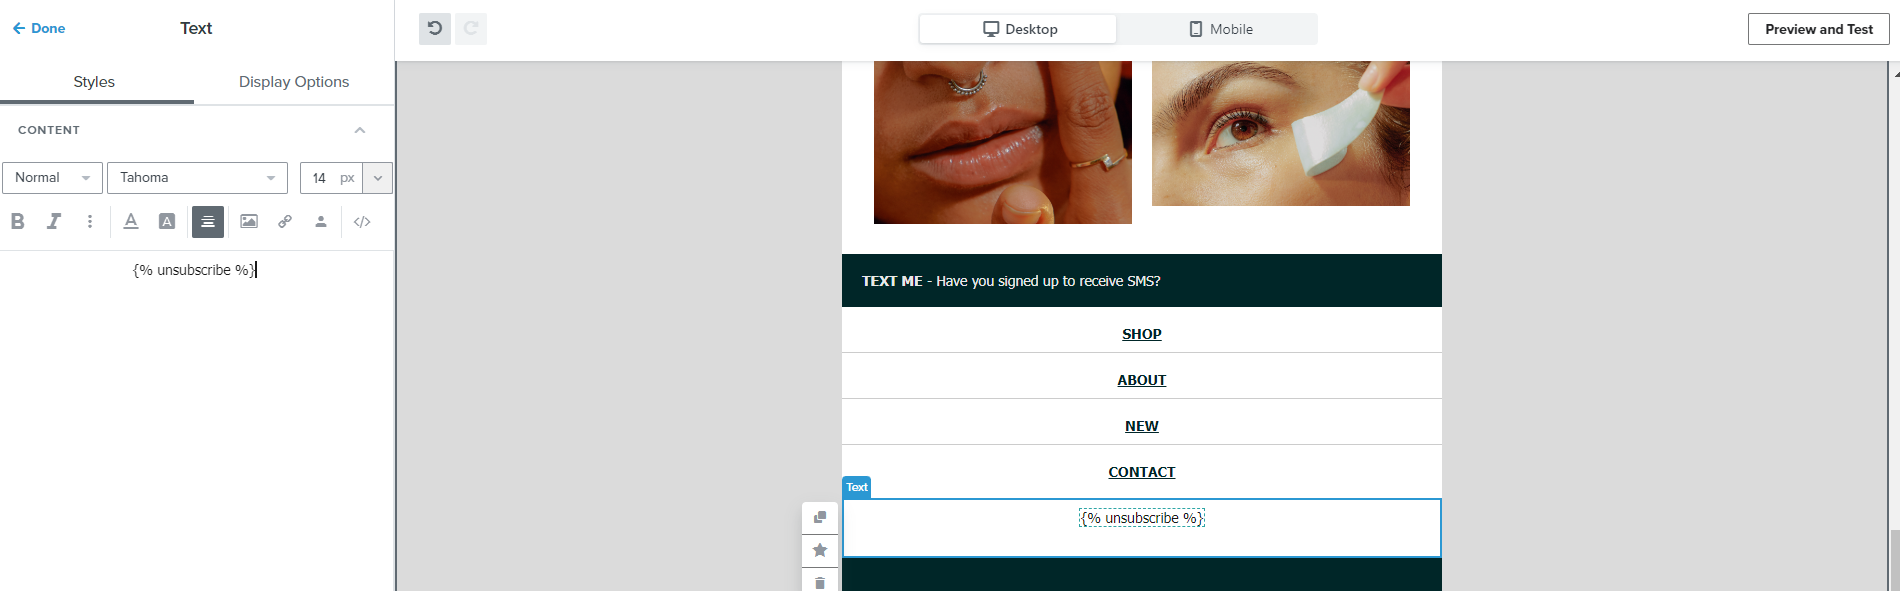
- You should see the Unsubscribe link in place of the code in the text block.
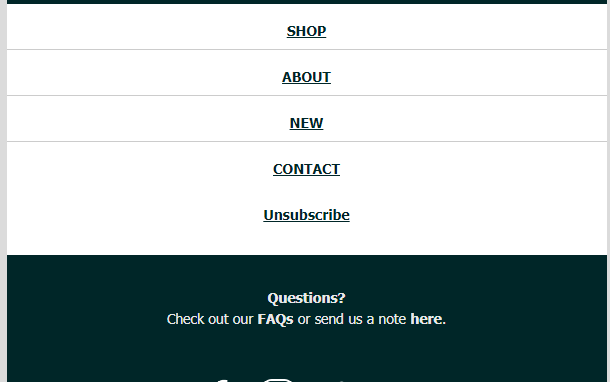
Build dynamic blocks in a metric-triggered flow
Add a dynamic image to your email - ( Example: products added to cart, products viewed)
Note: You can tailor your message for individual recipients by leveraging data stored in their Klaviyo profile or event data collected through integration. You can use this functionality to showcase an item that a recipient recently added to their cart by triggering a flow based on the "Added to Cart" metric. Alternatively, by storing a distinct image URL in a subscriber's profile, you can display a custom image in campaigns that you send to them.
-
Link your online shop to your marketing automation platform. Once you do, your customer’s activities in your website or store will flow into your marketing automation platform.
-
Create your automation flows where you want a specific image displayed for individual customers (for example, the product/s customer viewed or the items they left in their cart).
-
Go to your marketing automation platform’s email editor (we’re using Klaviyo in this example). Click Edit email.
- Click Preview and Test.
- Click Search for a Profile.
- Search for one of your customer profiles.
-
To retrieve the image variable that is stored as a profile property, begin by clicking Search for a Profile and selecting a profile that has the desired image stored in their profile properties. Next, navigate through their properties until you locate the image variable, and finally, click on the variable name to copy it.
-
To access an image variable stored within an event's data, select Event and choose the desired event from the dropdown menu. Once you have selected the event, scroll through its data until you locate the image variable. Finally, click on the variable name to copy it.
(Note: Message must be sent through a flow that is triggered by the same event for the dynamic image to appear correctly. For example, if you’re working on the add to cart flow, the image you should select should also be from the add to cart event.)
-
After copying your variable, insert an image block to your email message. Click Browse then click Dynamic Image.
-
Enter the variable you copied into the Dynamic variable or dynamic URL field.
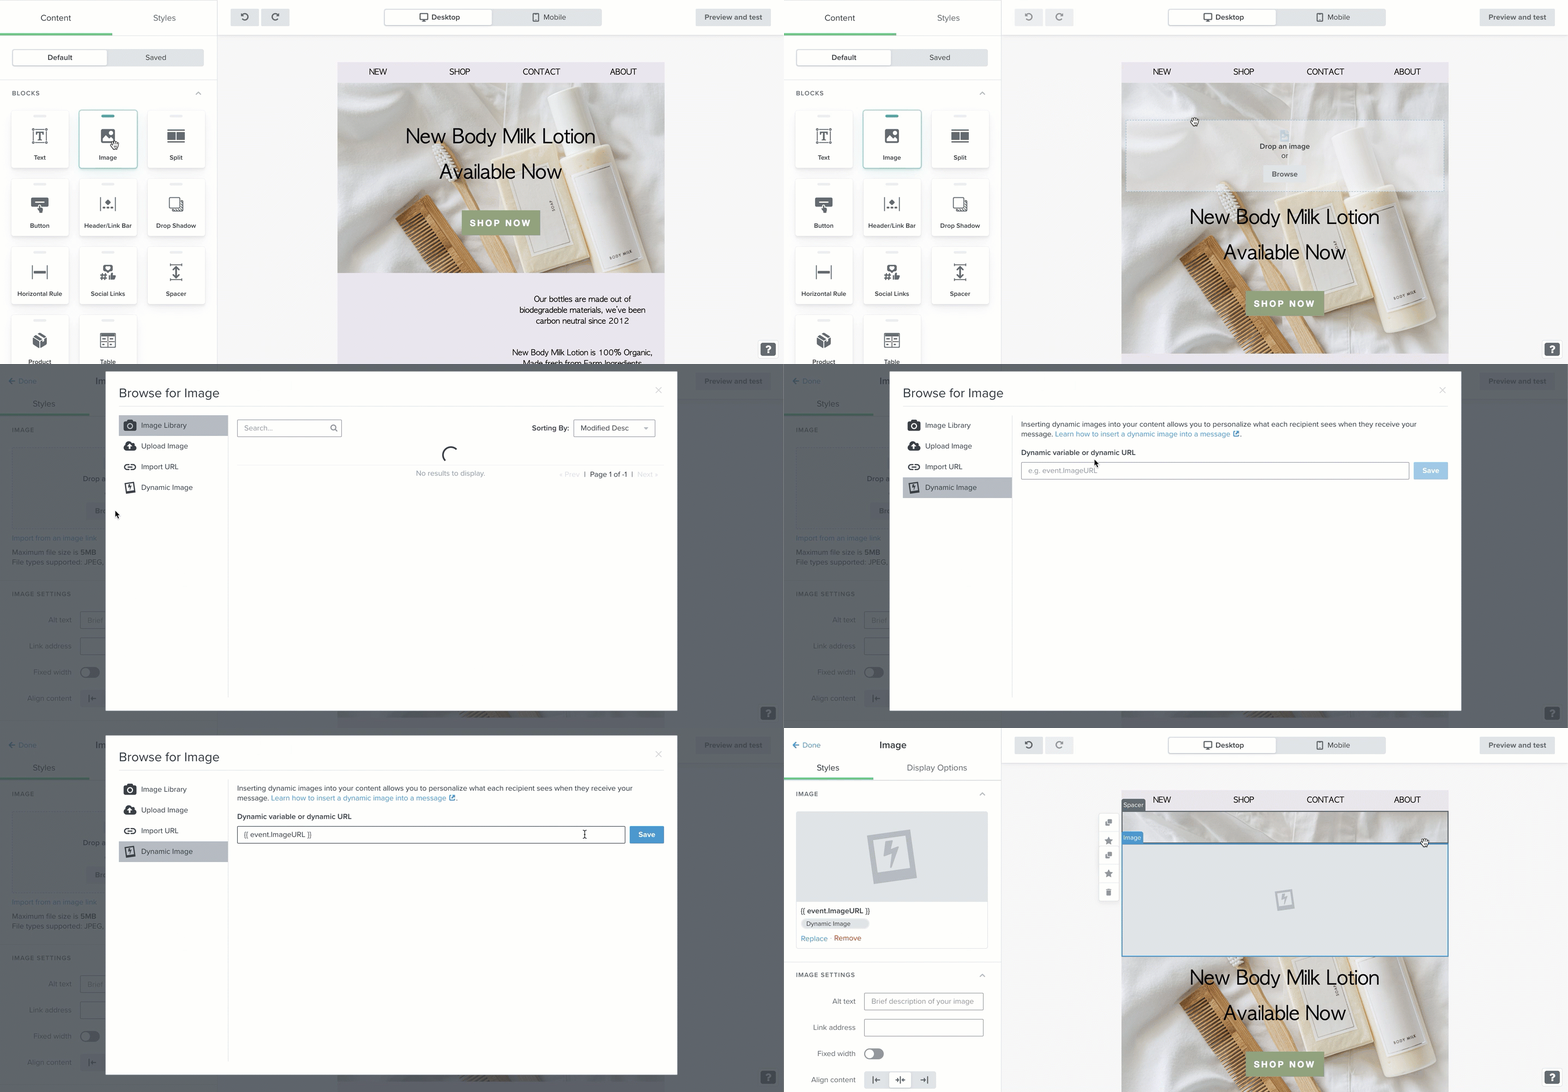
- Make sure to Preview and Test your email before setting live.
Conclusion
That’s it! You now know how to add dynamic banners to your email content to make it more engaging and personalized.
Execution Checklist:
-
Link your online store to your marketing automation platform.
-
Upload or build your lists and segments containing customer data from your store. (Note: If you’ve integrated your store, your customer’s information will flow into your marketing automation platform)
-
Build your dynamic blocks for both non-metric and metric-triggered flows
-
Test, test, test before going live