How to Connect Your Pop-Up with your Klaviyo List & Elminate The Double Opt-In
To integrate Klaviyo and Shopify for a better-personalized experience for your customers
Prefer a shortcut? 16 free tools do parts of this for you.

Aim: To integrate Klaviyo and Shopify for a better-personalized experience for your customers
Optimal Outcome: To increase customer engagement, allowing you to boost your sales and profits
What you need to start: Klaviyo and Shopify accounts
Why is this SOP Important: Shorten the learning curve by following this SOP. Moreover, boost customer engagement to encourage shoppers to buy from your store.
When and Where to execute: Perform this SOP after you set up your Shopify store and create a Klaviyo account. You can also do it as needed if you want another type of email for your subscribers.
Who Should Be Doing This: A person assigned to maintain your Shopify account or an IT personnel
What Is Klaviyo?
Klaviyo is a marketing platform for your Shopify or other eCommerce stores to help you provide a personalized experience to your shoppers. Its email marketing enables you to create a holistic ecosystem by automating customized messages. Klaviyo also sends SMS campaigns for multi-channel experiences for your buyers. You can manage automated content in one platform.
Execution
Resources/Tools & Set up
-
Klaviyo account
-
Shopify account
For New Klaviyo Users
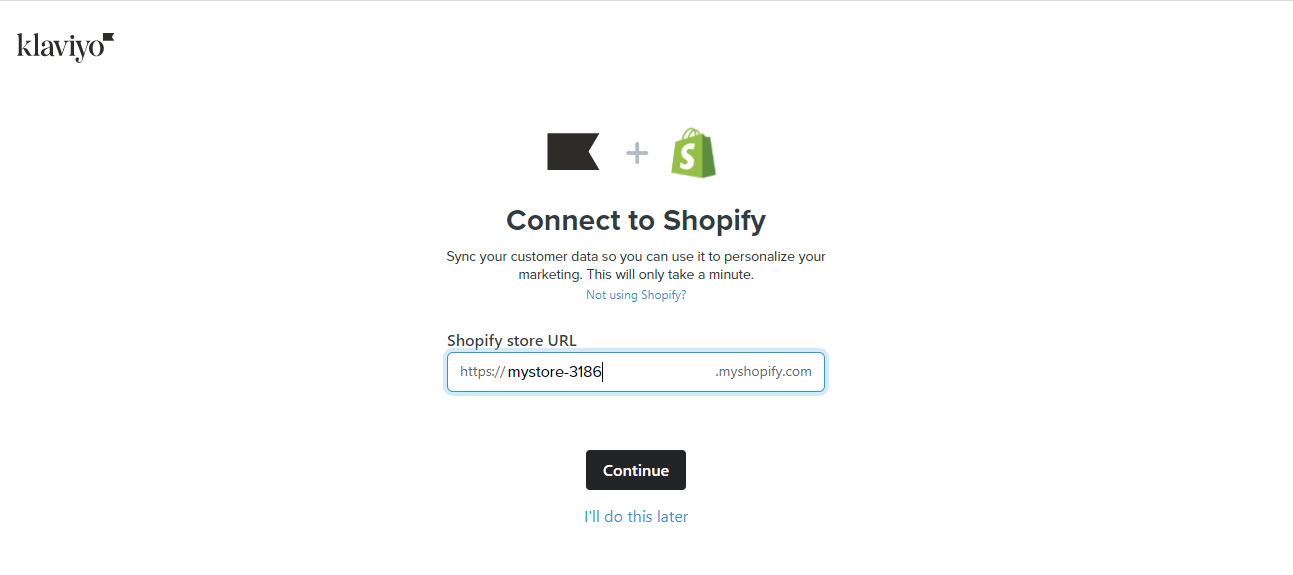
- Create a Klaviyo account by filling up the registration form. You can enter your Shopify store URL under the Company Website field. The next screen prompts you to connect your Shopify account with Klaviyo. Press Continue.
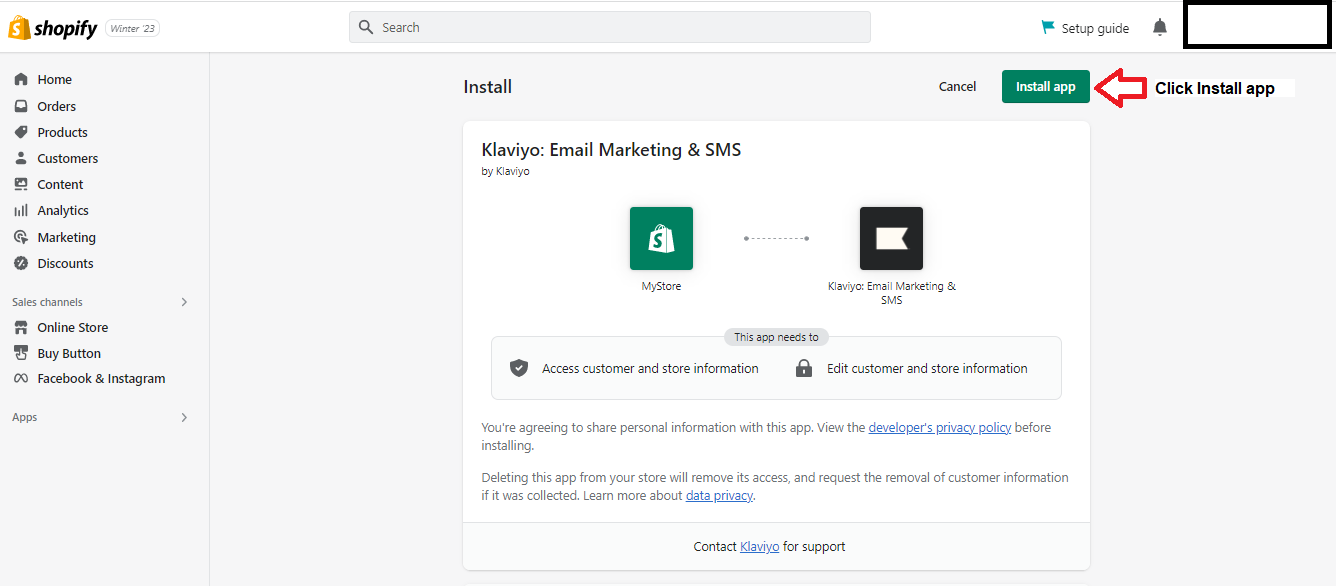
- The next screen will show your Shopify account, and you should click on Install app.
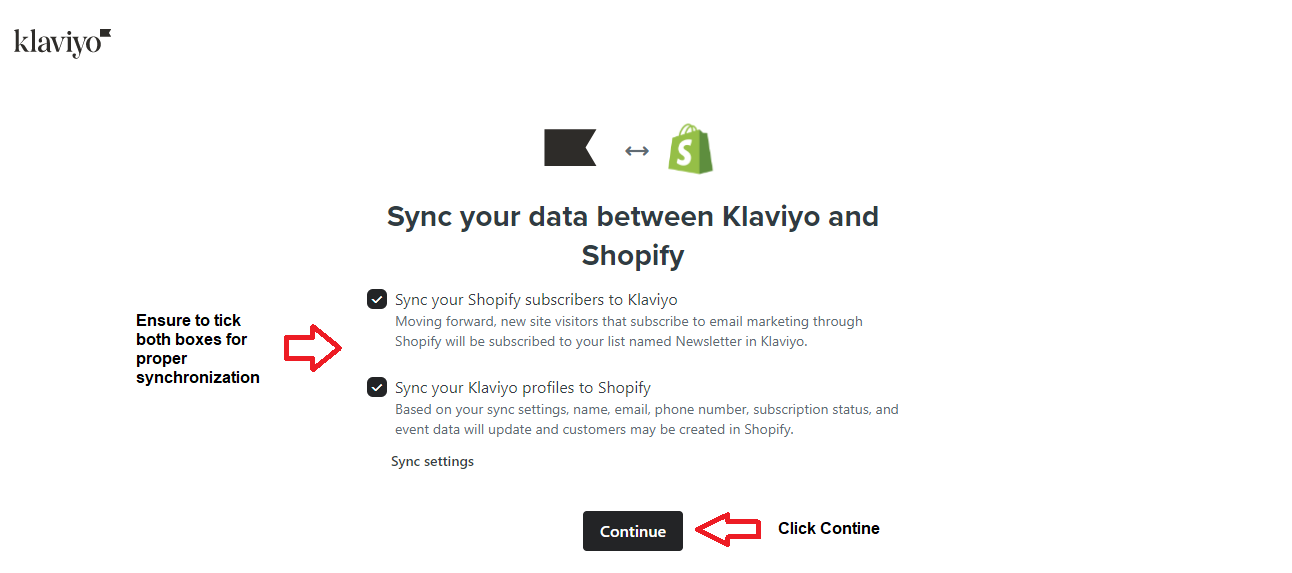
- Ensure to tick both boxes for the proper synchronization before clicking Continue.
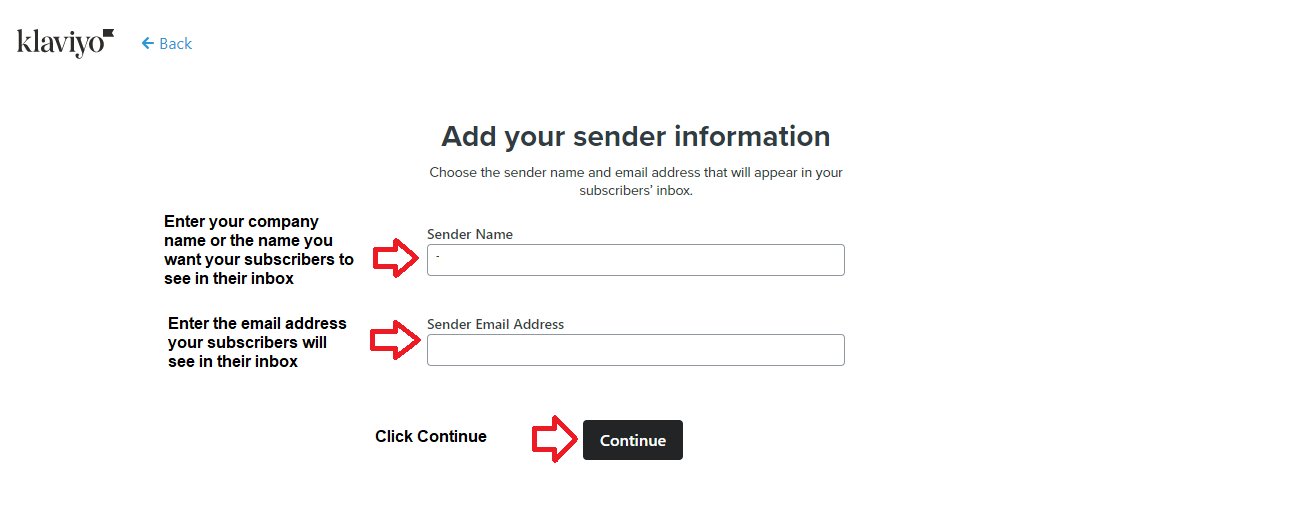
- Enter the name and email address your subscribers will see in their inboxes. Then, click Continue.
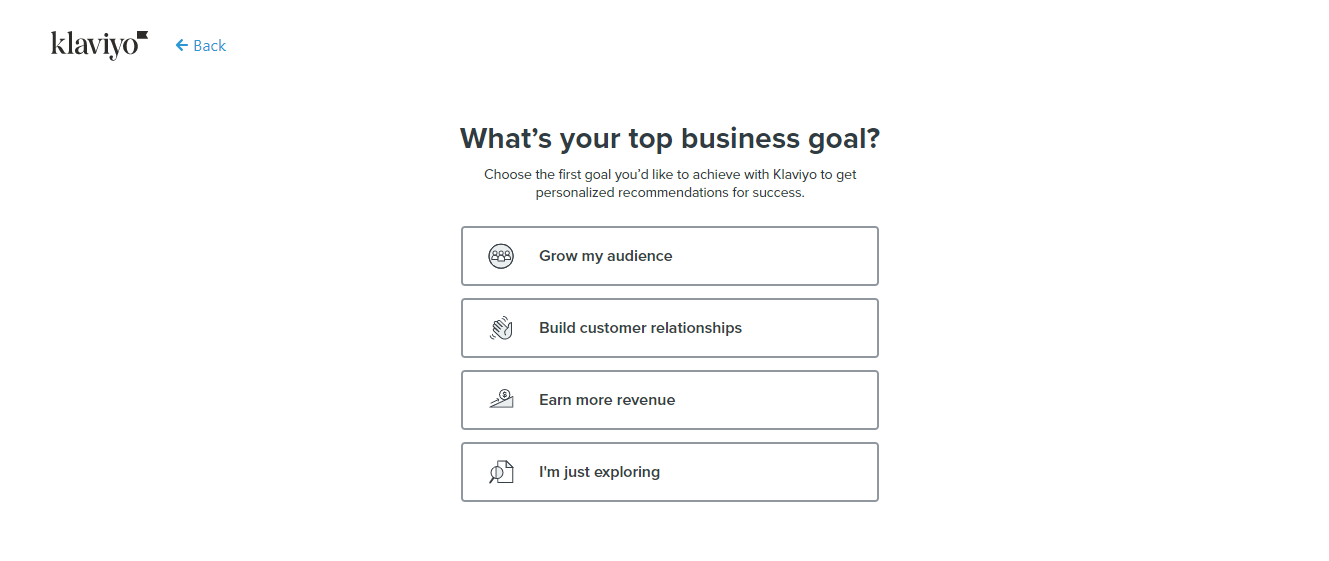
- Click on the first goal you want to achieve with Klaviyo.
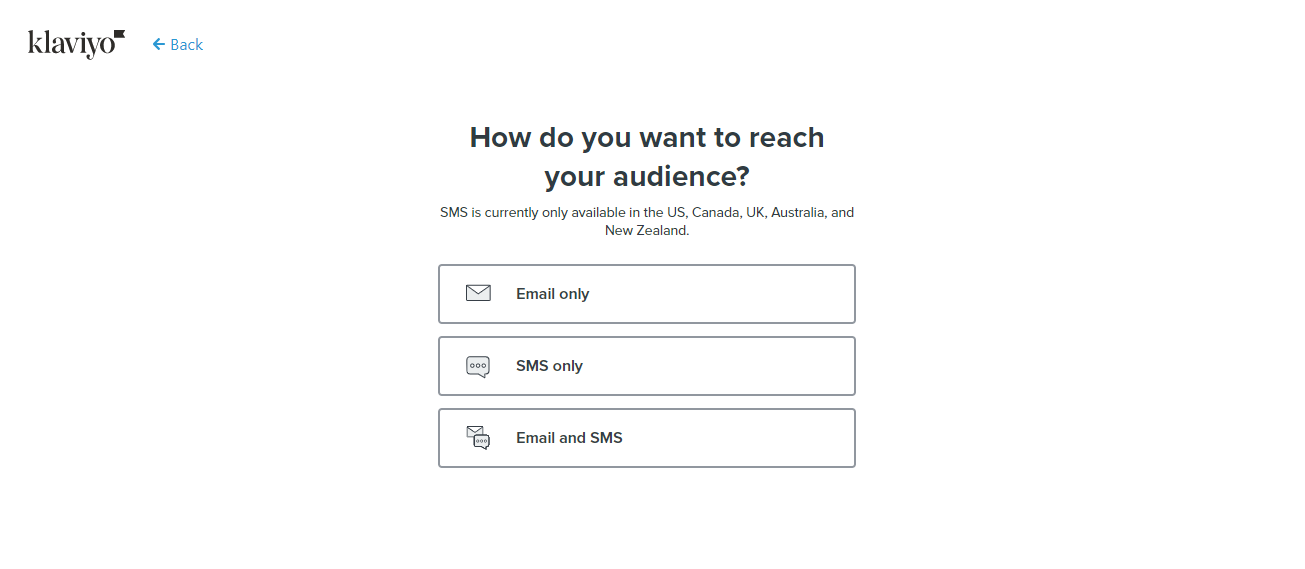
- Pick how you’ll reach your customers.
- You need to check your email to verify your account.
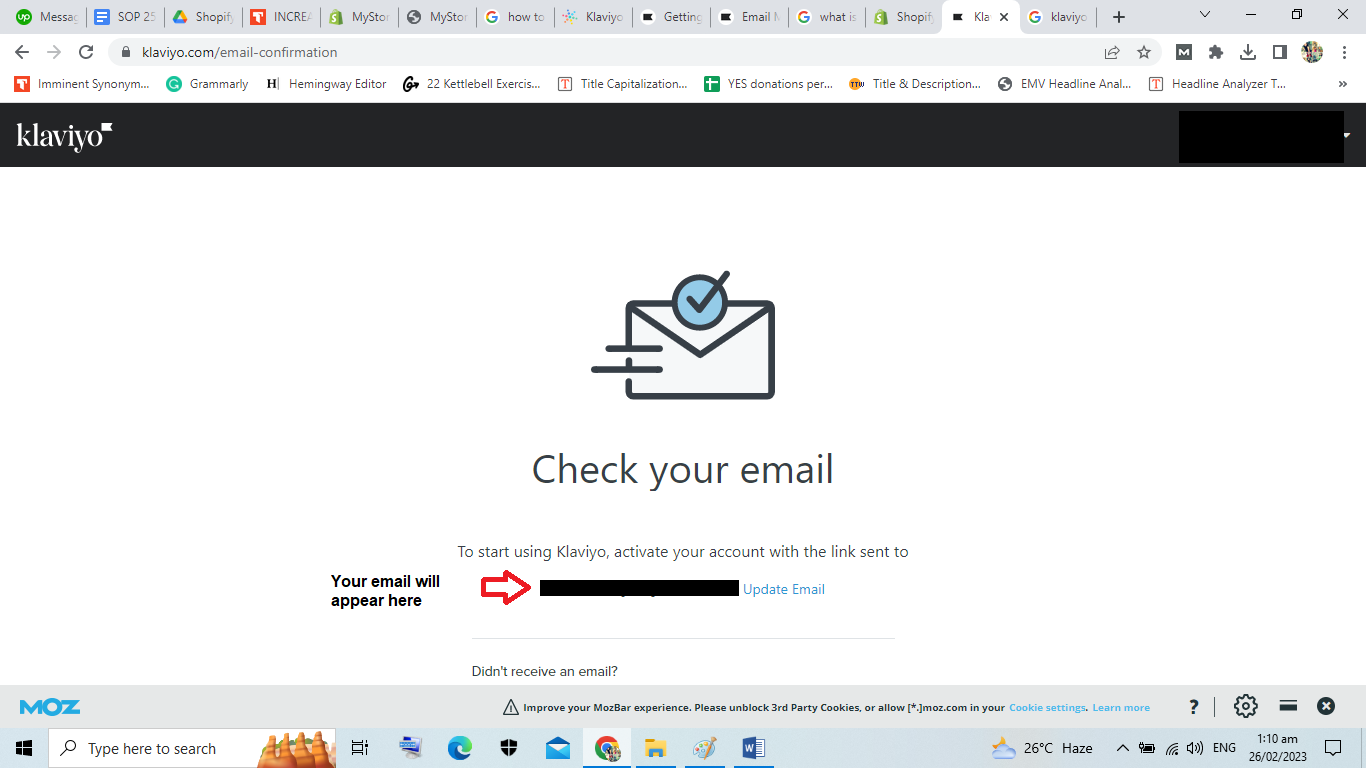
- You have successfully integrated your Shopify store with Klaviyo.
For Existing Klaviyo Users
- Click on your company name at the lower left corner of your Klaviyo dashboard. Choose Integrations when the popup window appears.
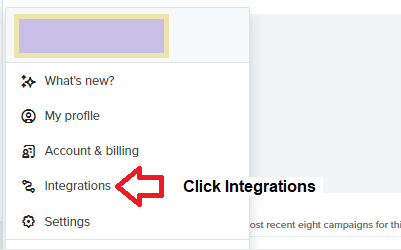
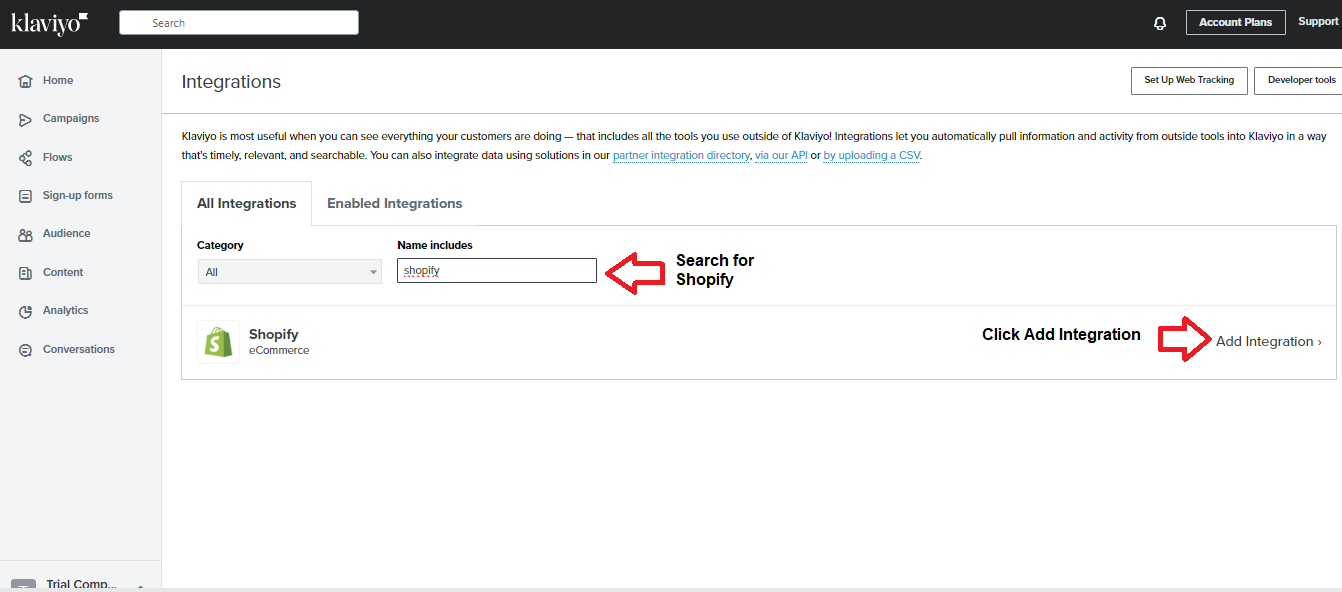
- Search for Shopify, then click Add Integration.
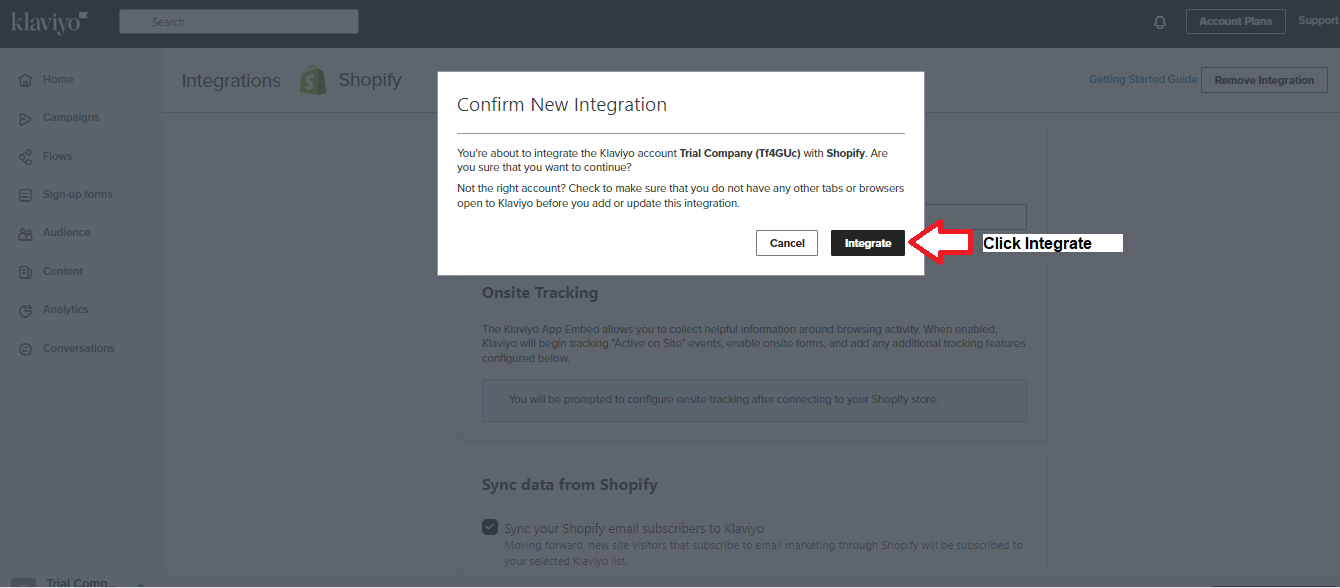
- You’ll see your Shopify admin screen, and you have to click Integrate.
Check for Double Opt-In
Klaviyo recommends double opt-in because you’ll get valid and non-malicious subscribers. By encouraging your customers to confirm their emails, you ensure you get the right subscribers to your list. However, you can also set it to single opt-in if you prefer.
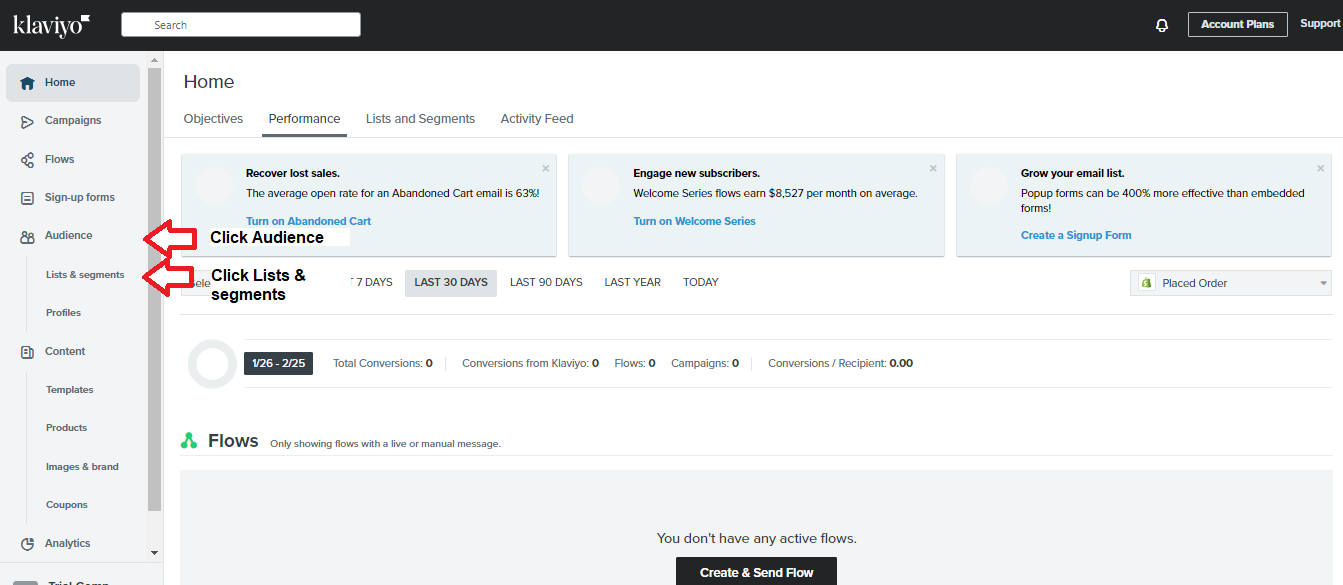
- In the Klaviyo dashboard, click on Audience, then Lists & segments.
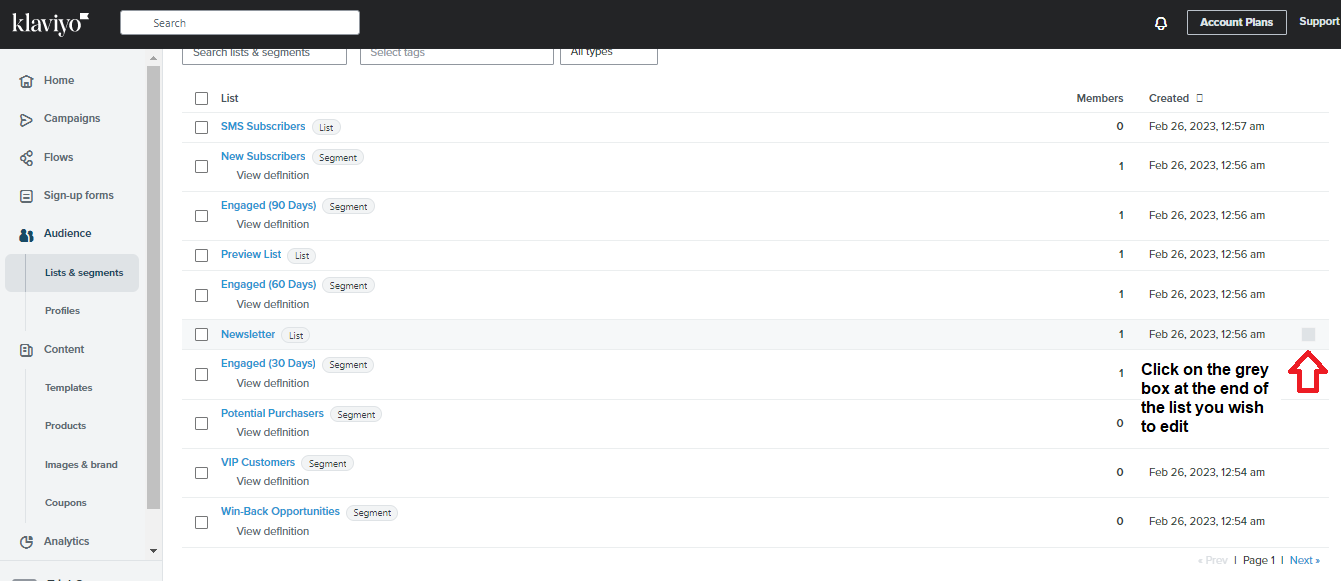
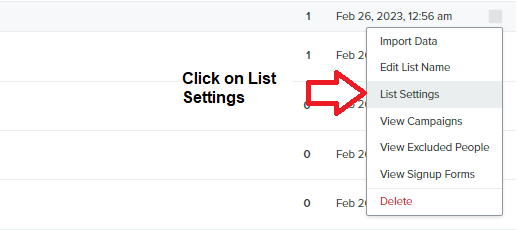
- Unfortunately, you set the opt-in per list. Therefore, ensure you select the single opt-in lists you have. Then, click the gray box at the end of the list you want to edit.
- A drop-down menu will appear, and you should choose List settings.
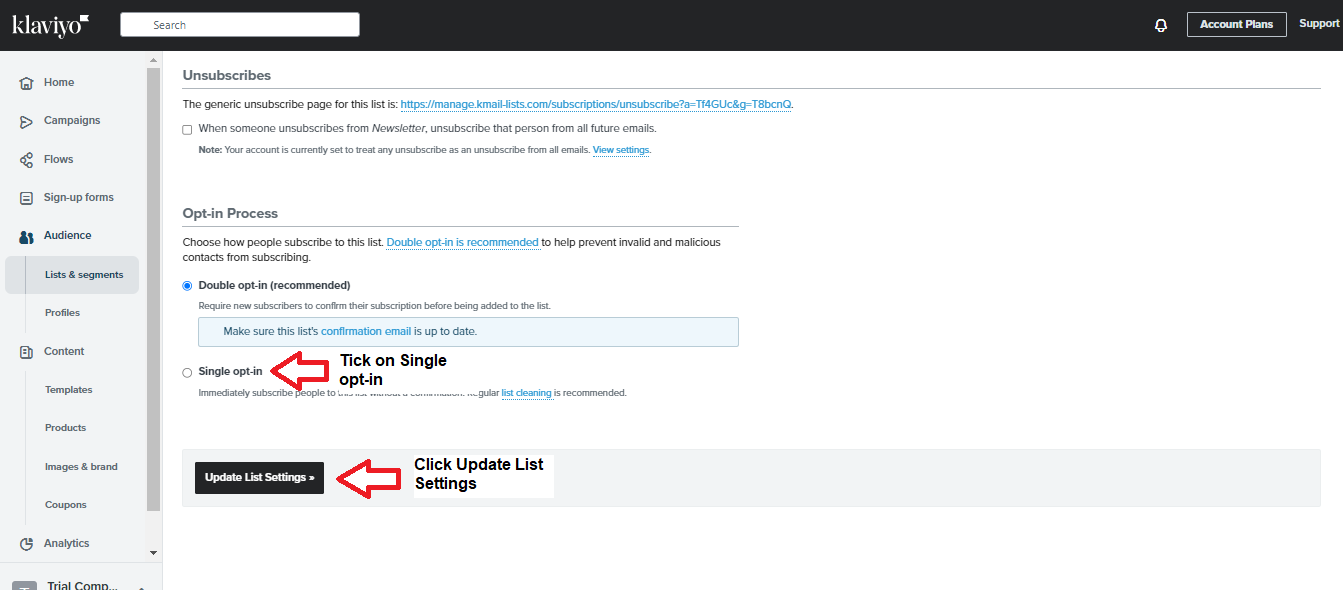
- Scroll down the screen on the right until you see Opt-in Process, then tick on Single opt-in and press Update List Settings. You should repeat the process for all lists you use.
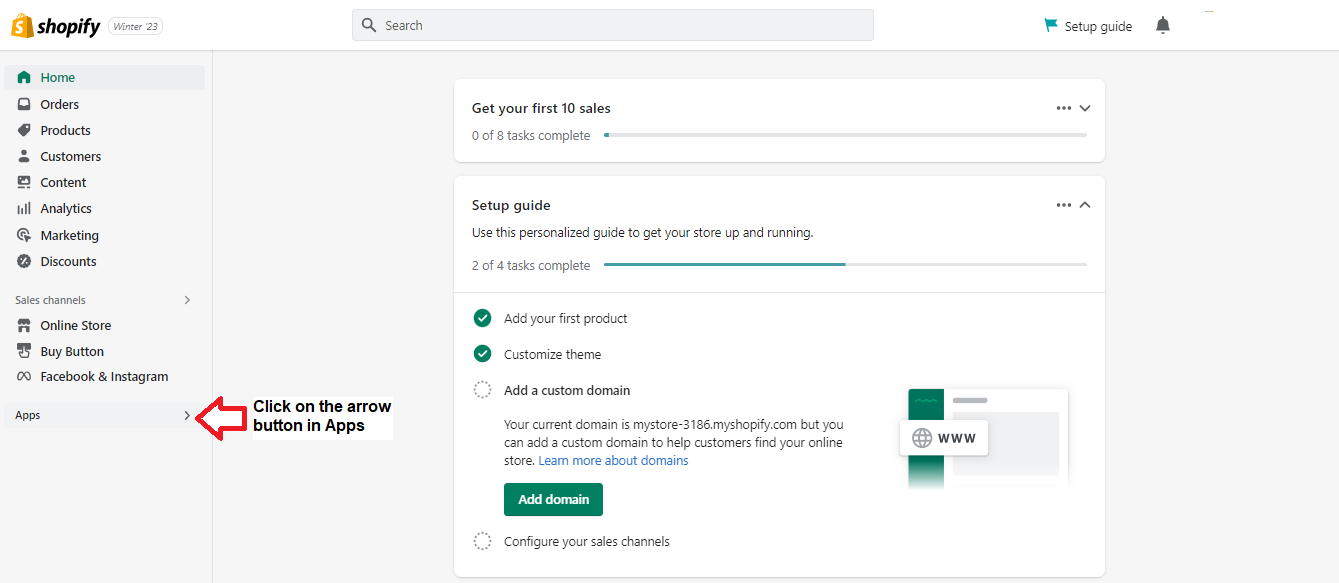
- You don't need to do anything else if you don’t change the default in Shopify. However, if you want to check, log into Shopify and click the arrow button in Apps to access the settings.
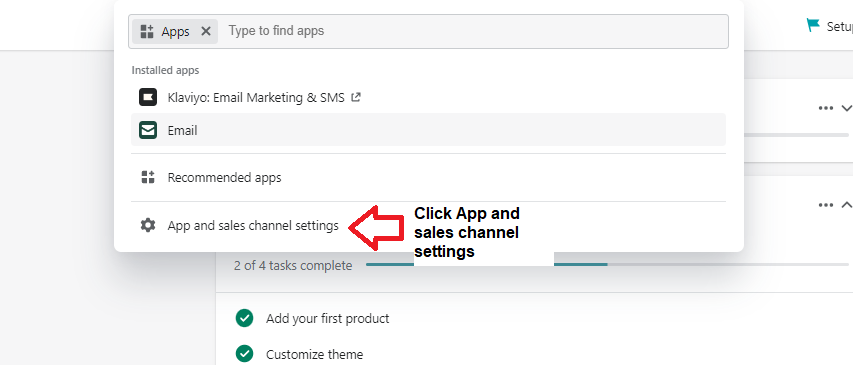
- Choose App and sales channel settings in the popup screen.
- Scroll down to Notifications and click on it.
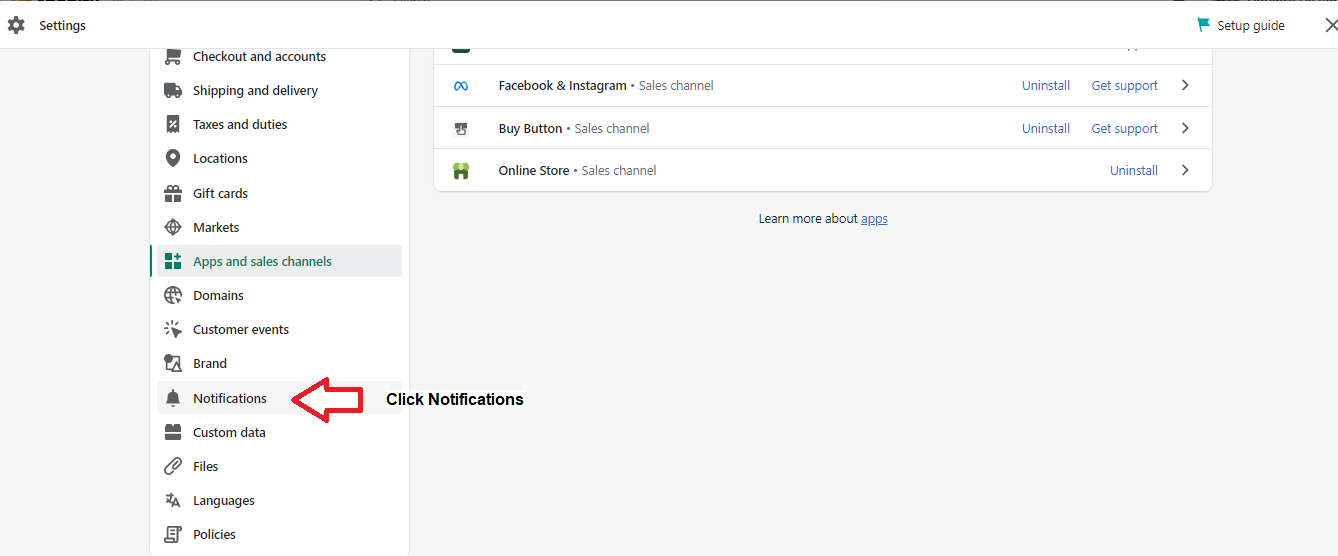
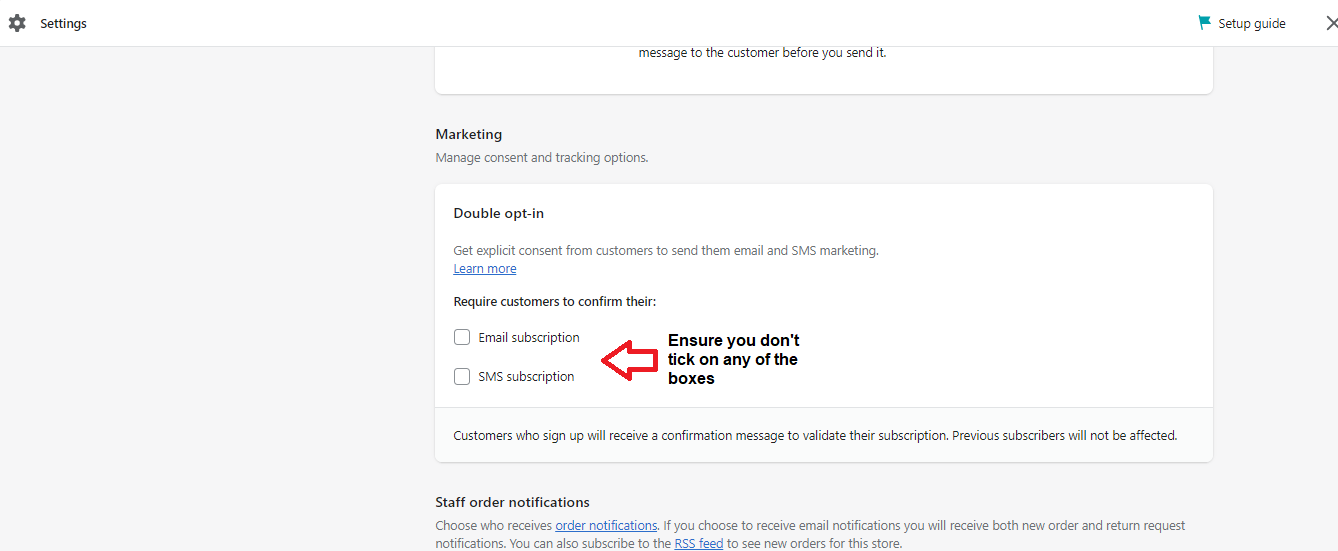
- Scroll down to Double opt-in and ensure you didn’t tick on any of the boxes.
Conclusion
Congratulations! You have integrated Shopify into your Klaviyo account.
Execution Checklist:
-
Klaviyo is a marketing app you use to personalize email marketing activities for your subscribers.
-
Integration is very straightforward and intuitive.
-
You can also ensure your subscribers don’t spend too much time finishing the subscription process by not allowing them to confirm their emails.
-
However, expect many spam subscribers if you don’t allow verification.