Setting Up a Trigger for Customer Views on a Product
To walk you through setting up tracking triggers for when customers view your product in your store.
Prefer a shortcut? 16 free tools do parts of this for you.
Aim: To walk you through setting up tracking triggers for when customers view your product in your store.
Optimal Outcome: To establish a process of tracking potential customers through their browsing activities and use the tracked data to create effective marketing campaigns.
What do you need to start: You’ll need an online store and a Marketing automation platform.
Why is this SOP Important: Tracking what products customers view in your shop can offer benefits such as understanding customer preferences, personalizing marketing campaigns, optimizing inventory, improving product descriptions, and increasing sales.
When and Where to execute: You only need to set this up once during the integration process.
Who Should Be Doing This: Marketing staff, person responsible for setting up automation
Execution
Resources/Tools & Set up
-
Enable viewed product tracking in BigCommerce
-
Set up browse abandonment flow (Follow this guide, SOP 229: Creating a Successful Browse Abandonment Flow on Klaviyo)
Enable viewed product tracking in Shopify
Connect your Shopify store to Klaviyo
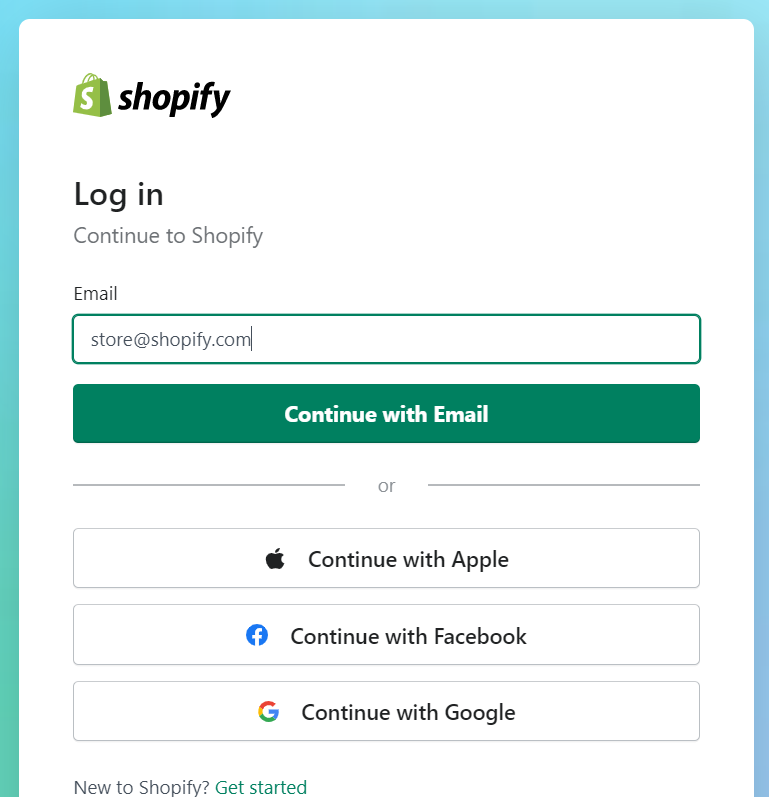
- Login to your Shopify account.
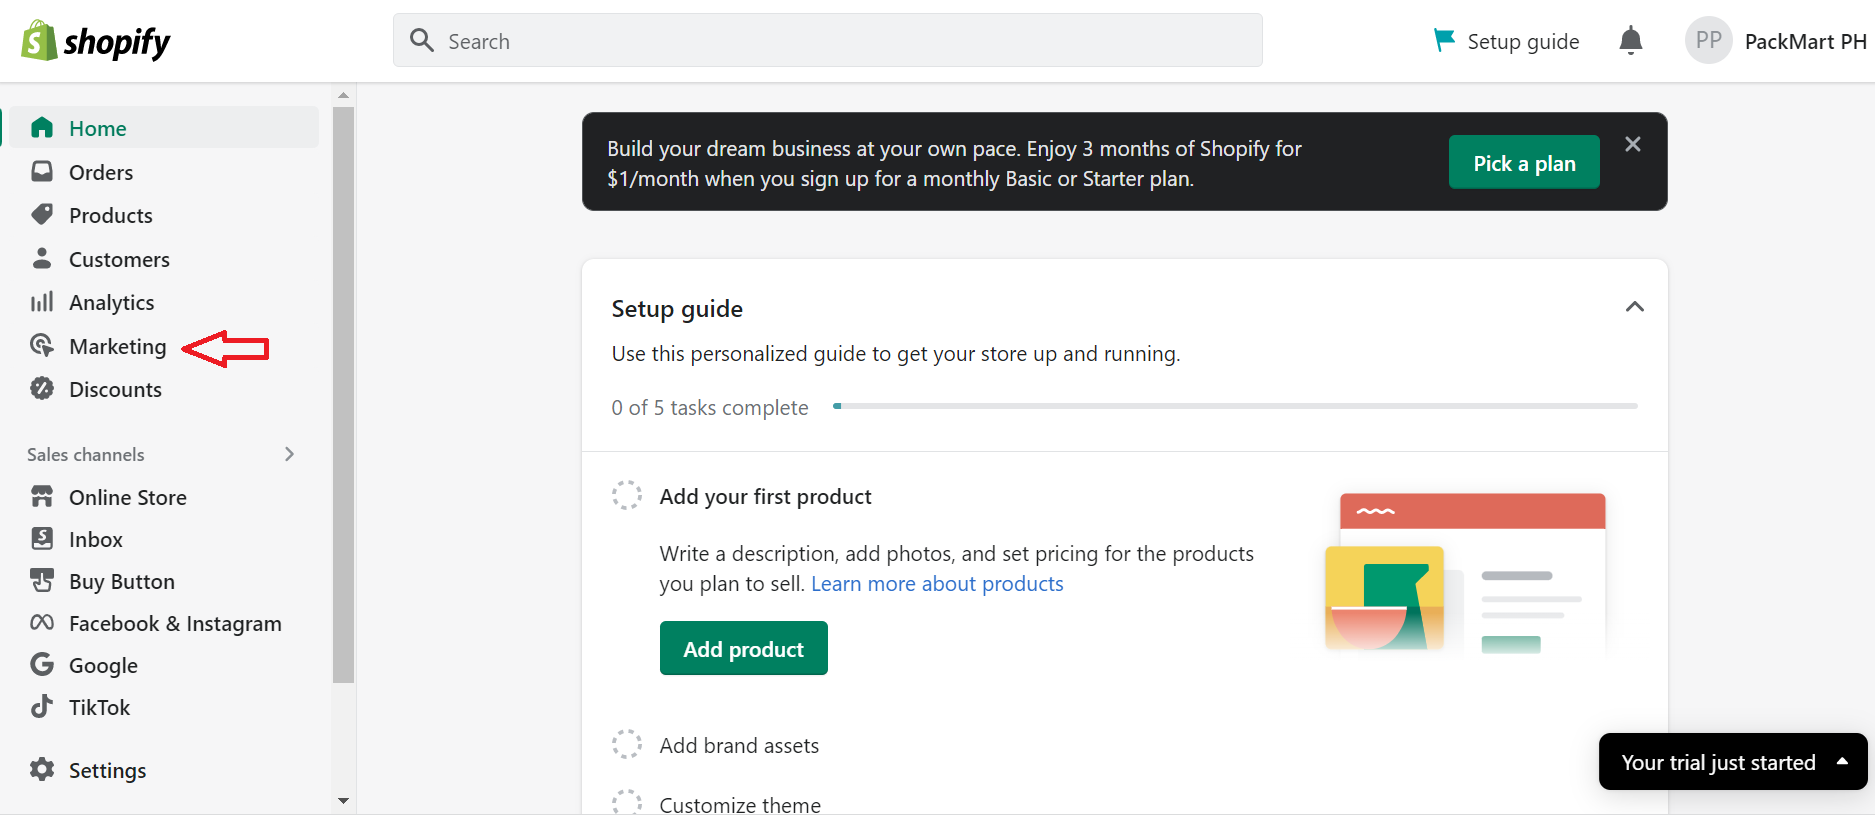
- Select Marketing from the left menu.
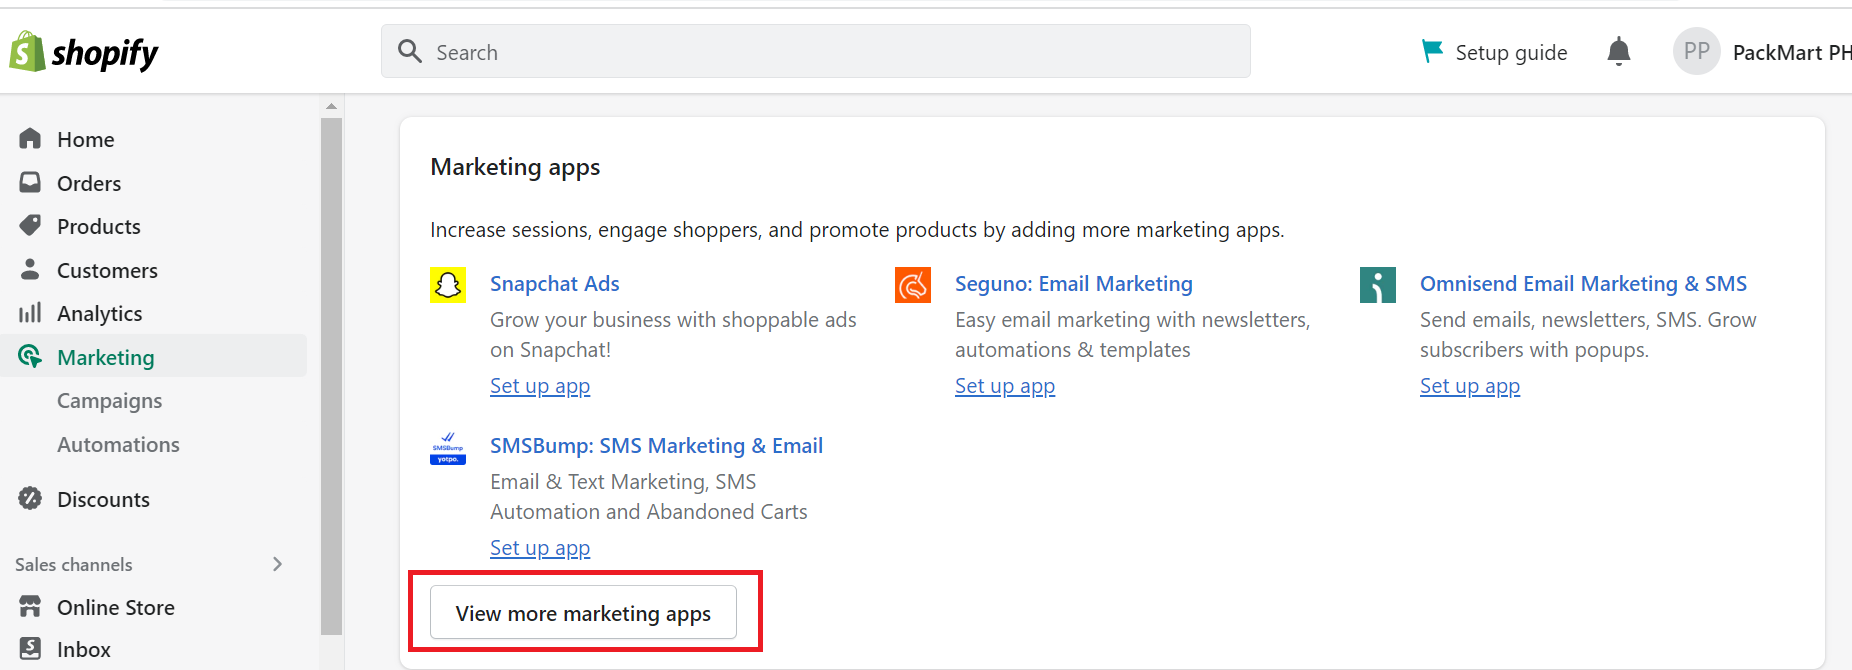
- Select View more marketing apps in the Marketing apps section.
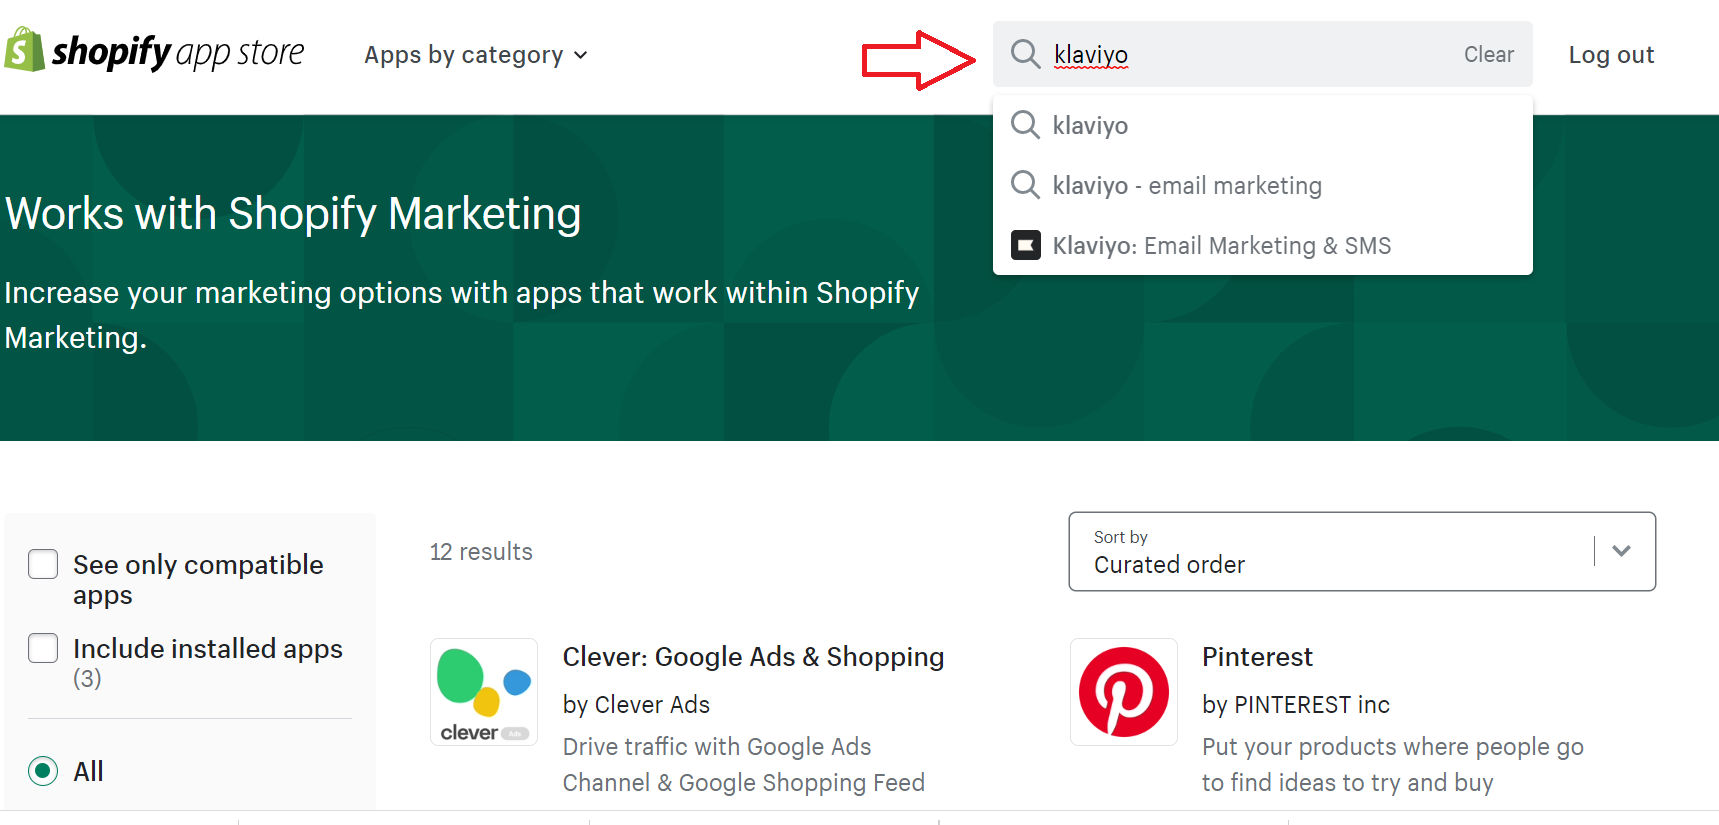
- Search Klaviyo from the search bar at the top-left section of the page.
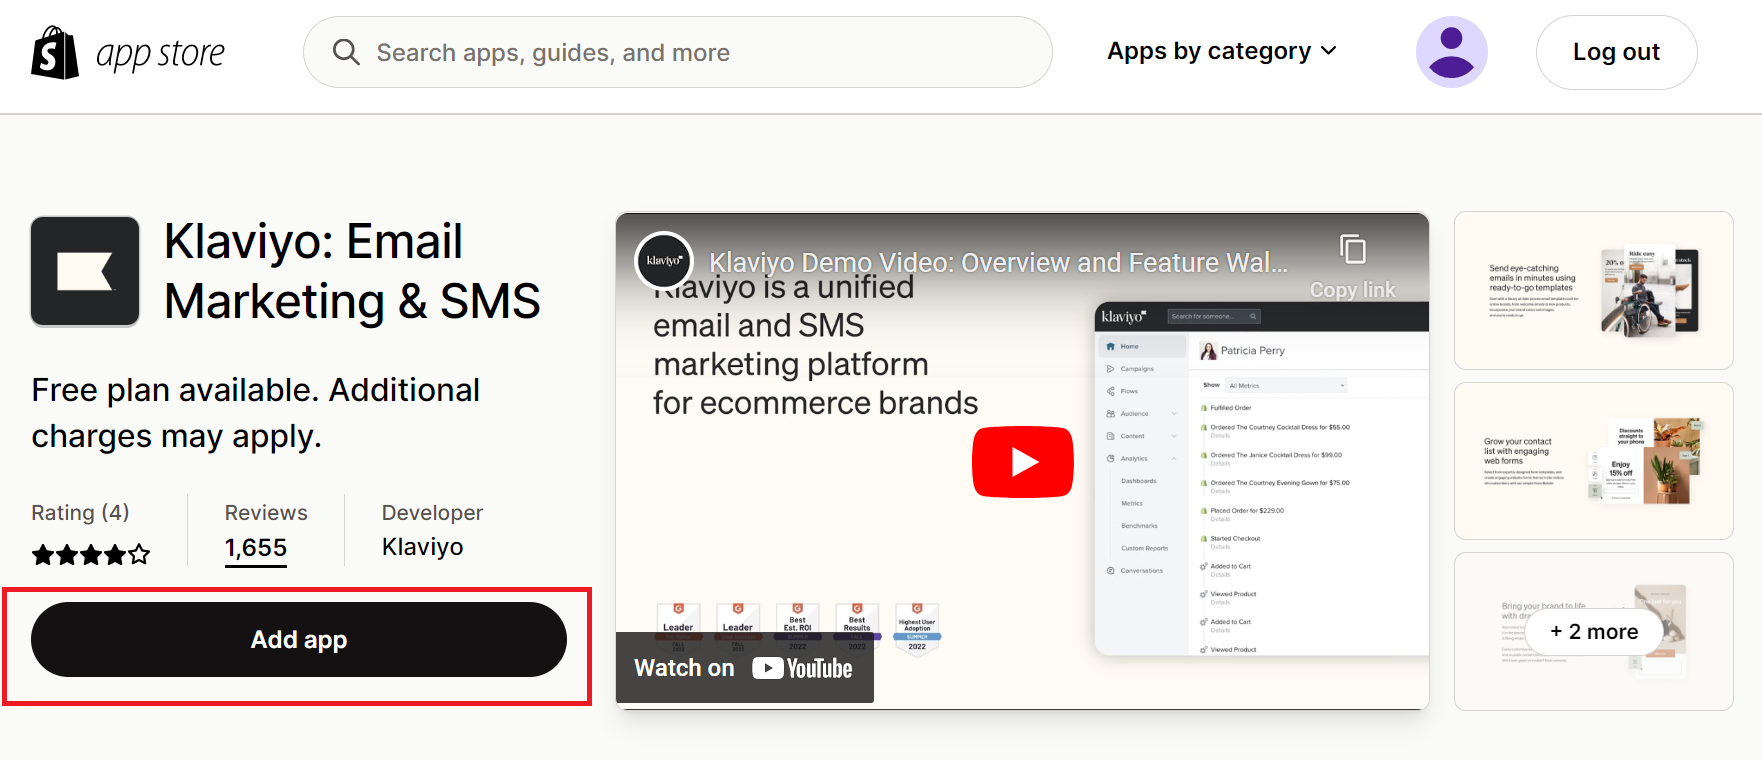
- Click on Add app.
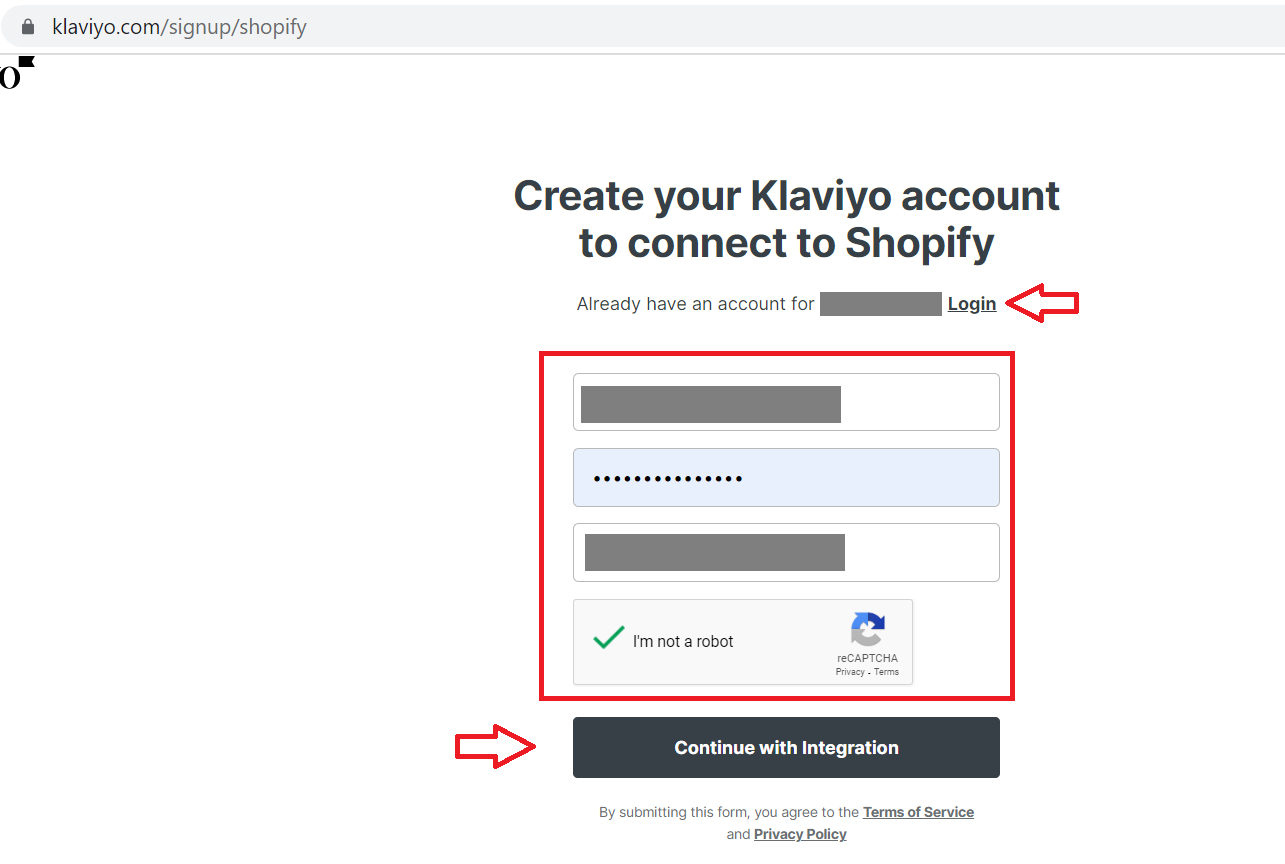
- Create or log in to your Klaviyo account, then click on Continue with Integration.
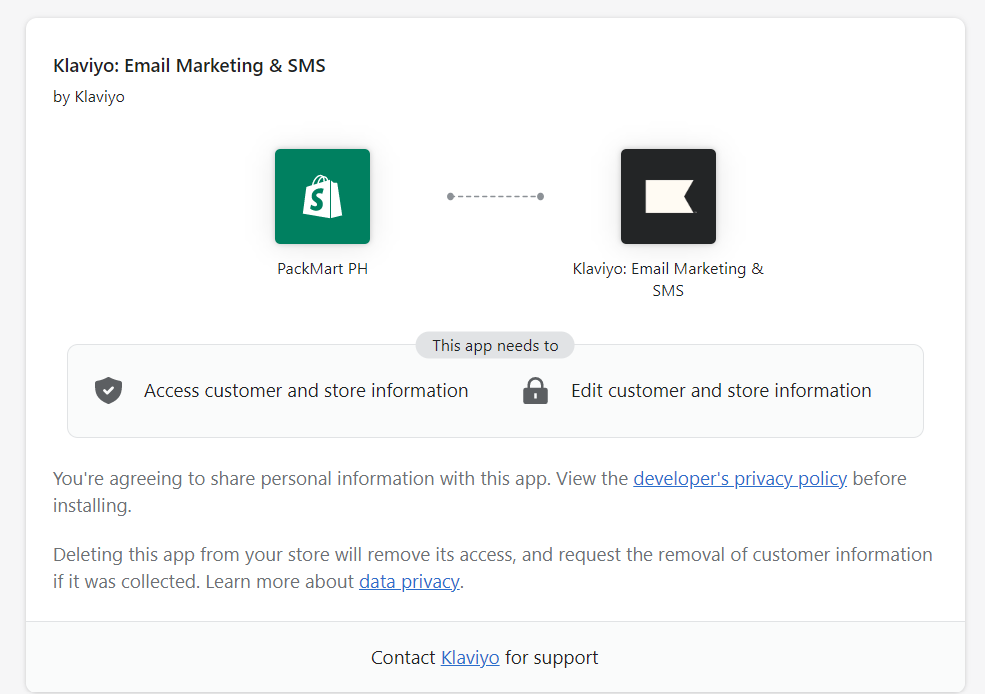
- Review permissions required.
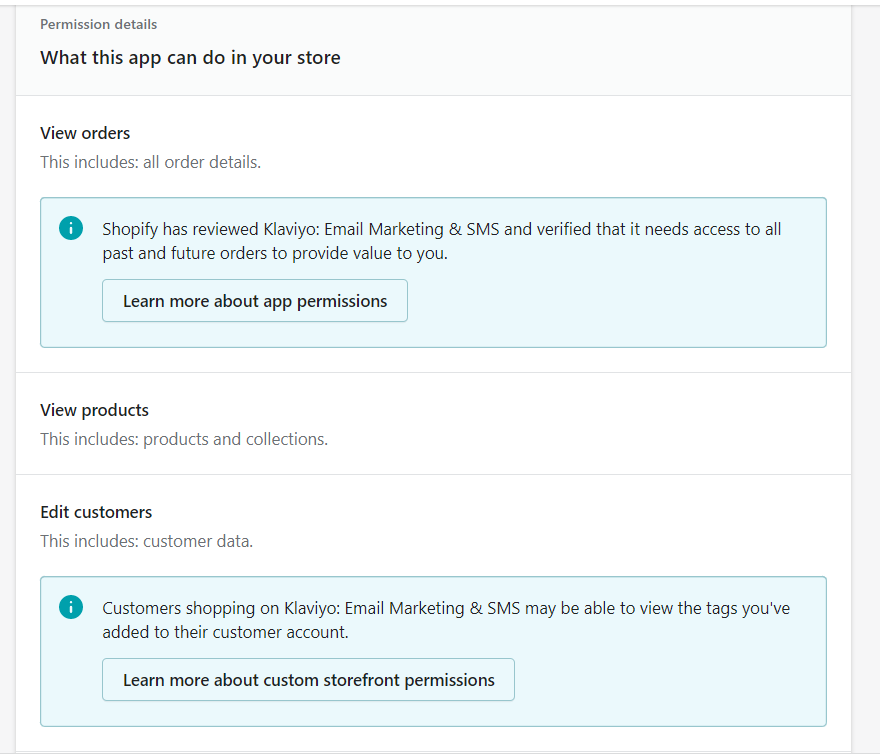
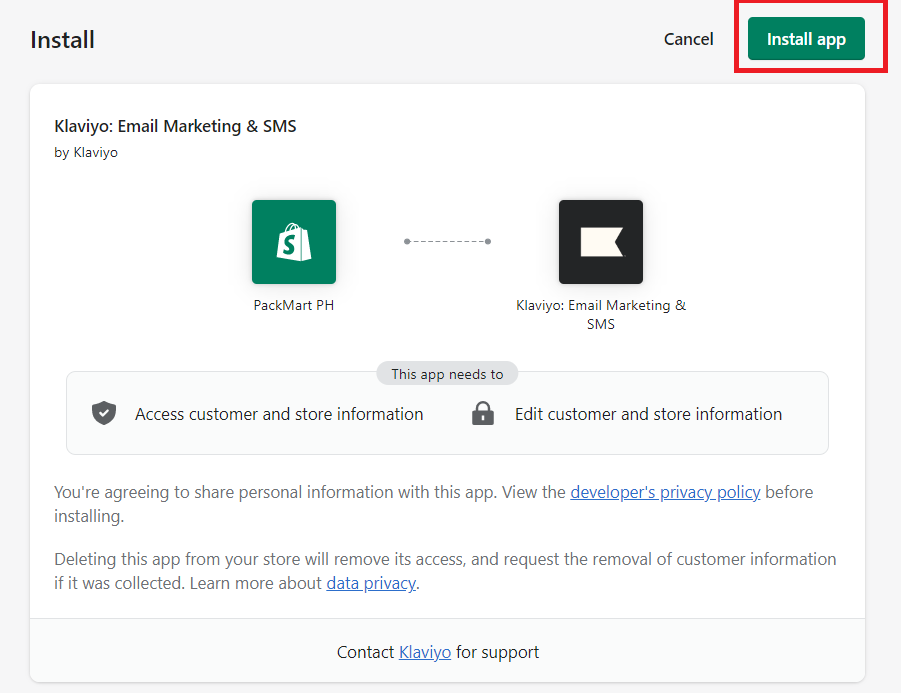
- Click the Install button at the upper-right corner of the page.
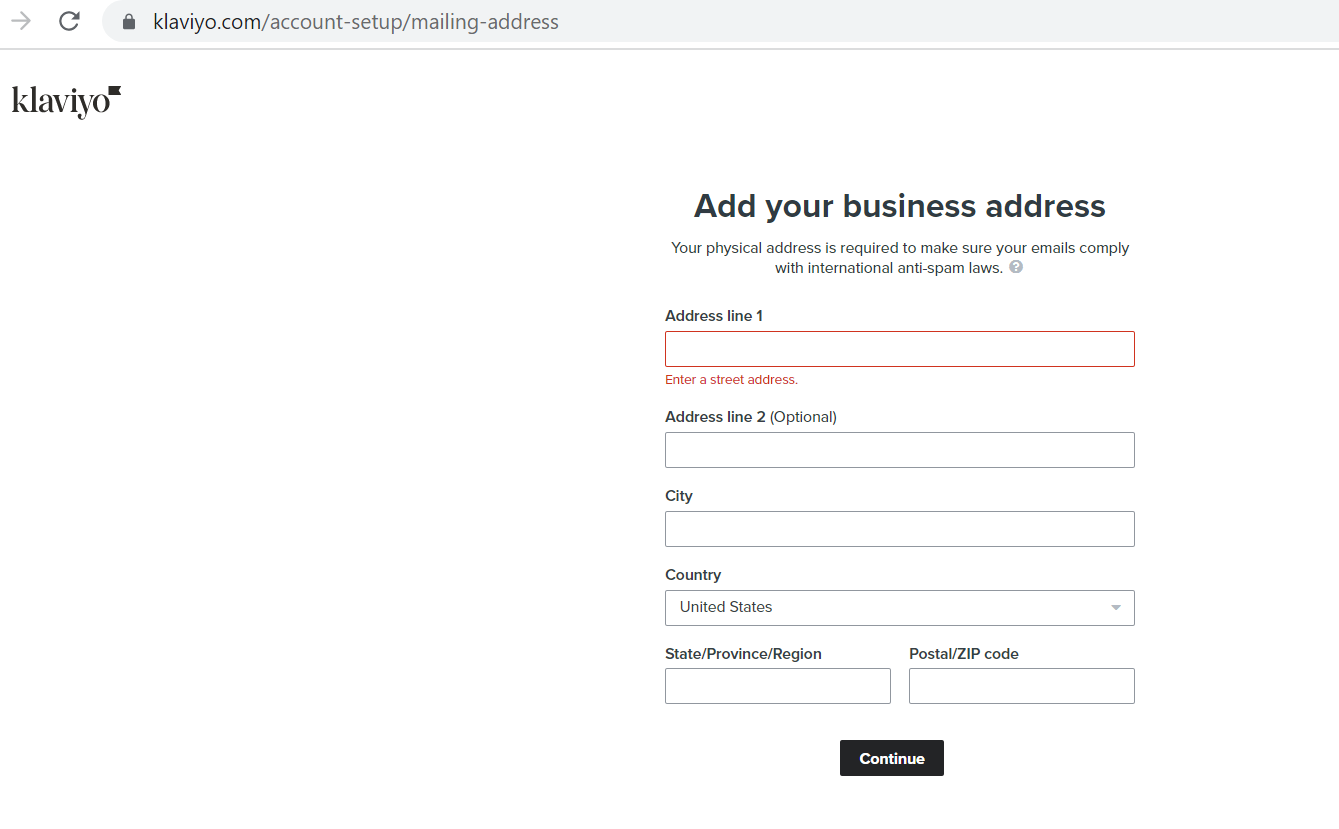
- Add your business info then click Continue.
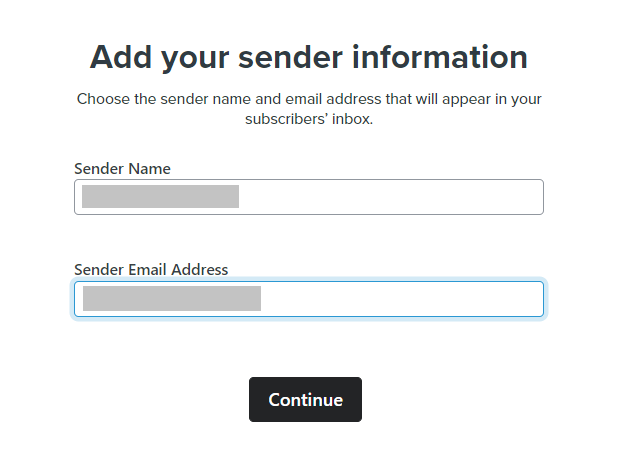
- Fill out the Sender Name and Sender Email Address. This information will appear on your subscriber’s inbox.
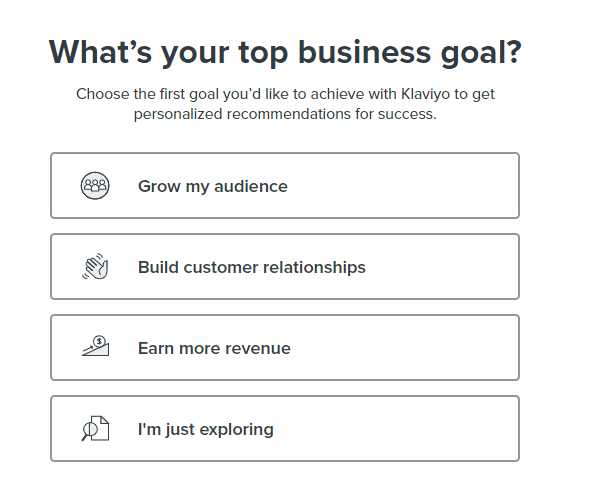
- Choose your top business goal.
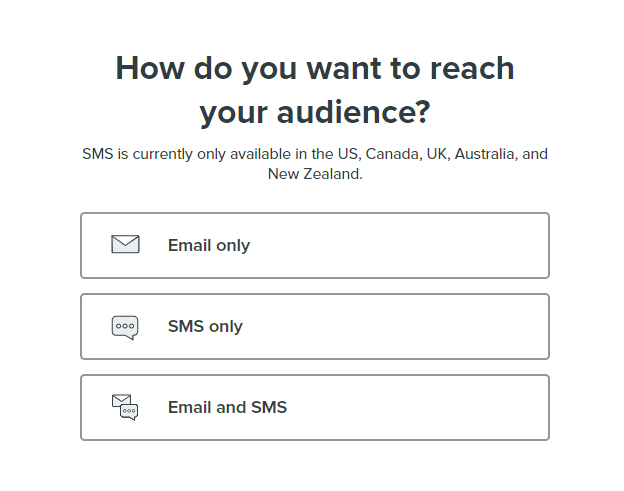
- Choose how you want to reach your audience.
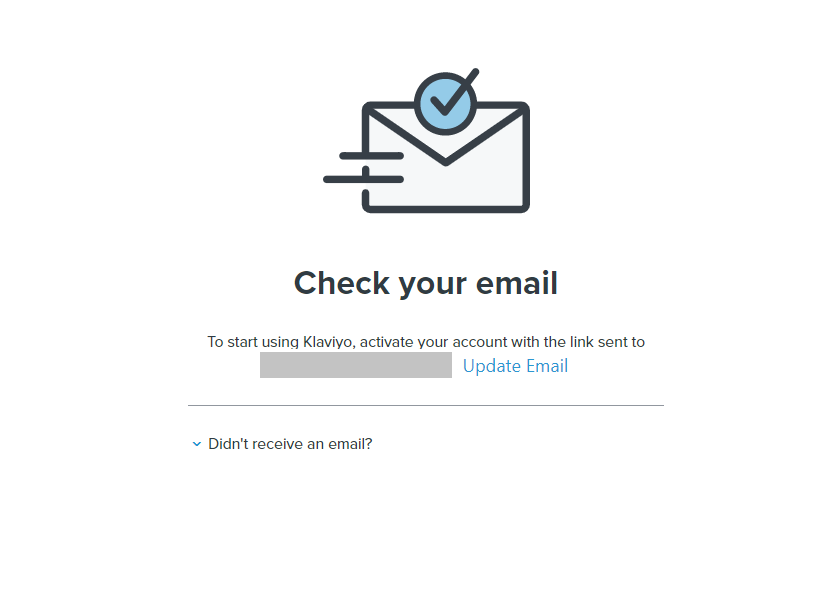
- You will then be prompted to confirm your email. Log in to your email and click the link to confirm your account.
Set up viewed product tracking on Shopify
Note: Based on your Customer Privacy settings in Shopify, Klaviyo may not track onsite events (including Active on Site and Viewed Product) for visitors to your Shopify store in the EU, EEA, UK and Switzerland, unless they have provided consent.
-
Login to Klaviyo.
-
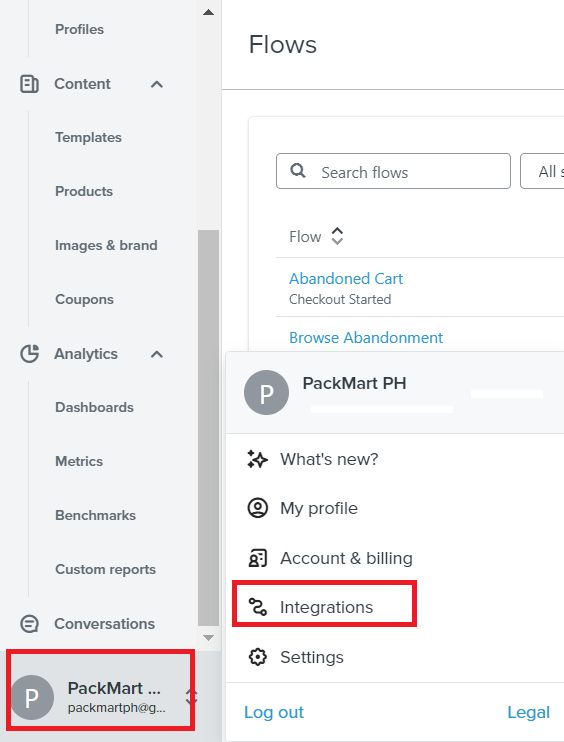
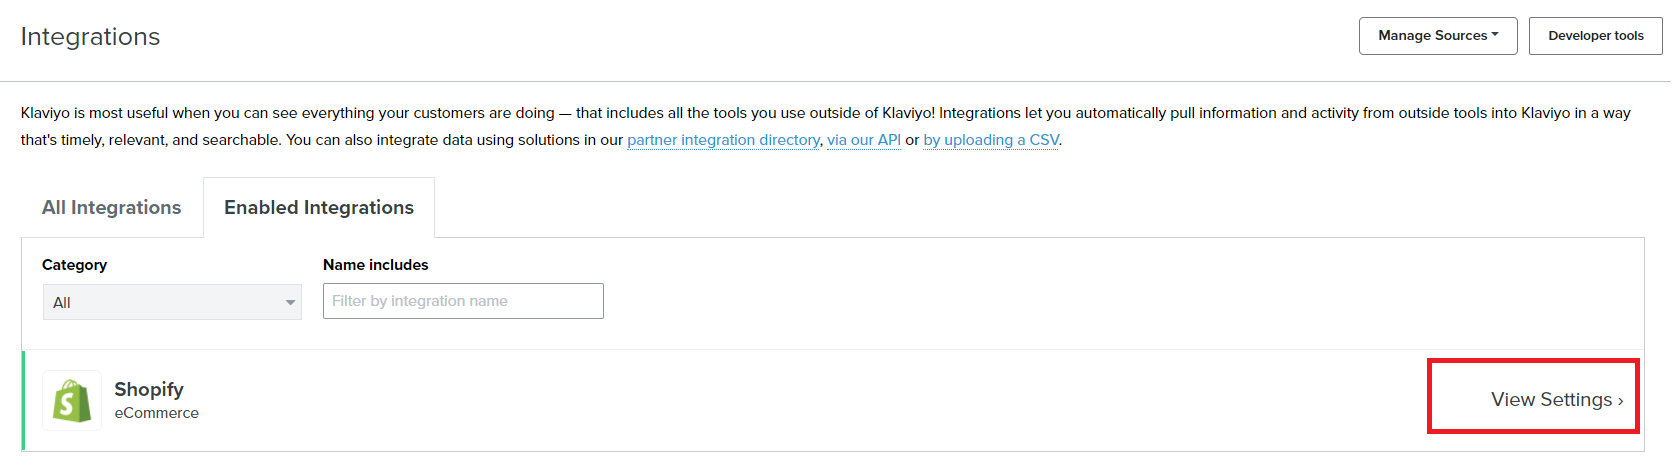
Navigate to the left menu and click your brand name, then click Integrations.
-
Choose Shopify then click View Settings.
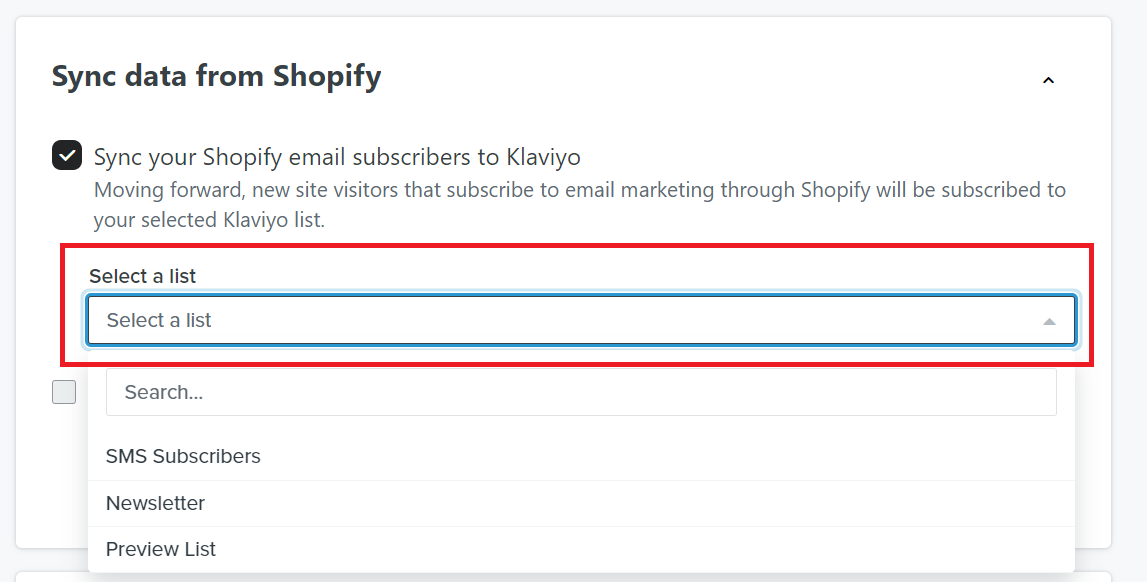
- Check the box next to Sync your Shopify email subscribers to Klaviyo, then select the list that you want to sync.
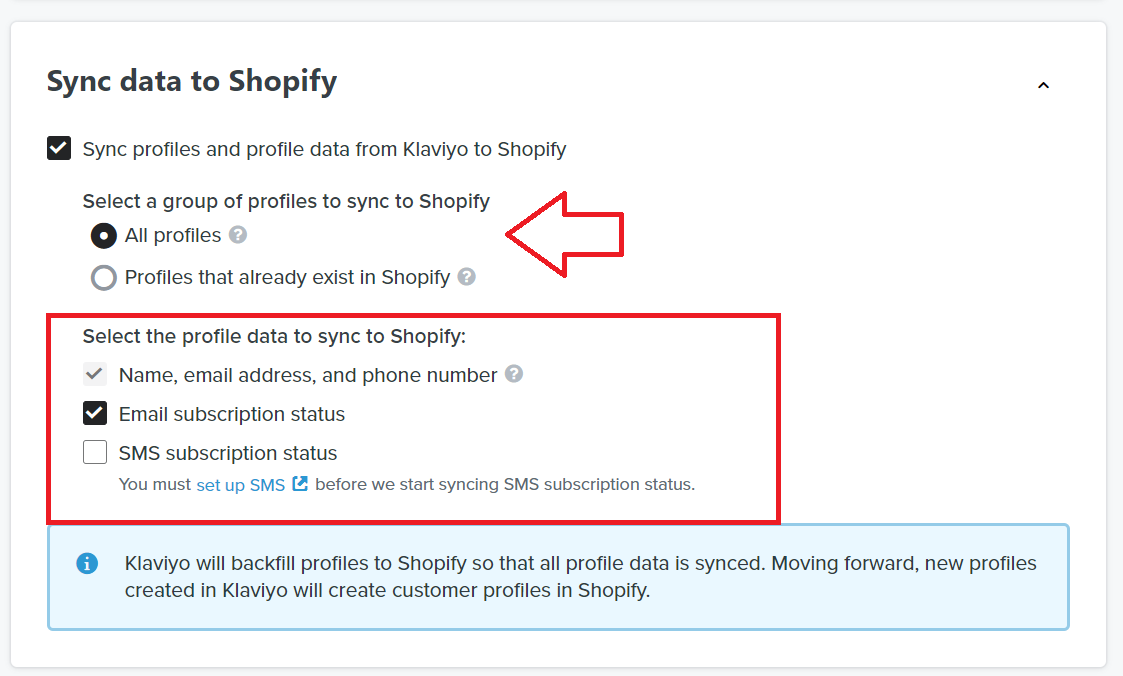
- Sync all profile data from Klaviyo to Shopify then make sure Email Subscription is also selected.
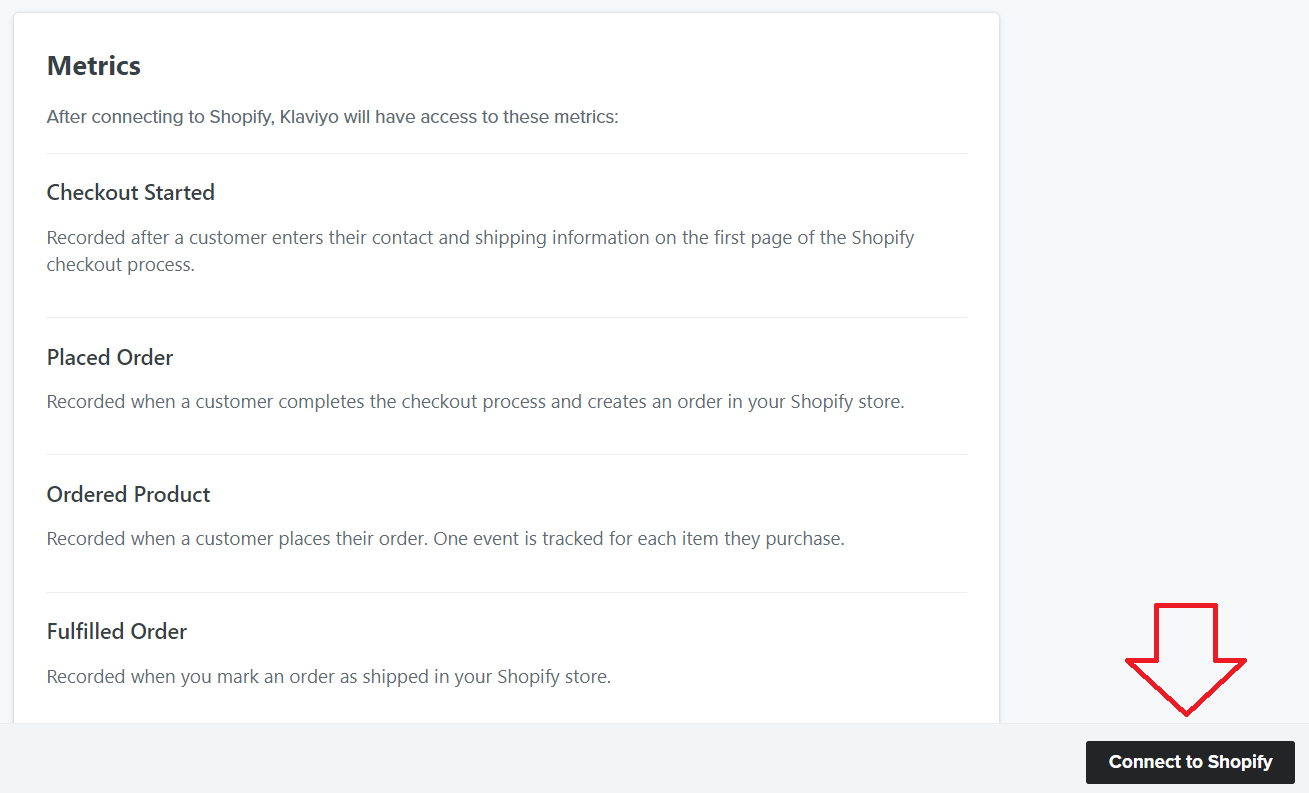
- Click Connect to Shopify. Klaviyo now has access to Shopify events such as check out started, placed order, fulfilled order etc.
Enable viewed product tracking in BigCommerce
Connect your BigCommerce store to Klaviyo
-
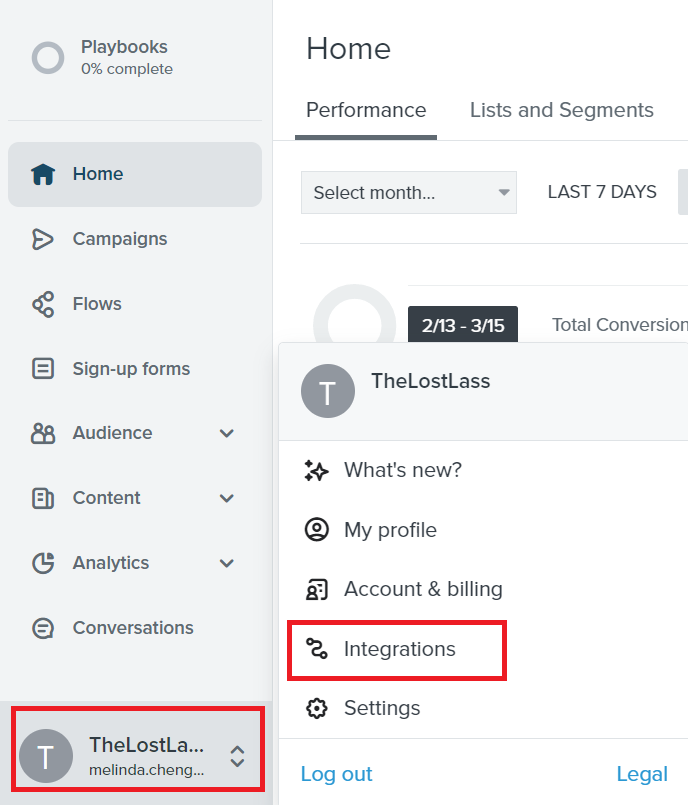
Login to Klaviyo. Navigate to the left menu and scroll to the bottom of the page. Click your name, then click Integrations.
-
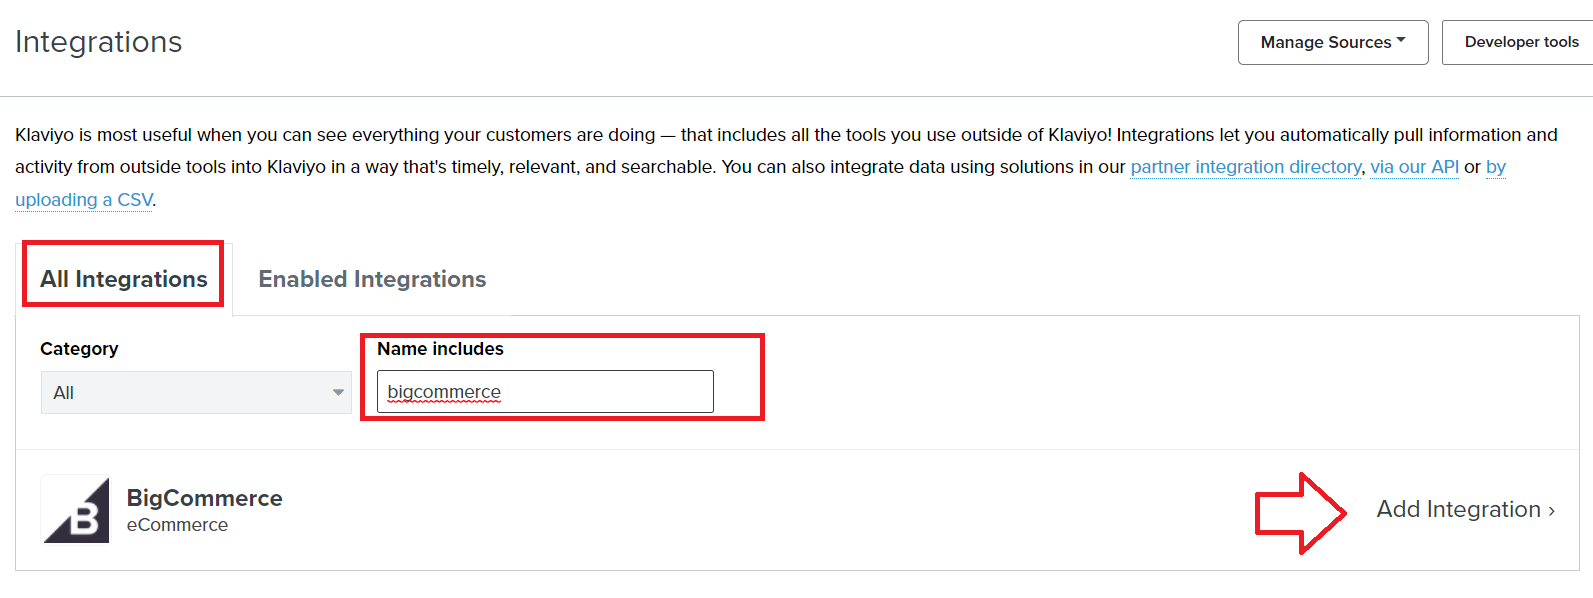
Click the All Integrations tab and search for BigCommerce. Click Add Integration.
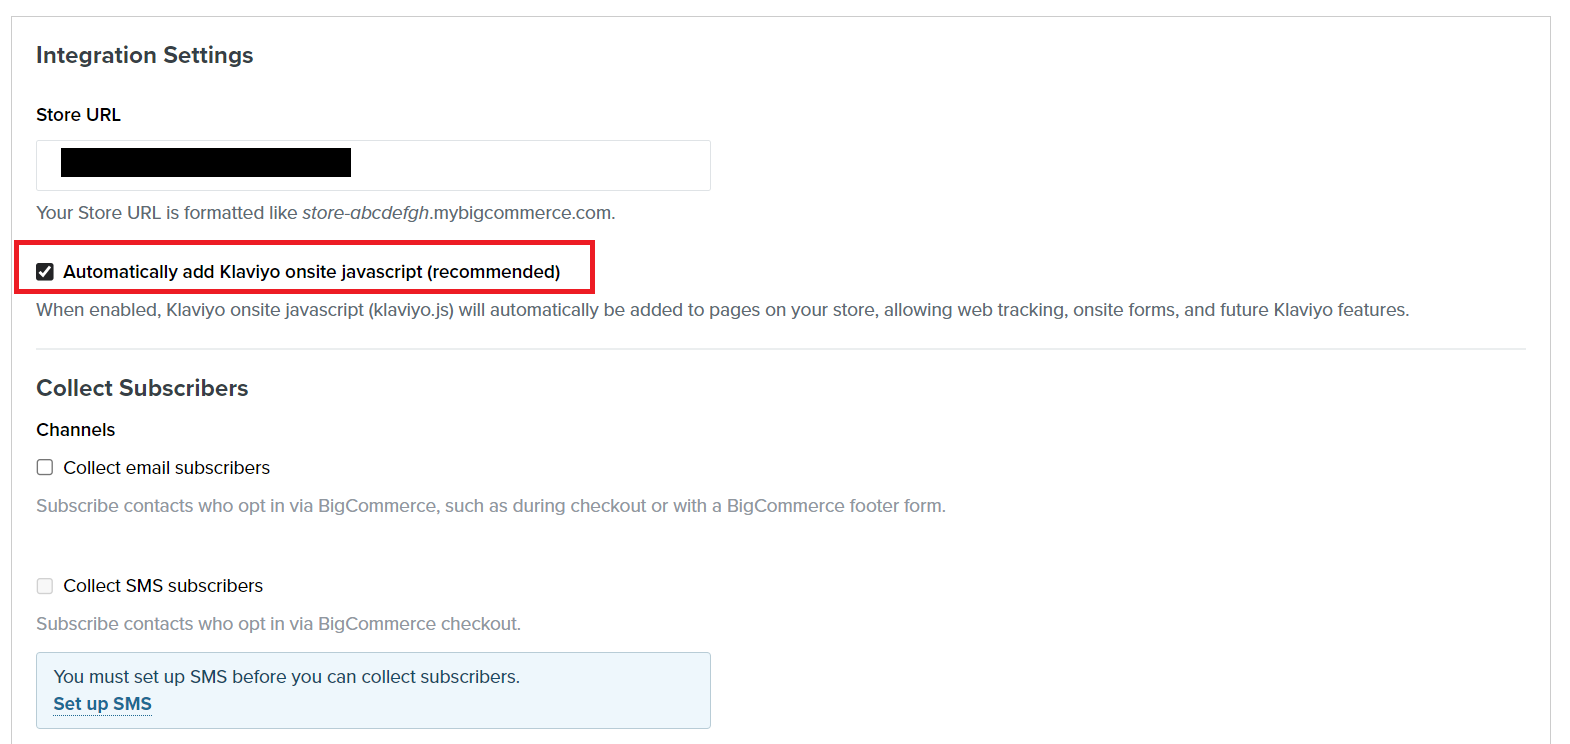
- Under Integration Settings, fill out the Store URL from your BigCommerce store. Make sure that Automatically add Klaviyo onsite javascript box is checked.
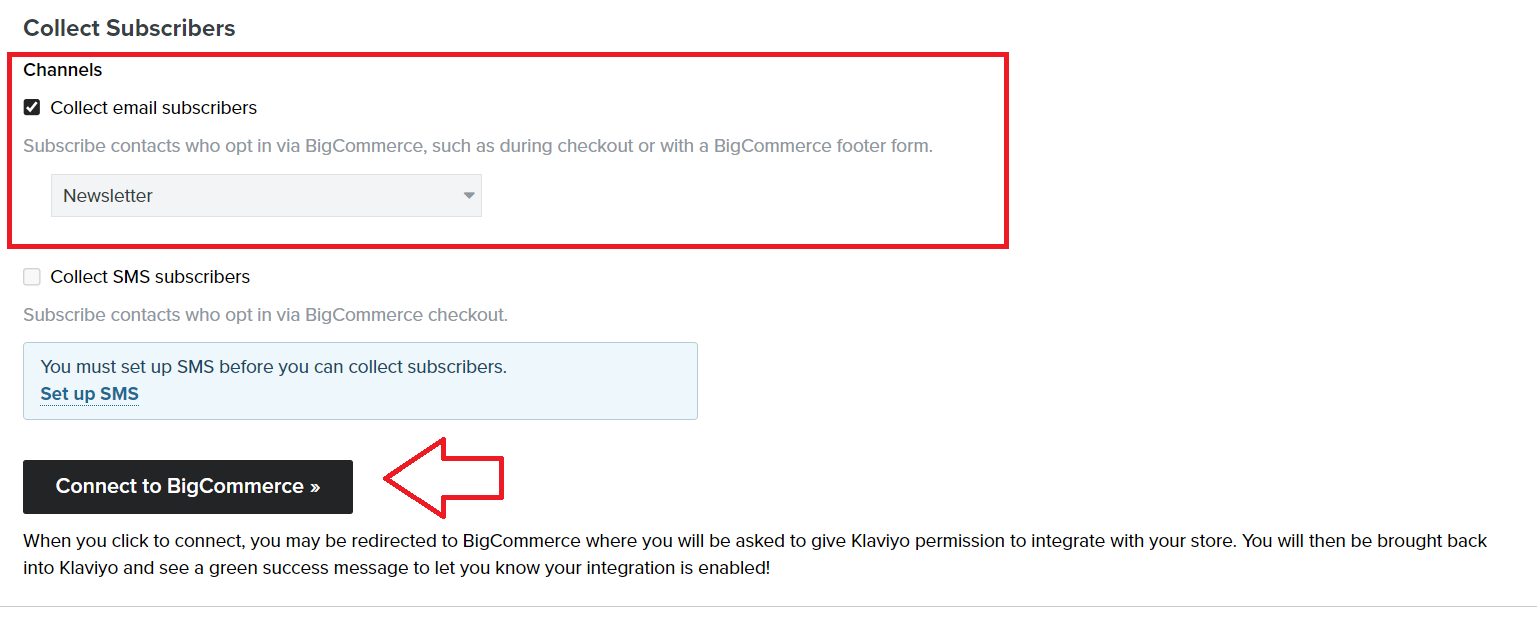
- Under the Channels section, check the box for Collect email subscribers and choose the subscription from the check box. Click Connect to BigCommerce.
- Confirm integration.
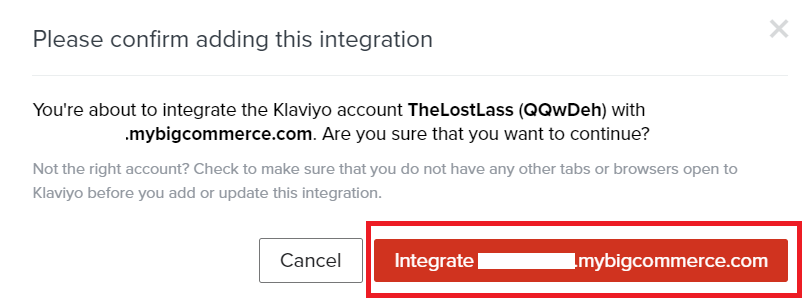
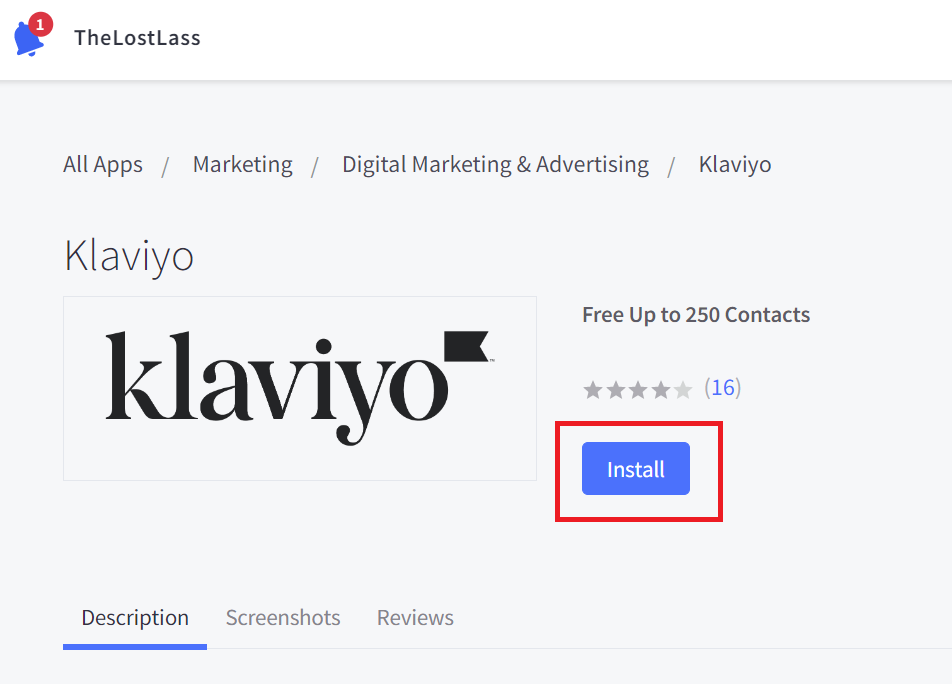
- The next page will take you to the BigCommerce page, click Install.
- It will take you back to Klaviyo and you’ll see the data sets from BigCommerce synching with Klaviyo.
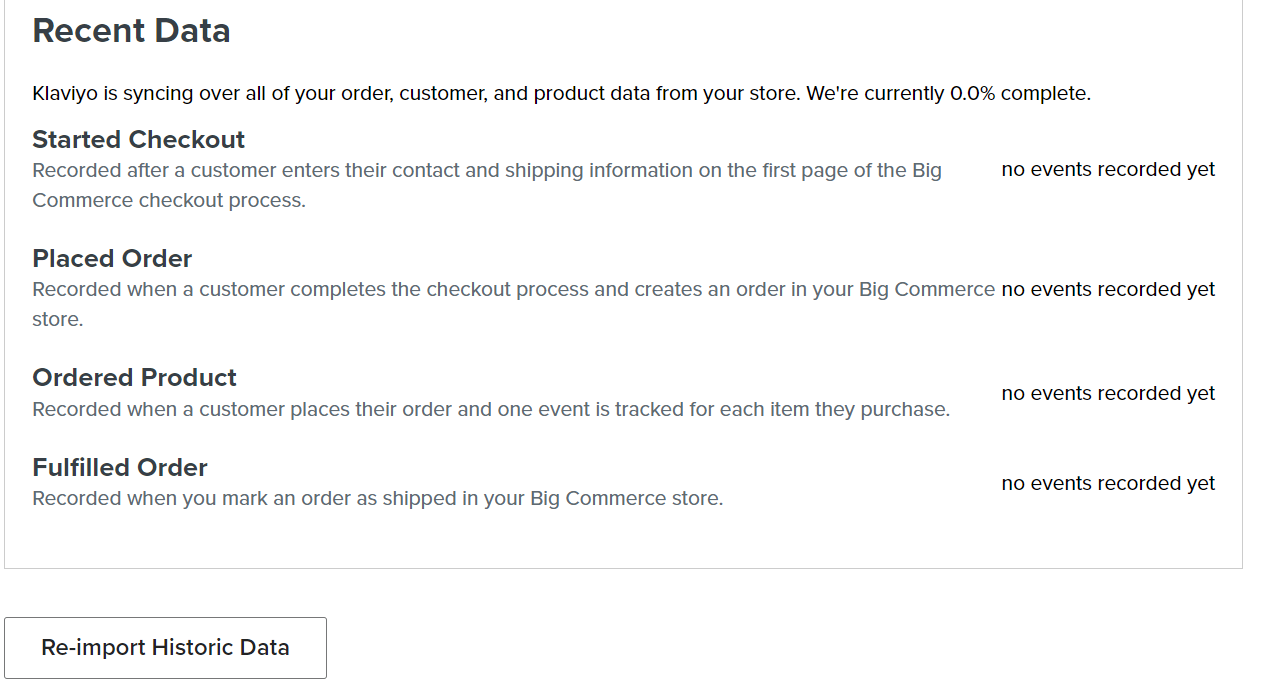
Set up viewed product tracking
-
In Klaviyo, navigate to the left menu. Click your name then select Integrations.
-
In the upper-right corner, click the dropdown for Manage Sources, then click Set Up Web Tracking.
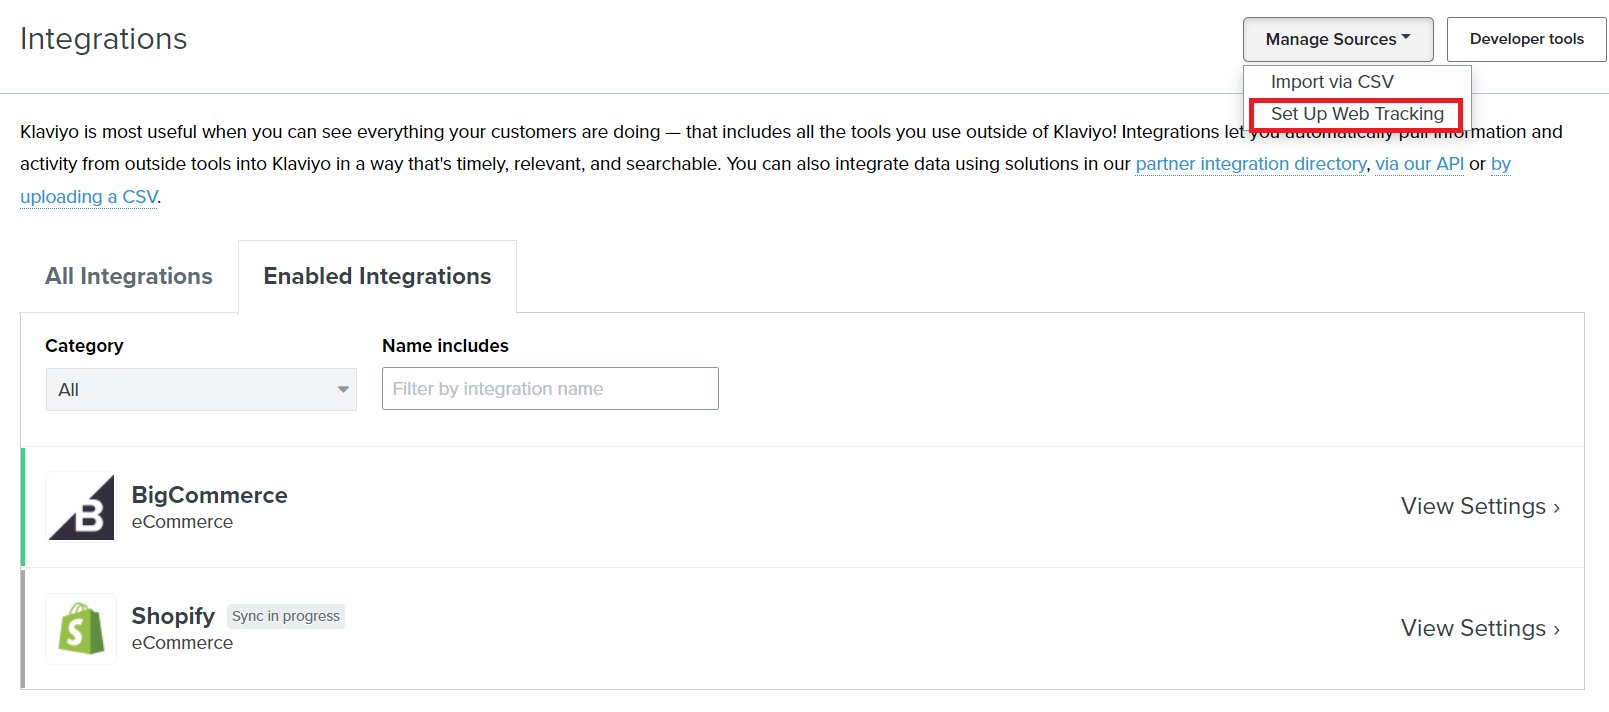
- Go to number 2, then copy the script.
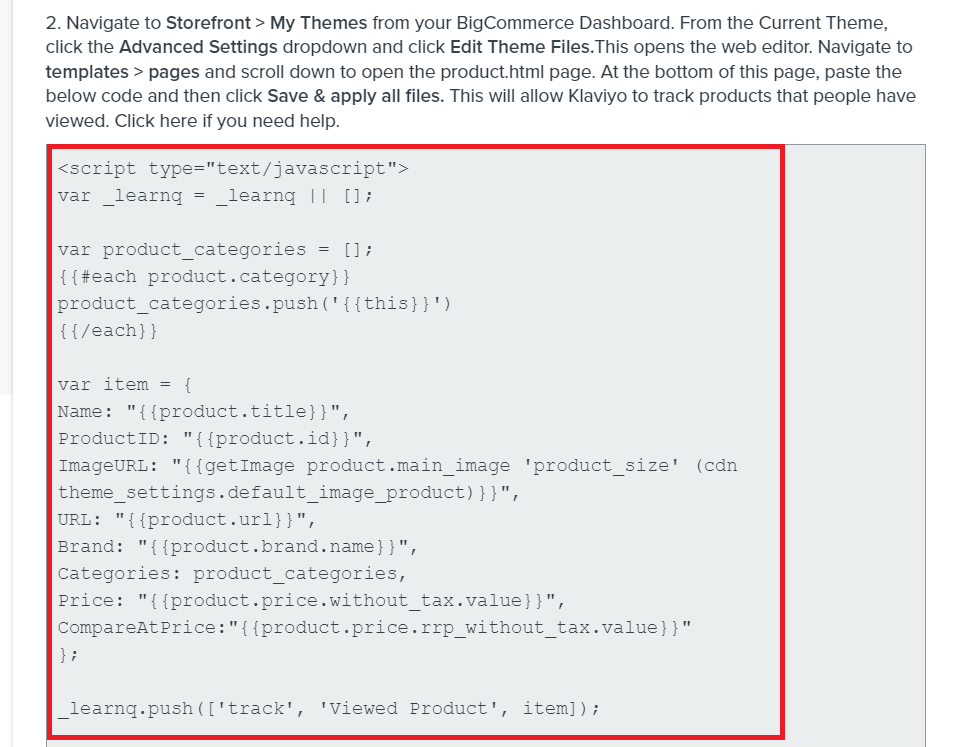
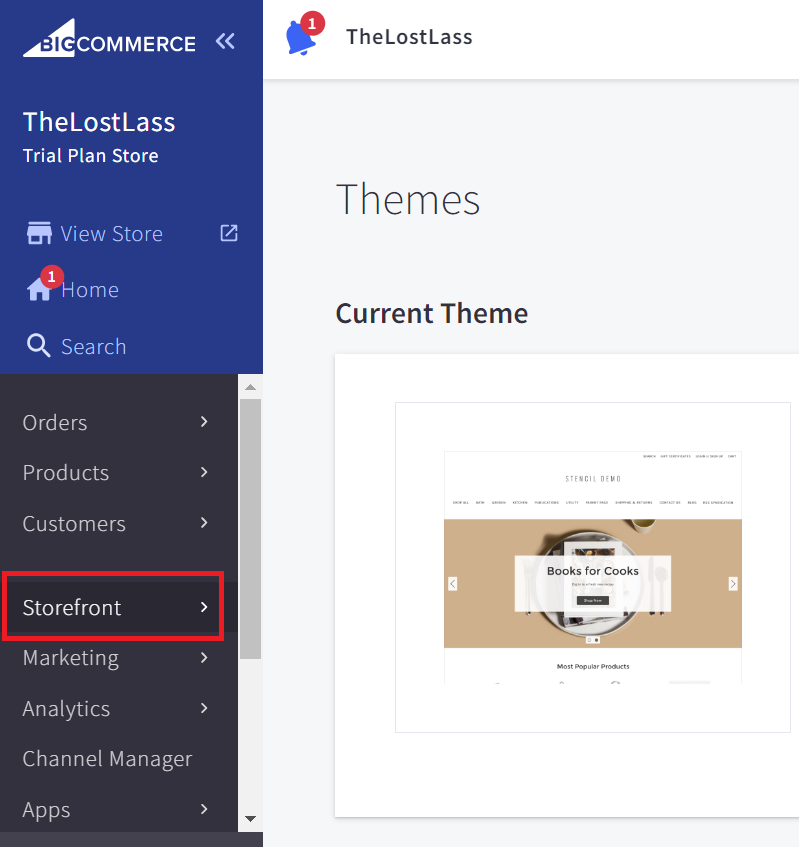
-
Go back to BigCommerce. Navigate to the left menu, then click Storefront.
-
Click Themes. Then click the Advanced dropdown then click Edit Themes Files.
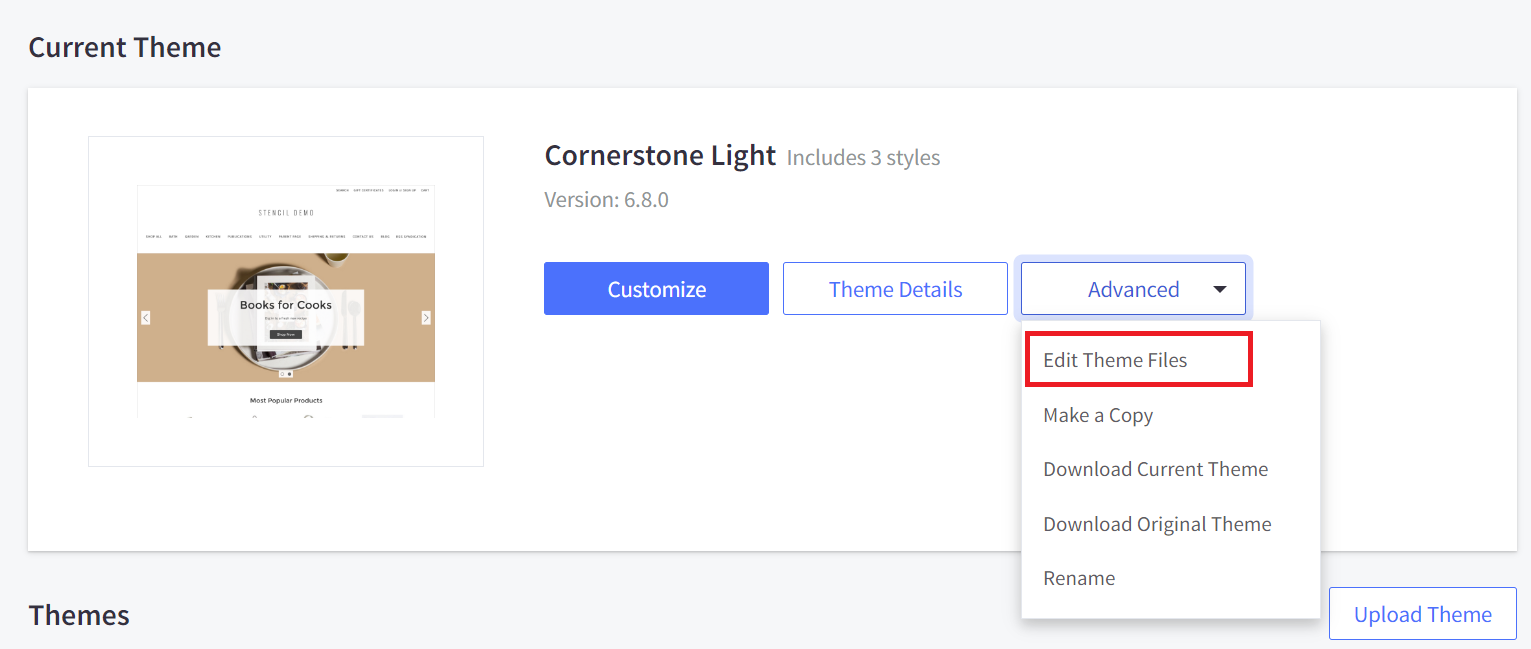
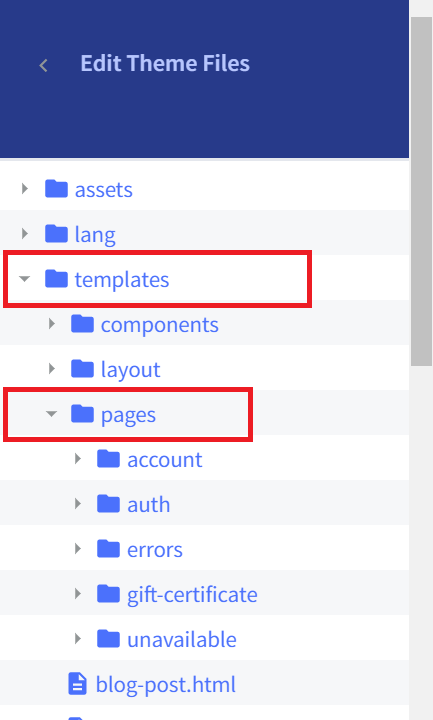
- Navigate to the left menu, then select templates→pages→product.html
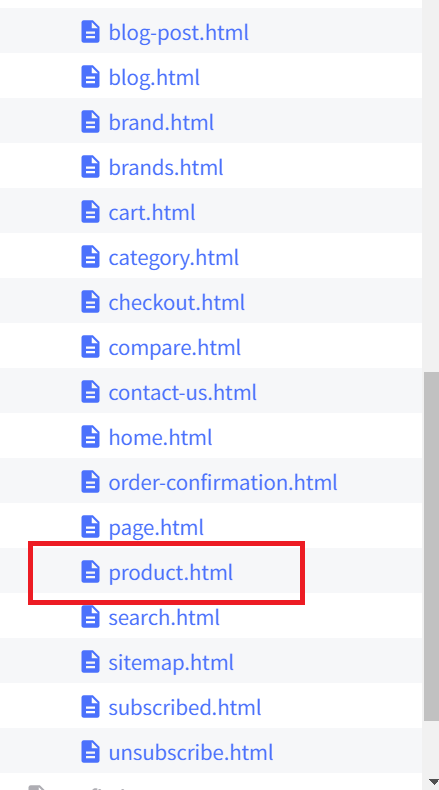
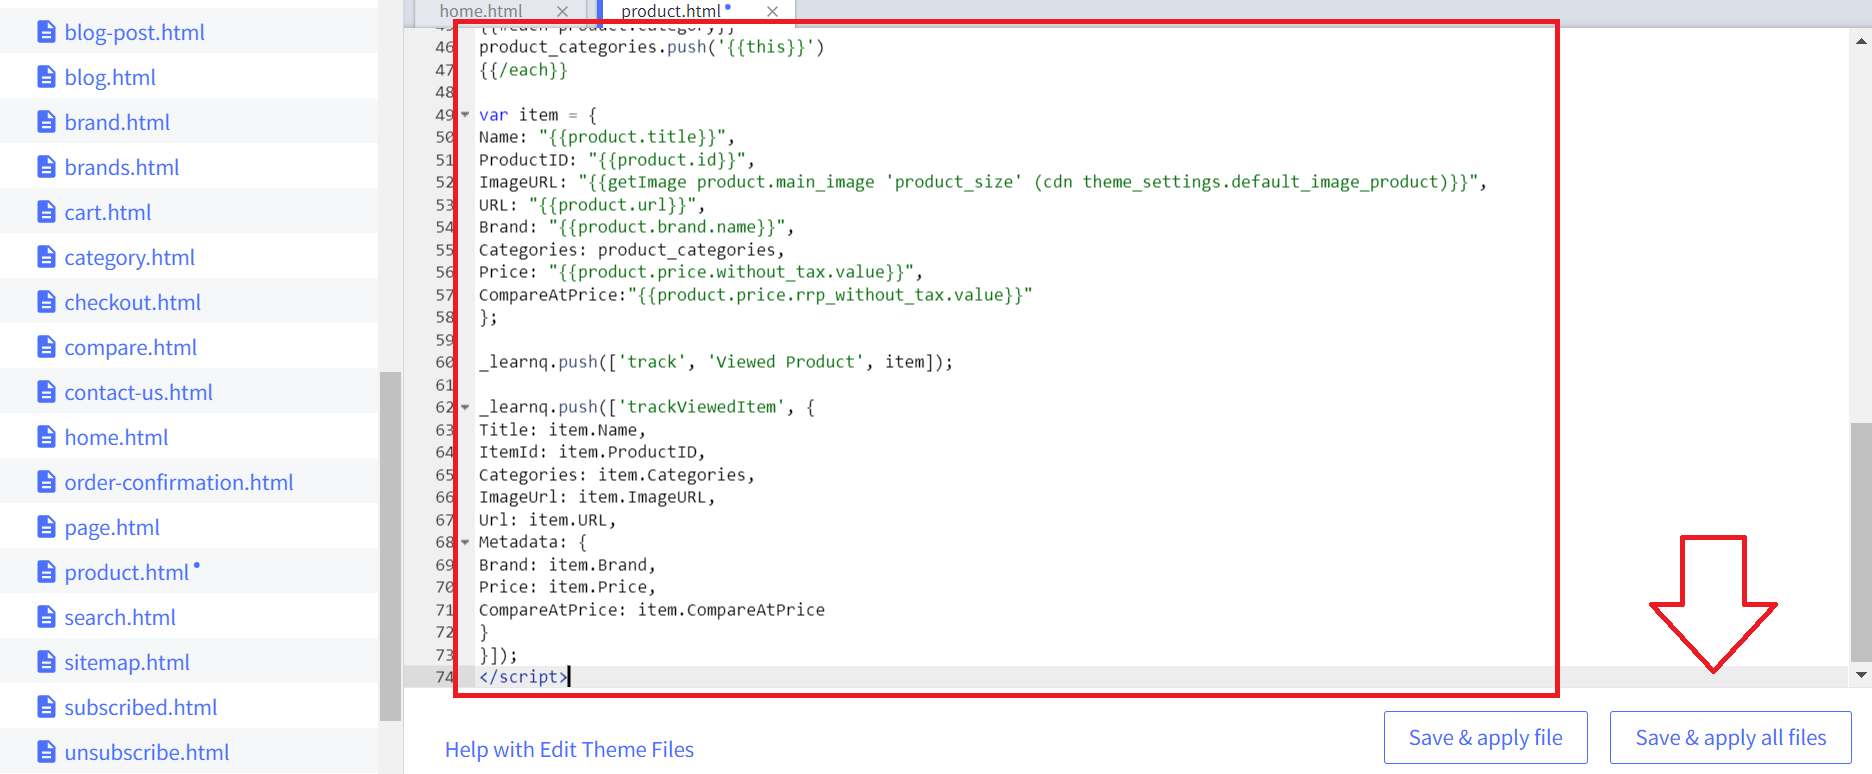
- Inside the editor field, scroll down to the very bottom of the page then paste the script from Klaviyo. Click Save & apply all files.
Conclusion
That’s it! You now have a way to track customers who viewed your store and which products they were browsing. You can use this data to create your browse abandonment email campaign.
Execution Checklist:
-
Connect your store to a marketing automation platform like Klaviyo.
-
Set up ‘viewed product’ tracking configurations in your store so that Klaviyo can use that data for the email flow.
-
Set up browse abandonment flow in Klaviyo