A Guide to Creating a ANIBIMI
To help you set up your animated Brand Indicators for Message Identification (Animated BIMI).
Prefer a shortcut? 16 free tools do parts of this for you.

Aim: To help you set up your animated Brand Indicators for Message Identification (Animated BIMI).
Optimal Outcome: To add your animated brand indicator in all your marketing emails to increase brand recognition and establish authenticity.
What do you need to start:
You’ll need the following:
An SVG logo file
A domain name
A web server
Knowledge of DNS server and email authentication
Why is this SOP Important: Setting up an animated BIMI can help improve email deliverability, enhance email security, increase brand recognition, and improve customer trust.
When and Where to execute:
Who Should Be Doing This: IT staff, marketing staff, person responsible for setting up email automation
What is a BIMI?
A BIMI (Brand Indicators for Message Identification) is a visual representation of a brand in email communications that appears as an animated logo or image next to the sender's name in the recipient's inbox. BIMI is based on email authentication protocols such as SPF, DKIM, and DMARC, and requires organizations to set up a BIMI record in their DNS that specifies the location of the logo and other relevant information. By setting up a BIMI, organizations can increase brand recognition, improve email deliverability and security, enhance customer trust, and gain a competitive advantage over other organizations that have not yet adopted this technology.
Execution
Resources/Tools & Set up
-
Set up your SPF, DKIM, and DMARC email authentication
-
Create an SVG Tiny PS version of your logo
-
Acquire a VMC for your logo (optional but recommended)
-
Publish a BIMI record of your domain in DNS.
Set up your SPF, DKIM, and DMARC email authentication
This gives email providers (such as Gmail or Outlook) confidence that the email is coming from a legitimate business. The better your authentication process is, the more likely your email will be delivered to your customers inbox and not flagged as spam.
Sender Policy Framework (SPF) is an email authentication protocol designed to prevent spoofing by verifying the sender’s IP address.
-
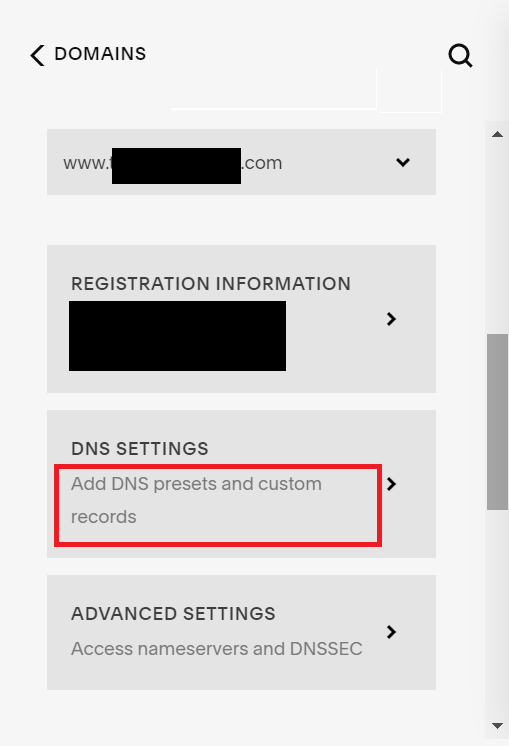
Go to the DNS settings of your domain provider (Example: Bluehost, Namecheap, GoDaddy, Squarespace etc.)
-
Click DNS Settings.
-
Under Custom Records, then click Add Record.
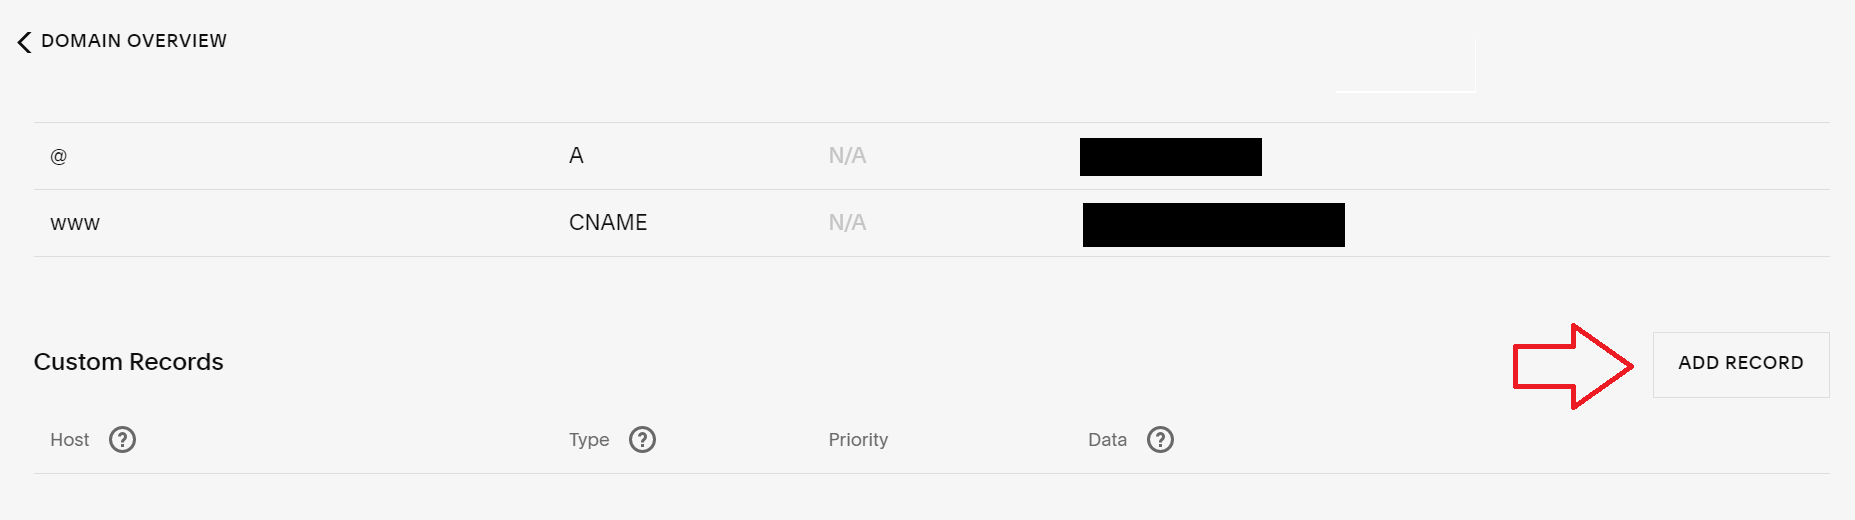
- Fill out the following information, then click Save.
Host = @
Type = TXT
Data / Value = v=spf1 include: _spf.google.com ~all

DomainKeys Identified Mail (DKIM) allows senders to digitally sign their email messages using a private key which can be verified by the recipient using the sender’s public key.
-
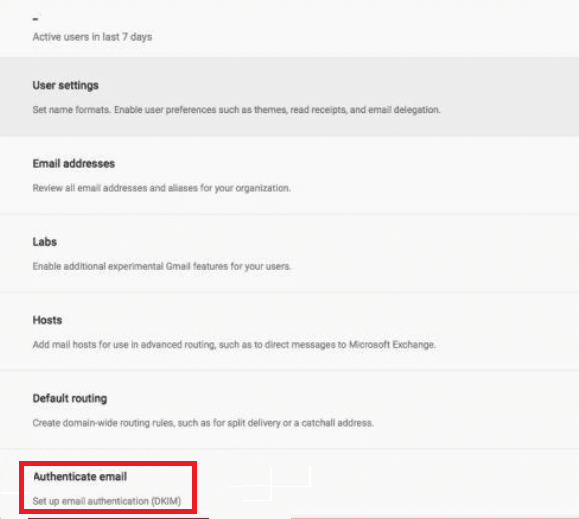
Go to your Email Service Provider. (Note: In this example, we’ll use Gmail.) Click Authenticate email.
-
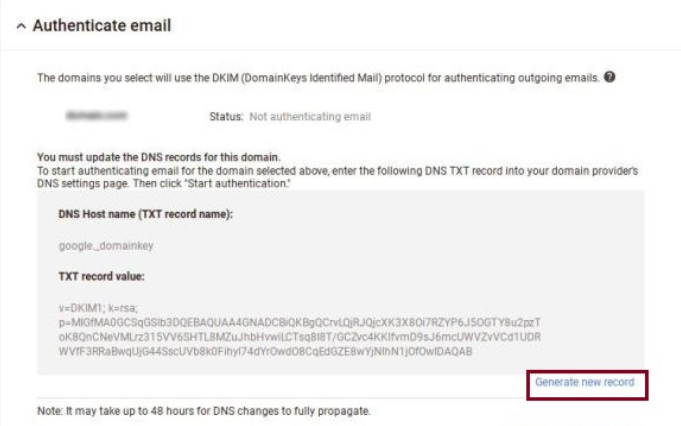
Click Generate new record. Copy the DNS Host name (TXT record name) and TXT record value.
-
Next, go back to the DNS settings of your domain provider (Example: Bluehost, Namecheap, GoDaddy, Squarespace etc.).
-
Under Domain Overview, click Add Record.
- In the host field, enter the host name you copied from Google Workspace (or from any other email service provider). Select TXT as Type and enter the TXT record value in the Data / Value field. Click Save.

Domain-based Message Authentication, Reporting, and Conformance (DMARC) is an email authentication protocol that’s built on top of SPF and DKIM to provide more comprehensive protection against email spoofing and phishing attacks.
- Navigate to the DNS settings of your domain host and click Add Record. Make sure that you’ve already set up both SPF, and DKIM before starting DMARC.
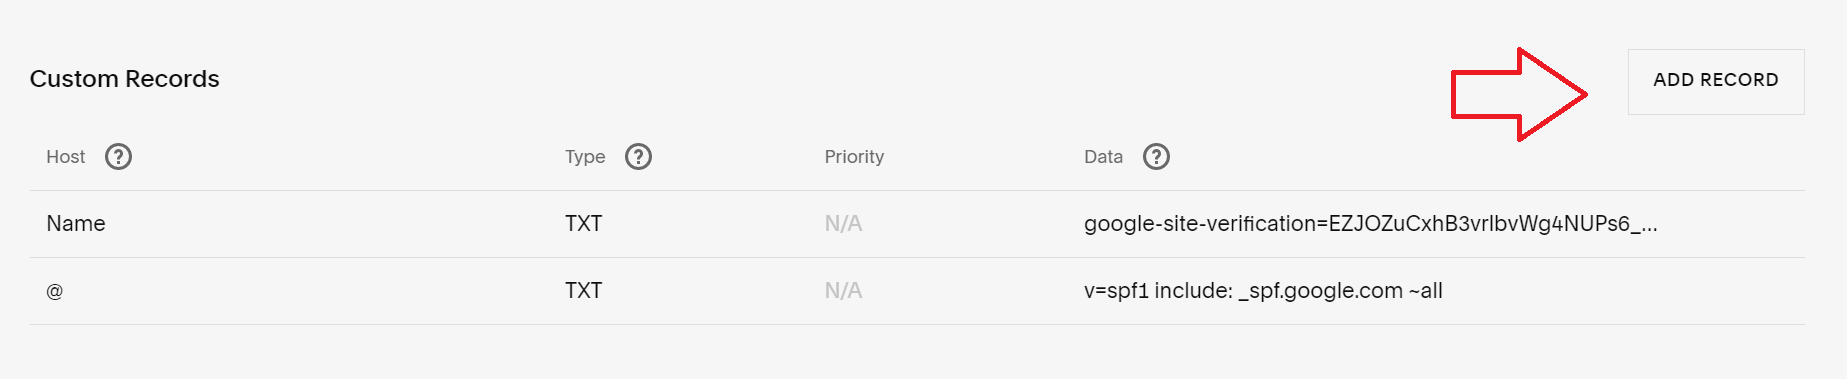
-
Choose TXT as Type. Add the host name (example _dmarc).
-
Follow this string to follow your data string:
v — A mandatory tag-value (DO NOT CHANGE)
p — Mail processing policy. Make sure it is set to either quarantine or reject.
rua – Email address for receiving statistical reports. The address must belong to the same domain for which the DMARC record is configured.
ruf — Email address for receiving reports on failed authentication checks. Since each error when verifying the sender’s address generates a separate report, it’s better to have a separate mailbox for this.
fo — Determines in what cases reports will be sent to the domain owner. Possible values include:
0 — a report is sent if SPF and DKIM checks fail. Set by default.
1 — a report is sent if one of the checks fails — either SPF or DKIM.
d — a report is sent for each DKIM verification performed.
s — a report is sent for every SPF check performed.
It should look something like this:
v=DMARC1; p=quarantine; rua=mailto:info@thebeanscenes.com; ruf=mailto:report@thebeanscenes.com; fo=s
Create an SVG Tiny PS version of your logo
You can use any image editing tool to create your logo but the best tool for converting file to SVG version is Adobe Illustrator.
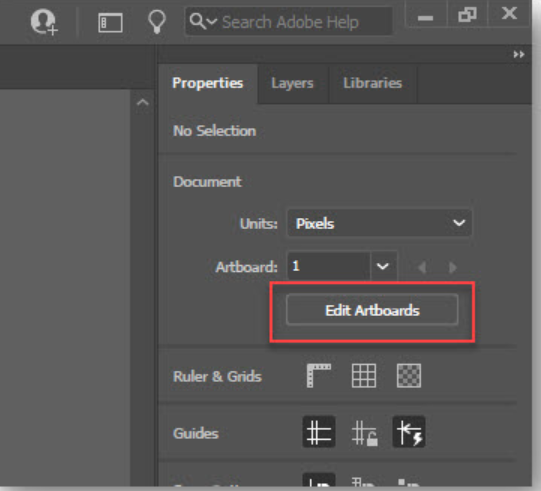
- Make sure that your log is perfectly square. To do this, click on Properties, then click Edit Artboards.
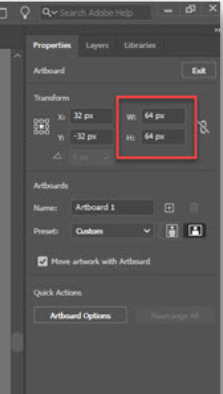
-
Make sure that the width and height are the same. Also ensure that your logo image is centered both horizontally and vertically.
-
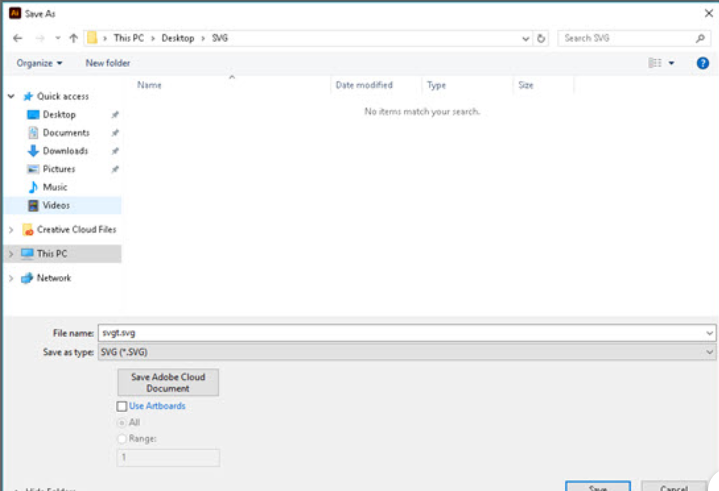
Click File, then Save As.
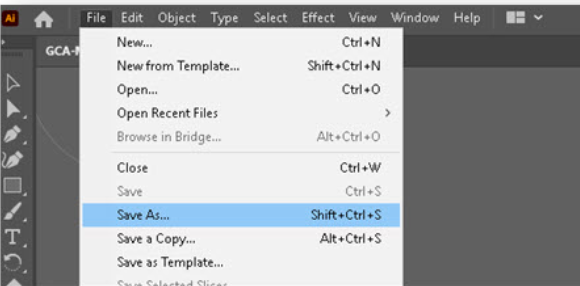
- Choose SVG from the Save as type drop down.
- Select SVG Tiny 1.2 from the SVG Profiles drop down.
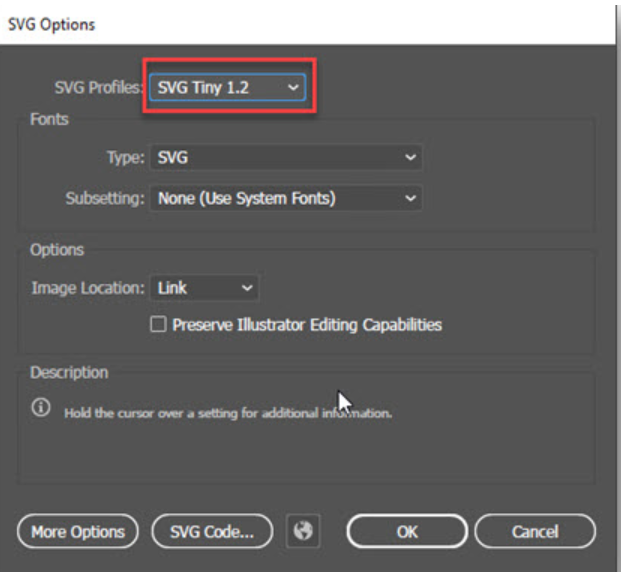
With the recent release from BIMI group, you’ll need to convert SVG Tiny 1.2 to SVG Tiny PS. You can use the following links to do so.
Acquire a Verified Mark Certificate (VMC) for your logo (optional but recommended)
- Register your logo as a trademark. Currently, the BIMI standard requires your logo to be a registered trademark before getting a VMC. It is recommended to consult with your legal team to check how to register your trademark.
- Get a VMC and upload to your web server. Once your logo has been trademarked, request your certificate from DigiCert or Entrust. You’ll get a Privacy Enhanced Mail file which you will then upload to your public web server. Take note of the URL of your PEM.
Publish a BIMI record of your domain in DNS
-
Go to the DNS settings of your domain provider (Example: Bluehost, Namecheap, GoDaddy, Squarespace etc.).
-
Under Custom Records, then click Add Record.
- Make sure that you have the following information ready:
-
URL of your SVG Image uploaded to your public web server. (Example: v=BIMI1;1=https://images.thebeanscenes.com/brand/logo.svg)
-
URL for your VMC uploaded to your public web server (Example: a=https://images.thebeanscenes.com/brand/certificate.pem)
- Fill out the fields as:
Type = TXT
Host = default._bimi.yourdomain.com (Example: default._bimi.thebeanscenes.com)
Data / Value = logo URL;PEM URL (Example: v=BIMI1;1=https://images.thebeanscenes.com/brand/logo.svg;a=https://images.thebeanscenes.com/brand/certificate.pem
Conclusion
That’s it! Now that you have published your BIMI, your emails should display your logo, enabling your customers to recognize you as a trustworthy business.
Execution Checklist
-
Set up your SPF, DKIM, and DMARC email authentication, in that order.
-
Create and save your logo as SVG Tiny PS using Photoshop Illustrator.
-
Register your trademark logo and get your VMC.
-
Upload your BIMI logo and the VMC PEM to your public server.
-
Publish your BIMI through your domain provider platform.