Excluding Customers Who Already Viewed Your Product in Your Email Flows
To give you a step-by-step guide in excluding customers who have already viewed your product in your email flows.
Prefer a shortcut? 16 free tools do parts of this for you.
Aim: To give you a step-by-step guide in excluding customers who have already viewed your product in your email flows.
Optimal Outcome: To set up your email campaign flows so that it will exclude customers who have already viewed your product.
What do you need to start: Marketing automation platform
Why is this SOP Important: By removing customers who have previously viewed a product from your email campaigns, you can enhance your marketing strategies, boost customer interaction, and ultimately generate higher sales and revenue for your business.
When and Where to execute: You can follow the steps in this SOP during the creation of your email campaign flows or anytime you want to optimize your email campaigns.
Who Should Be Doing This: Marketing staff, person responsible for setting up email automation.
Execution
Resources/Tools & Set up
-
Create your email campaign flow. Here are some of the example SOPs to get you started:
-
SOP 229: Creating a Successful Browse Abandonment Flow on Klaviyo
-
SOP 230: Optimizing Customer Retention with a First-Time Post-Purchase Flow on Klaviyo
-
SOP 232: Regaining Lost Customers with a Win-Back Flow on Klaviyo
Use Conditional Split logic card
- Select the flow that you want to work on.
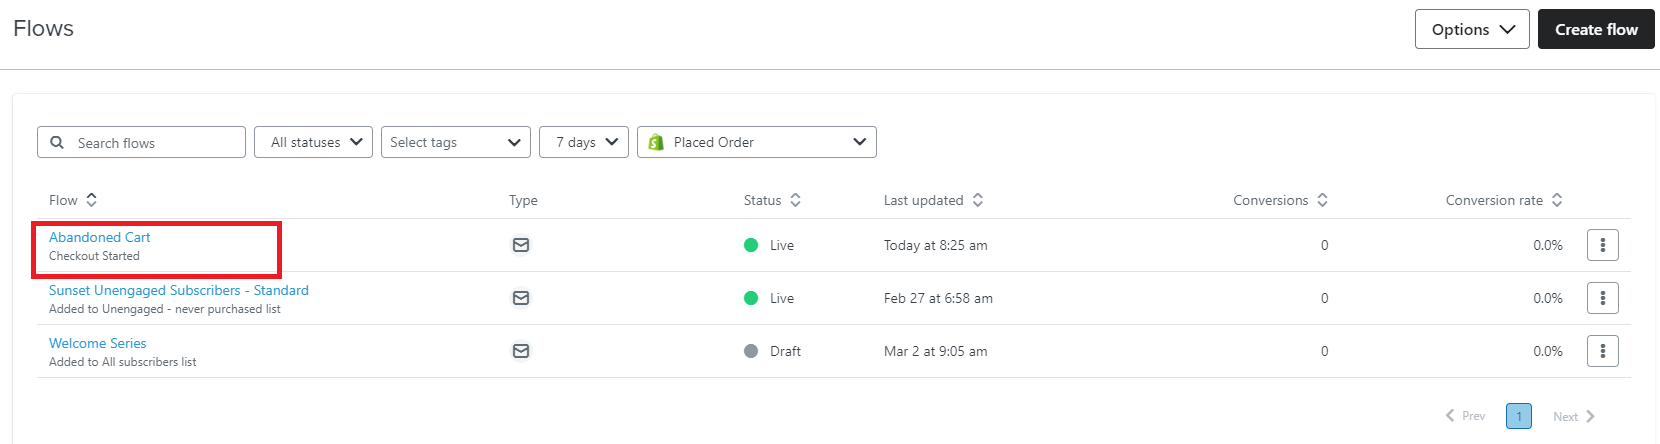
- Insert the Conditional Split card after every email in your flow.
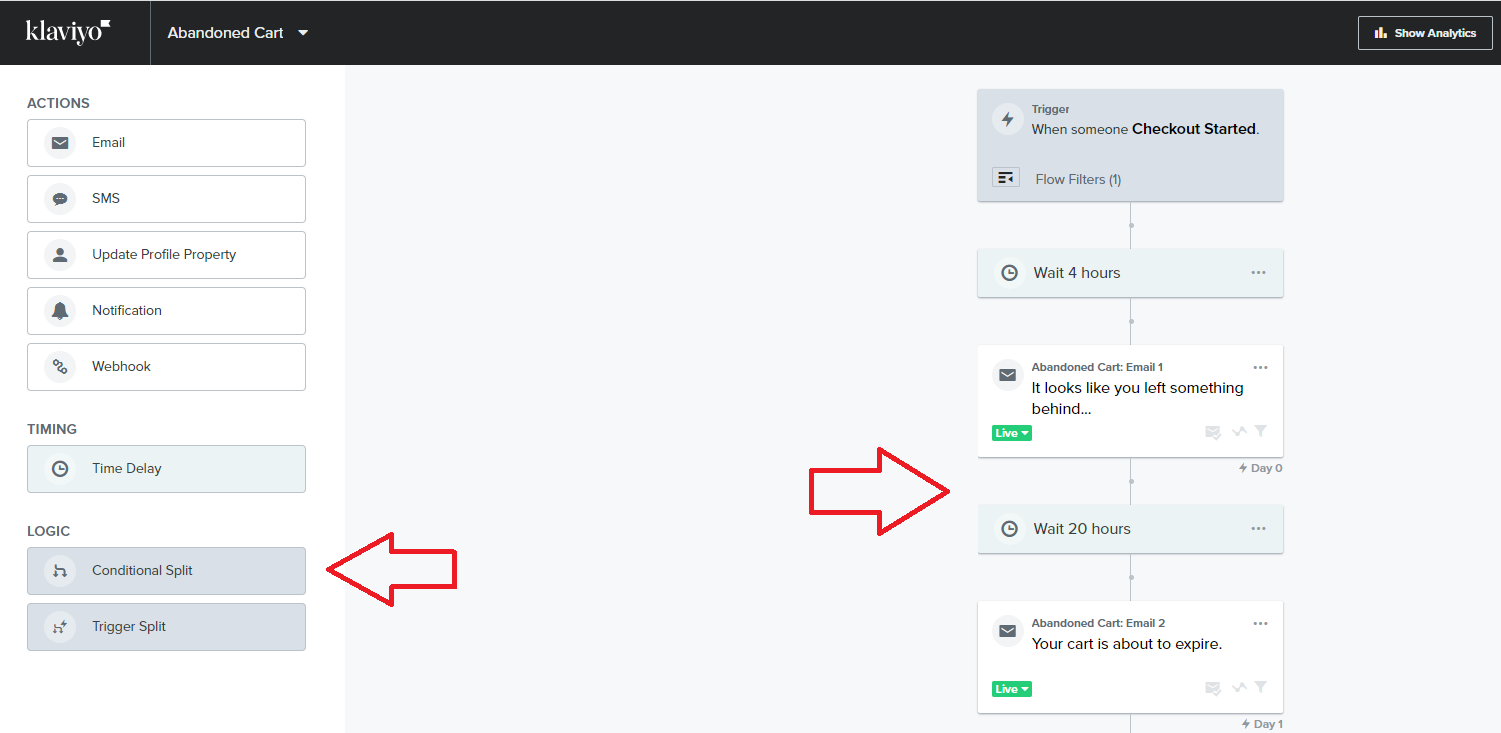
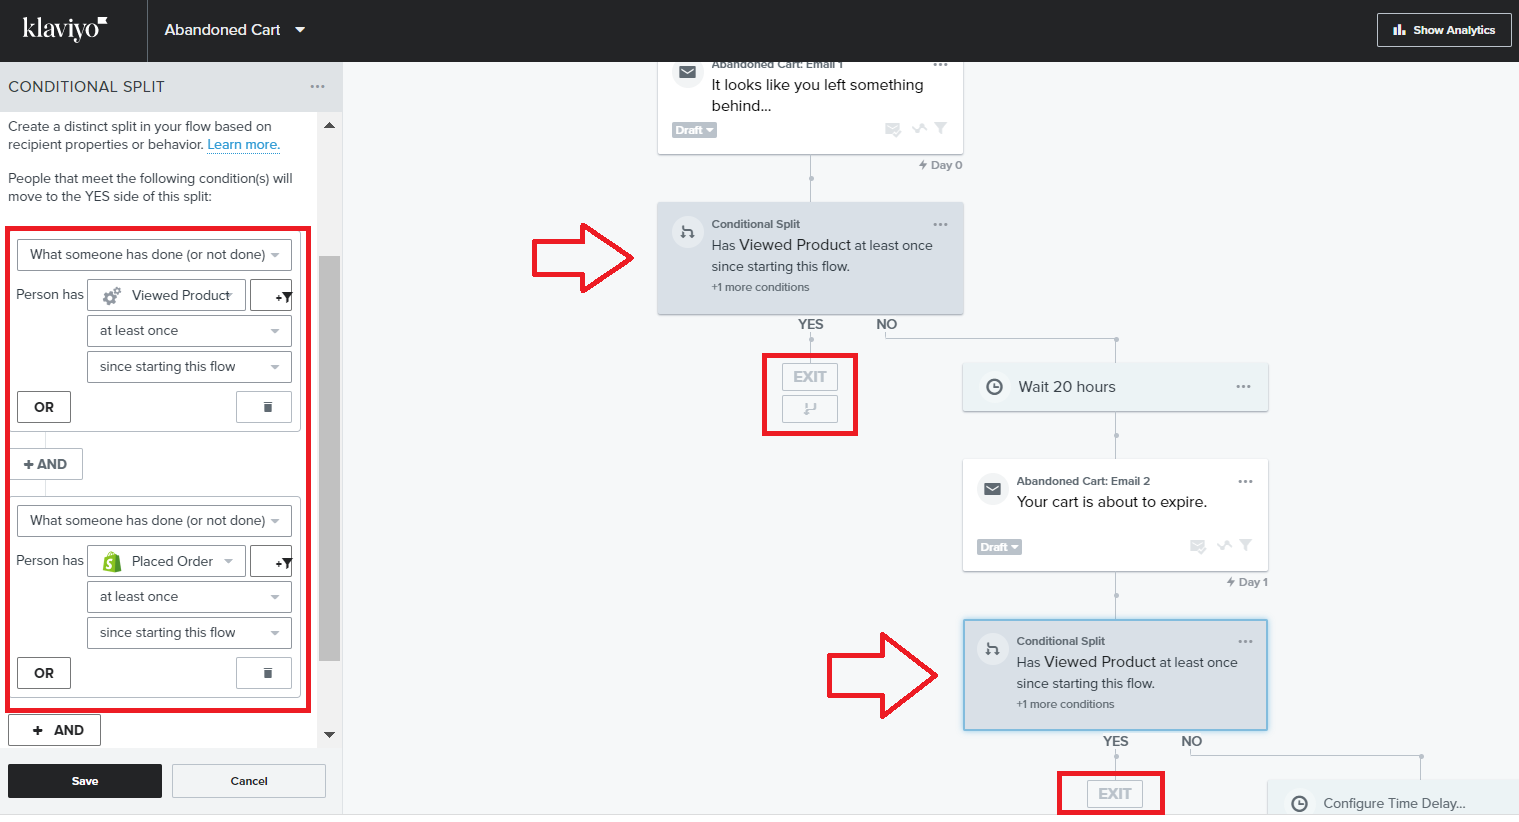
- Click the Conditional Split card and navigate to the left menu then configure as follows:
-
What someone has done (or not done)→Viewed Product→at least once→since starting this flow
-
What someone has done (or not done)→Ordered Product→at least once→since starting this flow
Make sure that the Yes path after the Conditional Split is followed by Exit. This means the customer will not receive any subsequent emails from the flow.
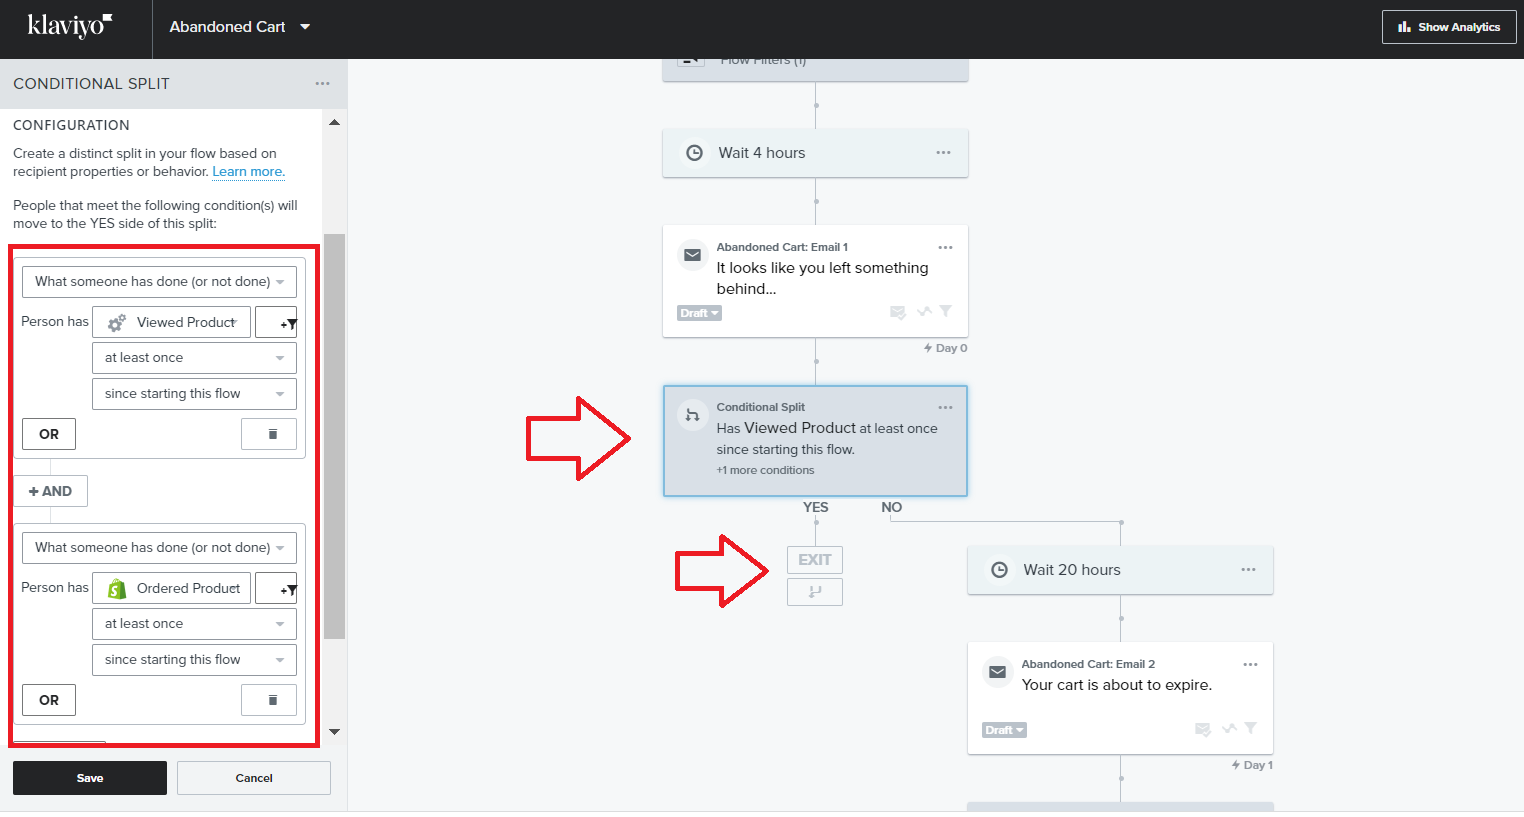
- Continue adding your Conditional Split cards after every email in your flow and use the same configuration as Step 3.
Use a Smart Sending Option
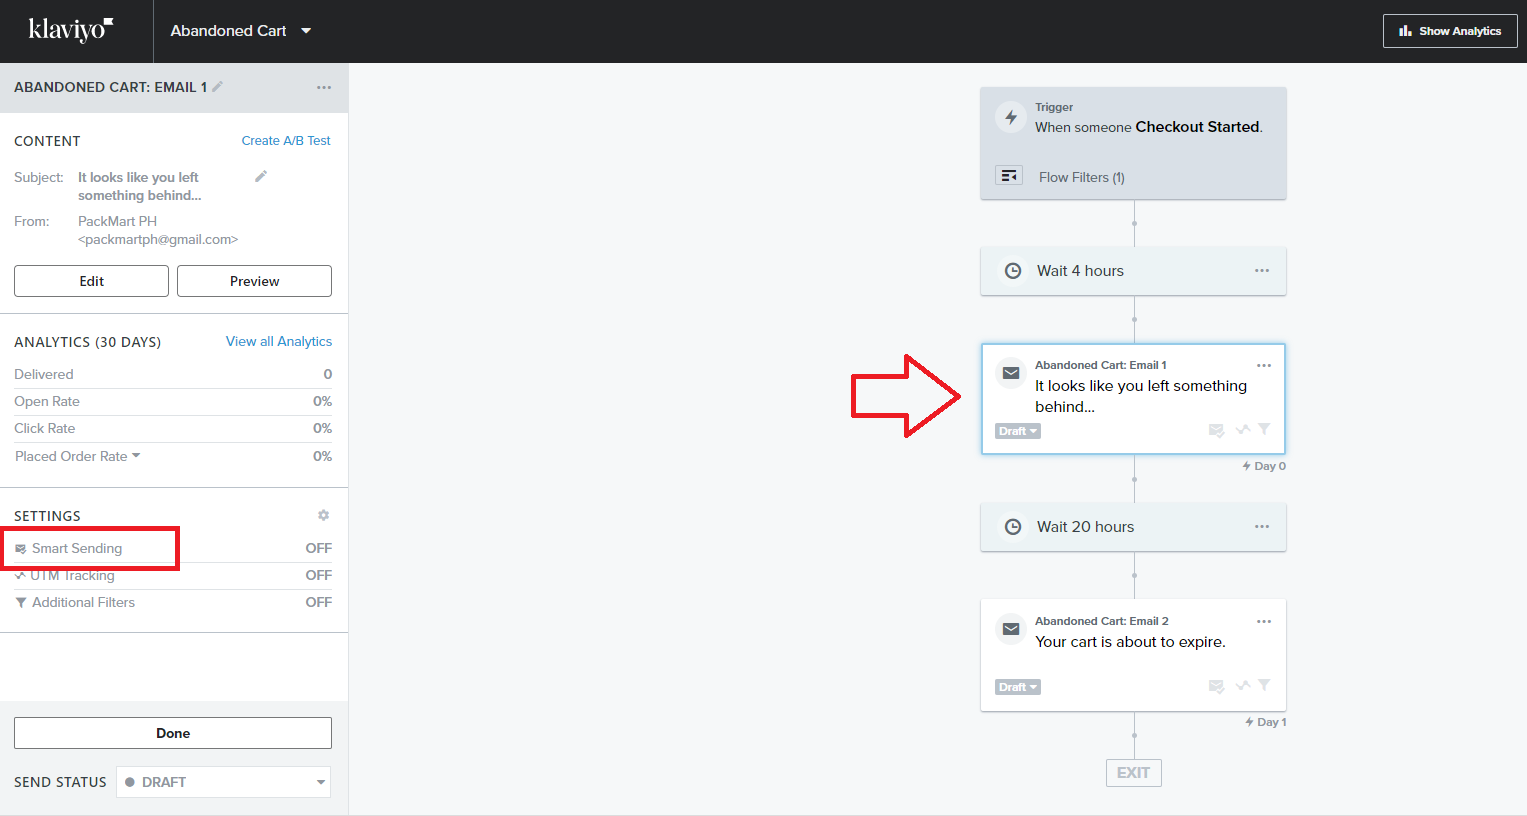
- Click the flow that you want to work on.
- Click the email card, then click the Smart Sending link.
- Navigate to the left menu and turn on Smart Sending, then click Configure.
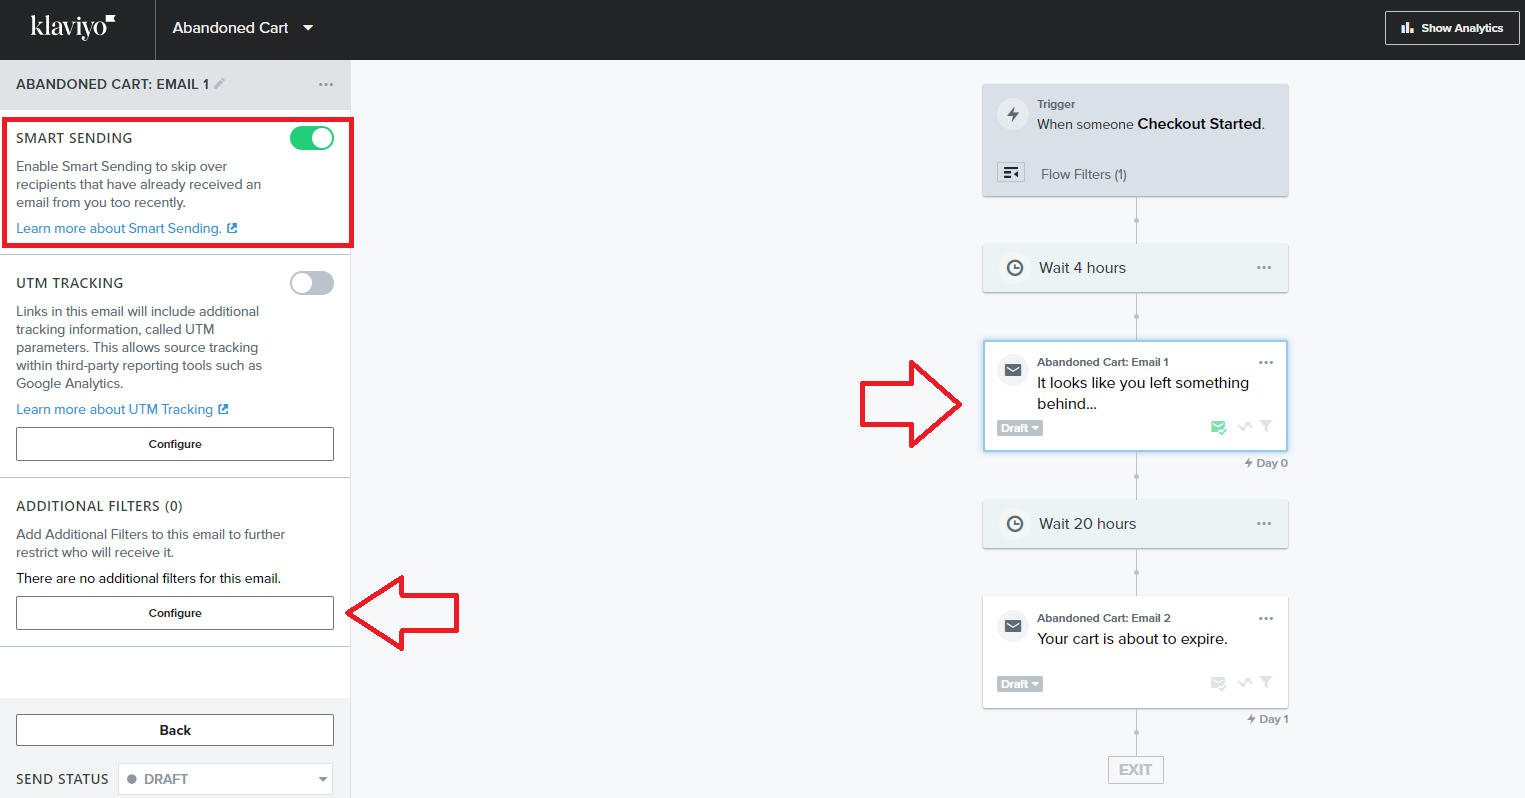
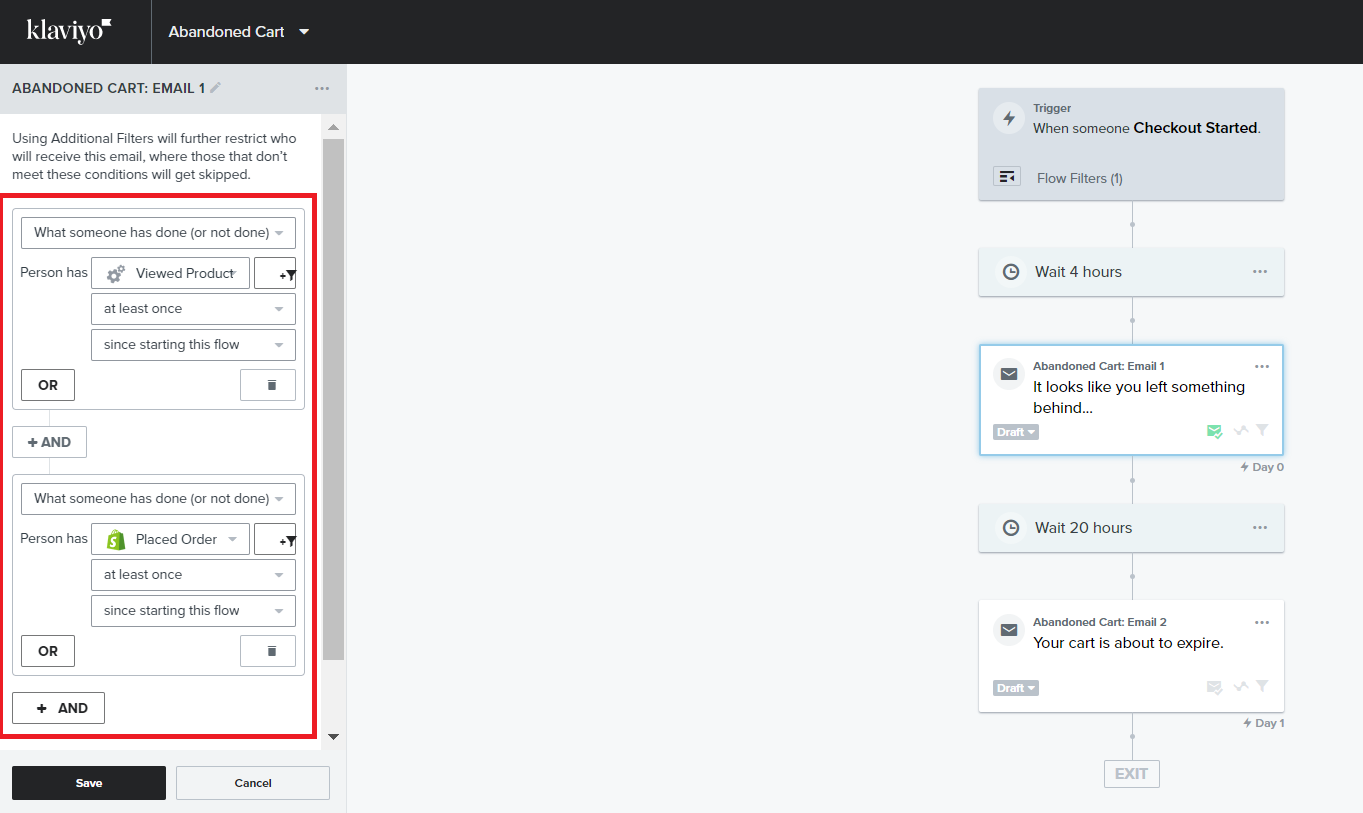
- Configure the Smart Sending as follows:
-
What someone has done (or not done)→Viewed Product→at least once→since starting this flow
-
What someone has done (or not done)→Ordered Product→at least once→since starting this flow
Conclusion
That’s it! You can now update the rest of your email campaigns to exclude customers who have viewed or ordered your product after each email event.
Best Practices:
-
Make sure you have the necessary data and analytics tools to track customer behavior and identify those who have already viewed a particular product. This may involve integrating your email marketing software with your website analytics tools or customer relationship management (CRM) system.
-
Use your data to segment your email list based on customer behavior, such as product views or purchases. This will allow you to target specific segments with relevant email campaigns.
-
Provide customers with the option to set their email preferences, including whether they want to receive emails about products they have already viewed. This can help you to avoid sending unwanted or irrelevant emails and improve customer satisfaction.
-
Use dynamic content in your email campaigns to personalize the content based on customer behavior. For example, you could display related products or services that may be of interest to customers who have already viewed a particular product.
-
Continuously test and optimize your email campaigns to improve their effectiveness. This may involve experimenting with different segmentation strategies, email content, or timing to identify the best approach for your specific audience.