Creating an Effective Welcome Flow in Klaviyo
To provide you with a step-by-step guide in setting up a welcome flow using Klaviyo.
Prefer a shortcut? 16 free tools do parts of this for you.

Aim: To provide you with a step-by-step guide in setting up a welcome flow using Klaviyo.
Optimal Outcome: You’ll have automated welcome emails sent to new sign ups so you won’t miss any opportunity to engage with your potential customers.
What do you need to start: You need a new subscribers list (from sign up form, subscribe page etc.), Klaviyo account.
Why is this SOP Important: Setting up an automated welcome email flow makes a great first impression, increases engagement, builds trust, saves time, and improves retention.
When and Where to execute: Klaviyo
Who Should Be Doing This: Marketing staff, the person responsible for setting up automation
What is Welcome Flow?
A welcome email flow is a series of automated emails that are sent to a new subscriber or customer after they sign up or make a purchase, with the goal of welcoming then to your brand, introducing your products or services, and encouraging them to engage with your content or take a specific action. The flow typically includes a series of emails that are scheduled to be sent at specific intervals, with each email designed to provide more information and value to the recipient.
Execution
Resources/Tools & Set up
Create your List
-
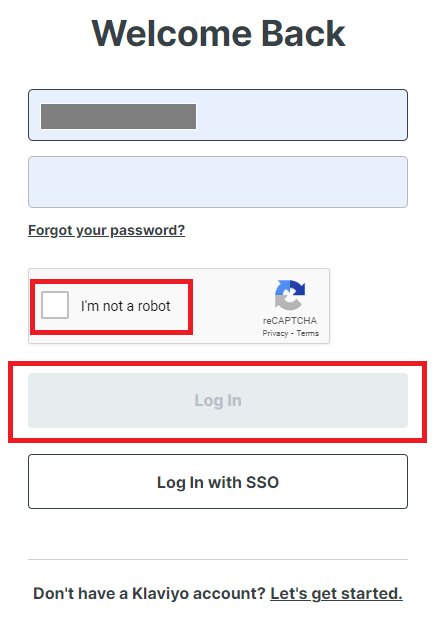
Login to your Klaviyo account.
-
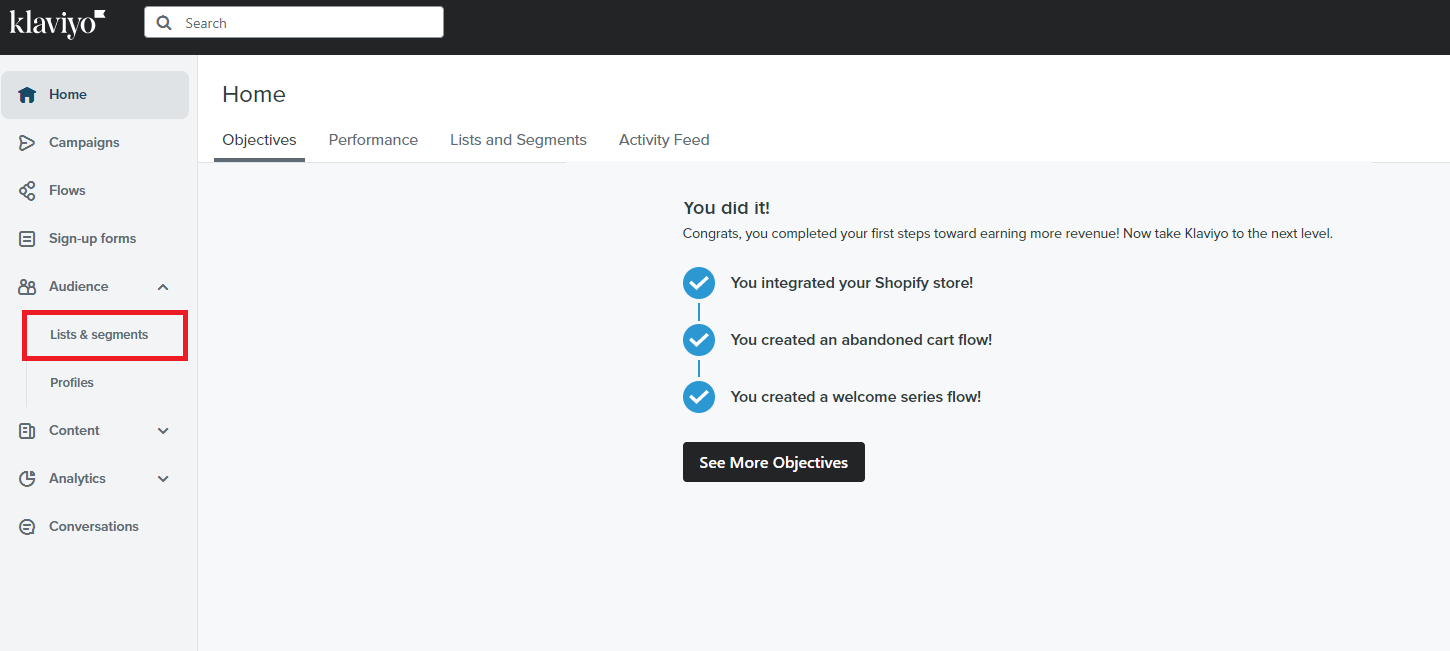
Navigate to the left menu, then click menu then click Lists & segments.
-
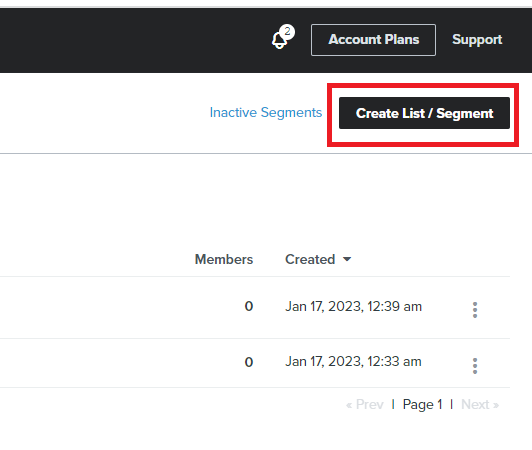
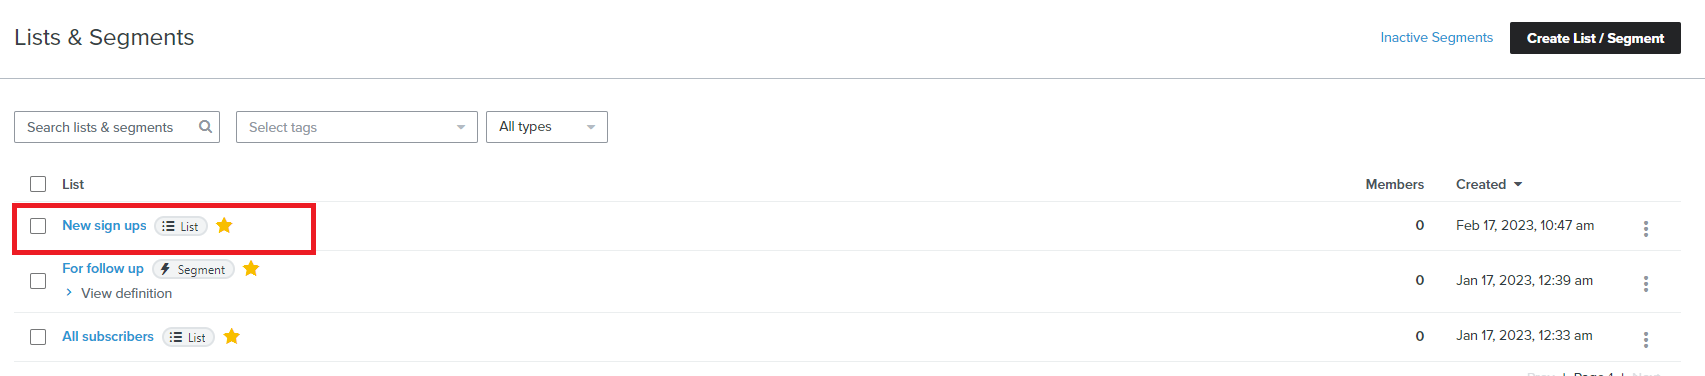
Click Create List / Segment.
-
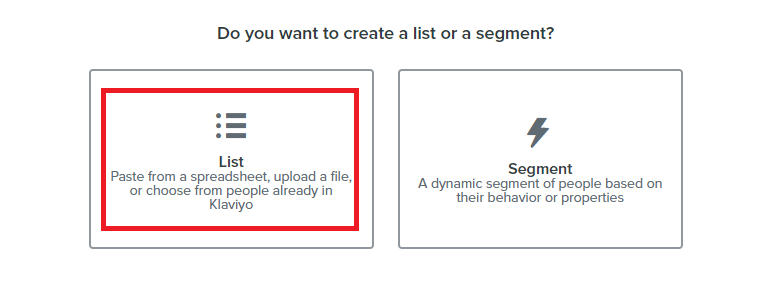
Select List from the options available.

-
Provide a name for your List, then click Create List.
-
Determine how you want to gather the contact list. If you already have an existing email list, you can click Upload Contacts. If you haven’t set it up yet, you can Create a Signup Form or Configure Subscription Page that you can add to your shop.
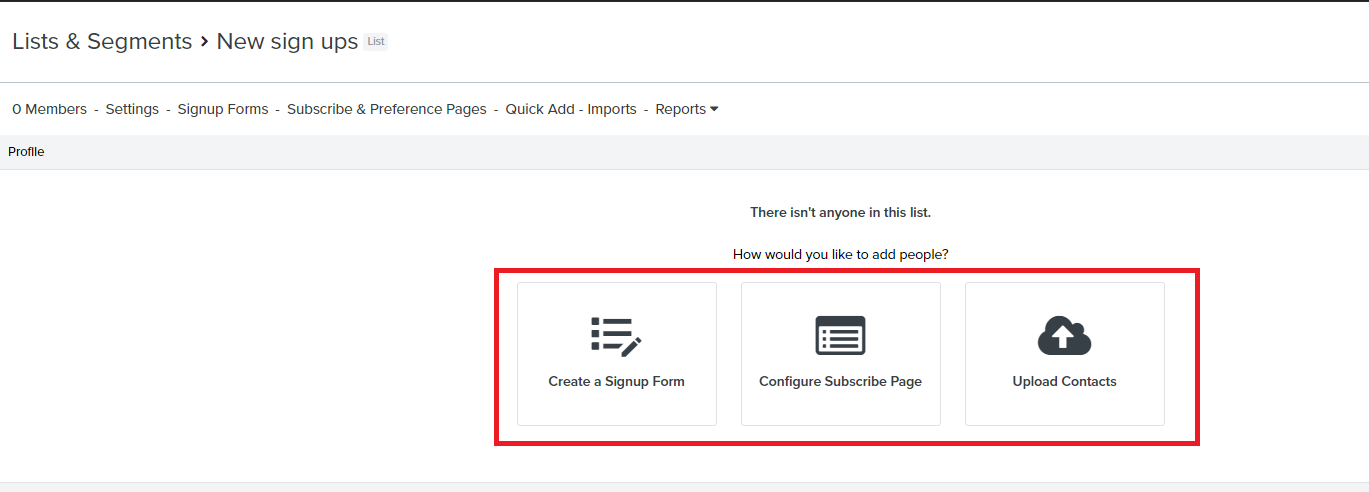
- If you choose to Create a Signup Form or Configure Subscribe Page, you can choose a layout from the existing templates or you can also click Build From Scratch.
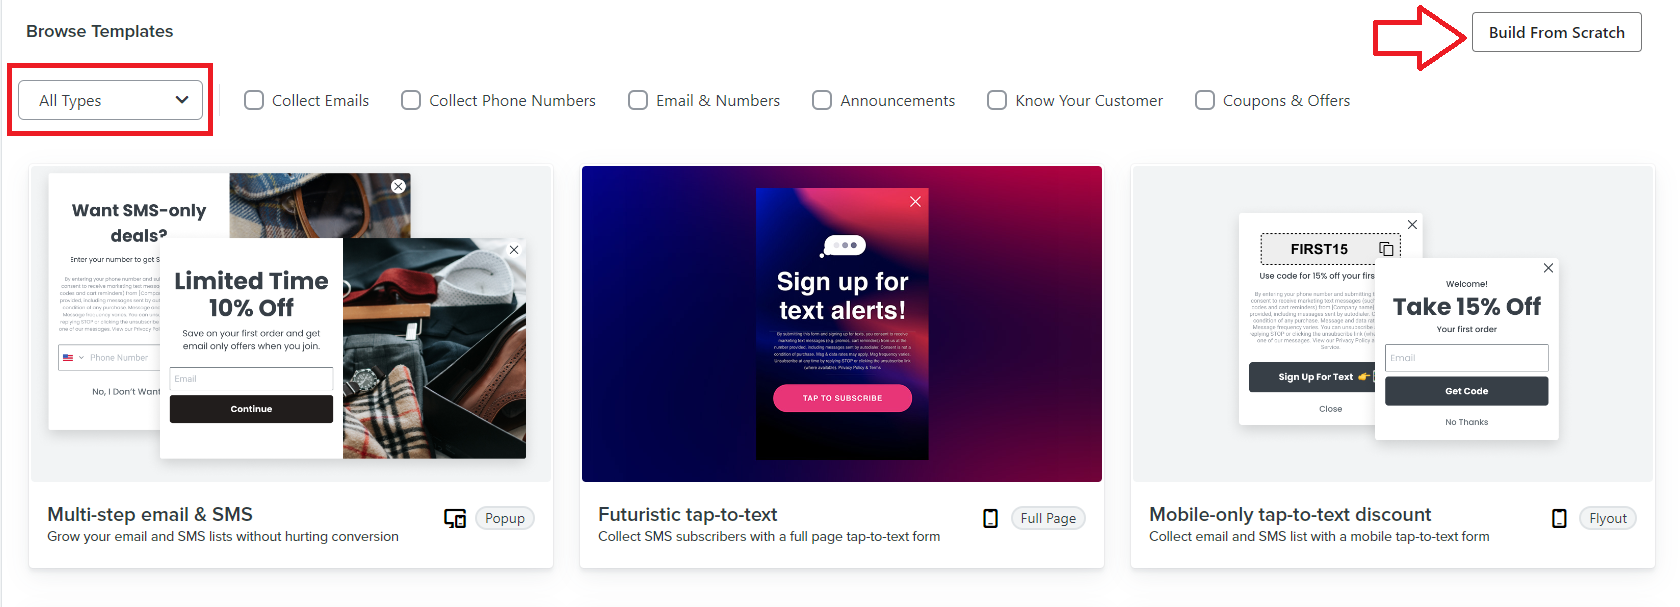
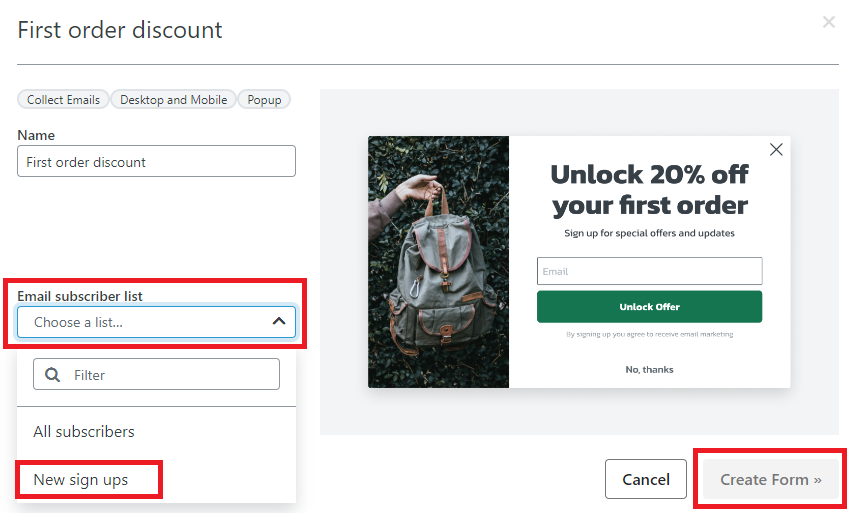
- Once you select a template, you can customize the settings, then click Create Form.
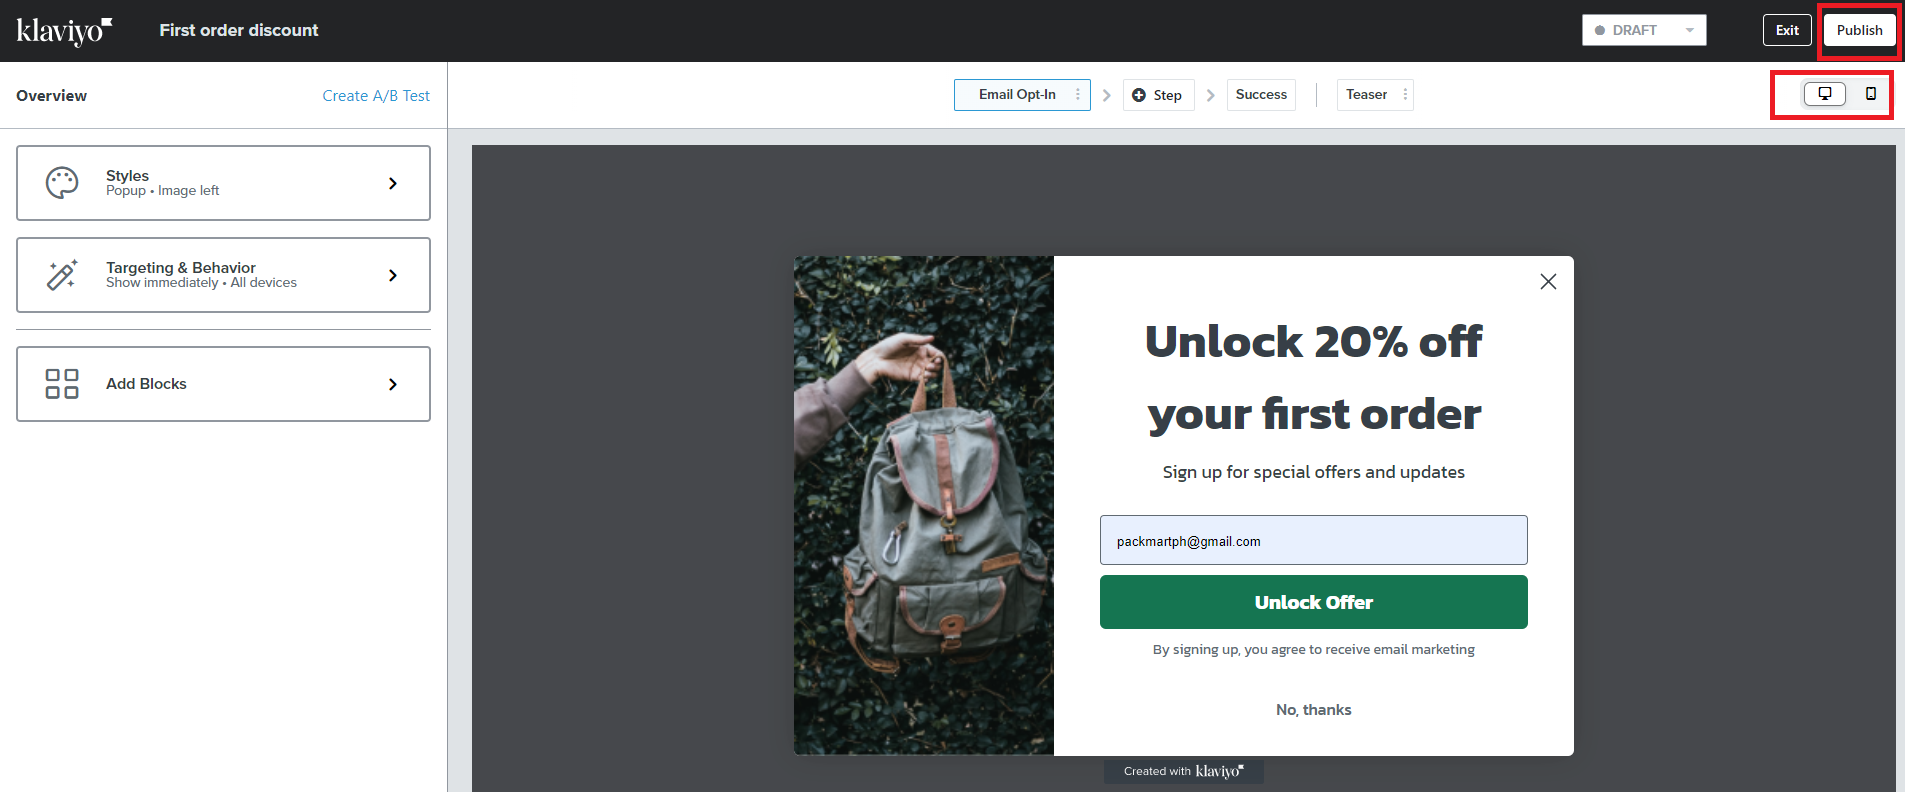
- You can also modify the ad creatives and test what it looks like in both desktop and mobile. Once you’re satisfied with your settings, click Publish.
- You will now see the List you created. The email addresses of people who signed up using your form will automatically be added to this list.
Turn off double opt-in on your list
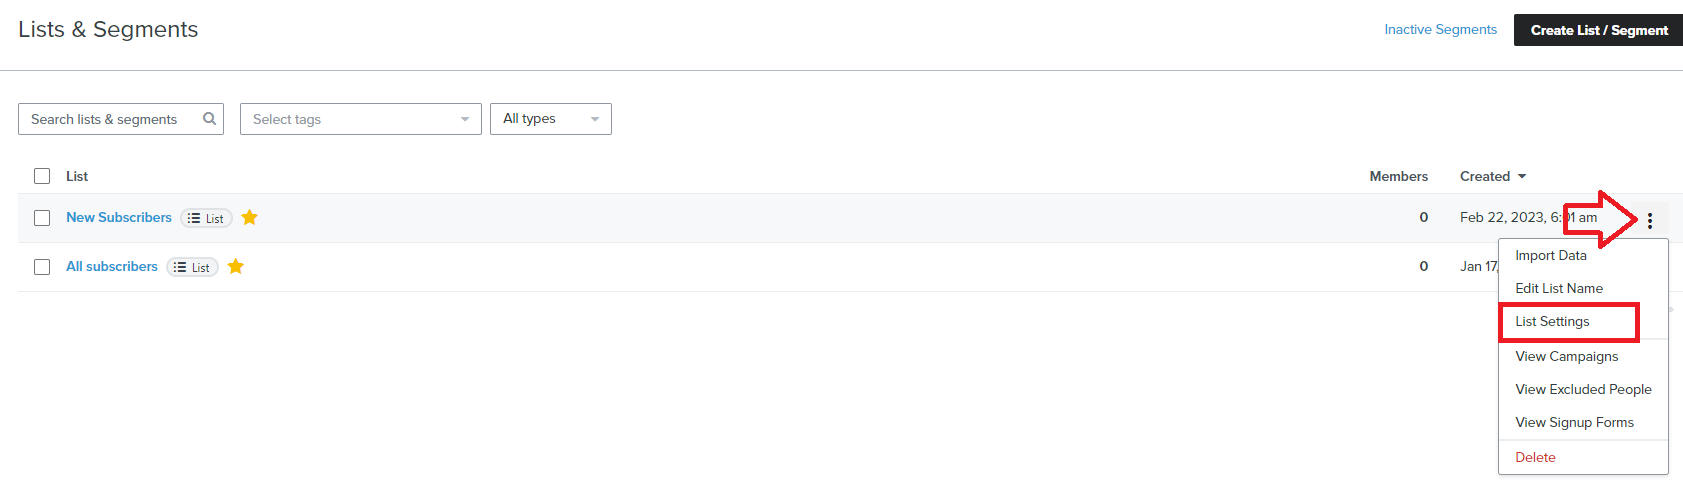
Click the 3 dots next to the list you created, then click List Settings.
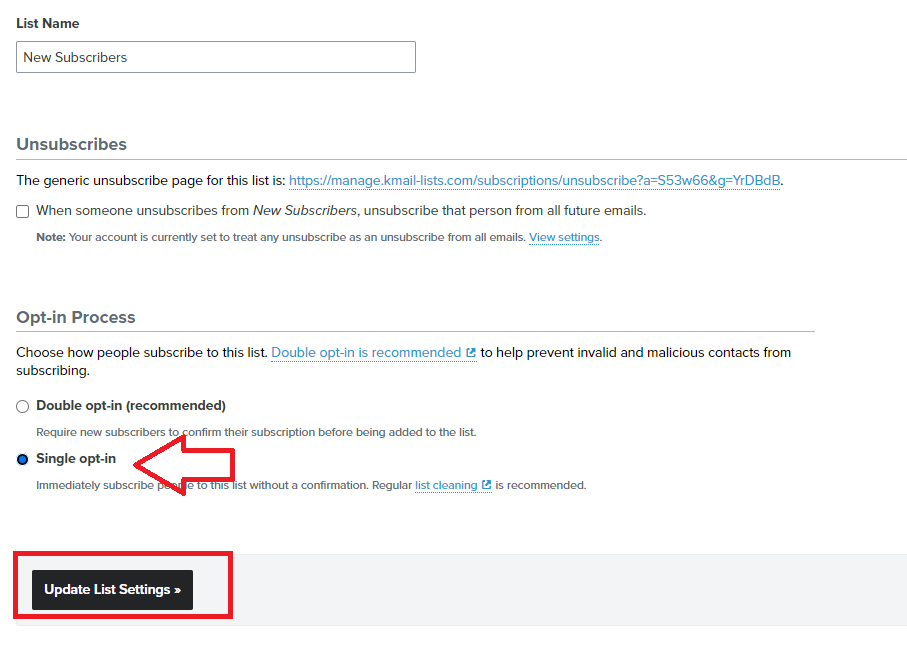
- In the Opt-in Process section, select Single opt-in, then click Update List Settings.
Prepare your welcome email strategy
Here’s an example of a WINNER welcome flow sequence:
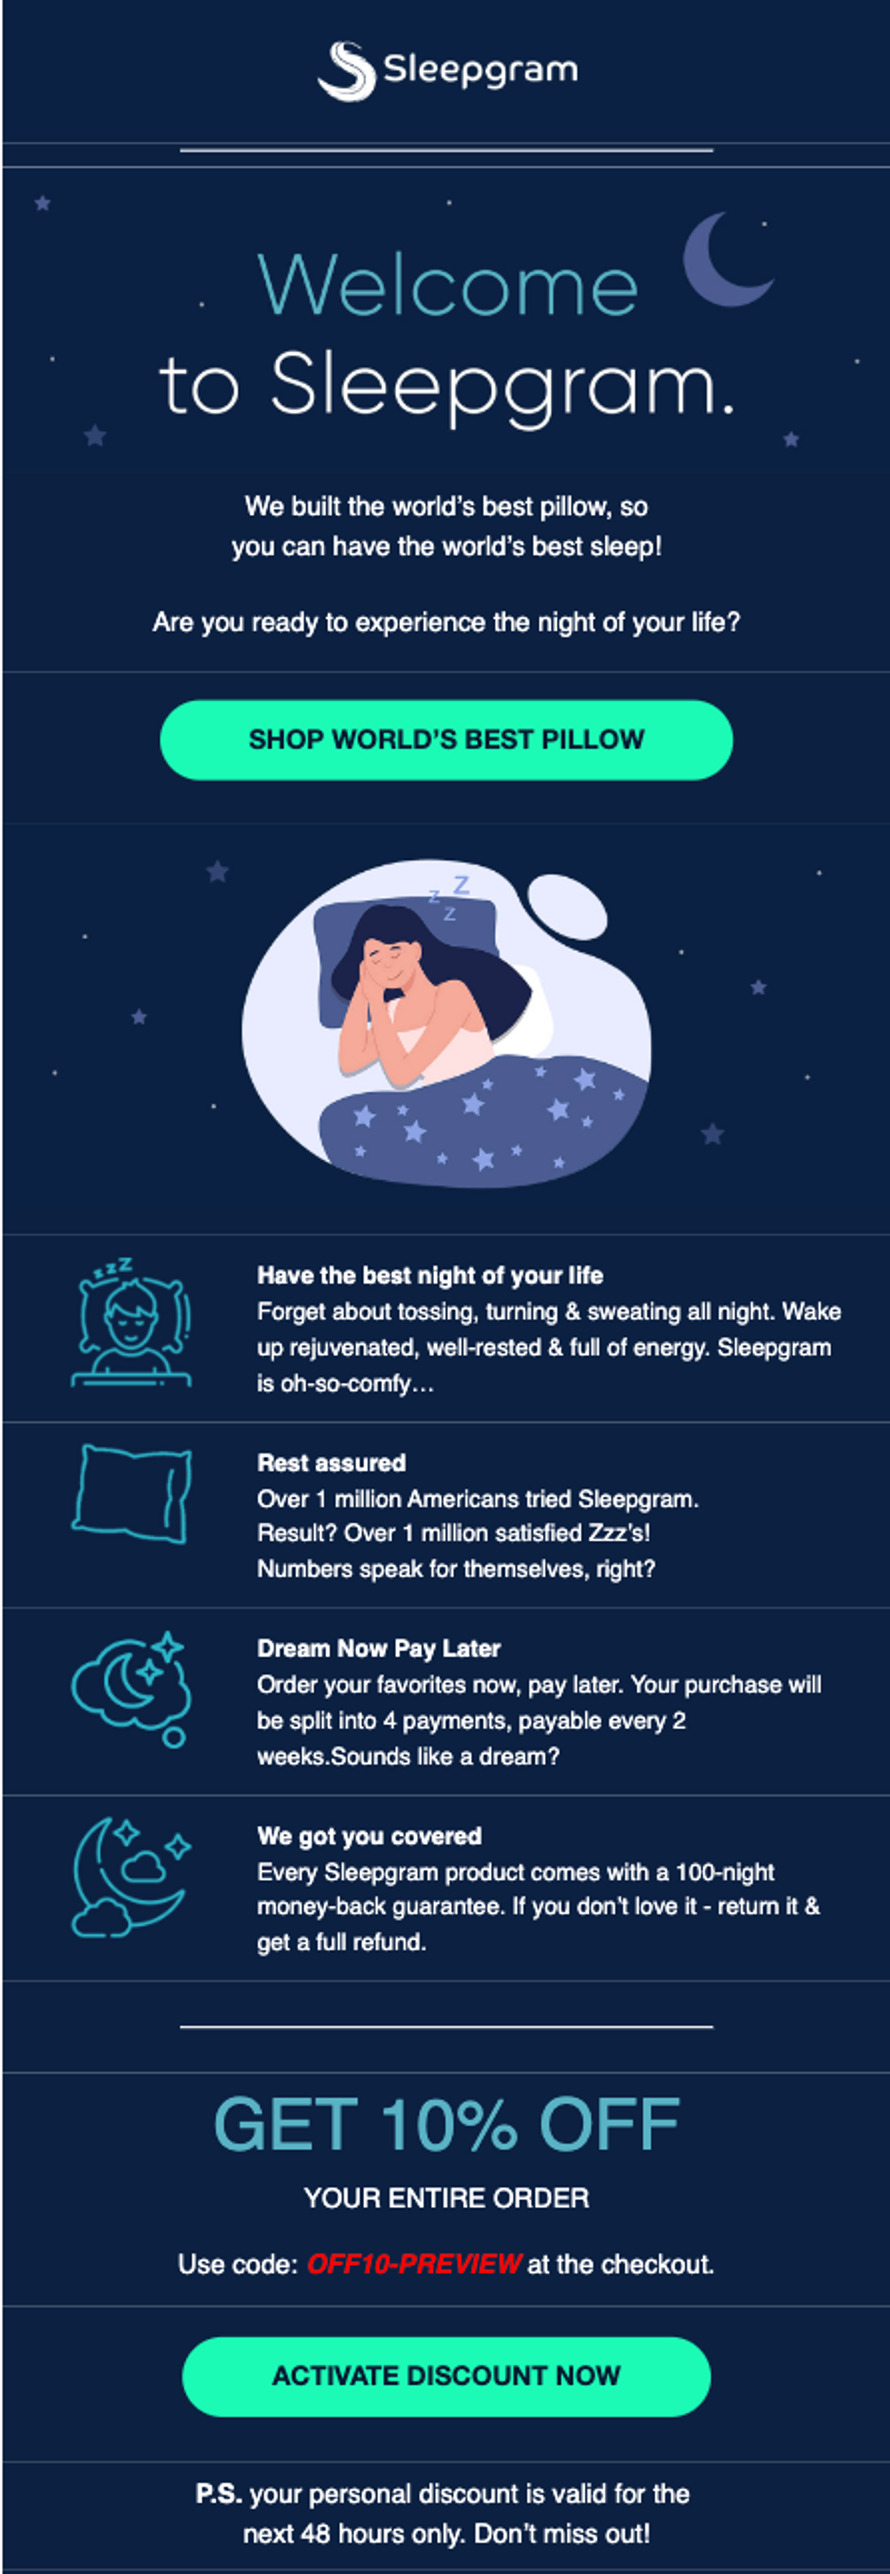
Email #1 - Welcome Discount + Brand story and Promise
Example:
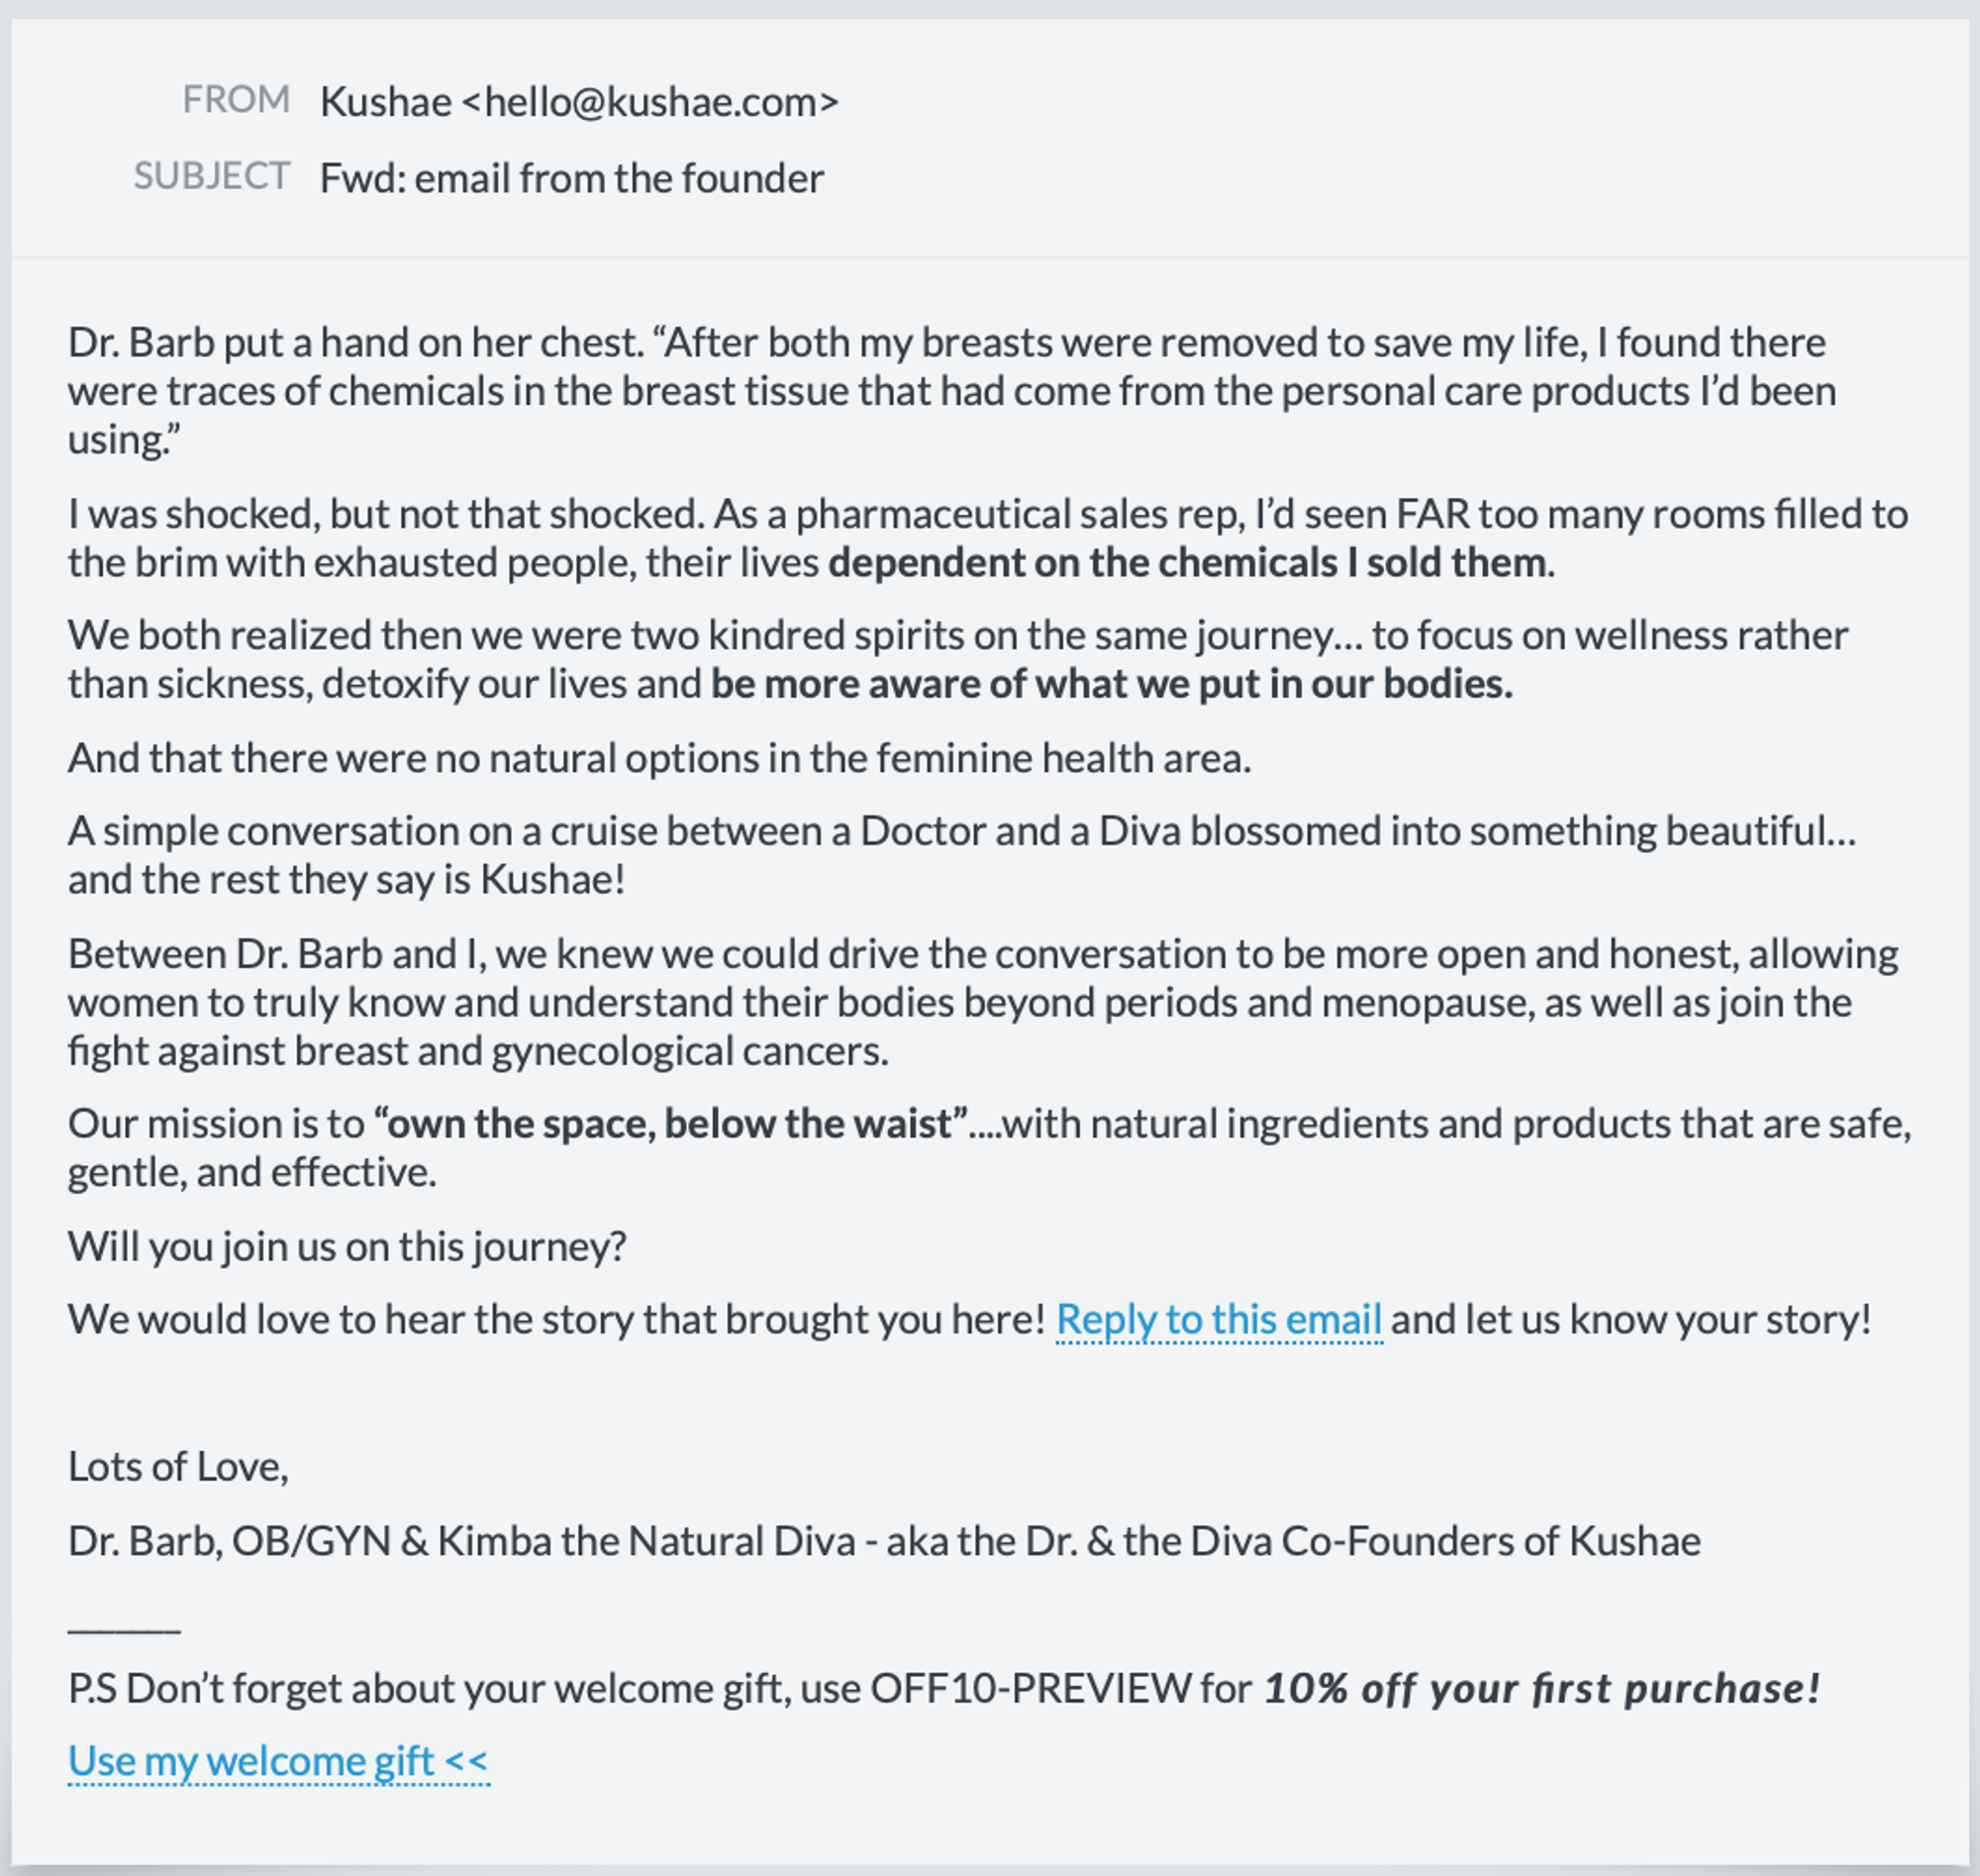
Email #2 - Plain text “welcome from the founder”. Personal story + discount follow up
Example:
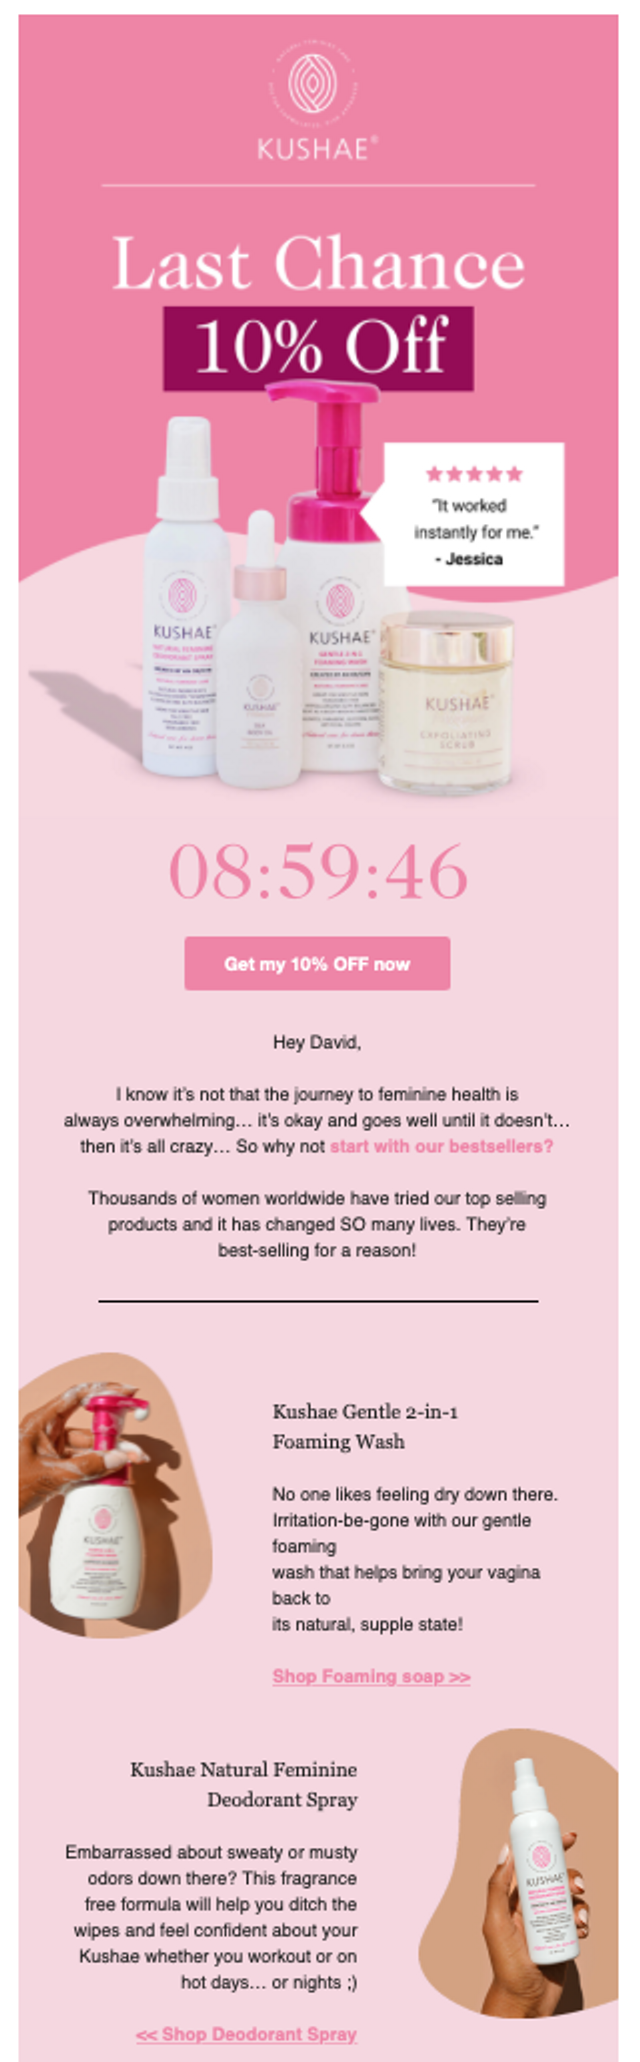
Email #3 - 10% off last chance + best sellers. (Timers, urgency, scarcity)
Example:
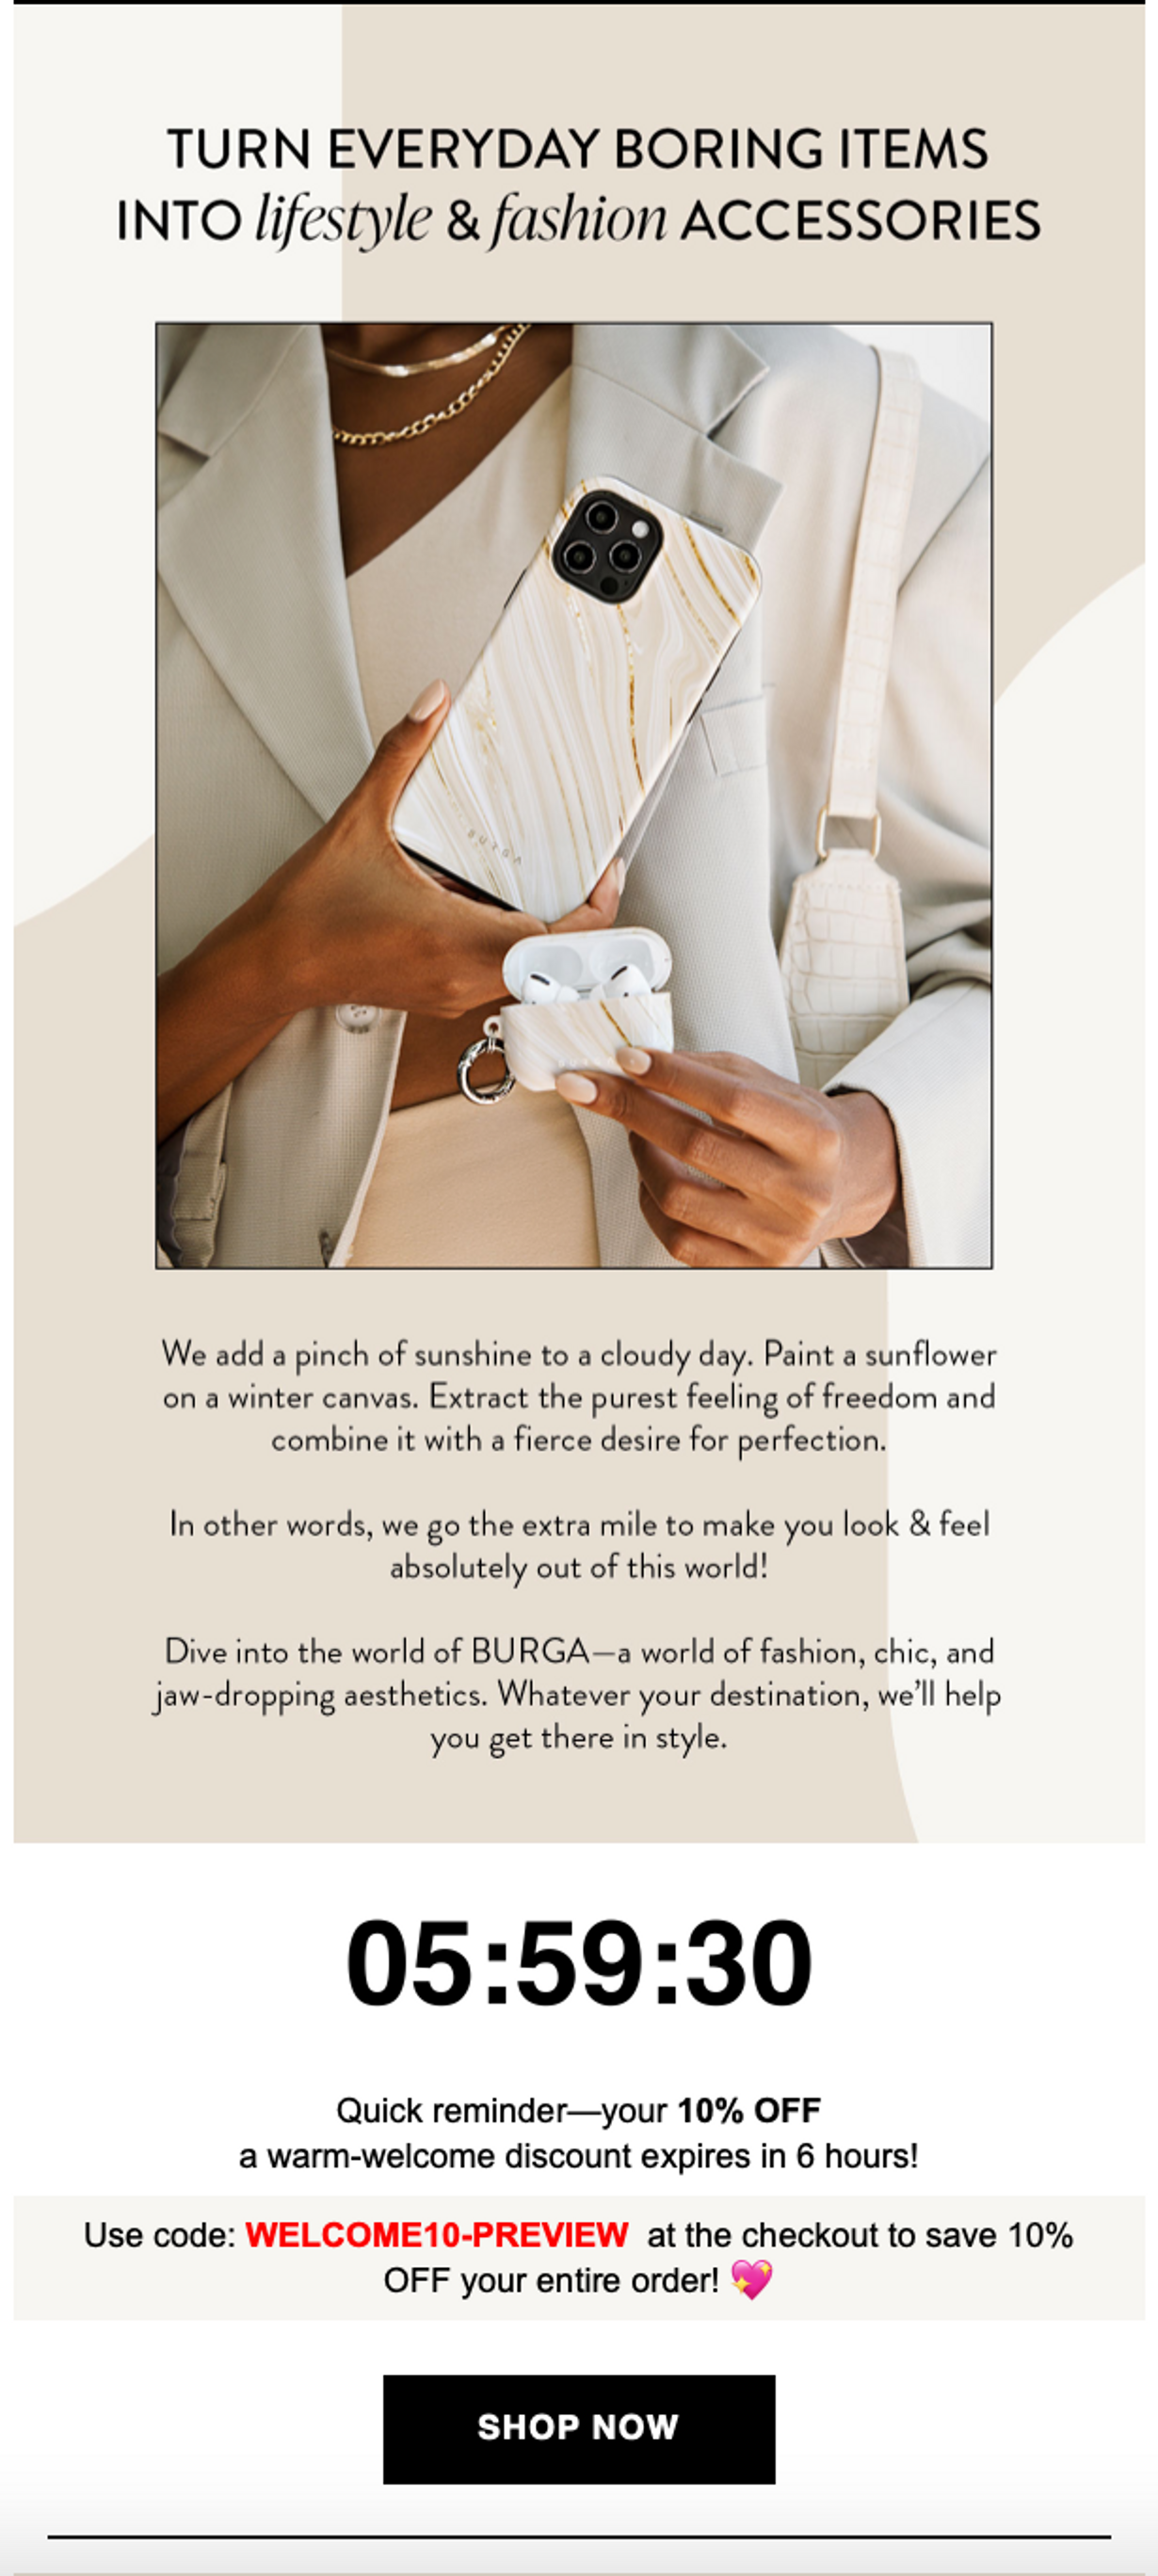
Email #4 - New discount (Free shipping, better offer) + Reviews (videos, gifs, people faces)
Example:
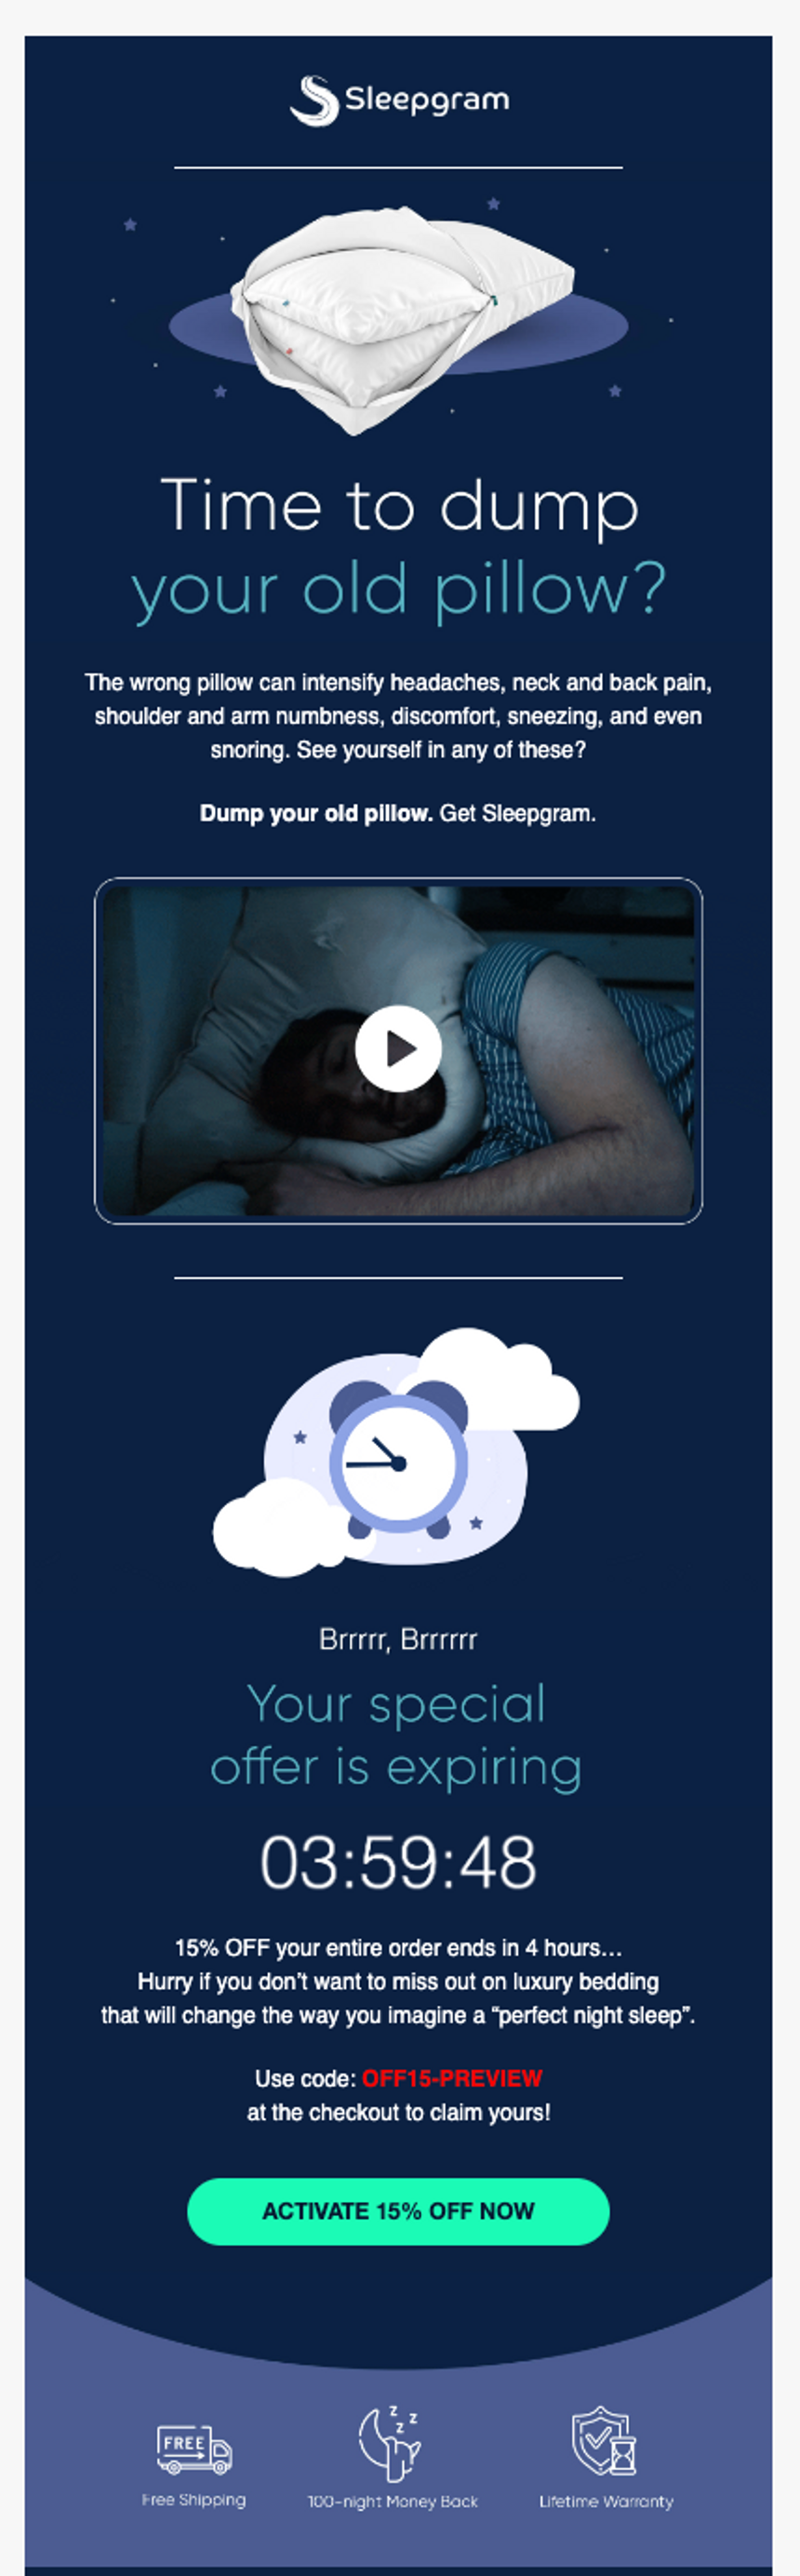
Email #5 - Discount last chance, another ‘never told’ founder story and brand benefits
Example:
Set up Welcome flow in Klaviyo
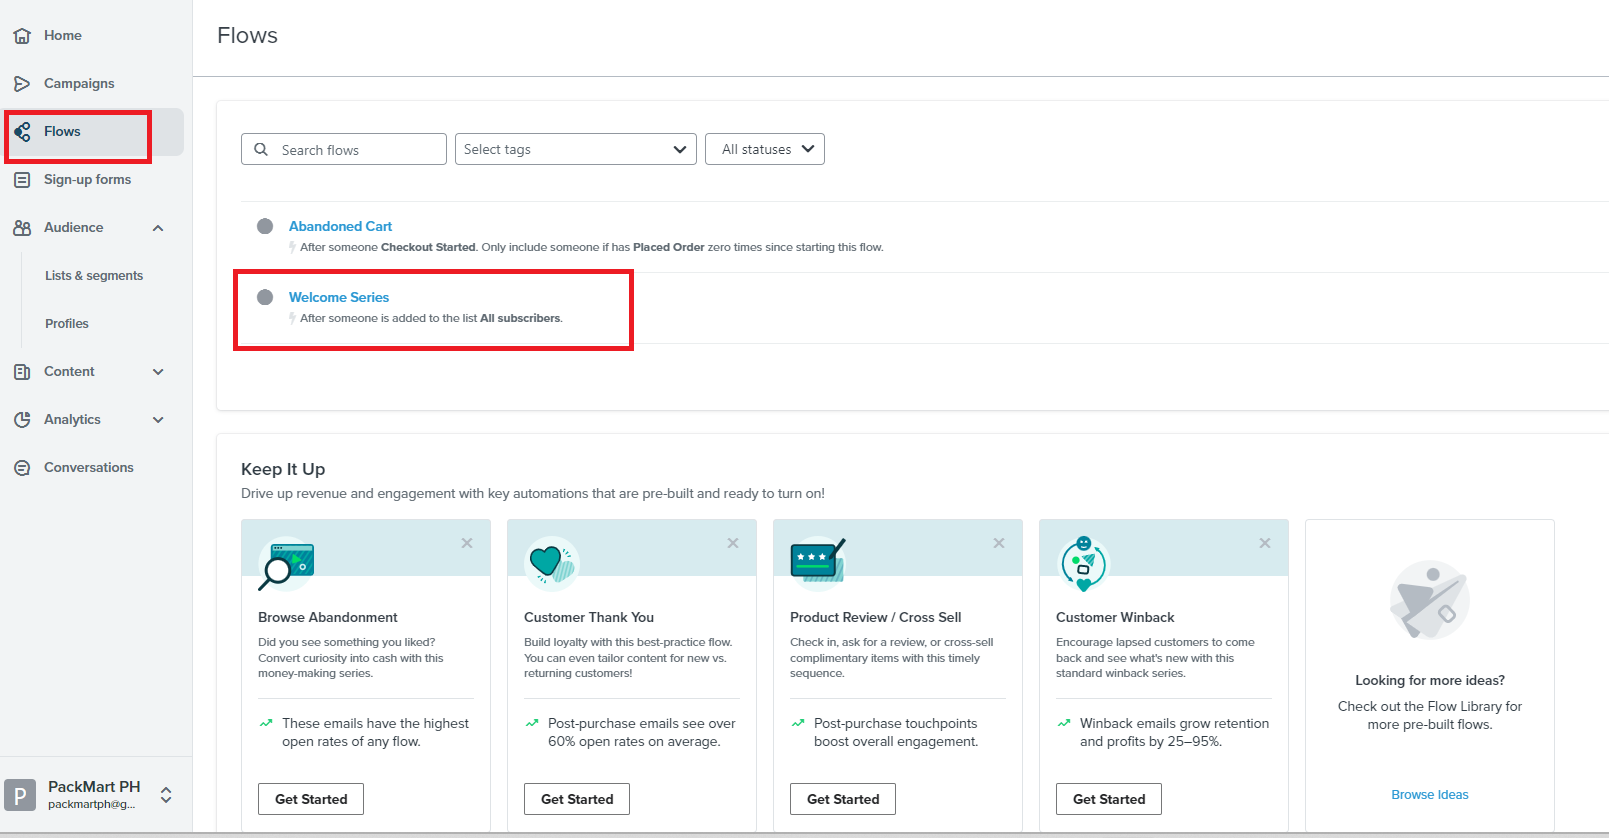
- Once you’ve set up your List, you’re now ready to set up your welcome flow. To do this, navigate to the left menu, click Flows then click Welcome Series.
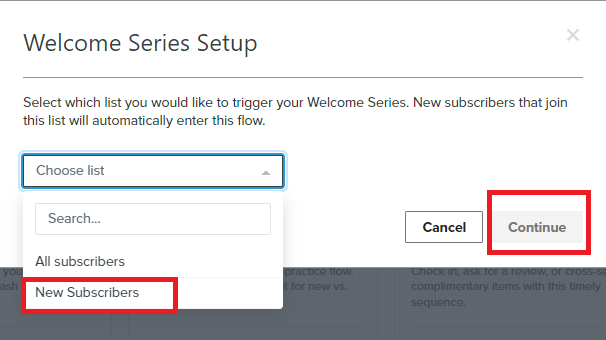
- From the pop-up dialog box, select the list that you created.
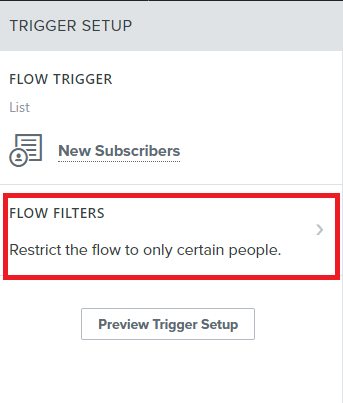
- Click the first card, then go to the left menu and configure the Flow Filters.
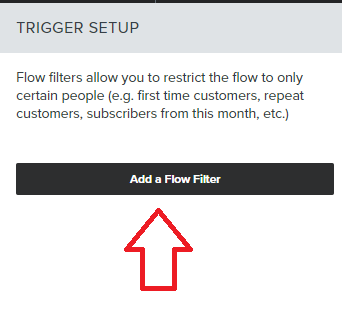
- Click Add a Flow Filter.
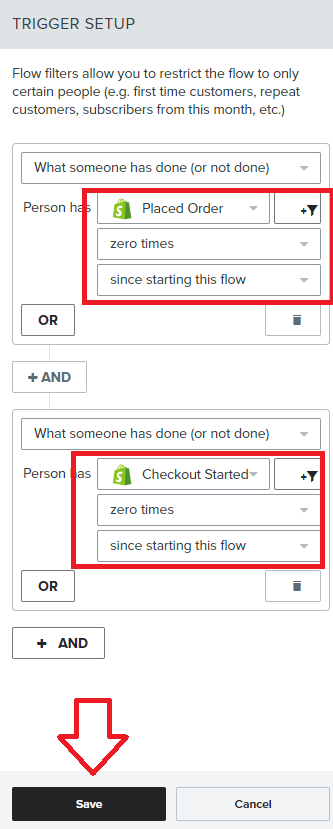
-
Set up the following triggers:
-
Trigger: What someone has done (or not done)
Configure: Placed Order →zero times→since starting this flow
- Trigger: What someone has done (or not done)
Configure: Checkout Started→zero times→since starting this flow
Scroll to the bottom of the column and click Save.
- Next, you can edit the contents of the email from each stage of the flow. Select the box of the segment you want to edit then click Edit. Make sure that you’ve prepared your email strategy beforehand.
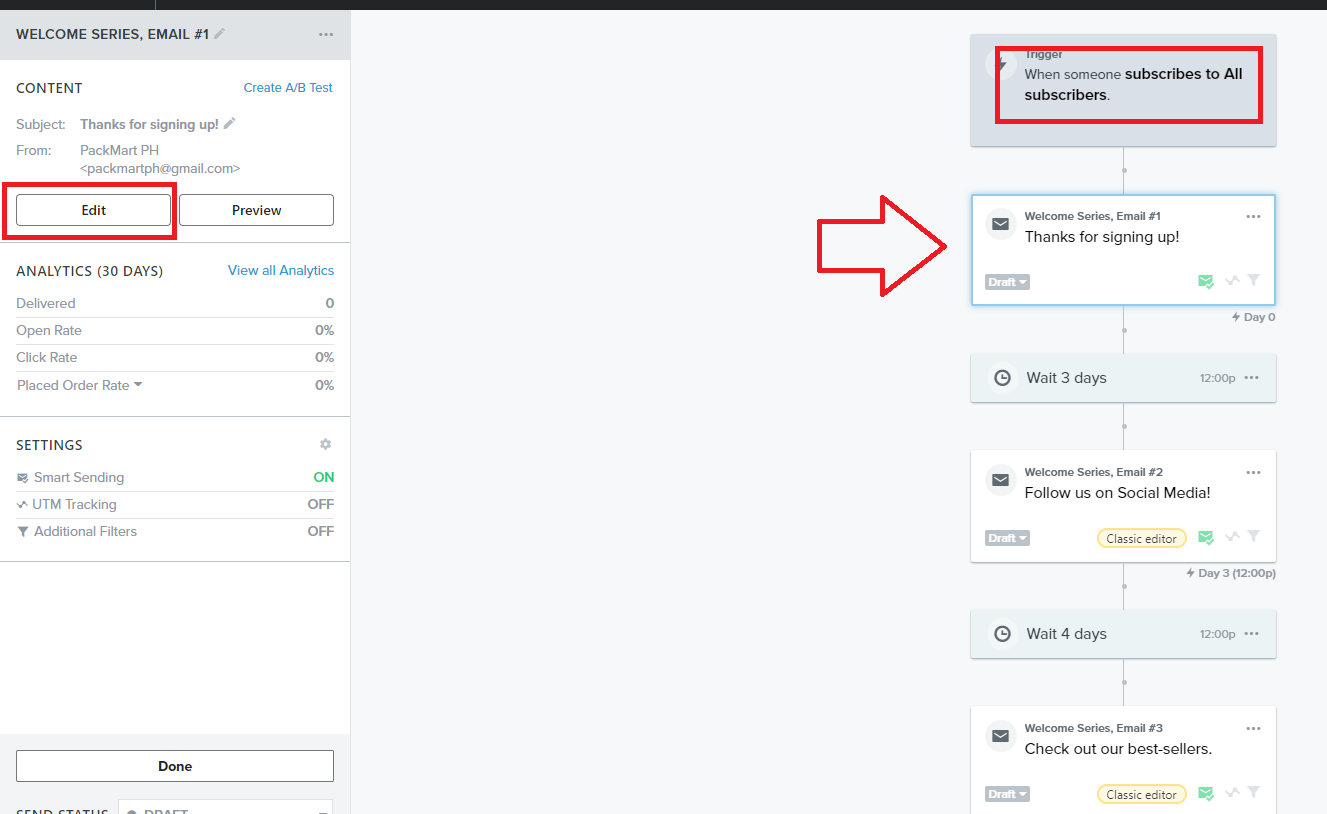
- Edit and improve the contents of the email that you will be sent to the customer. You can use the Subject Line Assistant to help you with crafting an eye-catching subject line. To edit the body of the email, click Edit Email.
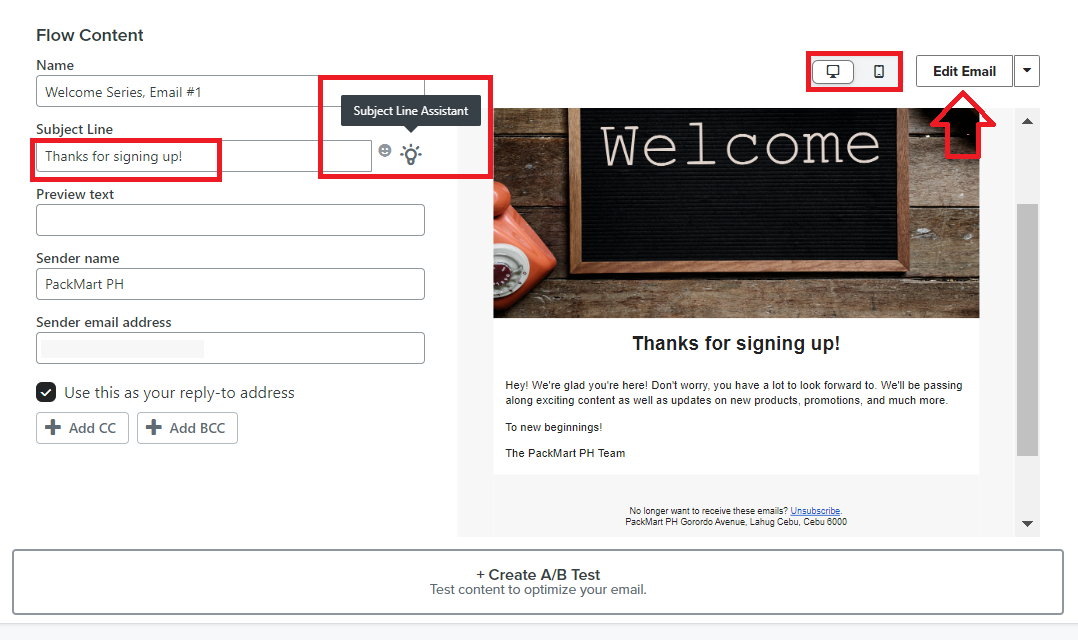
-
It’s a good practice to run A/B testing on the subject line for every email inside the flow. To do this, follow this detailed guide SOP 244: A Guide to A/B Testing Subject Lines.
-
You have several options to edit the email contents.
Text Only - If you just want to send a simple text-only email.
HTML - if you have complete control over the email design and configuration, you can use code to set up your email.
Drag and Drop - you can take advantage of email templates with pre-set design
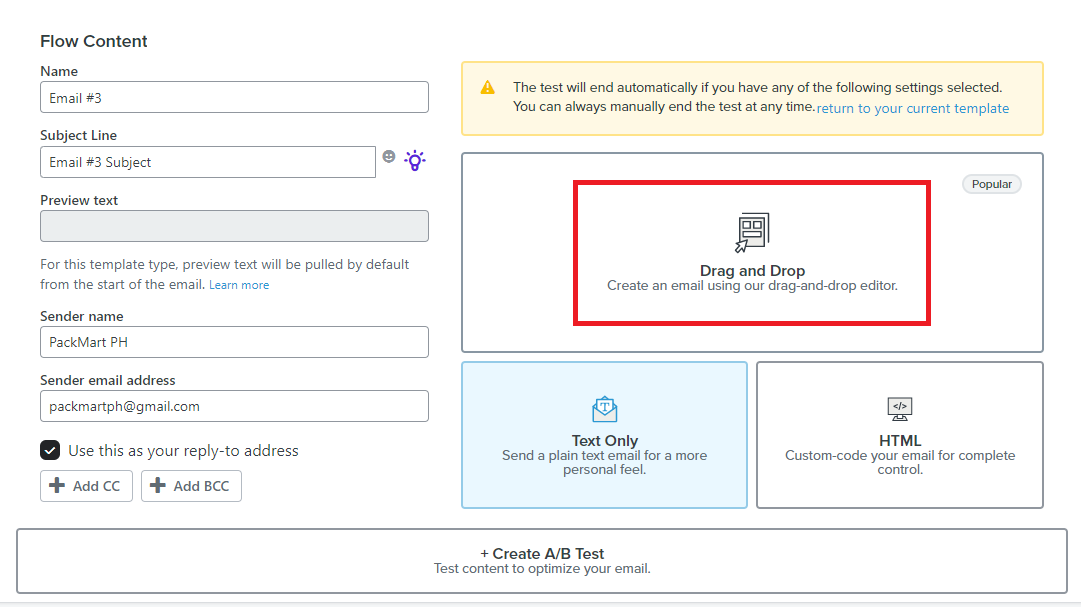
- You can choose from the pre-designed email templates.
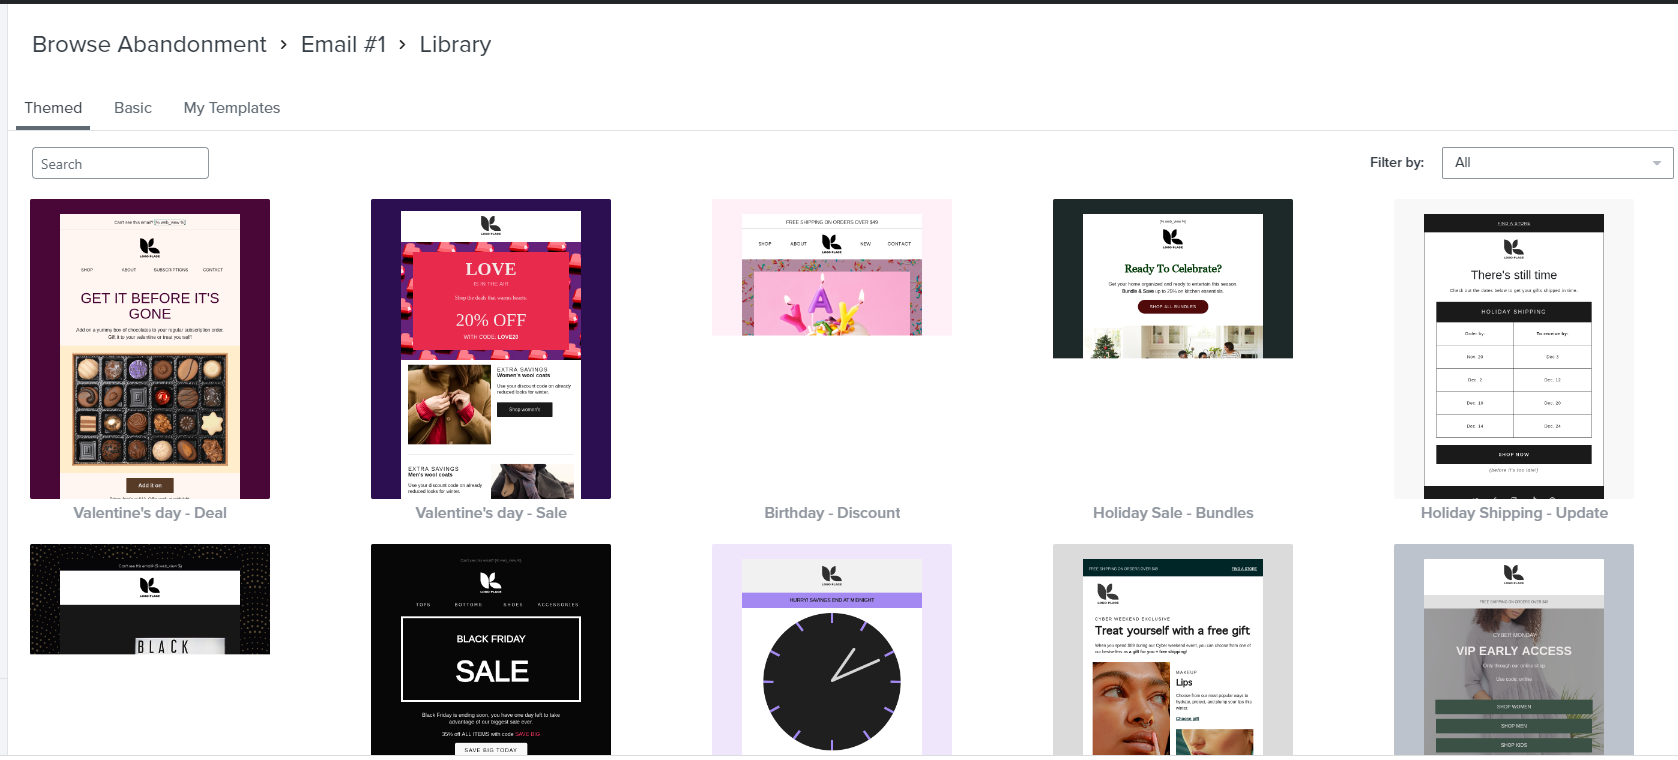
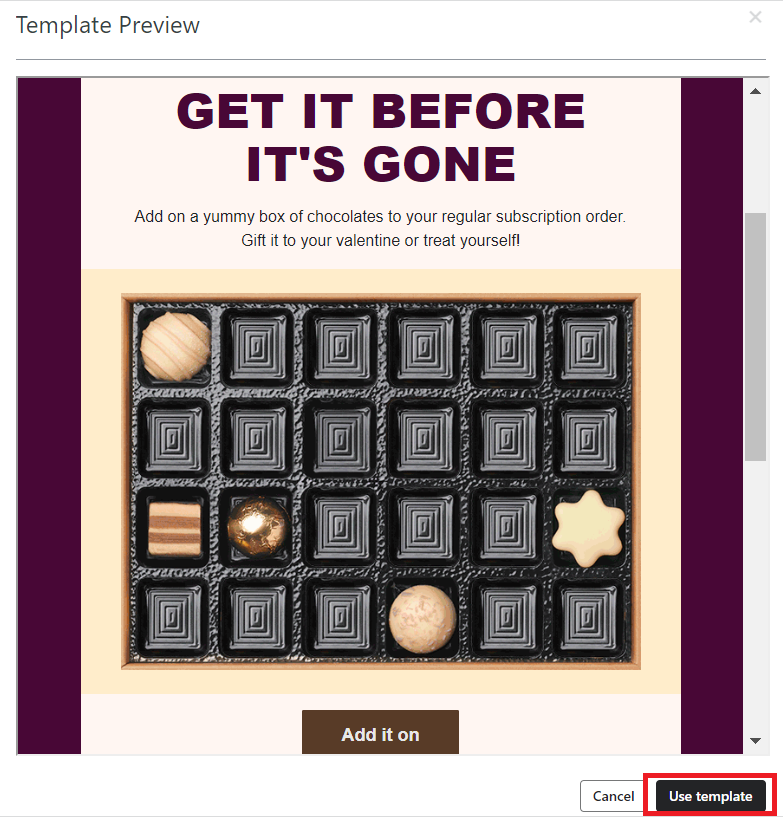
- Preview the template and click Use template.
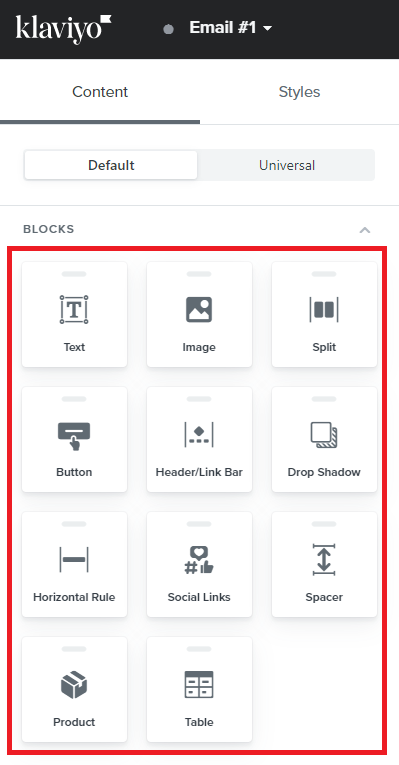
-
In the left menu, you’ll see options for customizing the elements of your email contents.
-
You can add your dynamic coupon code to your email content. Follow this guide to learn how to create and embed your code SOP 251: Setting Up Dynamic Discount Codes.
-
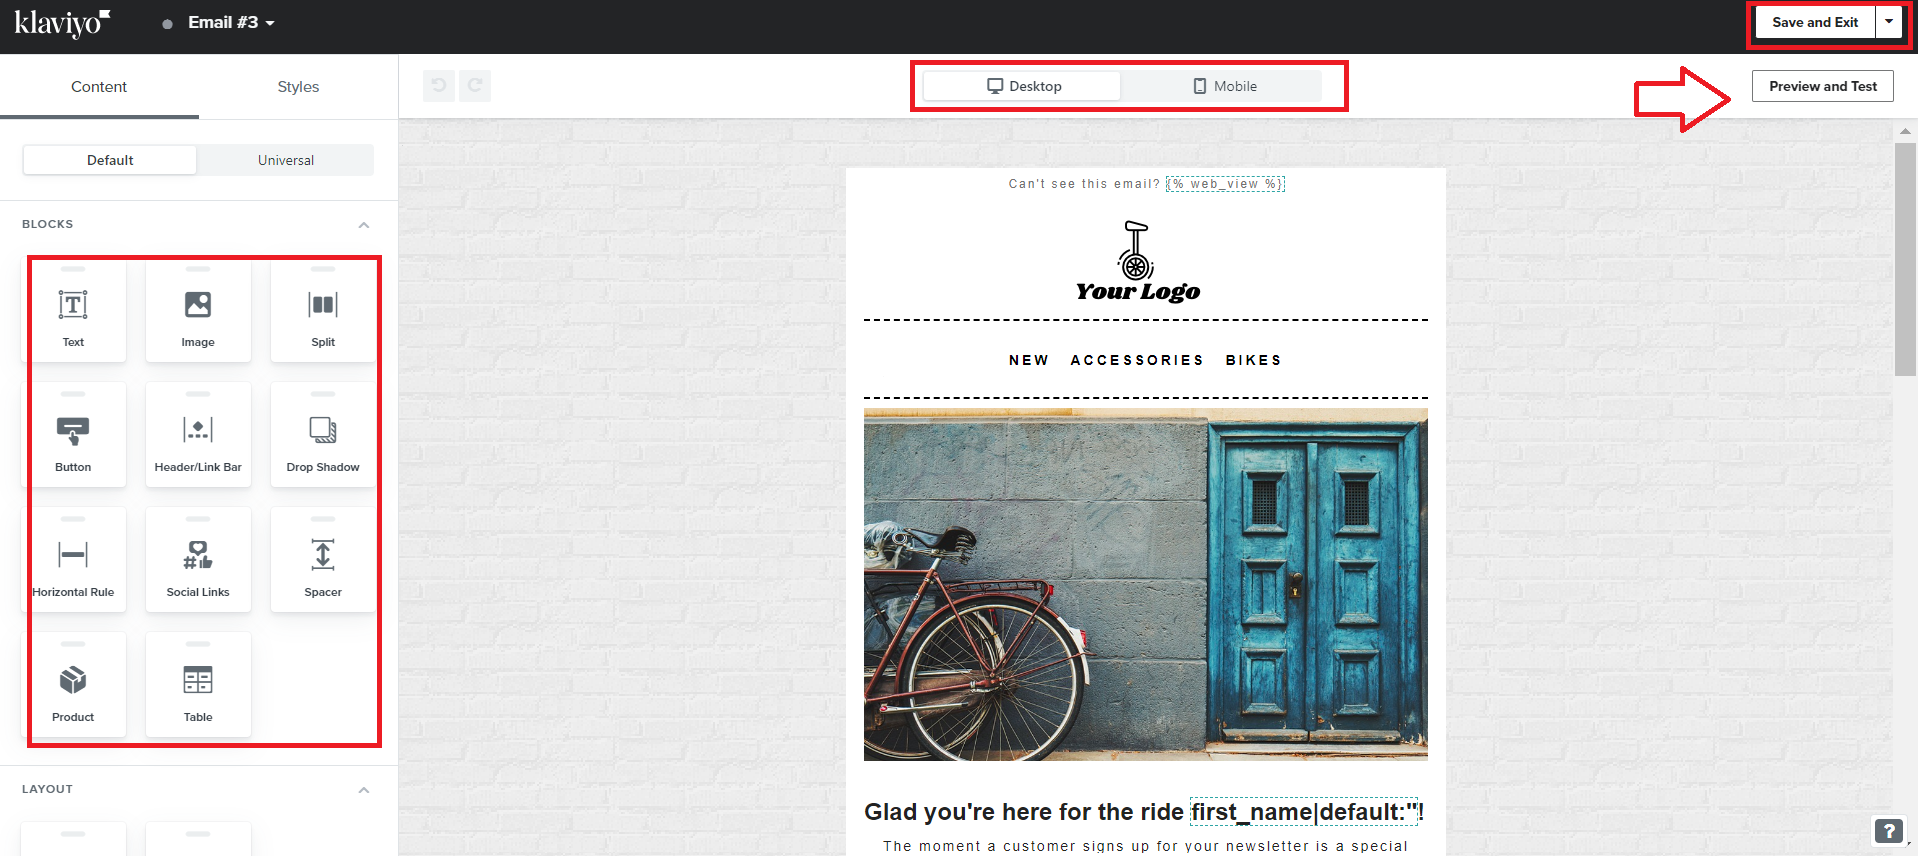
If you Continue updating your email template and make sure to check how the layout would look like in both Desktop and Mobile. Once you’re done, click Save and Exit.
- Run an A/B testing for your sending times to determine when is the best time to send your emails. To do this, follow this detailed guide, SOP 243: A Guide to A/B Testing Email Schedules.
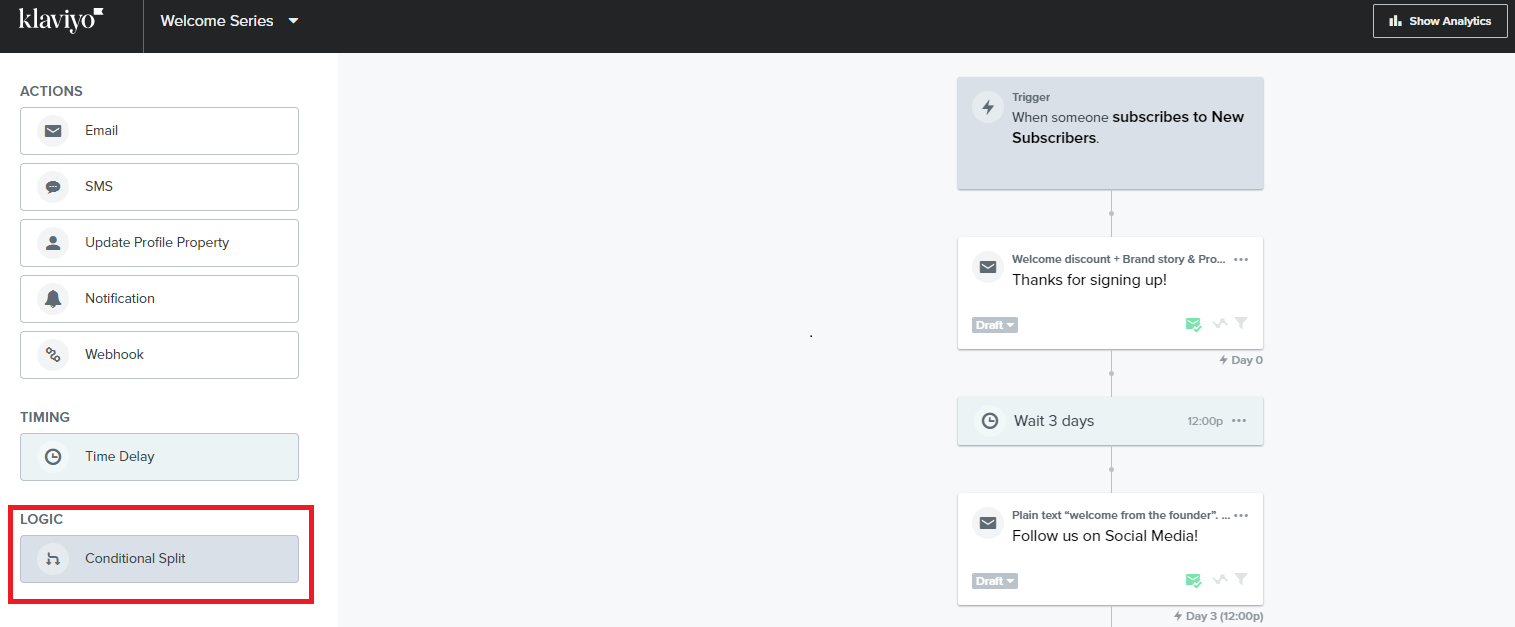
- Once you’re good with your settings and timing, you can now click Review and Turn On to start your welcome flow.

Conclusion
That’s it! Now that you have set up your welcome flow, emails will now be automatically sent to people who signed up for your business.
Execution Best Practices:
-
Set up correct links on your email content that land on the product page, best-seller page, or collection page (not the home page).
-
Run all tests for a month or until you can gather sufficient data to analyze your results.
-
Use subject lines that get your emails opened (Example: Fwd: message from the founder, [see more inside], Welcome, [action required] etc…)