Setting Up a Google Brand Awareness Campaign
To launch a Google brand awareness campaign for your website or online shop.
Prefer a shortcut? 16 free tools do parts of this for you.
Aim: To launch a Google brand awareness campaign for your website or online shop.
Optimal Outcome: To submit a brand awareness campaign for Google to review.
What do you need to start: An active Google Ads account and the necessary graphics that you want your ads to display.
Why is this SOP Important: Launching a Google brand awareness campaign can do wonders to increase your brand awareness and online visibility. Many also consider this as the first step of their marketing funnel一the main method that allows them to expand their reach and acquire new online visitors.
When and Where to execute: This is usually done in the early stages of marketing a brand. However, it is also recommended when you’re launching a rebranding campaign. Setting up a Google brand awareness campaign is performed within Google Ads manager.
Who Should Be Doing This: The marketing or advertising manager
What is a Brand Awareness Campaign?
Launching a brand awareness campaign is a marketing strategy that involves advertising your brand to raise the online recognition of your website or online shop. The goal is to expand your reach which in turn can be converted into sales or profits depending on your other objectives.
For the purposes of this SOP, we seek to achieve this using Google Ads manager.
Execution
Resources/Tools & Set up
- An active Google Ads Account
Setting up a Google Brand Awareness Campaign
-
Log into your Google Ads account.
-
Then, click on + New campaign.
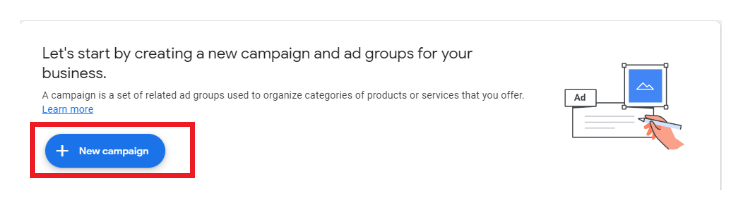
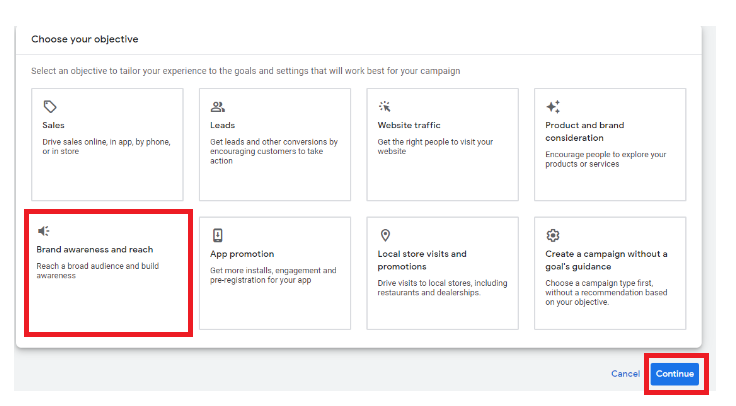
- A new window will open. Click on Brand Awareness and Reach then click on Continue.
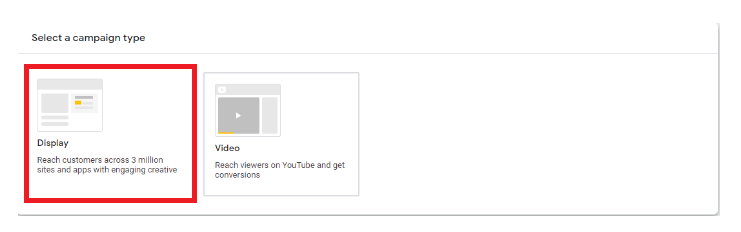
- The next section will appear. Click on Display.
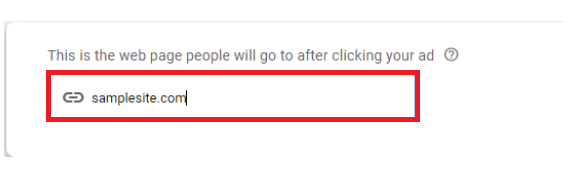
- A new section will appear. Enter the URL that you want to promote for your campaign.
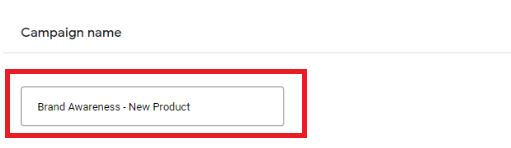
- Head to the Campaign name section and enter the name you want to use. Then, click on Continue.
- Remember: Standardize the naming process and stick with a generic naming convention to make your campaigns more organized. For example, you can use Brand Awareness - (Product Name).
For the purposes of this SOP, we are going to use Brand Awareness - New Product.
-
The Campaign settings window will appear. We will now go through each of the sections:
-
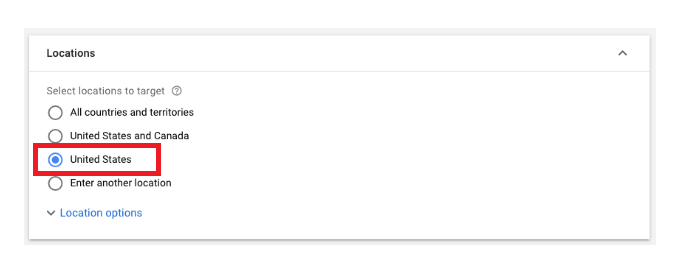
Locations: Pick the location where you want to show your ads.
Remember: If your shipping services only reach specific countries, you may want to select or at least prioritize those countries first. For the purposes of this SOP, we are going to select United States.
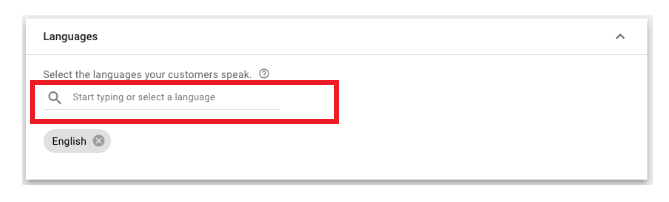
- Languages: This is optional. Click only if you want to display your ads to potential customers who can speak the selected language. Then click on Next.
-
The Budget and bidding window will appear. We will now go through each of its sections.
-
Budget: Input the daily max amount you wish to allocate to this campaign.For the purposes of this SOP, we are going to indicate $30.
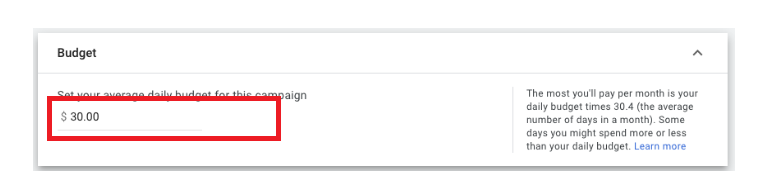
i. Reminder: Note that there may be slight variations on daily expenditures. It can also be possible that some days might have you spend more than your allocated budget.
ii. Reminder 2: Set your daily budget based on how many users are on the remarketing list. The list size should be directly proportional to your budget.
iii. Reminder 3: If you haven’t set your mind on a specific budget, you can set it at around $20 to $50 per day and edit it later.
- Bidding: Under What do you want to focus on? Select Viewable impressions. Make sure you’ve set a viewable CPM bid, which is the amount you can pay for every 1000 impressions for your advertisement.
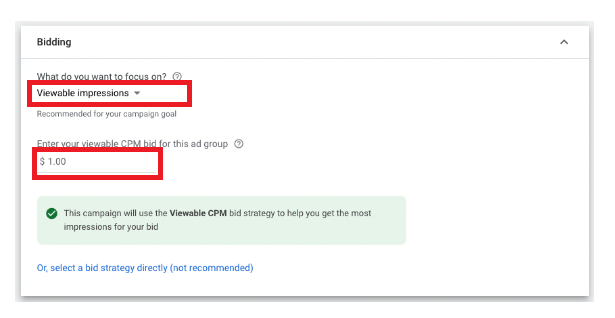
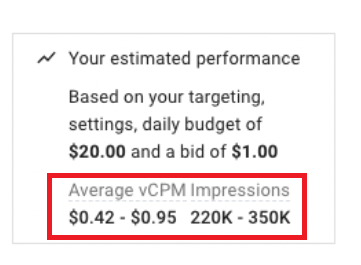
You will see the projected ad impressions on the right side. These projections will depend on your bid and budget. Click on Next.
- The Audience Segments window will appear. This is optional. Select only if you’ve already discerned your target audience’s interest and demographic.
Afterward, select Browse and pick your target audience’s demographic and interest.
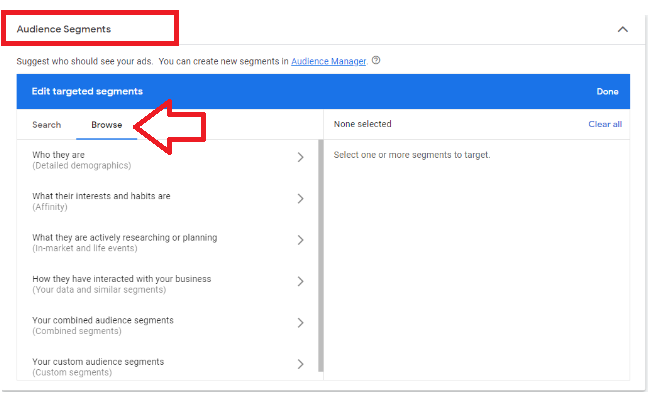
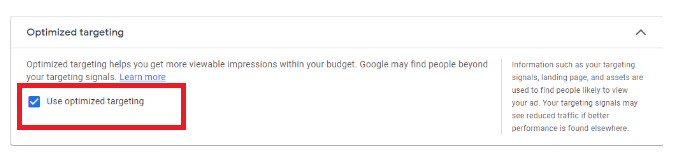
- You also have the chance to use optimized targeting. You may do so by clicking on its checkbox. Click on Next.
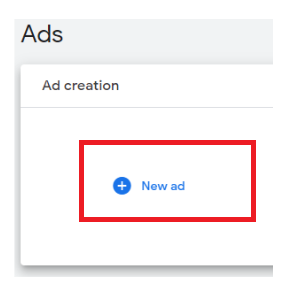
- The Ads window will appear, then select New ad under Ad creation.
-
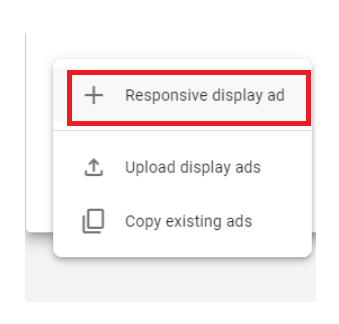
Select + Responsive display ad.
-
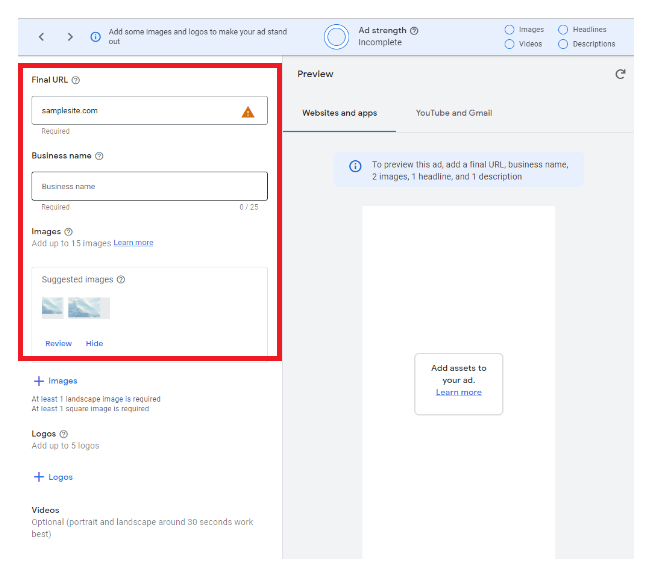
Complete the required fields to make your ad. A preview of your ad will be shown on the right panel.
-
Final URL - Make sure that you enter the correct URL and that it won’t lead to a dead link.
-
Business Name - Enter your business name.
-
Images - Add at least 2 images but you may add up to 15.
-
Logos - You may add at least 5 logos.
-
Videos - You may also add a 30-second video.
-
After you’re finished, click on Create Ad.
-
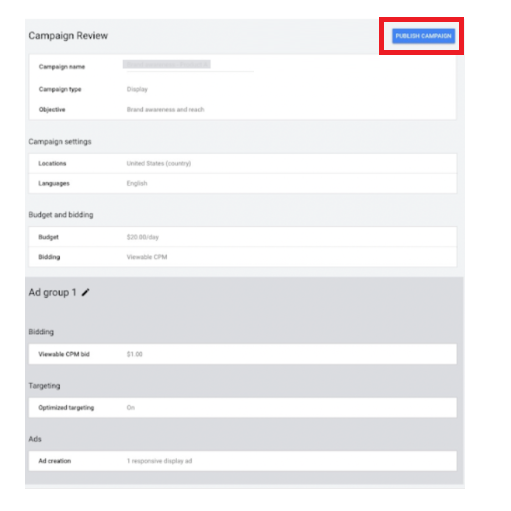
Review the details of your Campaign. Once done, click on Publish Campaign.
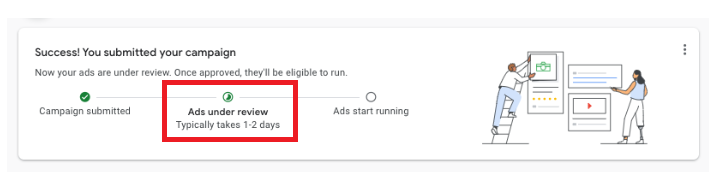
- A notification will appear that you have successfully submitted your campaign for approval. According to Google, it usually takes them a couple of days to approve ad campaigns before they start running.
Conclusion
You’re done! Launching an ad campaign via Google Ads is an effective method to build brand awareness, expand your reach, and increase conversion and sales. Fortunately, it’s very easy to do.
-
Log into your Google Ads account and create a new campaign.
-
Choose Brand awareness and reach as your objective.
-
Follow the prompts and enter the required information as you go. These include naming your campaign, setting the location and language, setting your budget, and audience.
-
Once done, you may now start creating your ad.Input all the necessary information and visuals that you want your ad to show.
-
Click on Publish Campaign to submit your ads for Google to review.