Understanding Acquisition Channels in Google Analytics for Better Insight
To be able to analyze your website or online shop’s acquisition channel reports in Google Analytics 4.
Prefer a shortcut? 16 free tools do parts of this for you.

Aim: To be able to analyze your website or online shop’s acquisition channel reports in Google Analytics 4.
Optimal Outcome: You will be able to accurately determine where your online visitors are coming from. For instance, are your online visitors coming from search results, as referrals, or from social media?
What do you need to start: To follow this SOP, you will need to have a Google Analytics 4 account.
Why is this SOP Important: Looking into your Google Analytics Acquisition Reports will help you determine where your online visitors are coming from and uncover data that you’ll find beneficial in your marketing and sales strategies.
Where to execute: You will need to set up a Google Analytics 4 account before you can access your acquisition channel reports.
Who Should Be Doing This: The person responsible for managing the site’s analytics, the marketing manager, or the SEO manager
What Are Google Analytics Acquisition Reports?
In a nutshell, Google Analytics Acquisition Reports seek to inform you where your online visitors are coming from.
Are they coming in as organic traffic, referrals, social media, or from other traffic sources? This will then help you determine what your most successful traffic sources are and how you can refine your SEO and advertising strategies to make the most of your most profitable channels.
At the same time, it will also uncover the pages of your website or online shop that perform well or poorly, especially in terms of conversions and sales.
Execution
Resources/Tools & Set up
- A Google Analytics 4 account
Creating a Report That Will Show Your Traffic Acquisition Channels
Note: For the purposes of this SOP, we are going to create the user segment between US and Non-US customers using Google’s Merchandise Store demo account.
To access this data, go to Google’s demo account page. Select “Google Analytics 4 property: Google Merchandise Store (web data)”.
-
Login to your Google Analytics account.
-
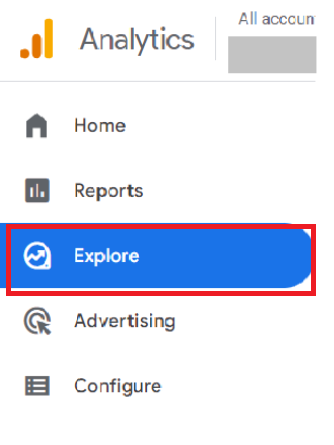
Click on Explore.
-
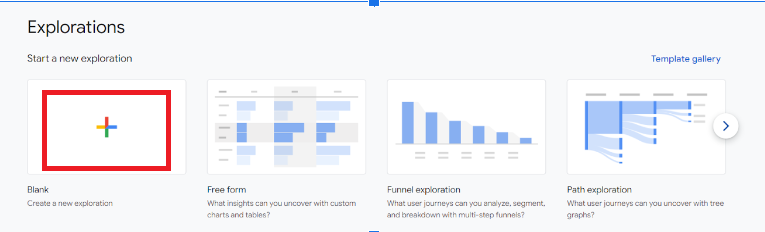
Select Blank to create a new exploration.
-
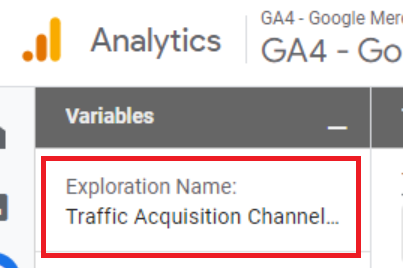
We are going to name our report Traffic Acquisition Channels Report.
-
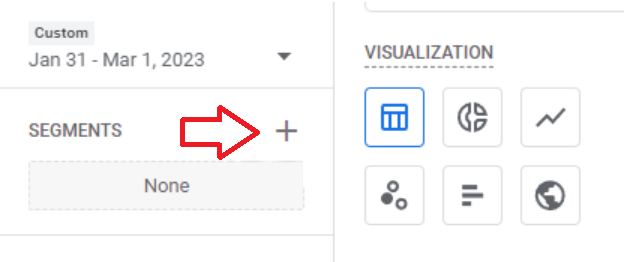
Let us make segments next. To do so, click on the + sign beside Segments under Variables.
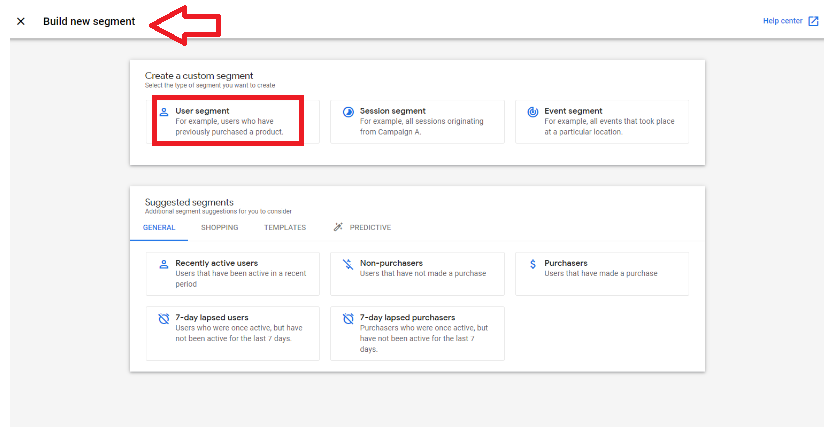
- The Build new segment page will appear. Choose User segment.
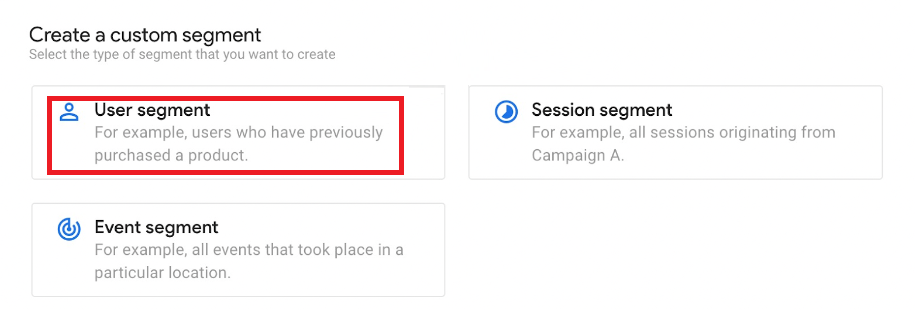
-
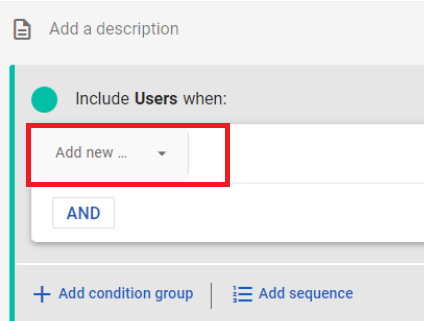
Click on Add new condition.
-
Below are some traffic channels segments that Google Analytics 4 enables you to create:
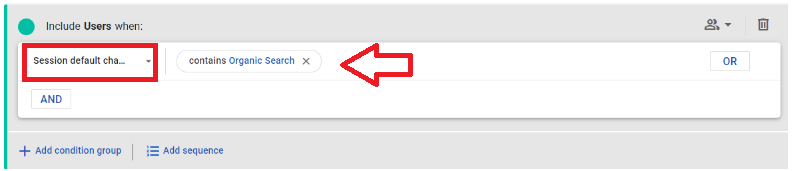
- Should you wish to make a segment report for Organic Search, click Session Default Channel Grouping in the condition filter interface and turn its value into Organic Search.
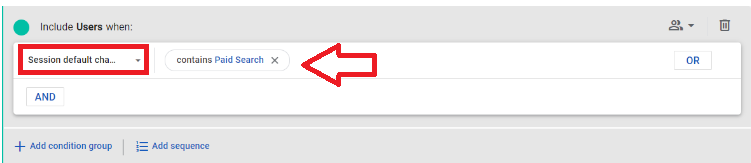
- When making a segment report for Paid Search, click Session Default Channel Grouping from the condition filter interface and turn its value into Contains Paid Search.
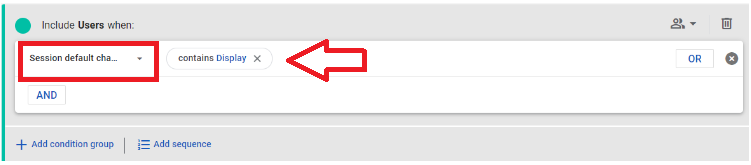
- When making a segment report for Display Ads traffic, click Session Default Channel Grouping from the condition filter interface and turn its value into Contain Display.
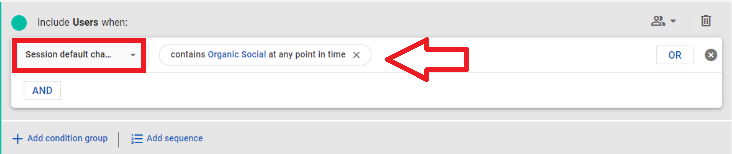
- When making a segment report for Social Media Traffic traffic, click Session Default Channel Grouping from the condition filter interface and turn its value into Contains Organic Social.
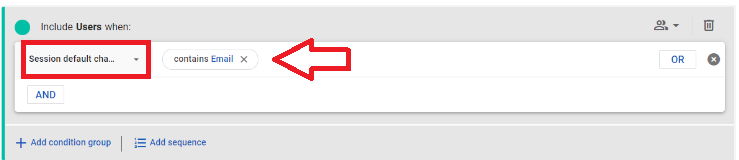
- When making a segment report for Email traffic, click Session Default Channel Grouping from the condition filter interface and turn its value into Contains Email.
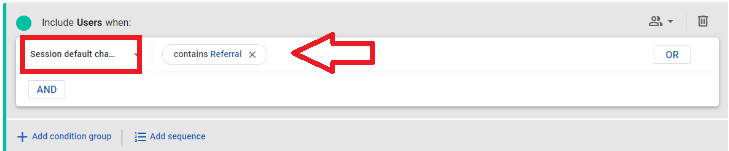
- When making a segment report for Referral traffic, click Session Default Channel Grouping from the condition filter interface and turn its value into Contains Referral.
Below is a compilation of the available channel groupings:
-
Organic Search
-
Direct
-
Referral
-
Paid Search
-
Display
-
Cross-network
-
Organic Social
-
Organic Video
-
Email
For this SOP, we will compare two traffic segments, particularly Paid Search traffic vs Organic Search.
-
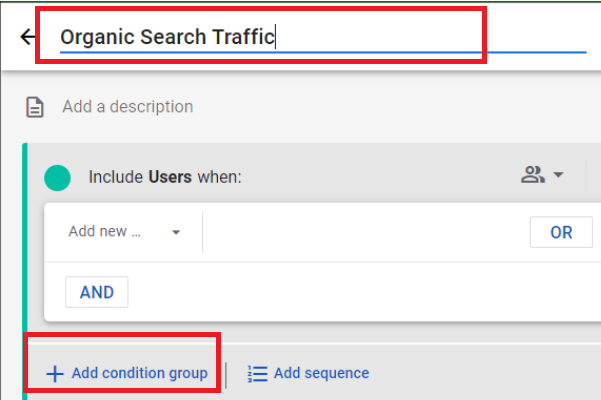
Let’s make our first segment. We are going to name it Organic Search Traffic.
-
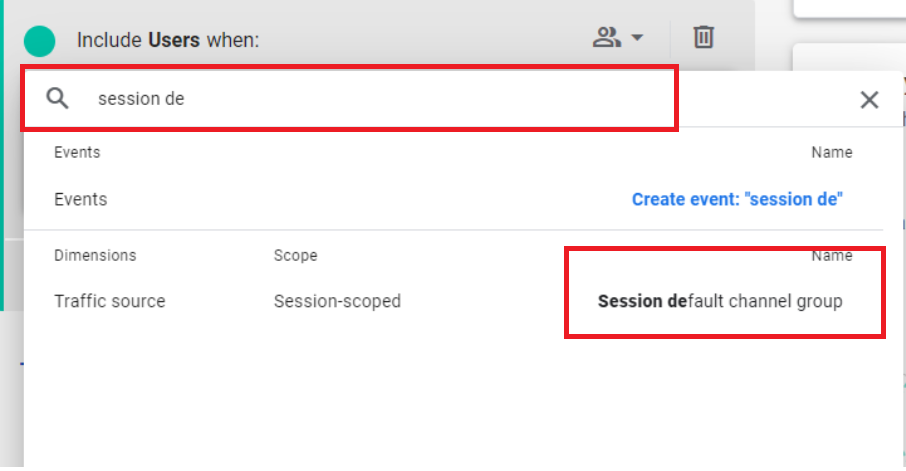
Click on Add new condition. Then, search for Session default channel group.
-
Select it.
-
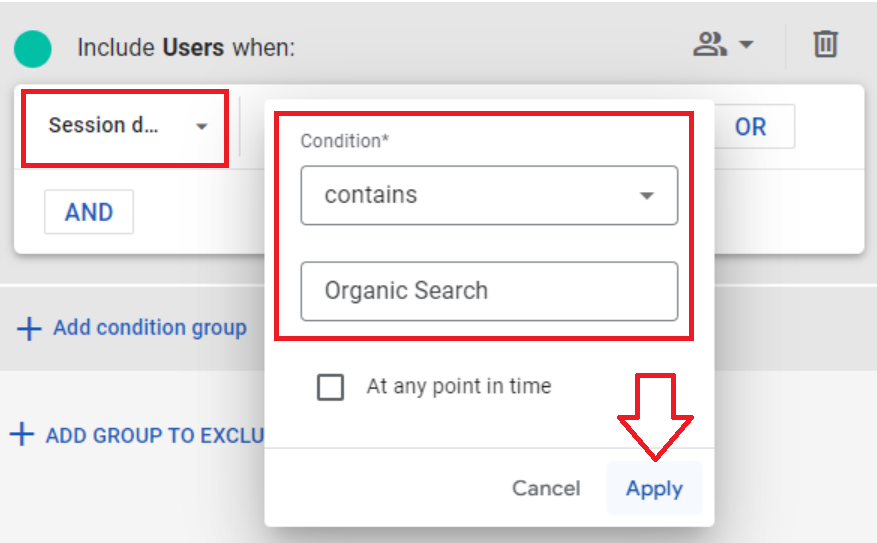
Click on + Add filter. For its Condition select contains and choose the value Organic Search. Once done, click Apply.
-
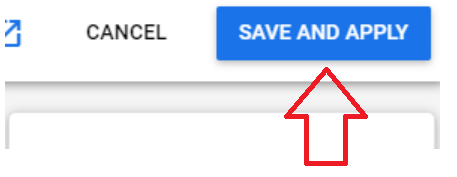
You can now see the number of users that belong to this segment. Click on Save and Apply located at the upper righthand corner of the page.
-
Let’s create another segment. This time, it’s for paid traffic. Click on the + sign beside Segments.
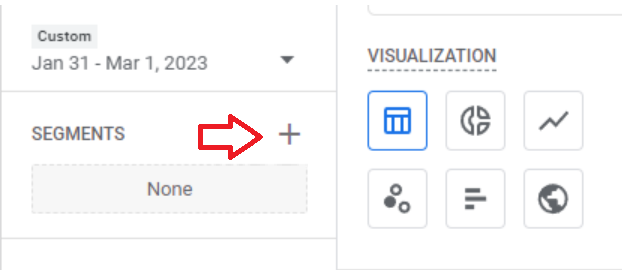
- The Build new segment page will appear. Choose the User segment.
-
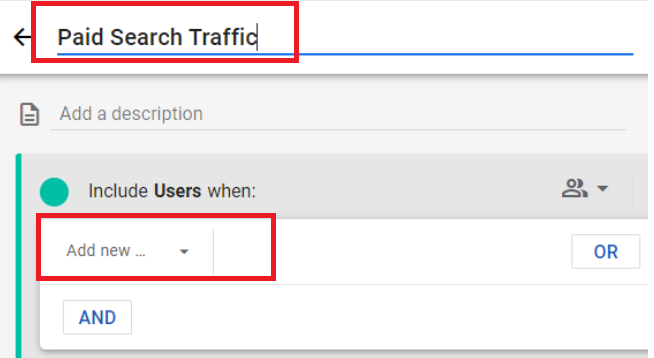
Name the segment as Paid Search Traffic.
-
Click on Add new condition. Then, search for Session default channel group.
-
Select it.
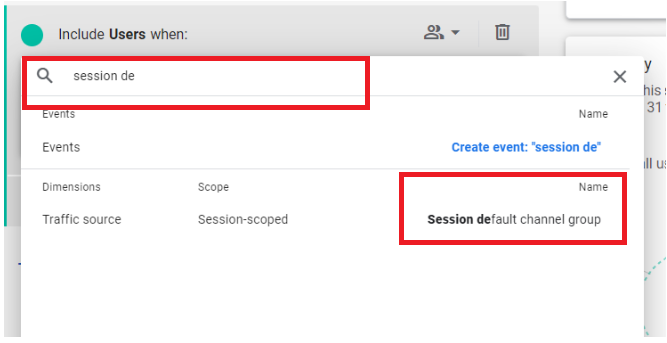
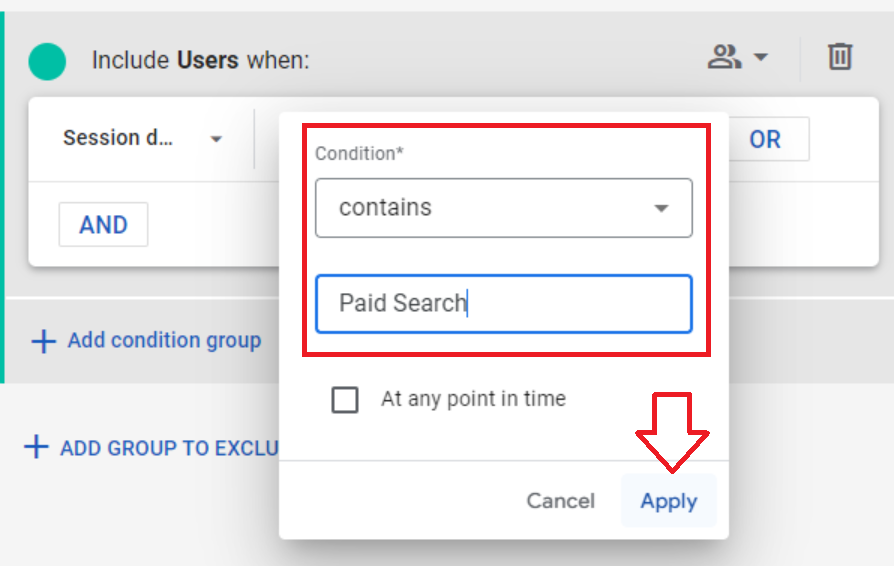
- Click on + Add filter. For its Condition select contains and choose the value Paid Search. Once done, click Apply.
-
You can now see the number of users that belong to this segment. Click on Save and Apply located at the upper righthand corner of the page.
-
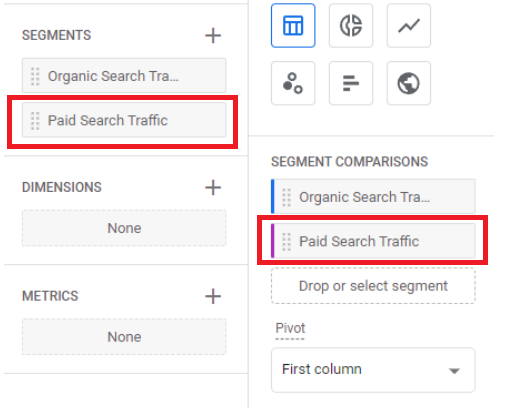
The segments we have just created should now appear under Segments and Segment Comparisons.
- Let’s add more data to our report by adding dimensions. To do so, click on the + sign beside Dimensions under Variables.
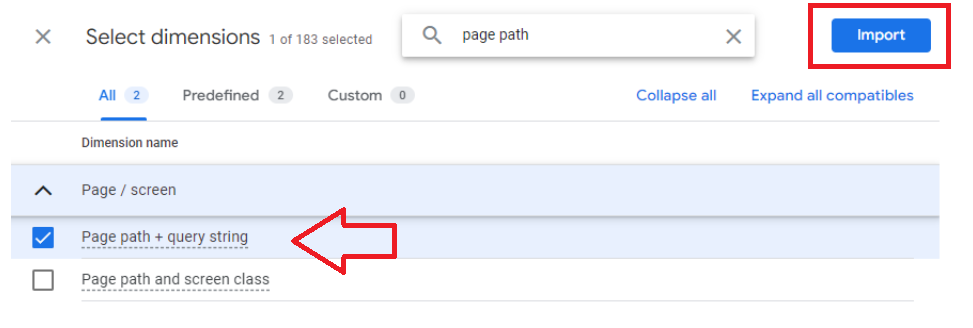
- The Select dimensions panel will appear. Search for page path. Then, select Page path + query string among the search results. Once done, click on Import. It’s at the upper right hand part of the panel.
Remember: By setting dimensions, you are deciding how your data will be presented and broken down in your report. For the purposes of this SOP, we are going to create a report about the organic and paid acquisition channels. We then wish to further break the data down by path and query string.
- Page path + query string should appear under Dimensions.
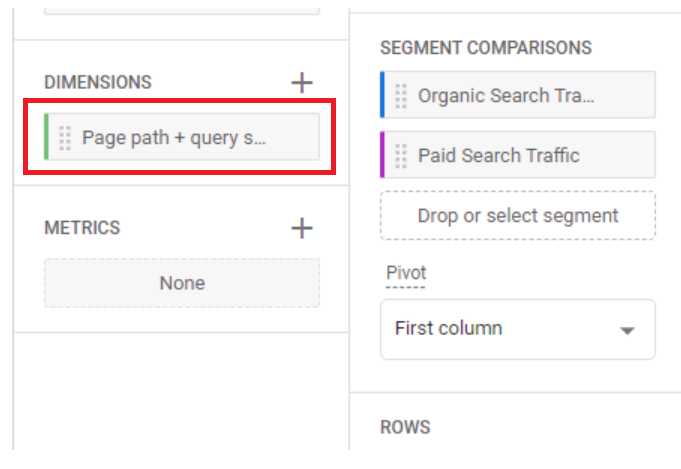
-
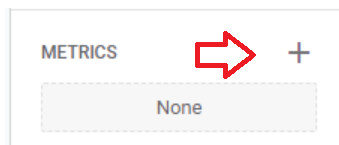
Next, click on the + sign beside Metrics. This will add another layer of data in understanding our traffic acquisition channels.
-
The Select metrics panel will appear. Search Views and select it.
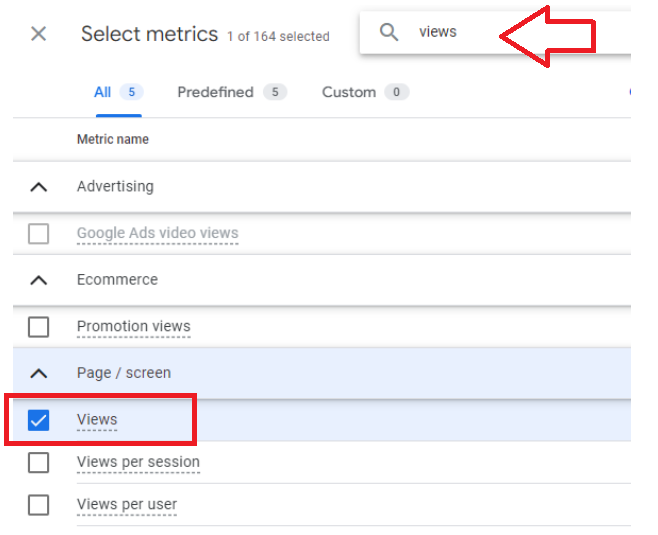
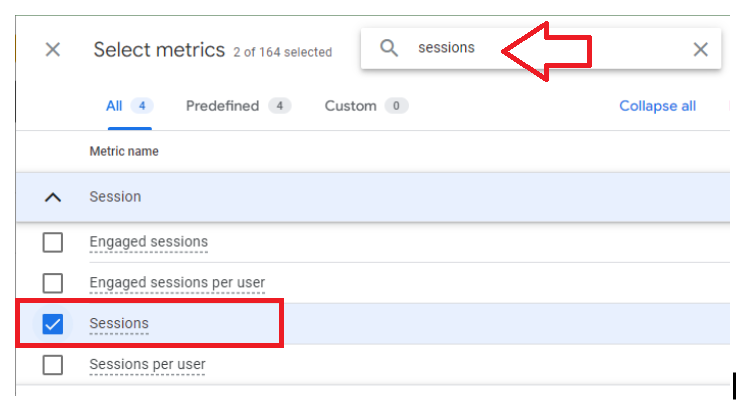
- Then, search Sessions and select it.
- From the top right corner, select Import.
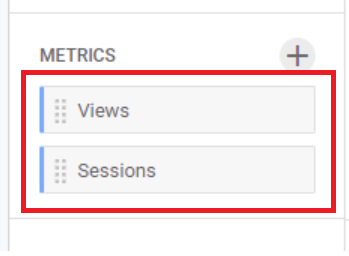
- You should now see Views and Sessions under Metrics.
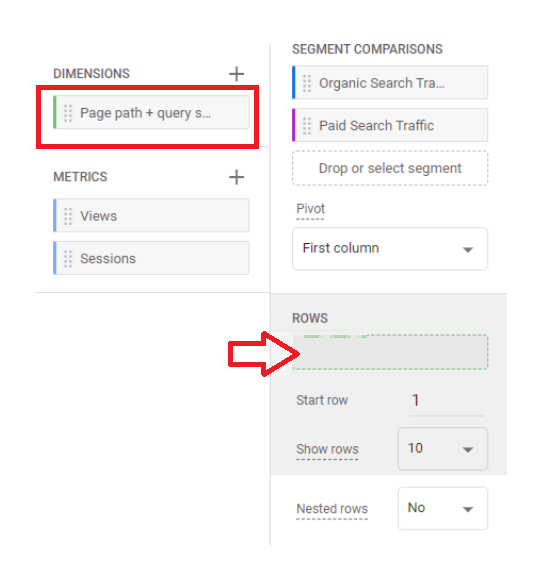
- Drag and drop Page path + query string under Rows.
-
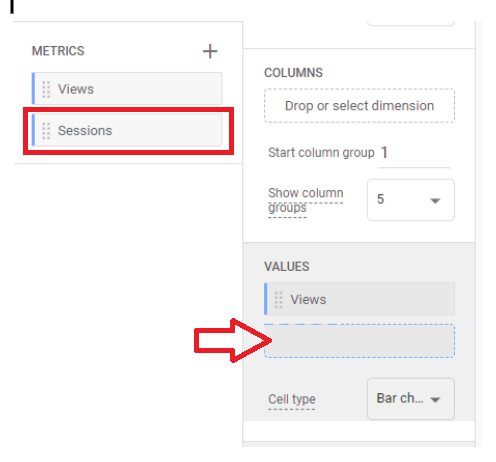
Drag and drop Views and Sessions under Values.
-
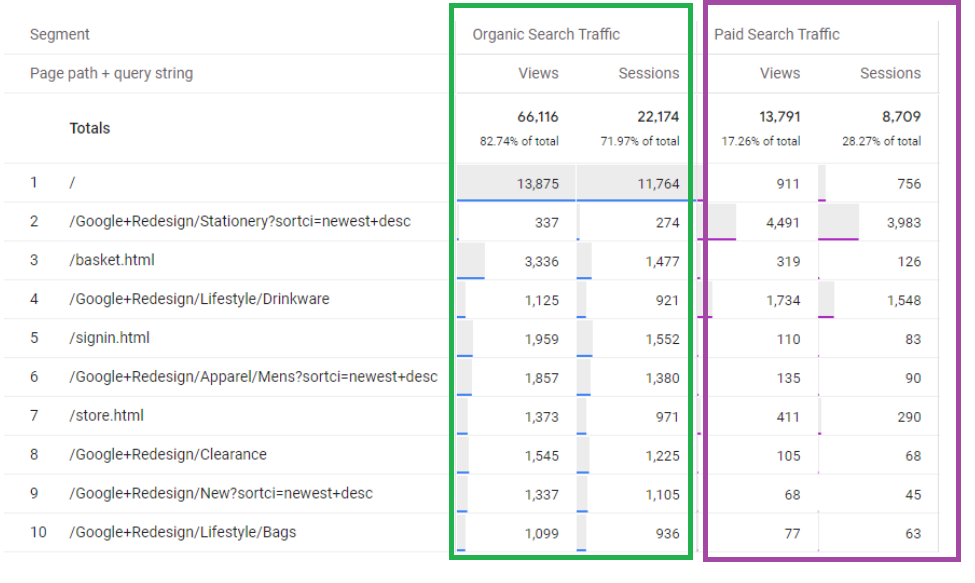
Congratulations! You may now view your traffic acquisition report from organic and paid search pages. Don’t hesitate to further experiment with the other types of traffic acquisition channels we’ve featured in step 7. These include Referrals, Email, and more.
The report will look something like this:
Conclusion
You’re done! Remember, learning how to analyze Google Analytics Acquisition Reports will help you accurately determine where your online visitors are coming from.
What are your most effective SEO efforts? What are your best sources of traffic? Are your online visitors coming in organically or were they referred to your website or online shop?
This way, you will be able to further refine your marketing and SEO strategies and make the most of your efforts.
-
Create a new exploration report in Google Analytics 4. Name it Traffic Acquisition Channels Report.
-
Create separate user segments for the channels that you want to track.
-
Add dimensions and metrics to further add data to your traffic acquisition channels report.
-
Next, drag your dimensions under Rows. Then, drag your metrics under Values.
-
This will reveal the data you wish to analyze.
-
Feel free to experiment with other traffic sources, dimensions, and metrics to further reveal valuable data about where your website or online shop’s guests are coming from.