A Guide to Creating and Analyzing Landing Page Reports in Google Analytics
To determine the landing pages that your online visitors use to enter your website or online shop via Google Analytics 4.
Prefer a shortcut? 16 free tools do parts of this for you.

Aim: To determine the landing pages that your online visitors use to enter your website or online shop via Google Analytics 4.
Optimal Outcome: You will be able to successfully track the landing pages that online visitors use to enter your website and use these information to adjust your digital marketing efforts, increase incoming traffic, and of course conversion and sales.
What do you need to start: To follow this SOP, you will need to have a Google Analytics 4 account.
Why is this SOP Important: Knowing the particular pages that your online visitors use to enter your website or online shop is essential in optimizing your web pages, fine-tuning your digital marketing efforts, and creating informed conversion and sales strategies.
Where to execute: You will need to set up a Google Analytics 4 account before you can set up a landing page report.
Who Should Be Doing This: The person in charge of managing web analytics, the marketing manager, or the SEO manager
What Is a Landing Page?
A landing page is usually defined in the e-commerce and digital marketing world as a standalone page that is specifically created for marketing or advertising purposes.
However, Google Analytics defines a landing page a little bit differently. Instead, it is defined as any page that an online visitor “lands on” to enter your website or online shop.
Having said that, multiple pages can be deemed as landing pages, and they don’t have to be specifically created for marketing.
Execution
Resources/Tools & Set up
- A Google Analytics 4 account
Creating a Landing Page Report in Google Analytics 4
-
Log into your Google Analytics 4 account.
-
Select the right property that you want to work with. However, for the purposes of this SOP, we are going to use Google Analytics’ demo account.
-
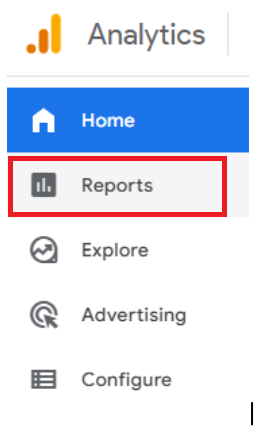
Click on Reports from the main side menu.
-
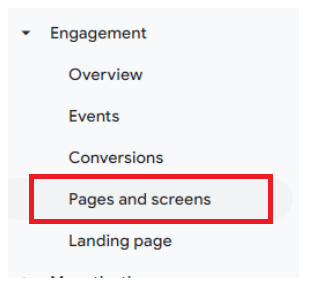
Then, click on Engagement and under that, click on Pages and Screens.
-
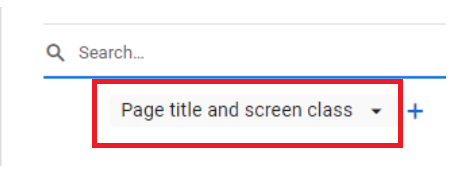
This section is sorted by page title by default. Click on Page title and screen class under the Search bar that you’ll find on the main right panel.
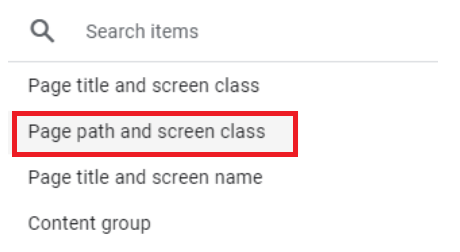
- From the choices, select Page path and screen class. Doing so will reveal the updated report that’s sorted according to your page URLs. You may also find this information under Behavior > Site Content > All Pages report via Universal Analytics.
- Feel free to look at the session data for your website or online shop’s pages.
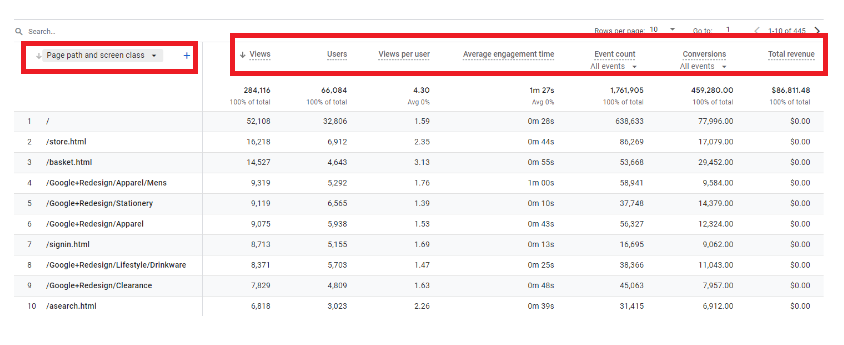
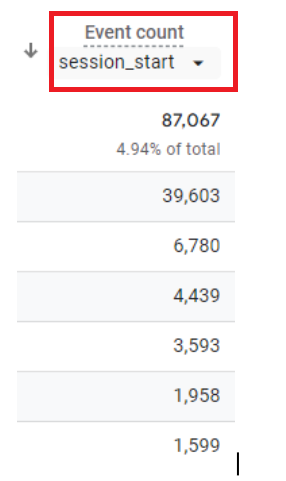
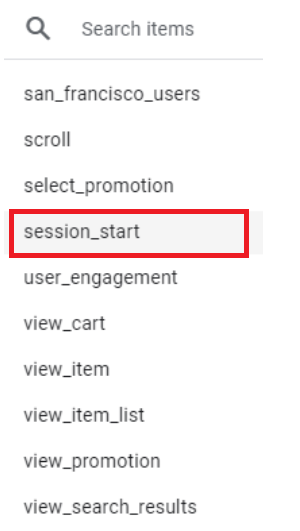
- Let’s take a look at your landing page data next. To do so, click on All events under Event count and replace it with session_start. You will find this option under your list of choices. Doing so will filter your pages to only show data when your online uses first start their session.
- Congratulations! We have now successfully created a landing page report via Google Analytics 4.
Segmenting the Landing Page Data According to Your Traffic Sources
- As a website or online shop owner, it is ideal for you to know where your online visitors are coming from. Hence, in this part of the SOP, we are going to segment the landing page data generated by our Google Analytics 4 report according to your traffic sources. Again, we are going to use Google’s demo account to show you how it’s done.
To start, check that you’re still under Engagement then Pages and screens.
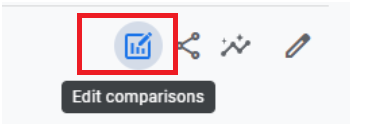
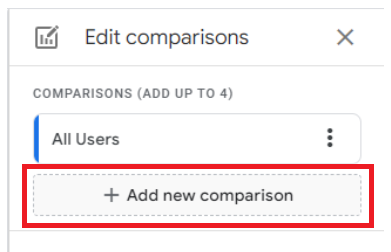
- You will find four small icons at the upper right hand part of the dashboard. The first one is Edit comparisons. Click on that.
-
The Edit comparisons side panel will appear.
-
Click on + Add new comparison. The Build comparison panel will appear.
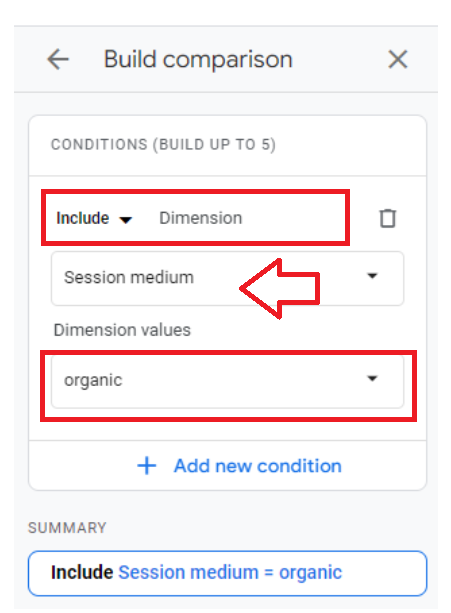
This will allow you to add a dimension and look at specific metrics in your report. Feel free to explore your options but for the purposes of this SOP let’s say that we want to look at the landing page sessions that come from organic search.
-
To do that, click on Select dimension and select Session medium. Choose organic as your Dimension value as well.
-
You may replace organic with other Dimension values. The available options are:
Organic - This refers to your non-paid online traffic coming from search engine results.
CPC - This refers to your paid online traffic coming from search engine results.
Referral - This refers to your online traffic coming from other websites that have featured your link.
Email - This refers to your online traffic coming from links shared via email.
Social - This refers to your online traffic coming from links shared via social media portals.
None - This refers to your direct online traffic. This means that the online visitor didn’t use a link but instead typed your website URL directly into the browser.
Remember: Only active sources will appear in your list of choices. If you can’t find one in particular then this only means that your website or online shop is not getting any traffic from that source yet.
- Congratulations! You may now view a detailed version of your landing page report based on where your traffic is coming from.
Conclusion
You’re done! Remember, creating a landing page report will prove incredibly helpful to determine your website or online shop’s best-performing pages. Which of your pages brings in the most people to your website? How engaged were they? Did their visit end up in a sale?
With the insight you’ve gotten from the landing page report, you will be able to create more informed SEO and marketing strategies. You’ll also make the most of your top-performing pages as you’re looking for ways to help the slower entrances catch up.
-
The first step in creating a landing page report is to access your Reports. Select Engagement, then Page and Screens.
-
Select Page path and screen class. This will sort your website or online shop’s page URLs.
-
To determine your landing pages (or the online locations where your users first start their session), choose session_start from Event count.
-
You may also add dimensions to your landing page reports to reveal further details such as where your online traffic is coming from.