Pinterest Conversion Tracking With GTM
The aim of this SOP is to provide step-by-step instructions on how to set up Pinterest conversion tracking with Google Tag Manager (GTM).
Prefer a shortcut? 16 free tools do parts of this for you.

Aim: The aim of this SOP is to provide step-by-step instructions on how to set up Pinterest conversion tracking with Google Tag Manager (GTM).
Optimal Outcome: The optimal outcome of this SOP is the successful implementation of Pinterest conversion tracking through GTM, which will allow you to track and optimize your Pinterest ad campaigns more effectively.
What do you need to start:
-
A Pinterest account with access to the Pinterest Ads Manager
-
AGoogle Tag Manager account with admin access to the container in which you want to set up Pinterest conversion tracking
-
A website or landing page where you want to track Pinterest conversions
-
Knowledge of basic HTML and JavaScript
-
Basic understanding of Pinterest ad campaigns and conversion tracking.
Why is this SOP Important: This SOP is important because it provides a detailed guide on how to set up Pinterest conversion tracking with GTM, which is a crucial step in optimizing your Pinterest ad campaigns. With accurate conversion tracking, you can better understand the performance of your Pinterest ad campaigns and make data-driven decisions to improve your return on investment (ROI).
When and Where to execute: One time only when you are setting up your Pinterest ad campaigns and conversion tracking.
Who Should Be Doing This: Digital marketing professionals who are responsible for managing Pinterest ad campaigns and optimizing their performance.
Set up Pinterest Conversion Tracking
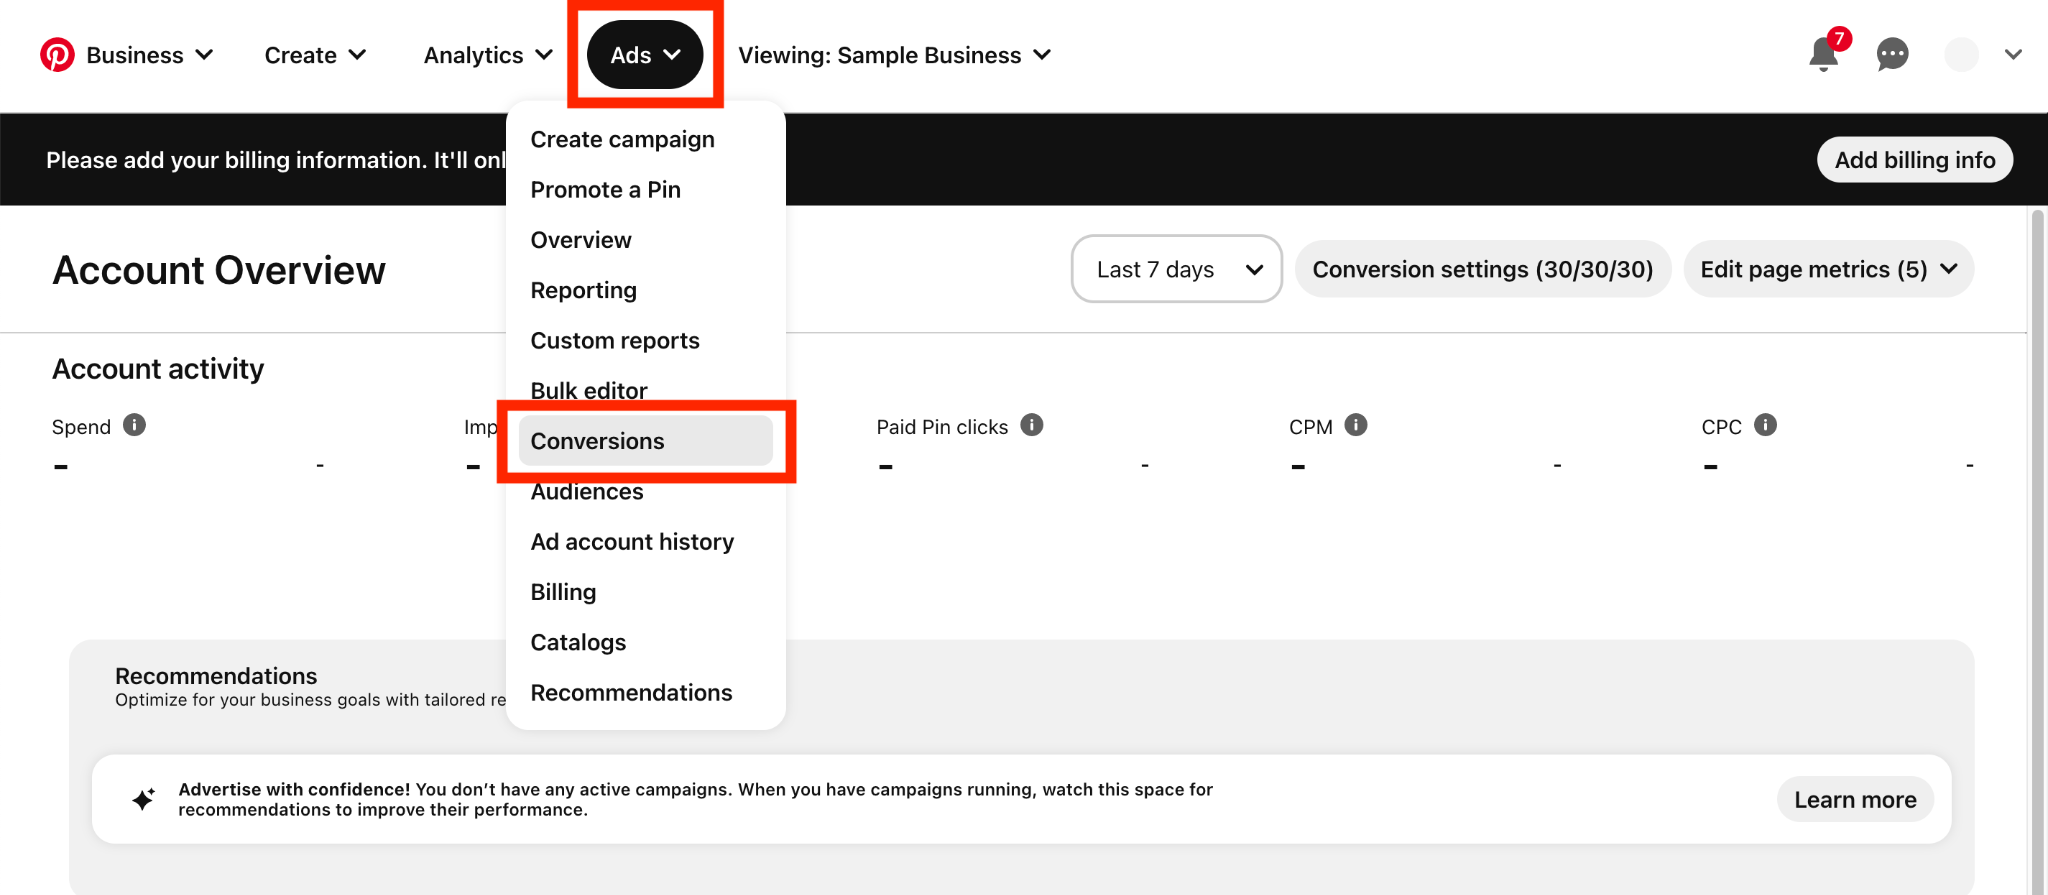
- Log in to your Pinterest Ads Manager account and click on "Ads" from the left-hand menu then click "Conversions".
-
Click "Create Conversion".
-
Choose the type of conversion you want to track, such as website visits or checkouts.
-
Configure the conversion settings, including the conversion name, description, and the category of the conversion.
-
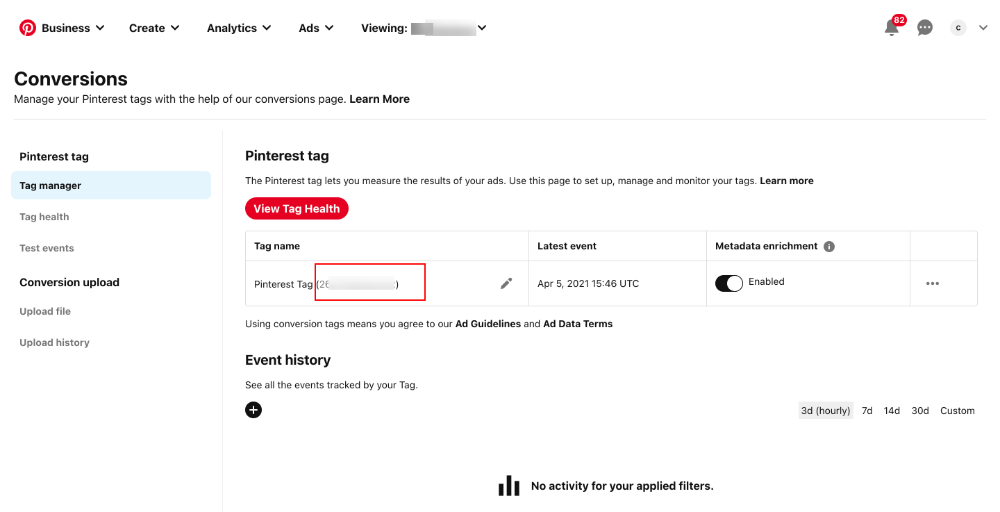
Select the "Use Tag Manager" option and copy the conversion ID.
Set up a Pinterest Conversion Tag in Google Tag Manager
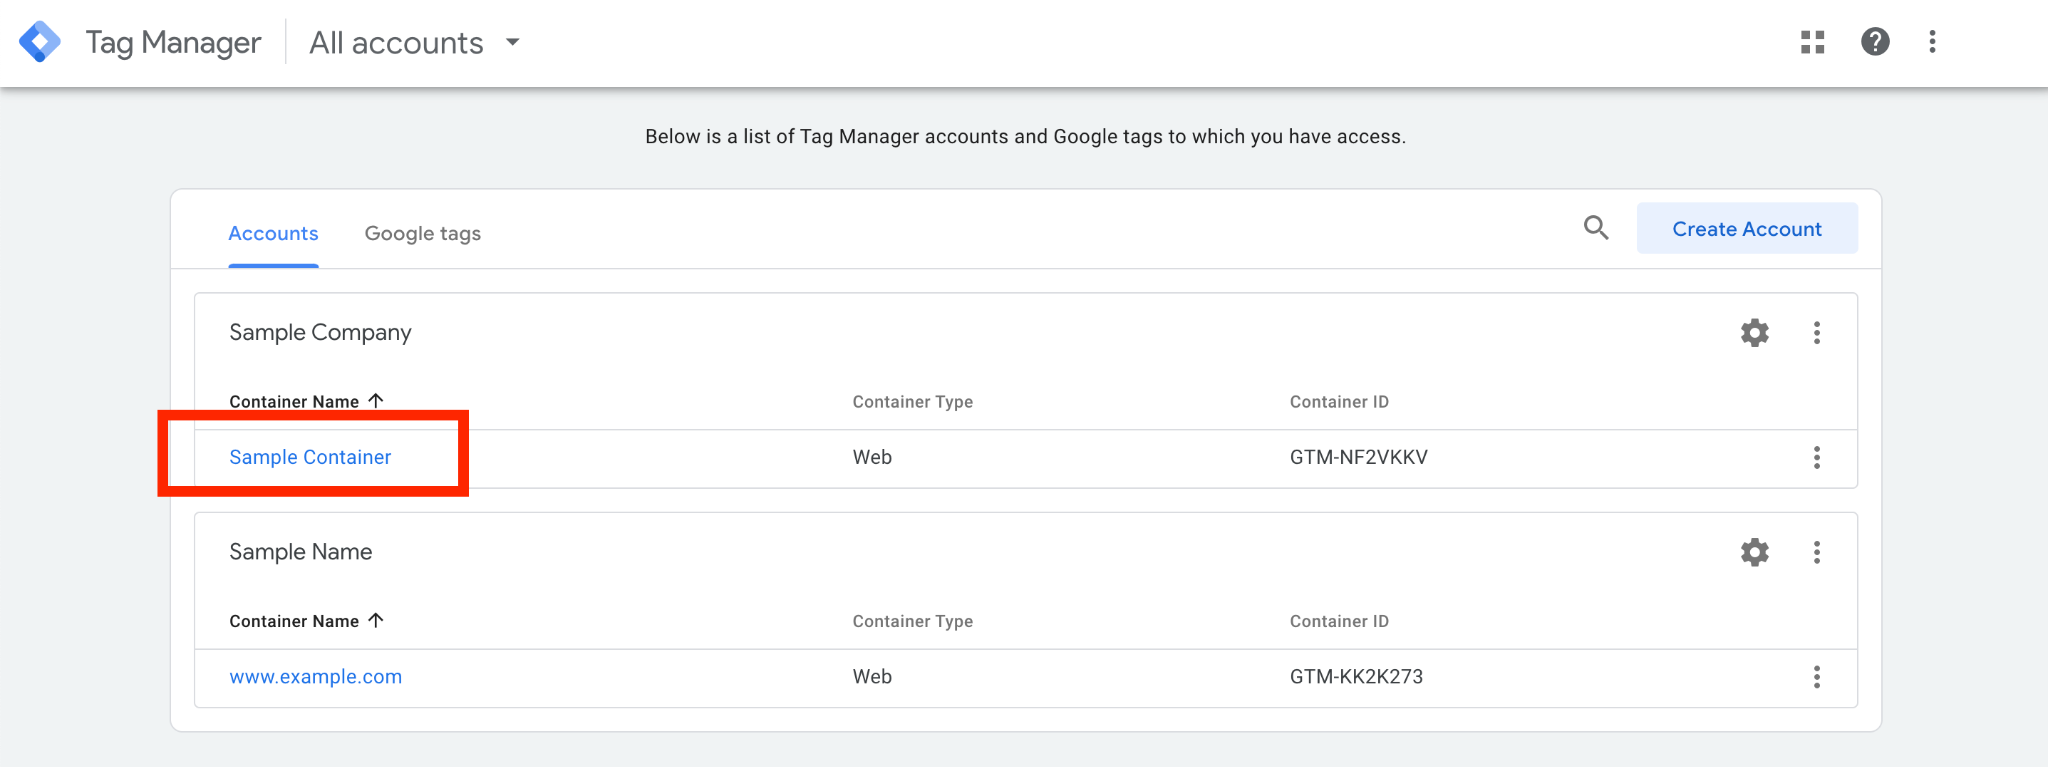
- Log in to your Google Tag Manager account and select the container where you want to create the conversion tag.
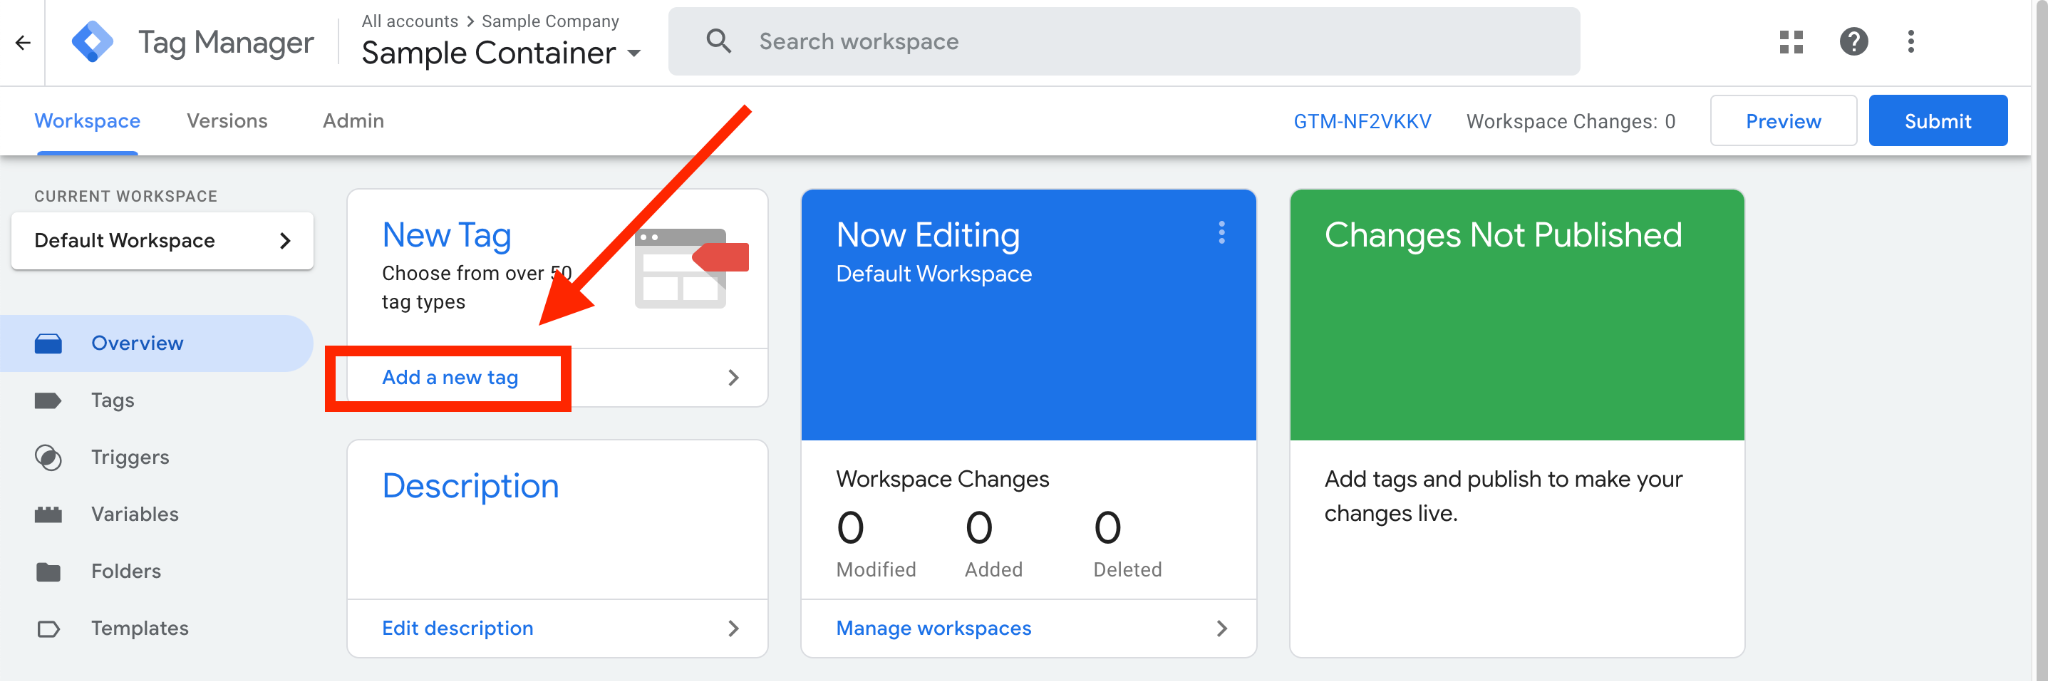
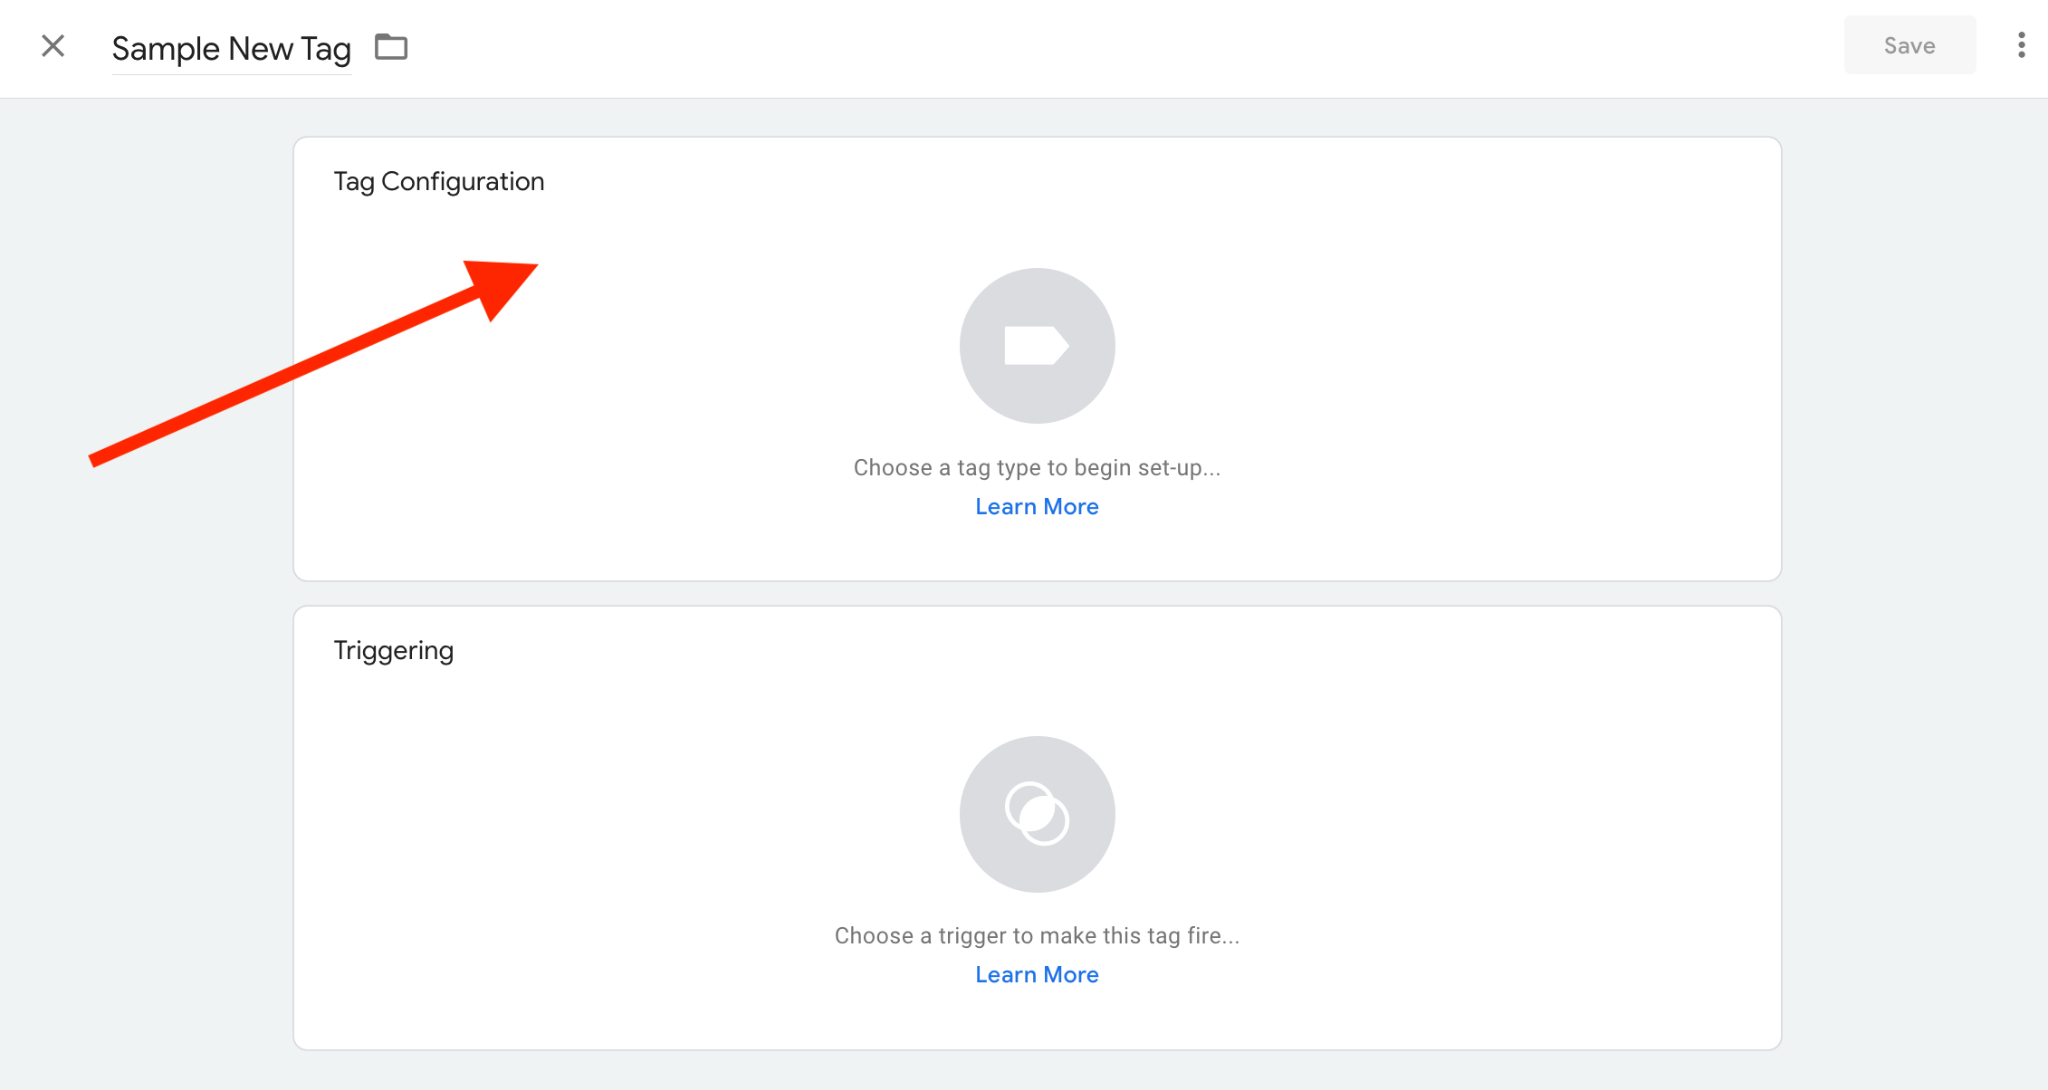
- Click "Add New Tag".
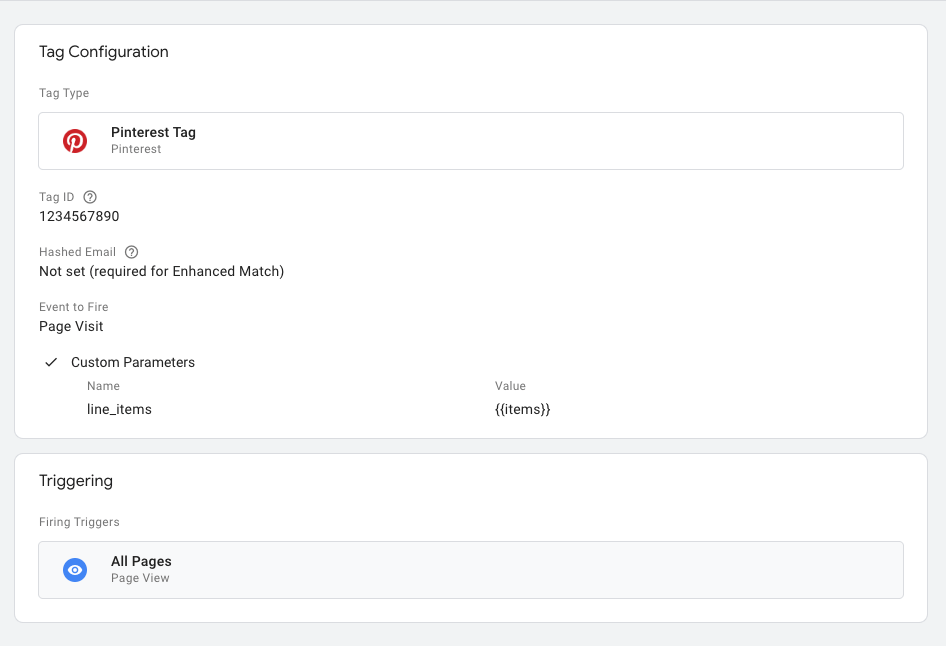
- Click “Tag Configuration”.
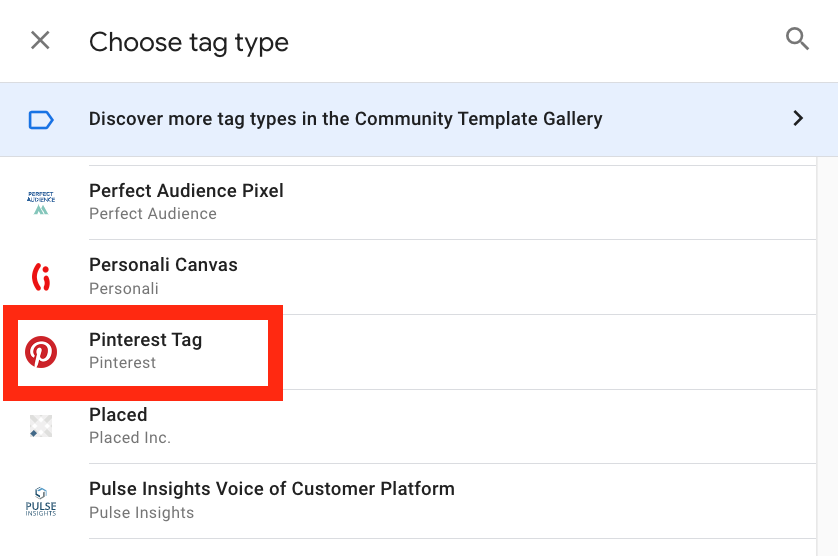
- Select “Pinterest Tag”.
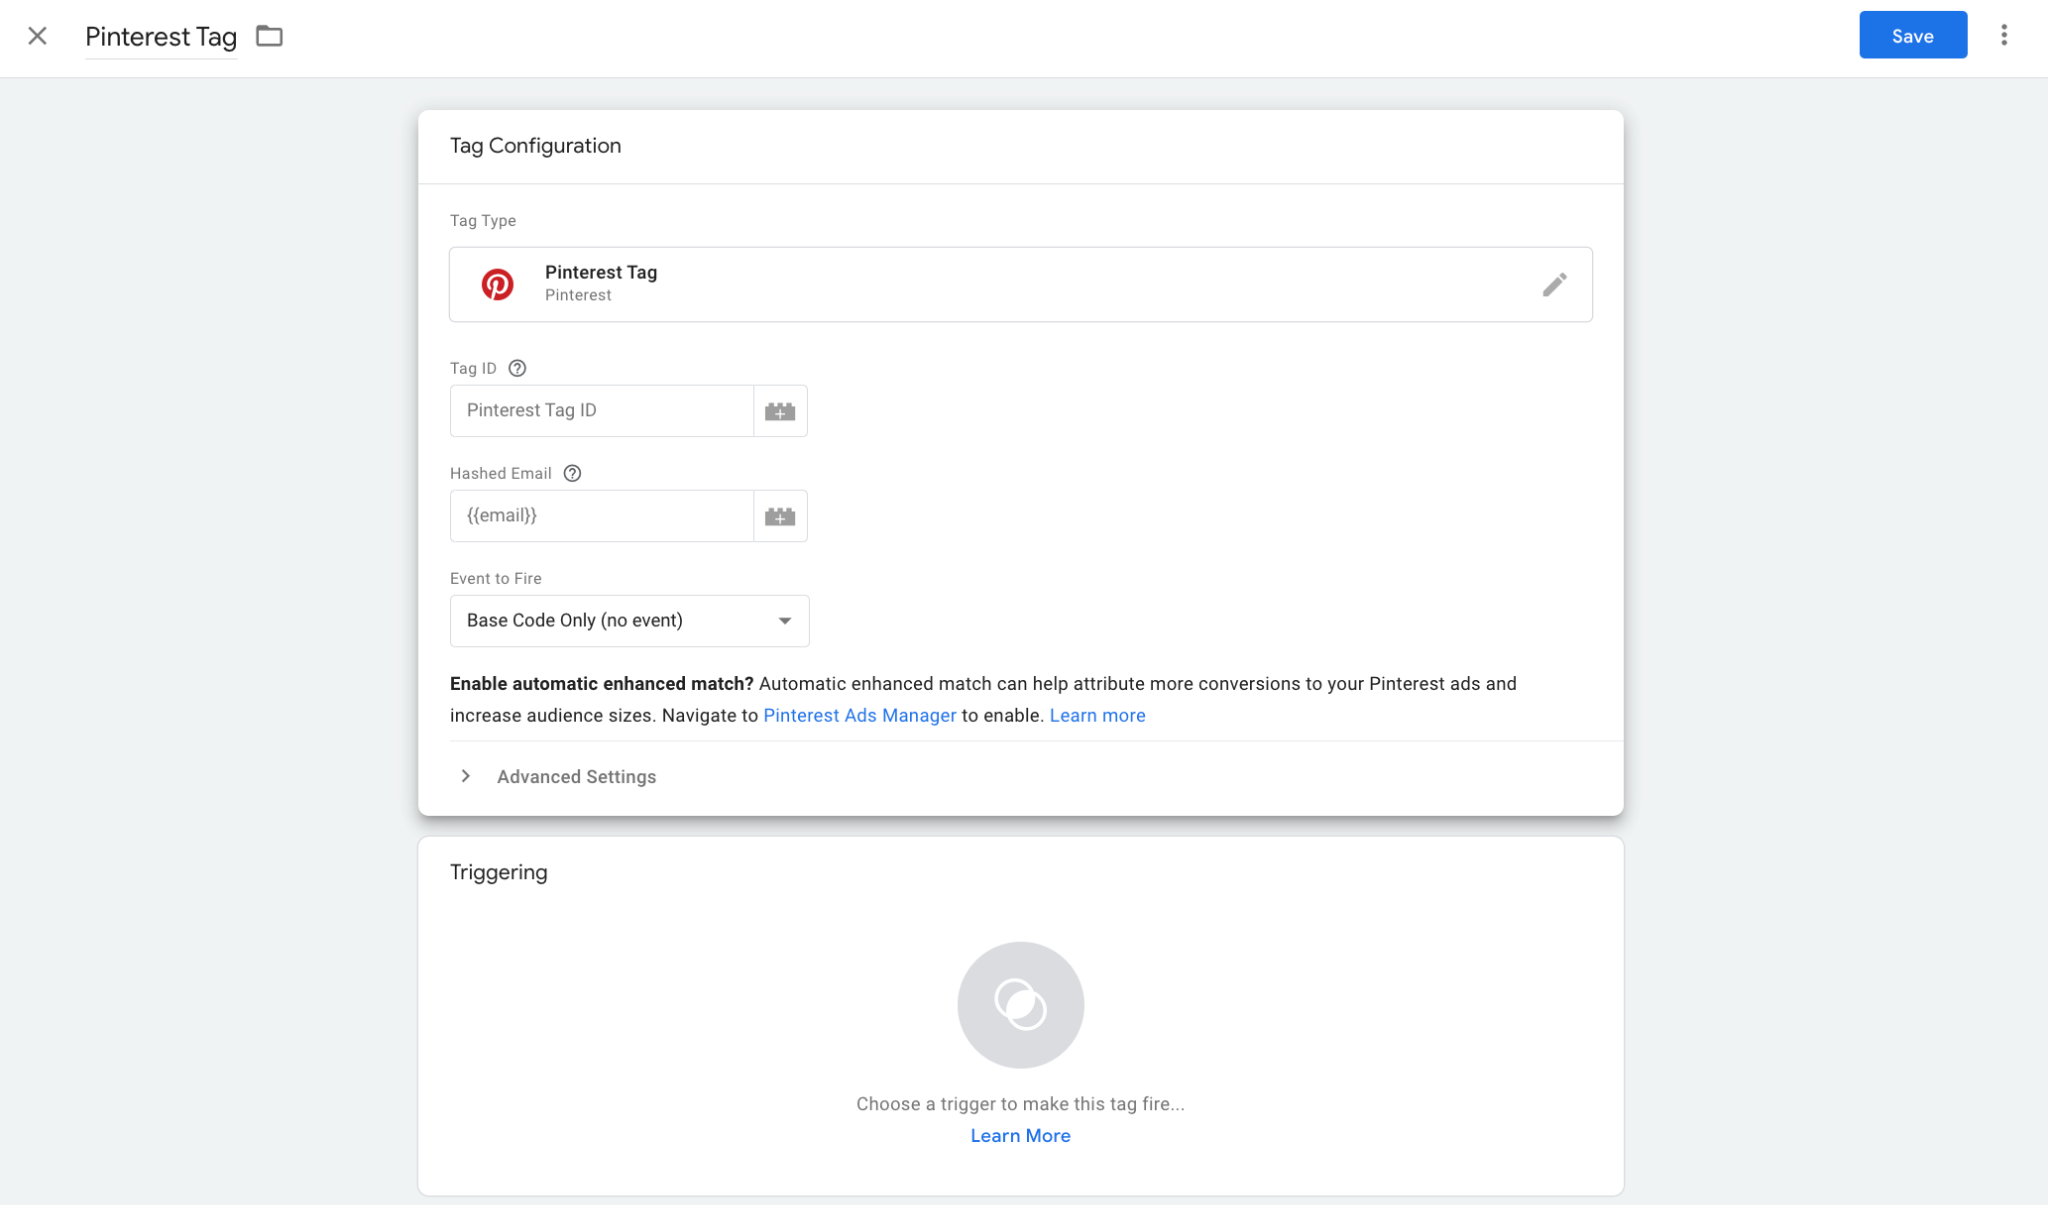
- Paste the Pinterest tag ID that you copied earlier.
Set up a Trigger for the Conversion Tag
- Click on "Triggering" to add a trigger to the tag.
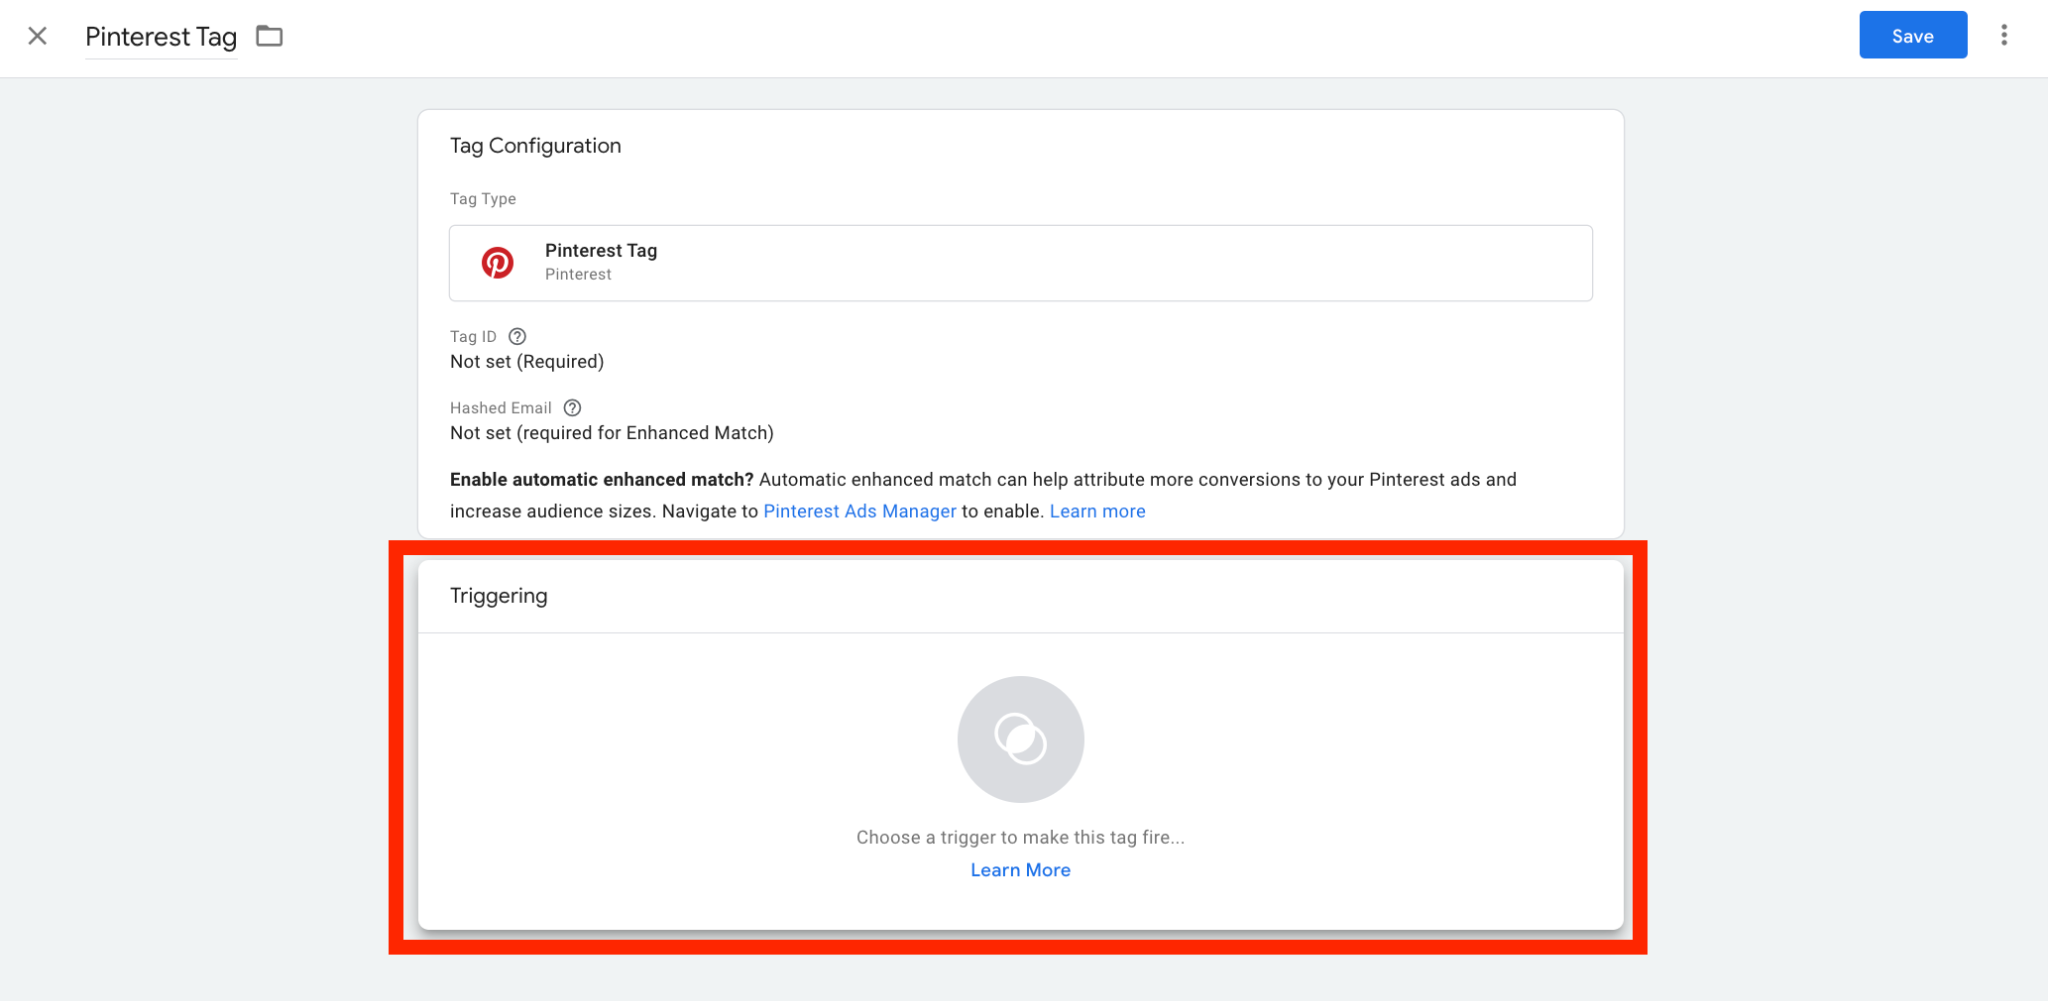
- Choose "Page View" as the trigger type.

- Save the trigger and then return to the Pinterest Conversion Tag.
Verify that the Conversion Tracking is Working
-
Once the tag is live on your website, test the conversion tracking to ensure that it's working correctly.
-
Go to the Pinterest Ads Manager and click on "Conversions".
-
Select the conversion that you just created and click on the "Test" button.
-
Follow the steps provided to test the conversion tracking, and ensure that the test is successful.
Conclusion
You’re done!
By following these steps, you can successfully set up Pinterest conversion tracking with Google Tag Manager. This will allow you to track the performance of your Pinterest ad campaigns more accurately, and optimize your advertising strategy based on data-driven insights.
Execution Checklist:
-
Set up Pinterest Conversion Tracking
-
Set up a Pinterest Conversion Tag in Google Tag Manager
-
Set up a Trigger for the Conversion Tag
-
Verify that the Conversion Tracking is Working