How to Install Google Tag Manager on Your Shopify Store
To add Google Tag Manager to a Shopify site.
Prefer a shortcut? 16 free tools do parts of this for you.

Aim: To add Google Tag Manager to a Shopify site.
Optimal Outcome: Google Tag Manager is properly installed without any technical issues.
What do you need to start: Google Tag Manager is available only to stores on the Shopify Plus plan.
Why is this SOP Important: Google Tag Manager is a great tool to help you collect, track, and analyze important data about your Shopify store more easily.
When and Where to execute: Only once—the first time you install Google Tag Manager—in your Shopify admin.
Who Should Be Doing This: The person responsible for website management or analytics.
Environment Setup
Important: This SOP works only for accounts using Shopify Plus plans
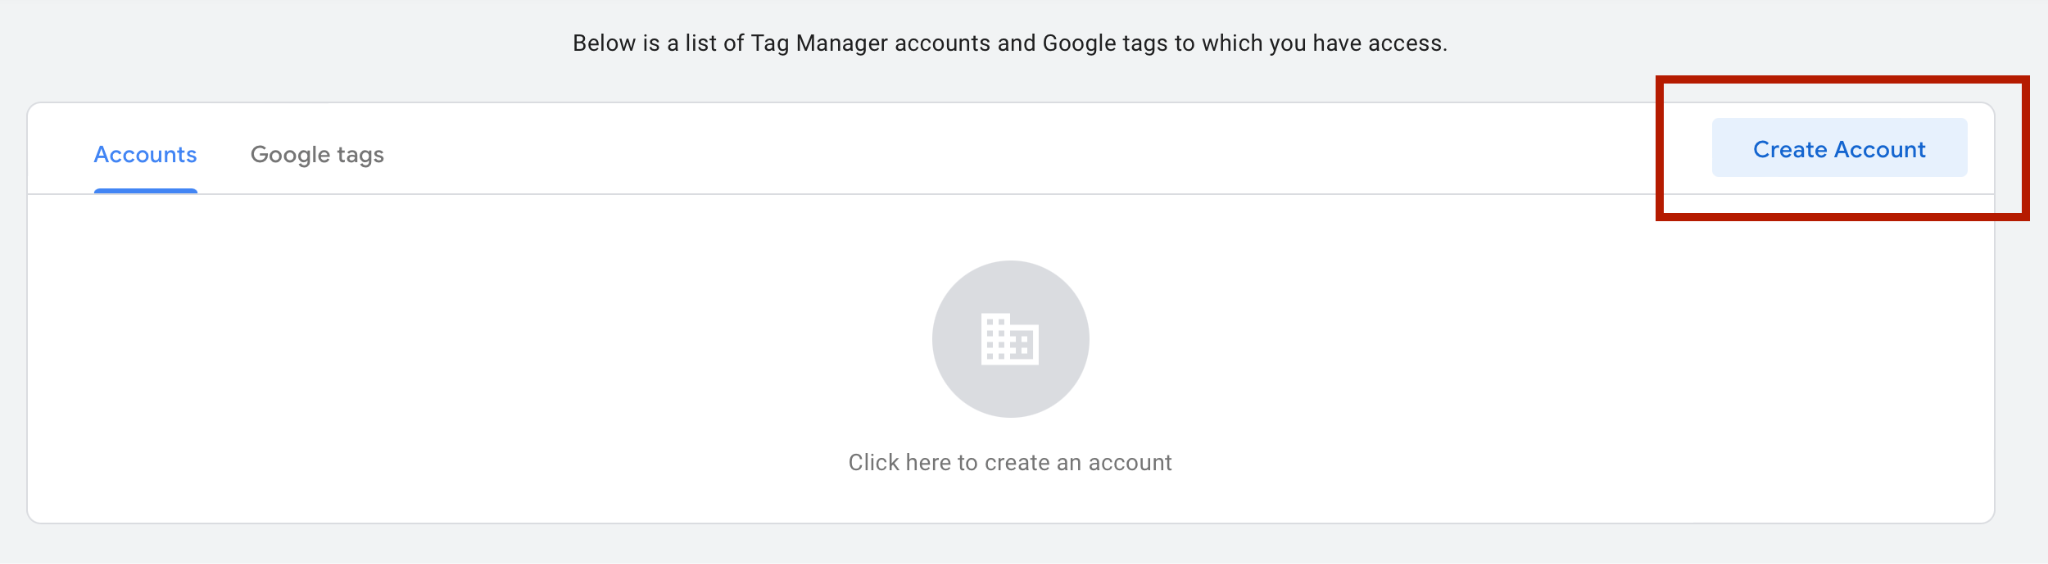
- Go to Google Tag Manager, click the “Accounts” tab, and click “Create Account”.
-
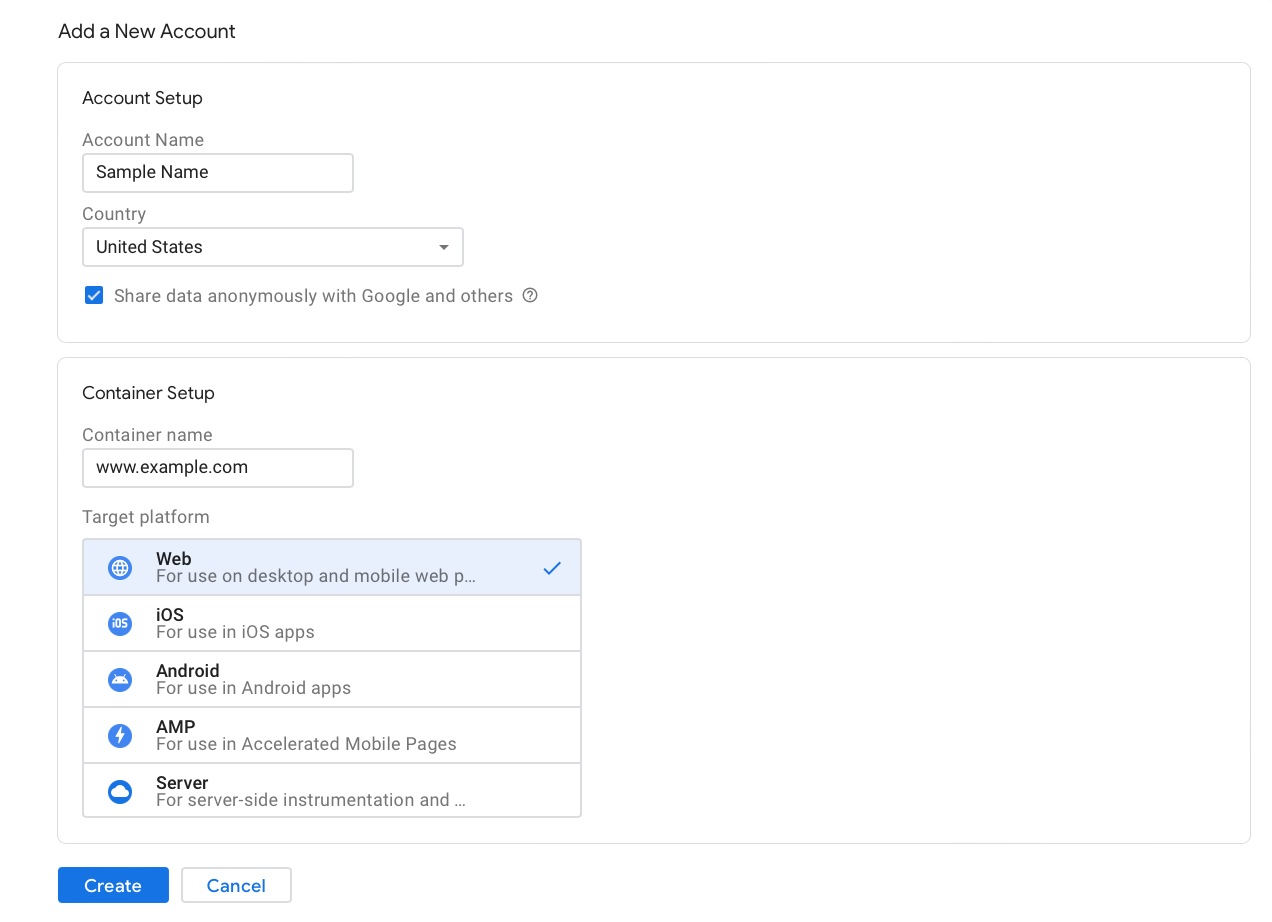
Fill in the following information:
-
Account Name — The name you use to identify this account.
-
Country — Country origin.
-
Container name — Insert the URL of your website
-
Target platform — Where do you plan to add Google Tag Manager (e.g. on your website, mobile, etc)
-
(Optional) Share data anonymously with Google.
-
-
Once finished. Click “Create”.
-
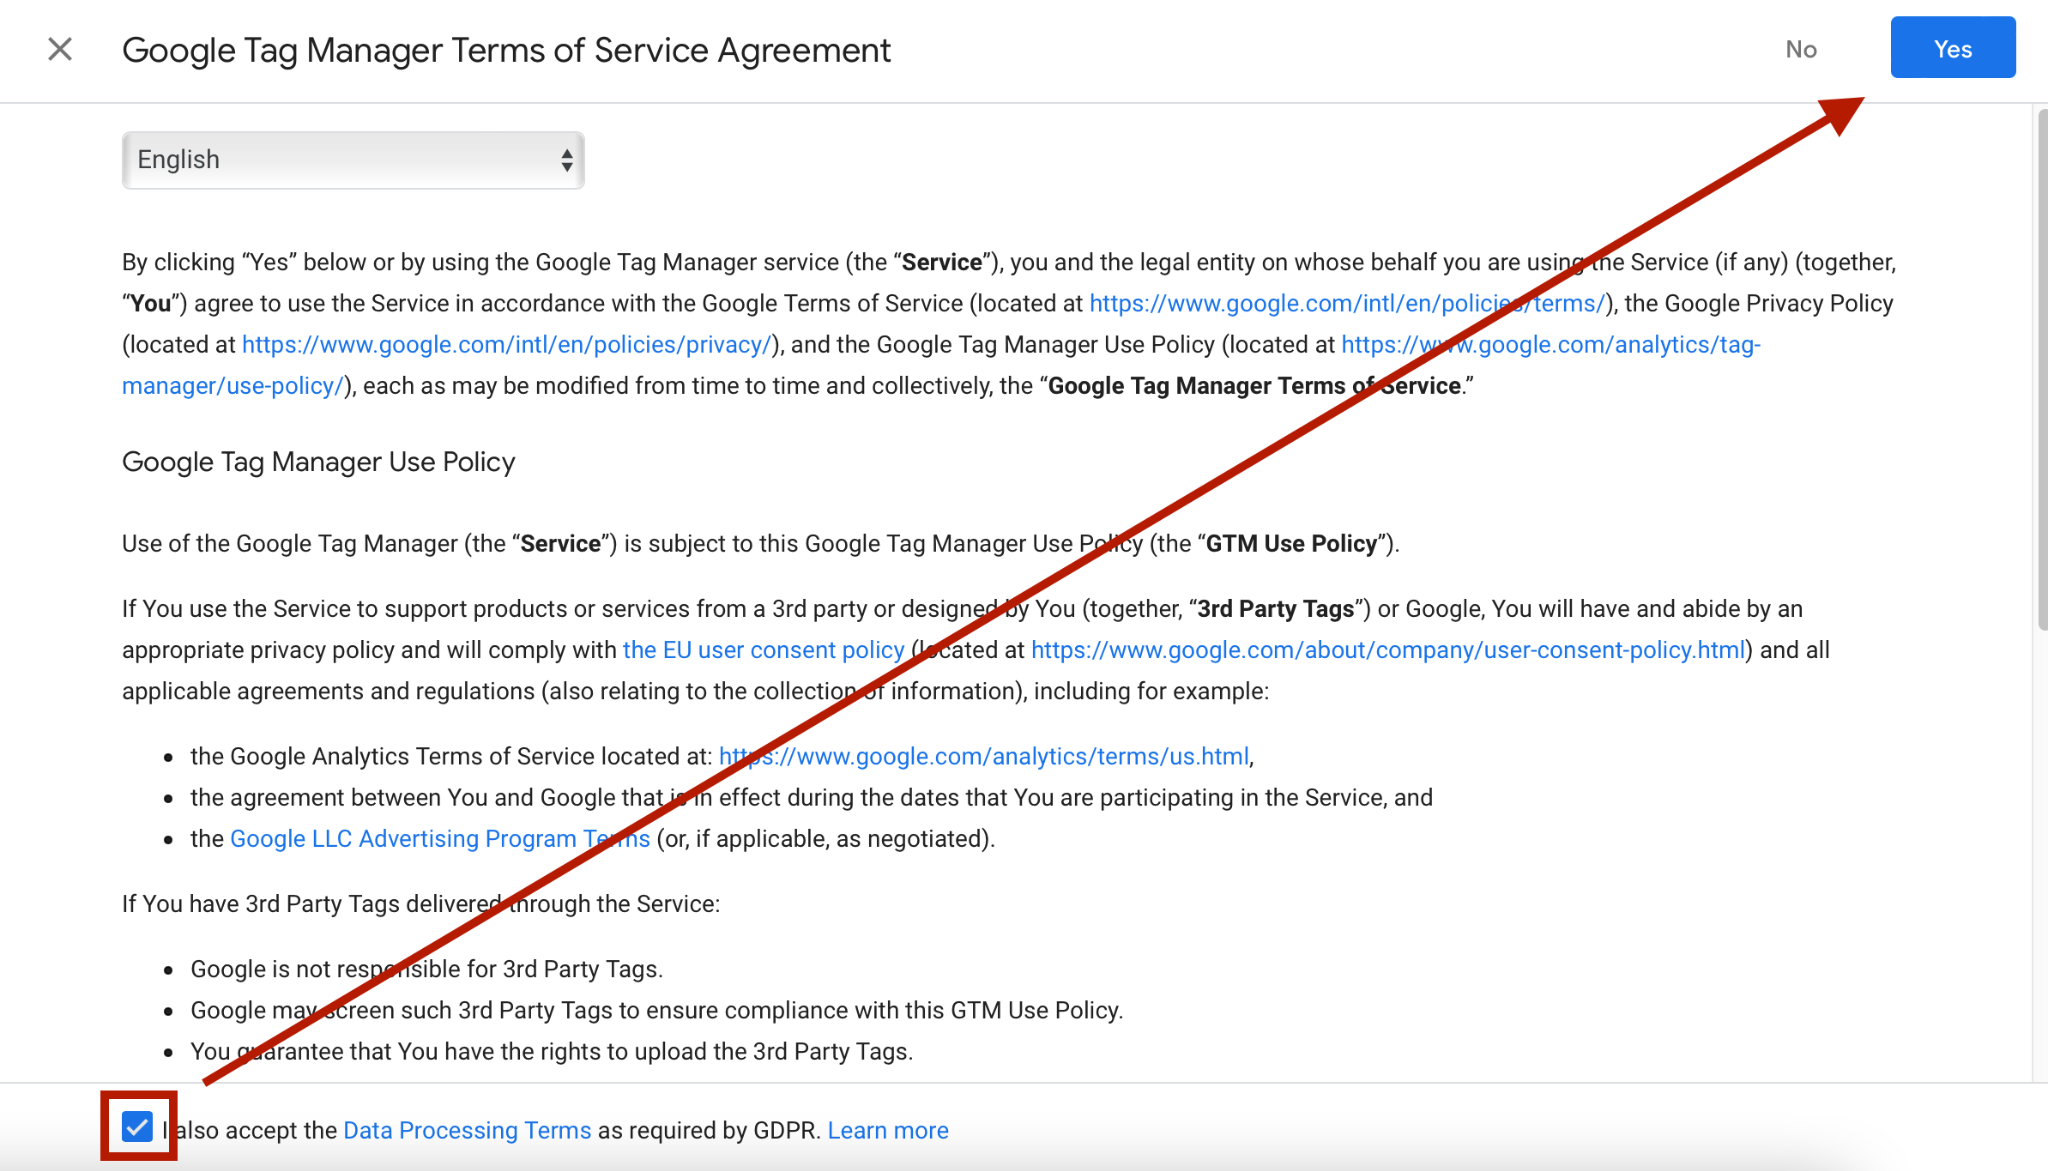
You’ll see a Google Tag Manager Terms of service pop up. Select the checkbox and click “Yes”.
-
You will see the code to install Google Tag Manager. Ignore this for now. Click “OK” to close the pop up.
-
Once you are in your Workspace, make note of your Google Tag Manager ID.
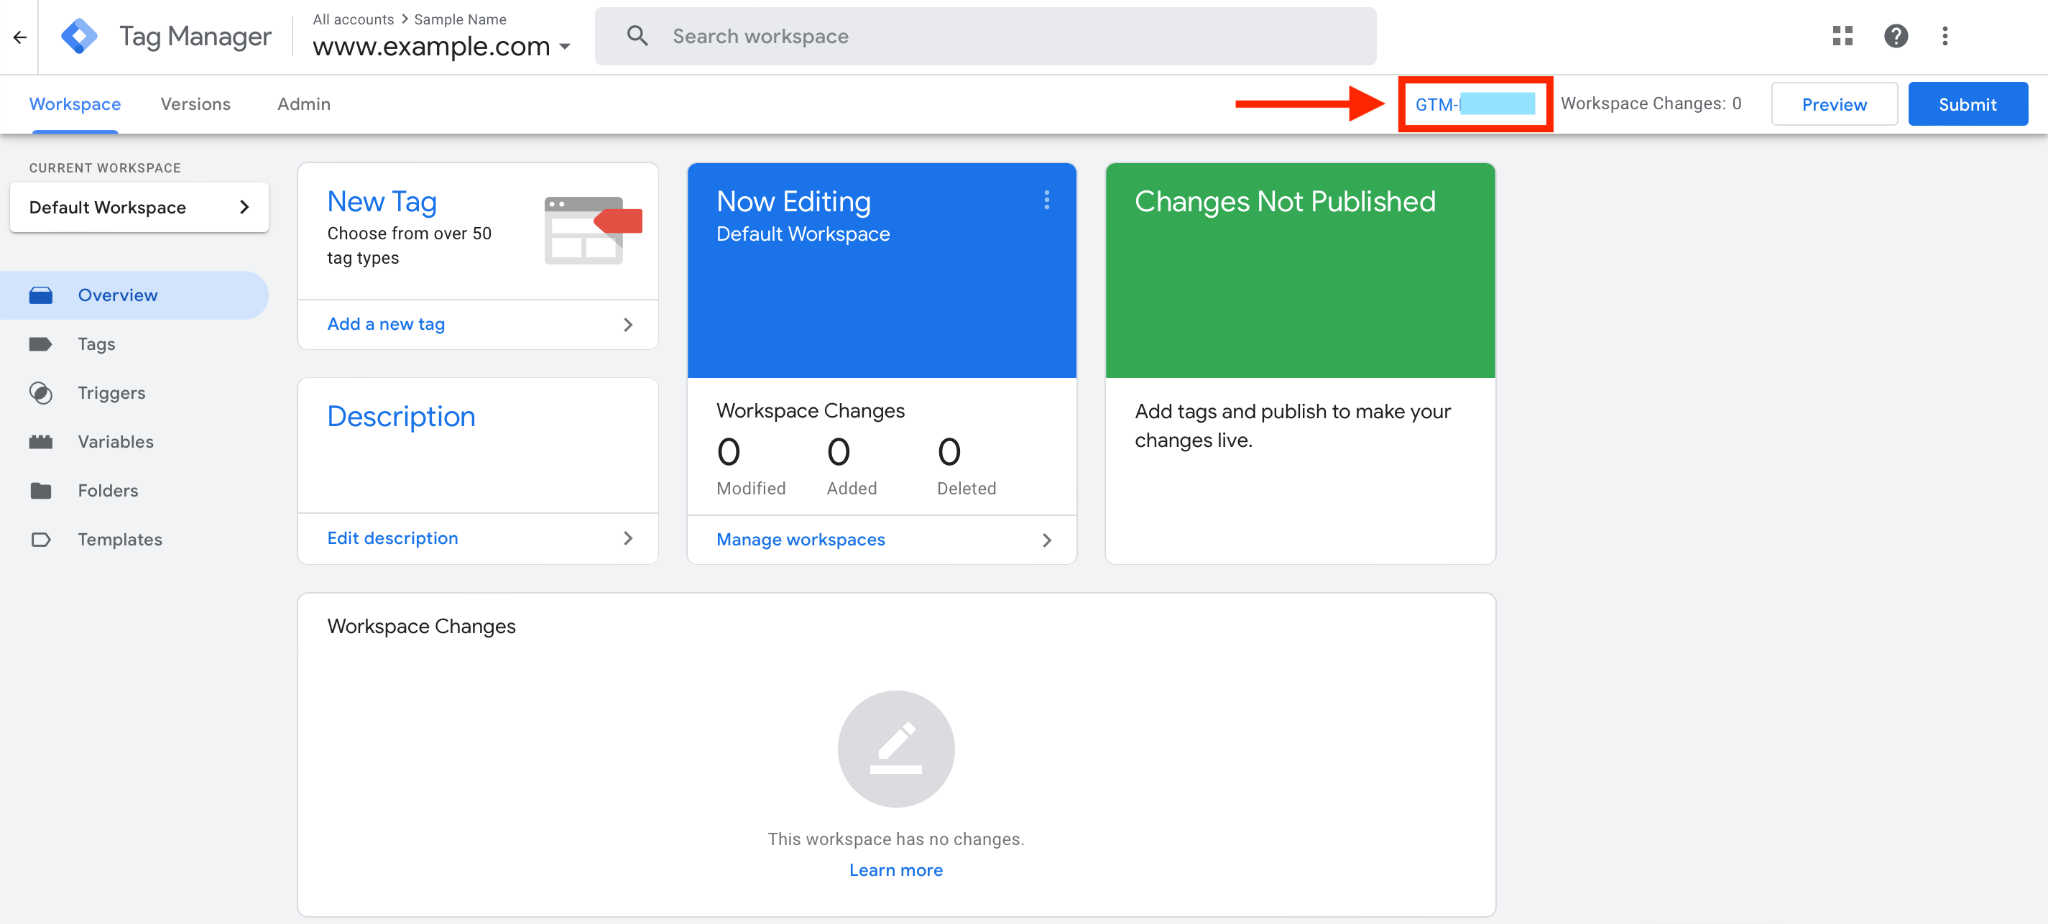
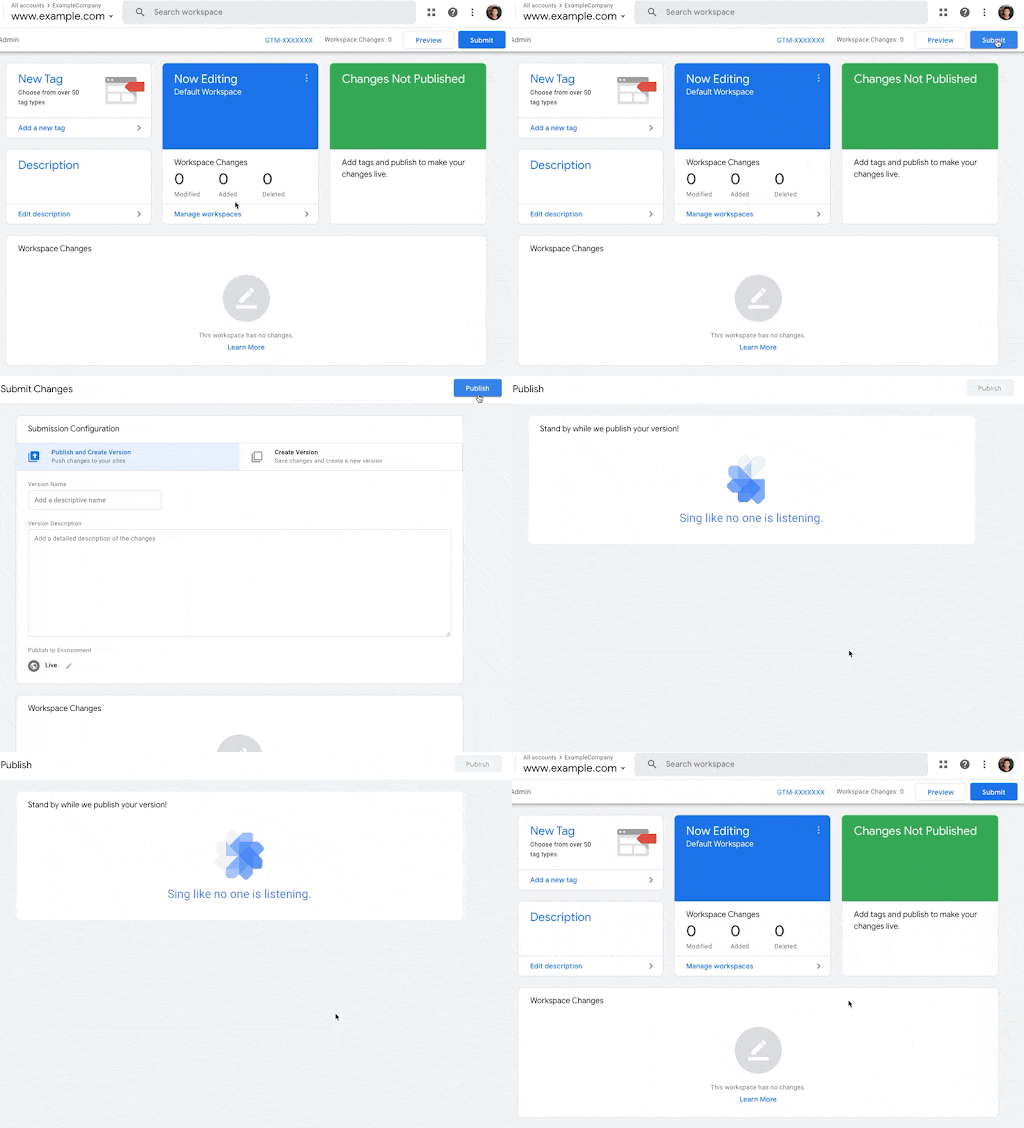
- Click on Submit > Publish > Continue to publish your Google Tag Manager container.
Add Google Tag Manager code to your Shopify theme
-
Log in to your Shopify account.
-
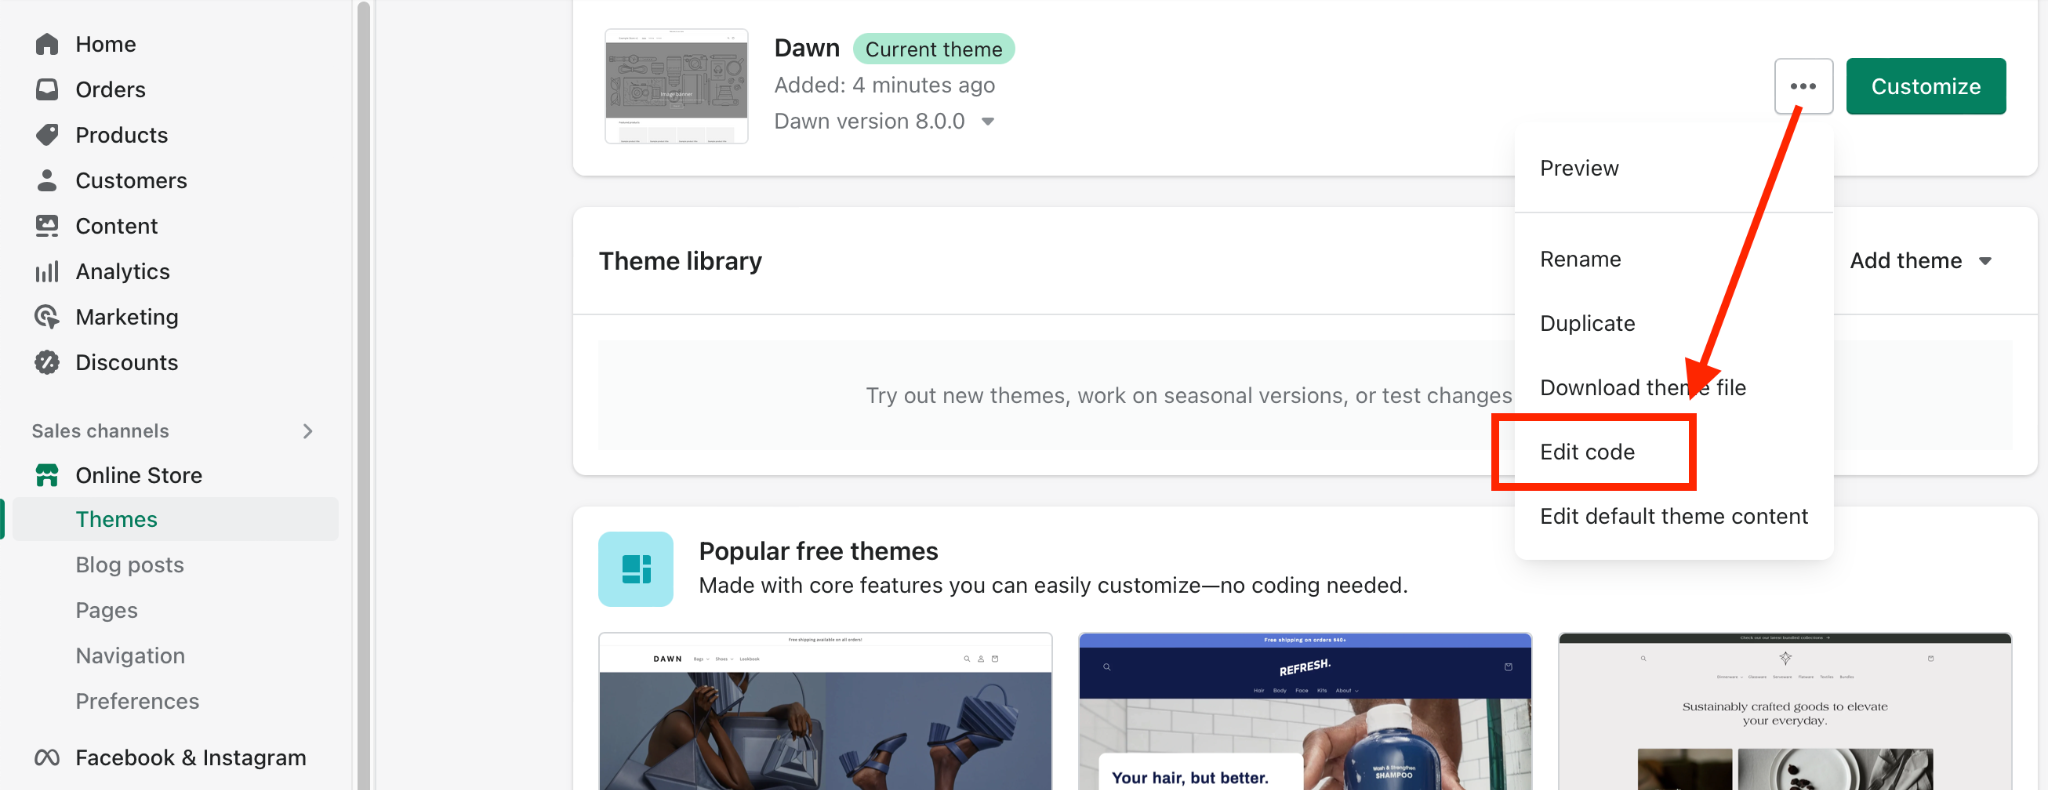
In your Shopify admin, click “Online store”, and then click “Themes”.
-
In the theme drop-down, click “Edit Code”.
- Note: Before you proceed, you can choose to duplicate your theme first for backup.
-
Go back to Google Tag Manager and copy the first code snippet into the <head> tags of your theme.liquid and checkout.liquid code:
- Click your Google Tag ID Manager.
-
Copy the code from the first box. You can find it directly under the text “Paste this code as high in the <head> of the page as possible:”
-
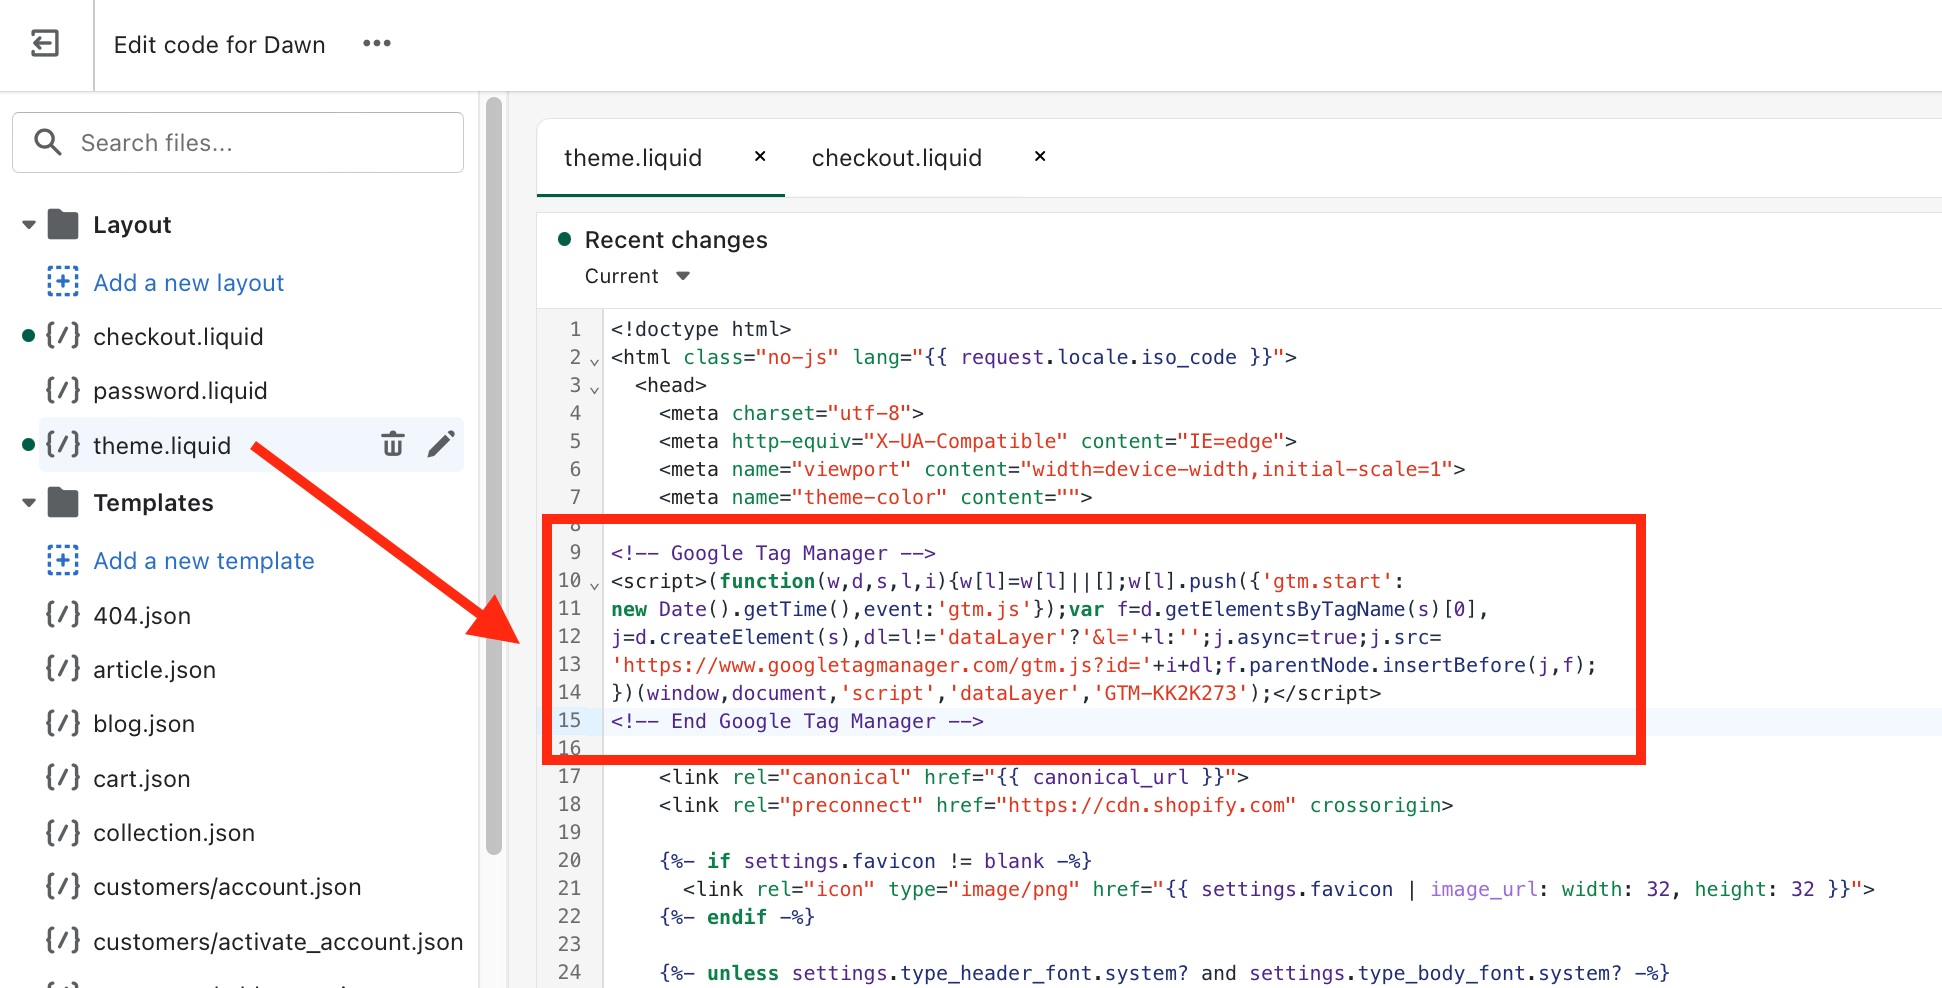
In your Shopify admin, open your theme.liquid file. Paste the code snippet as high in the <head> of the theme.liquid code as possible.
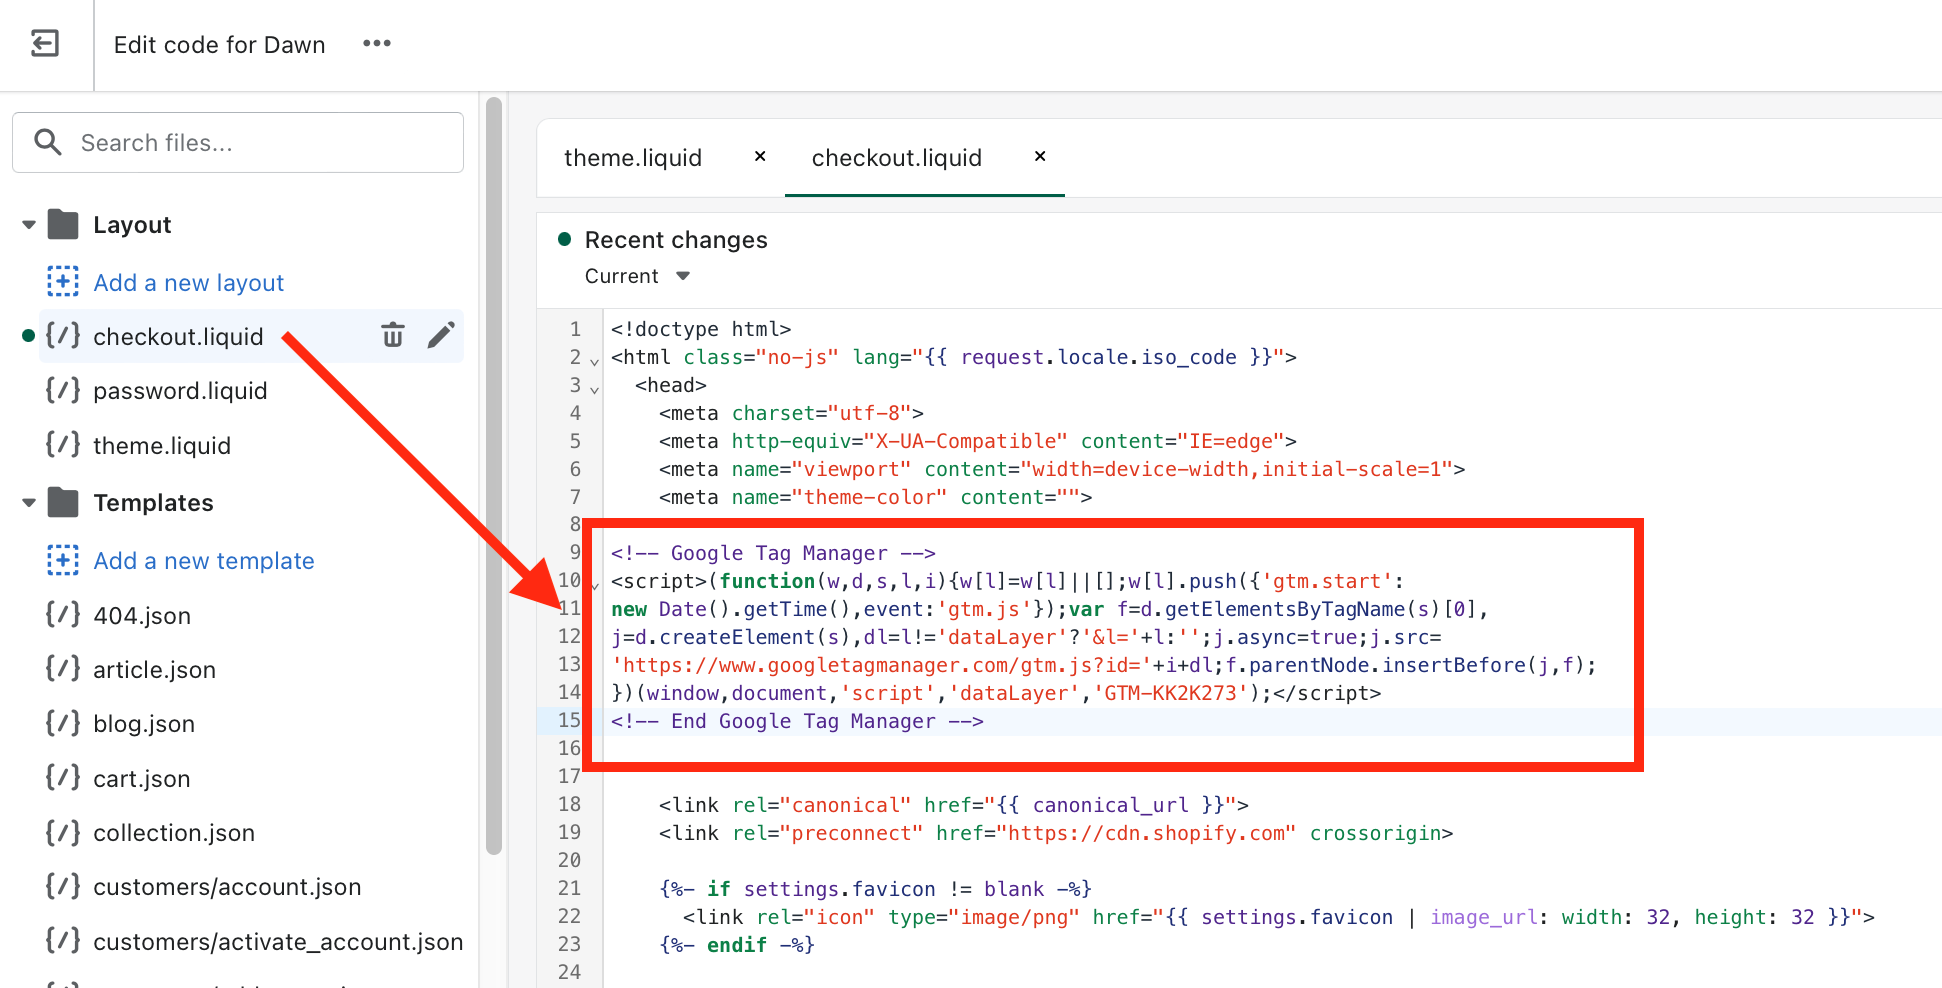
- Open your checkout.liquid file. Paste the code snippet as high in the <head> of the checkout.liquid code as possible.
-
Go back to Google Tag Manager and copy the second code snippet into the <body> tags of your theme.liquid and checkout.liquid code:
- Click your Google Tag ID Manager.
-
Copy the code from the second box. You can find it directly under the text “Additionally, paste this code immediately after the opening <body> tag:”
-
In your Shopify admin, open your theme.liquid file. Paste the code snippet as high in the <body> of the theme.liquid code as possible.
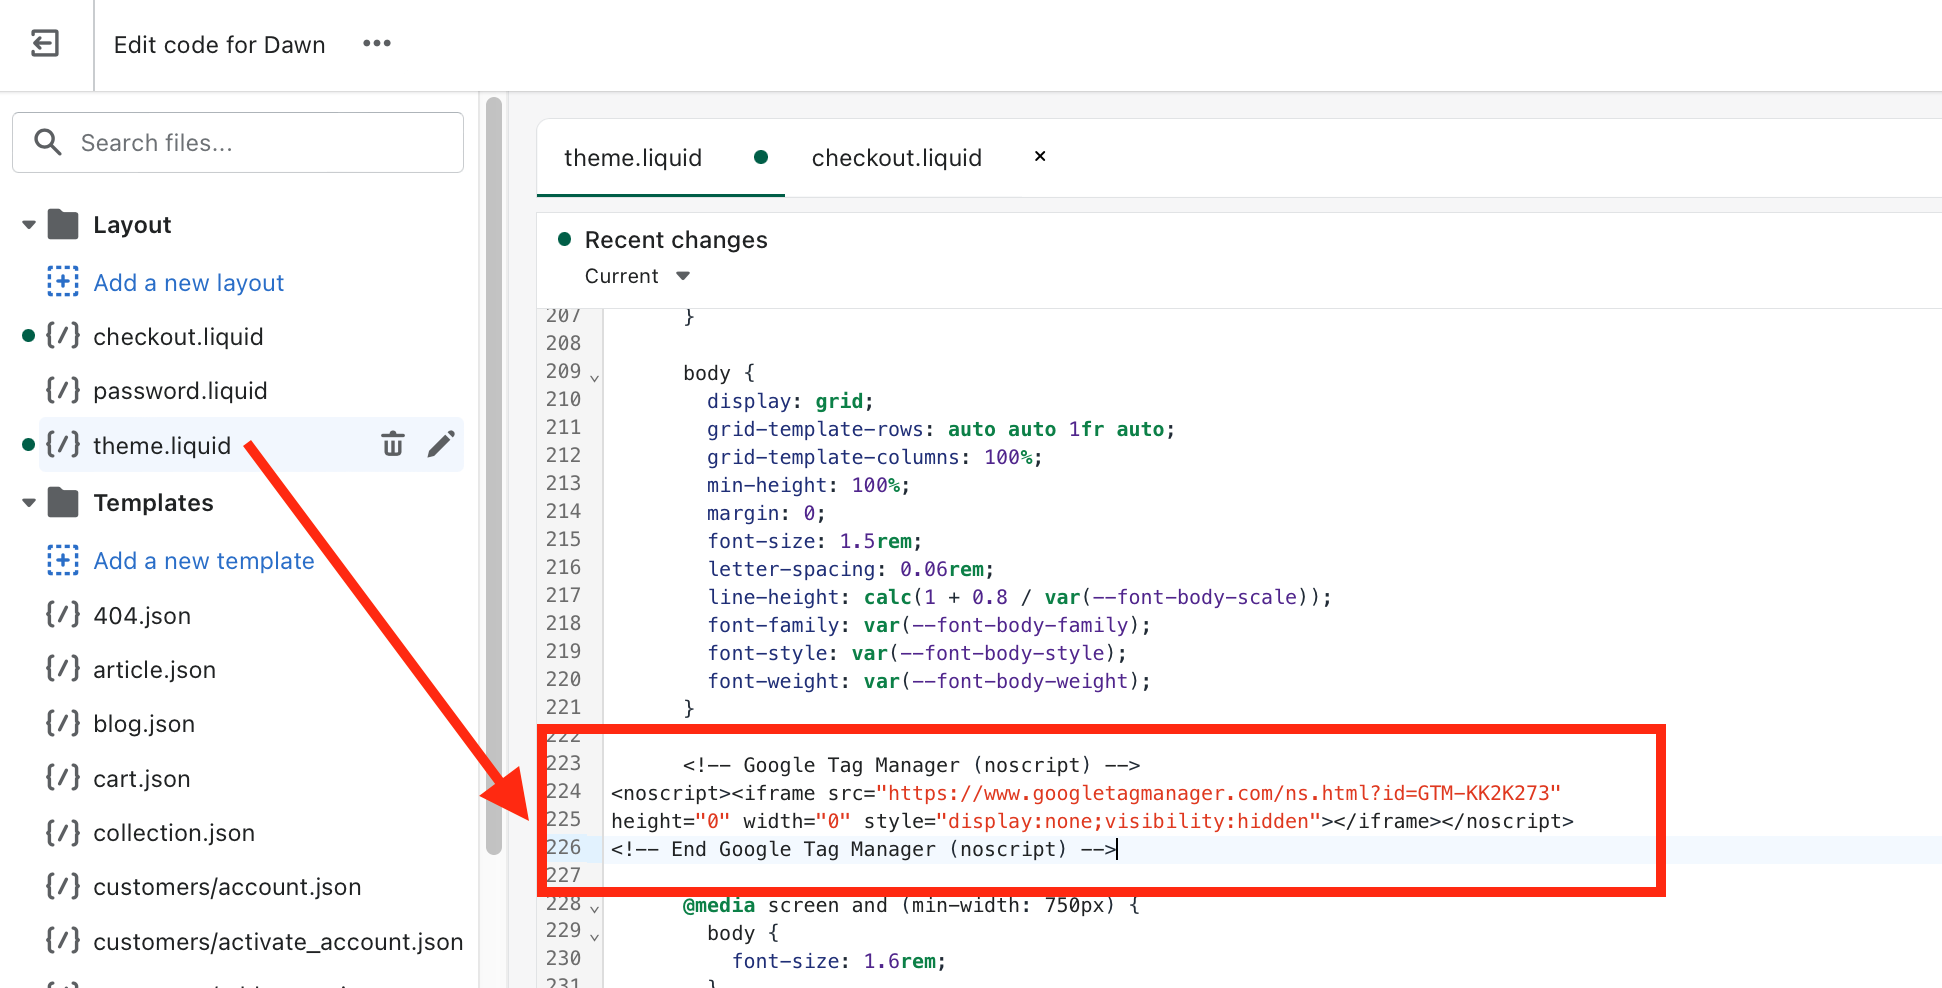
- Open your checkout.liquid file. Paste the code snippet as high in the <body> of the checkout.liquid code as possible.
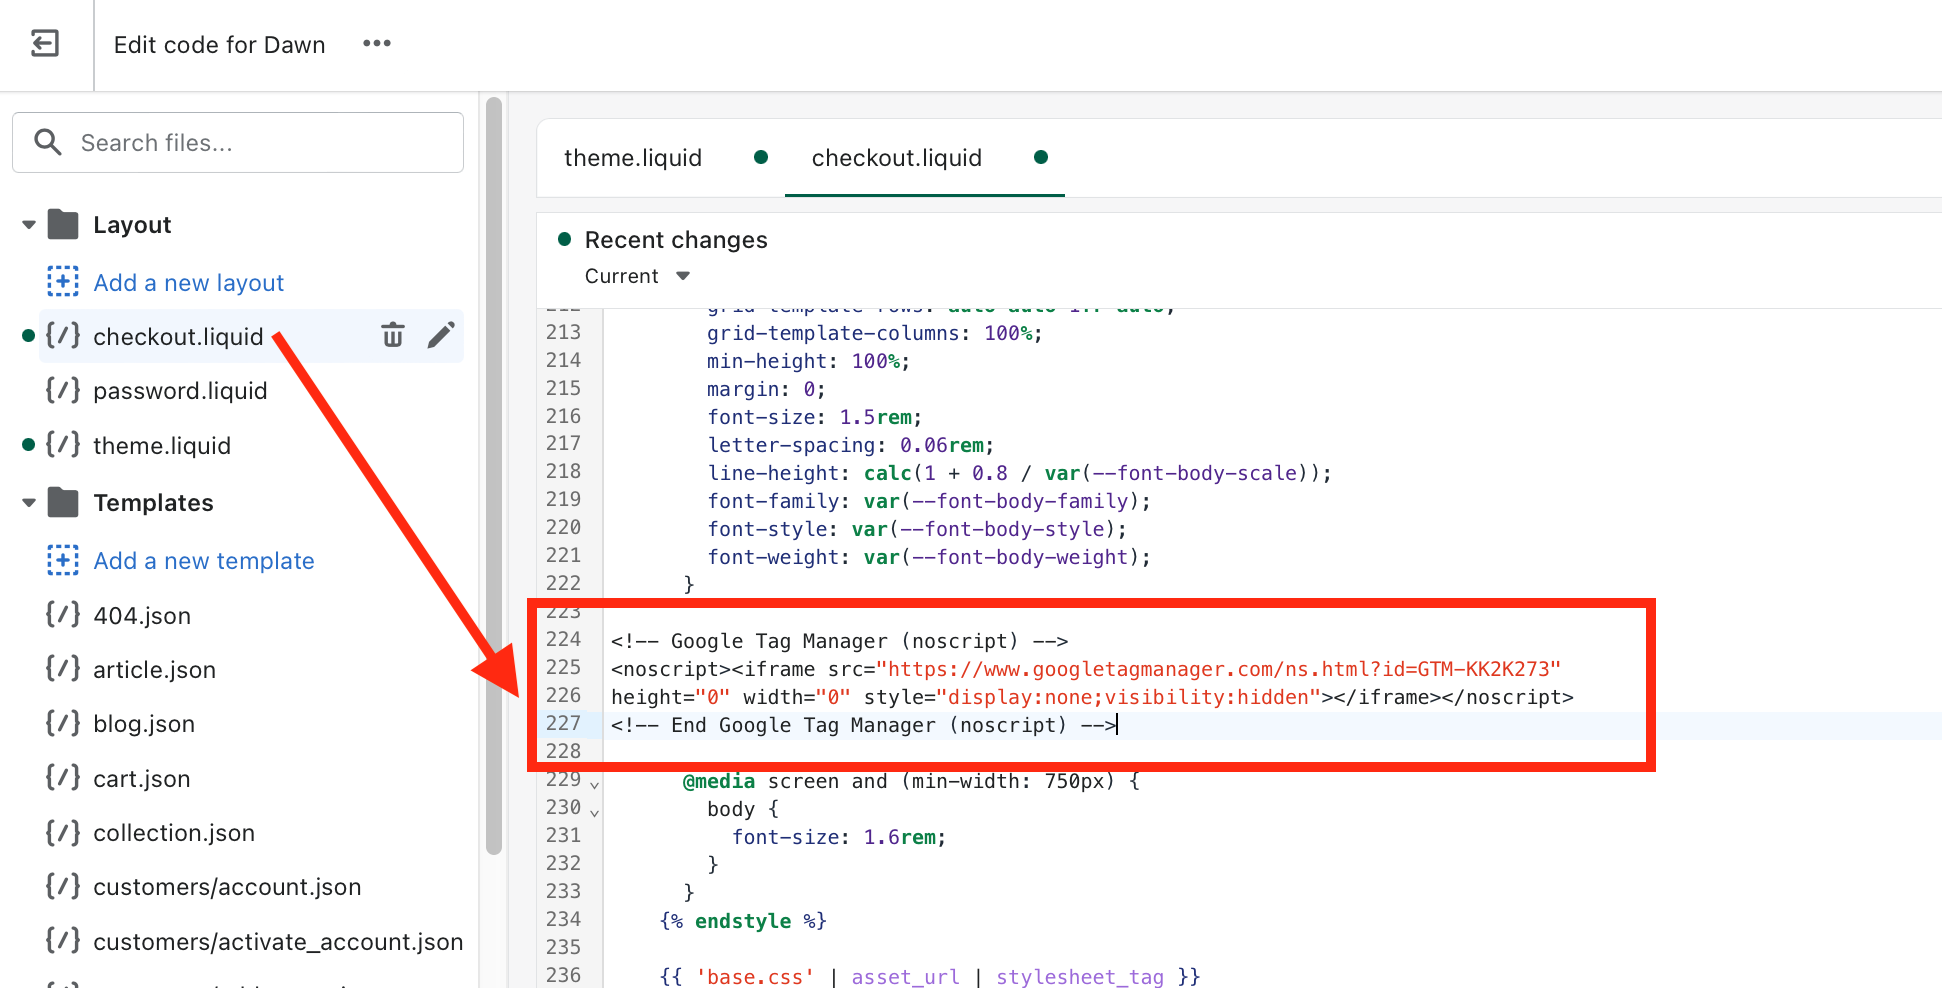
- In your Shopify admin, click “Save”.
Verify that Google Tag Manager is Installed
- Open your Google Tag Manager and click “Preview”.
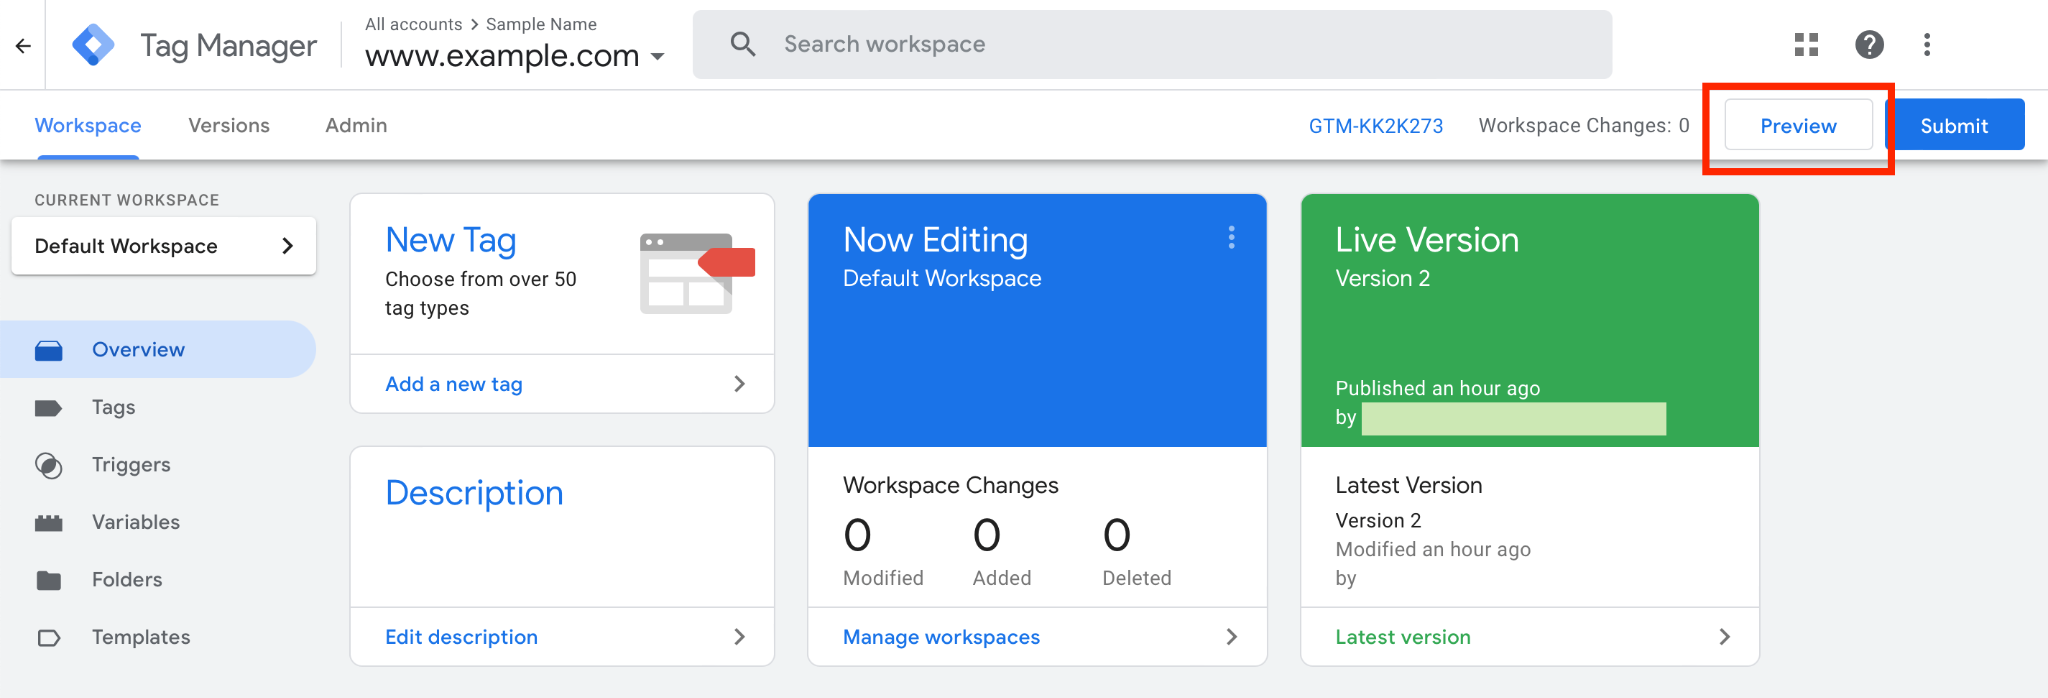
- Input your store’s URL and click “Connect”.
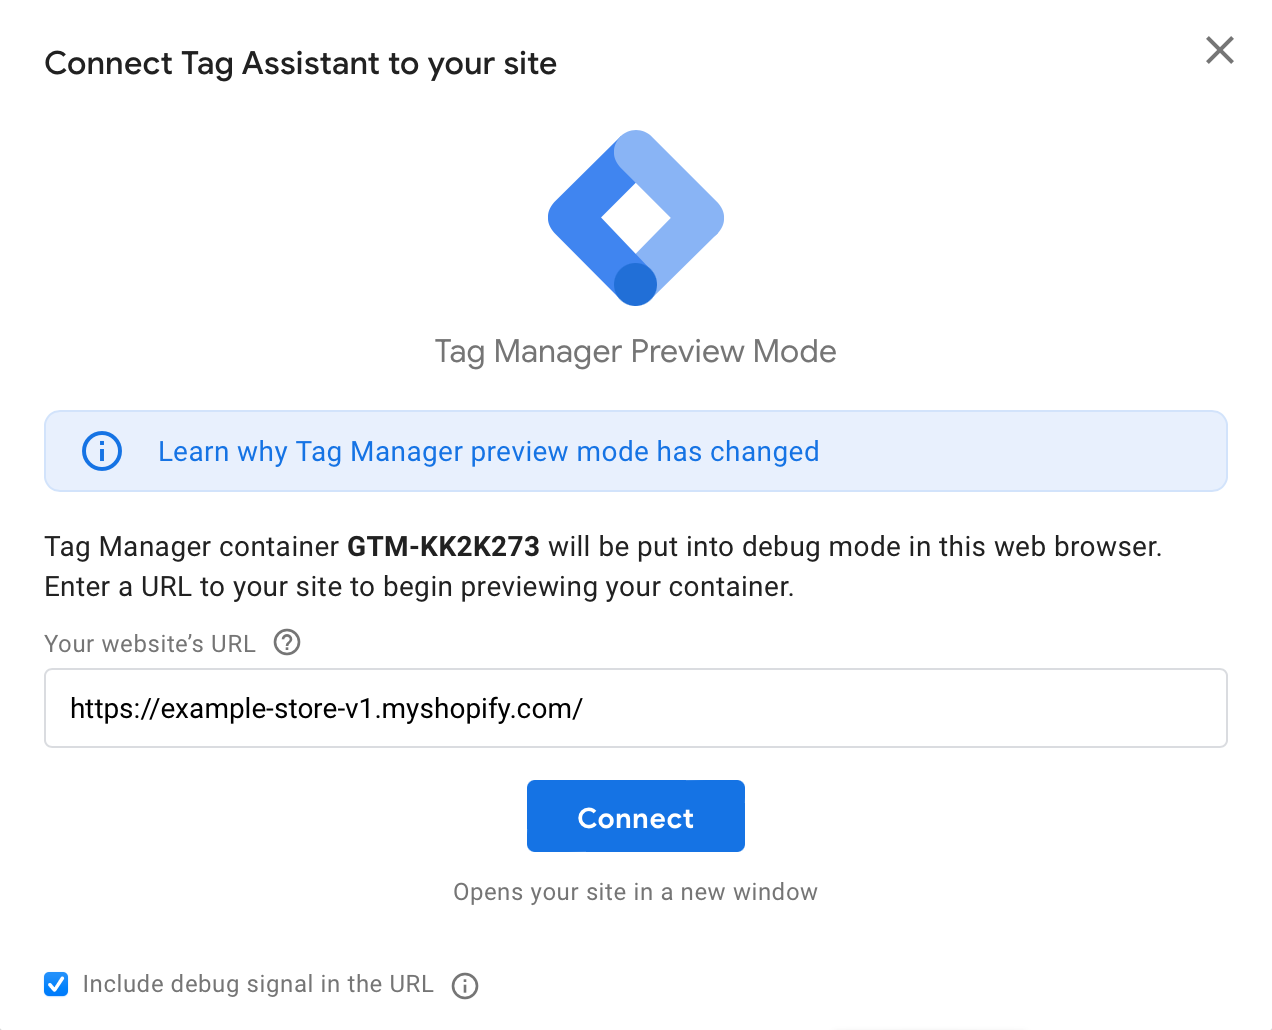
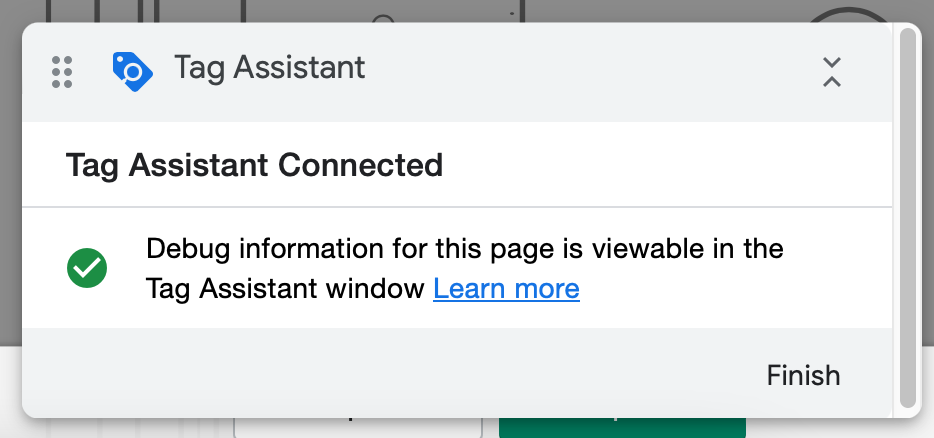
- If the Google Tag Manager installation is successful, you will be redirected to your store page and you will see a pop up at the bottom right corner with the prompt “Tag Assistant Connected”.
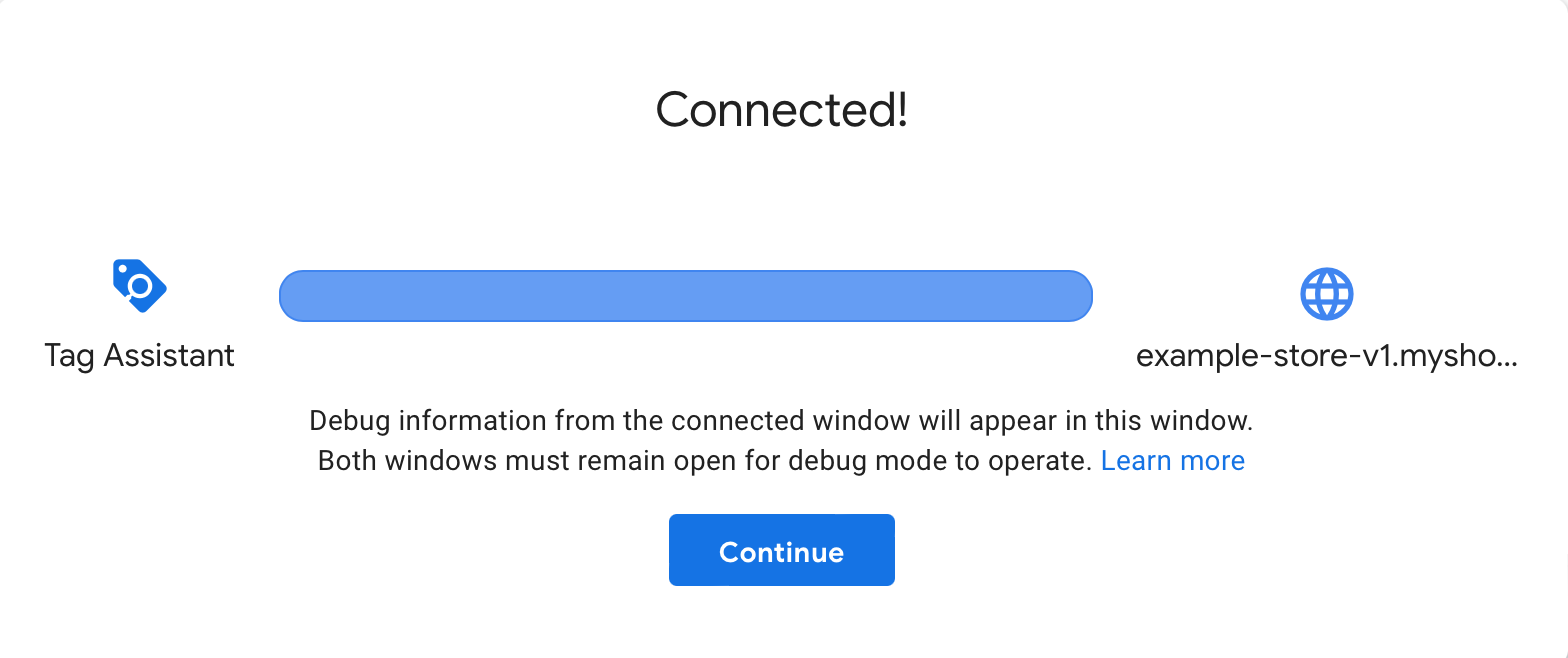
- You will also see a “Connected!” prompt when you go back to Google Tag Manager. Click “Continue” and you’re done.
Conclusion
And that's it!
You have successfully integrated Google Tag Manager with your Shopify store.
Execution Checklist:
-
Set up your Google Tag Manager account.
-
Copy the first code snippet from Google Tag Manager and paste it into the <head> tags of your theme.liquid and checkout.liquid code.
-
Copy the second code snippet from Google Tag Manager and paste it into the <body> tags of your theme.liquid and checkout.liquid code.
-
Don’t forget to click Save.
-
Verify integration by going back to Google Tag Manager, clicking the Preview button, typing your store’s URL, and clicking Connect.
-
Once you see a pop-up that says “Tag Assistant Connected”, you’re all done.