Tracking Leads with Google Analytics
To monitor lead signups using Google Analytics
Prefer a shortcut? 16 free tools do parts of this for you.

Aim: To monitor lead signups using Google Analytics
Optimal Outcome: Understand if your strategy is successful by checking Google Analytics’ conversion report
What you need to start: You should have a Google Analytics account.
Why is this SOP Important: Lead generation tracking is essential in your marketing and sales initiatives because you need to determine if your strategies are getting enough revenue. To be effective, you should know the source of your leads. Moreover, you should identify the channels that are attracting your high-value leads.
When and Where to execute: You should perform this SOP after you’ve set up your website’s Thank You page, which thanks your customers after they sign up as a lead.
Who Should Be Doing This: Any person who’s part of the marketing team
What Is Lead Tracking?
Lead tracking is essential to the sales and marketing program because it documents sales tips with critical information about its position in the funnel. You need to track your leads so your sales team can follow up with the prospects, ensuring your staff provides due attention to all potential buyers.
Execution
Resources/Tools & Set up
-
Your website’s lead magnet
-
Google Analytics account
-
Google Analytics Debugger Chrome Extension
Create an Event for Each Lead Generation
NOTE: Before you perform the succeeding steps, your website should have a Thank You page where you can direct your visitors after they sign up as leads.
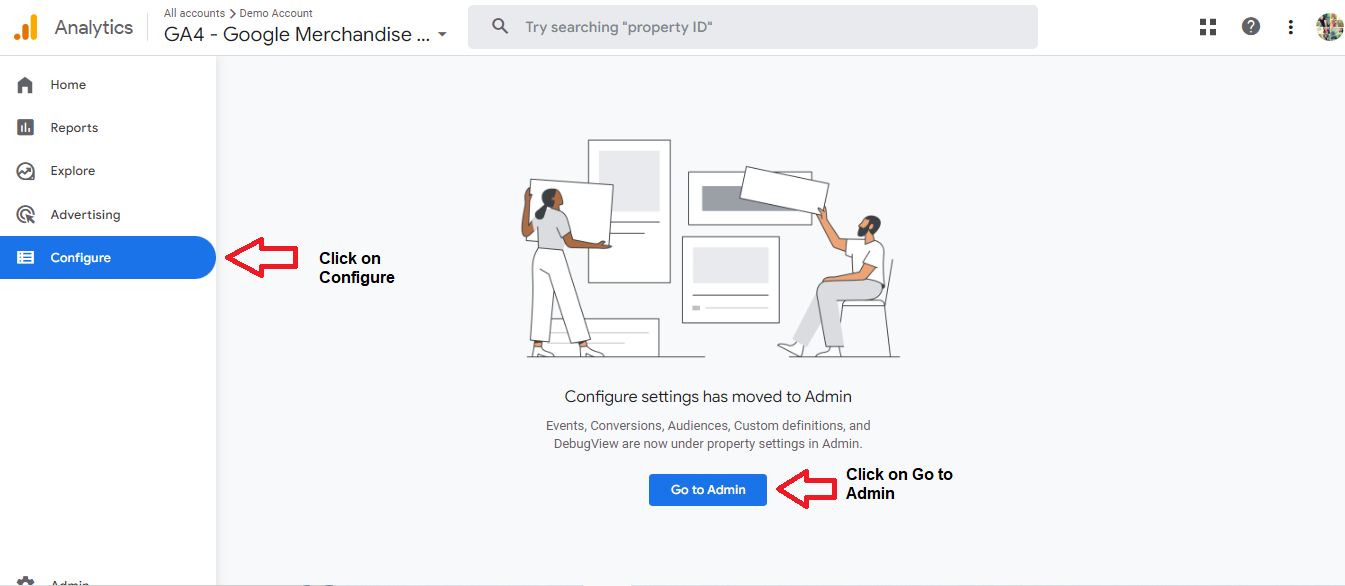
- Log into your Google Analytics account, then click on Configure. Finally, click on Go to Admin.
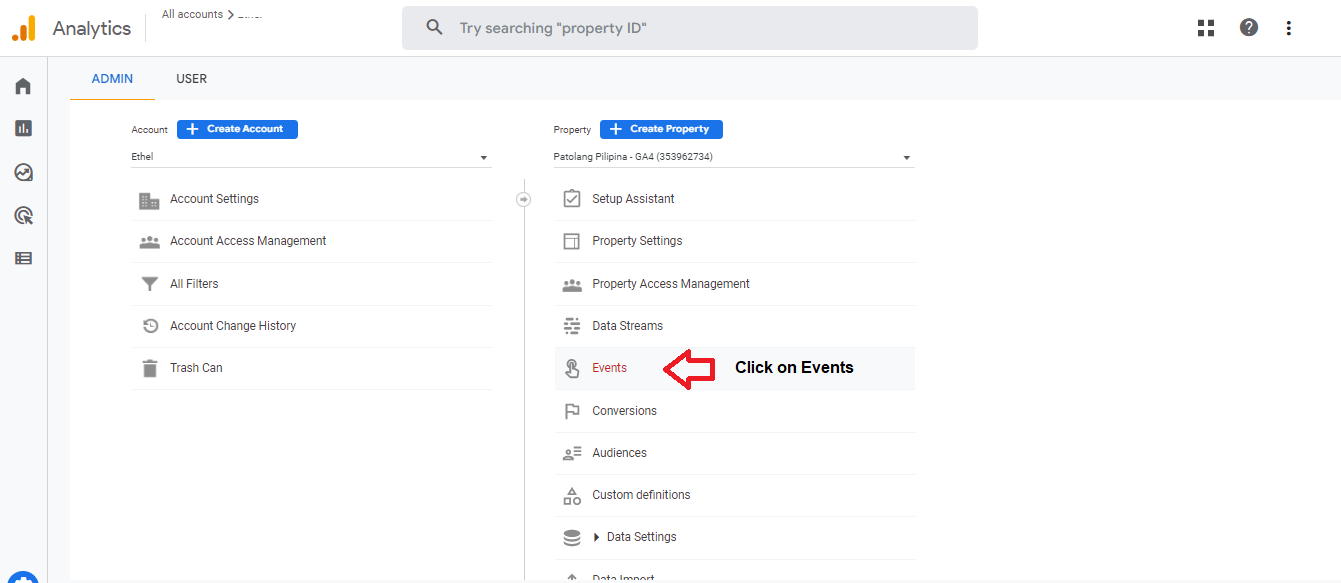
- Click on Events on the next screen.
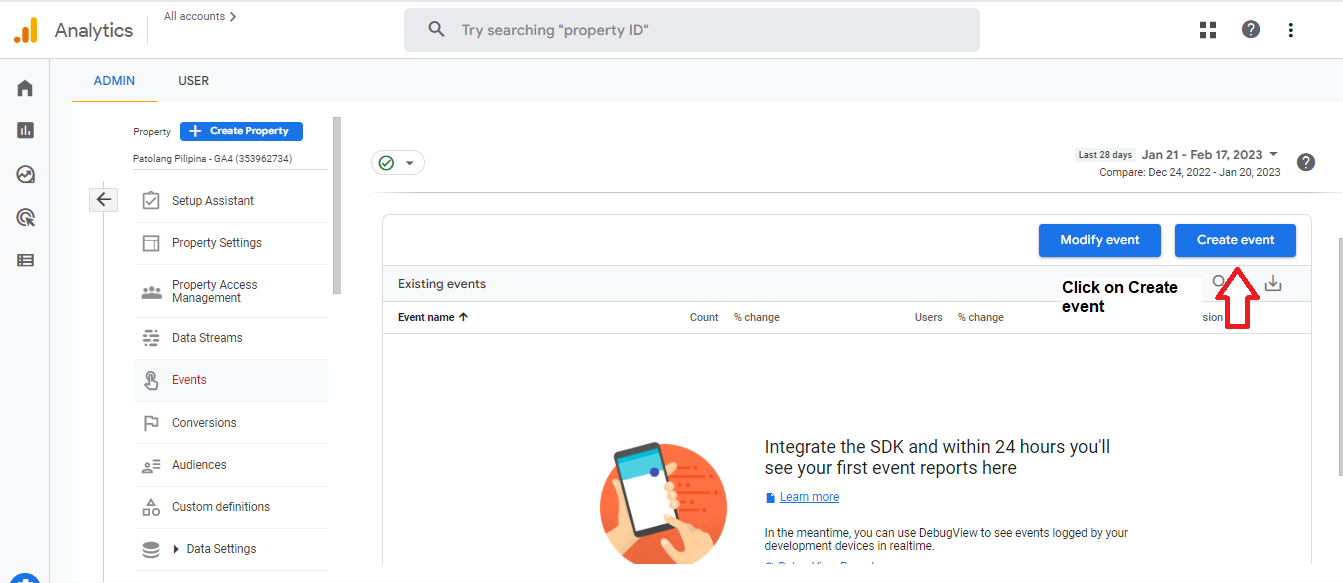
- Click on Create event.
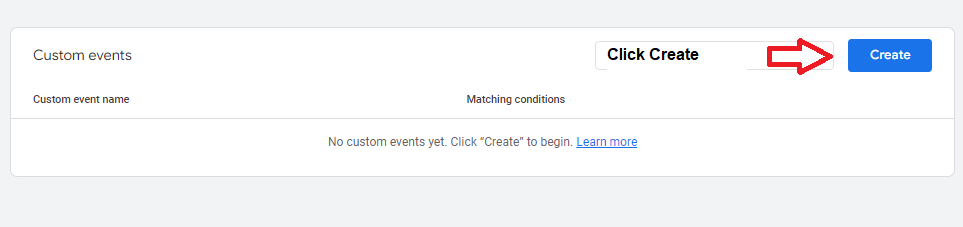
- A popup screen will appear. Click on Create.
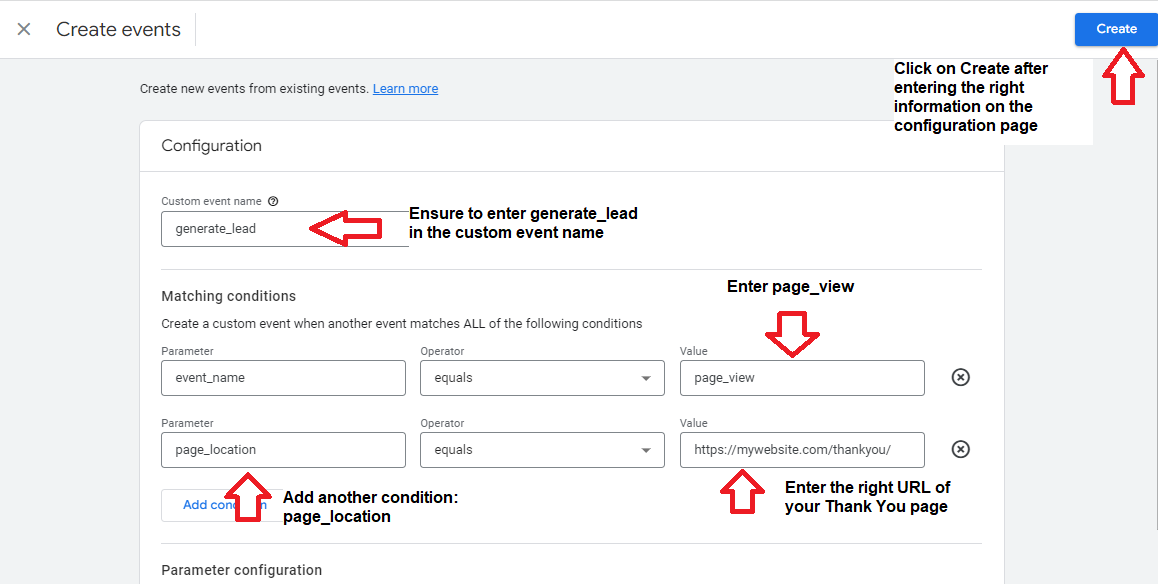
- Enter the correct information on the next screen.
Custom event name: generate_lead
-
Event_name equals page_view
-
Page_location equals [URL of your Thank You page]
Click on Create when you finish encoding the required information.
6. Click the X (Cancel) button to return to the Events page. Then, click on the New conversion event.
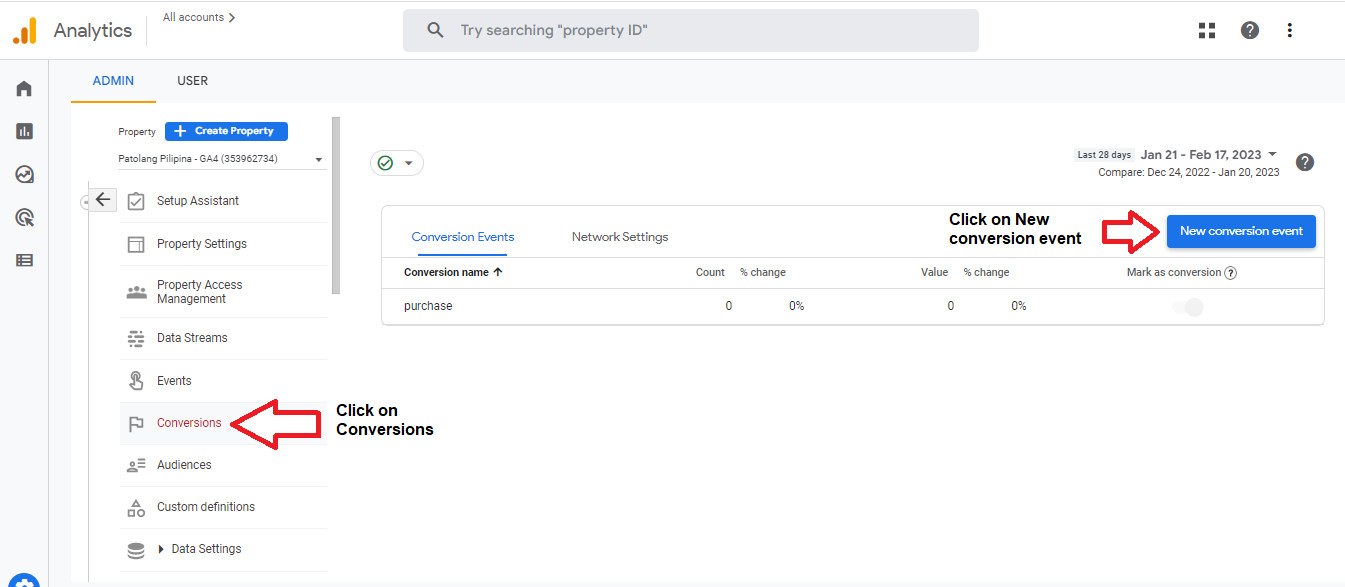
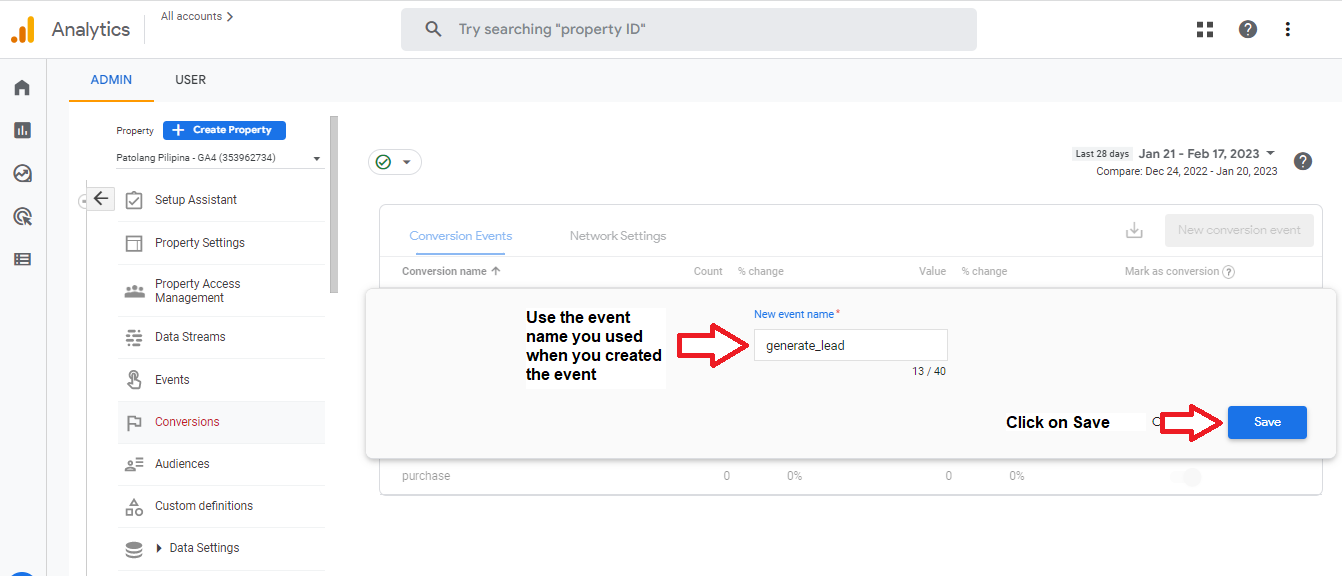
7. Use generate_lead as the event name, then click on Save.
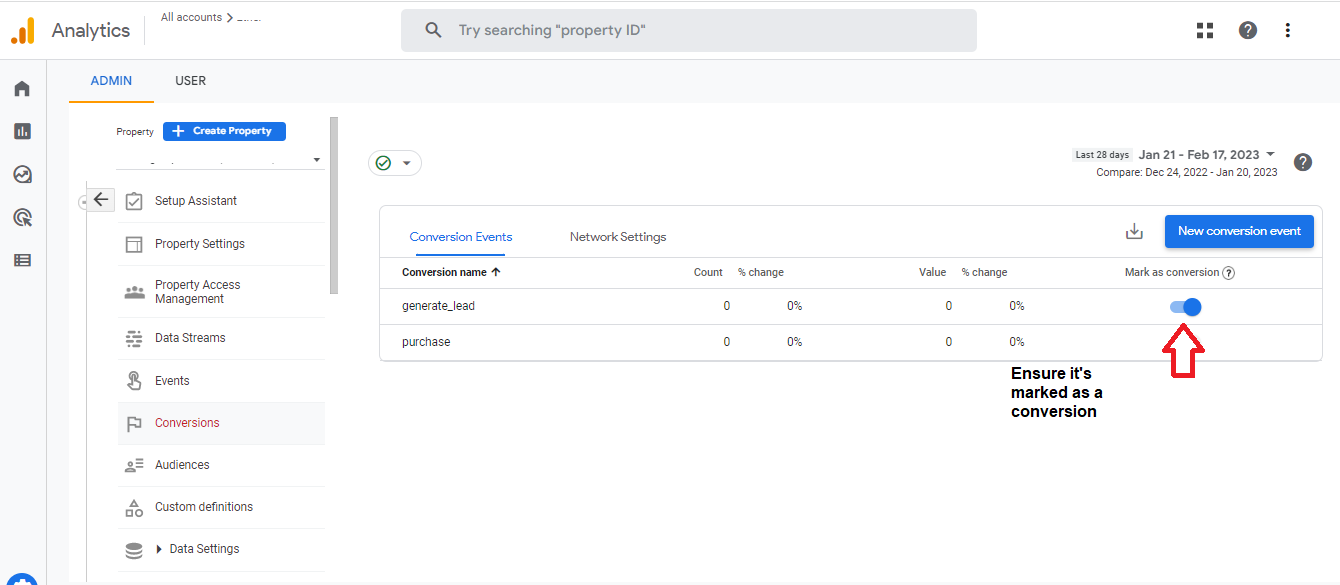
8. Ensure you mark generate_lead as a conversion for Google Analytics to include the conversion event in the report.
Validate Your Google Analytics Set Up
NOTE: Before trying this SOP, you have the Google Analytics Debugger Chrome Extension installed on your Chrome web browser.
- Use Google Analytics to check in real time if your lead tracking setup is operational. First, ensure that the Google Analytics Debugger Chrome Extension is ON.
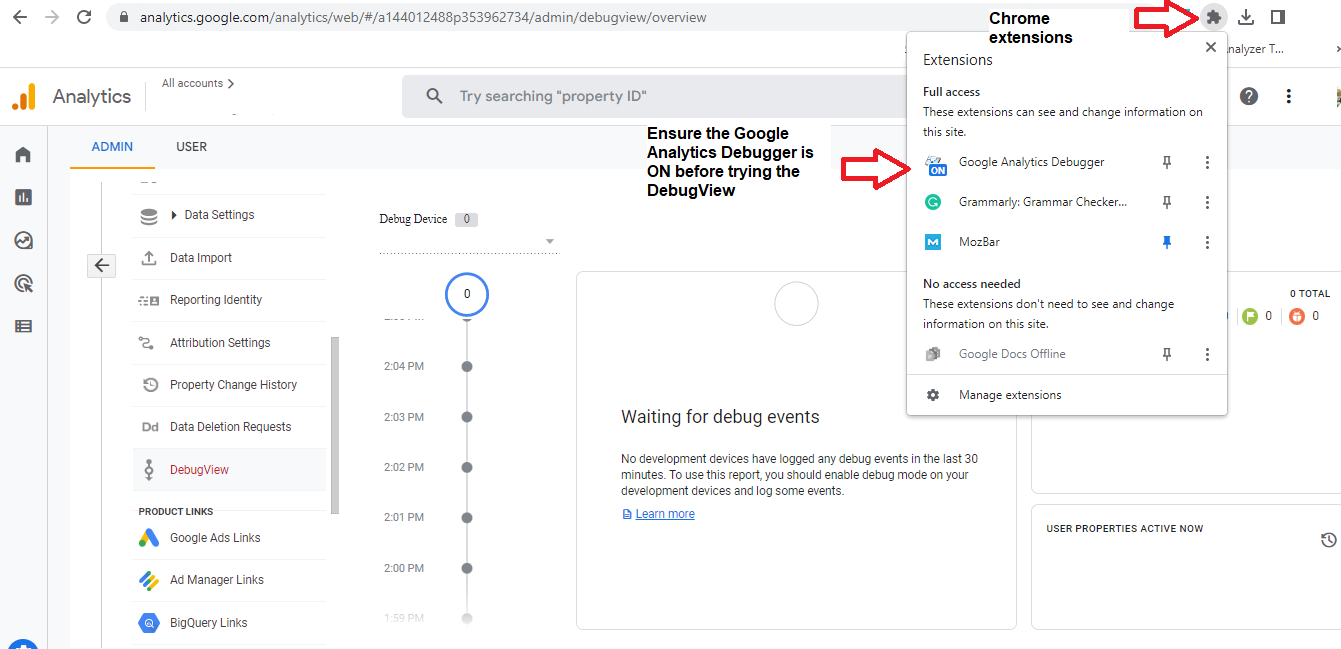
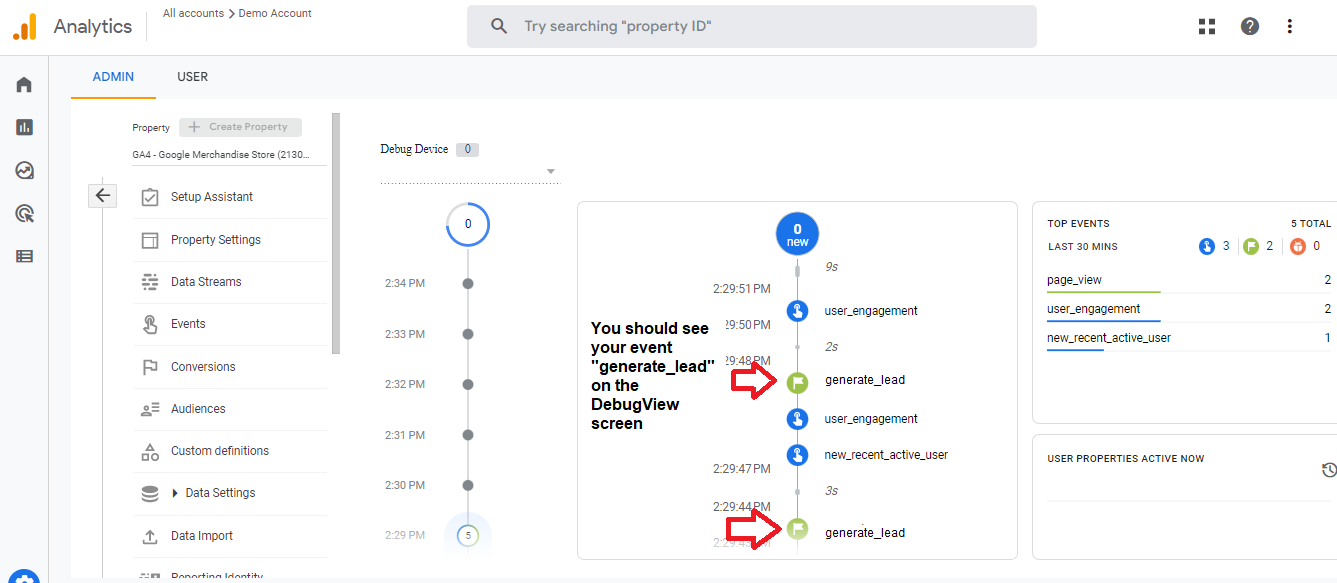
- Log in to your Google Analytics account and go to DebugView under Property. Then, try your website’s signup page then try it. If you see your Thank You page on the screen, you should also see the “generate_lead” event on your DebugView screen.
Conclusion
Congratulations! You can now track your lead generation performance through Google Analytics.
Execution Checklist:
-
Lead tracking is essential because you need to know how successful your lead magnet is.
-
You can track your leads efficiently in Google Analytics.
-
However, you should first ensure that you have a Thank You page on your website, which will show every time a visitor signs up. Moreover, you need to have your Google Analytics account correctly set up.
-
Create an event for generate_lead, then create a new conversion for it. Ensure the “Mark as conversion.” is ON.
-
Verify if lead tracking is successful using the DebugView feature of Google Analytics. Don’t forget to install the Google Analytics Debugger Chrome Extension first.