A Step-by-Step Guide to Tracking Custom Events in Google Analytics
To set up a custom tracking event on Google Analytics that triggers whenever a user interacts with your website or online shop.
Prefer a shortcut? 16 free tools do parts of this for you.

Aim: To set up a custom tracking event on Google Analytics that triggers whenever a user interacts with your website or online shop.
Optimal Outcome: You will be able to successfully track a custom event whenever a user is interacting with your website or online shop.
What do you need to start: To follow this SOP, you will need to have a Google Analytics 4 account. We are also going to use the GA Debugger browser extension to verify the custom events later on.
Why is this SOP Important: It is crucial to be aware of how your online visitors interact with your site. What are their activities? Where do they spend most of their time? Knowing these behaviors is greatly beneficial in analyzing how your online business is performing.
Where to execute: You will need to set up a Google Analytics 4 account before you can create and track custom events.
Who Should Be Doing This: The person responsible for managing the site’s analytics.
What Are Custom Events on Google Analytics?
Google defines a custom event as a digital interaction that can be clearly defined by a set of parameters.
These are events that are not usually tracked by Google Analytics unless you have clearly requested them through the process that we are going to share with you below.
Execution
Resources/Tools & Set up
-
A Google Analytics 4 account
-
GA Debugger Chrome Extension (for verifying your custom events later on)
Setting Up a Custom Event in Google Analytics 4
-
Log into your Google Analytics 4 account.
-
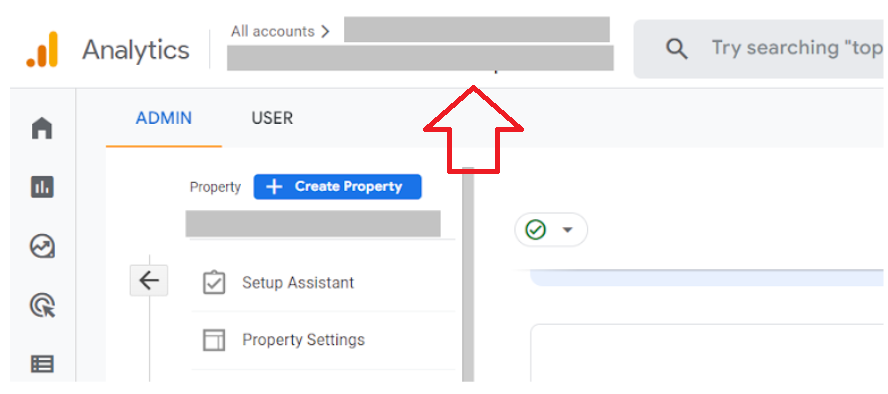
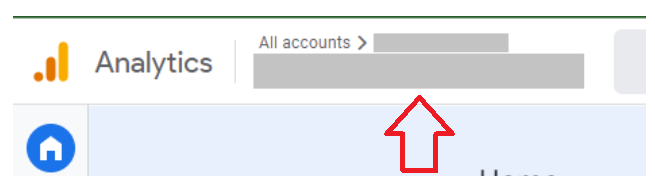
Choose the website that you want to target by selecting the right option beside “All accounts”.
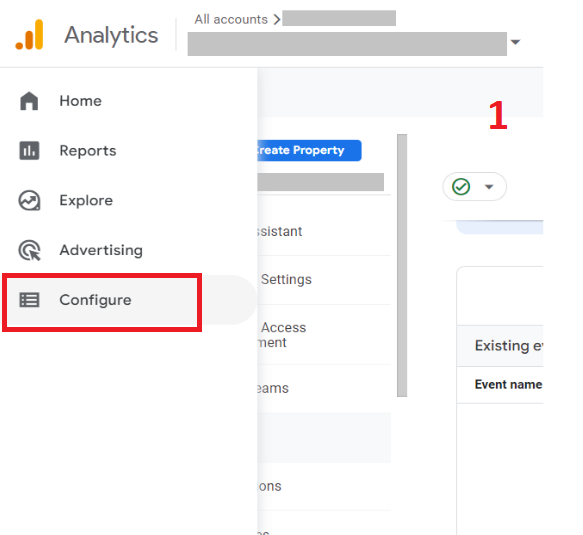
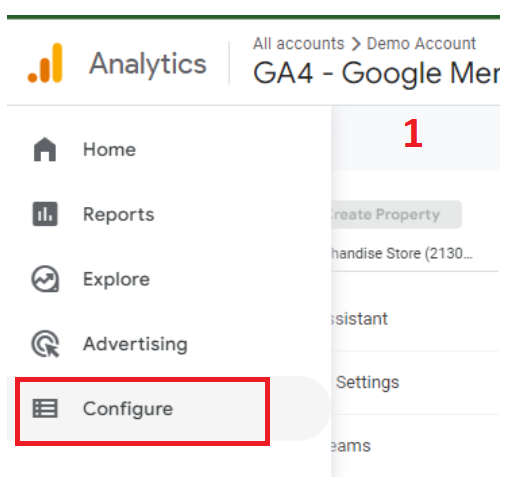
- Click on Configure, then select Events.
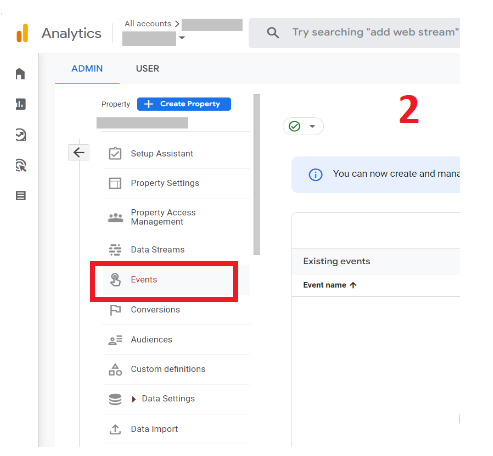
- Doing so will reveal the list of events that occurred inside your website within a set time period. Since we are showing you a new account, you will notice that there are no existing events listed in the screenshot below.
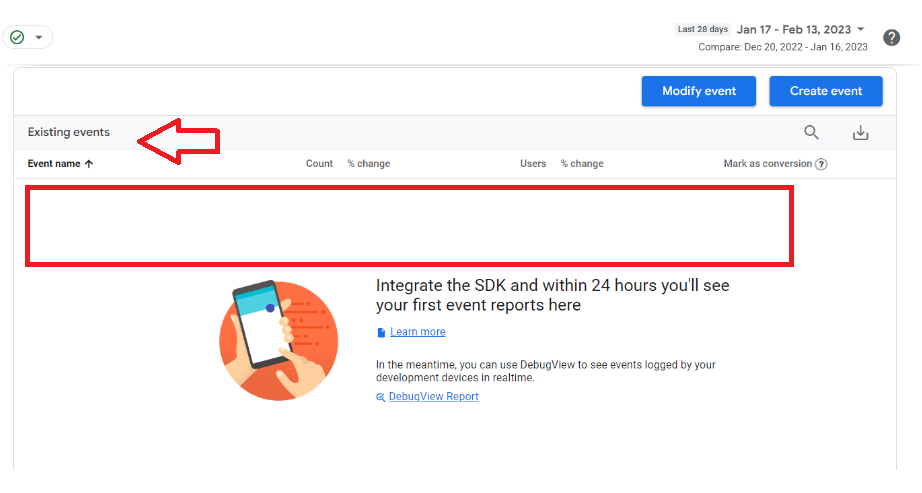
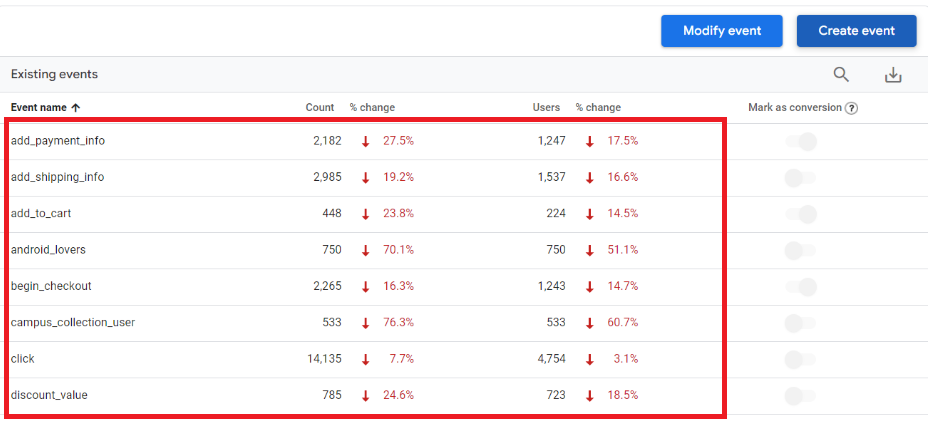
- Those who have existing events will see something like the screenshot below courtesy of the Google Analytics demo account:
- Create a new custom event by clicking on Create event at the upper right part of the page.
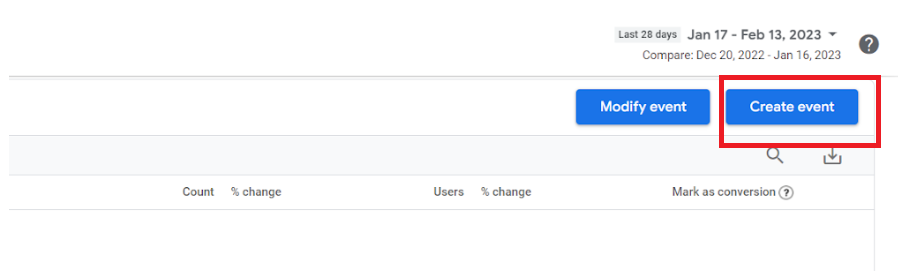
- The next window will appear. Click on Create.

- The event configuration page will appear. Fill out the form. Here are the details you’ll need:
- Custom event name - This is the name that will describe what kind of digital interaction you want to track. For the purposes of this SOP, let’s say that you want to track every time an online user clicks on a particular page (such as your shop page).
Be sure to check out Google’s event name guidelines for more information.
- Matching conditions - These are the conditions that must be met in order to trigger the tracking. It is common to use two sets of parameters: to determine the action and location.
Following our example, we are going to configure our event this way:
i. event_name —- equals —- page_view
ii. page_location —- contains —- (your shop page’s URL)
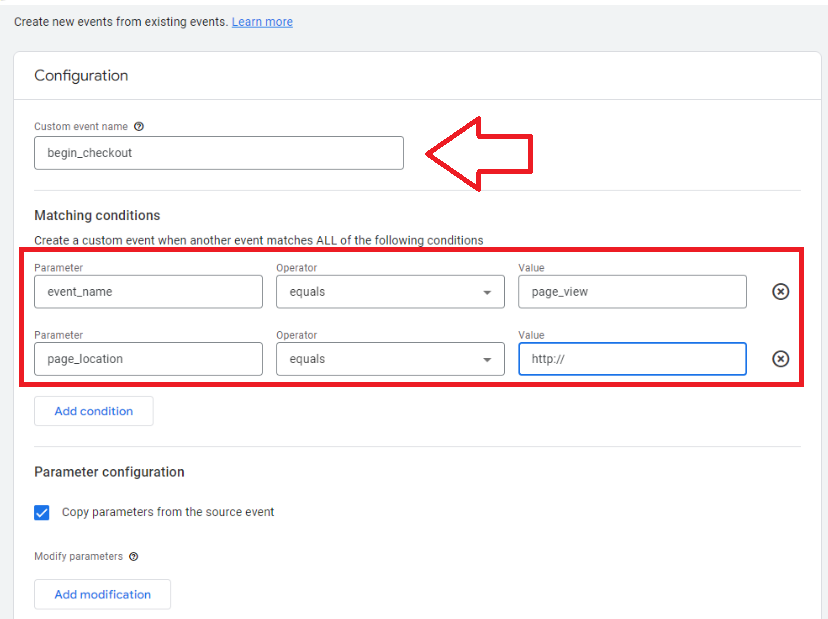
Note: For the purposes of this SOP, we are going to track checkouts. Hence, we are going to name the event as begin_checkout. Don’t forget to add the URL of your checkout page as the value of the page_location parameter.
-
Upon completing your event configuration, you may then click on Create.
-
Congratulations! You have just created a custom event. Use the exit button to go back to the event dashboard. Now, every time someone visits your shop page by clicking on it from the menu, this action will promptly get tracked by Google Analytics.

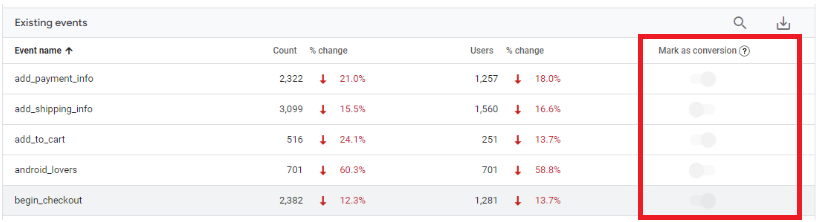
- You may mark this custom event as a conversion by clicking on the toggle. Remember, you should only mark events as conversions if you consider them important (it may be a checkout completion, purchase, or form submission).
Editing an Event in Google Analytics 4
- Next, we are going to teach you how to edit a custom event on Google Analytics 4. First, select the right property. This is the website or online shop where you have implemented your Google Analytics 4 tracking code.
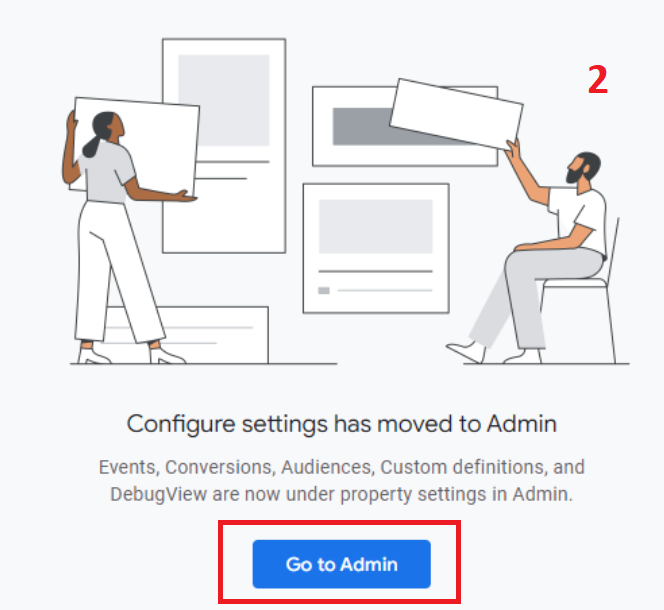
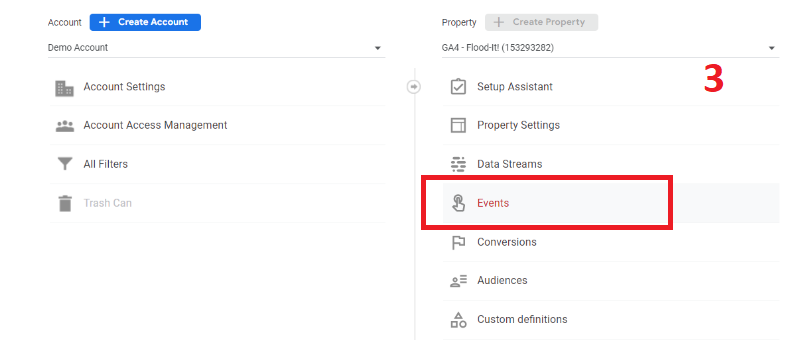
- Click on Configure, click Go to Admin, then Events. For the purposes of this SOP, we are going to use the Google Analytics demo account.
- Click on Create event.

- Select the event that you want to edit. This will open the Configuration page.
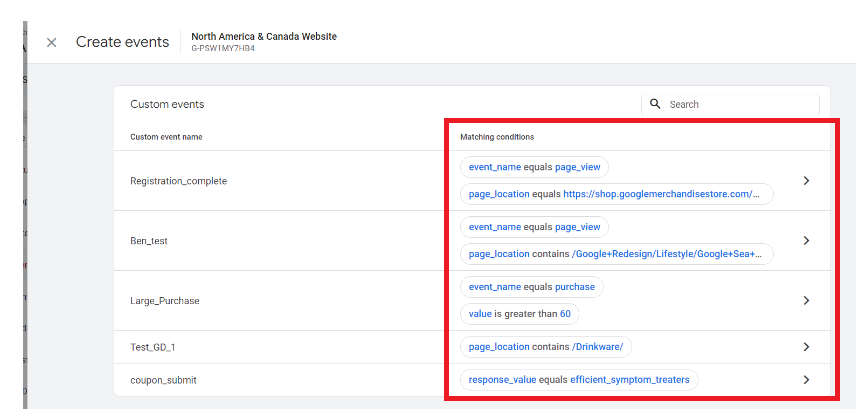
- Perform the edits that you want to do. Don’t forget to click on Save once you’re done.
Congratulations! You have just successfully edited your custom event on Google Analytics 4.
Deleting an Event in Google Analytics 4
- Next, we are going to teach you how to delete a custom event in Google Analytics 4. First, select the right property. This is the website or online shop where you have implemented your Google Analytics 4 tracking code.
- For the purposes of this SOP, we are going to use the Google Analytics demo account.
Click on Configure, then Go to Admin, and Events.
- Click on Create event.
- Select the event that you want to edit. This will open the Configuration page.
-
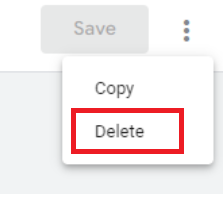
Select the event that you want to delete. Click on the menu beside the Save button at the upper righthand corner of the page and click on Delete.
-
You will be redirected to the Create events page once you’re done.
Verifying an Event Setup in Google Analytics 4
-
Install the GA Debugger Chrome Extension to use Google Analytics 4’s Debug View function and verify your lead tracking’s efficacy.
-
After downloading the extension, ensure the plugin is active by clicking on it. It will also have the word “ON” atop its icon.
-
Afterward, log into your Google Analytics account.
-
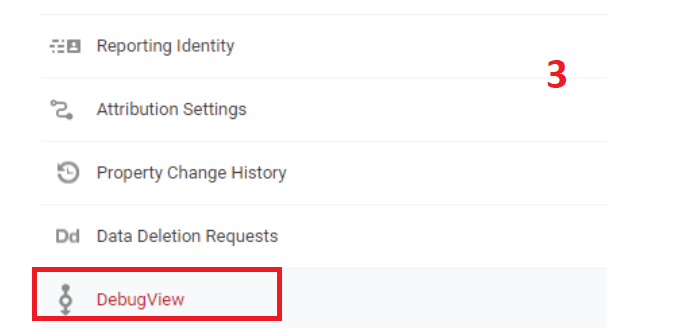
Click on Configure, then Go to Admin, and click on DebugView.
-
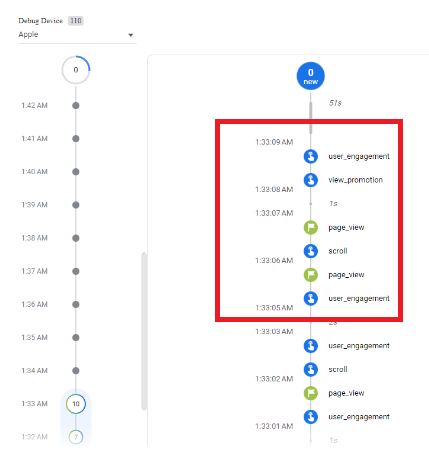
DebugView allows you to see the events tracked in real-time. You can now test to see if the custom event setup is working.
-
Go to the web page that currently tracks the event.
-
Once the lead tracking is a success, you’ll now see the custom event currently tracked in DebugView.
Conclusion
You’re done! Remember, creating and tracking custom events in Google Analytics 4 is an efficient way to monitor the activities that online visitors do whenever they’re on your website. It will also help you determine the best adjustments you can in your online shop to further boost conversions.
-
Tracking custom events will inform you whether your online shop is performing well or not.
-
By toggling the conversions tab, you will also gain insight into your conversion and sales.
-
You can create multiple custom events to get a more holistic overview of your online shop’s digital activities.
-
To create a custom event, be sure to name the event appropriately, following Google’s event name guidelines.
-
Set the matching conditions. These include the activity to be tracked as well as the online location of where this trigger happens.
-
You will find information about your existing events on your Google Analytics 4 dashboard.
-
You may also click on the toggle to mark these events as conversions.
-
Other things that you can do with Google Analytics 4 are editing and deleting custom events
-
Finally, you may also verify how your custom events are working using the DebugView feature.