A Guide to Setting Up Twitter Conversion Tracking Using GTM
To efficiently keep track of Twitter Ads conversions using Google Tag Manager.
Prefer a shortcut? 16 free tools do parts of this for you.

Aim: To efficiently keep track of Twitter Ads conversions using Google Tag Manager.
Optimal Outcome: You will be able to keep track of how well your Twitter Ads are performing in terms of conversion. This way, it will be easier to assess your campaigns and make necessary adjustments.
What do you need to start: You will need Google Tag Manager running on your website or online shop. An active Twitter Ads account is also necessary.
Why is this SOP Important: By being aware of how your Twitter Ads are performing in terms of conversion, you will be able to make more informed decisions on how to make your ad campaigns more effective and successful.
When and Where to execute: This SOP is performed in Twitter Ads Manager and Google Tag Manager.
Who Should Be Doing This: The person handling analytics, the marketing manager
What is Google Tag Manager?
Google Tag Manager is a free online platform that allows users to install, track, and manage marketing tags on websites or online shops without the need to learn how to code. In addition, it is also an ideal tool to keep your marketing tag and site analytics in one place.
Execution
Resources/Tools & Set up
-
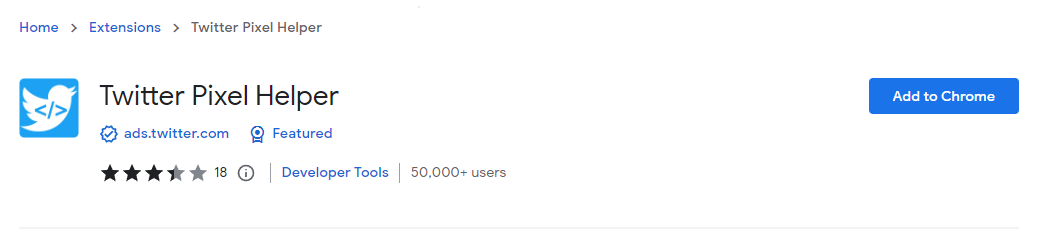
You must first install the Google Chrome extension, Twitter Pixel Helper, on your browser. It will allow advertisers to verify your Twitter website tags.
-
To do so, just click on Add to Chrome and follow the prompts.
Generate Your Twitter Tag
-
Log into your Twitter Ads account.
-
Click on Tools. This will reveal a dropdown menu.
-
Then, select Conversion Tracking.
-
This will allow you to generate a new website tag. You will be asked to agree to the Terms and Conditions. Click on Agree.
-
Next, click on Generate website tag for conversion tracking.
-
The code will be shown.
-
Copy the code and paste it on a notepad. We are going to use this later.
Installing Your Tag With Google Tag Manager
-
Log into your Google Tag Manager account.
-
Select the appropriate account.
-
Click on Tags, then New.
-
Name this new tag “Twitter Tag” for better tracking.
-
Select Custom HTML.
-
This will open the Tag Configuration window. Paste the code obtained from Twitter Ads earlier under the HTML section.
-
Then, click on Triggering to launch the tag.
-
Google Tag Manager will then present you with two options:
-
All Pages - This will allow Twitter tracking on your entire website or online shop. This is what we usually recommend.
-
Some Pages - You may access this by clicking on the + symbol on the upper right-hand corner of the window. Click on Trigger Configuration. Doing so will open the Trigger Configuration window. Select Page View as your Trigger Type. Then, select Some Page Views. Configure the settings so that it shows Page Path and contains, then on the last section, indicate the page URL that you want to track.
-
-
We recommend choosing All Pages. This will allow you to track conversion events that happen across your website or online shop.
-
However, if you want to limit your tracking to a particular event, or track multiple conversion events separately (for instance, if you offer different downloadable digital assets as opt-ins), then we recommend choosing Some Pages.
-
Upon making your decision, click on Save.
-
Then Submit.
Set Your Conversion Events
You may track different conversion events via Google Tag Manager. These are:
-
Site Visit. This will track how many users visit your website or online shop’s landing page.
-
Purchase. This will track how many users have made a successful purchase on your website or online shop.
-
Download. This will track how many users have downloaded a digital asset from your website or online shop.
-
Sign up. This will track how many users have signed up on a form posted on your website or online shop.
-
Custom. This will allow you to create a custom conversion event that the options above can’t adequately represent.
Generating Conversion Events
-
Log into your Twitter Ads account.
-
Click on Tools. This will reveal a dropdown menu.
-
Then, select Conversion Tracking.
-
Click on Create new conversion event at the upper right-hand panel of the window.
-
Configure your new conversion event. You need to edit the following:
-
Name. Give your conversion a name that makes it easier to track within Twitter Ads Manager.
-
Type of Conversion. These are the five options we have featured above: site visit, purchase, download, sign up, and custom.
-
Website Tag. Choose Universal Website Tag.
-
Traffic Conditions. Choose the pages that signify the completion of your conversion event. For instance, most sites set up a “Thank you for signing up” page that shows after a successful form submission. Use the URL path of this page.
-
-
Set your Attribution Window. This will allow you to set conditions that you can attribute to your Twitter ads.
There are two values: Post-Engagement and Post-View.
Suppose an online user sees your Twitter ad and has purchased the advertised product even if the online user didn’t interact with it.
As long as the duration meets your set value, then it can still be attributed to your Twitter ad as a conversion. The appropriate values will depend on your needs and preferences.
However, we usually recommend setting the Post-View attribution to “Off” for more accurate reporting.
We also usually set our Post-Engagement duration to 30 days. This allows online users at least a month to be converted and tracked.
Verifying Your Conversion Events
Congratulations! You have successfully set up your tags and conversion events. Now, it is time to test whether they are working as they should.
-
Open your website or online shop with your Google Chrome browser.
-
Perform the triggering action that you have set earlier. For instance, if you’re tracking sign-ups, then you should complete your online form and submit it until you reach the “Thank you for signing up” page that you have indicated.
-
Next, click on the Twitter Pixel Helper icon. This will open the extension. It should indicate that your Twitter tag had fired successfully. It will also display additional details about the event such as the Tag ID, URL parameters, and more.
-
Now, go back to your Twitter Ads account. Click on Tools, then Conversion Tracking. You should see that your conversion events under Website Tag have a Tracking status.
Remember: If you see an Unverified status, then keep in mind that the tracking process can sometimes take time to reflect on Twitter Ads Manager.
If, after some time, the status still continues to show Unverified, then you have two options. You may perform this SOP again to make sure that you have performed each step correctly. Or, you may work with a web developer to resolve your particular issue.
Conclusion
You’re done! Remember, launching ad campaigns on Twitter is a good idea to promote your website, online shop, brand, products, or services. The question is, how will you know whether your campaigns are efficient in converting online viewers or not? Fortunately, there is a way to track the conversion events related to your Twitter ad campaigns via Google Tag Manager.
-
To begin, install the Twitter Pixel Helper, a Google Chrome extension that can track triggering actions.
-
Once done, head over to Twitter Ads Manager and generate your Twitter tag for conversion tracking. Save the HTML code as you will need it later.
-
Head over to Google Tag Manager and create a new tag.
-
Configure this tag. You will need the HTML code you obtained from Twitter Ads Manager earlier.
-
Set your conversion events.
-
Configure the conversion events accordingly.
-
Verify that you were able to successfully set up your tag and conversion events with the help of the Twitter Pixel Helper extension.
-
You may also check Twitter Ads Manager whether your tags are currently tracking and verified.