Setting Up Automated Facebook Ads Report Analytics
Provide you with a step-by-step guide in generating an automated report to summarize your campaign that can be readily shared with your clients or team members.
Prefer a shortcut? 16 free tools do parts of this for you.
Aim: Provide you with a step-by-step guide in generating an automated report to summarize your campaign that can be readily shared with your clients or team members.
Optimal Outcome: A report containing the most recent campaign data and results will be provided to your team or client for analyzing ad performance.
What do you need to start: You’ll need to have admin access to Facebook Business Manager of the ad account you’re sending the reports for.
Why is this SOP Important: Setting up automated Facebook Ads report analytics allows you to regularly track and analyze the performance of your Facebook advertising campaigns, helping you identify areas for improvement and optimize your efforts.
When and Where to execute: Facebook Business Manager account and Facebook Ads Manager
Who Should Be Doing This: Data Analysts, Media Buyer, Marketing staff
What is Facebook Ads Report Analytics?
Facebook Ad Analytics is a collection of data that reflect a campaign’s performance. It analyzes paid media (CTRs, impressions) and provides accurate information on the marketing efforts.
Execution
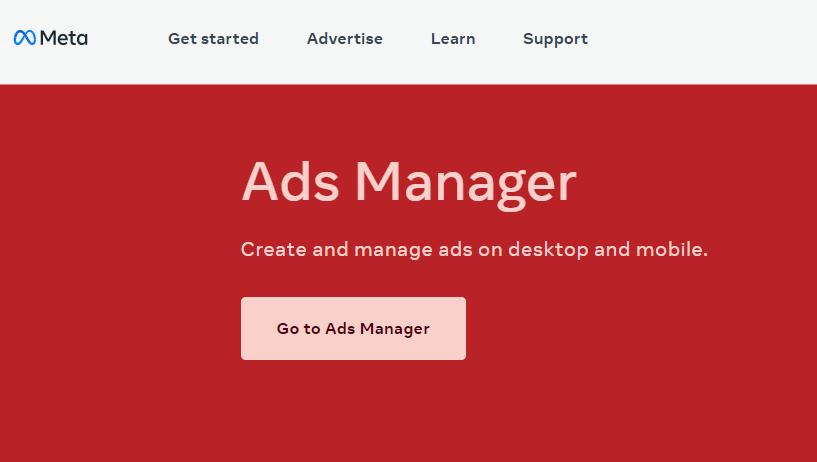
Create your report from Facebook Ads Manager
Login to your Facebook Ads Manager account.
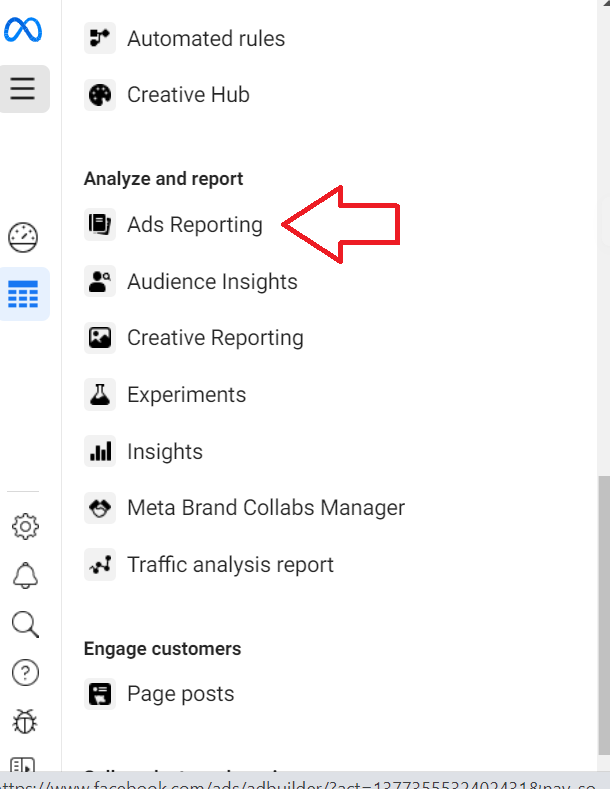
Navigate to the left menu and click Ads Reporting.
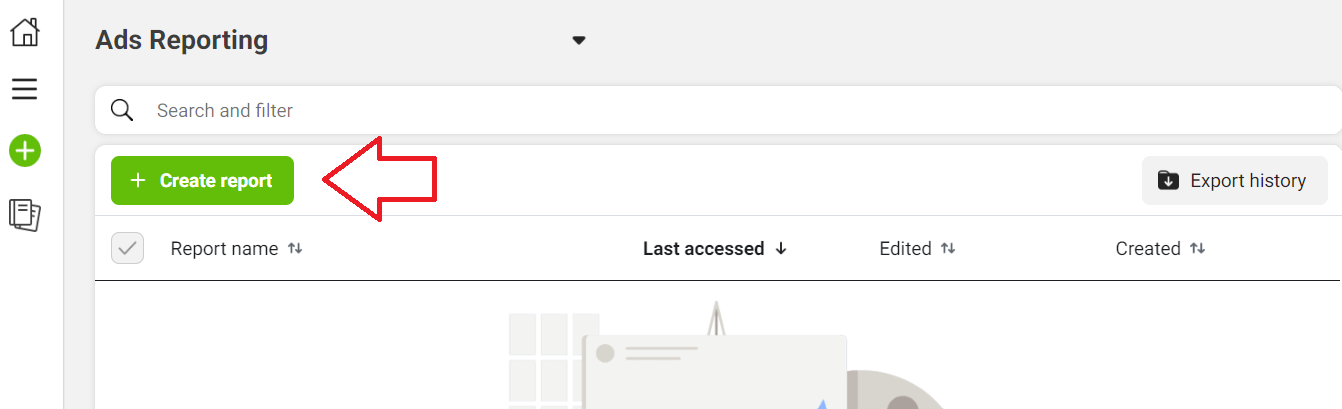
In the Ads Reporting page, click Create report.
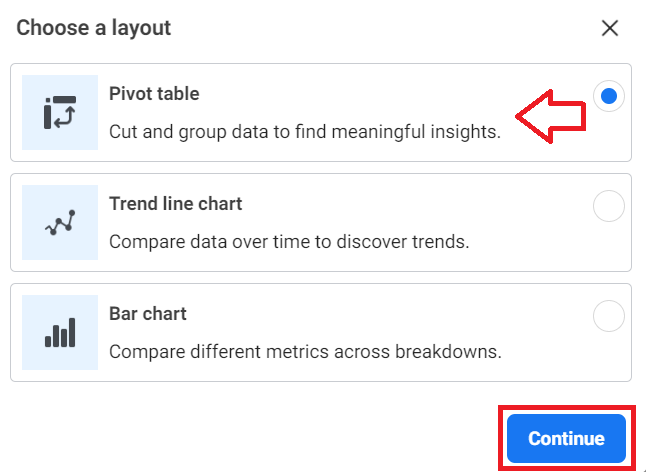
Select the layout of the report you want to generate. In this example, we’re selecting the Pivot table option. Click Continue.
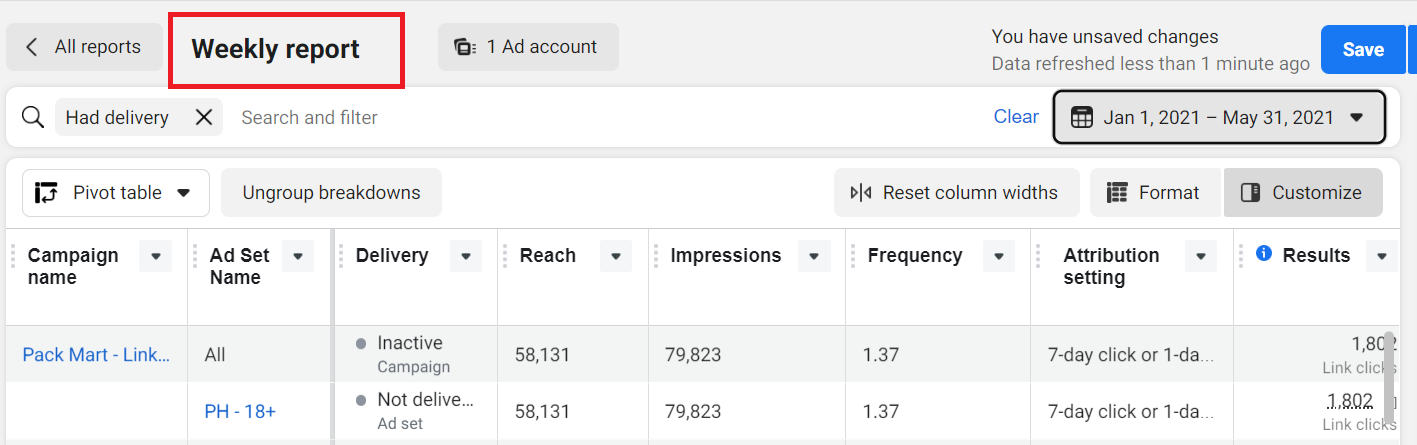
- Provide a name for your report.
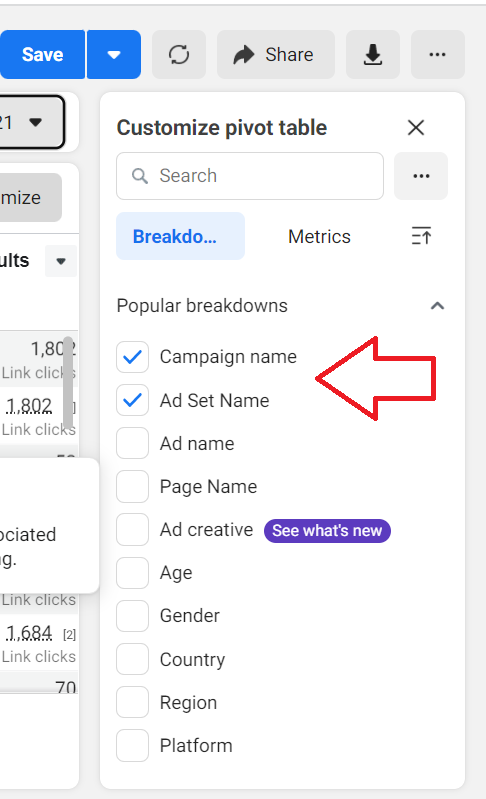
- Navigate to the right menu then select the parameters you want to see in your report.
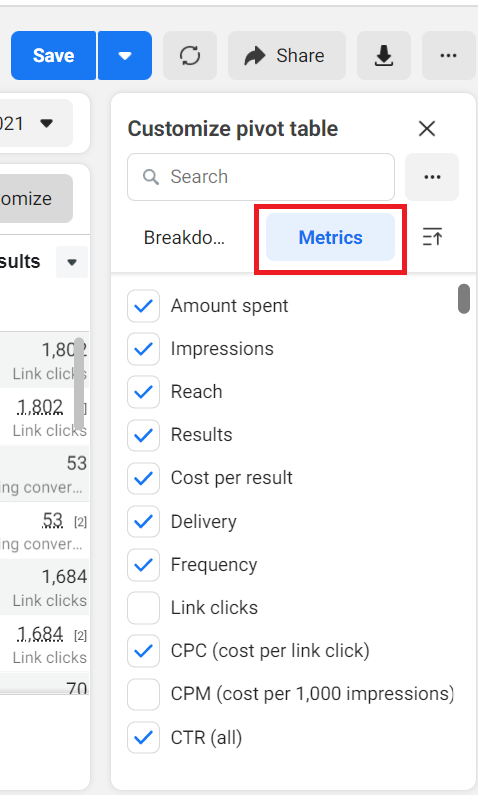
Click Metrics, then click the checkboxes of the metrics you want to see on the report.
Some of the common ones are:
-
Ad spend
-
Reach
-
Clicks
-
CPC
-
Results
-
Cost per results
-
Return on Ad Spend (ROAS)
- Your table on the main report dashboard will automatically update as you select the metrics.
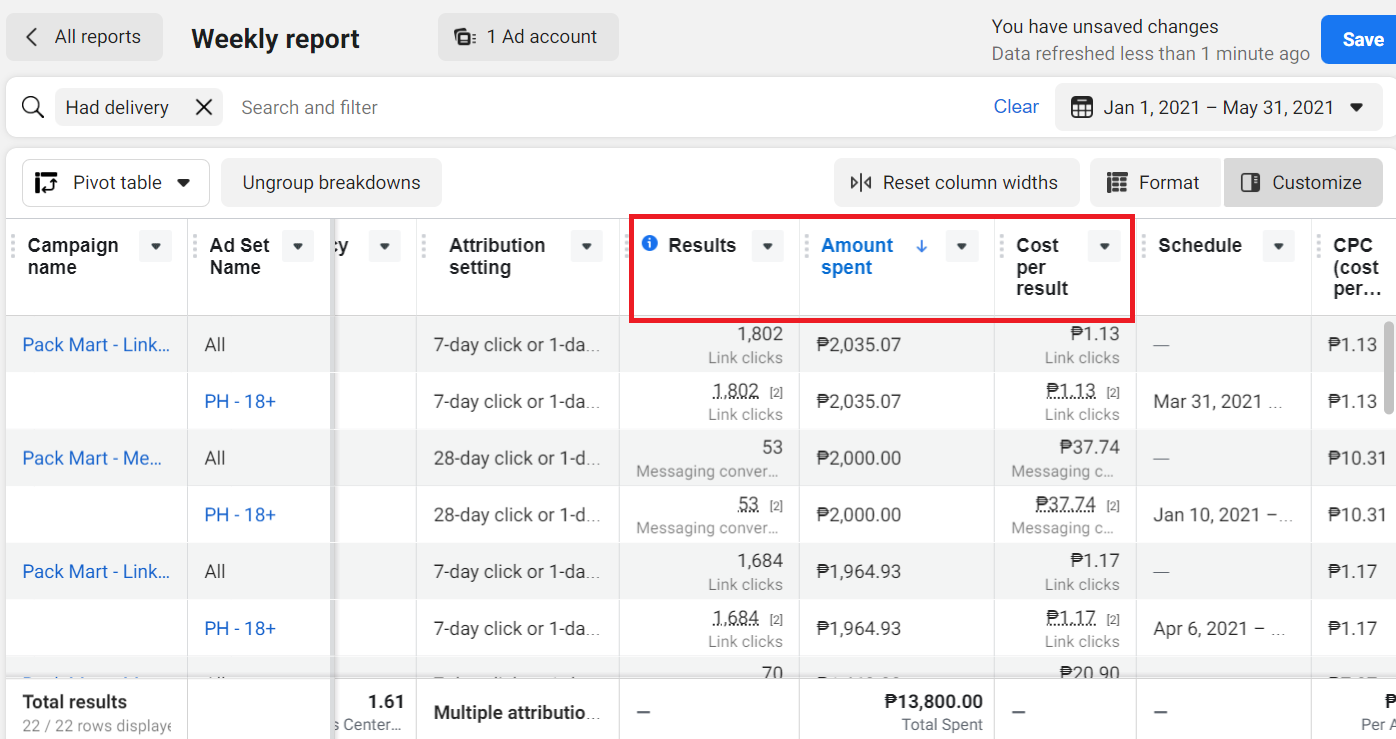
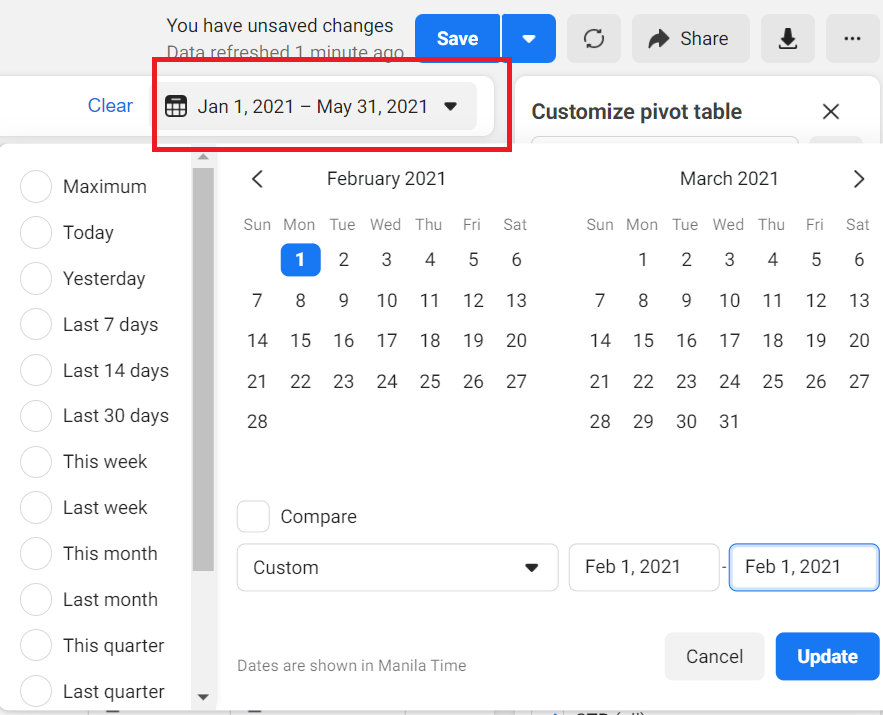
Next, adjust the date that’s covered by this specific report.
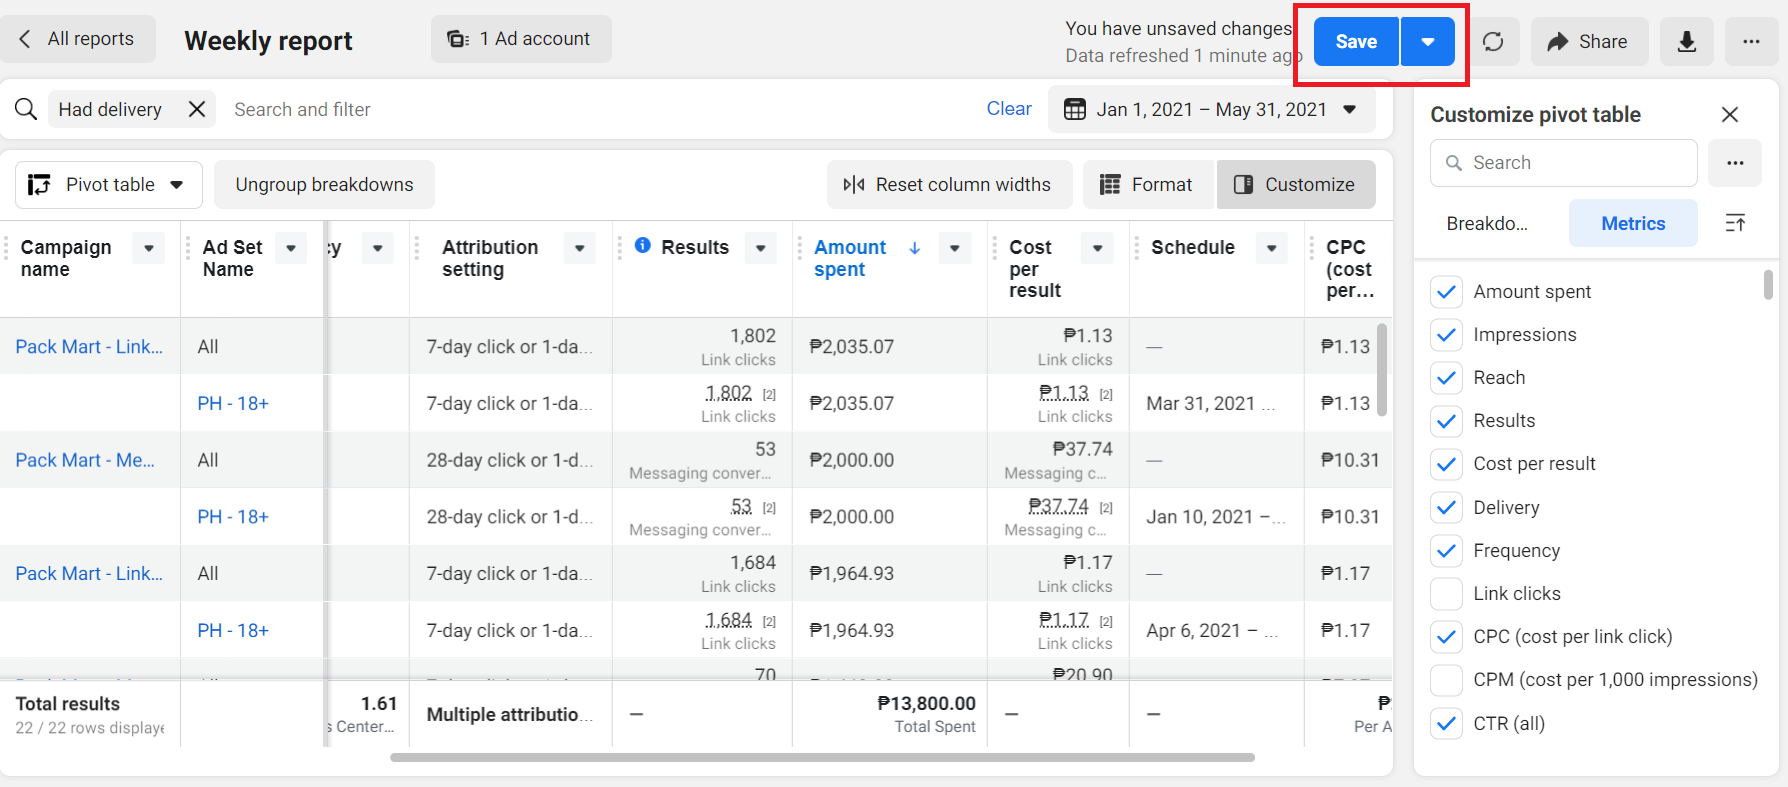
Once you’re satisfied with the data on your report, click Save.
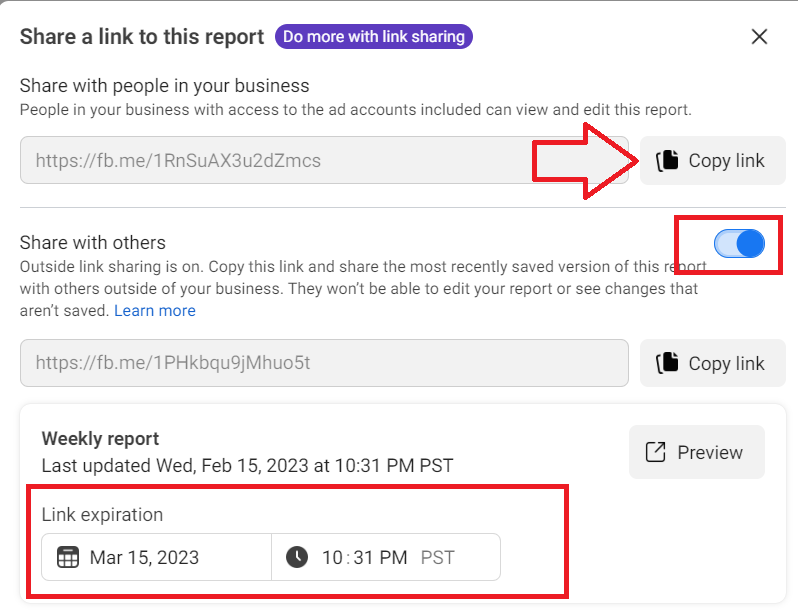
From the Ads Reporting page, click the share icon next to the report that you want to share to your stakeholders.

Copy the link and share it with the people who need to see the report. You can also indicate a time and date when the link will expire.
Schedule your automated reports
Click the name of the report that you wanted to share on a regular basis.
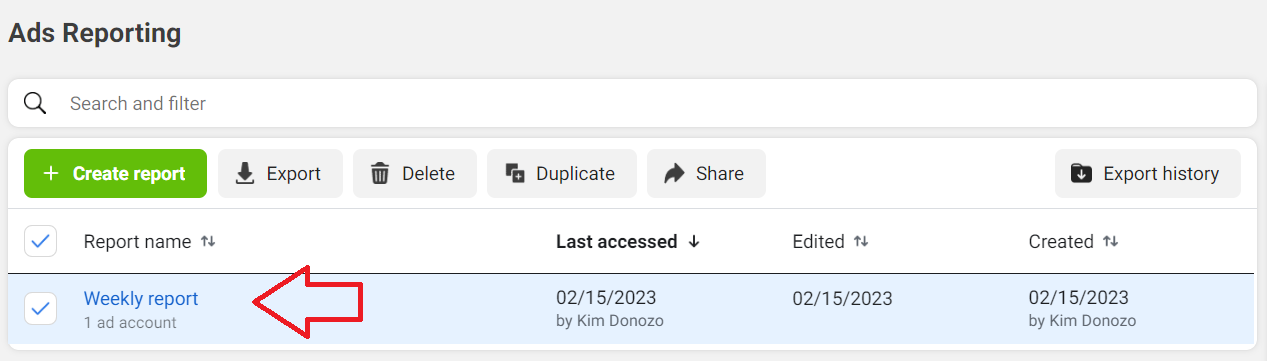
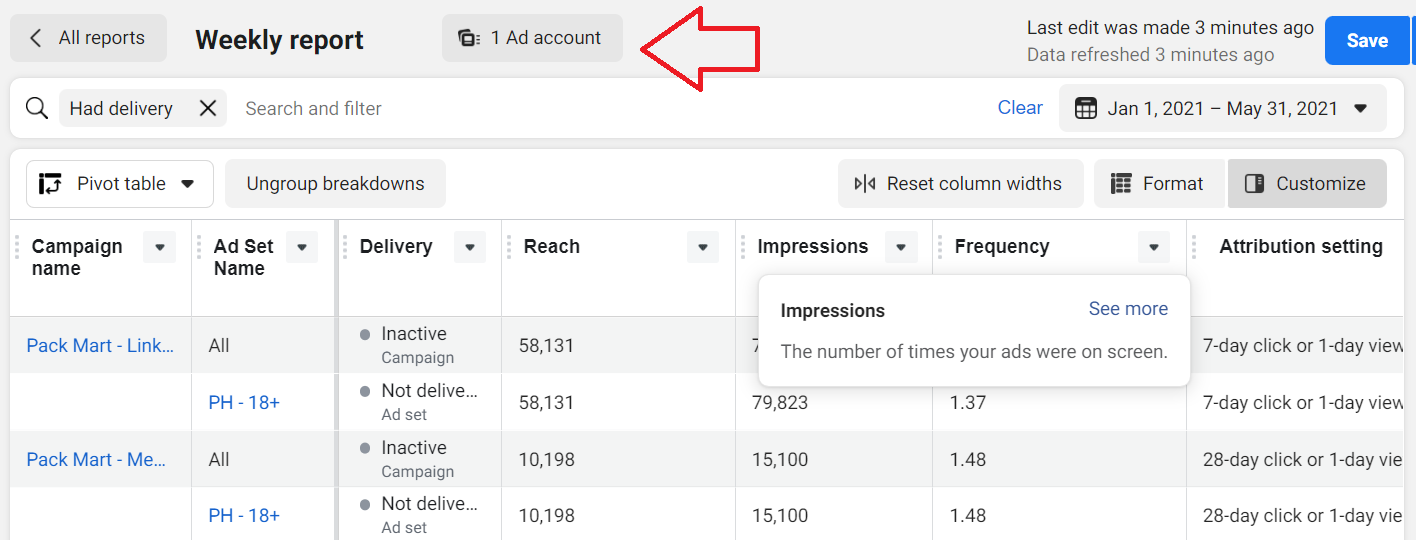
- Click on the icon next to the report name.
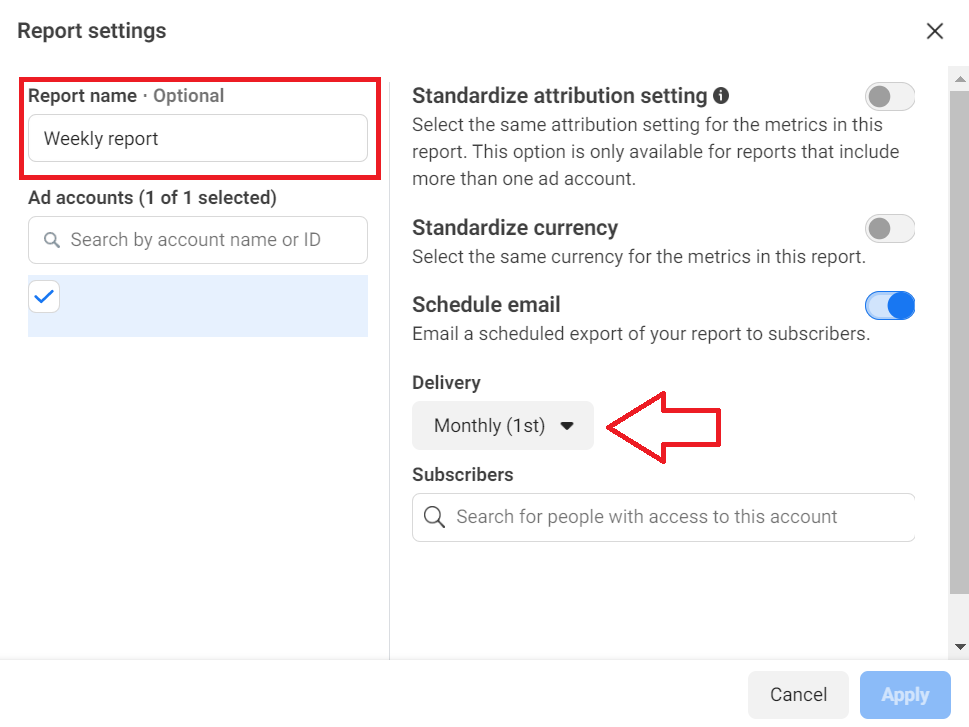
- In the report settings, select the frequency of the report.
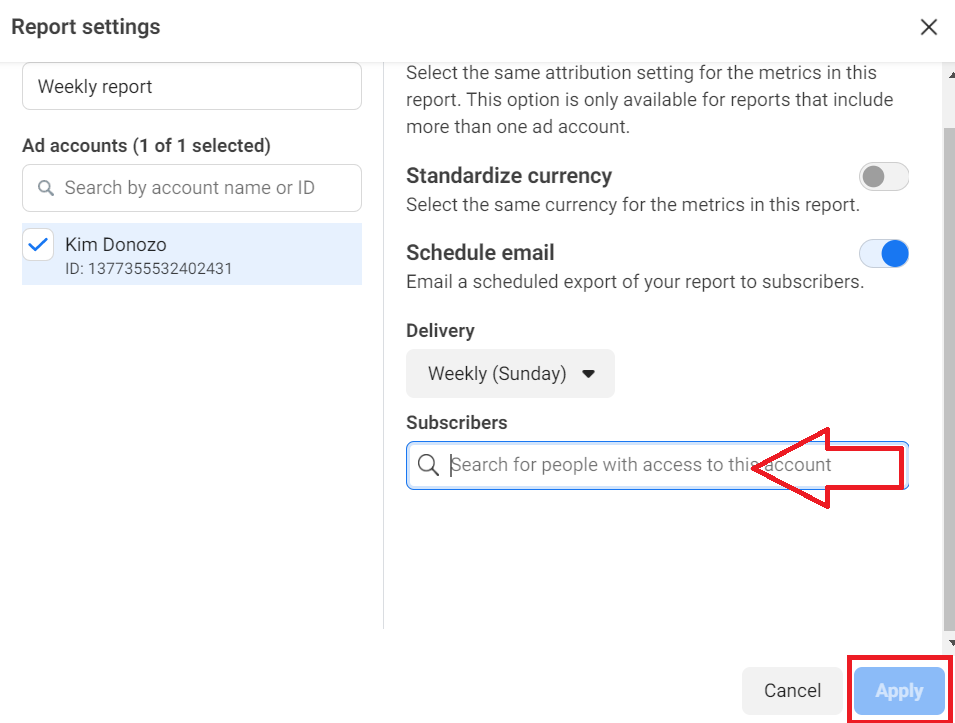
- Enter the names of the people who will receive your automated reports, then click Apply.
Conclusion
That’s it! Your team members or clients can now receive regular reports about your Facebook ads campaign and results.
Execution Checklist
Things to remember when setting up an automated Facebook Ads report:
-
Make sure that you have admin access to the Facebook Ad account that you want to generate a report for.
-
Make sure that the recipients of your automated reports have access to the Facebook Ad account you’re generating the report for.
-
Ensure to add all the necessary and relevant metrics in the report settings.