Using Automatic Discounts for Abandoned Checkout Recovery Emails in Shopify
To walk you through setting up automatic discounts for abandoned checkout recovery emails in Shopify.
Prefer a shortcut? 16 free tools do parts of this for you.

Aim: To walk you through setting up automatic discounts for abandoned checkout recovery emails in Shopify.
Optimal Outcome: To encourage customers that hesitate on checking out their preferred items from your store by sending automated marketing emails using Shopify features.
What do you need to start: To follow this SOP, you must have a Shopify account and utilize a custom marketing automations.
Why is this SOP Important: Automatic discounts on abandoned checkout recovery emails enable customers to buy your store's products for lower price than they originally are. With this type of dedicated discount, the customer is incentivised into purchasing the products.
When and Where to execute: To execute this SOP, you need to prepare the workflow of email marketing automation beforehand and create an email template using the templates provided by Shopify or by making your own, which is where the automated discount can be applied.
Who Should Be Doing This: This should be analyzed first by the finance team and should be done by the marketing strategy team.
Discounts for Abandoned Checkout Emails
Abandoned checkout emails is one of the automated marketing strategies that is available in Shopify. When specific events happen that are indicated in the workflow, it will serve as a trigger for the automated emails to send. Custom marketing automations function depending on how long the customer has abandoned its checkout. Discounts in these types of emails may be applied using a discount code or through a shareable link, which will be shown in the execution.
Execution
Resources/Tools & Set up
-
Shopify account
-
Custom marketing email automation
Creating a Discount
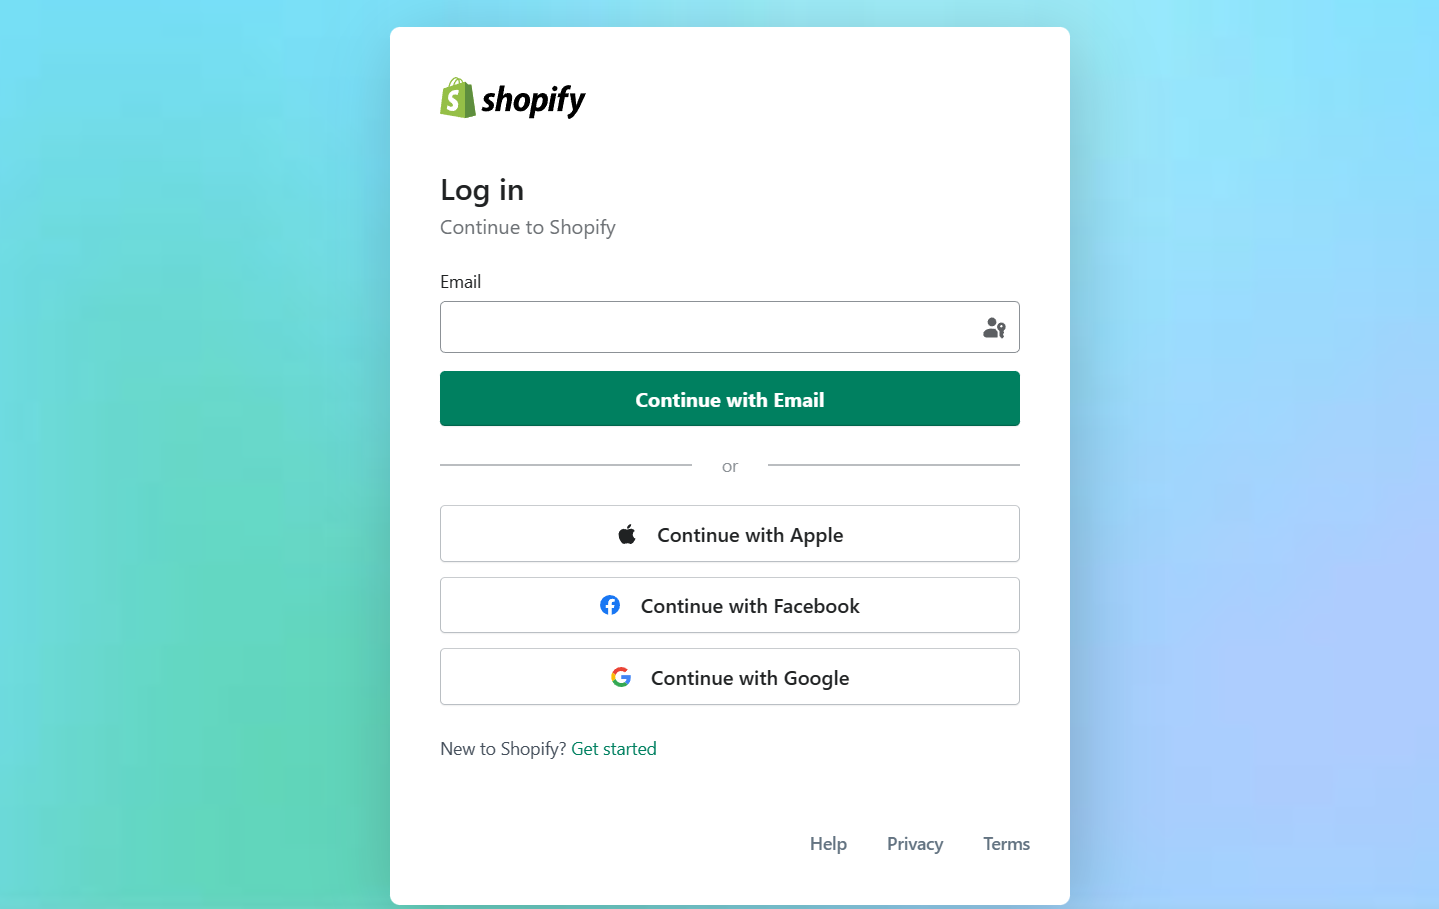
- Log in to your business Shopify account using either your email, Apple, Facebook, or Google account.
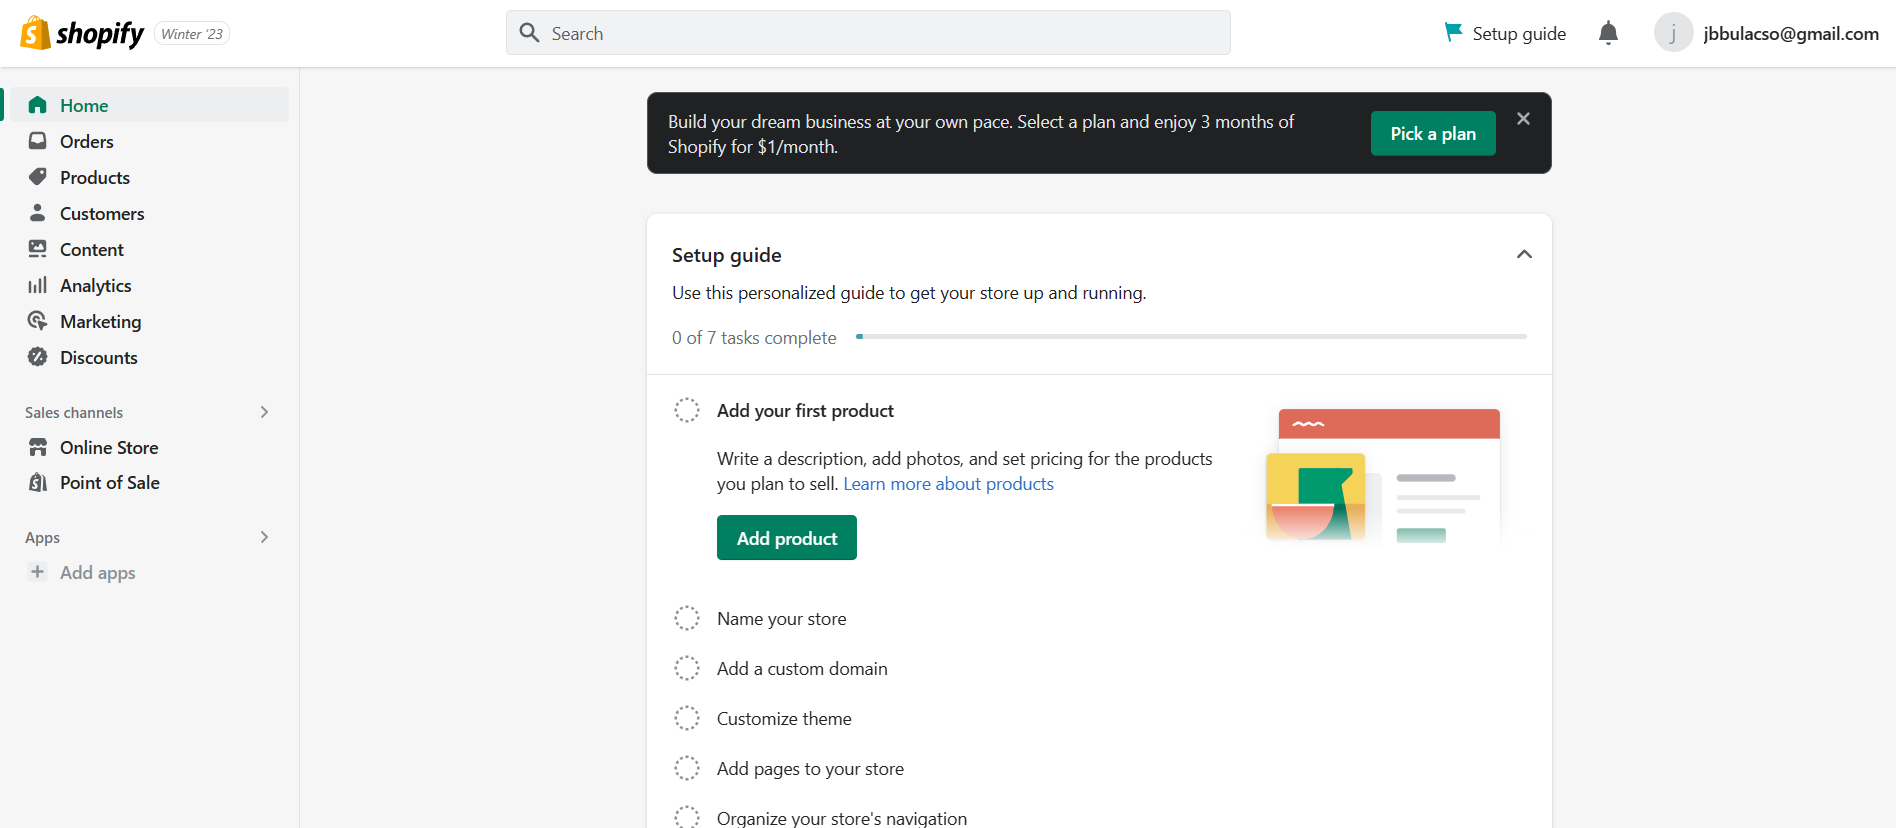
- In the Dashboard located on the left side, click on “Discounts”.
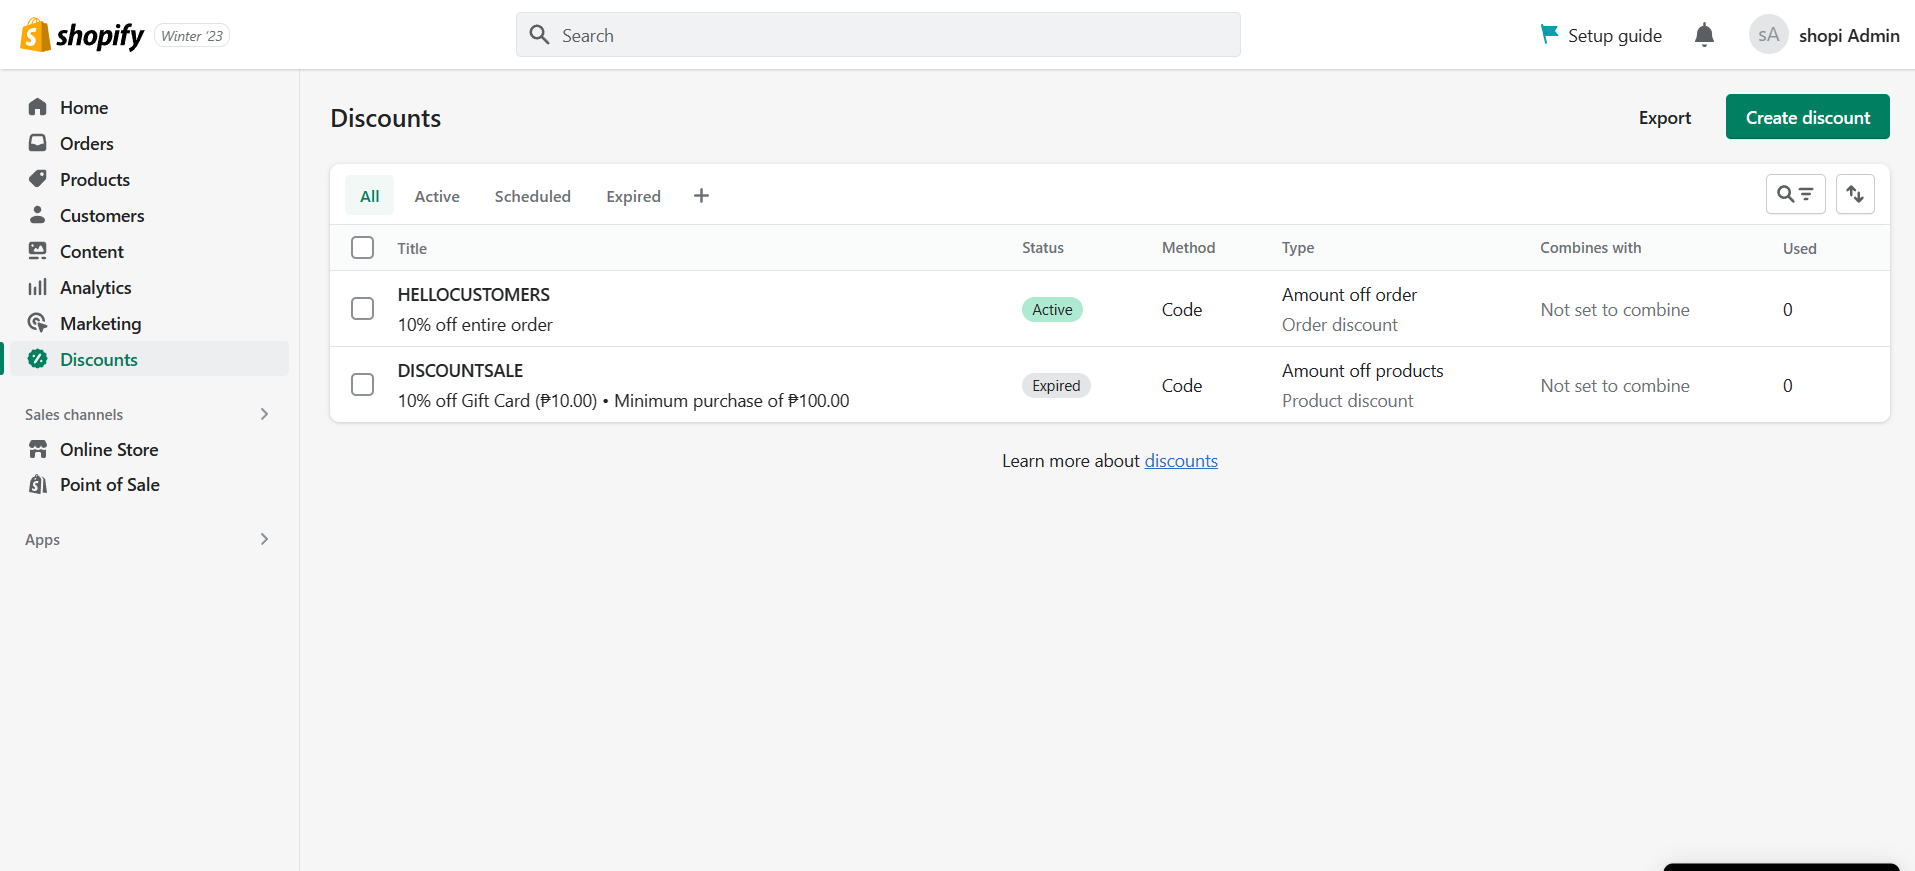
- In the Discounts tab, click “Create discount” to specifically create a discount for the abandoned checkout recovery emails.
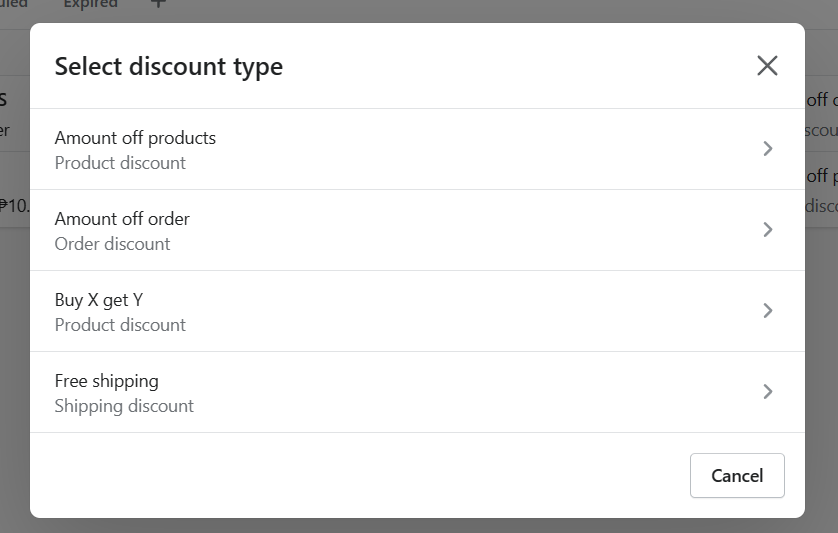
- Since you are creating a discount for abandoned checkouts, click “Amount off order” to discount the orders of those customers who abandoned their checkouts.
- To create an order discount, the discount code is needed. It is the code that the customers enter before checking out their preferred items. It is necessary that you name it to encourage customers to buy more from your business and form a relationship with them by simple interactions included in your emails.
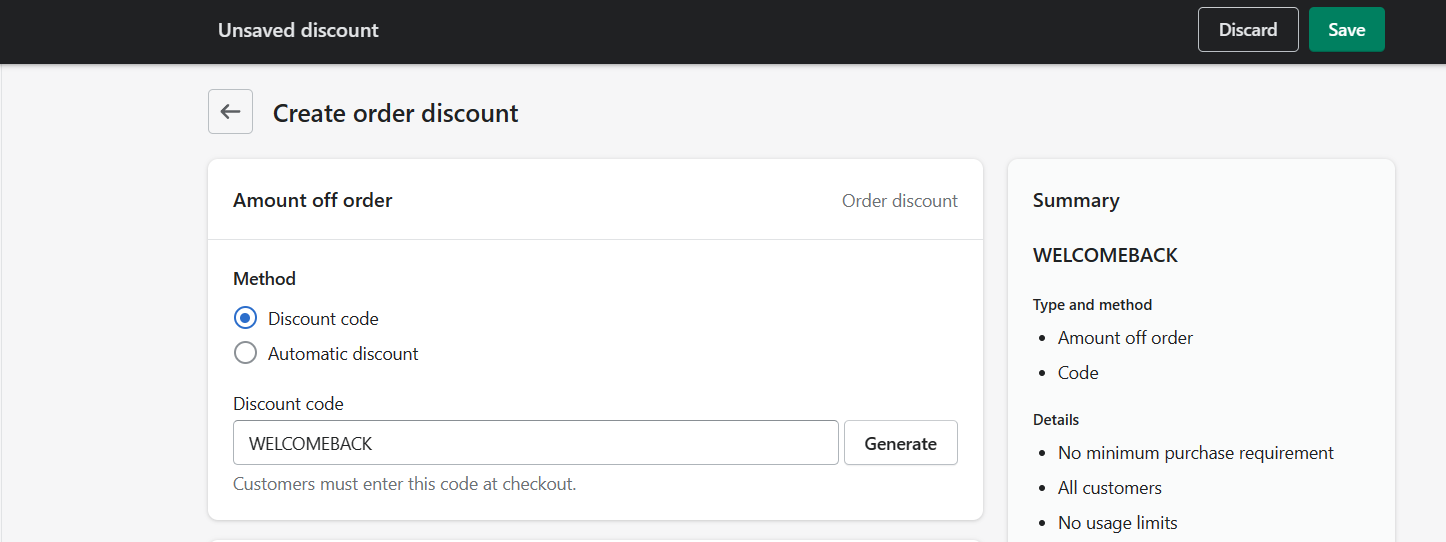
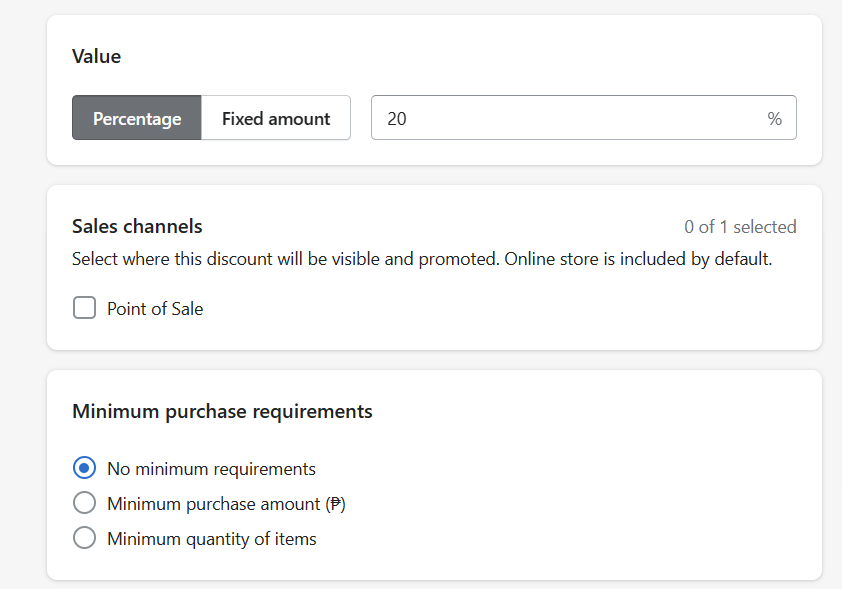
- You can set the discount value to a percentage or fixed amount. If you choose the percentage discount, you have to indicate the percent discount that you want to give your customers. If you choose the fixed amount, you have to indicate a specific value in your currency that you will discount from the order of your customers. Since you are dealing with abandoned checkouts, it is advisable to set the minimum purchase requirements to “No minimum requirements” so you can encourage your customers to continue their checkout.
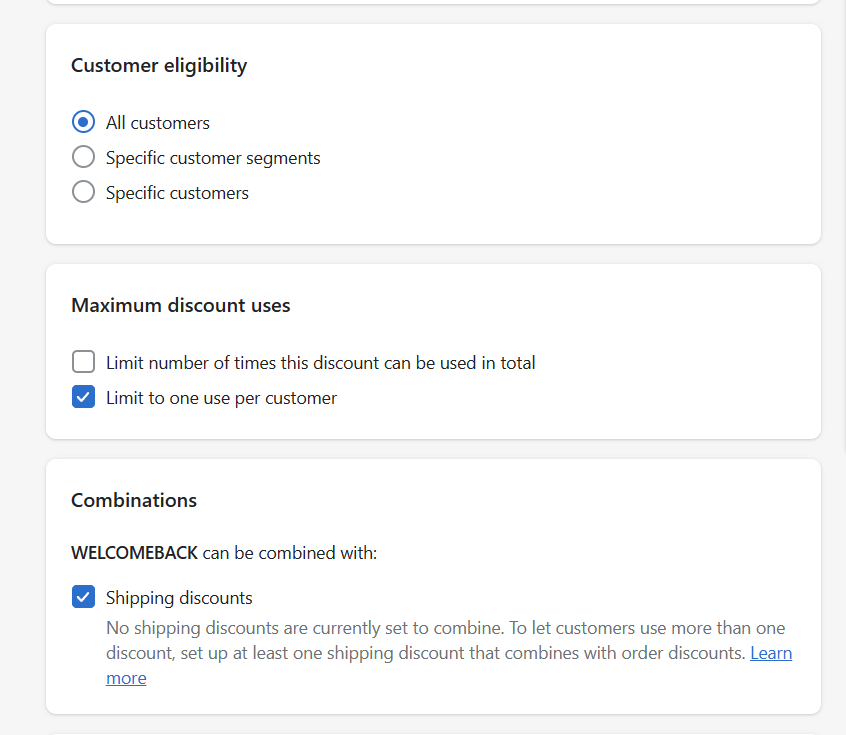
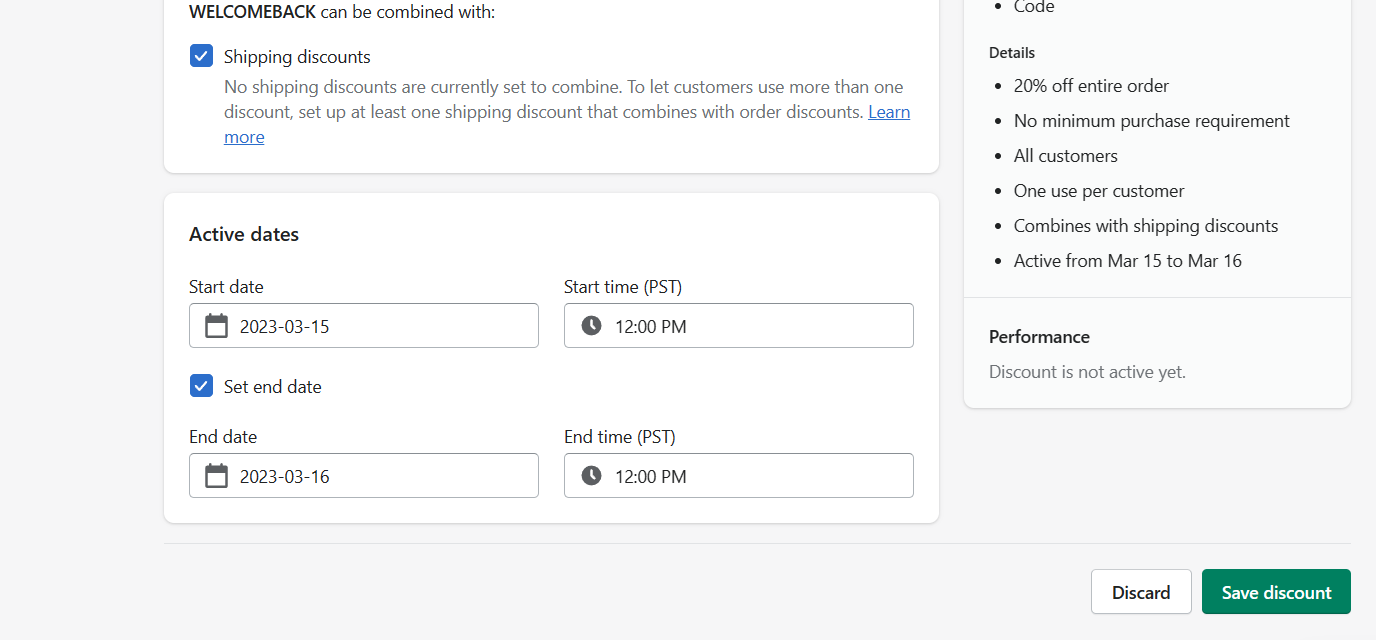
- Next is the Customer eligibility. To assure that all customers with abandoned checkouts are considered, it must be available to “All customers”. Additionally, Maximum discount uses can be set to have a “Limit to one use per customer” to make sure that there is no overusing of the discount link. You can also combine the discount with another discount such as for shipping.
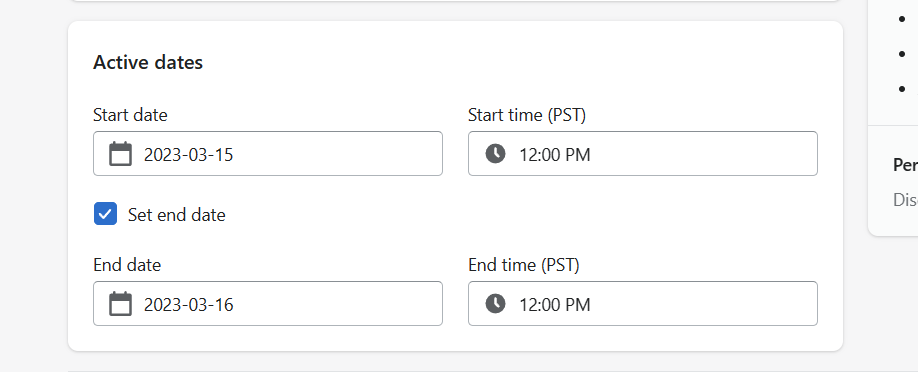
- Lastly, you can set starting and ending dates for the discount. It is advisable that this discount would be available for a short period of time to encourage customers to buy their abandoned checkouts immediately after receiving and reading the email.
- After modifying the details of the discount, review everything and click “Save discount”.
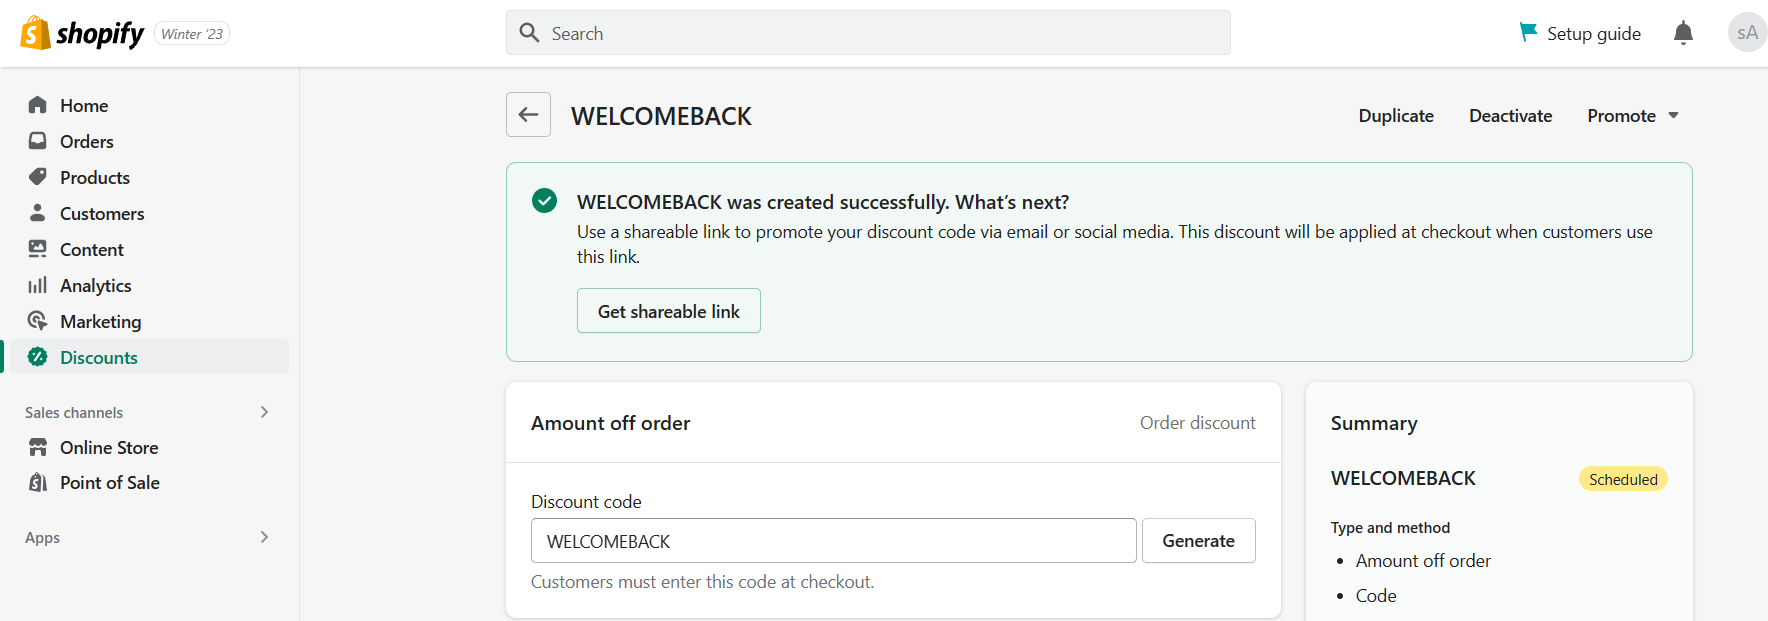
- On the top of the Summary, click the “Get a shareable link” button.
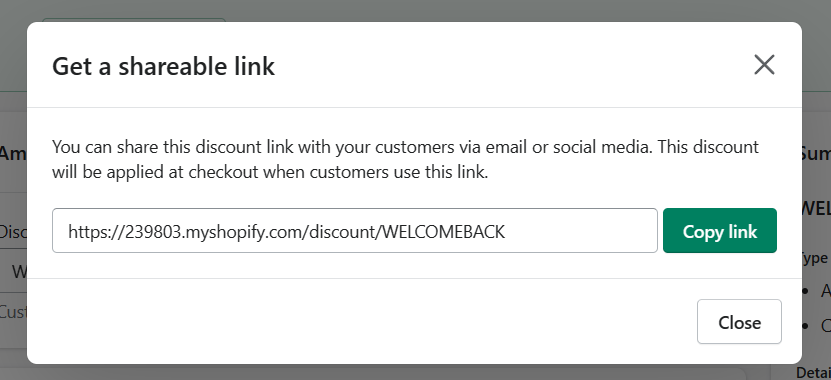
- After clicking, you will be shown a link. When customers click this link, they will be redirected to a discounted checkout that you have prepared. To copy this link, click “Copy link”.
Applying Discount Link on Abandoned Checkout Emails
- In the Shopify homepage, search for the “Apps” in the left dashboard and click it.
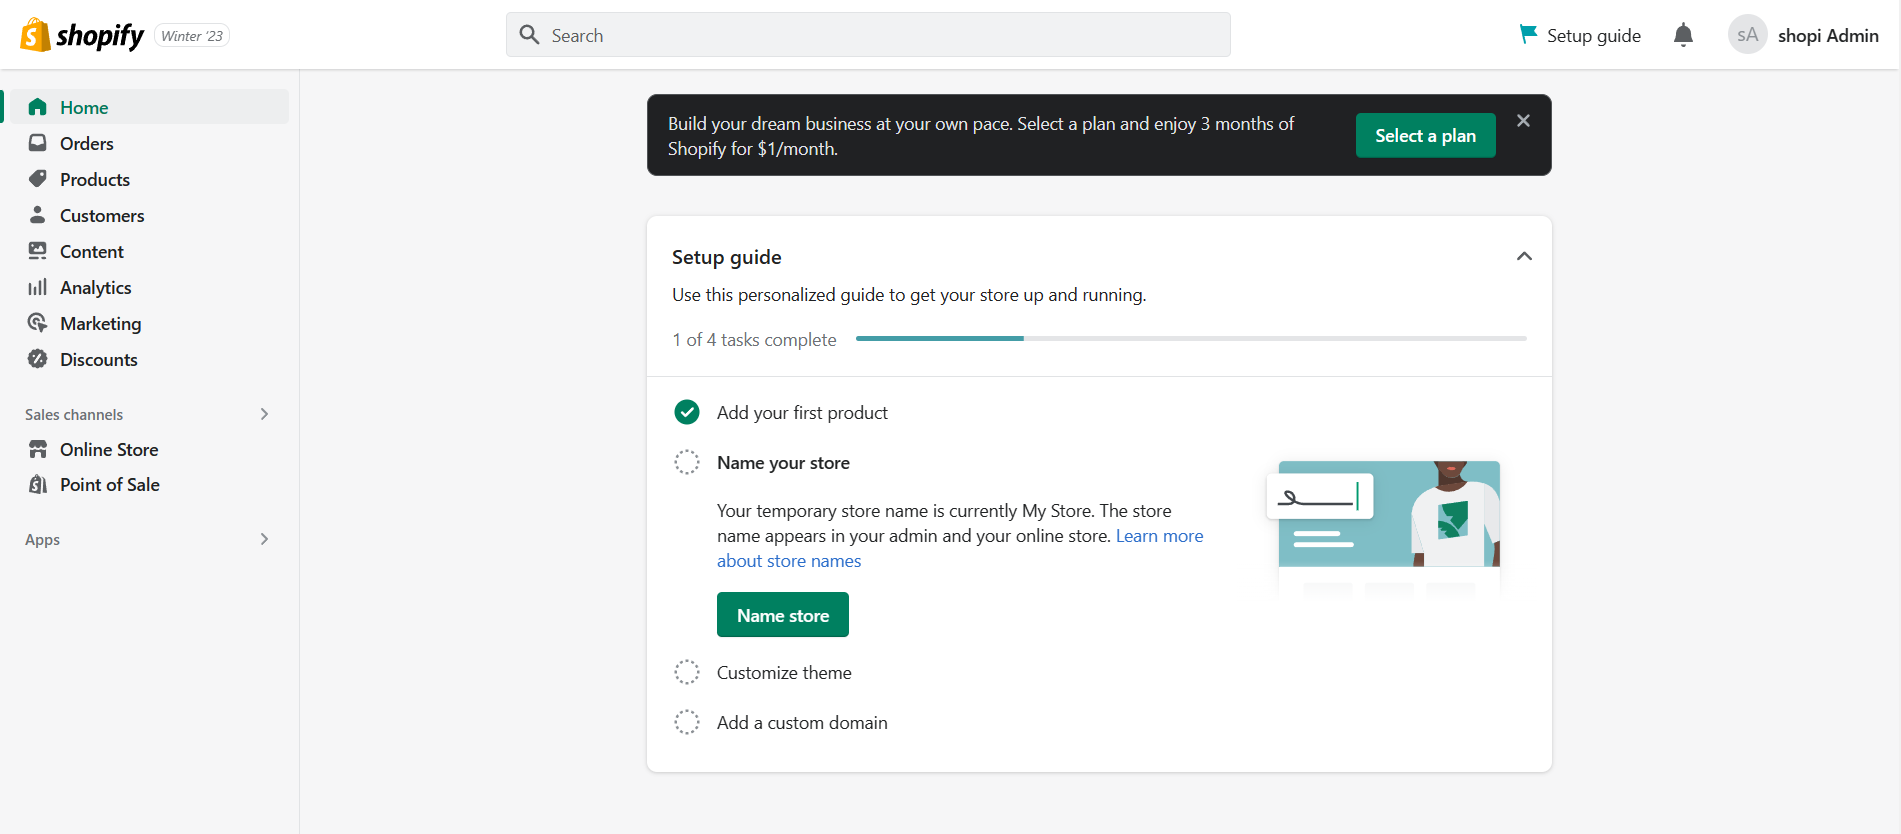
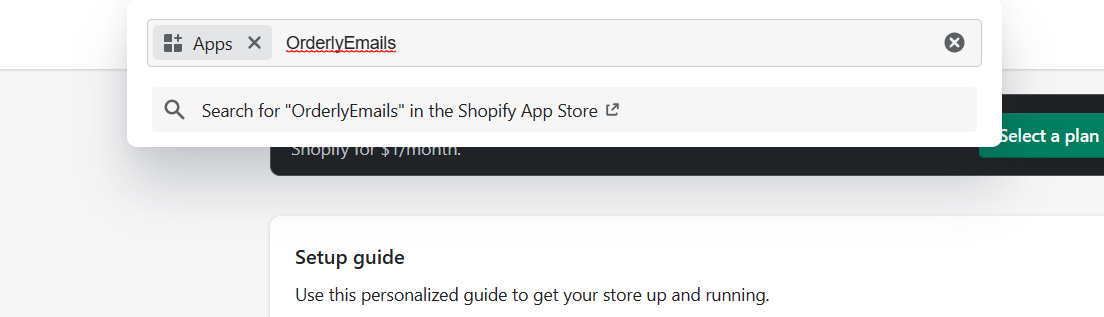
- A blank search field would pop out after clicking the Apps. Using this, search for “OrderlyEmails” and click the search.
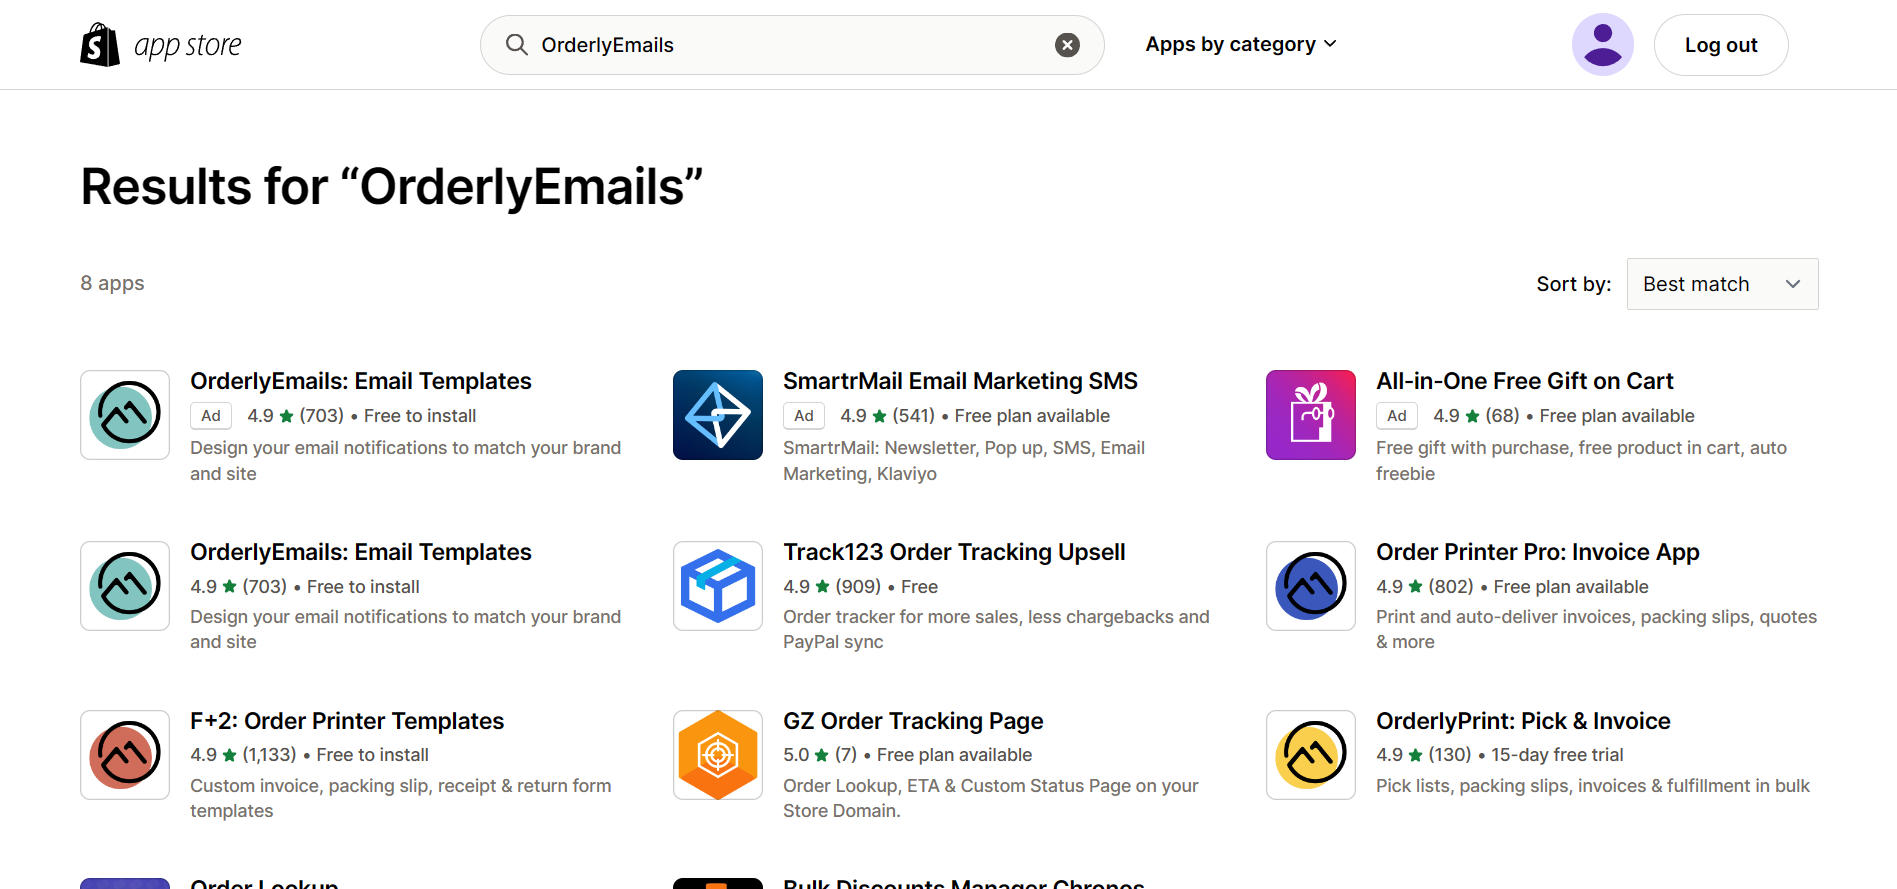
- You will be redirected to another tab. Among the results, click the first one named “OrderlyEmails: Email Templates”.
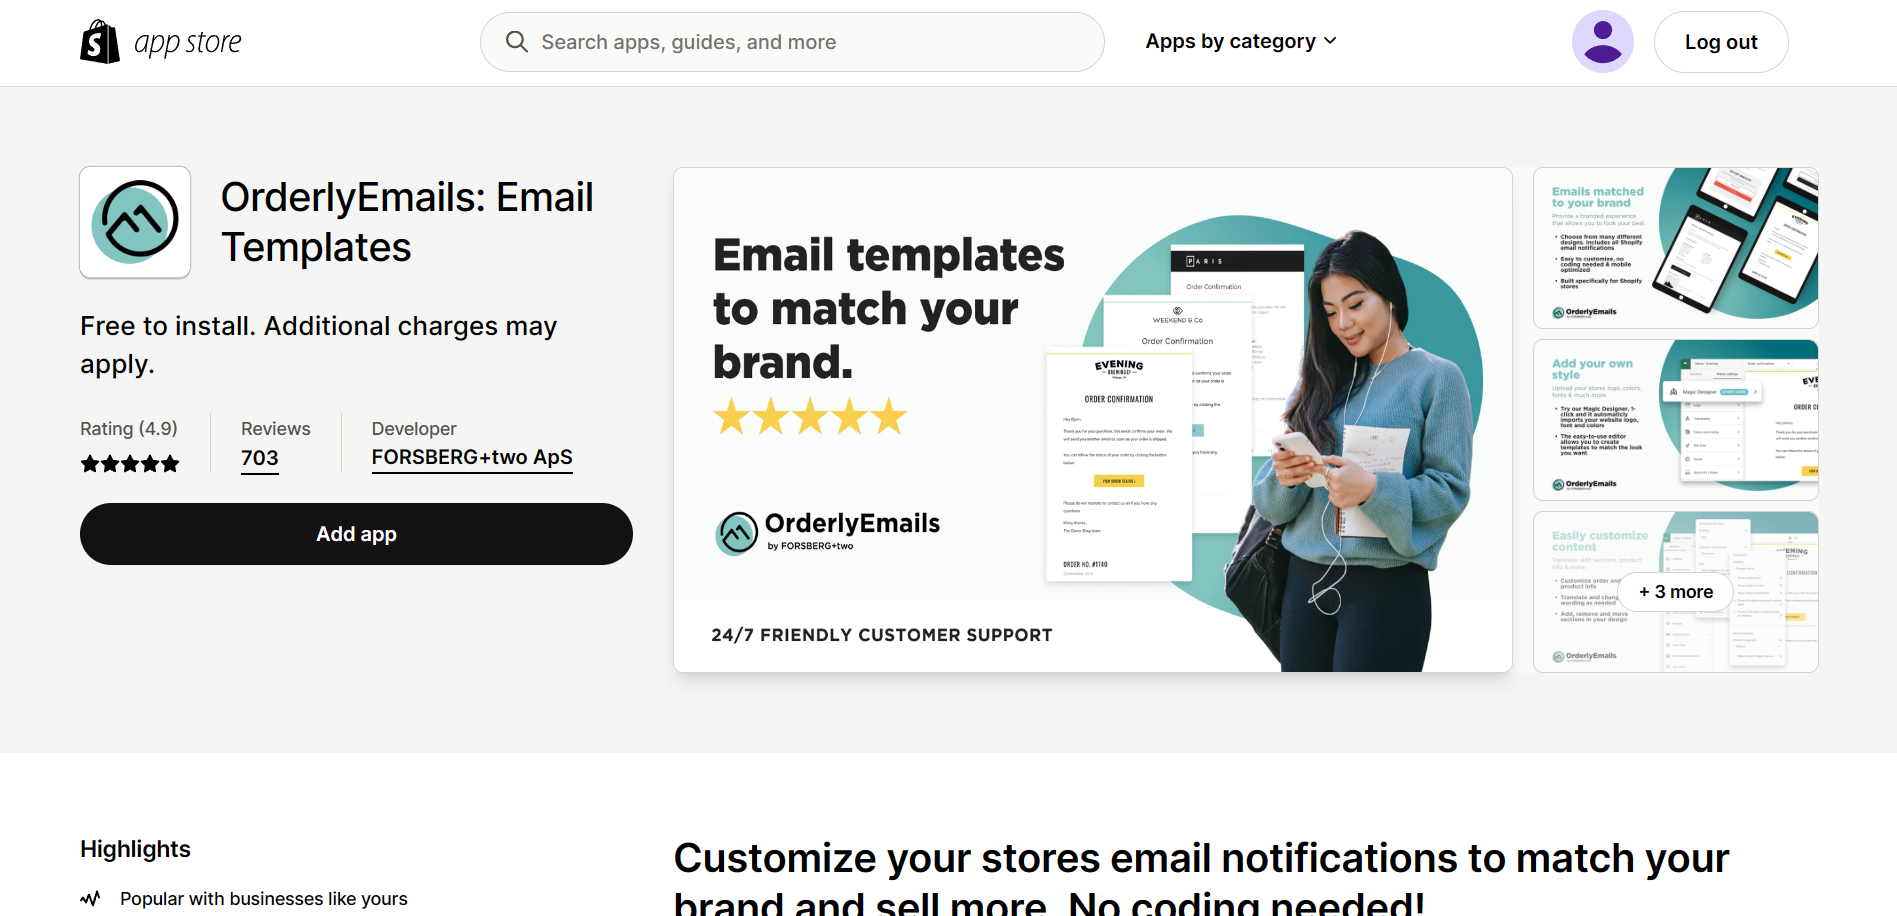
- After clicking the first result, click the “Add app” to incorporate OrderlyEmails in your Shopify store.
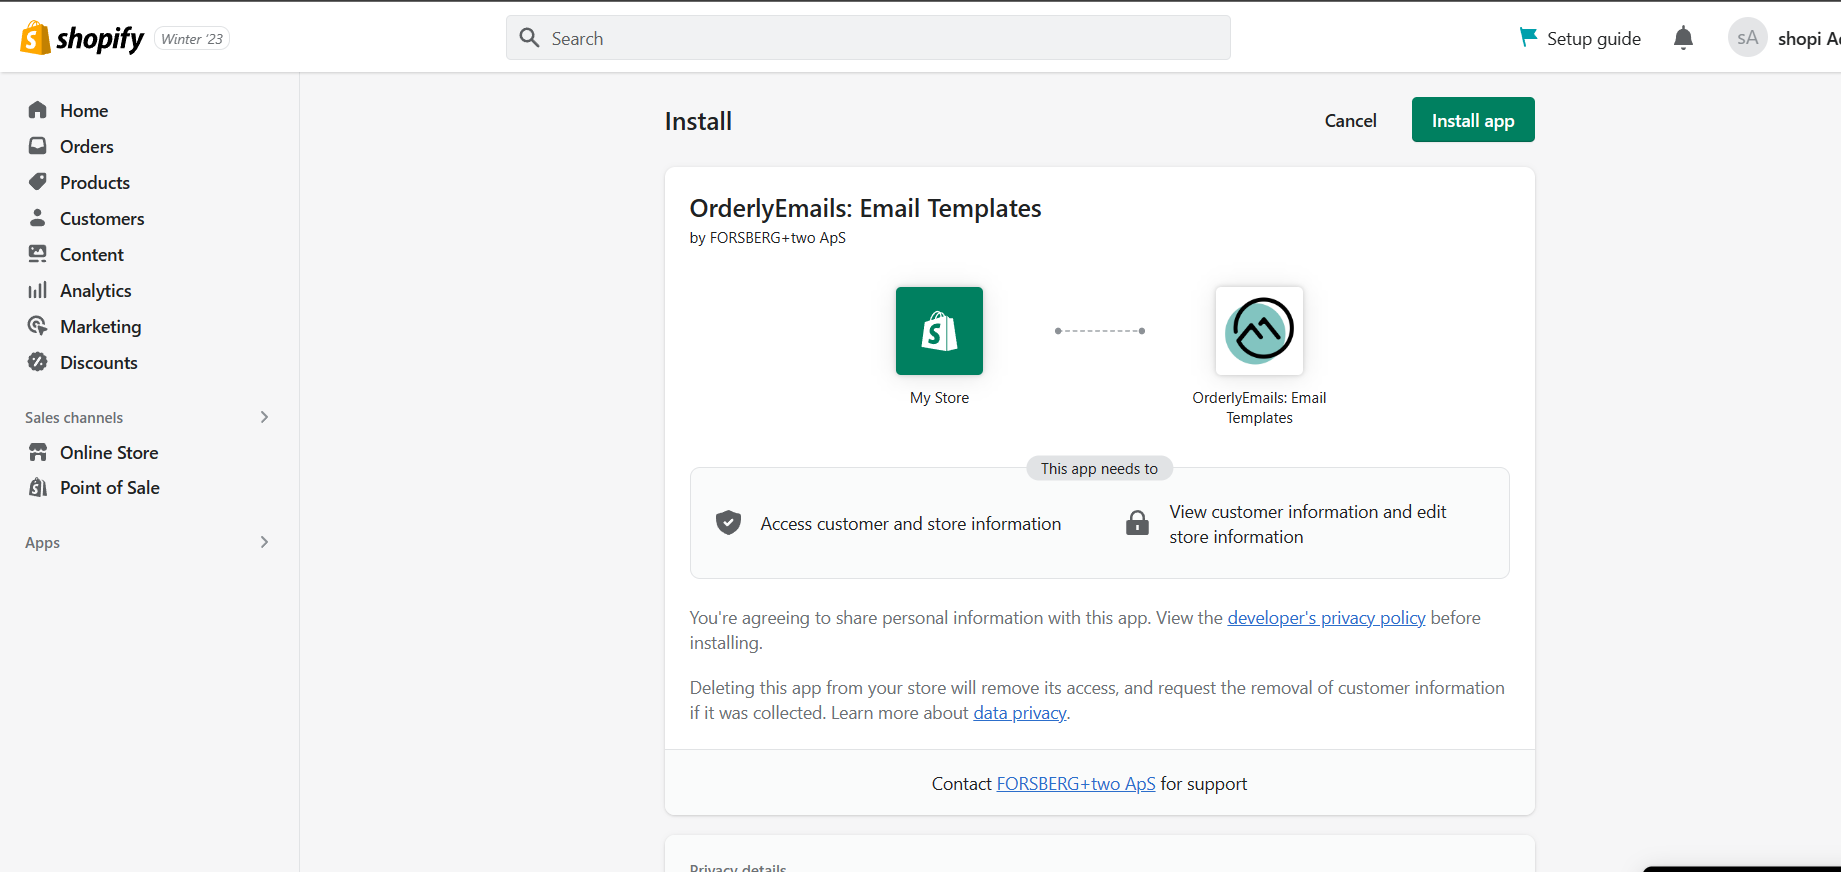
- After adding the app, you will be requested to install the app. NOTE: Installing this app means allowing it to access, view, and edit customer and store information. Click the “Install app” button.
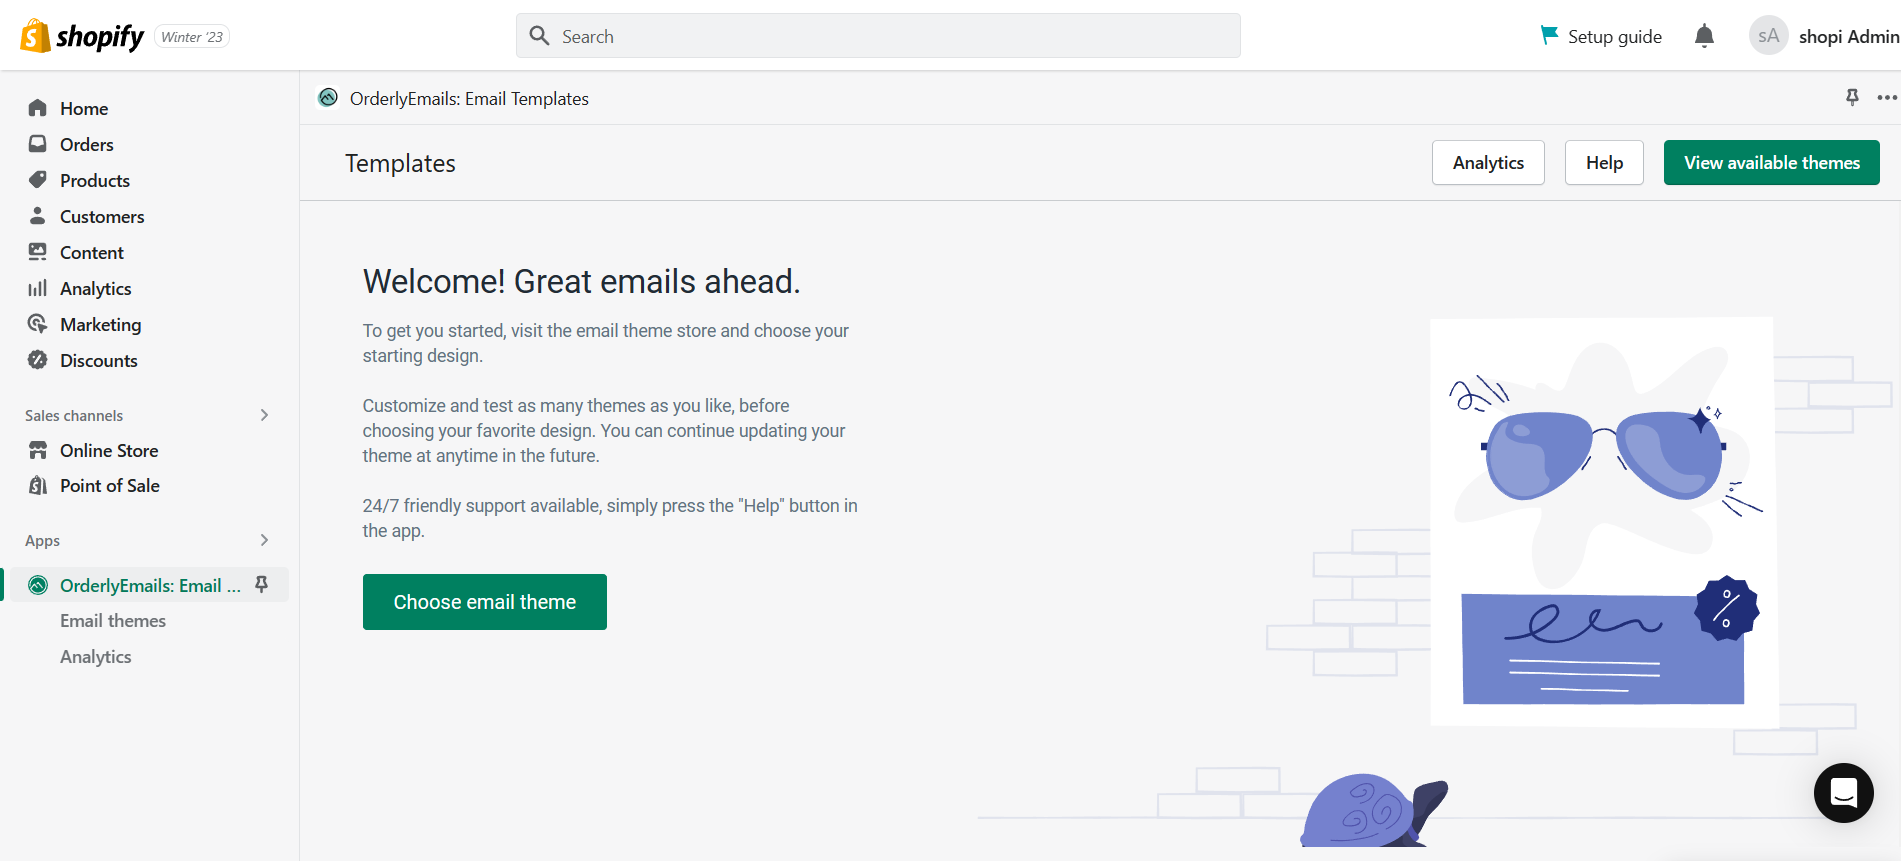
- After installing, the OrderlyEmails app will be available for use. Click the “View available themes”.
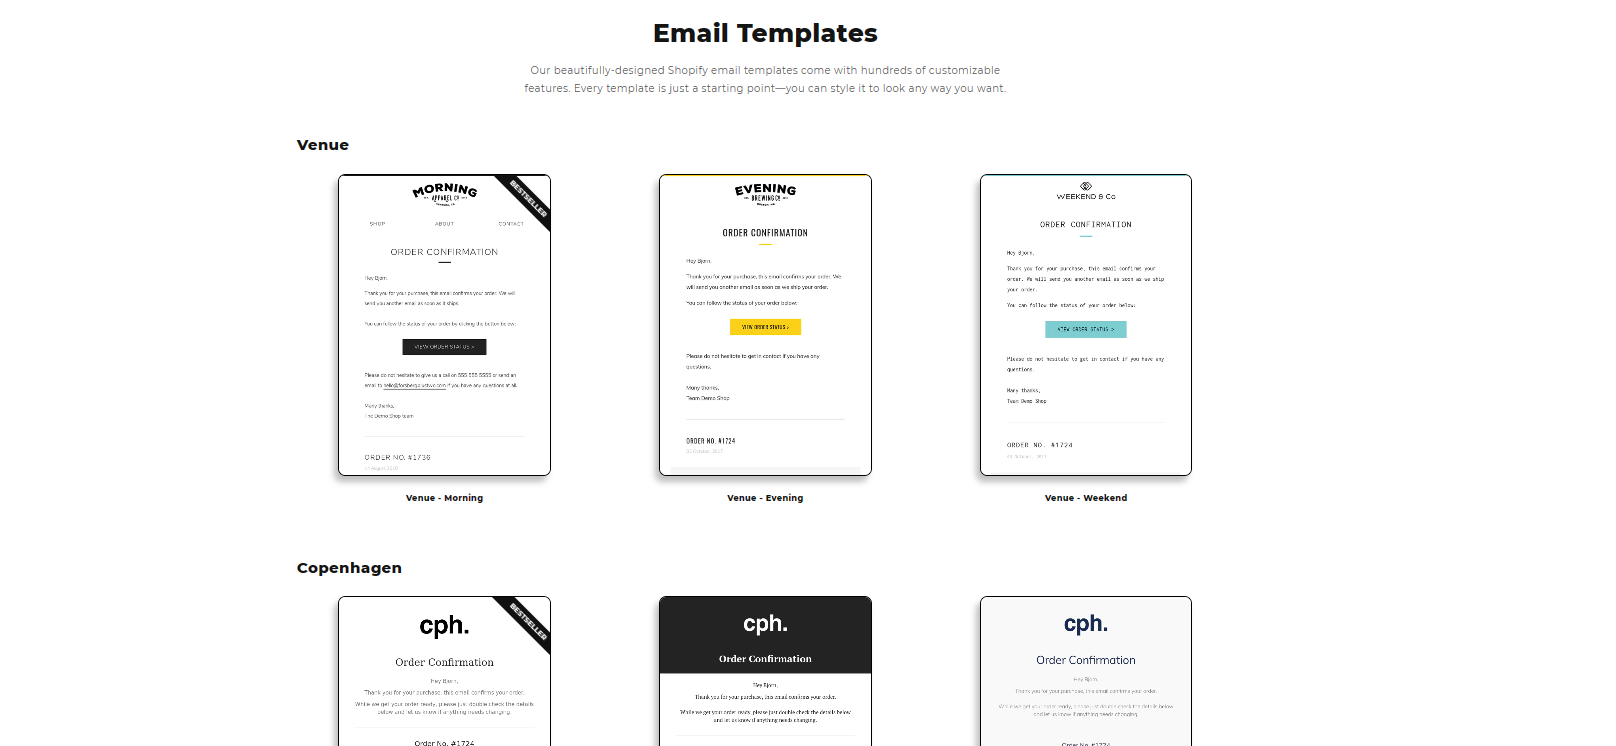
- Choose an email template that will work best for you and click it.
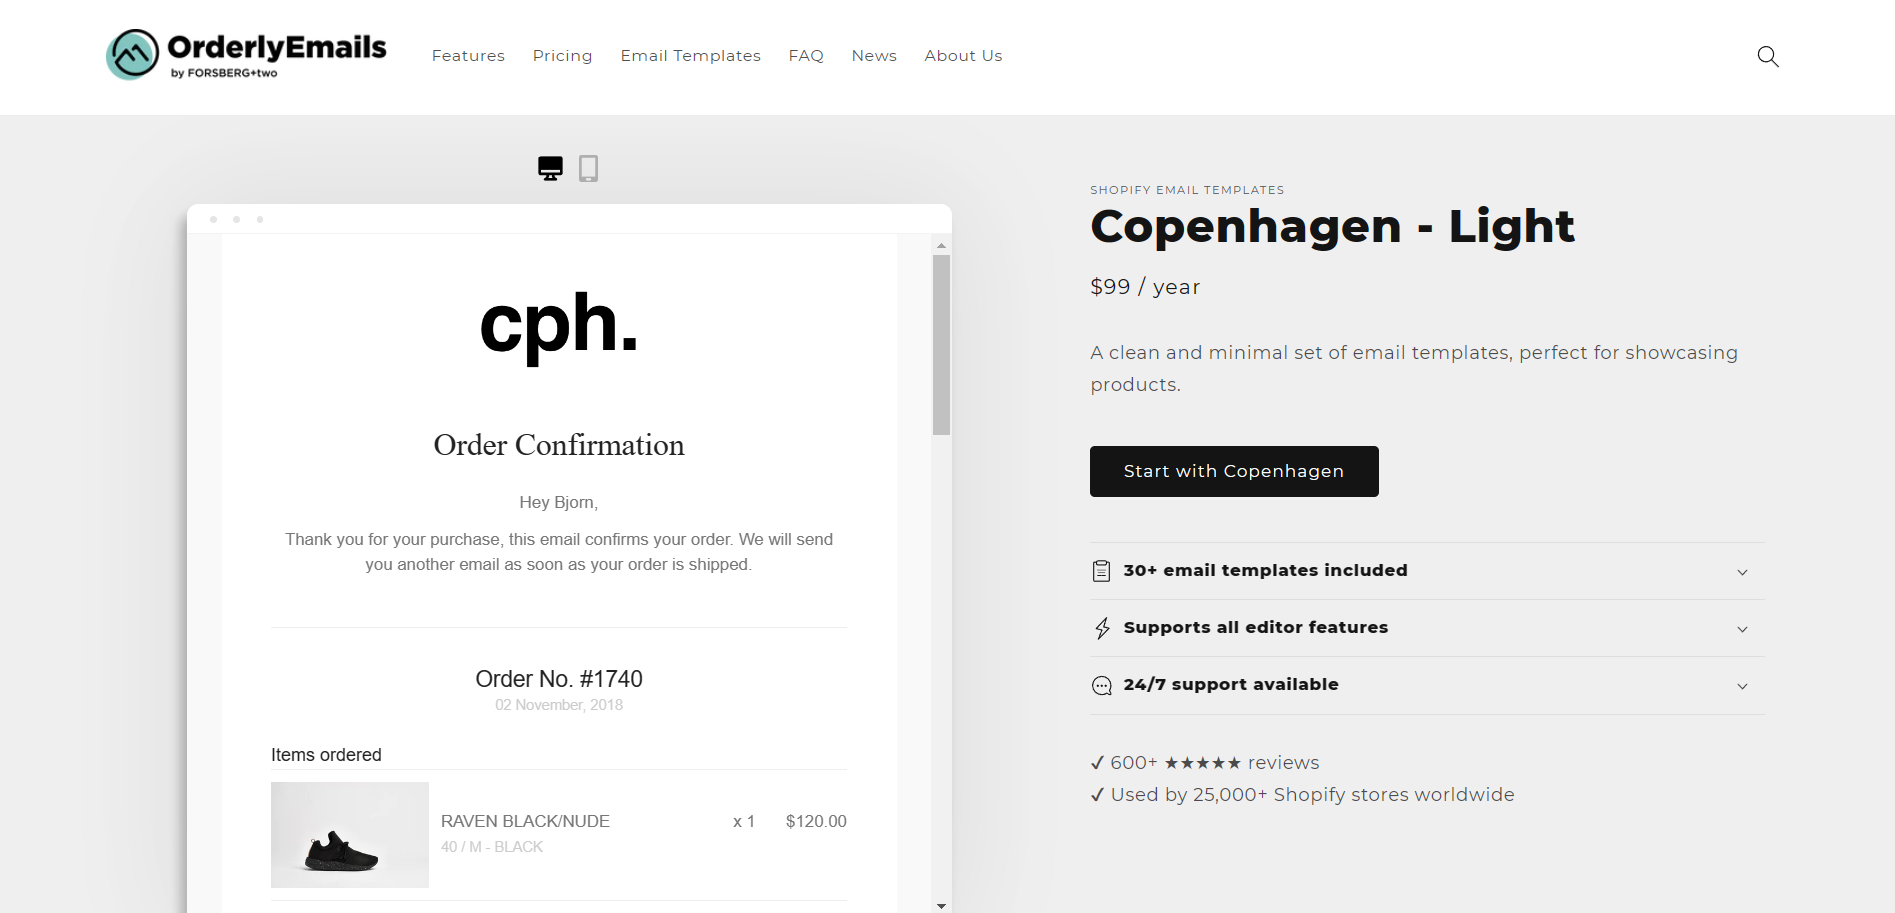
- Click “Start with …” to open and edit the email format.
- You will be redirected to the OrderlyEmails site. Here, you can edit the email newsletter for customers in the “Sections”.
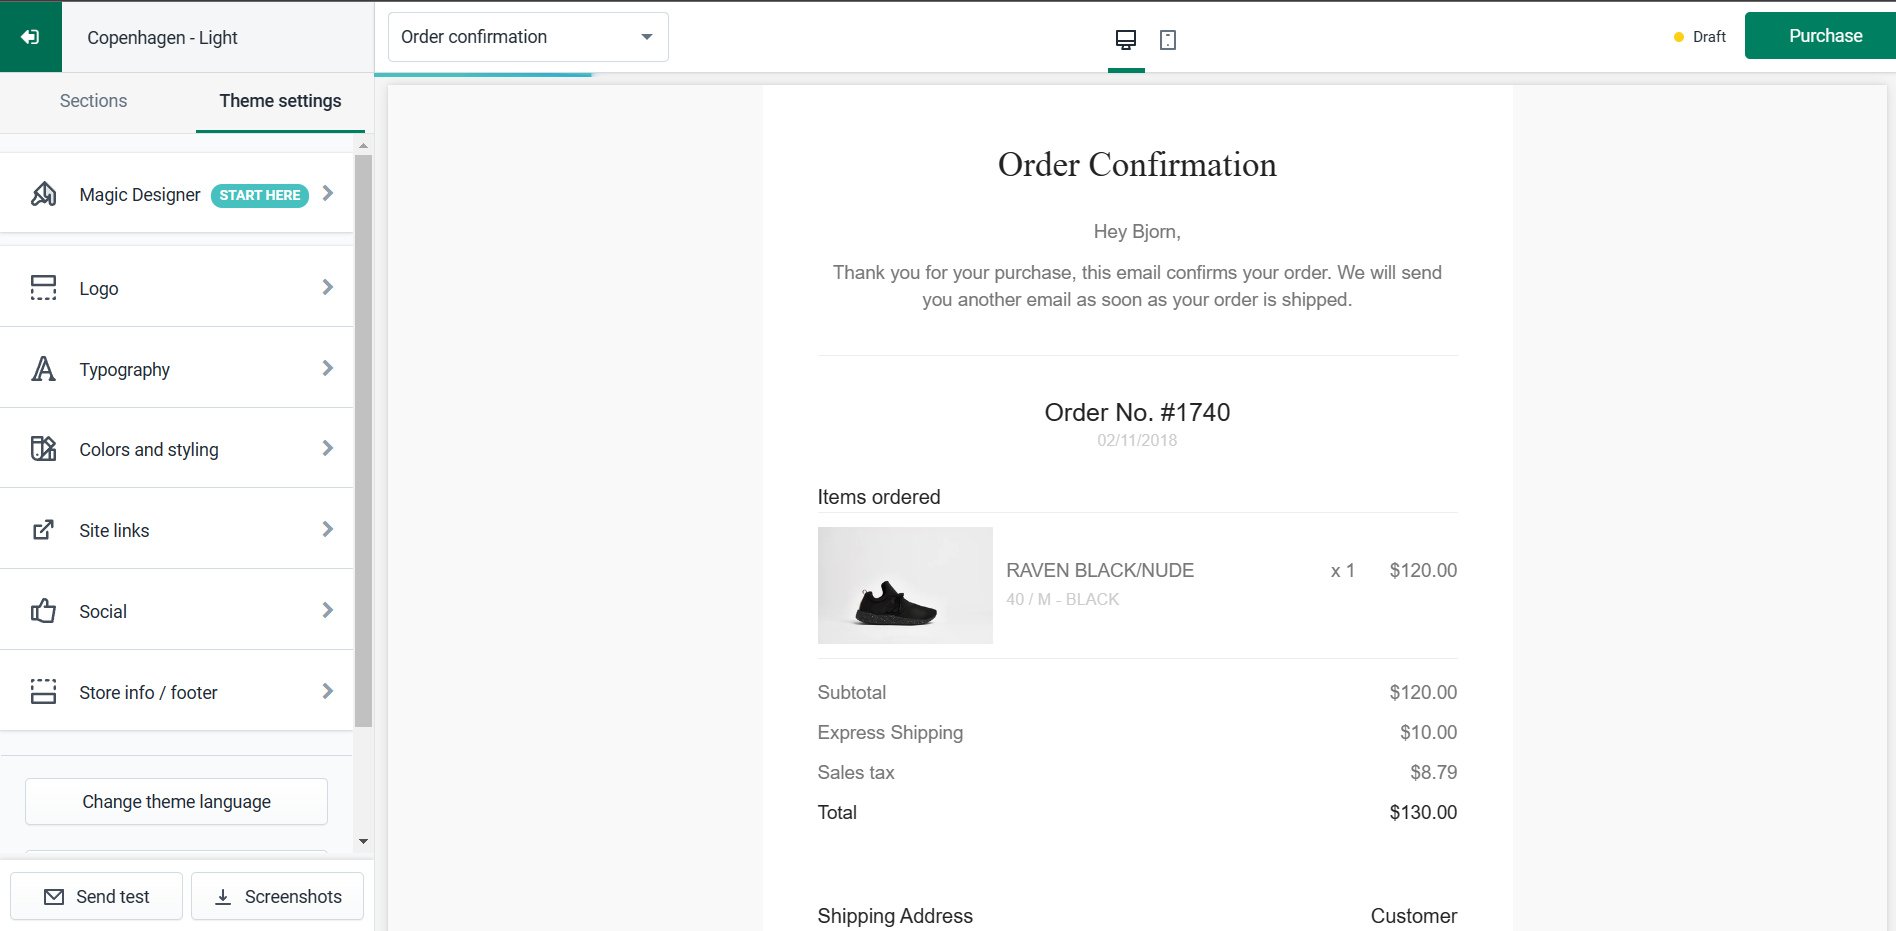
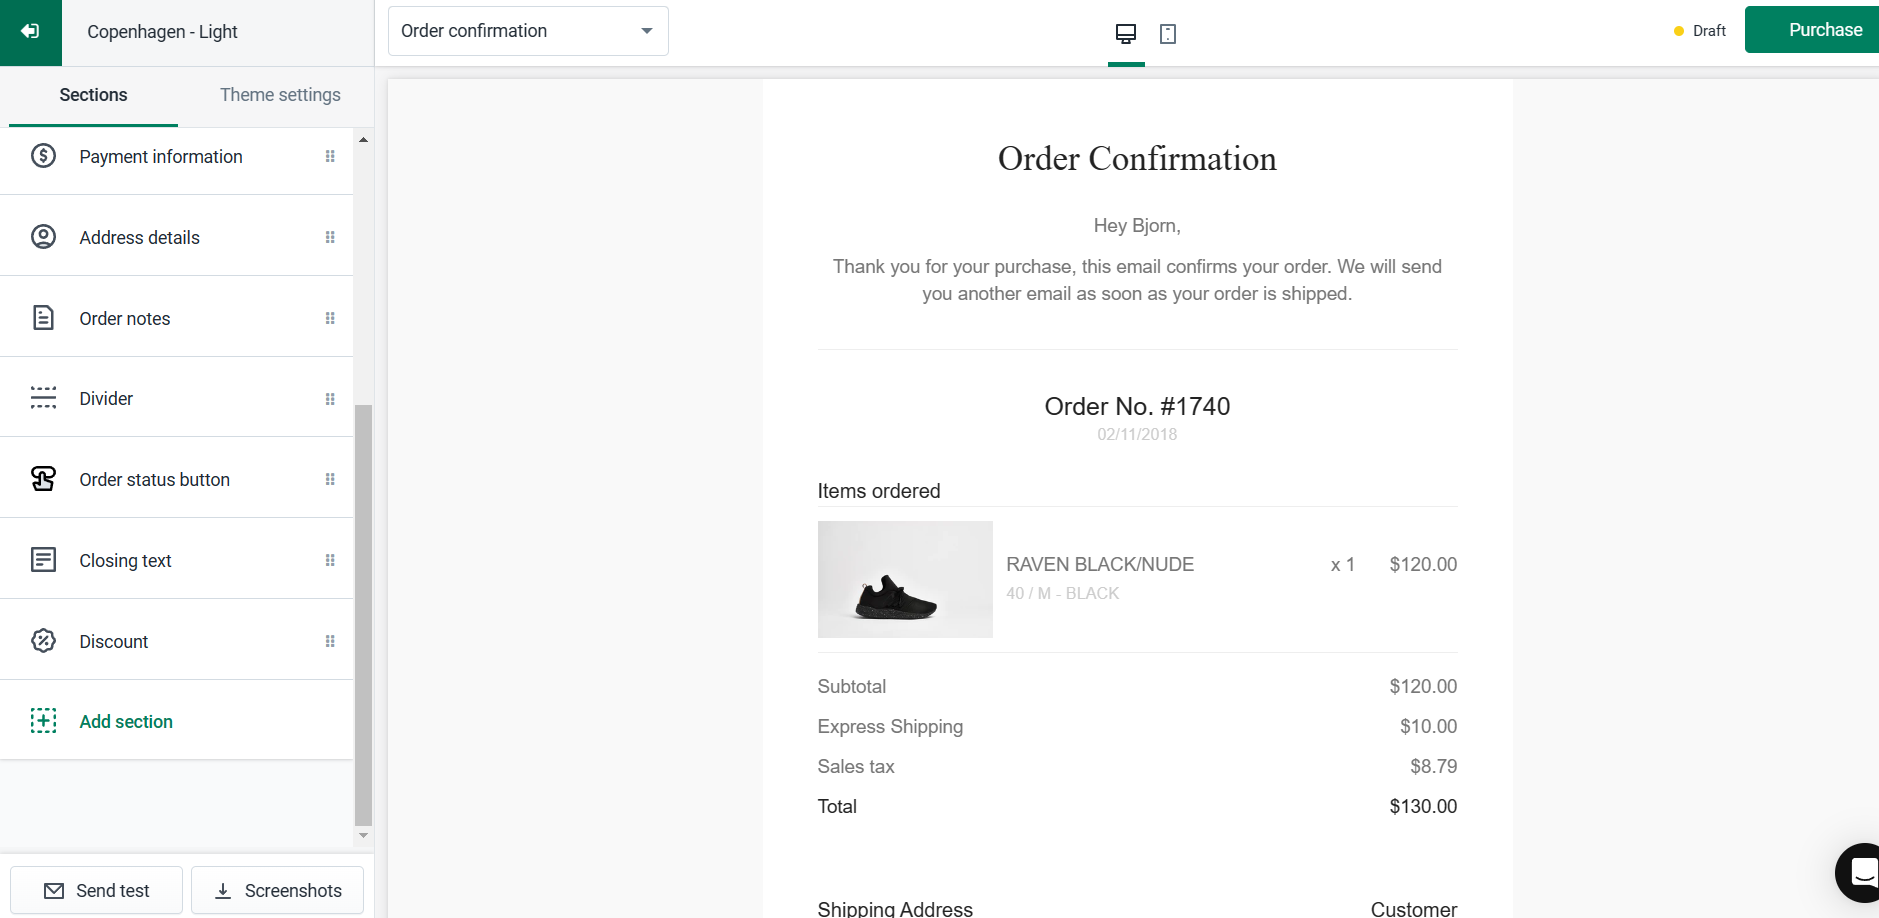
- Once navigated to the Sections, scroll down to view the Discount.
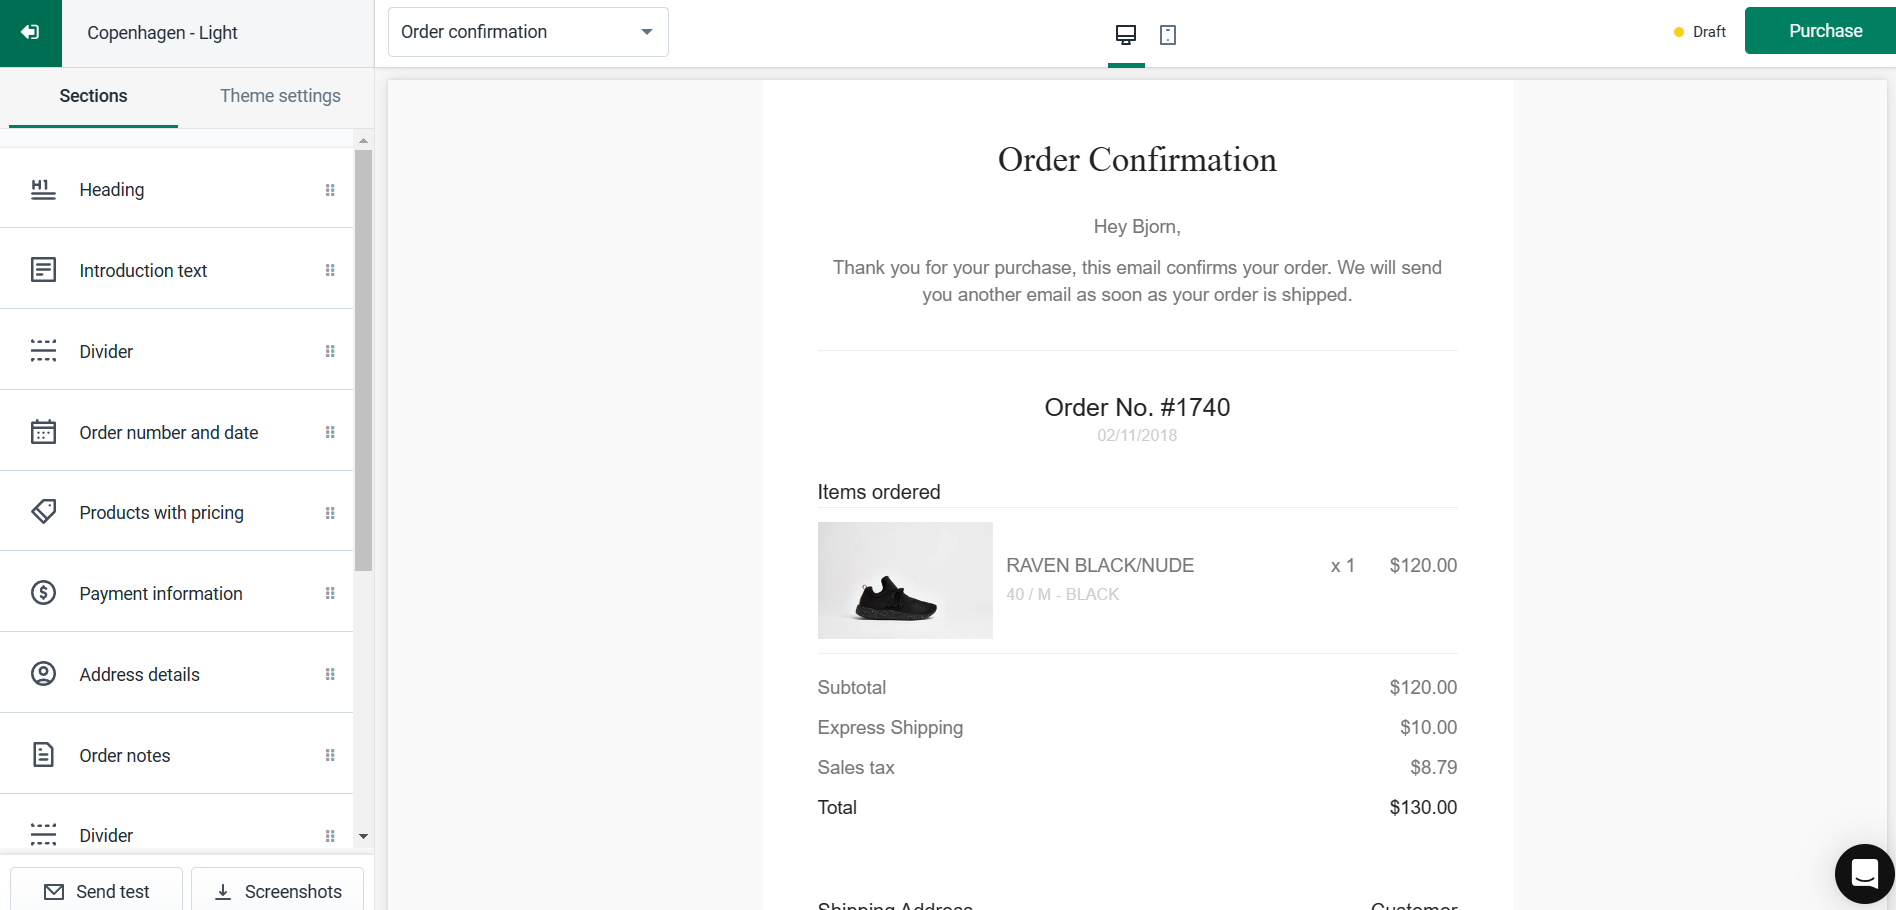
- Click the “Discount”.
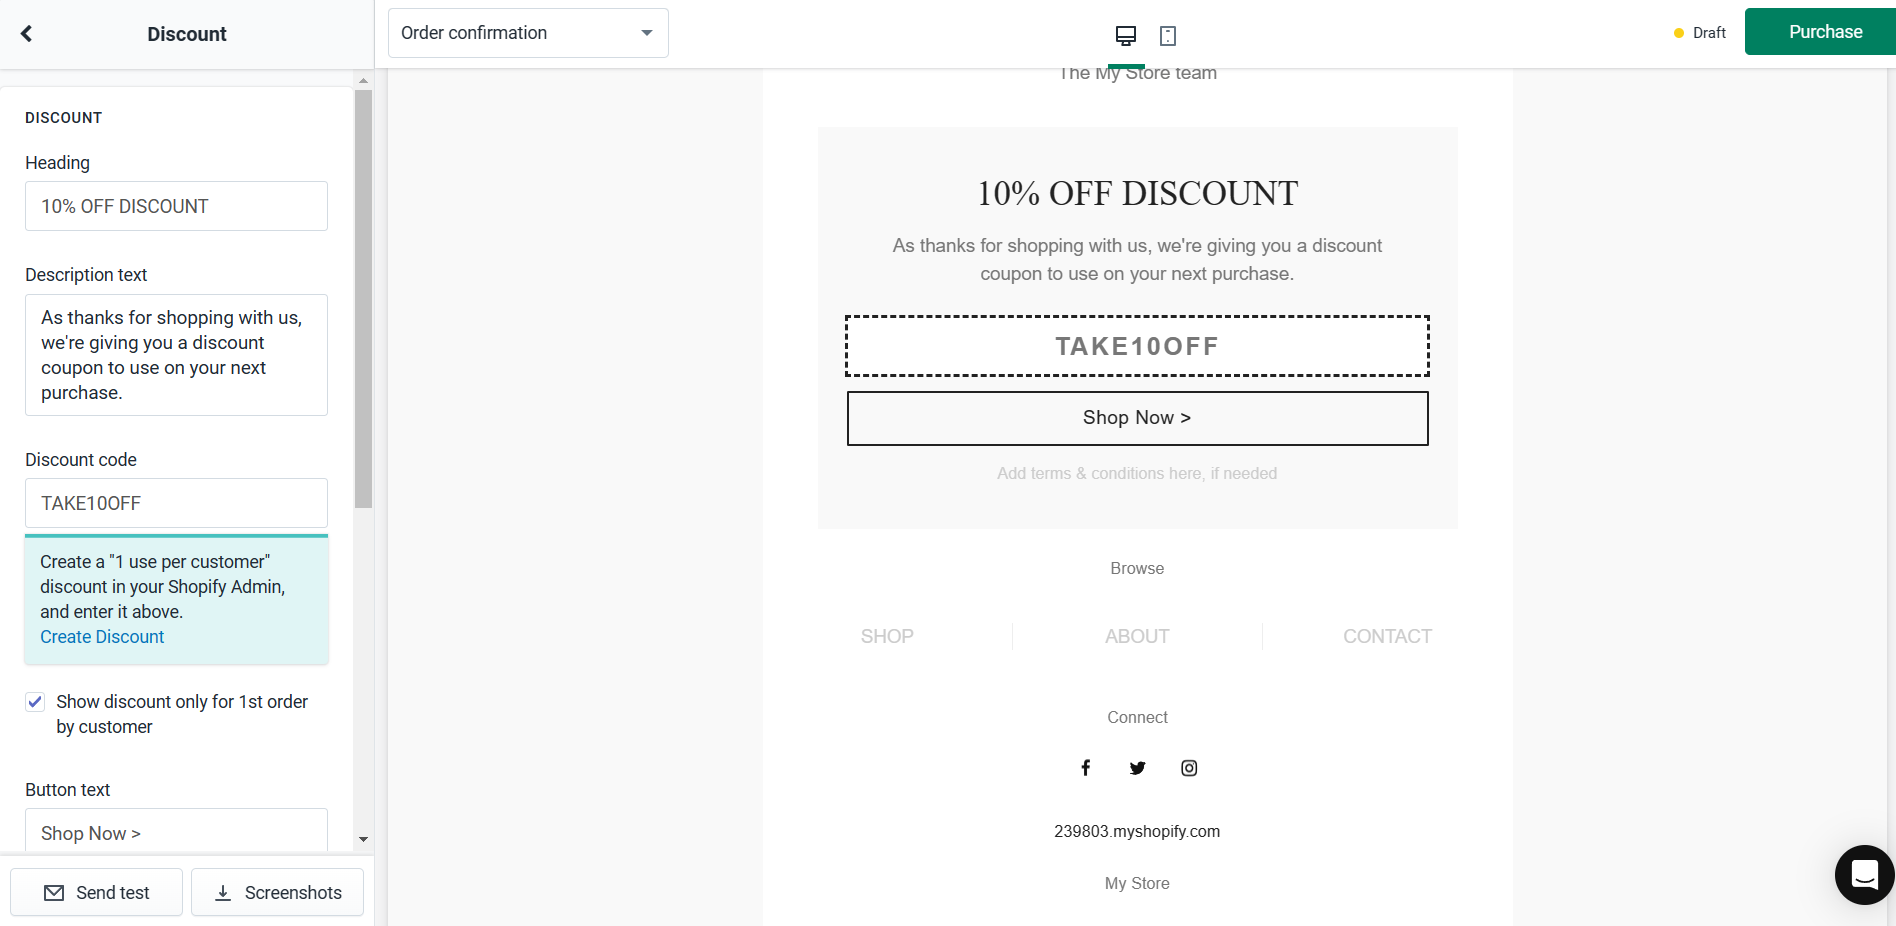
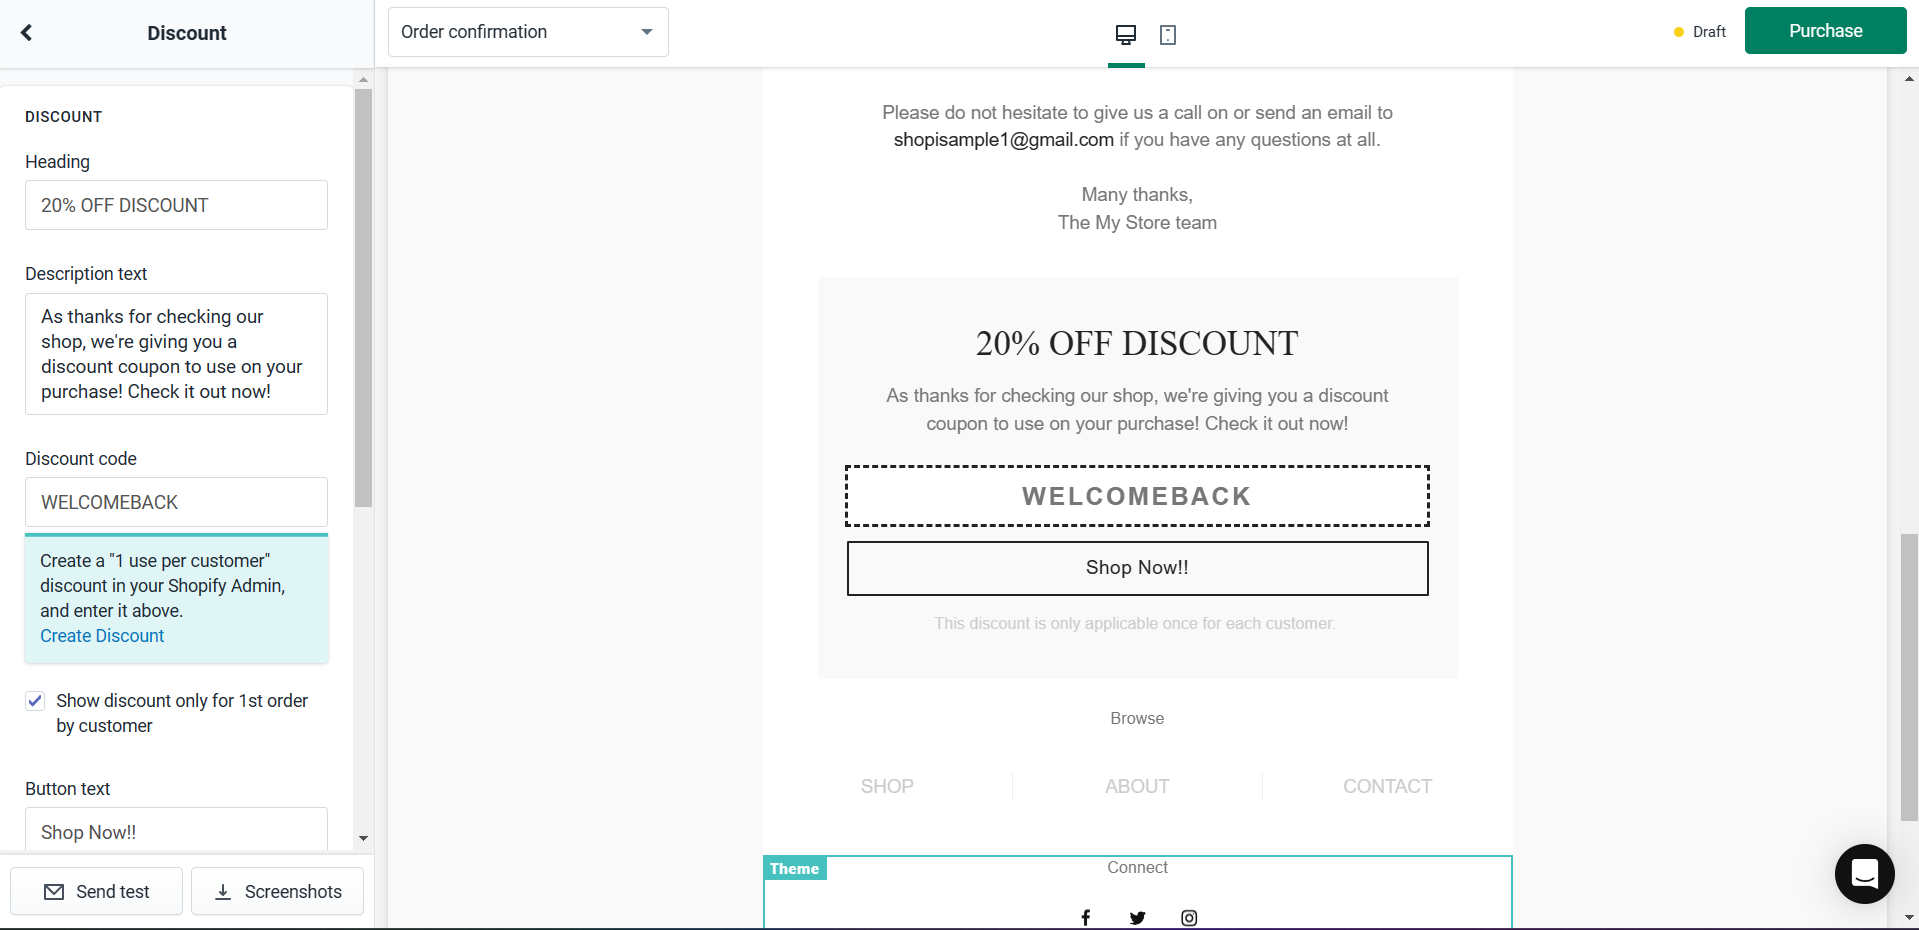
- After clicking the Discount, you will be redirected to the part of the email newsletter where you can edit out the discount. Since the discount you have made previously on Shopify was 20% off, you must edit the discount settings of your email template to match the details of your discount.
- Edit the Headline, Description text, Discount code, Button text, and Terms and conditions text according to the discount details that you have made in Shopify**.** Make sure that the discount code and the corresponding percentage or fixed amount discount in Shopify matches with the information indicated on the email newsletter. You can see the preview of your edited work on the right side of the screen.
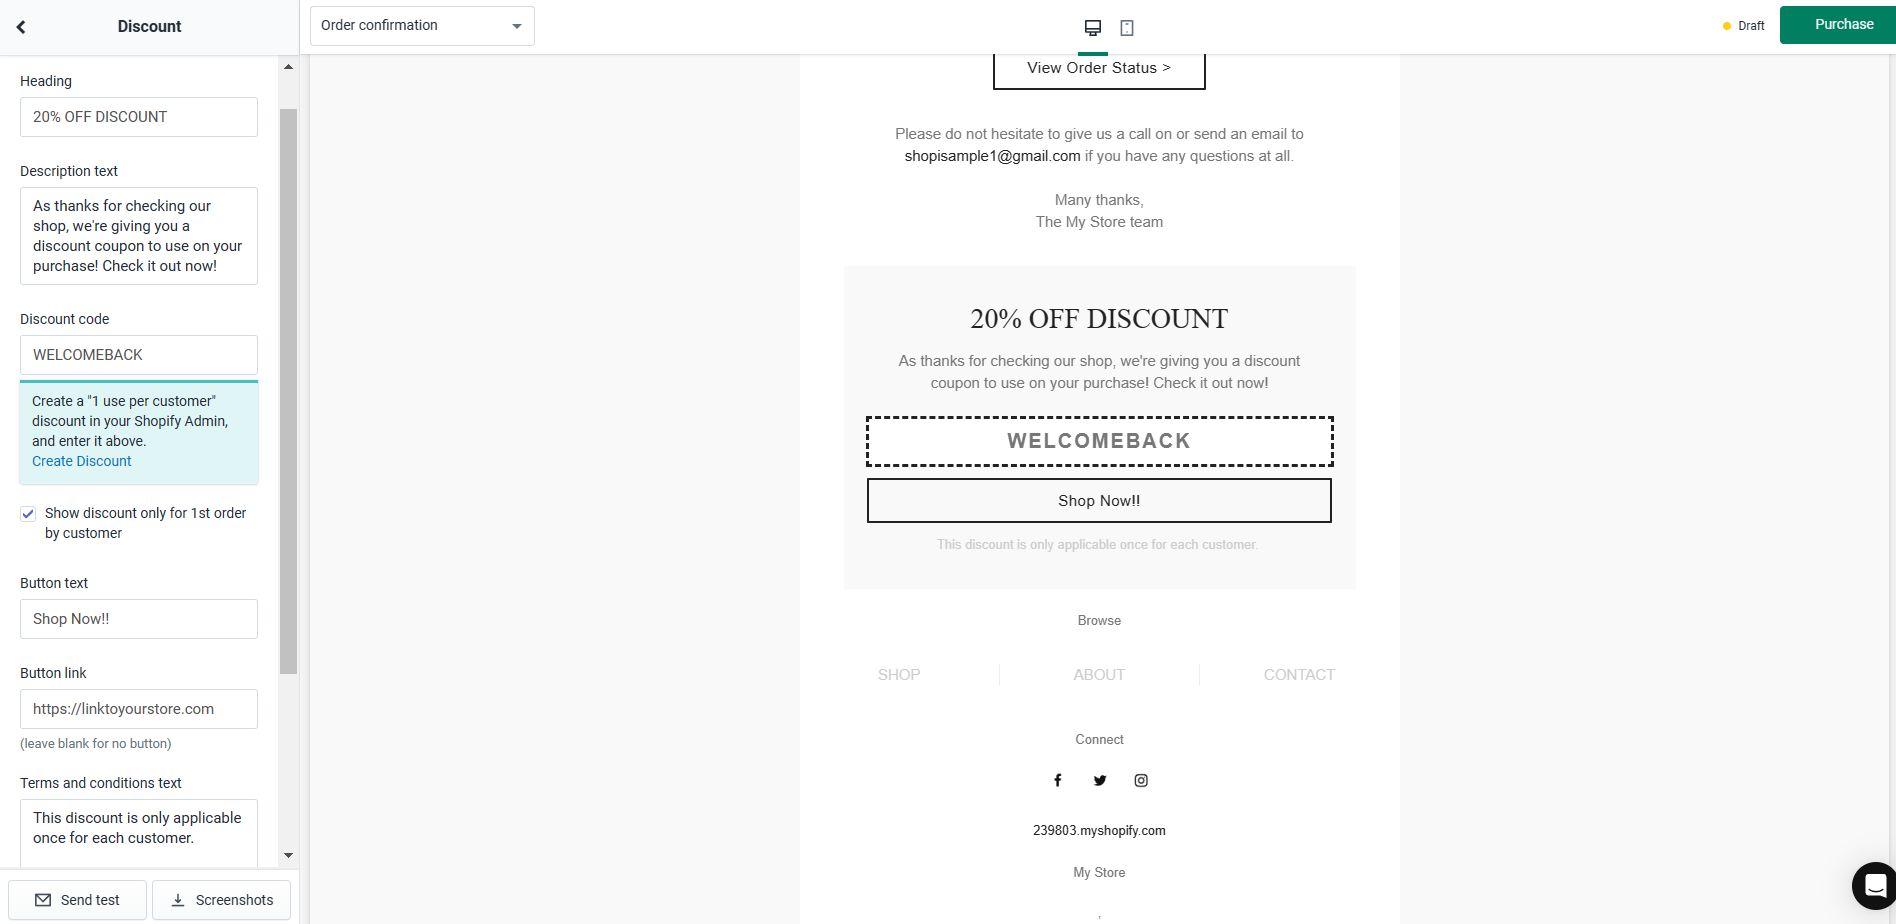
- Do not forget that in the Button link, you must indicate the shareable link of the Shopify discount that you made earlier. Edit the format indicated in the format and paste the shareable link.
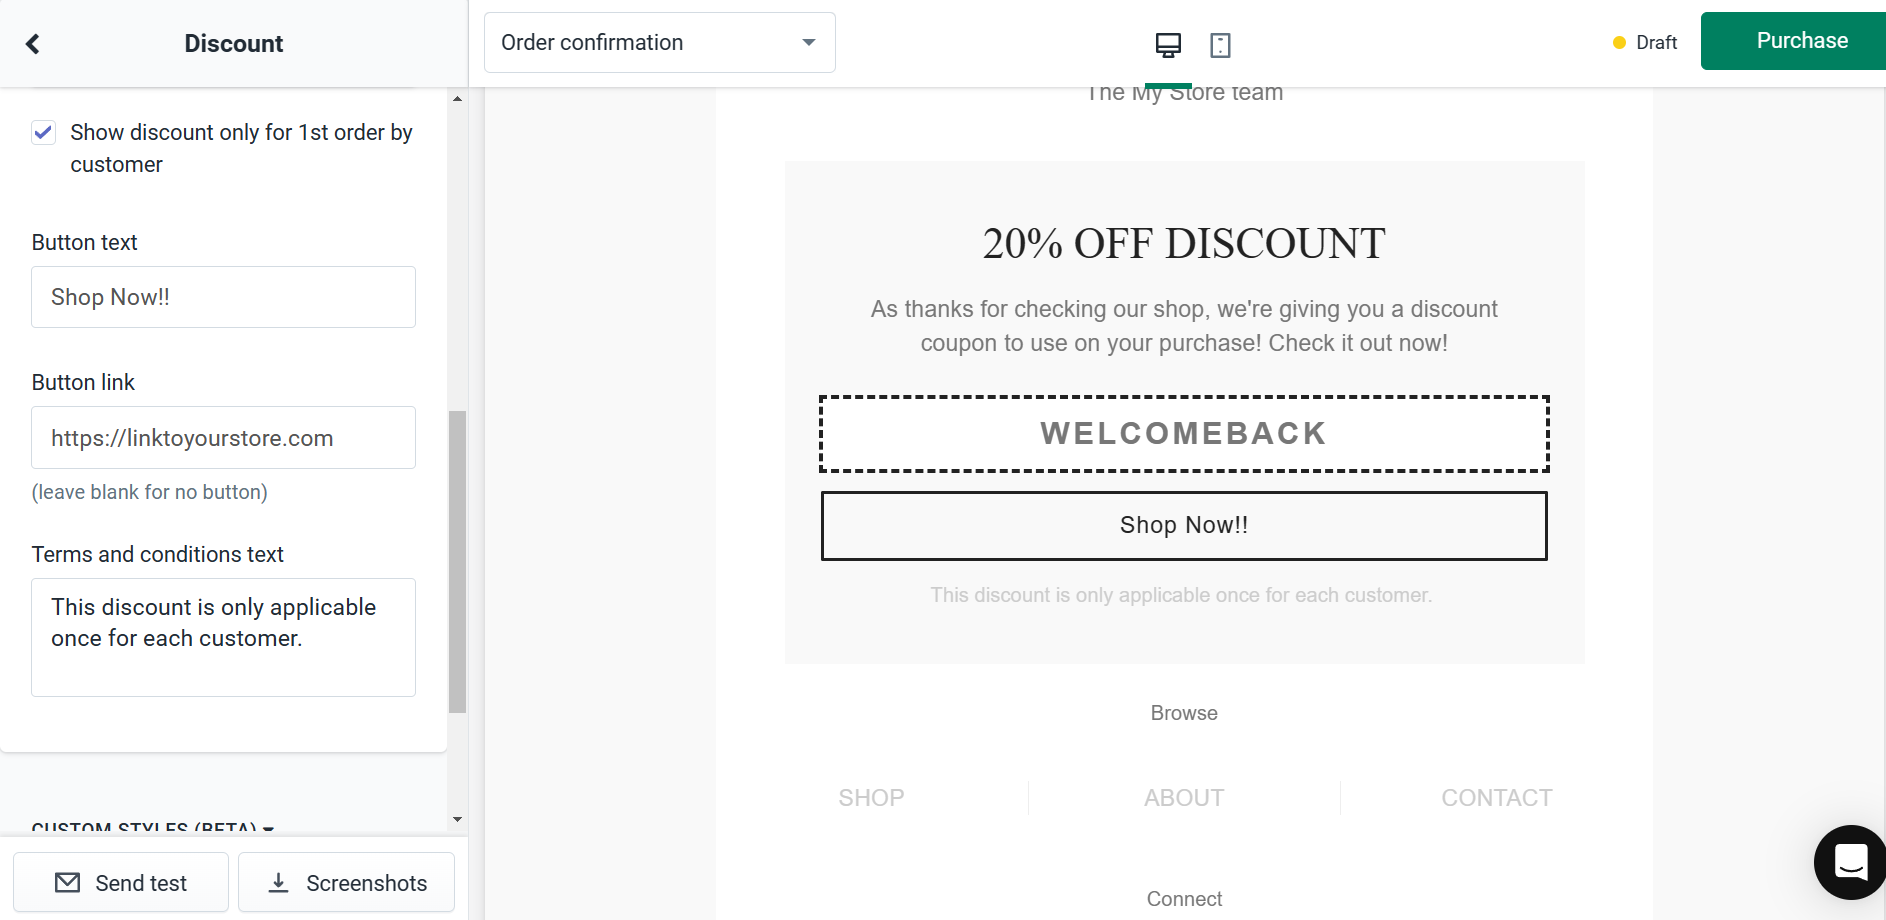
- As soon as they click the “Shop Now!!” button, your customers will be redirected to automatic discount on their checkouts.
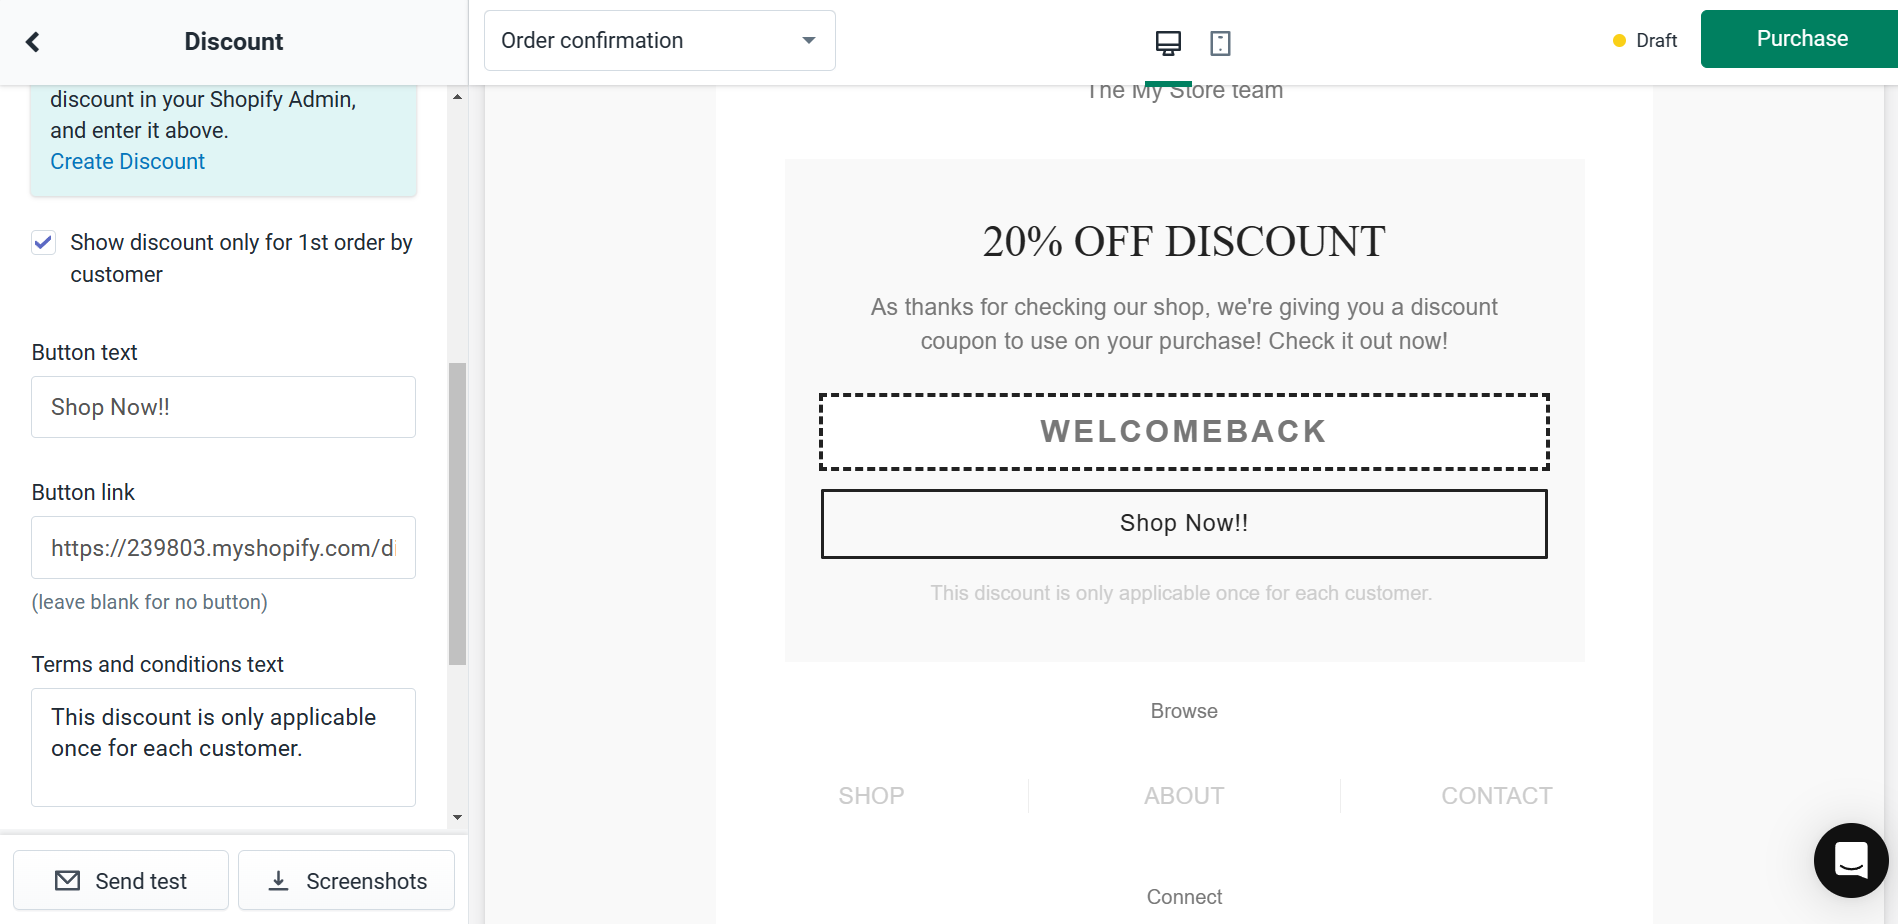
- After finishing other details of the email template, you can now click “Purchase” to finish the process and set up your payment methods for the OrderlyEmails app in Shopify.
Conclusion
You’re done! Always remember that using automatic discounts for abandoned checkout recovery emails induces multiple benefits such as efficient discounting method for items, improvement of sales, and clearing out items from inventory.
-
To utilize automatic discounts, discount links are preferable instead of discount codes. The discount links are automatically applied during checkout when the customer clicks the button links.
-
It is necessary that you already have the email template that Shopify will automatically send to the customers.
-
By purchasing the email template, there is no need for monitoring the customers who have abandoned checkout.
-
Getting a shareable link can only be done after the discount has been activated, so make sure that the discount that you will use for the email is active so there will be no barriers in your automated marketing.
-
Emphasize the discount text so that the customer will see it immediately and be encouraged to purchase on your Shopify store.