Best Practices for Organizing Product Categories on Shopify
To give order to the chaos and disarray that your Shopify outlet currently experiences. Doing this will make it easier for you to find the piece, product, or content you're trying…
Prefer a shortcut? 16 free tools do parts of this for you.

Aim: To give order to the chaos and disarray that your Shopify outlet currently experiences. Doing this will make it easier for you to find the piece, product, or content you're trying to find.
Optimal Outcome: Properly categorizing the content on your Shopify outlet can help you be more organized and productive. It eases the complexity of finding specific products in your store. Moreover, product categories also indicate the tax obligations and exemptions consumers can encounter whenever they purchase a certain product. That being said, effective categories serve as a guide for customers for every purchase.
What do you need to start: In categorizing your content on Shopify, having considerable critical and creative thinking skills can be an advantage. Embodying these traits would make developing a well-structured idea for defining and documenting your content taxonomy easier.
Moreover, it is a must to have a working and active Shopify account, as this will be the main platform we'll be using to categorize your content.
Why is this SOP Important: The first element that can jumpstart potential interaction between consumers and eCommerce sites is a strong search engine. One way to make this work is by categorizing your products or services available on Shopify. Doing this allows search engines to fetch your products quicker than usual. Therefore, providing a better and improved user experience for your current and future customers.
When and Where to execute: There's no best or worst time to organize the product categories in your Shopify outlet. If you feel like your store is in complete disarray and needs a major makeover and improvements, feel free to do so! 🙂
Categorizing your content is completed within your own Shopify account and store. But you can take advantage of online sources when looking for inspiration and designs.
Who Should Be Doing This: The main character in this SOP is YOU! If you don't have a team or prefer to do it by yourself, then it would be best to execute this task yourself. Doing this can fast-track the process and lessen confusion when organizing and designing your content.
But, if you're working in a company or team, then you should assign this task to a member who's a Shopify expert. This is because they know the best strategies to use in product categorization.
Overview
Shopify is an eCommerce platform that allows users to build and customize their online stores. Once done, they can sell their products in multiple locations, such as websites, in-person, social media channels, and pop-up shops. Shopify can connect you with thousands to millions of potential consumers worldwide.
Effectively and efficiently market your products by carefully organizing your product categories. This is the term used to identify the labels assigned to a collection of products. Having well-defined Shopify categories can help your products appear on search engines whenever consumers search for your or similar products.
Execution
Resources/Tools & Set up
-
A desktop or laptop, mobile phone, and a fast and reliable internet connection.
-
A working and active Shopify account.
-
Knowledge and understanding of the Product Taxonomy guidelines of Shopify.
-
A detailed list of tips and tricks on effectively categorizing your Shopify content is widely available online.
Tips to Effectively Organize Categories on Shopify
The truth is, there are no right or wrong tactics when it comes to organizing the product categories on your Shopify outlet. The design and structure you want to incorporate depending on your business's wants and needs.
You can always change and upgrade the categories whenever and wherever you like. Besides, the marketing world continuously changes from time to time without prior notice. So, make sure to keep up with these trends to make the most out of your store! 🙂
In the meantime, here are some tips and tricks you can consider, so you can finally start the categorization process.
- Acknowledging Shopify's Product Organization Capabilities.
- Organizing your product categories on Shopify can take time and effort. But it doesn't have to be! You can choose from two options to make more specific and detailed categories as you wish.
- Manual Collections, as Shopify identifies it, allows you to sort and group your products based on how you'd like to categorize them. For example, for the main categories, you'll have labels such as:
-
Women
-
Men
-
Kids
-
Home
-
Pets
-
After identifying your main categories, you can create subcategories under them. Subcategories are labeled by Shopify as "Product Tags."
-
You can associate these searchable keywords with your products to make them visible and findable through online search.
- Automated Collection uses selection conditions you can add and specify in your product categories to automatically filter or match your products in the Shopify admin.
Note: In this SOP, we'll focus on how to create and organize your categories MANUALLY. We'll have a separate guide for doing it automatically because this involves a more complex process since there are several ways to do this.
- Determining what type of organization tactic you'll incorporate in your collections.
- In breaking down your products to group them into several categories, Shopify offers two options you can implement.
- Simple Collection pertains to the broader category of product collections. For example, labeling a group of women's or men's clothes that includes every outfit suitable for each gender.
- This might be a good idea, but choosing from this type of collection can be overwhelming, and difficult for consumers to find what they're actually looking for.
- Nested Collection pertains to the narrower category of product collections. It includes multi-levels of subcategories that break down each type of outfit. For example, the women's section is grouped into:
-
Tops
-
Bottoms
-
Swimwear
-
Shoes
-
Jewelry
-
Always remember this when categorizing your products on Shopify: "Ease of use is the key." So, implementing the Nested instead of Simple Collection option is more advisable. This is because it helps consumers drill down their choices, making it easier for them to find what they're looking for.
- Planning out your collection.
-
After understanding Shopify's product organization capabilities and identifying the type of tactic you want to incorporate, it's time to draft and plan your structure.
-
Research and check what categorization tactic works best in your industry.
-
Take a look at your products on Shopify, and start breaking these down from a broader to narrower perspective.
-
Observe your competitor's outlet - how they organized their categories - and use those ideas as your inspiration for creating your own version.
-
Always put your feet into the shoes of your consumers. While organizing your products, internalize how they'll react once they see your shop.
-
Organize your Shopify store's product categories
Start building your own empire on Shopify in the most organized and detailed way.
Steps in adding categories
The first and foremost thing you need to do when organizing your Shopify store to make it look more straightforward and convenient is to add the main categories.
-
Log in to your Shopify account.
-
On the left side of the screen is your Navigation Bar. Click Products > Collections > Create Collection.
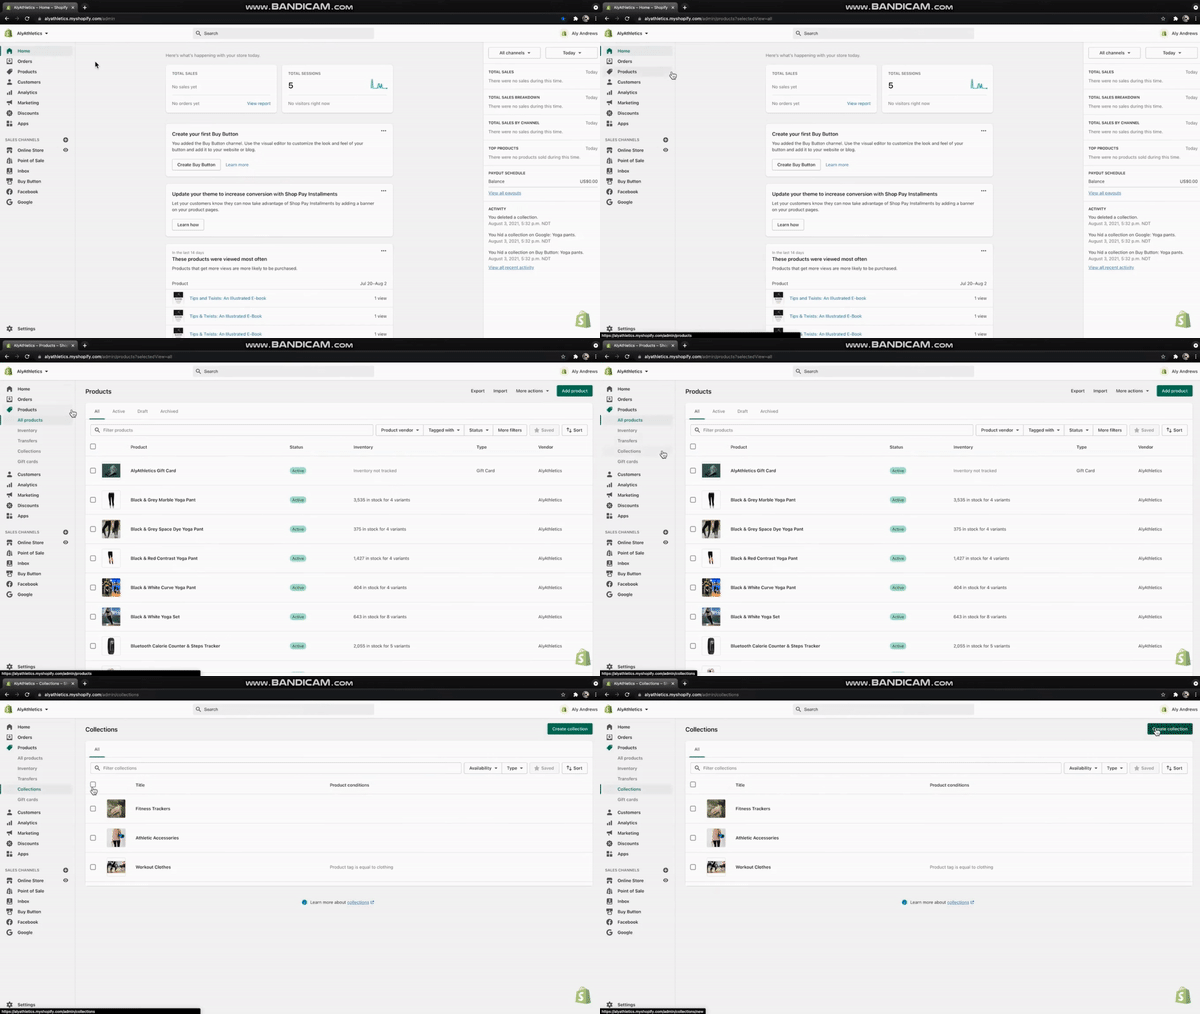
- Label the category as you wish. Example: Yoga Pants. Then, add a brief description about the collection.
Do this until you've added all the collections (categories) you want to include in your store.
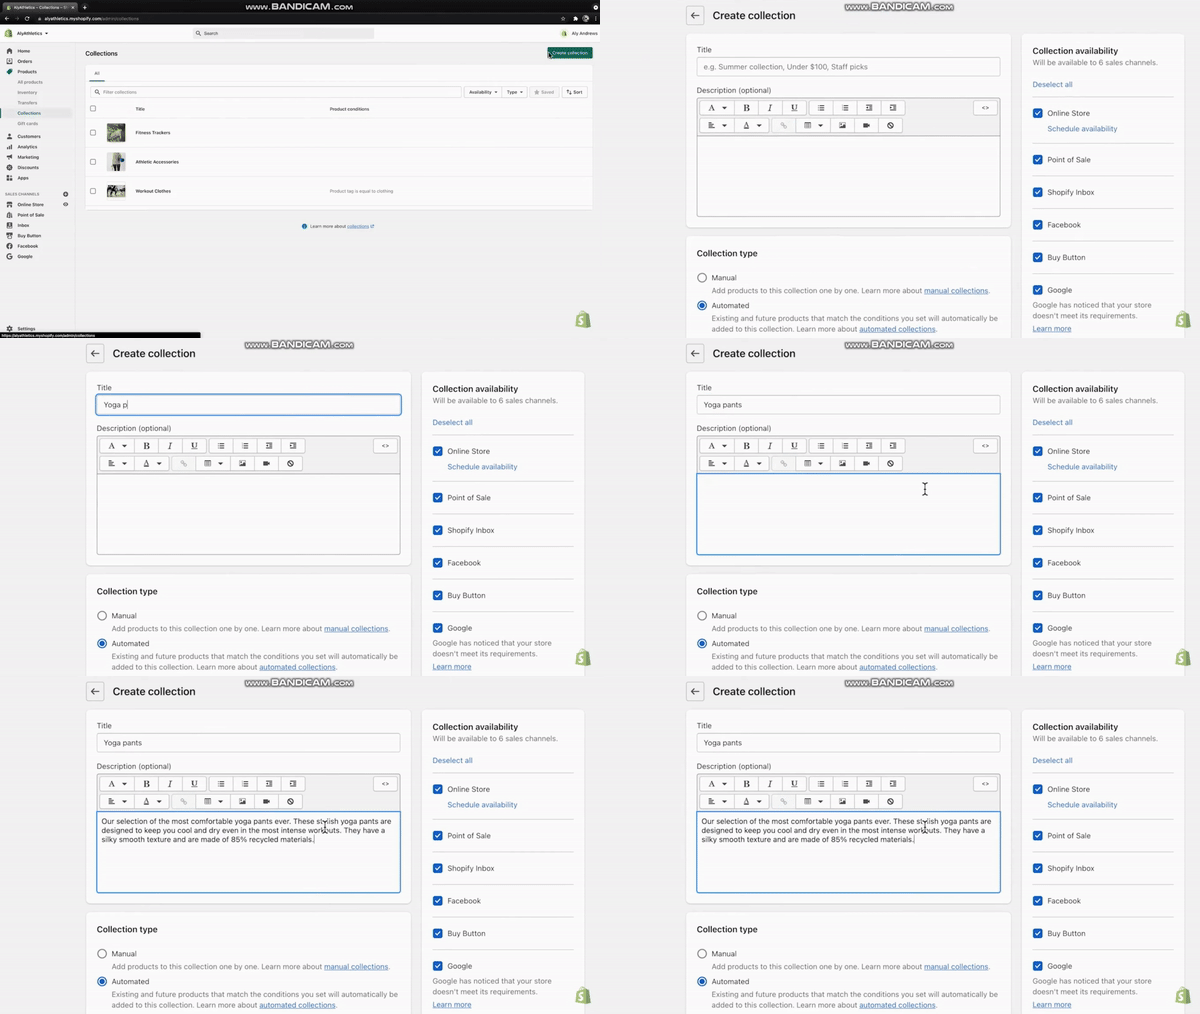
- Click Manual, then Edit Website SEO.
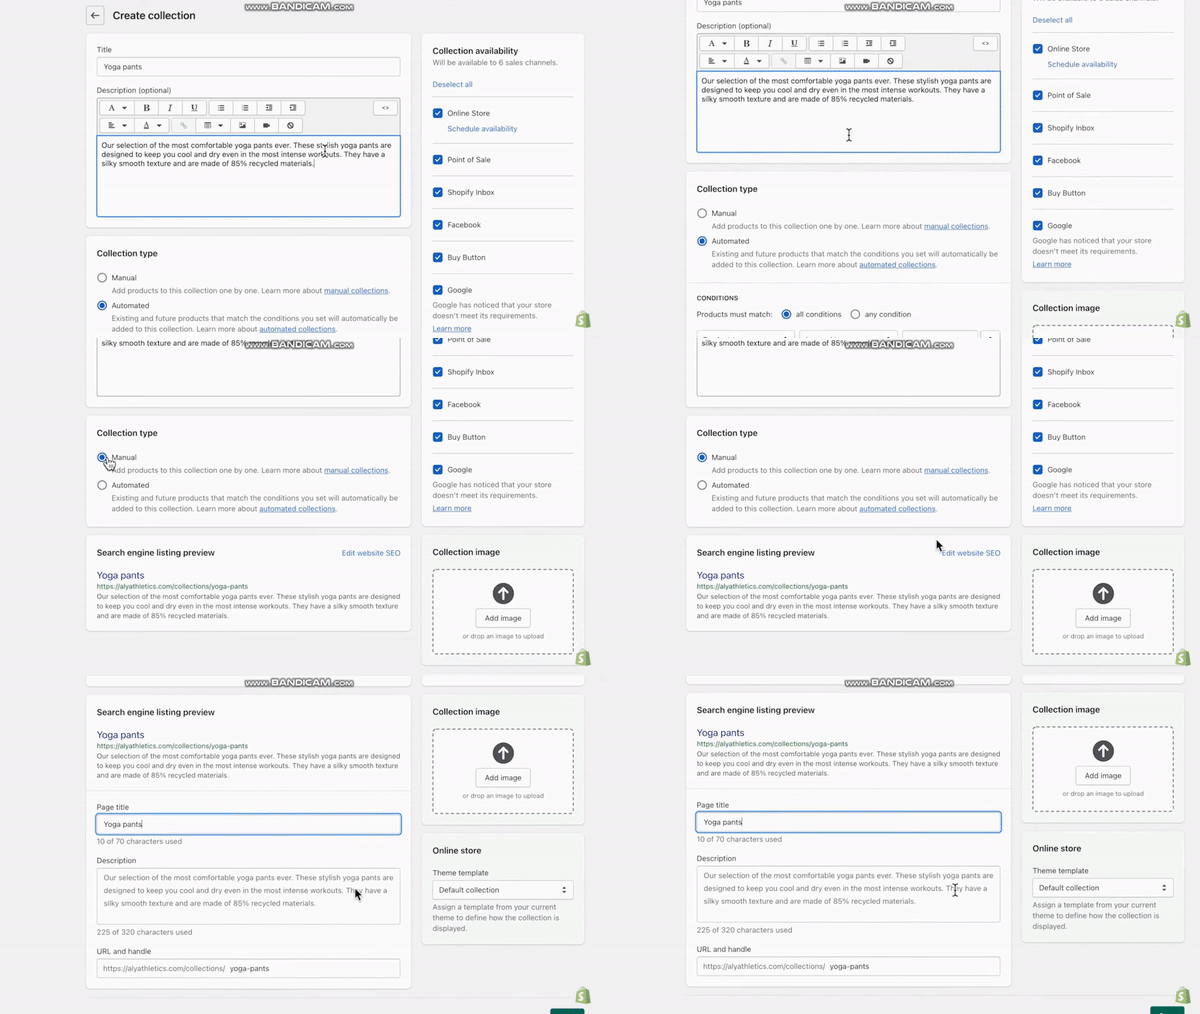
- Customize the Collection Availability by ticking the box beside the sales channel where you want your collection to be displayed.
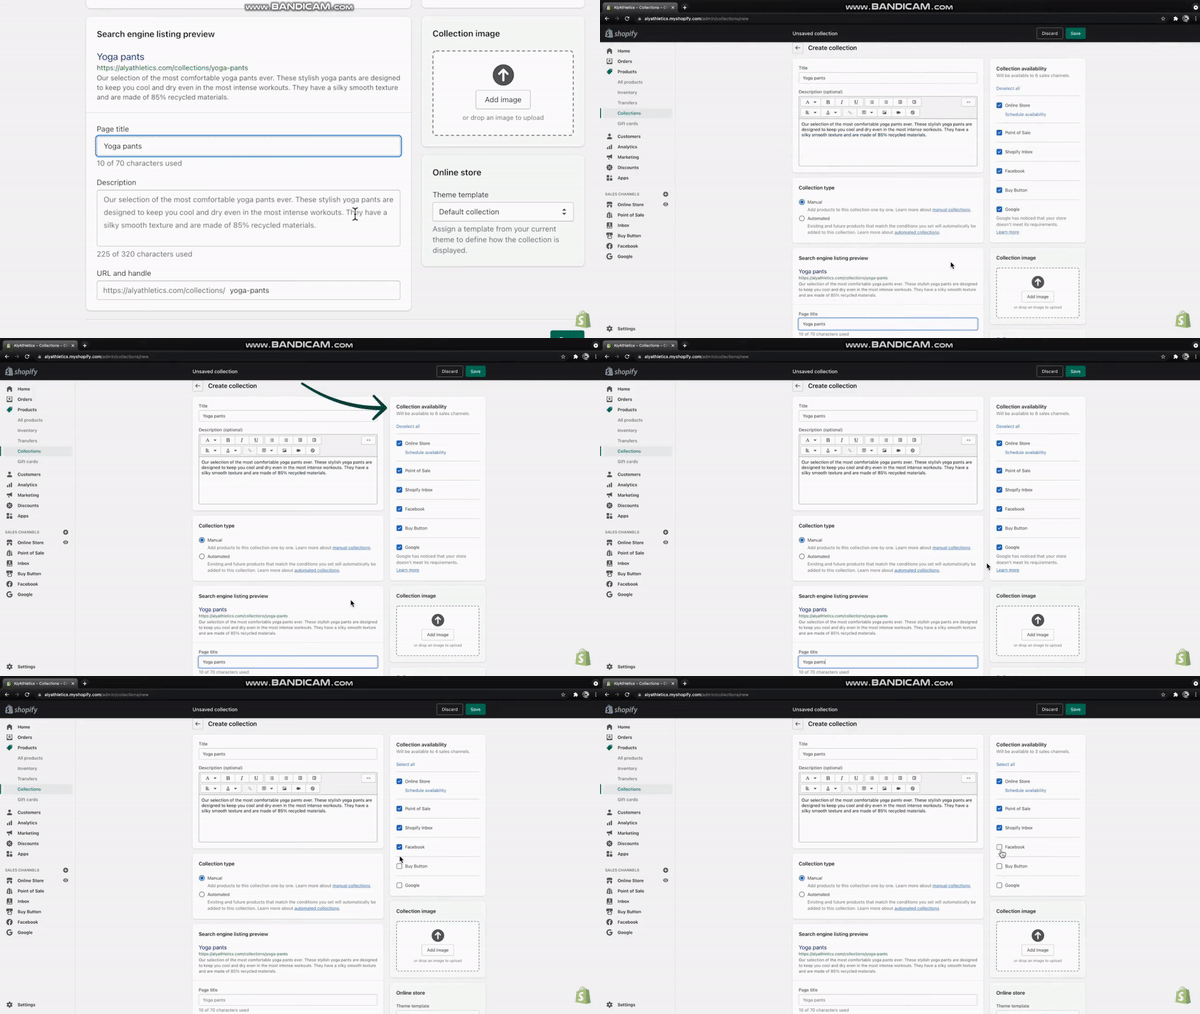
- If you want to link the collection in your navigation menu, select the Online Store.
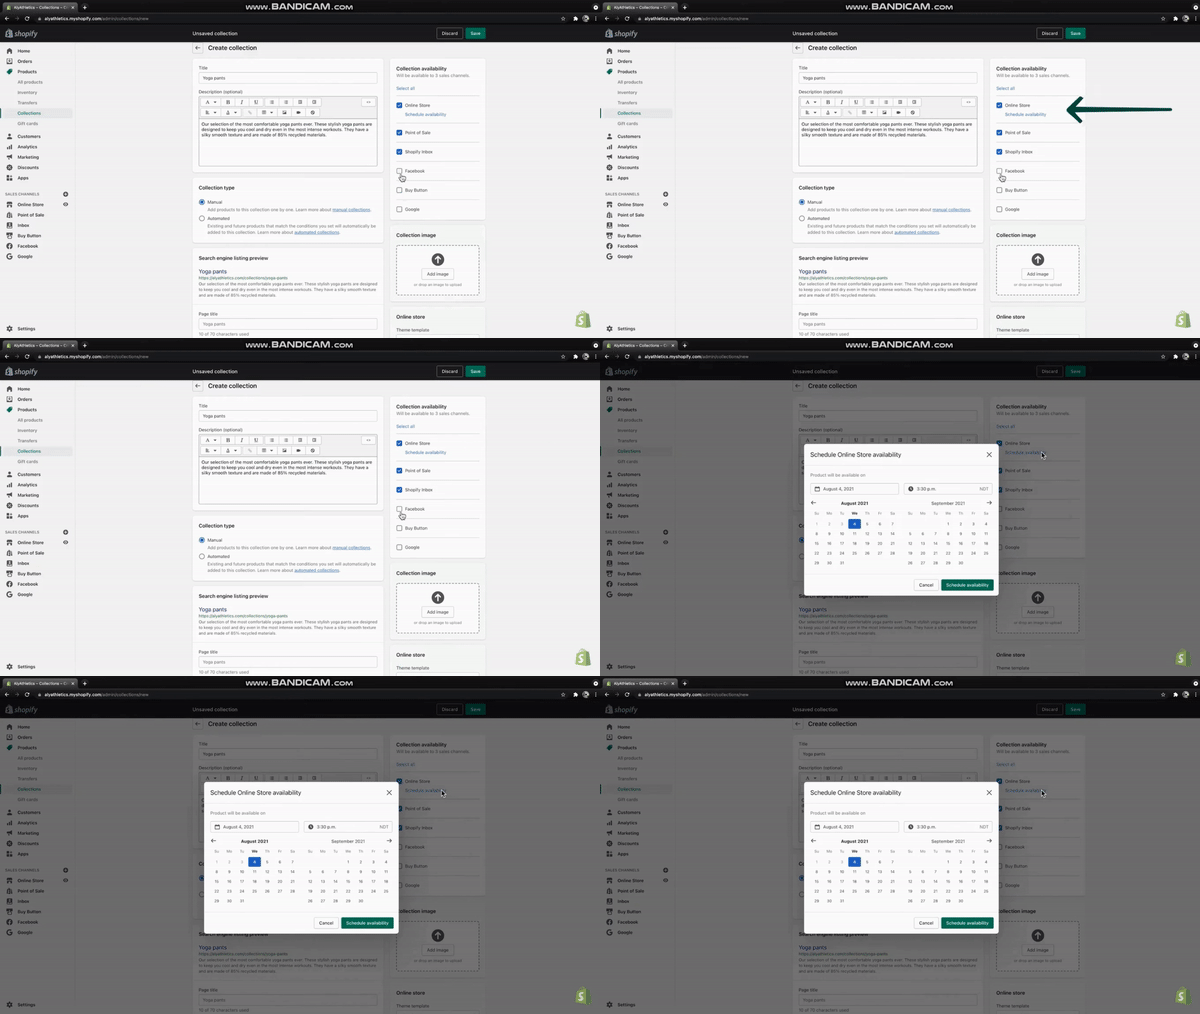
If you want to schedule this collection to be published at a future date, click Schedule Availability, then select your desired dates.
Steps in adding products to your collection
After creating your main and subcategories, now is the best time to add the products under the collection where it belongs.
- To add products to your collection, click Browse to see your inventory.
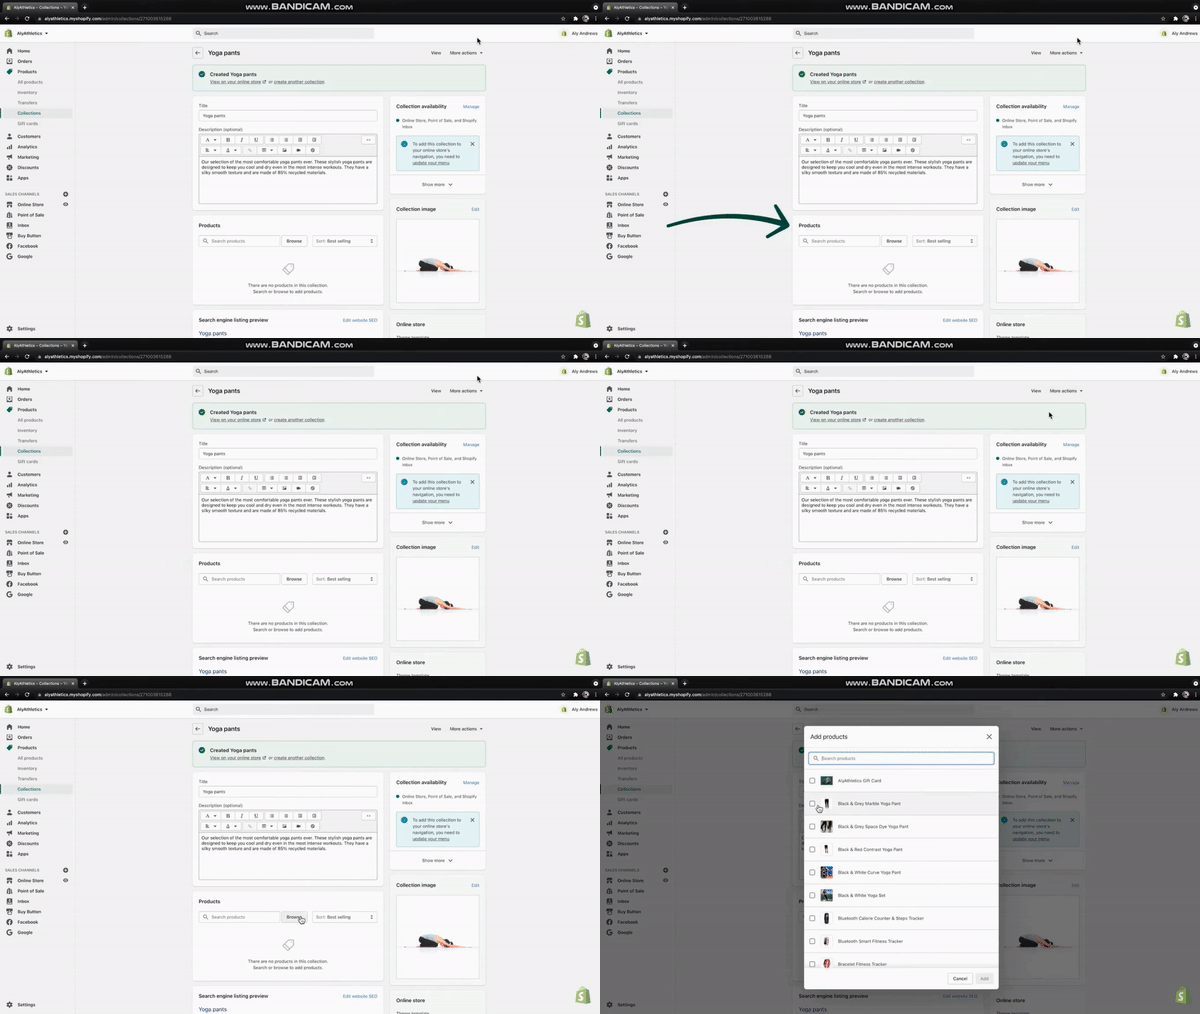
- Scroll through to see the items you wish to add into the collection. Select everything you wish by checking the boxes beside the product title.
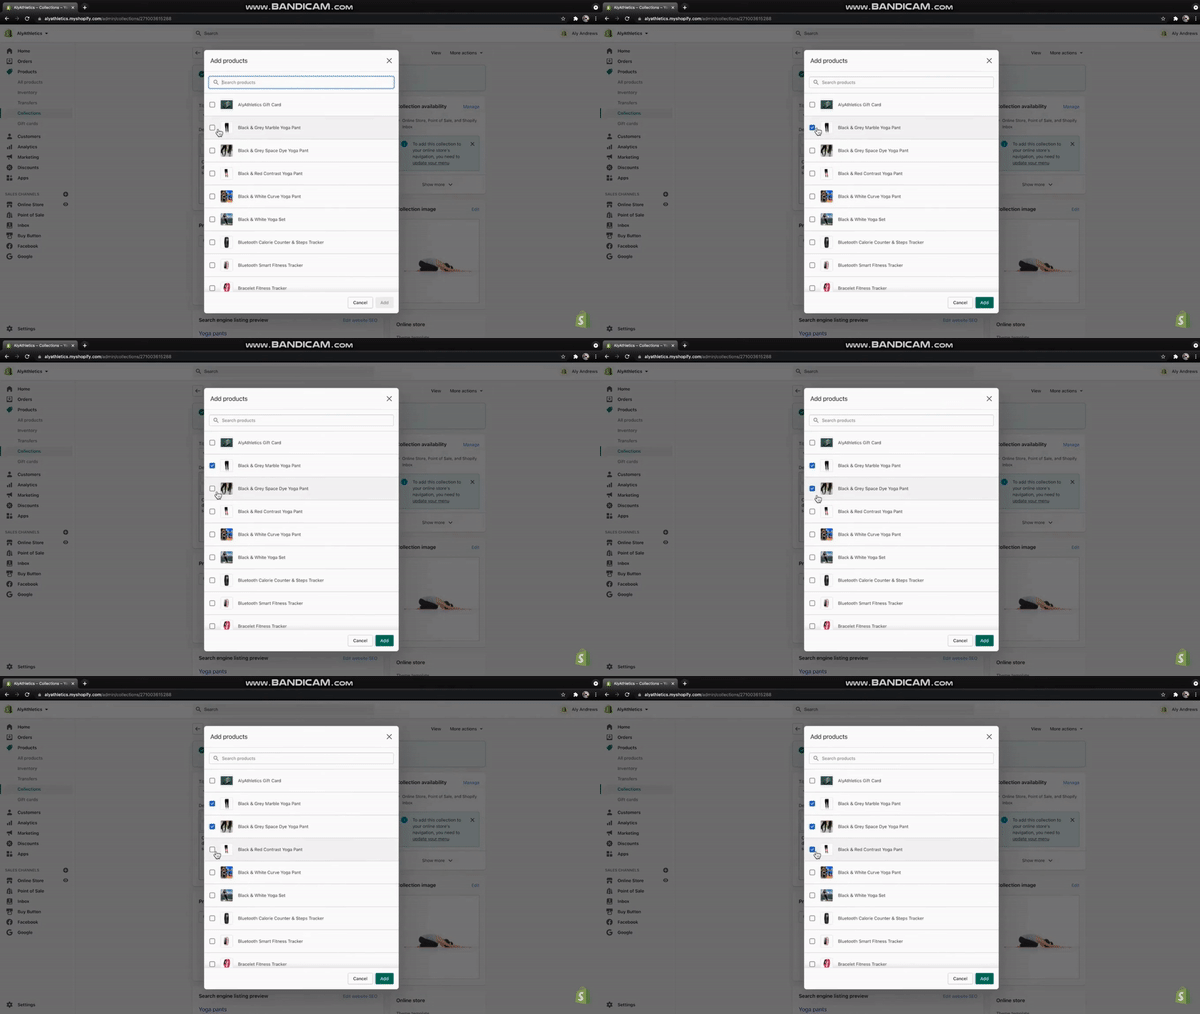
- You can also type the product title in the search bar to add an item. Then, click Add to finish.
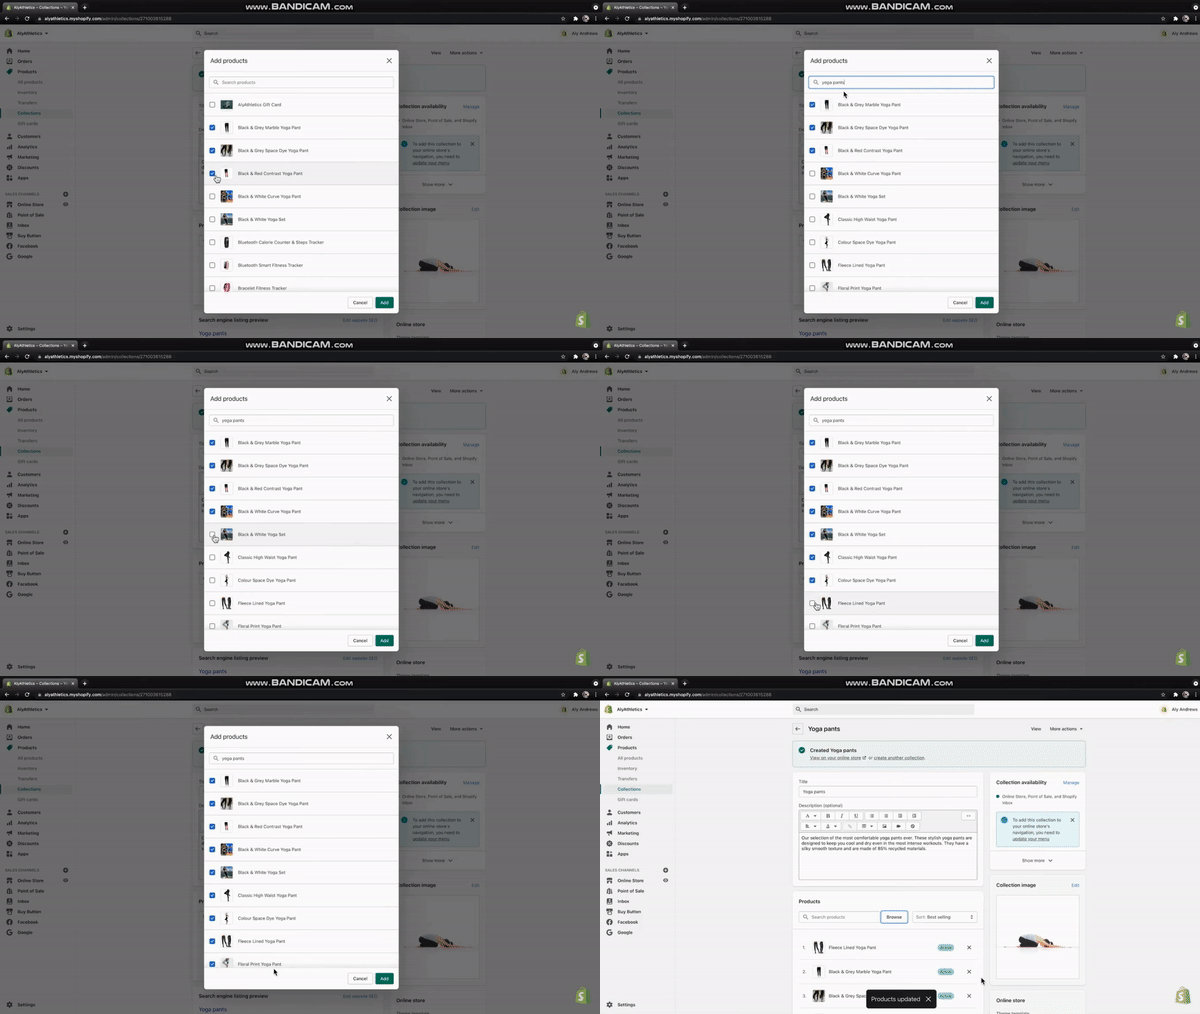
- To arrange products, choose an option from the Sort dropdown menu. If you choose to sort manually, drag and drop the products in the order you want them to appear.
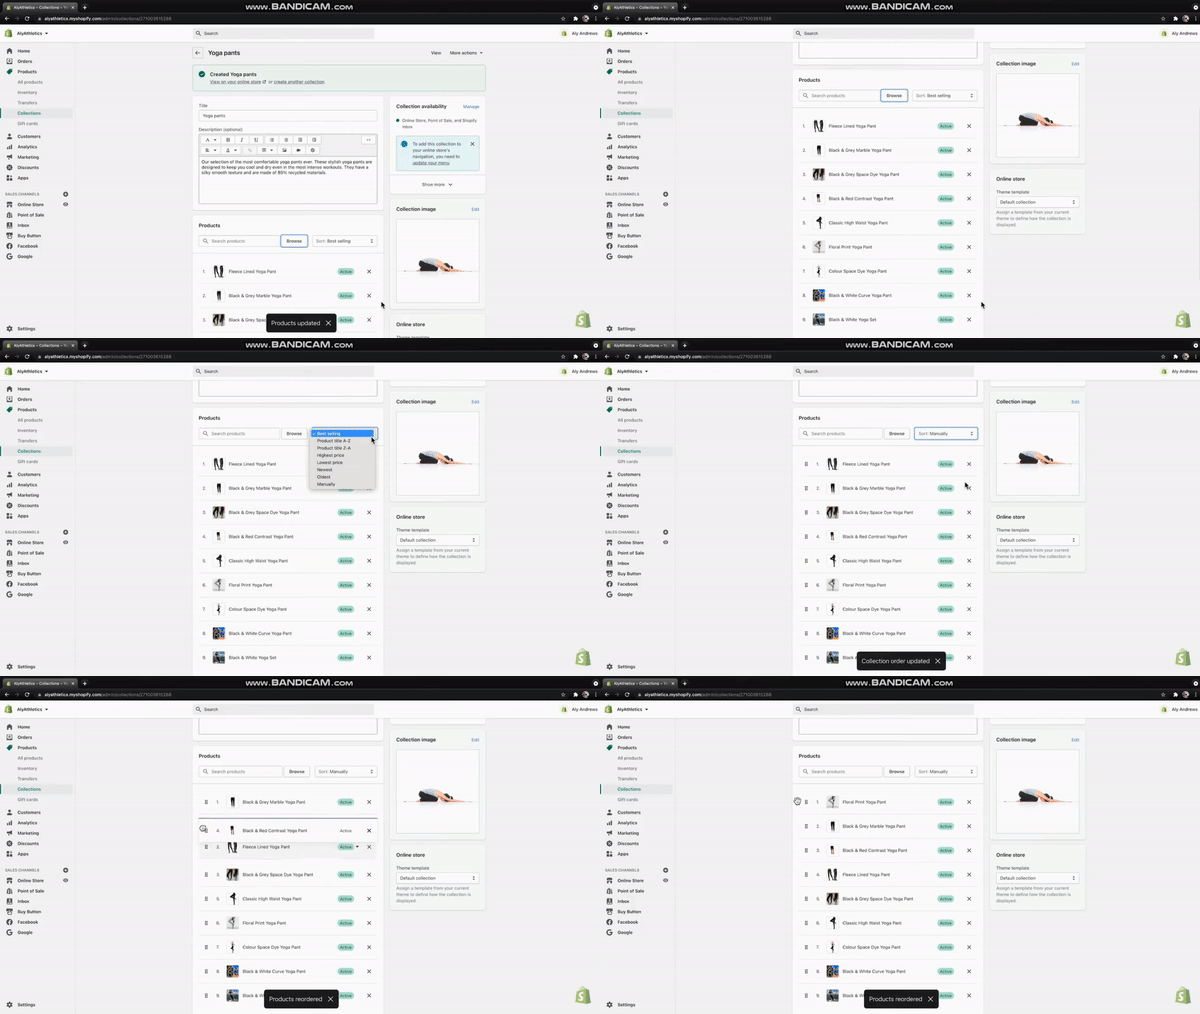
Steps in adding manual collection to your navigation menu
Now that you've added the categories of your store, let's add your manual collection (which you created a while ago) to your navigation menu. This way, it would be easy for customers to find and locate the new collection.
- Go back to the homepage, and on the lower left side, click the Online Store tab > Navigation, then select the menu you wish to manipulate.
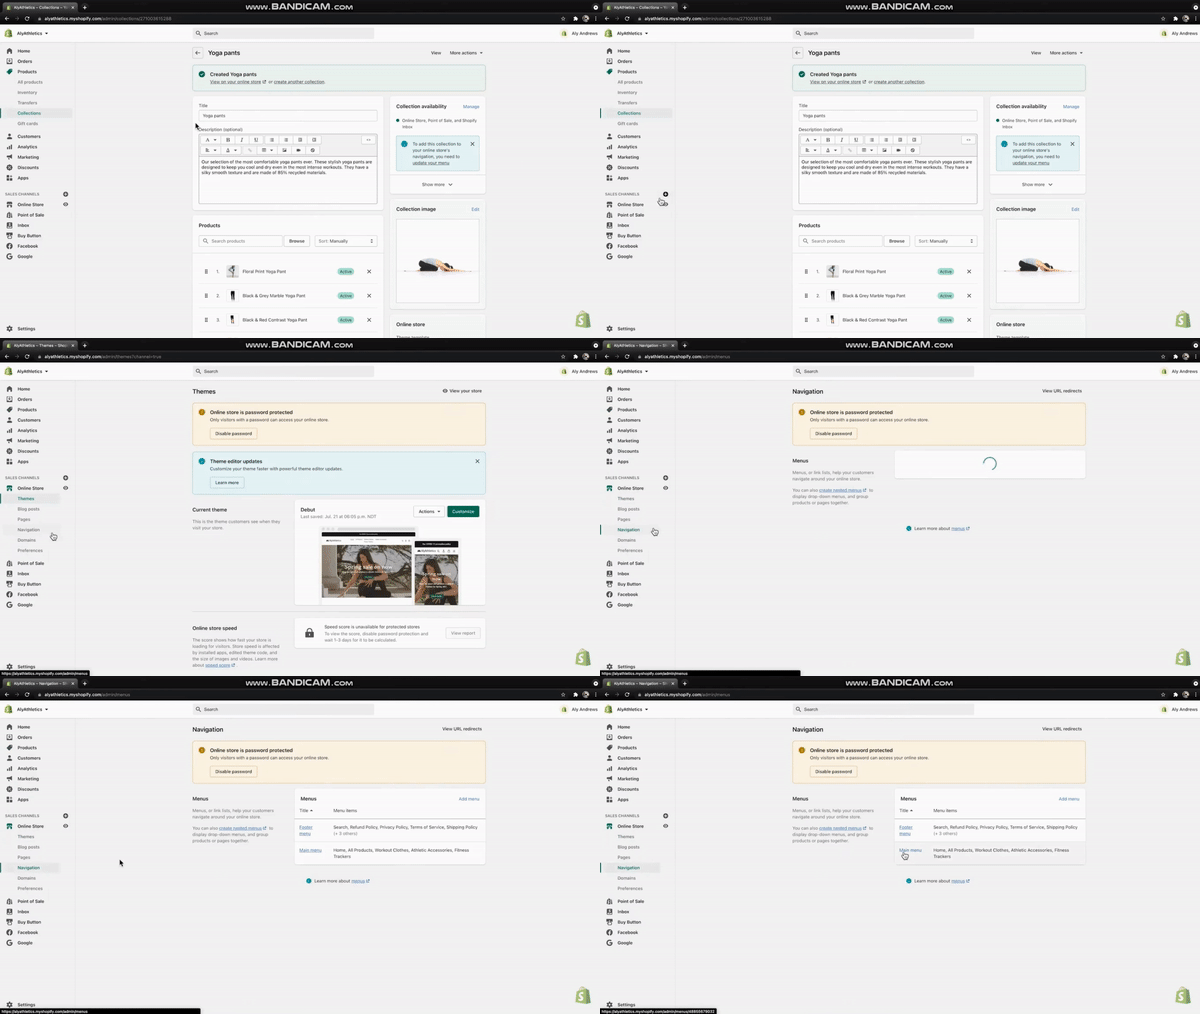
If there’s none, then click the Add Menu on top.
- Click the Add Menu Item, then label to create your subcategories.
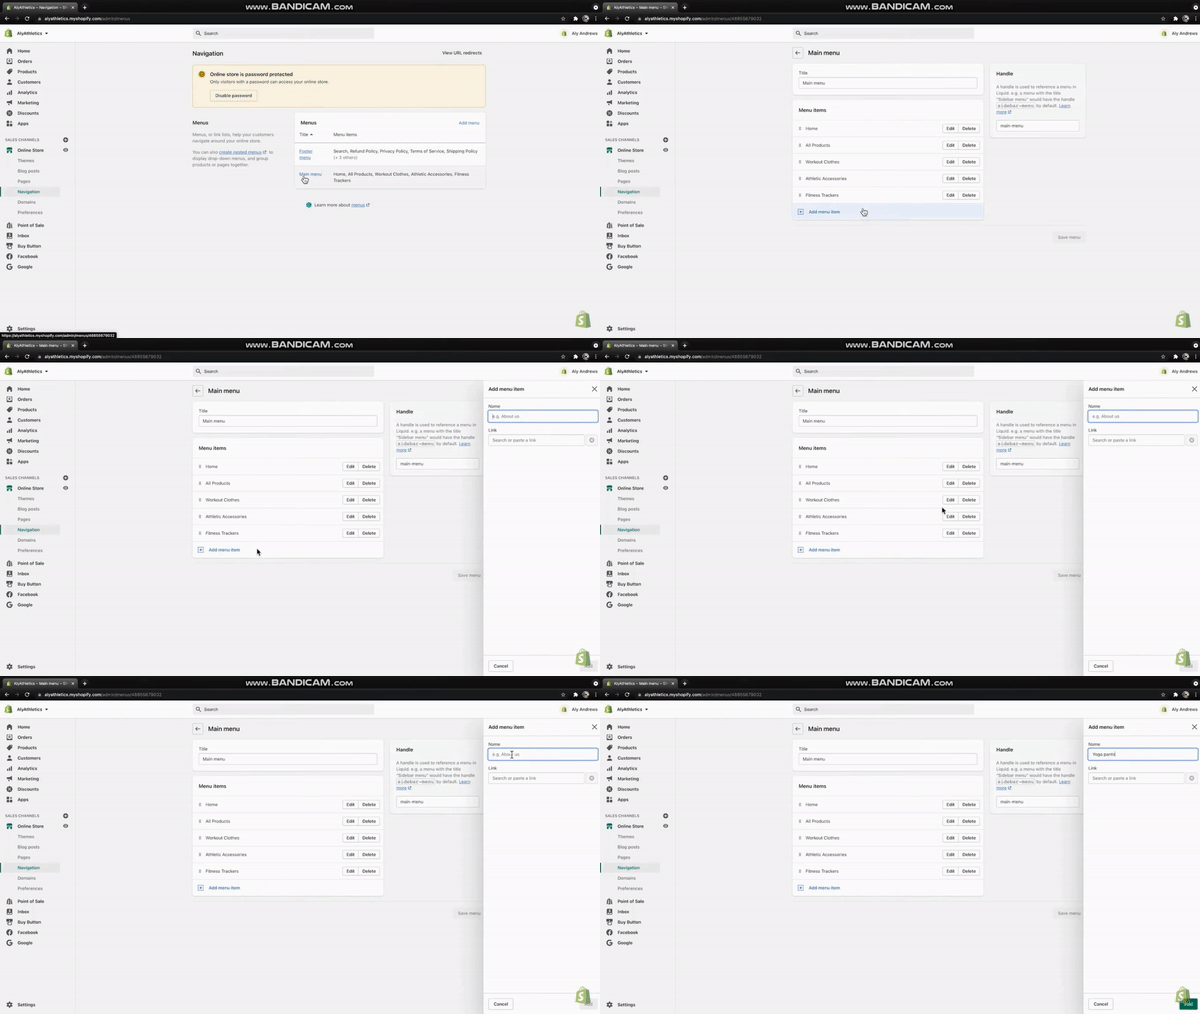
- Click the box under the “Link” section > “Collections” > select the collection you want to incorporate > Add.
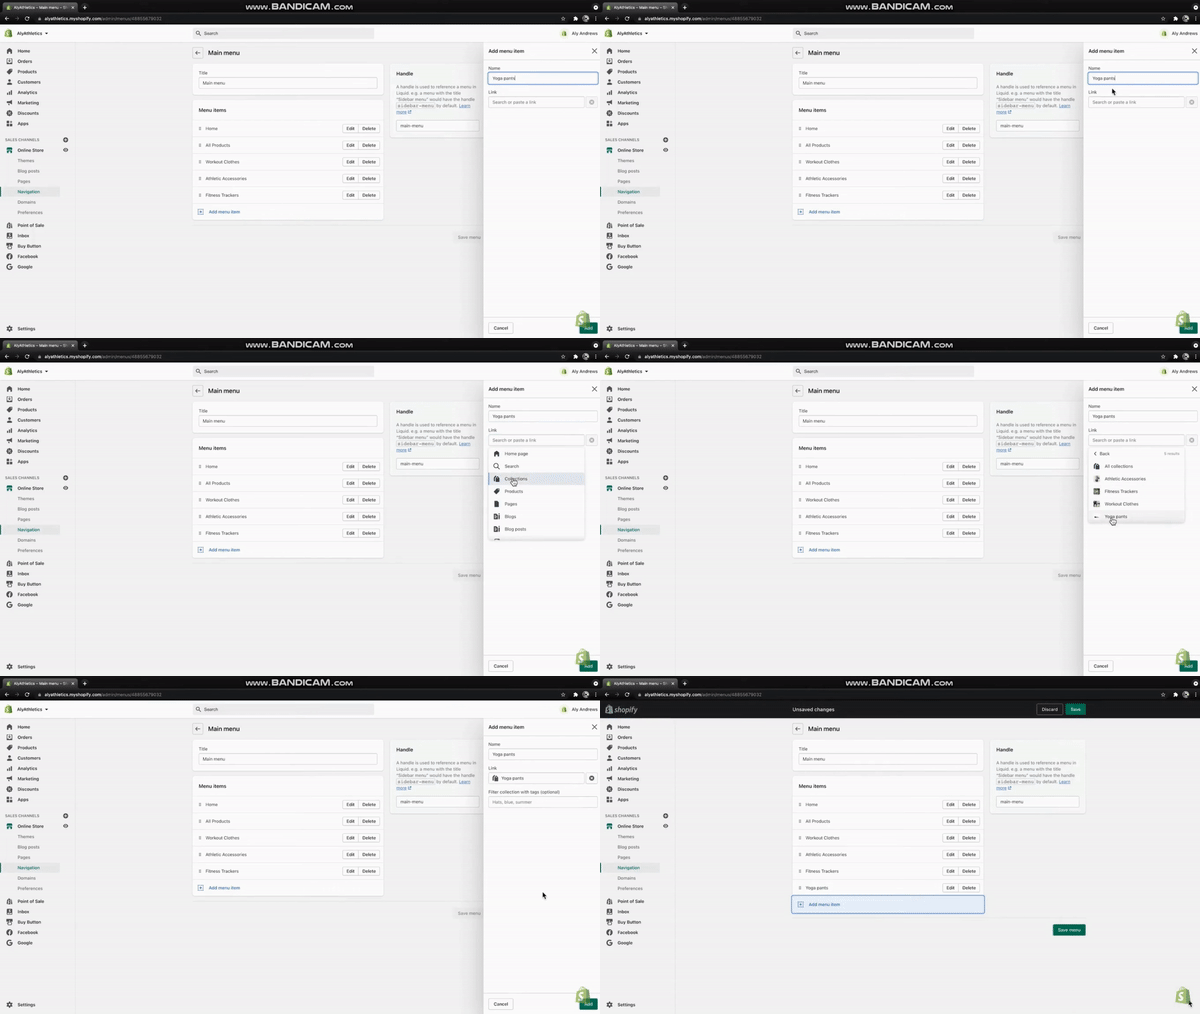
- Click the six-dot icon before the collection name to drag each subcategory under the main category where it belongs. Example: Workout Clothes > Yoga Pants.
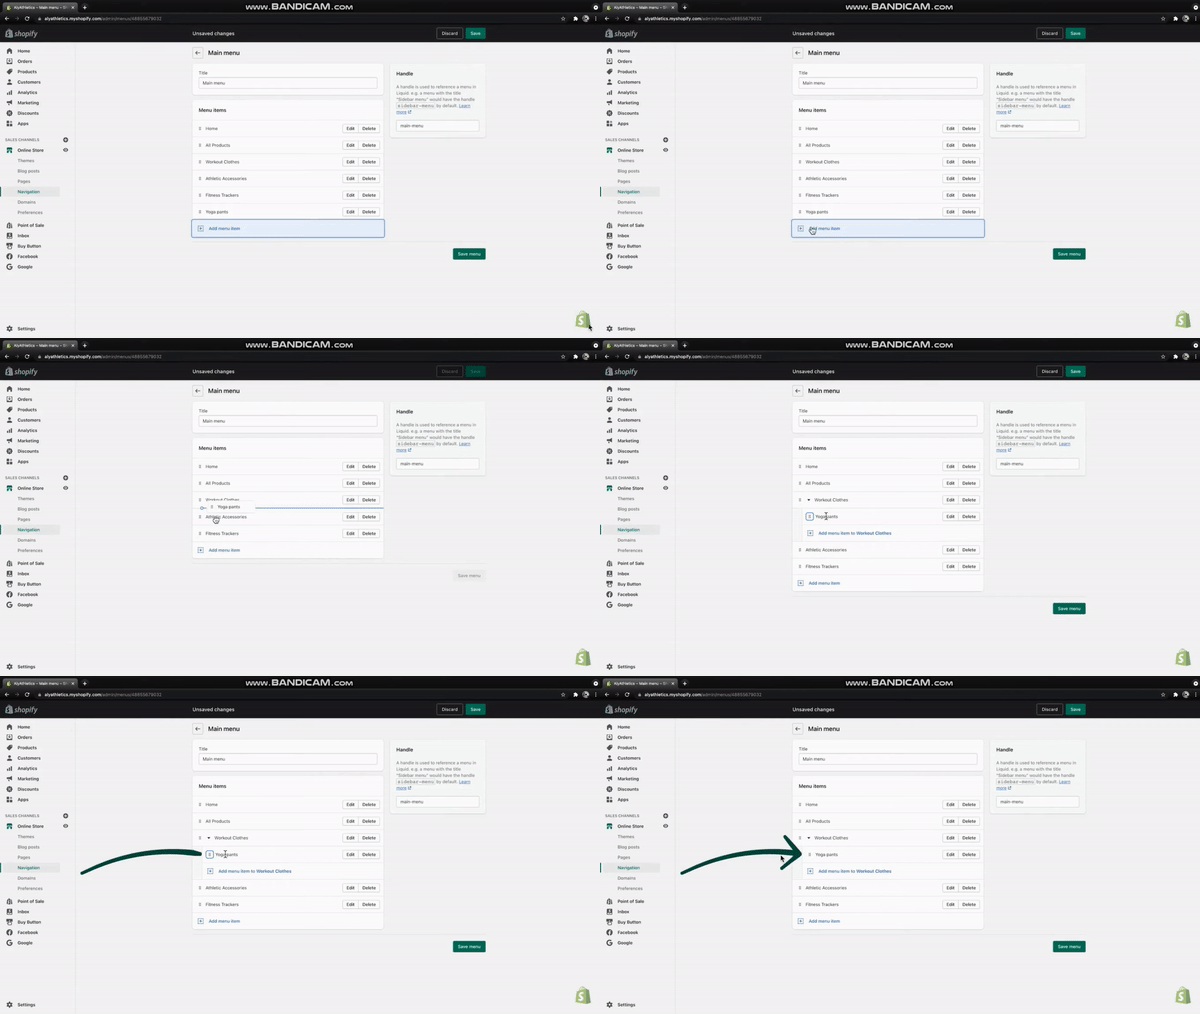
- Do the last two steps repeatedly until you've included all of your desired subcategories until you'll have a setting that looks like 👇. After doing everything, click Save Menu.
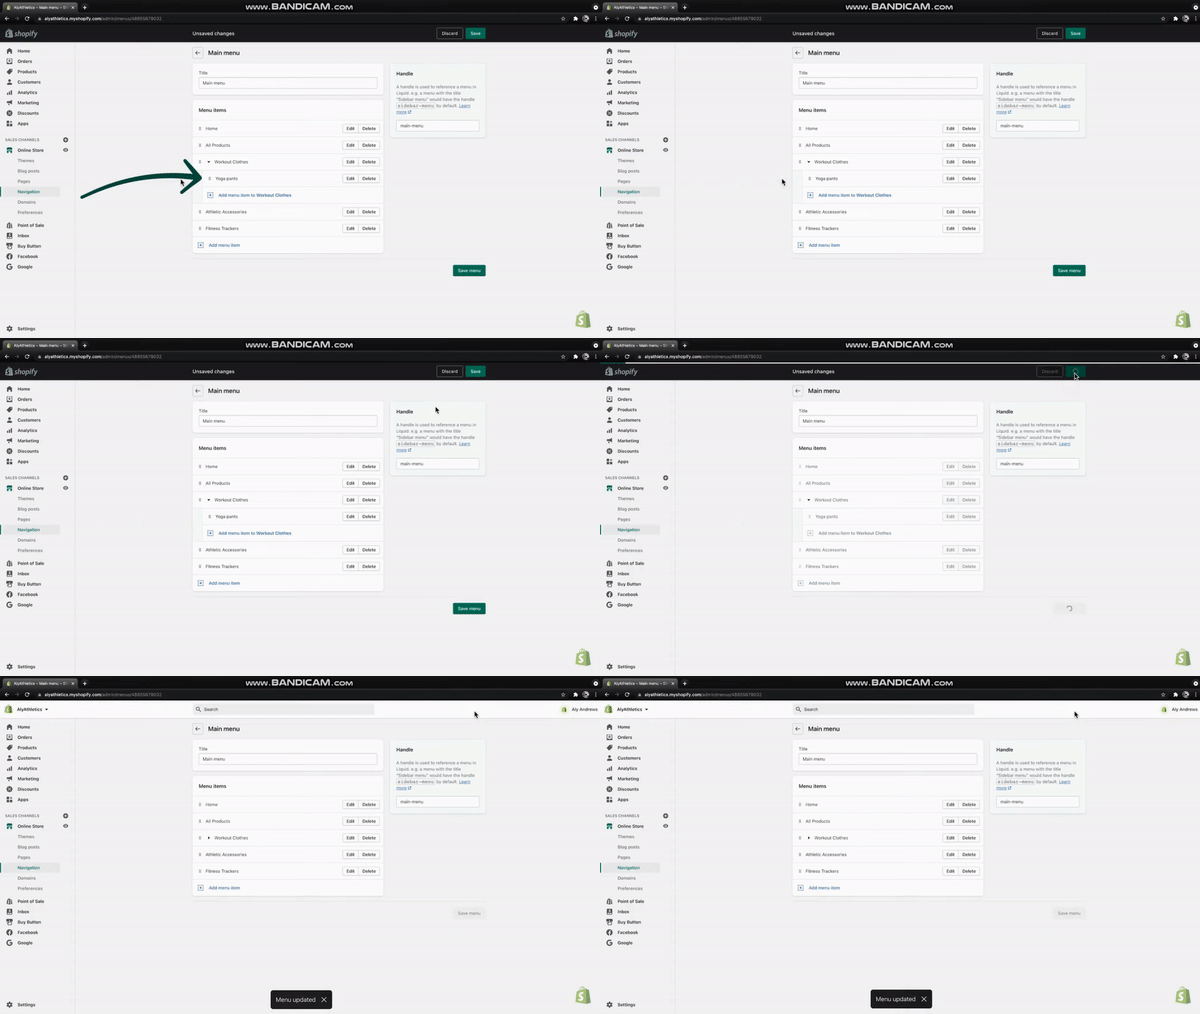
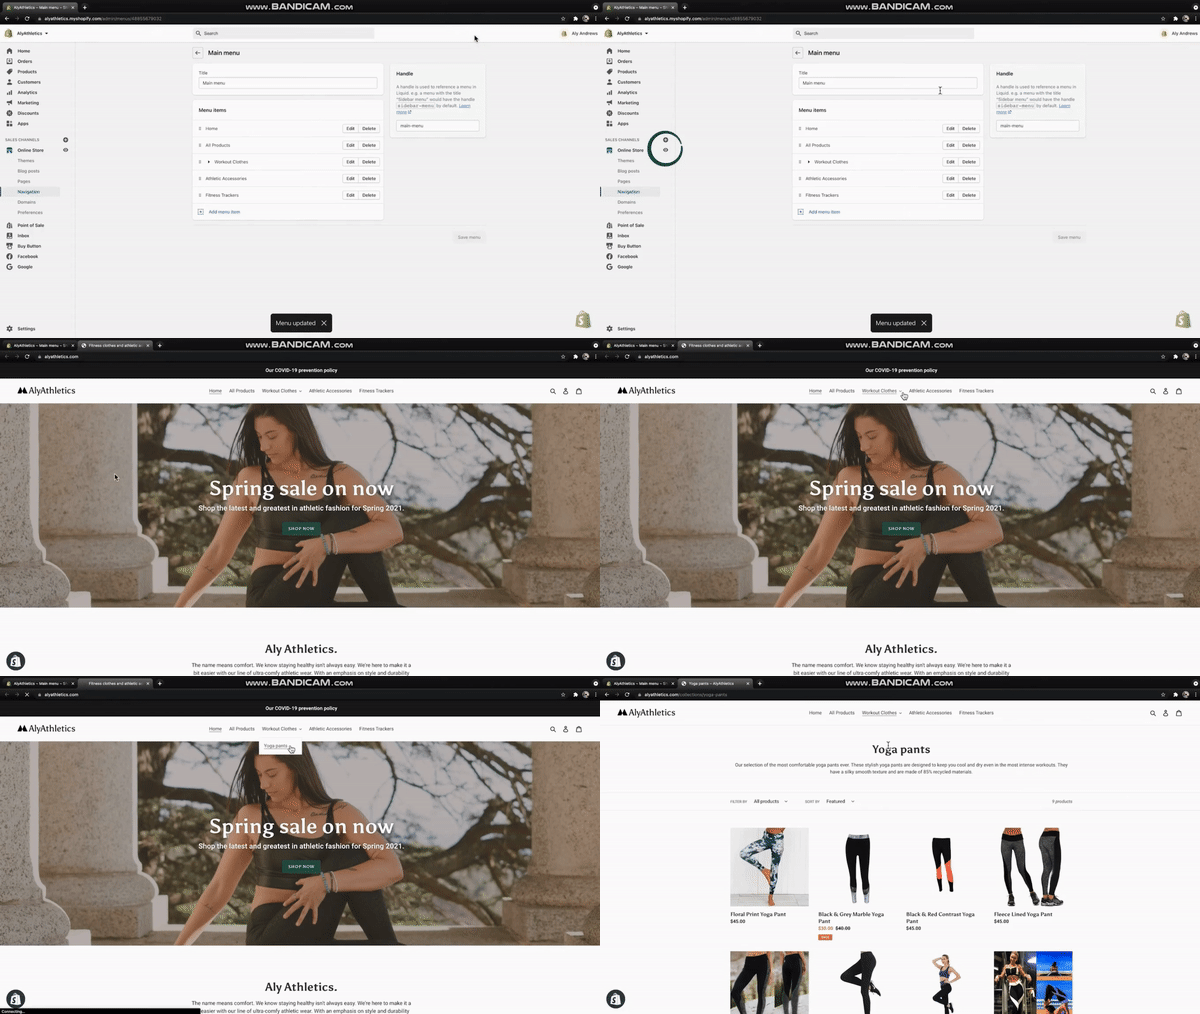
- Check the appearance of your Shopify store by clicking the 👁️ beside the Online Store > Workout Clothes > Yoga Pants.
Conclusion
Congratulations, you're done!
Following the tips and steps in this SOP can help you achieve a better and more organized Shopify store. This way, you don't have to worry about potential consumers leaving your page, as when they enter your shop, they'll spot a detailed and well-crafted store.
When this happens, their shopping experience will be more straightforward since having a list of categories and subcategories can narrow their shopping choices.
Execution Checklist:
-
Take time to learn and understand Shopify's organizational capabilities.
-
Assess whether you want to do this manually or automatically.
-
List down the products you wish to categorize.
-
Start creating the main and subcategories to narrow down your product list. You can do this by yourself or with a team of Shopify experts.
-
Add the products under the main and subcategory where it belongs.