How to Use Optimizely to Set up and Analyze A/B Tests on Your Site
To use Optimizely to set up and analyze A/B tests on your website.
Prefer a shortcut? 16 free tools do parts of this for you.
& optimize*

Aim: To use Optimizely to set up and analyze A/B tests on your website.
Optimal Outcome: After following this SOP, you will be able to create and launch A/B tests on your website using Optimizely, and analyze the results to make data-driven decisions for improving your website's user experience and conversion rate.
What do you need to start:
-
An Optimizely account
-
Access to the website you want to test
-
A clear understanding of the goal of your A/B test and what you want to optimize for
-
A hypothesis or theory to test
Why is this SOP Important: A/B testing is a crucial part of improving your website's user experience and conversion rate. By using Optimizely, you can easily set up and launch A/B tests and analyze the results to determine which variations of your website perform better.
When and Where to execute: This SOP can be executed whenever you are ready to set up an A/B test on your website using Optimizely. It can be done from anywhere with an internet connection.
Who Should Be Doing This: This SOP is intended for website owners, digital marketers, and other professionals who want to use A/B testing to improve their website's user experience and conversion rate.
Set up an Optimizely account
-
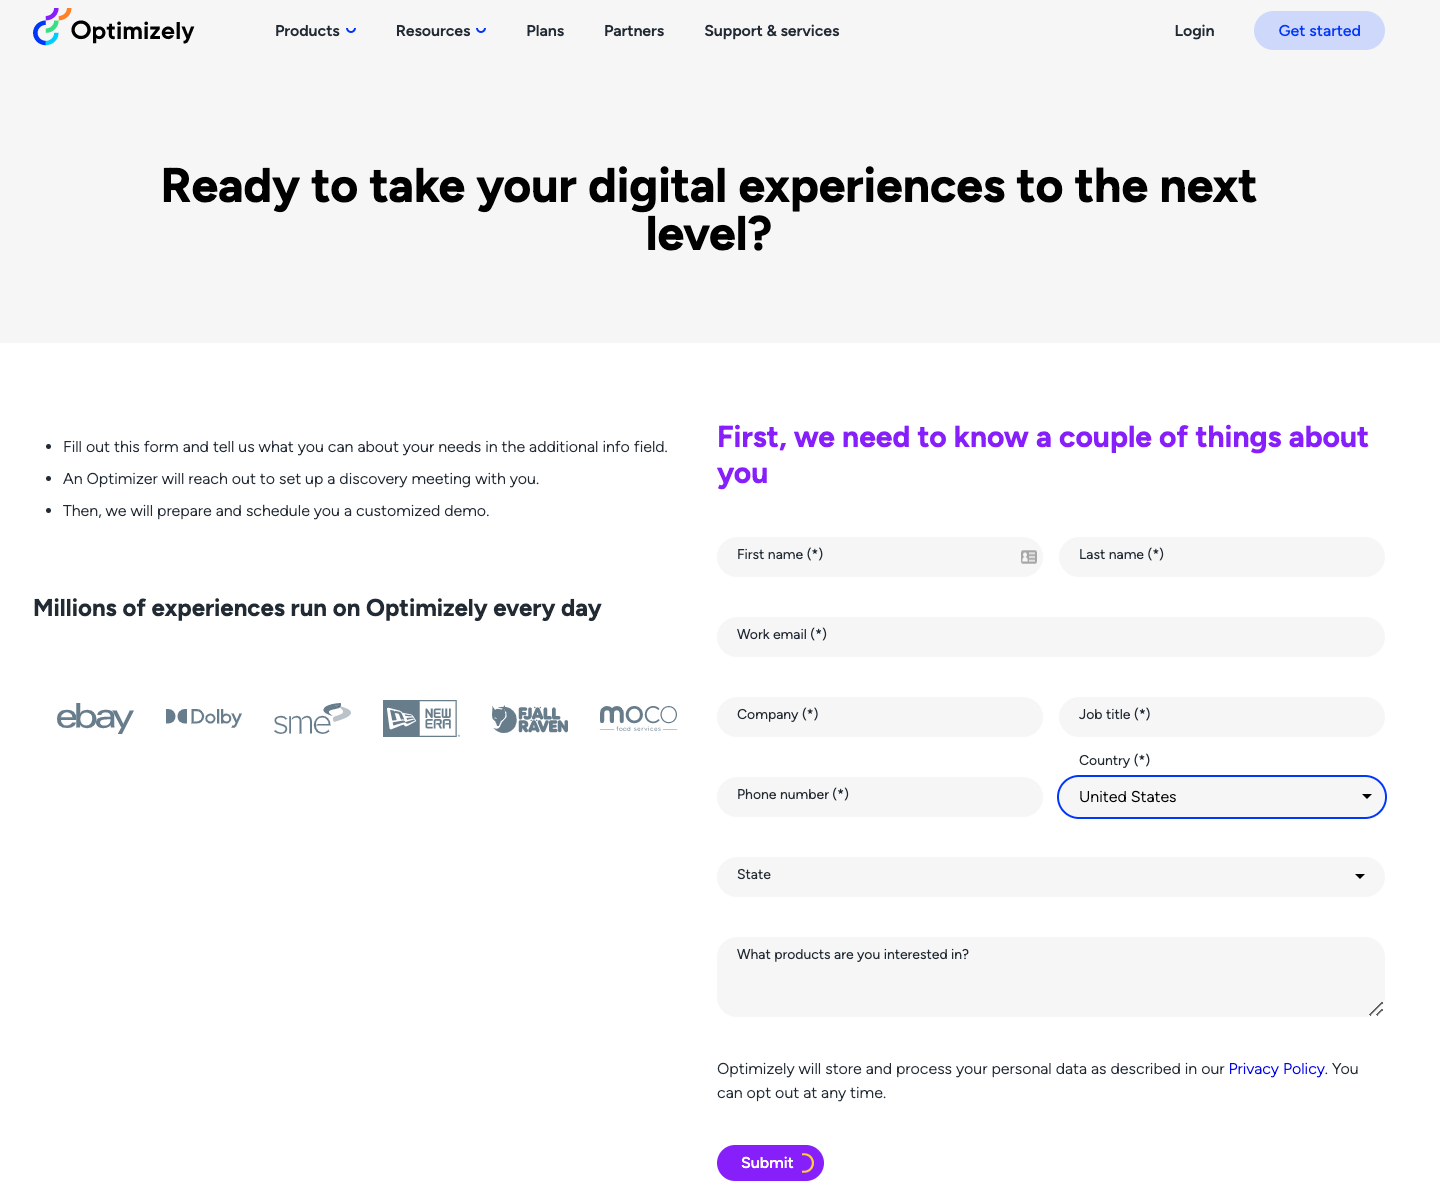
Go to www.optimizely.com.
-
Click Get Started.
-
Fill-out all required fields and click Submit.
Install the Optimizely code snippet
Once you've created an account, you'll be given a code snippet that needs to be added to the head section of your website. This code is what allows Optimizely to track user behavior on your site.
- Enable Cross-Origin Tracking
You will need to set up cross-origin tracking if, during the course of a typical website visit, your visitor sees pages that are on different domains, subdomains, security protocols, or ports, and if you need to preserve experiment variations, behavioral targeting, or event tracking across these pages.
-
Navigate to Account Settings > Security and Privacy and scroll down to Cross-Origin Tracking.
-
Un-check the box for Use Automatically Discovered URLs.
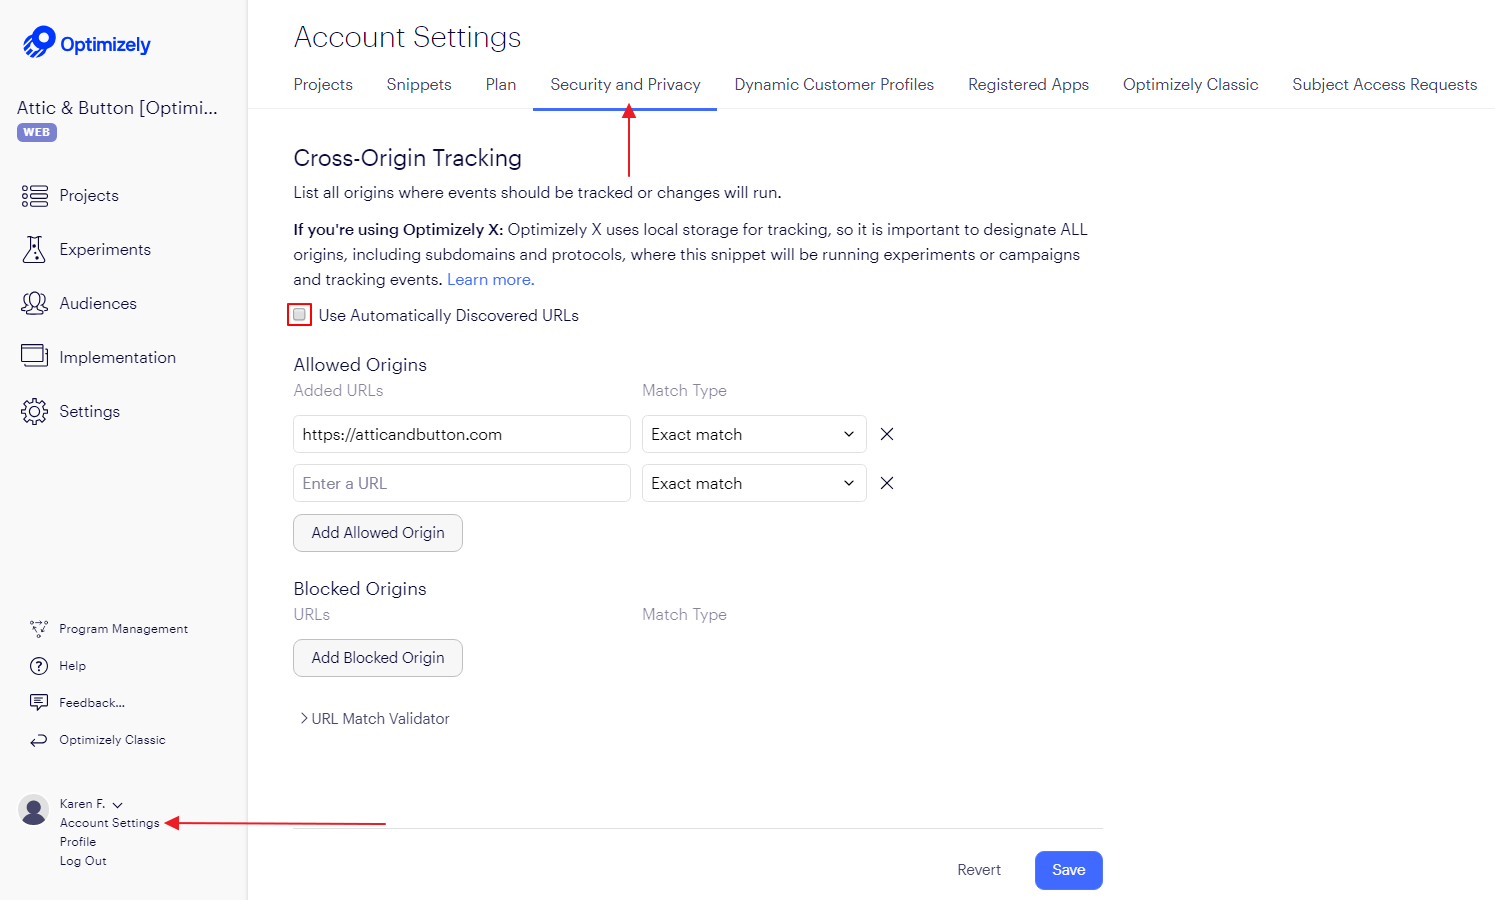
- Under Allowed Origins, enter the URLs where events should be tracked and use the Match Type dropdown to target specific origins or groups of origins.
Unlike URL Targeting, the value matched with the pattern is specifically the "origin" portion of the URL, not the whole URL. There are several ways to specify origin patterns:
-
http://example.com (exact match)
-
https://shop.example.com (exact match)
-
example.com (suffix match)
- This will include origins like http://example.com and https://shop.example.com but no other top-level domains. Data may be shared with other second-level domains.
-
https://(.\*\\)example.com$(RegEx match)- This includes all of example.com when accessed via the secure https protocol. If you do not terminate the regular expression by placing the $ character after your domain, your data may be shared with other top-level and second-level domains.
- Use the URL Match Validator in Optimizely to check that your targeting matches the URLs you expect.
You can check full URLs, including path, query string, and hash, but those portions of the URL are ignored by the match pattern.
-
Click Save.
-
Copy the Code
-
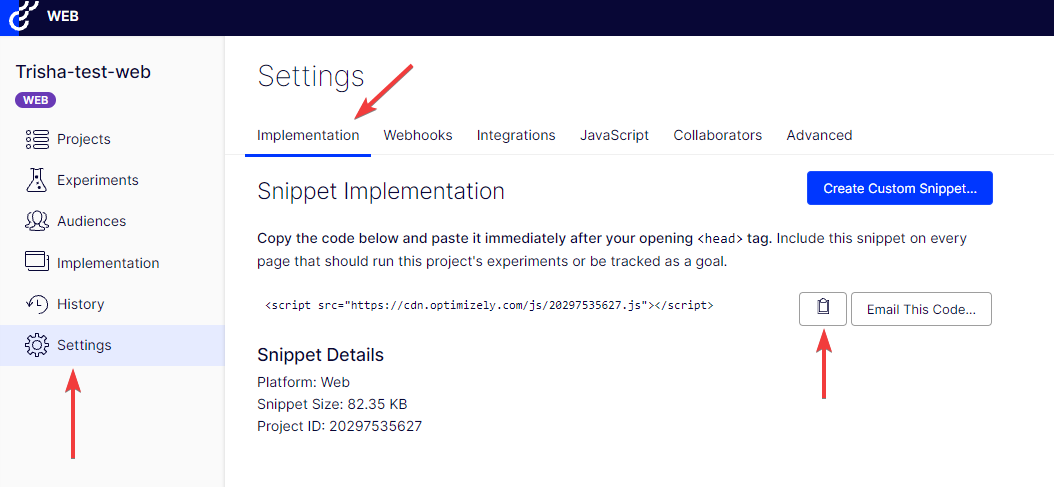
Navigate to the Settings tab in the left sidebar.
-
Click Implementation.
-
You will see a code under Snippet Implementation. Click the Copy to Clipboard icon beside it.
-
- Add your snippet to the <head> tag of your site
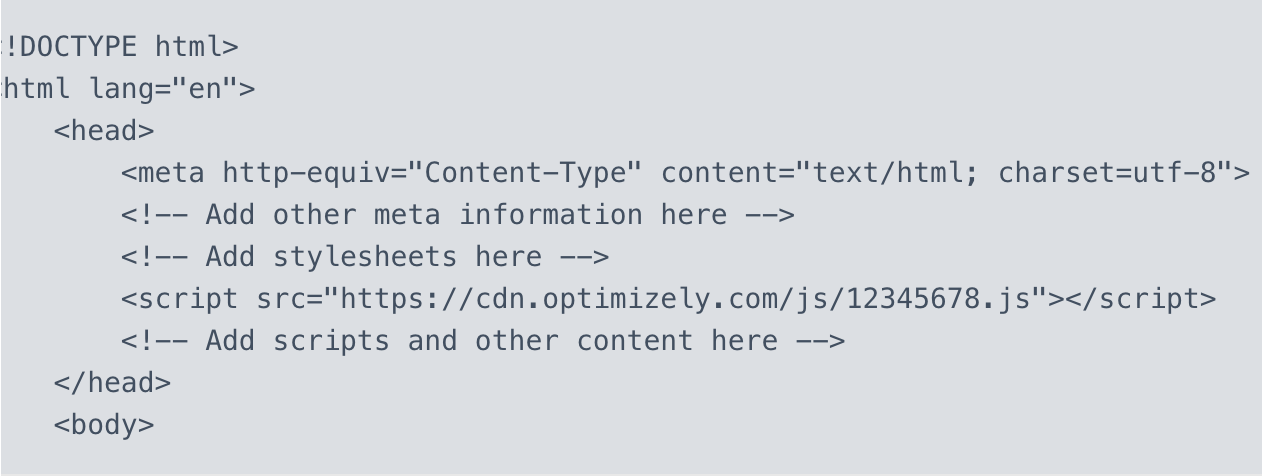
It is highly recommended to implement the snippet as high up in the head tag as possible, generally after your <html> tag, charset declarations, and possibly other meta tags. Place the Optimizely Web Experimentation snippet before code for any analytics or heatmapping platforms as well.
Here is what the Optimizely Web Experimentation snippet might look like on a page:
-
Check that the snippet is implemented
-
Find the snippet on the page
-
First, check that the snippet is implemented on the page. You can do this by typing 'optimizely' into the JavaScript console. This example uses Google Chrome, which we recommend for troubleshooting and QA.
-
Open the developer console.
-
Click Console, then enter "Optimizely" into Search.
-
-
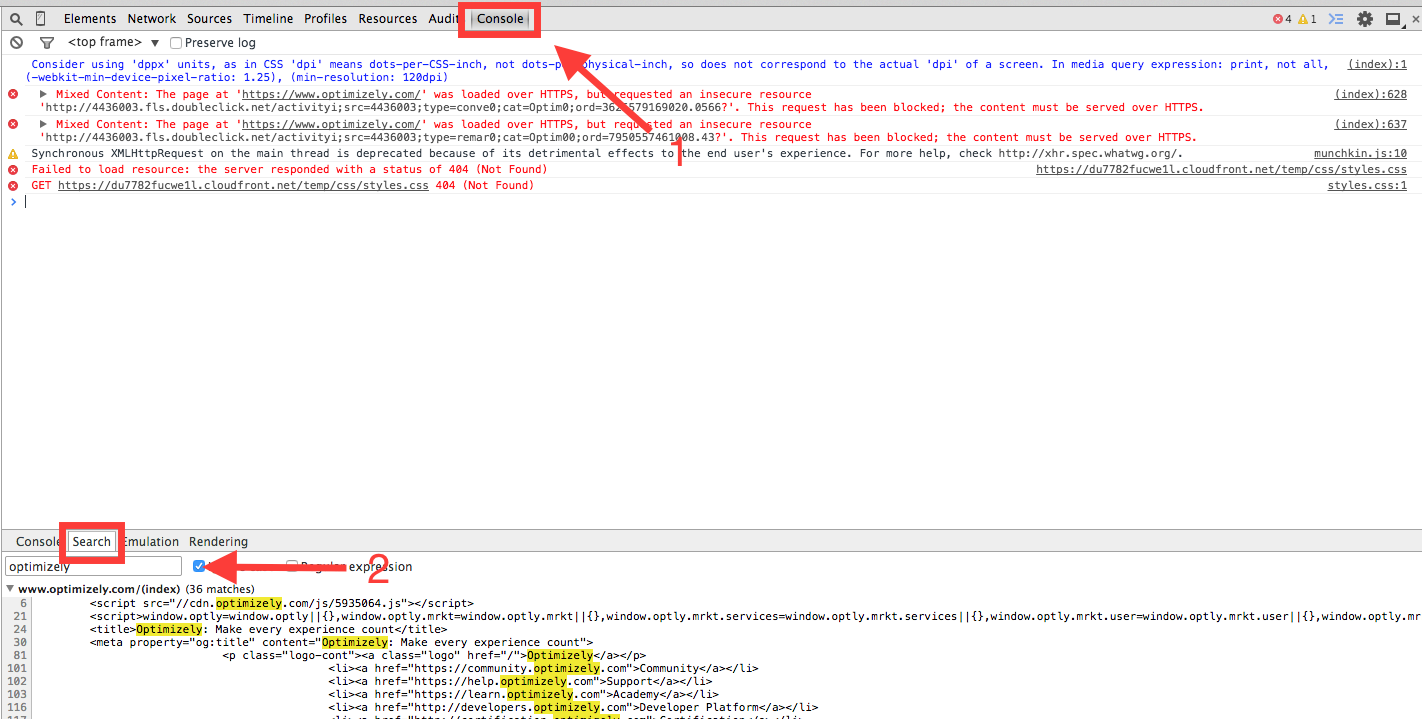
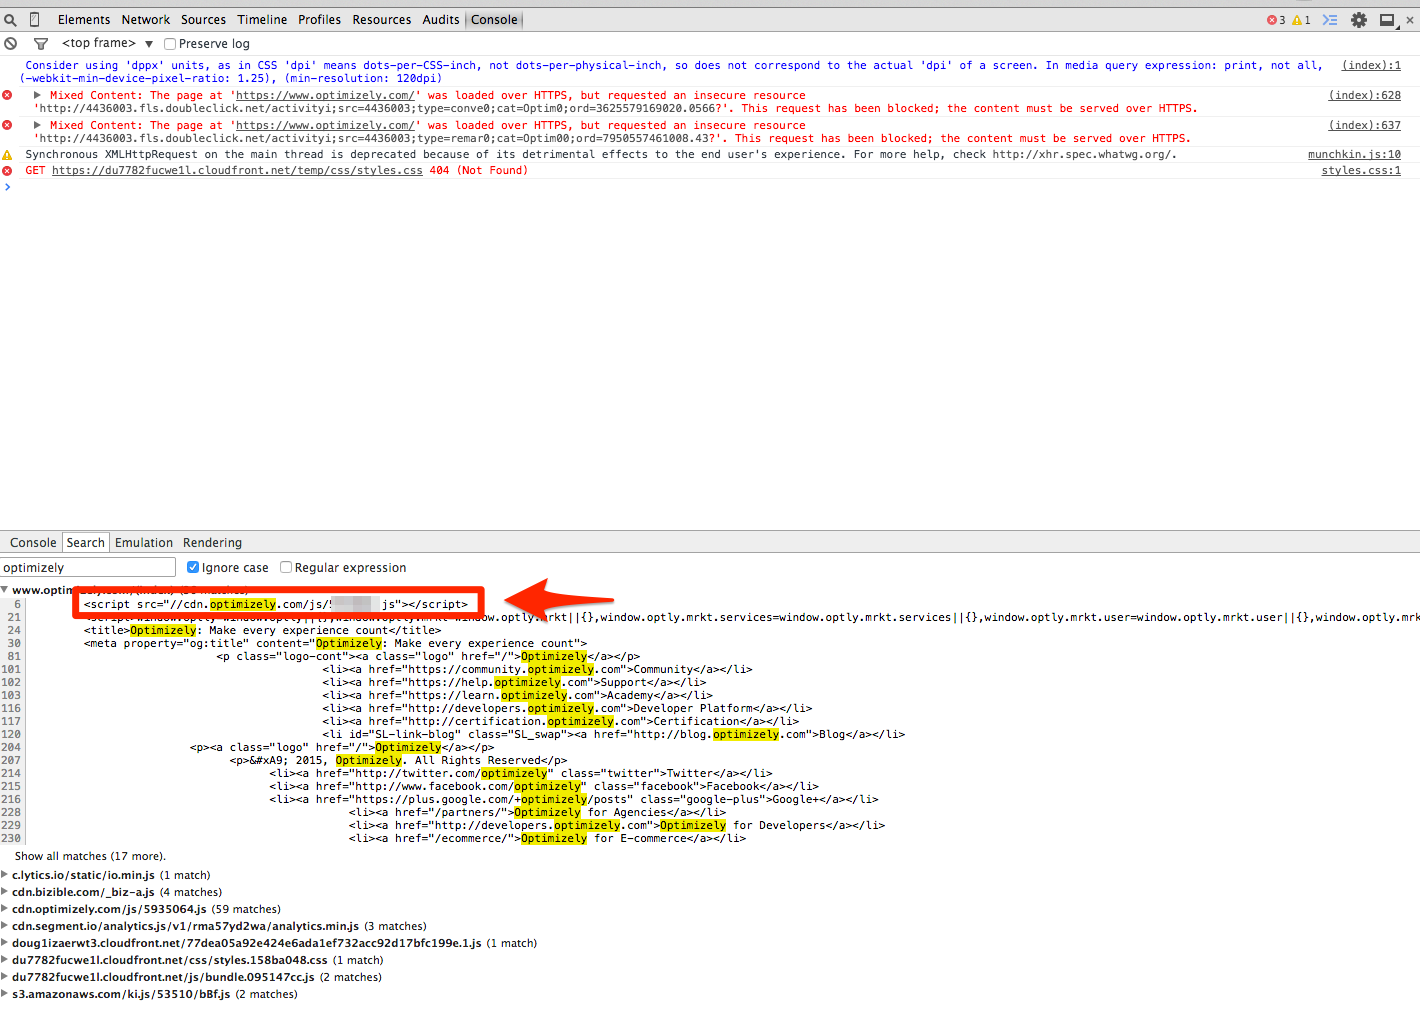
- If the snippet is implemented, you will see it in the following format:

- Check that it is the correct snippet
Once you find the snippet on your page, make sure that the snippet on the page matches the project that you are working with.
Here is how to check:
-
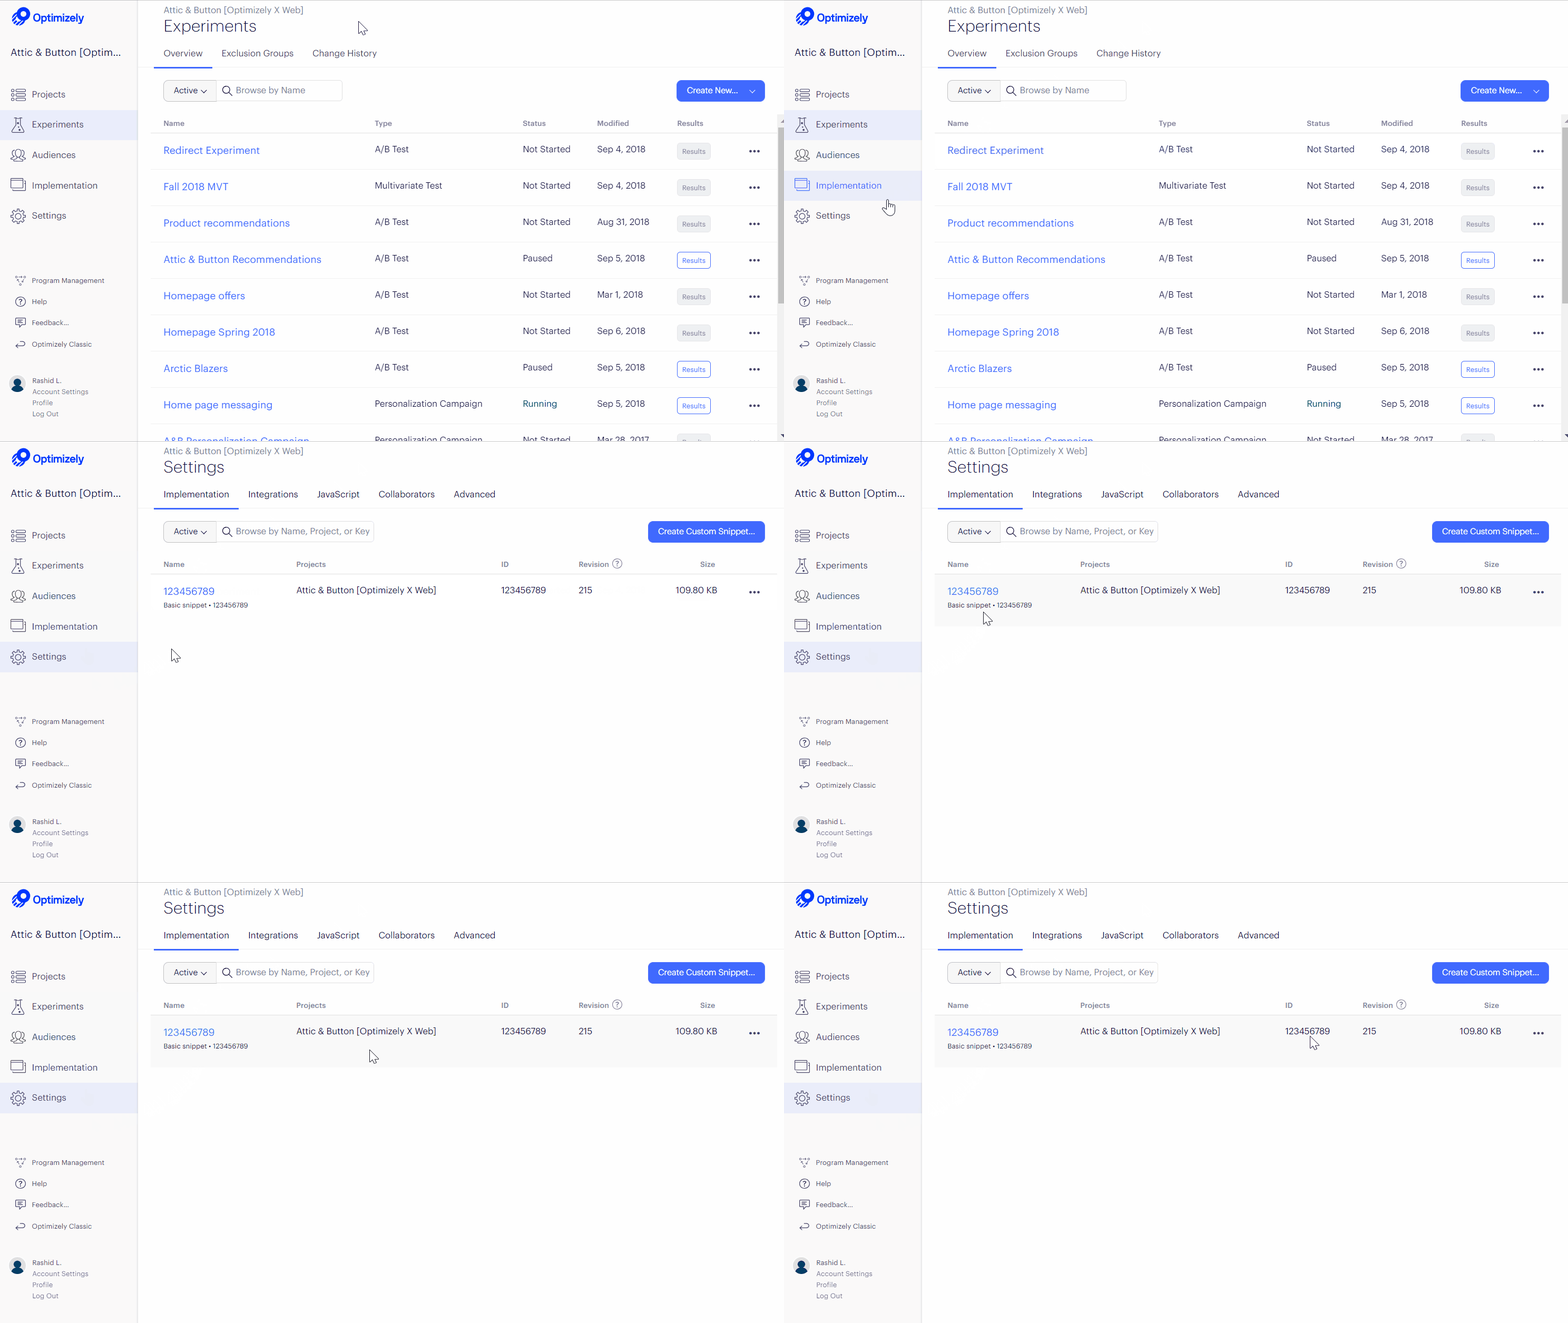
In your project, navigate to Settings > Implementation.
-
Check that ID on your page matches the snippet on your Snippet Implementation page. In the example above, the snippet ID is "123456789" matches the ID on the page, so you know the right snippet is implemented.
Create a New Experiment
- To create a new A/B test, In the “Experiments” tab, click “Create New Experiment” and select “A/B Test."
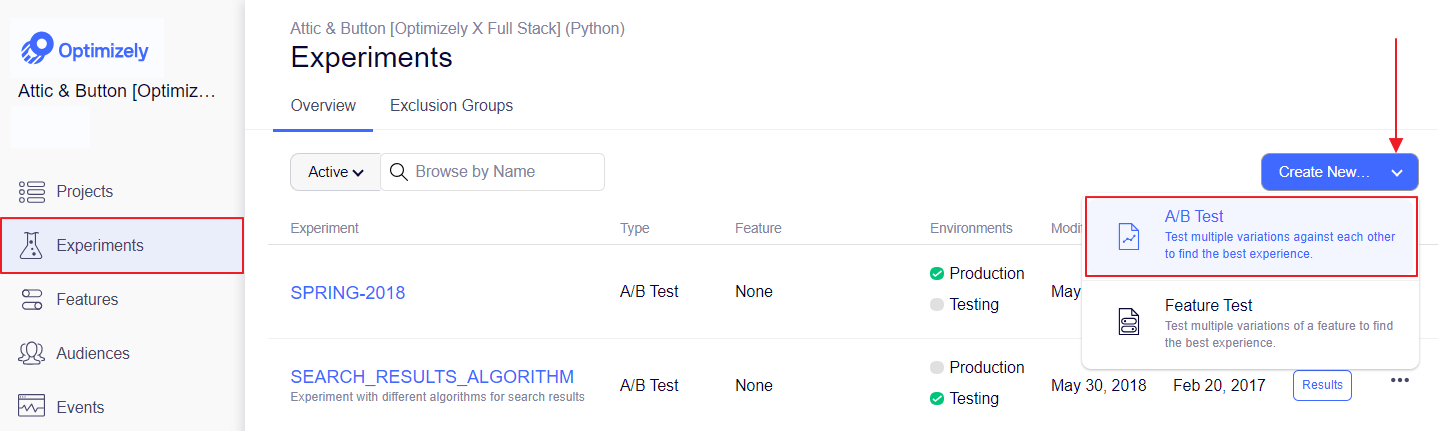
- Type a name and description for your new experiment.
Set up URL Tagging
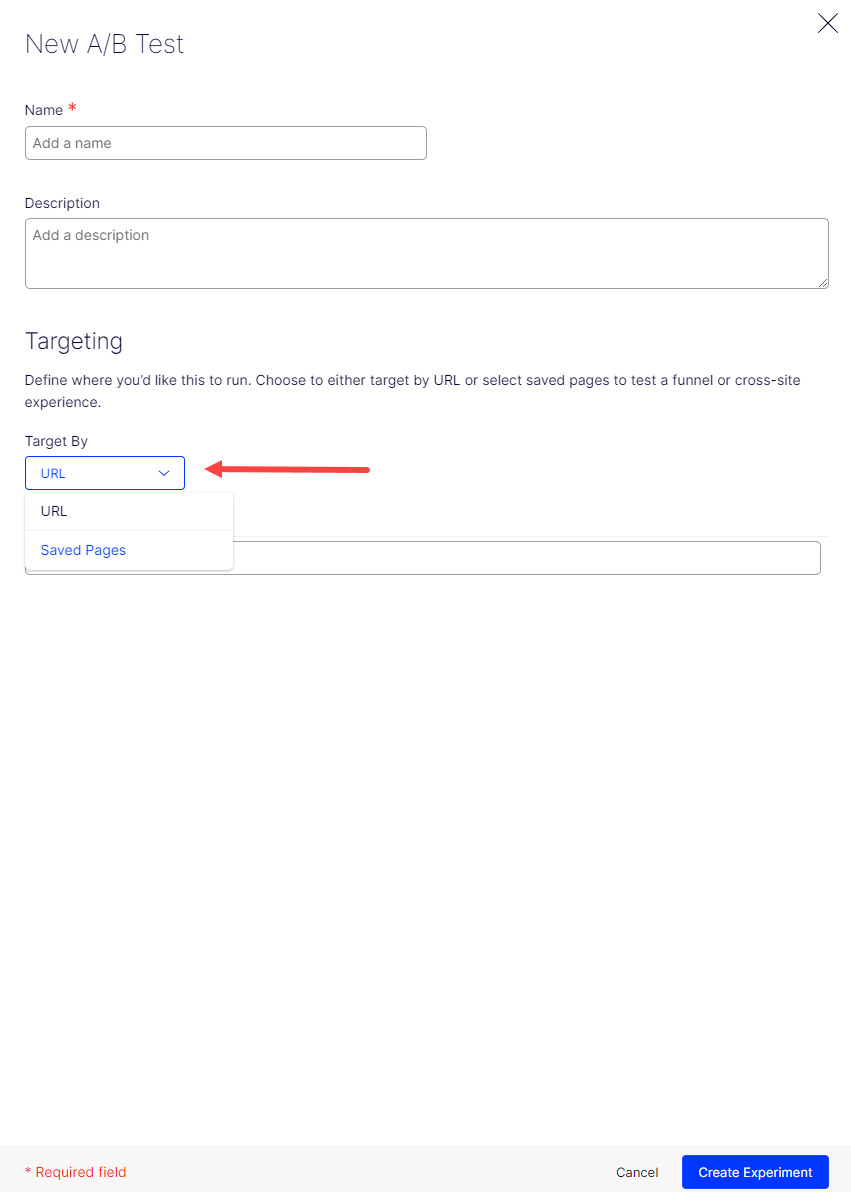
Set where your experiment will run. You can choose where your experiment runs or you can use pages for this instead.
In general, if you want to add a simple URL to run an experiment just once, target the single URL. If, on the other hand, you plan to run experiments on this set of URLs regularly, you'll want to use pages.
Create a Variation
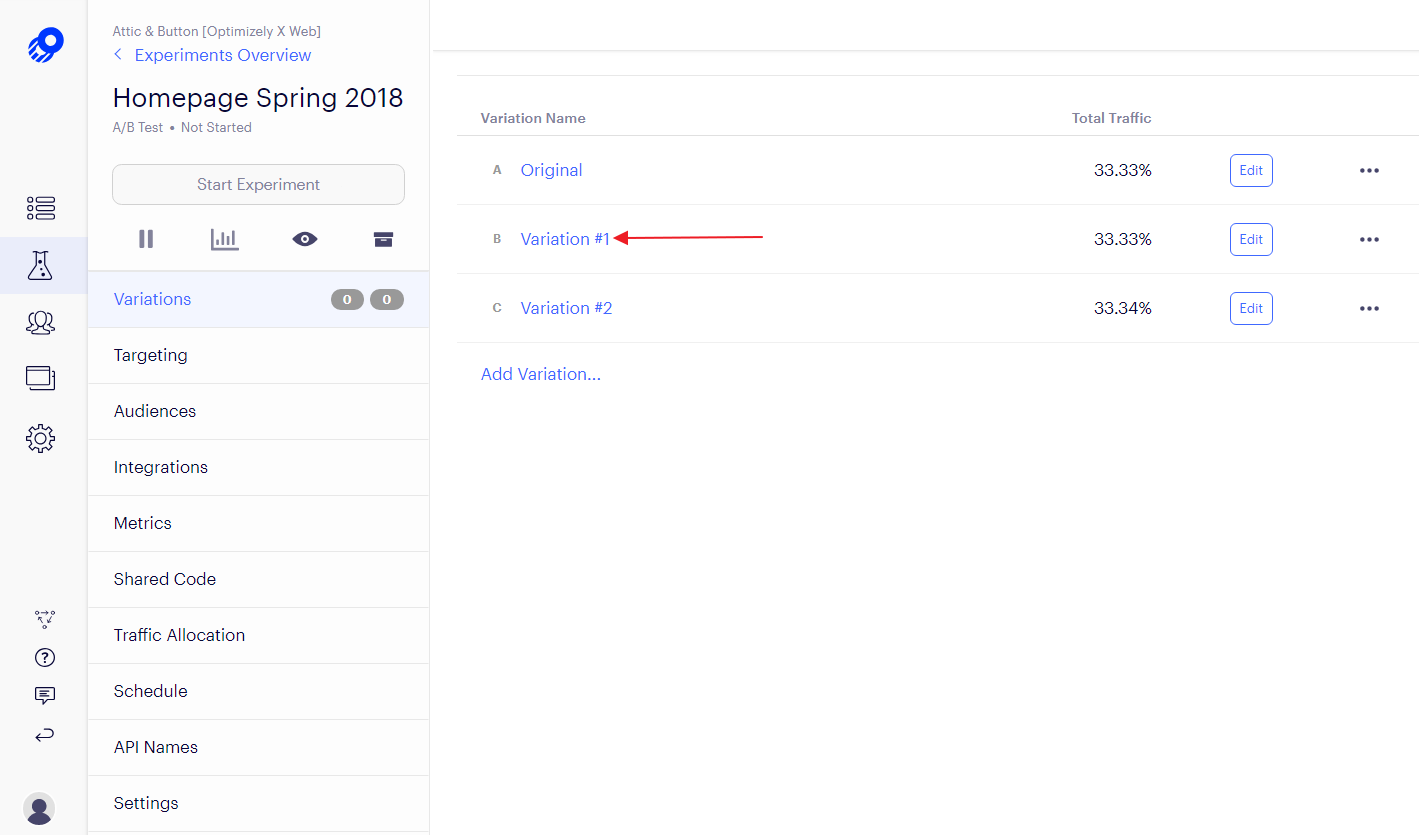
From the Experiments dashboard, click the experiment name to open the experiment. To make changes to your variations. Select the variation you want to edit.
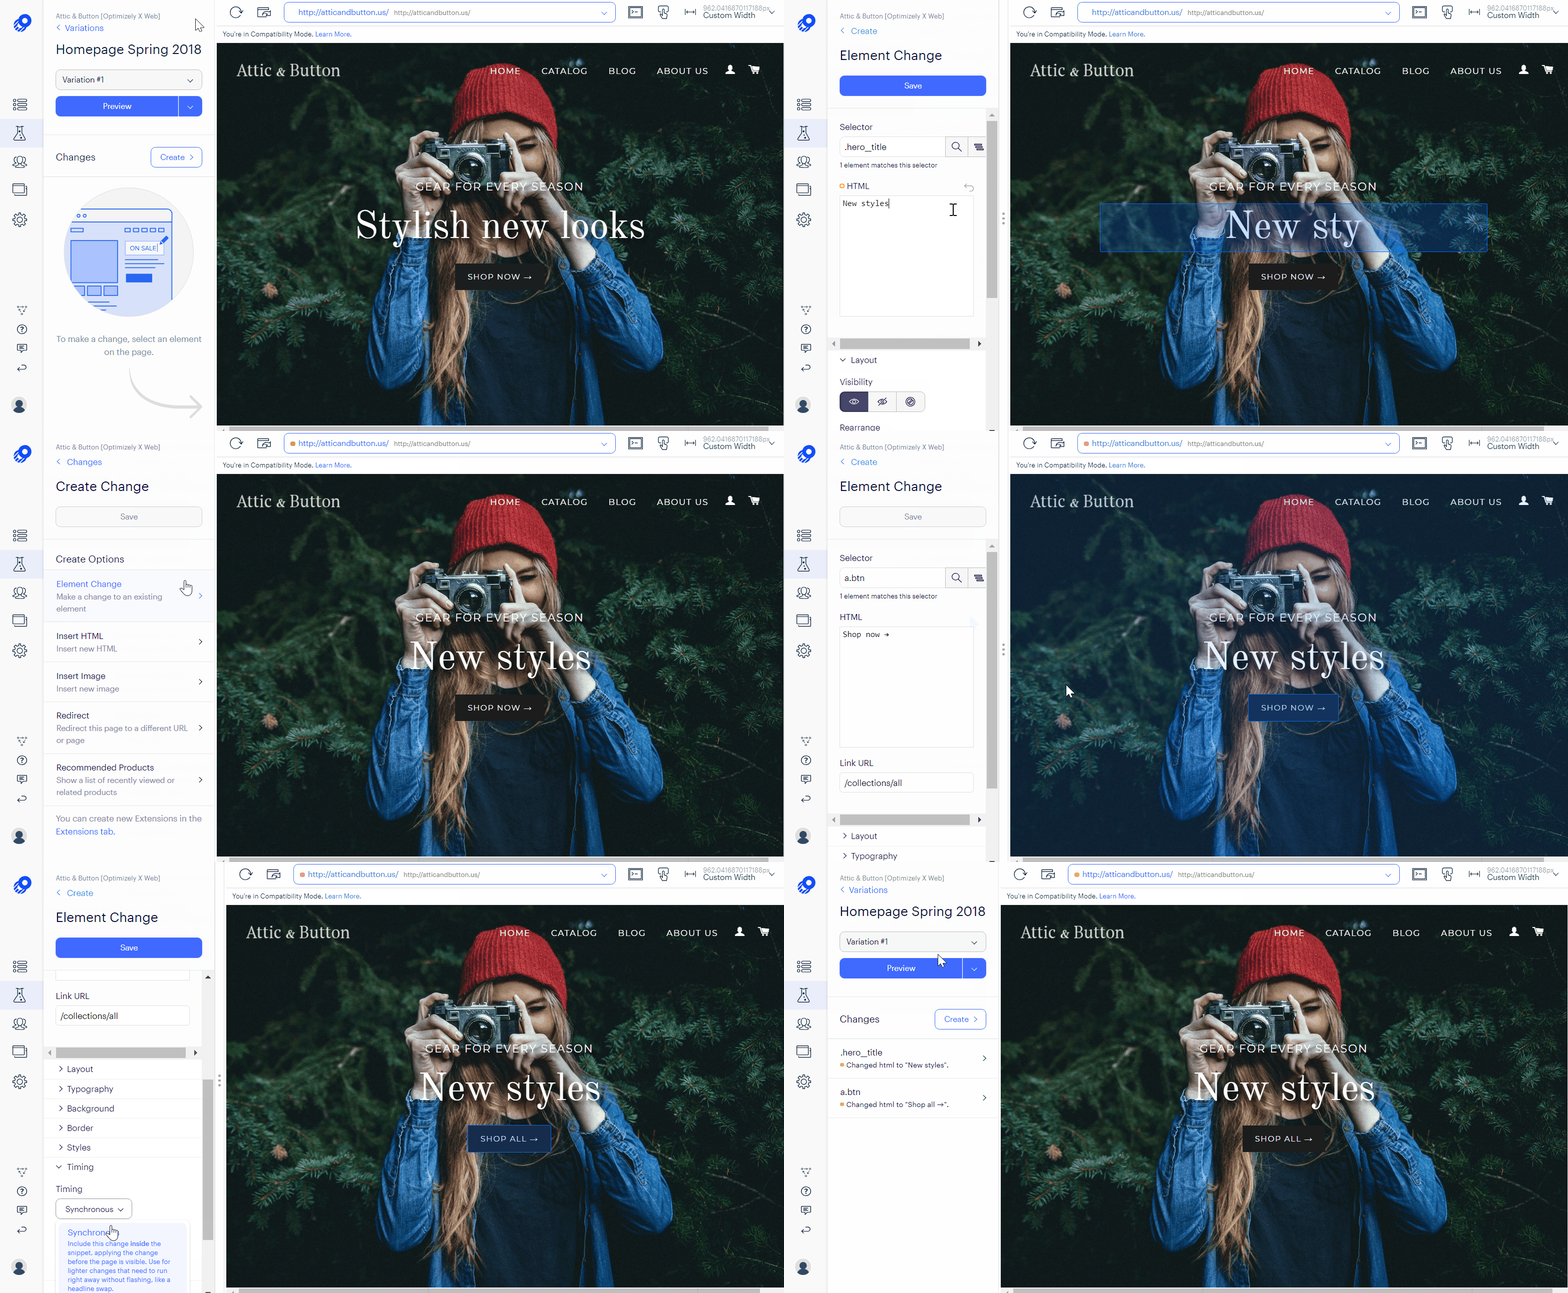
In the Visual Editor, you can make any changes to the layout and appearance of your site, including:
-
Change the layout, including the element's visibility or position; or even rearrange the element on the page
-
Modify or replace typography, images, background styles or borders
-
Add inline CSS
-
Fine-tune jQuery selectors
-
Change the timing of the change from synchronous to asynchronous
Add Audiences (optional)
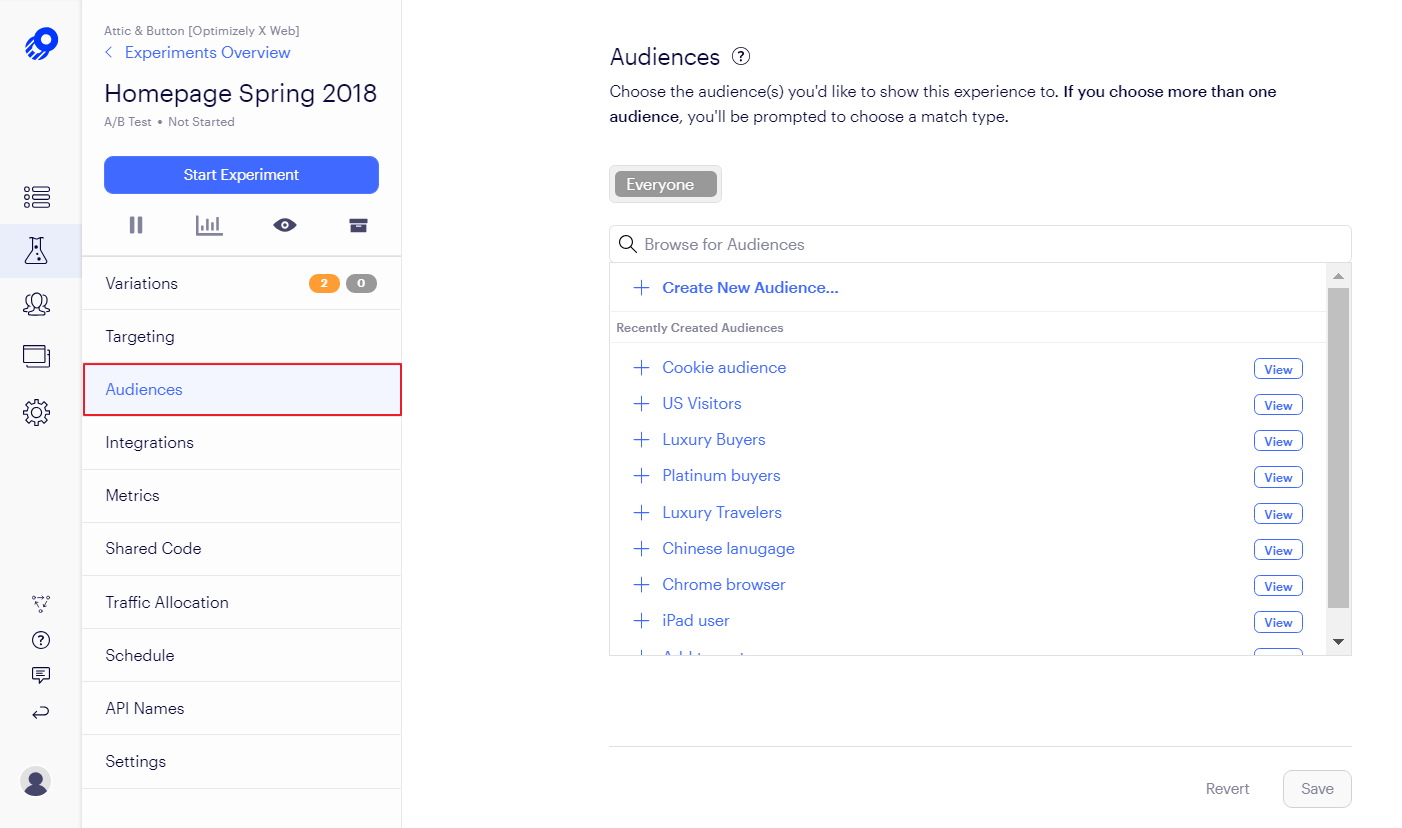
Audiences allow you to decide who will see your experiment.
The default audience is all visitors to your site (Everyone). Click (+) to add any existing audiences to your experiment. Or, click Create New Audience to build a new audience.
Add Metrics
Add the metrics that measure success for your experiment. If the changes in your variation are successful, what will you measure to show improvement?
Create a metric from an existing event or create a new event for the experiment. To add an existing event, click the plus symbol (+).
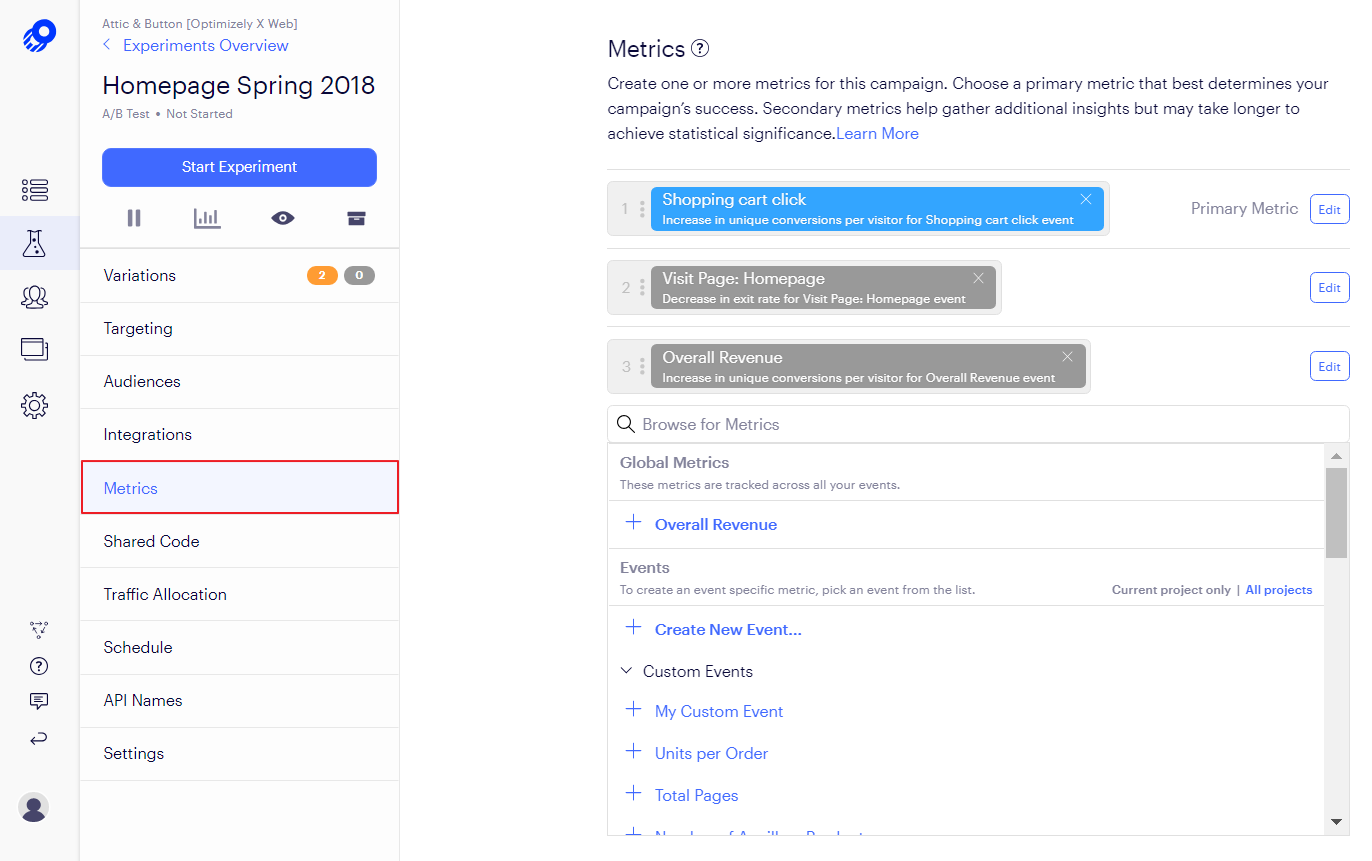
The first metric you add is the primary metric for the experiment. This metric determines whether your experiment "wins" or "loses," and should track an event that is directly affected by the changes you make in your experiment.
Optimizely's Stats Engine makes sure that the primary metric reaches statistical significance as quickly as possible. You can also add secondary metrics to measure the downstream effects of your experiment.
Set Traffic Allocation
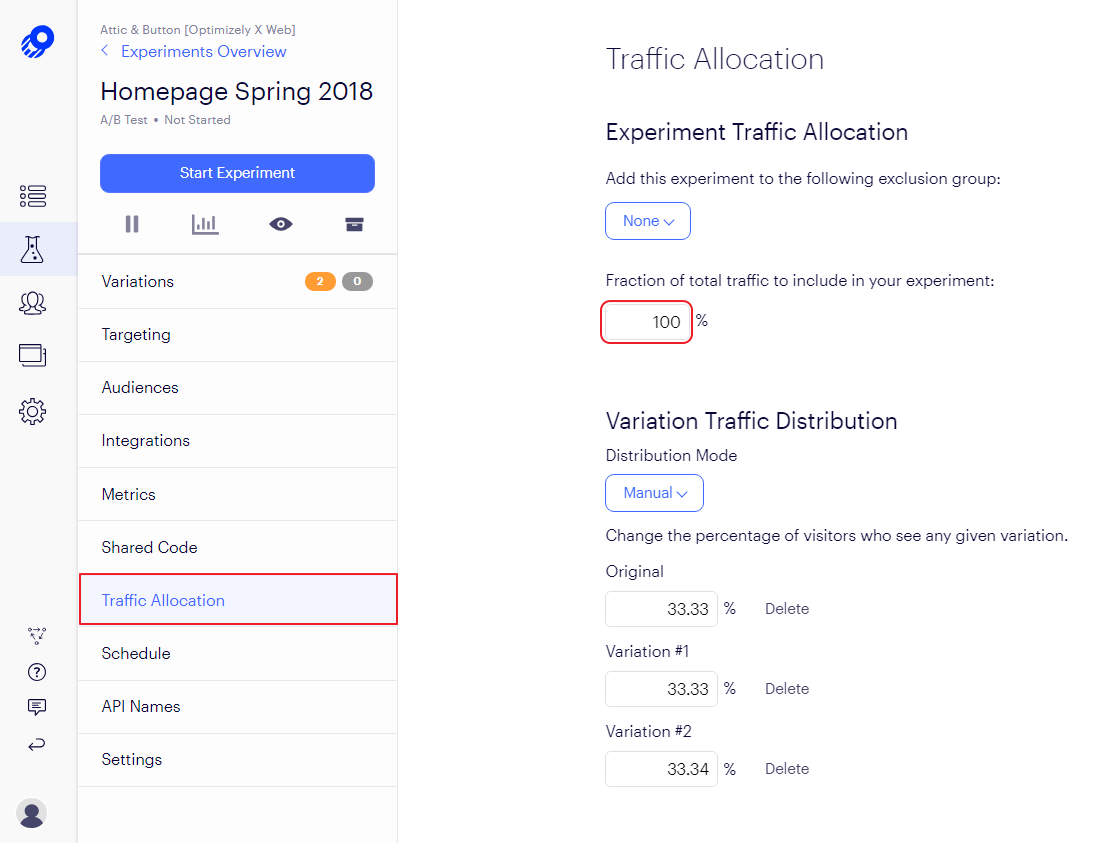
Set traffic allocation to specify how traffic will be split between your variations. Optimizely Web Experimentation randomly allocates traffic into different variations, including the original.
If you like, you can change the fraction of traffic that goes into each variation. Or, you can leave it as is. You can also change the total traffic that goes into the experiment as a whole.
Test and Publish
After you set up the components of your experiment, preview it to make sure it looks and works the way you intend.
Click Preview to view visual changes for your variation.
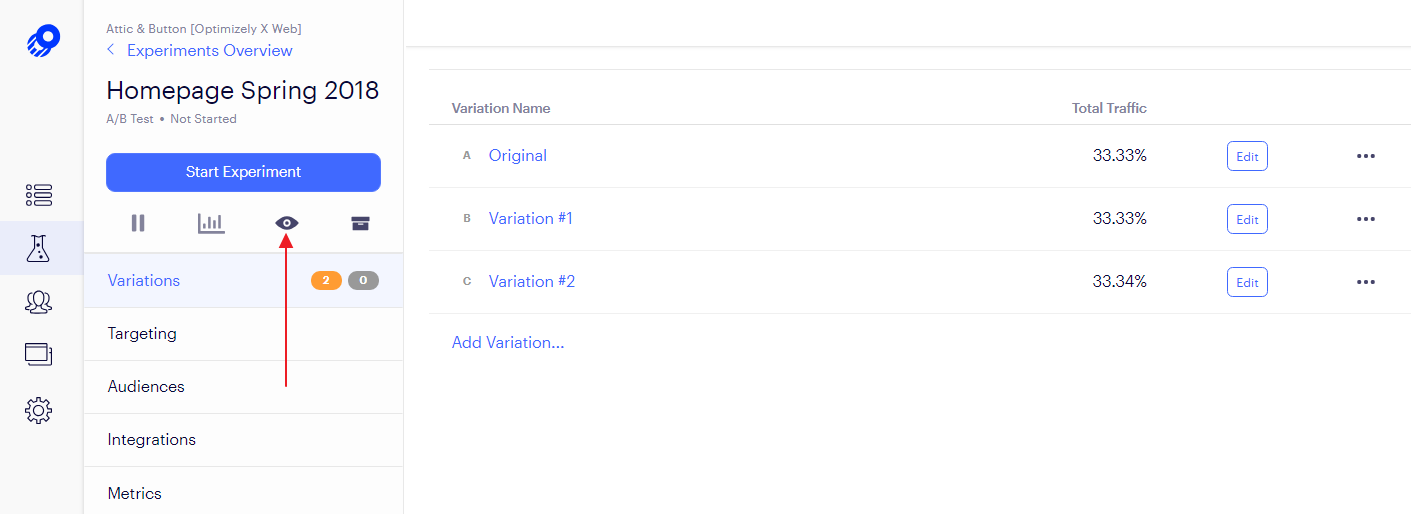
See Preview tool to test the functionality of your campaign.
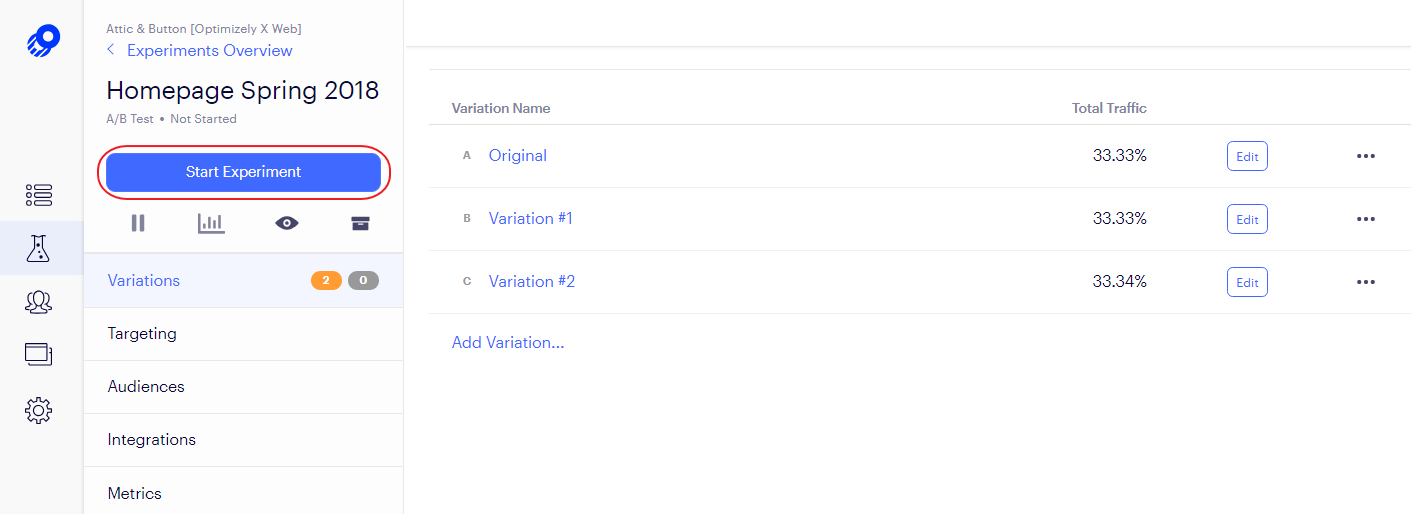
When everything looks and works the way you want, click Start Experiment to set the experiment live for visitors.
Analyze your results
Once your experiment has been running for a while, you can start to analyze the results. Optimizely will provide you with detailed reports on how each variation is performing, so you can see which changes are having the biggest impact on your conversion rate.
Draw conclusions
Once your experiment has run for long enough to generate significant data, you can draw conclusions about which variation is the most effective. Use this information to make changes to your website that will improve your conversion rate.
Iterate and improve
A/B testing is an ongoing process, so once you've finished one experiment, you can start another. Use what you've learned from your previous experiments to create new variations and continue to improve your website's conversion rate.
Conclusion
You’re done!
You’ve now setup Optimizely and ran an A/B test.
Execution Checklist:
-
Set up an Optimizely account
-
Install the Optimizely code snippet
-
Create a new experiment
-
Set up URL Tagging
-
Create a variation
-
Add audiences (optional)
-
Add Metrics
-
Set traffic allocation
-
Test and publish
-
Analyze your results
-
Draw conclusions
-
Iterate and improve