A Guide to Testing Your Shopify Store
To walk you through the process of testing your store in Shopify.
Prefer a shortcut? 16 free tools do parts of this for you.

Aim: To walk you through the process of testing your store in Shopify.
Optimal Outcome: To predict the possible problems and obstacles in your website which will hinder the process of getting sales and/or marketing your products.
What do you need to start: To follow this SOP, you need to have your account in Shopify and your Shopify store website link to view your website in the consumers' perspective.
Why is this SOP Important: Testing your Shopify store is an essential part of starting or maintaining your business. From the checking out process, shipping information, store website design, and its view on different devices, the testing by Bogus Gateway helps to identify the things that should be added or revised from the website. By testing the store, you can also gain insights from other people on how to improve your store website.
When and Where to execute: Testing the store must be routinely done to check your website's efficiency and see the positions of every product and buttons if they are working. This is also discreetly done before launching the website.
Who Should Be Doing This: This should be done by the person-in-charge of developing and designing your web and assistance from the Marketing or IT department would be preferred.
Shopify Store Testing
Shopify store testing is done usually for business websites to ensure that the future viewers of that website would enjoy browsing and easily make their purchase on the platform. If one of the buttons or icons is not working in the checkout process, then that will lessen the possible sales for your company and you will also have a bad first impression to your customers, leading to negative brand recognition. This process requires a long attention span to details to prevent errors in the system.
Execution
Resources/Tools & Set up
- Shopify store
Activating Bogus Gateway
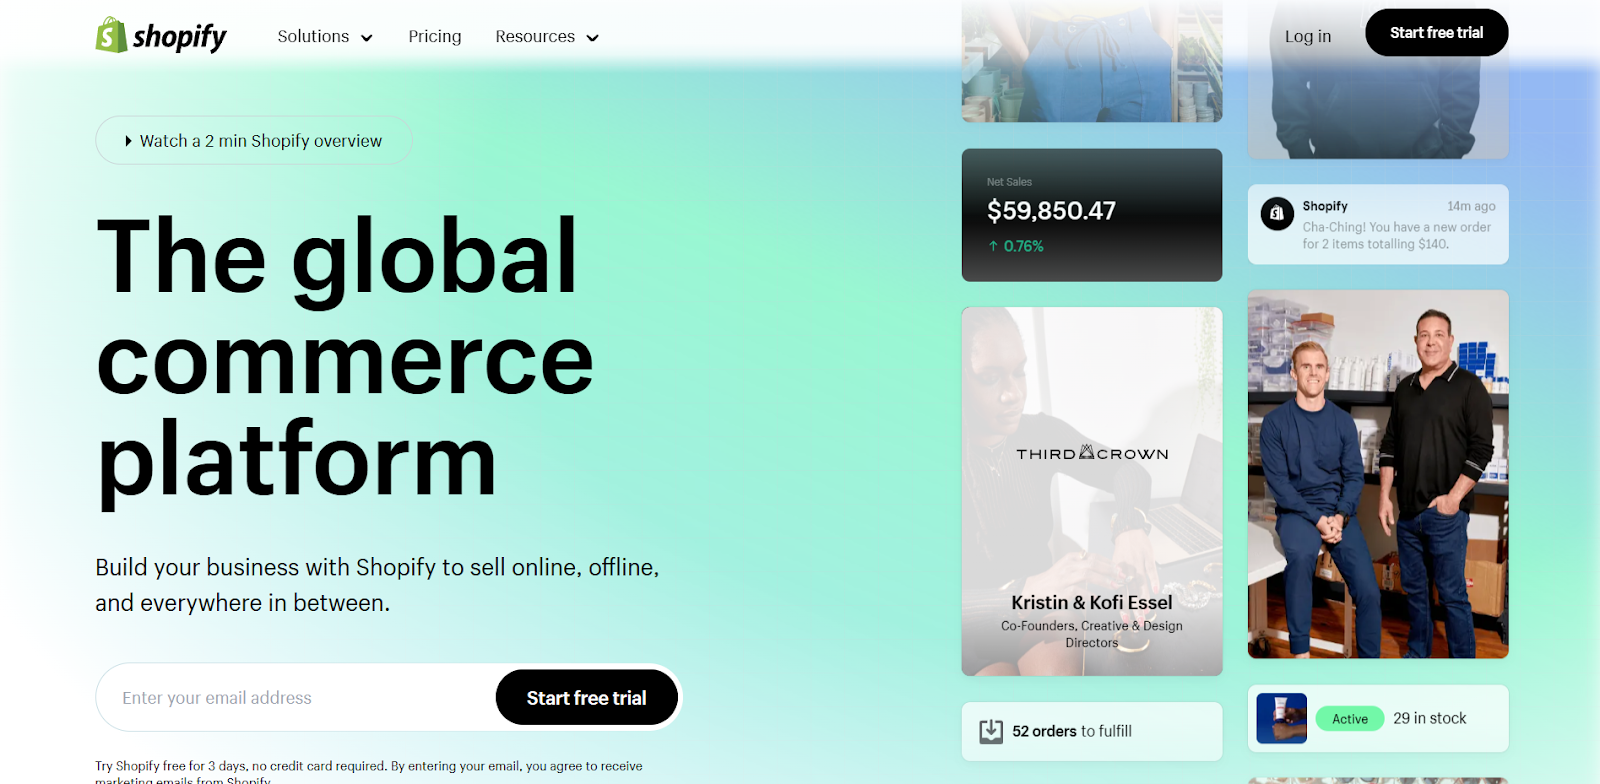
- Sign in to your Shopify store account by clicking “Log in” and entering your account details.
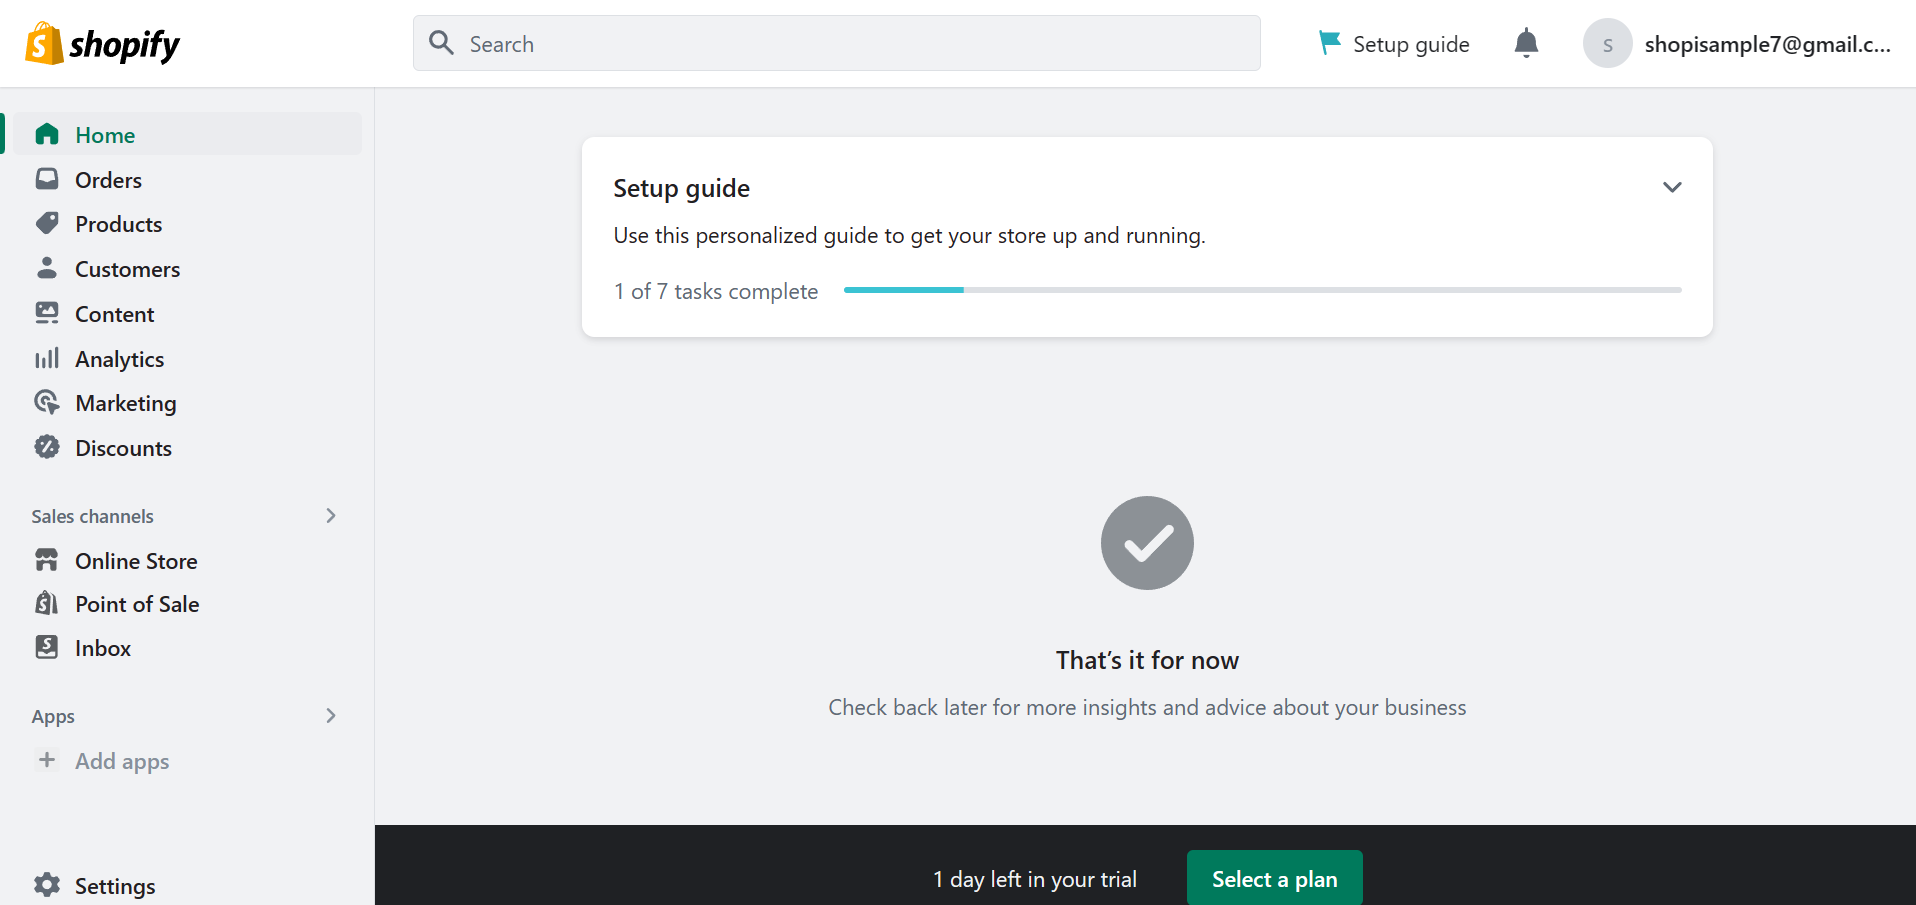
- Once you are redirected to the Shopify homepage, you will see a dashboard on the left. Click “Settings” located in the lower left corner.
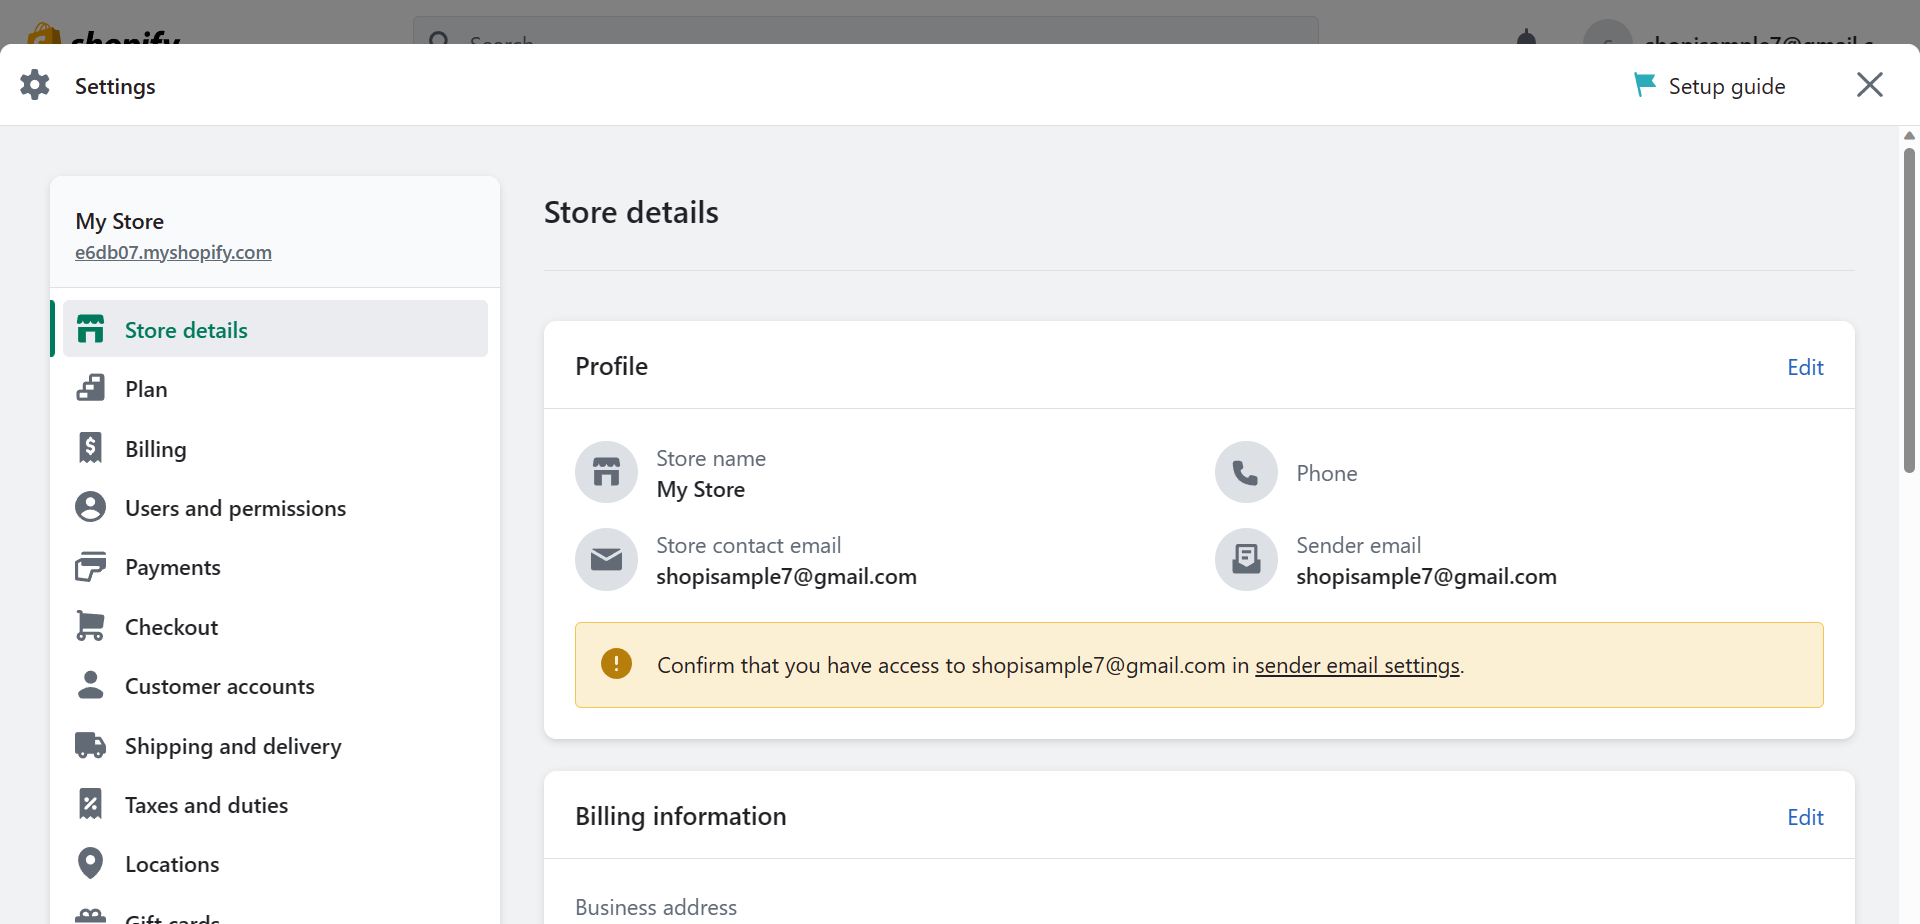
- After navigating to Settings, go to the Payments page.
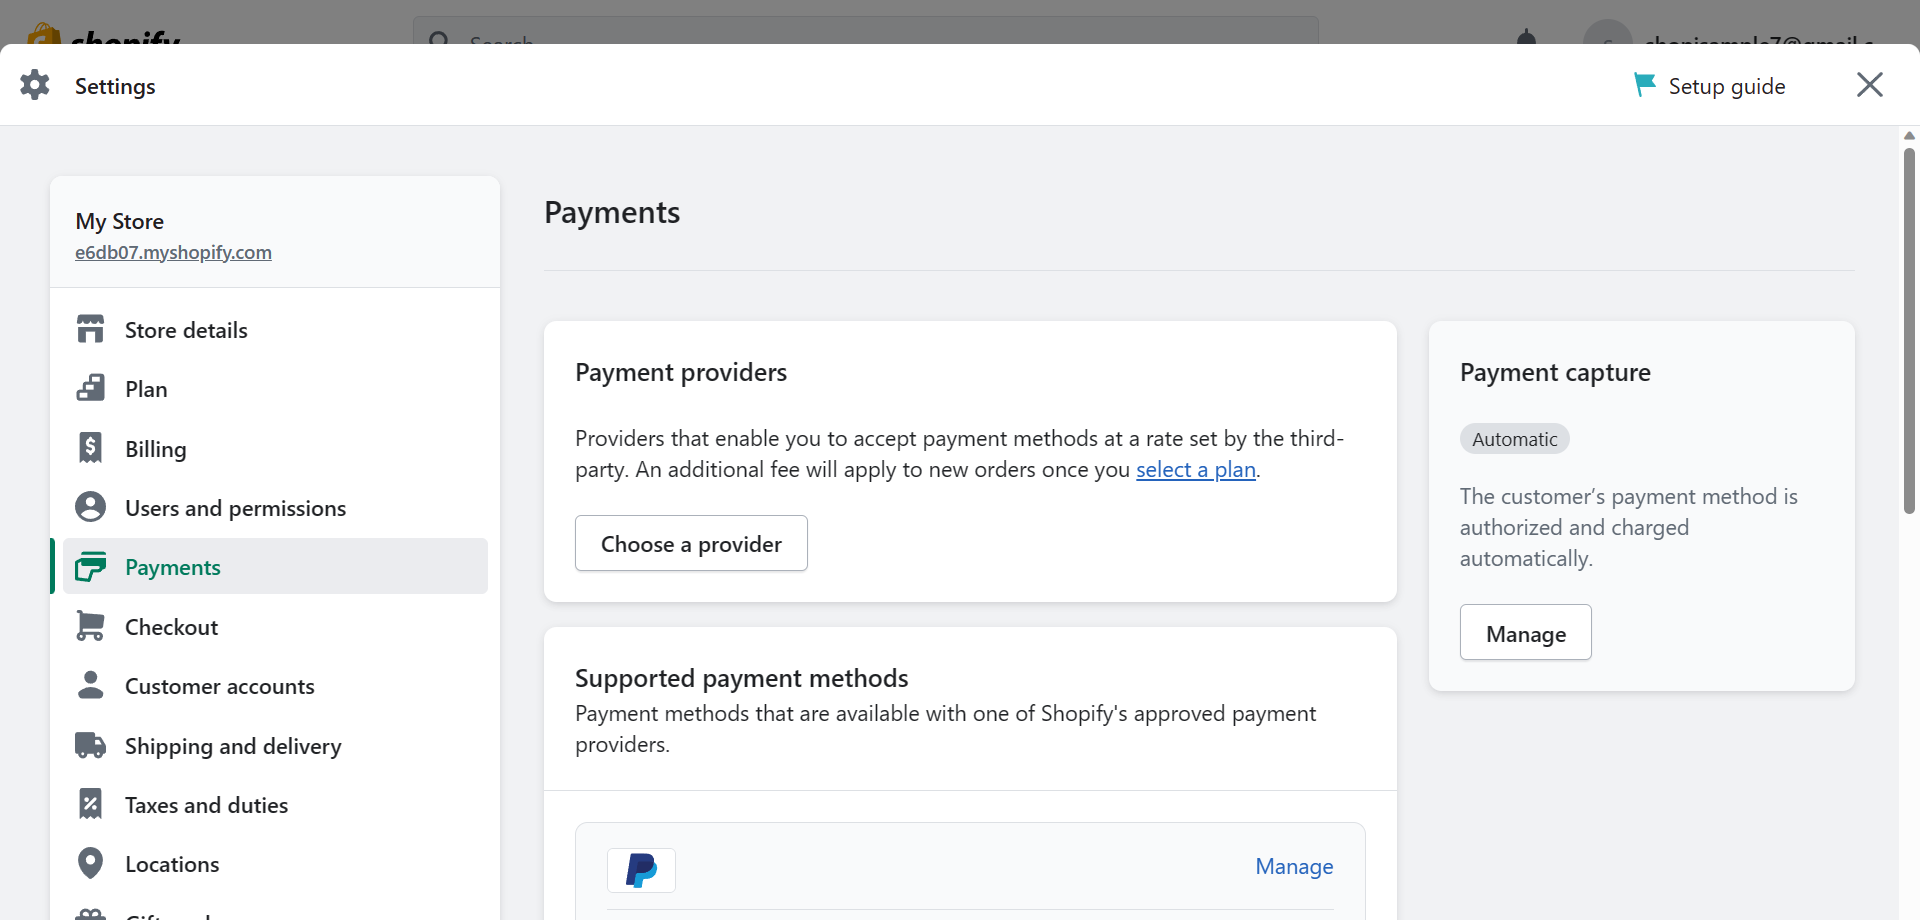
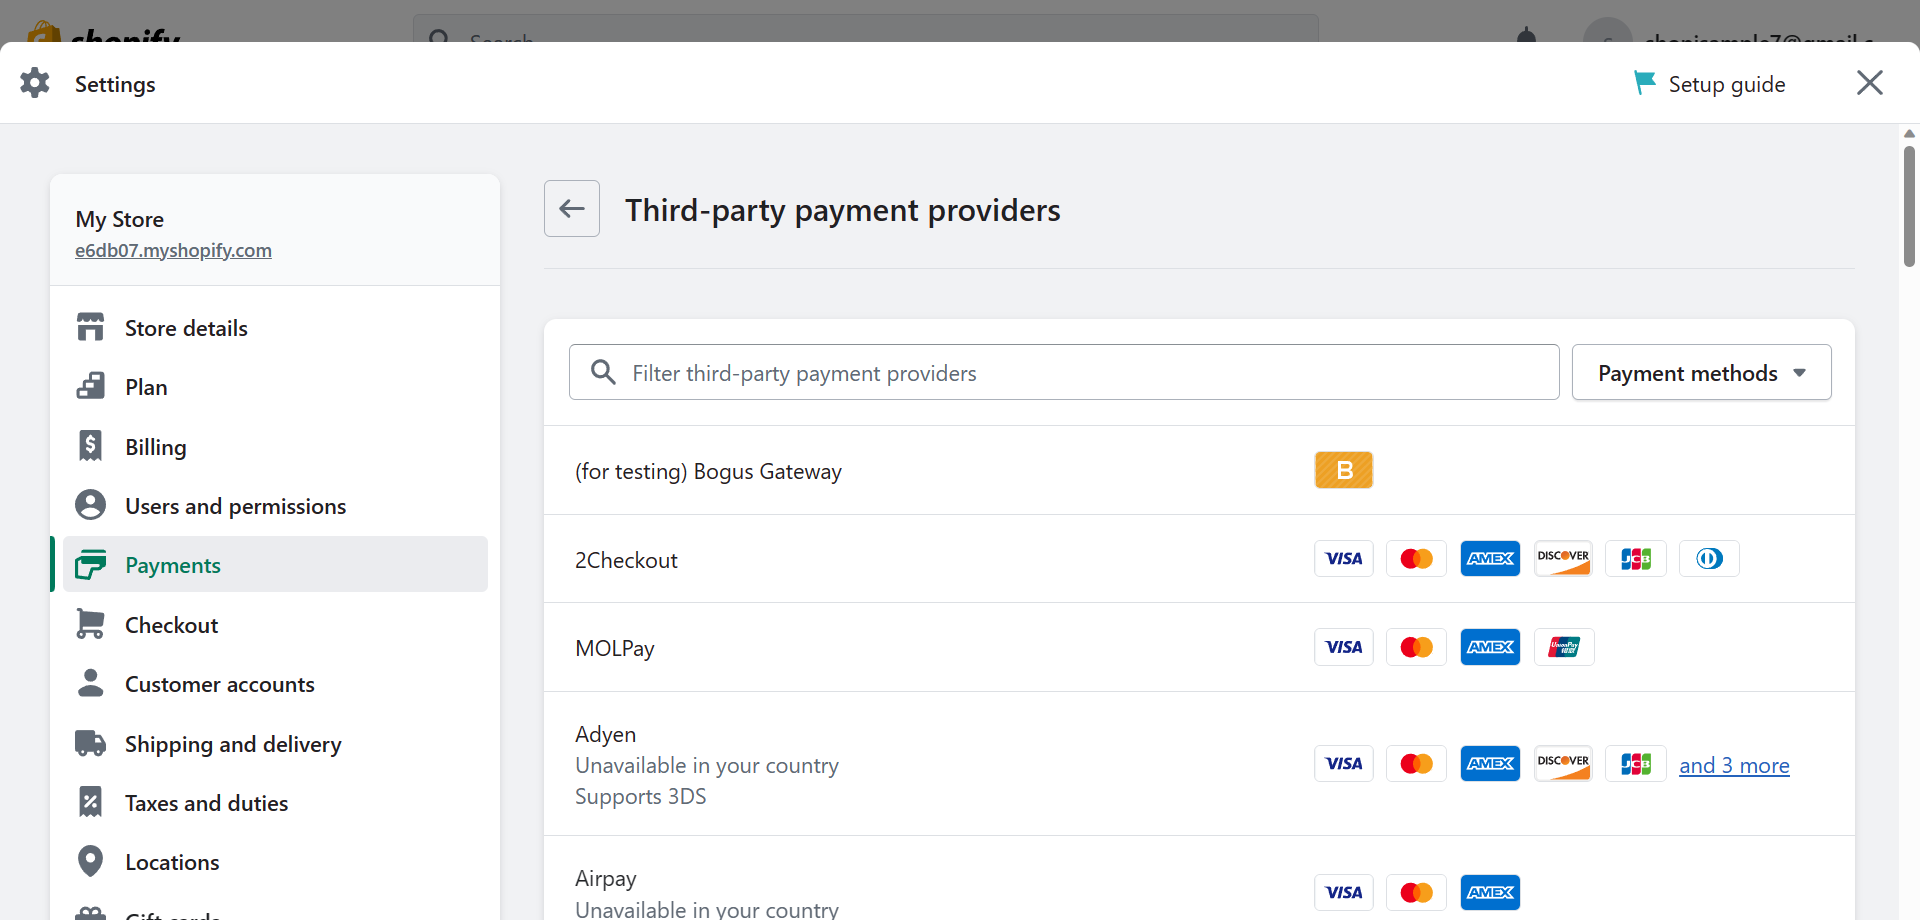
- You will see the Payment providers, which allows third-party providers to be activated in your Shopify store. To activate Bogus Gateway, click "Choose a provider".
- As indicated, Bogus Gateway is a payment provider that can only be used to test your Shopify store in checking out. It means that there would be no need to include legitimate details because it would still be accepted as a trial order. Click the "(for testing) Bogus Gateway" to continue.
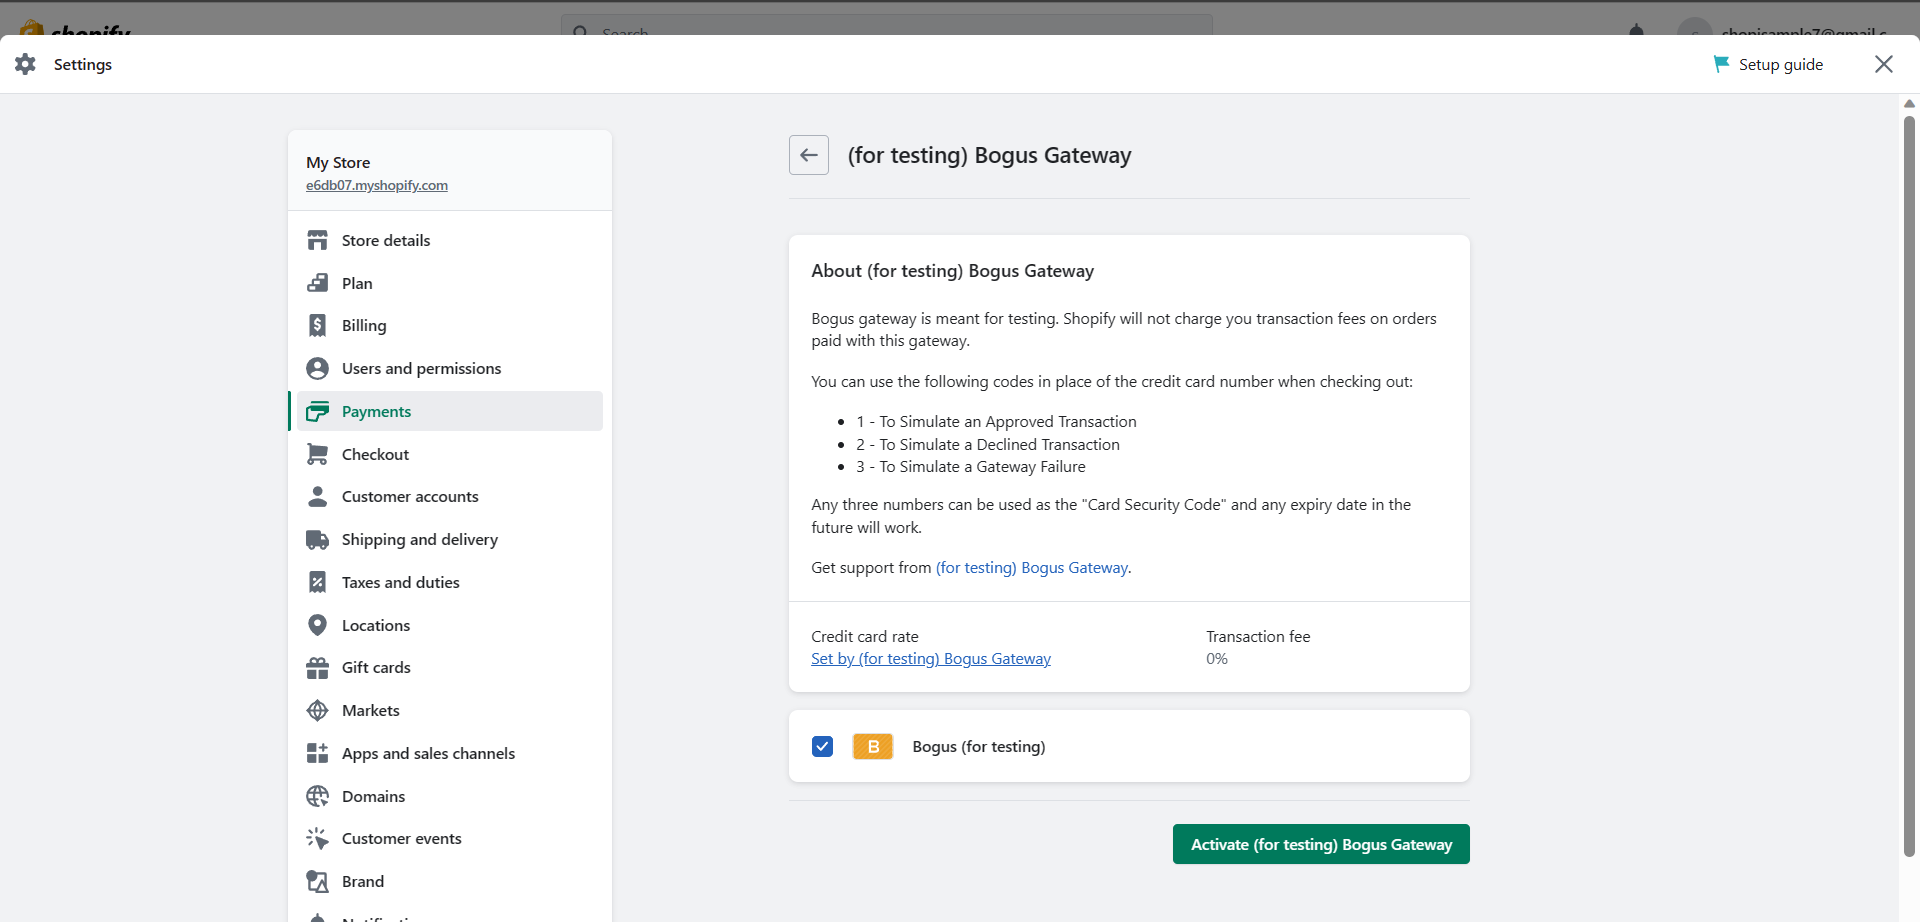
- After clicking Bogus Gateway, you can see some instructions to use the simulation provider. As indicated, you can place 1 in the credit card number to simulate an approved transaction, 2 to simulate a declined transaction, and 3 to simulate a gateway failure**.** If you want to activate it, click the "Activate (for testing) Bogus Gateway" button.
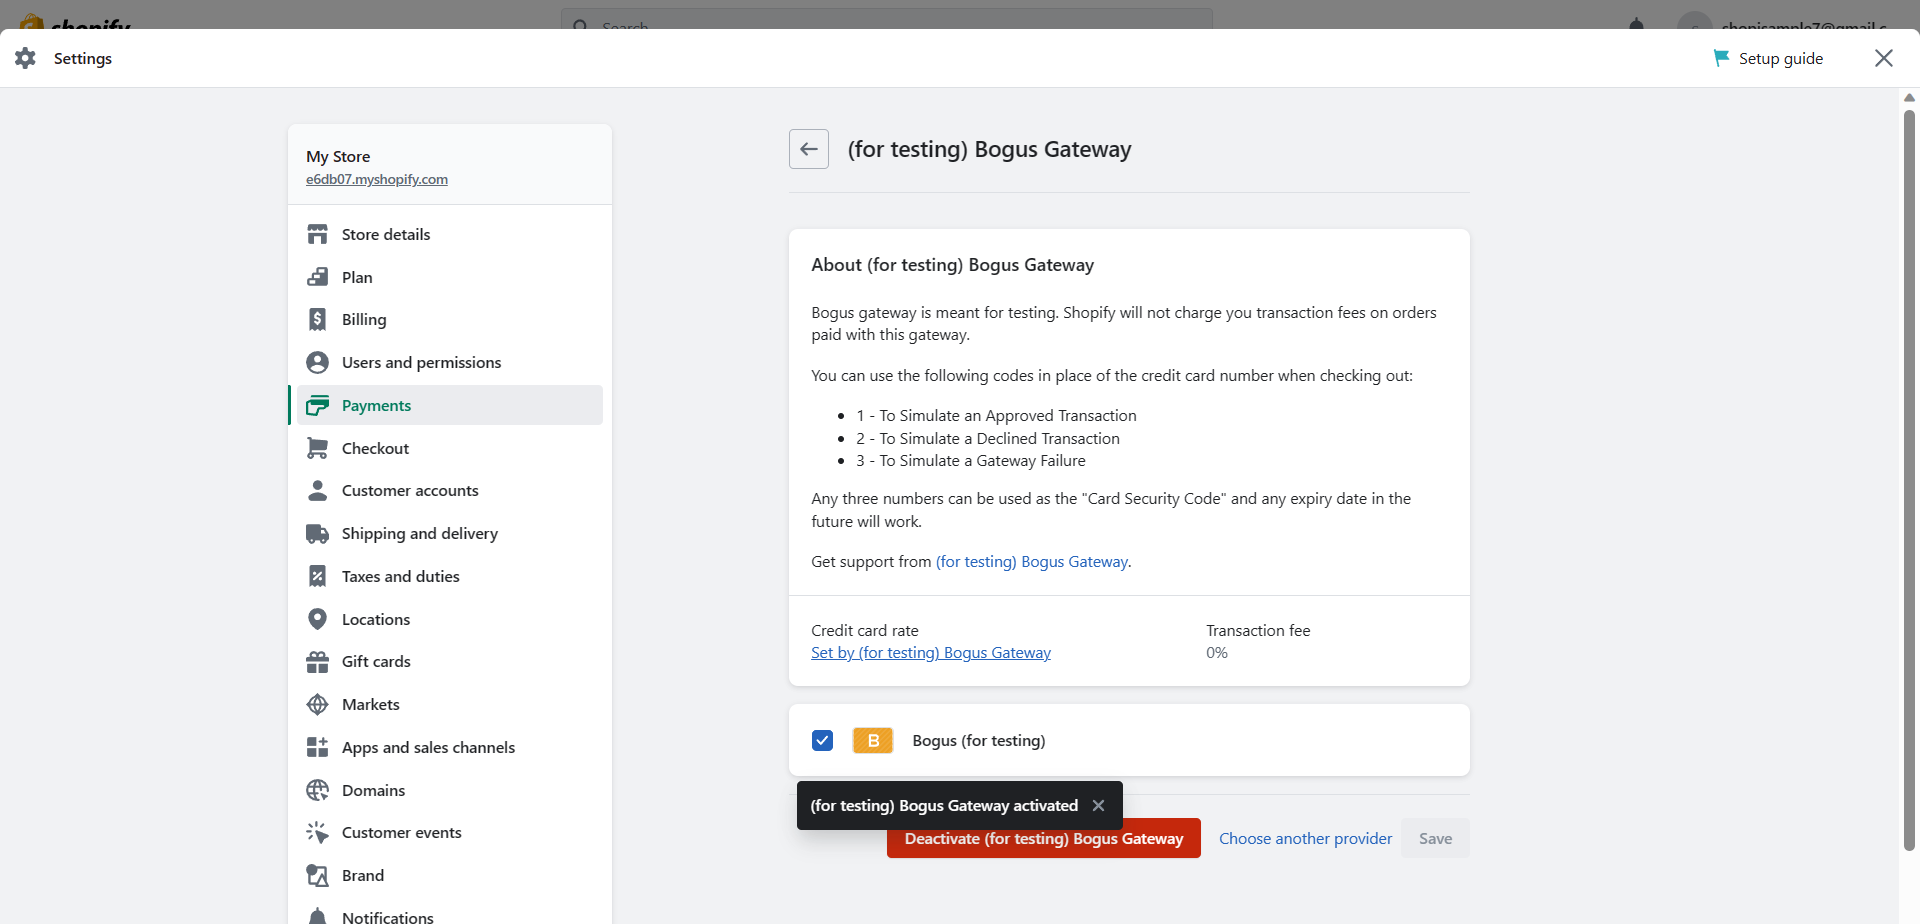
- After activating the simulation provider, this will be how it looks and you are now ready to go for a test.
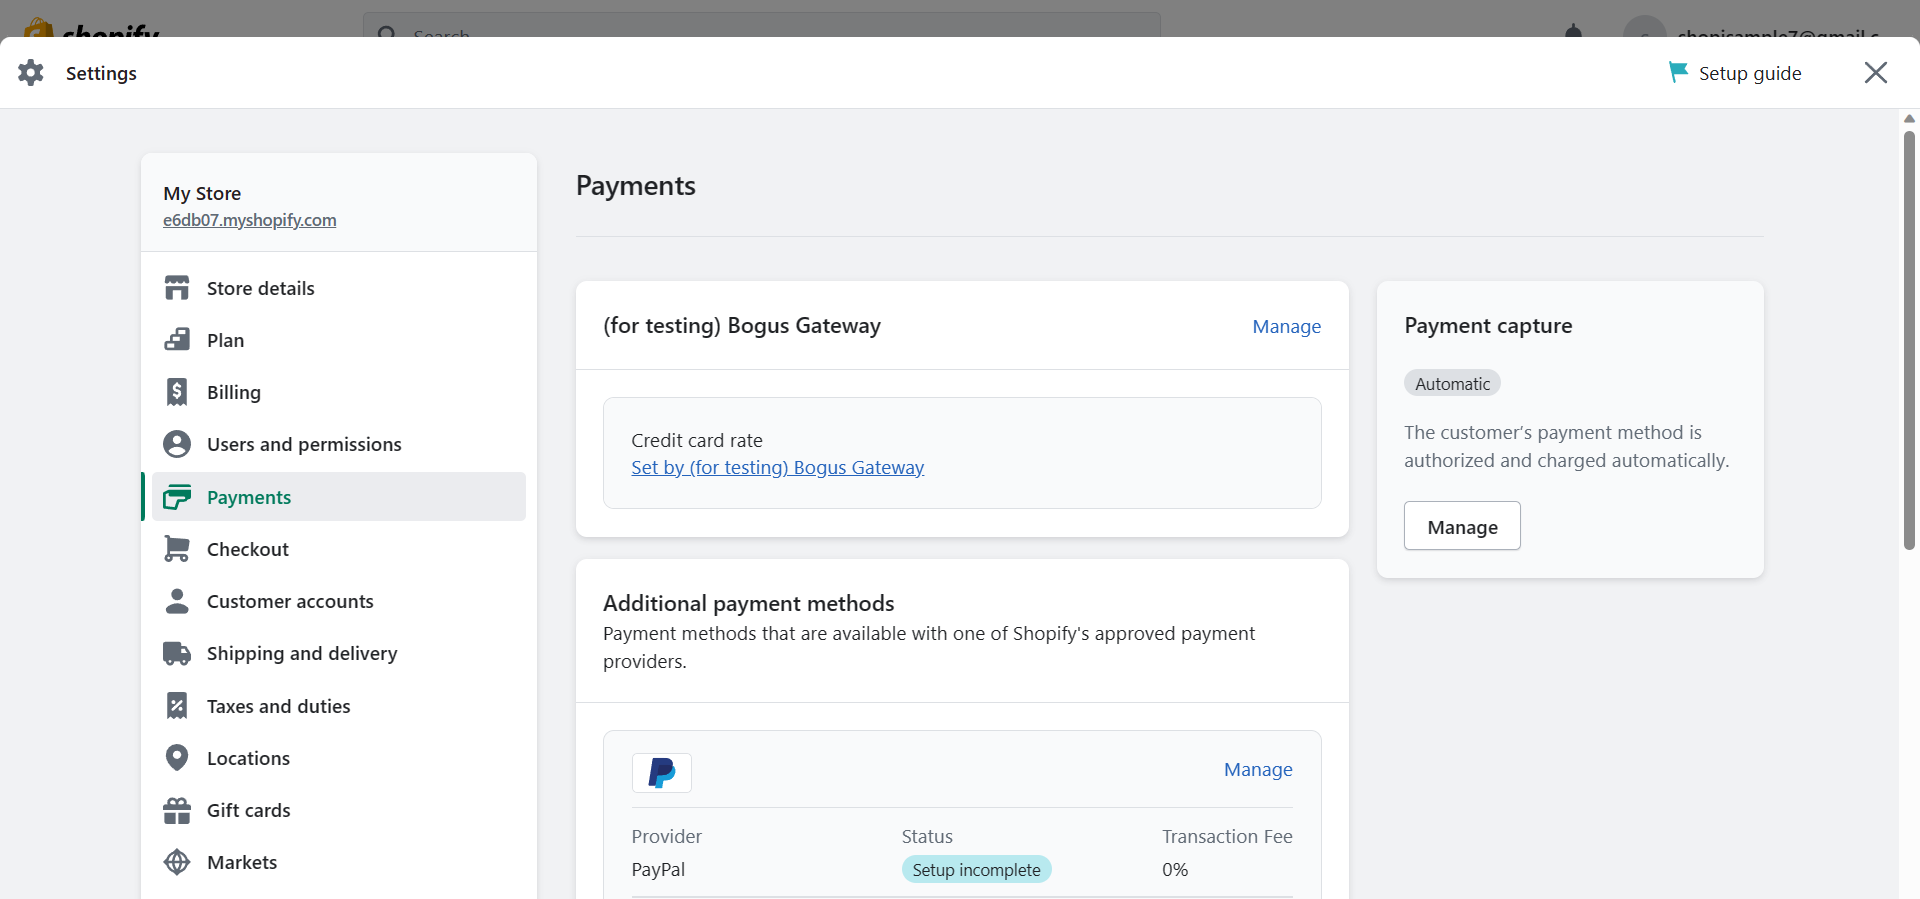
Testing Shopify Store
- You need to go to your website's link for a preview to test your checkout process in your customer's perspective. To find it, Look for the myshopify link below the name of your store in Settings, and click it.
- After navigating to your Shopify store, you can now go to your cart and add a product. After adding a product, click the bag icon to go to your Cart.
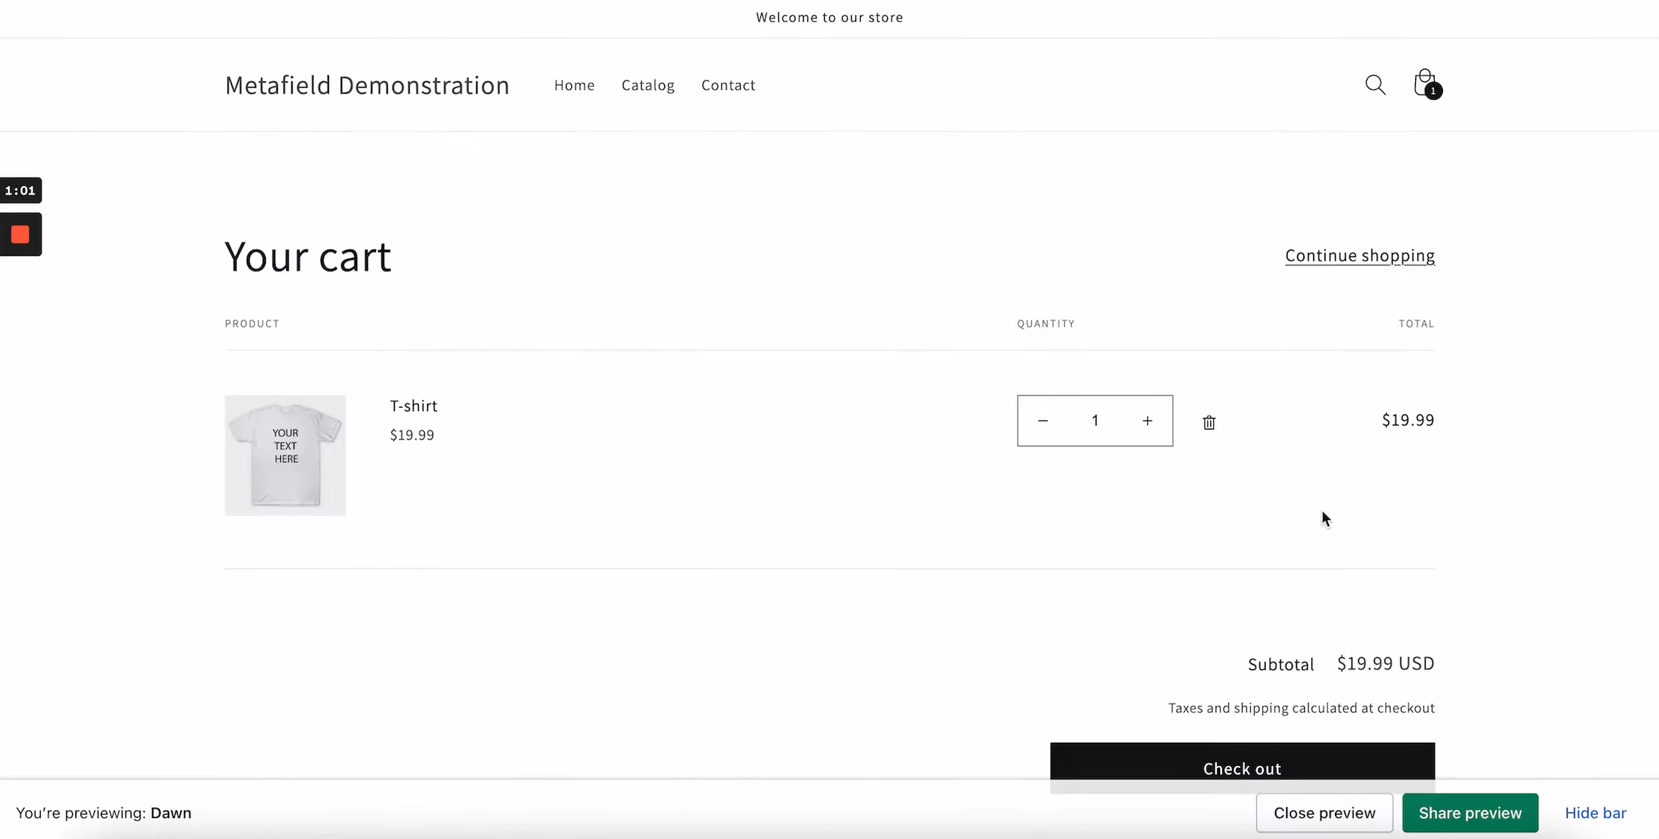
- After seeing your product there, you can now check it out by clicking the "Check out" button.
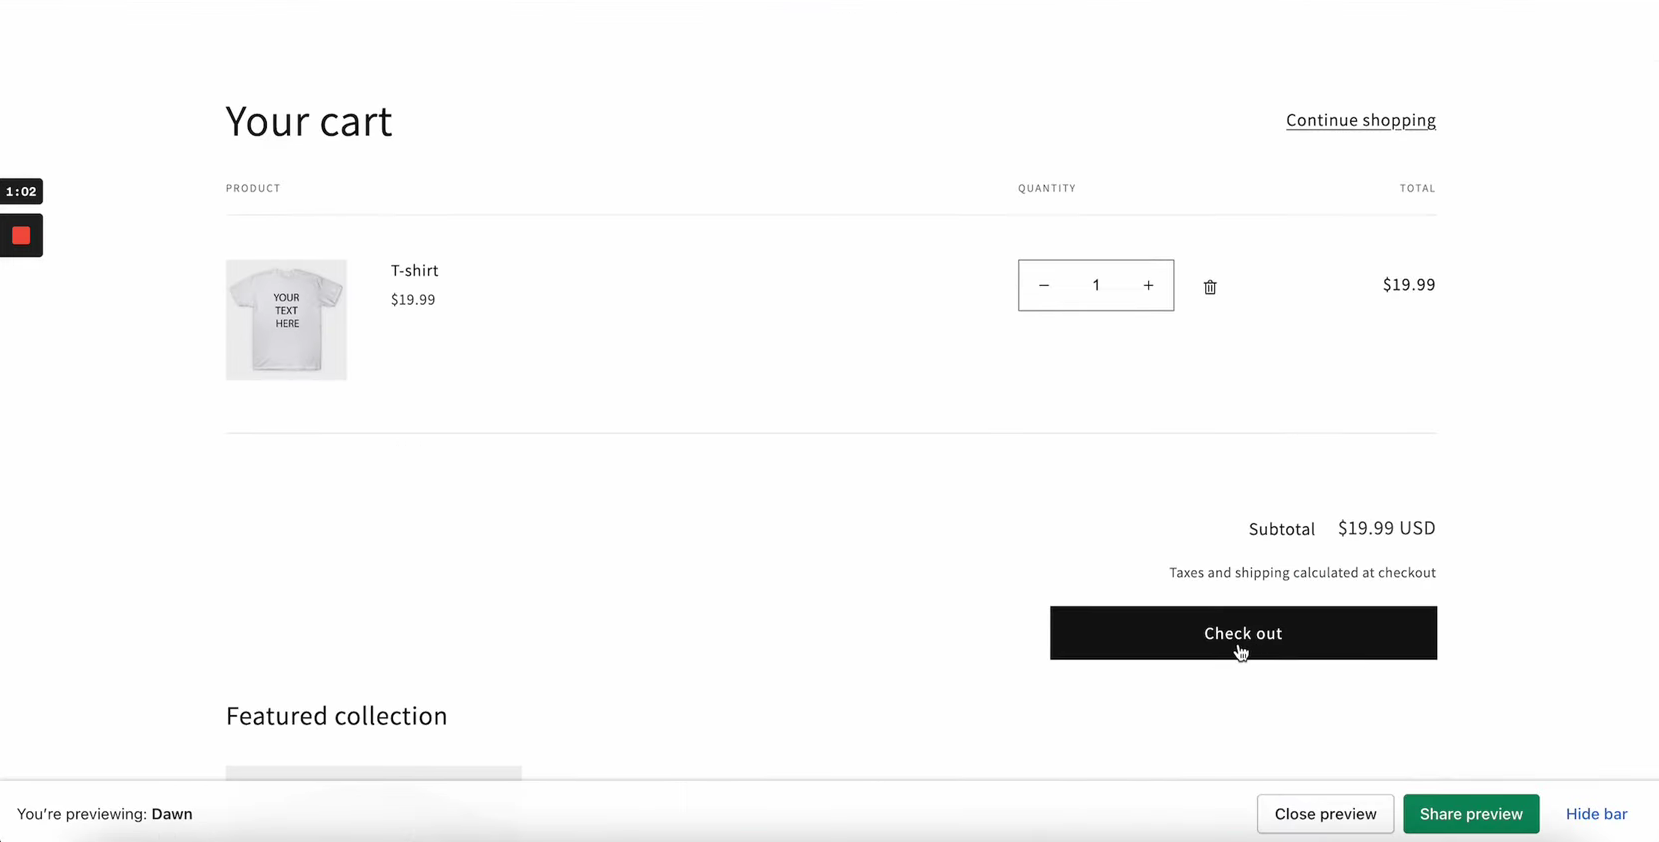
- This will be your customers' perspective after you clicked the checkout button. Here, they will have to indicate their contact information such as Email, which they can choose to use if they want to receive offers and news about your business, and Shipping address to deliver your product to them. This field needs to be provided accurately by your customers, so Last name, address, city, state, and ZIP code are required. After entering bogus information in these fields, you can now proceed to the shipping page by clicking "Continue to shipping".
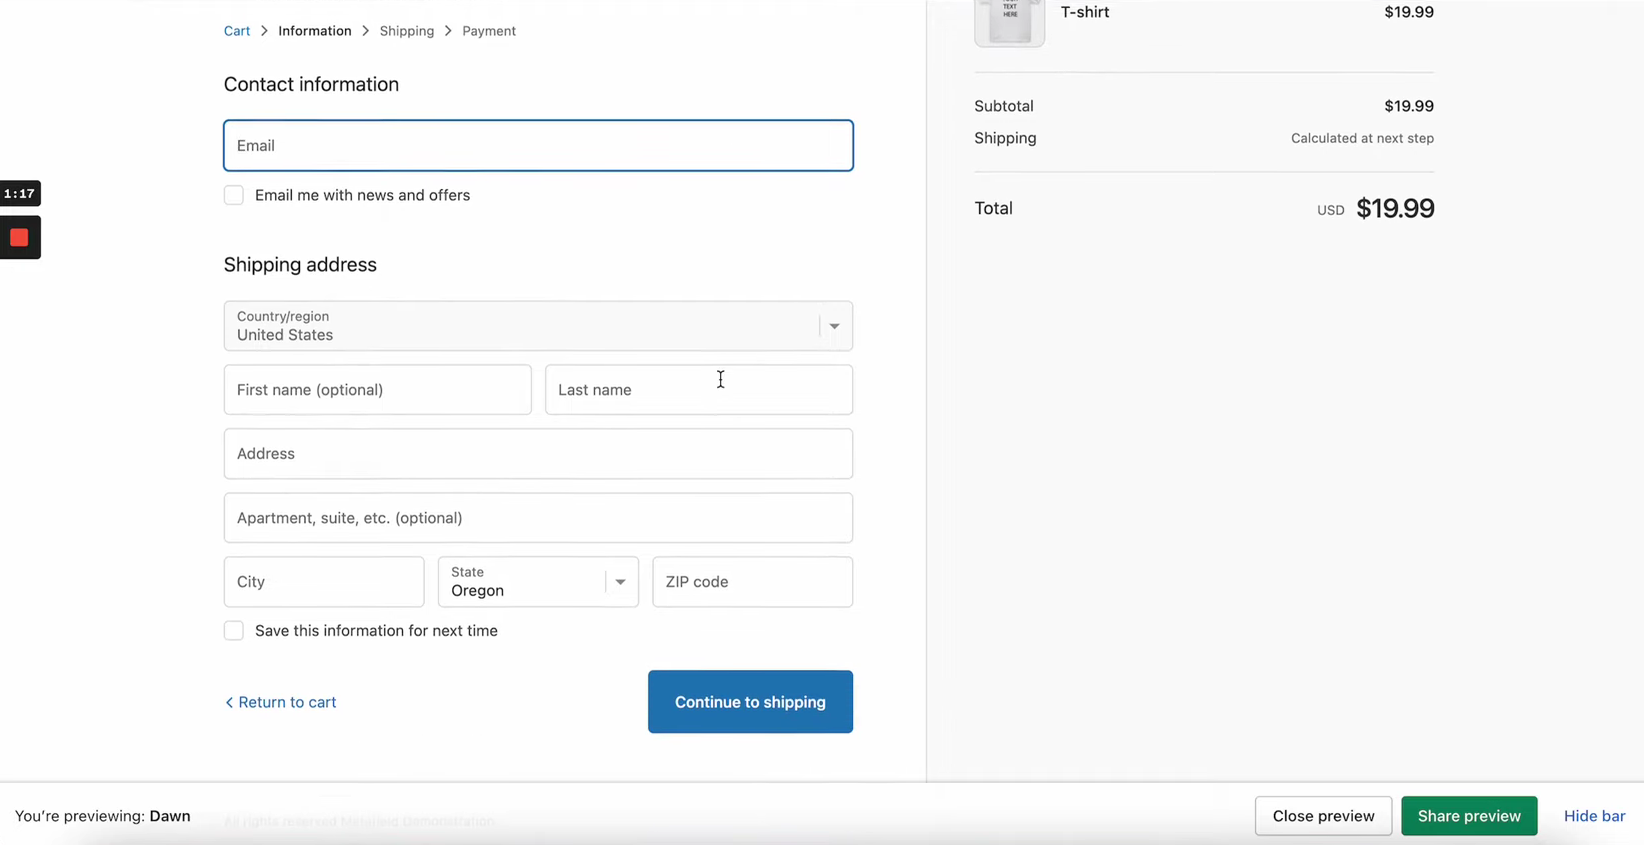
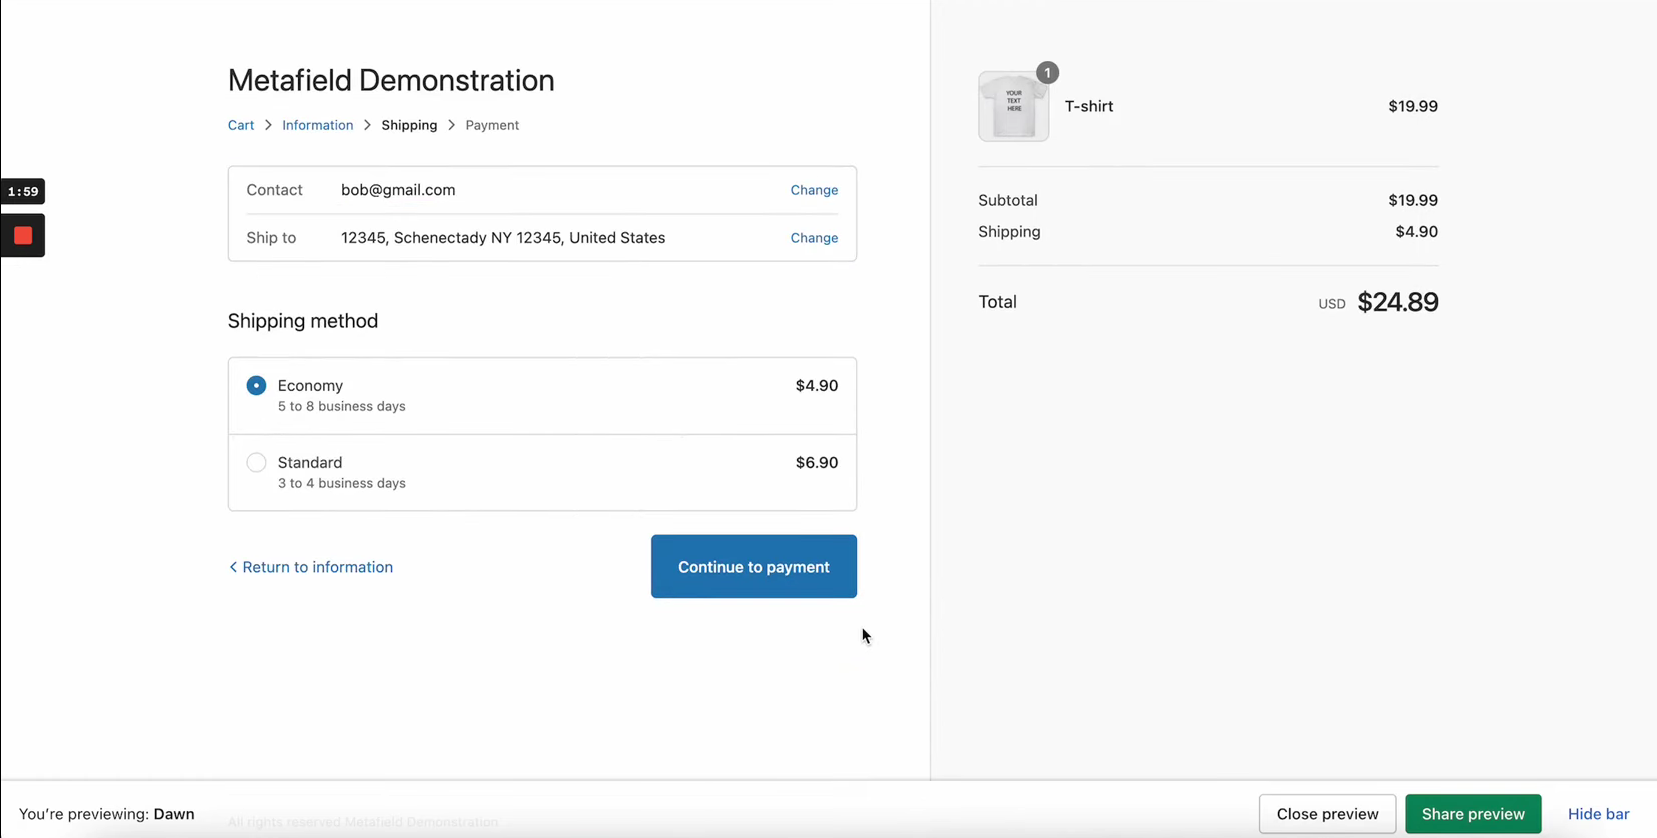
- You can see the contact information and shipping address that you have indicated earlier in the top part of the Shipping page. In this page, you will now let your customers choose their Shipping method. Economy shipping would be cheaper than Standard shipping but it would take more days before the customer can receive it. If they want the products to arrive immediately, then they can choose to have Standard shipping. after clicking one of the two, click the "Continue to payment" button to proceed to the Payment page.
- Here is the Payment page. Your customers can indicate their credit card details here, which needs the Card number, Name on card, Expiration date, and Security code.
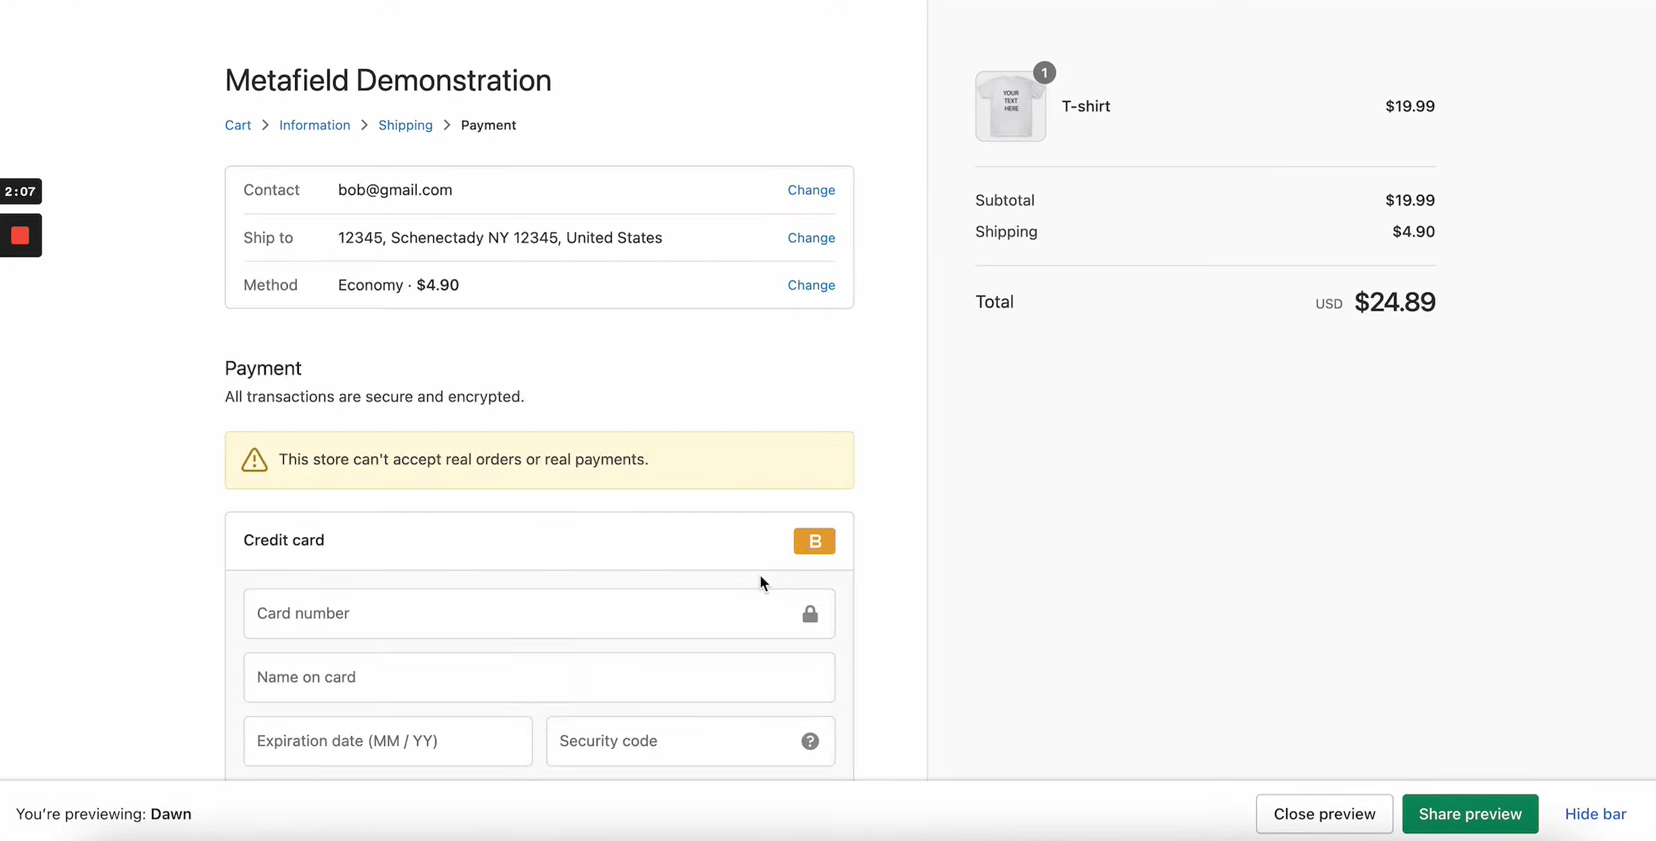
- If you remember earlier, you need to type 1 under the Card number field so you can simulate a successful transaction. If you want a failed transaction, you can put 2 and a Gateway failure would be 3.
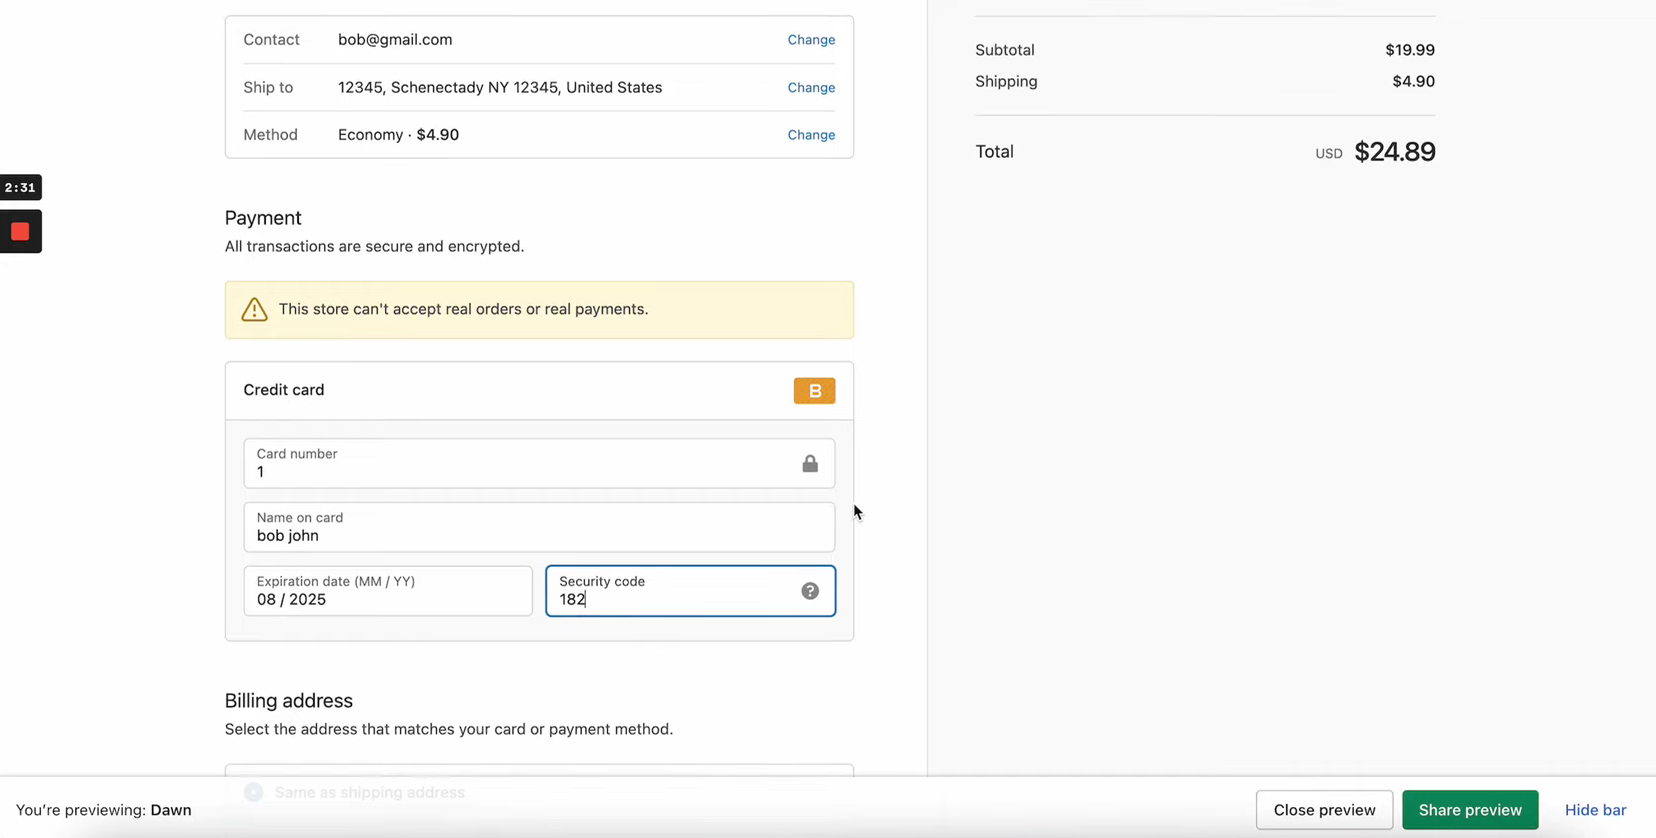
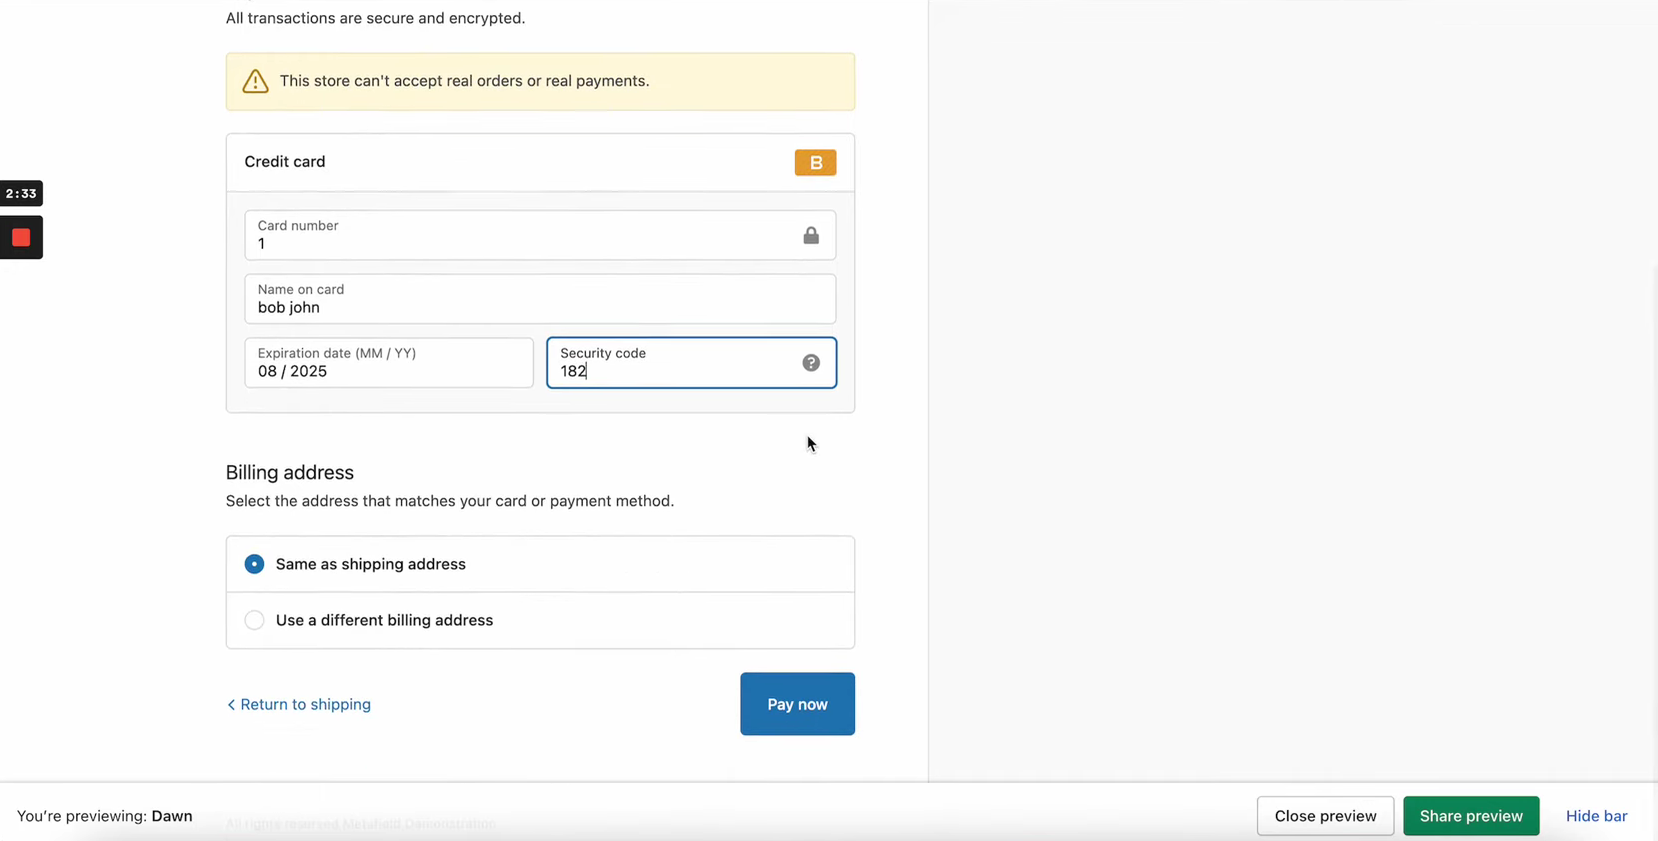
- Lastly, the Billing address would be inquired. You can use your shipping address but you can also indicate a different billing address. After choosing, click the "Pay now" button to see if the test has worked.
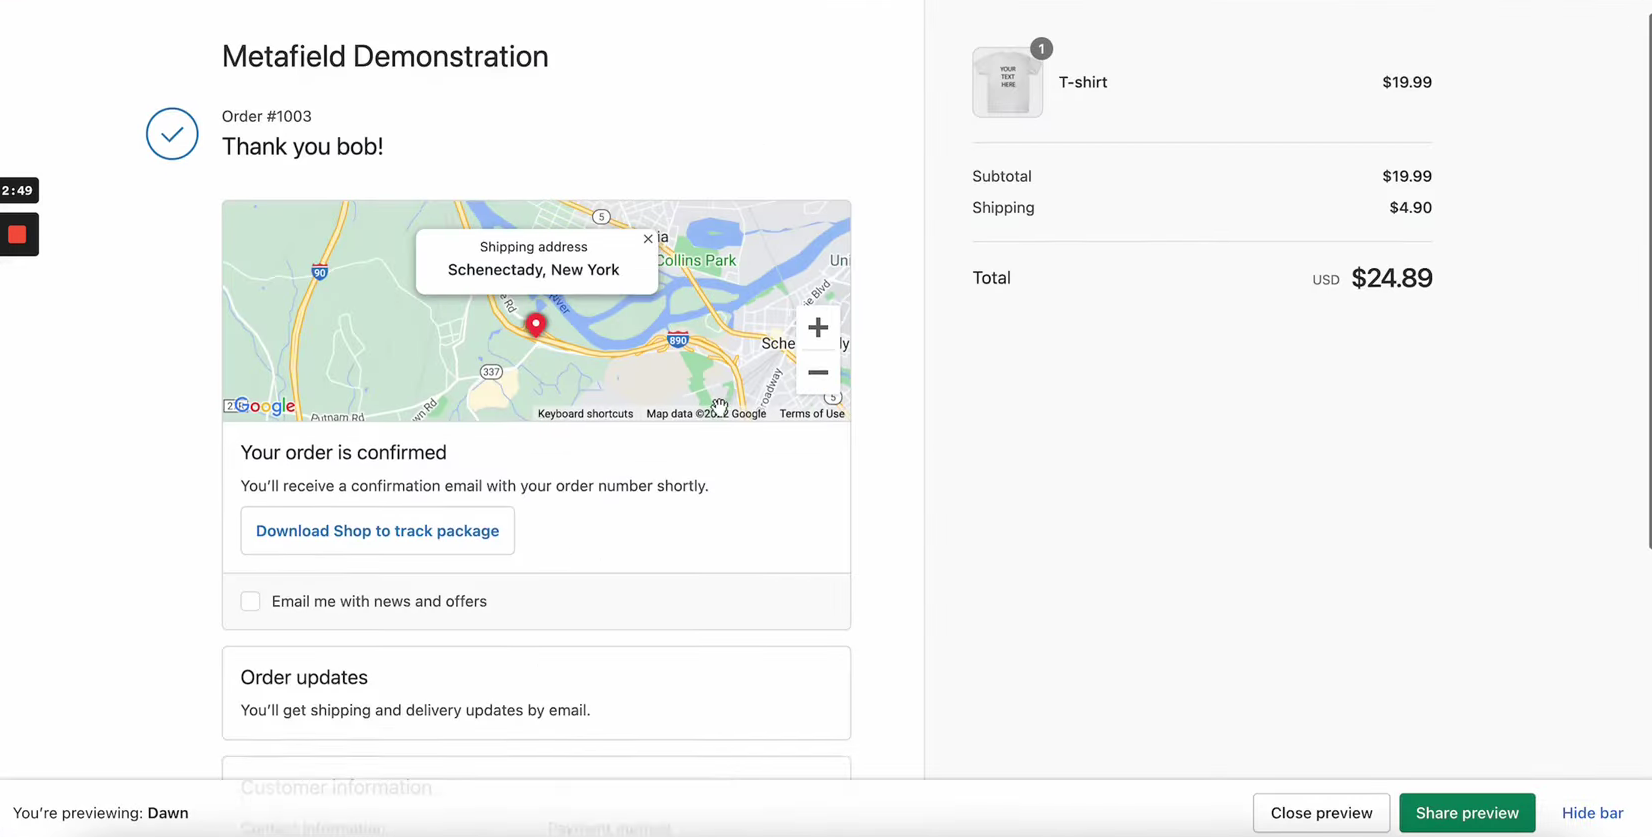
- This page confirms that you have ordered from the Shopify store. This will also be the view of your customers after they place an order in your store. After the test, you can now click the "Close preview" button to stop it.
- To see the placed order, you can navigate to the "Orders" page.
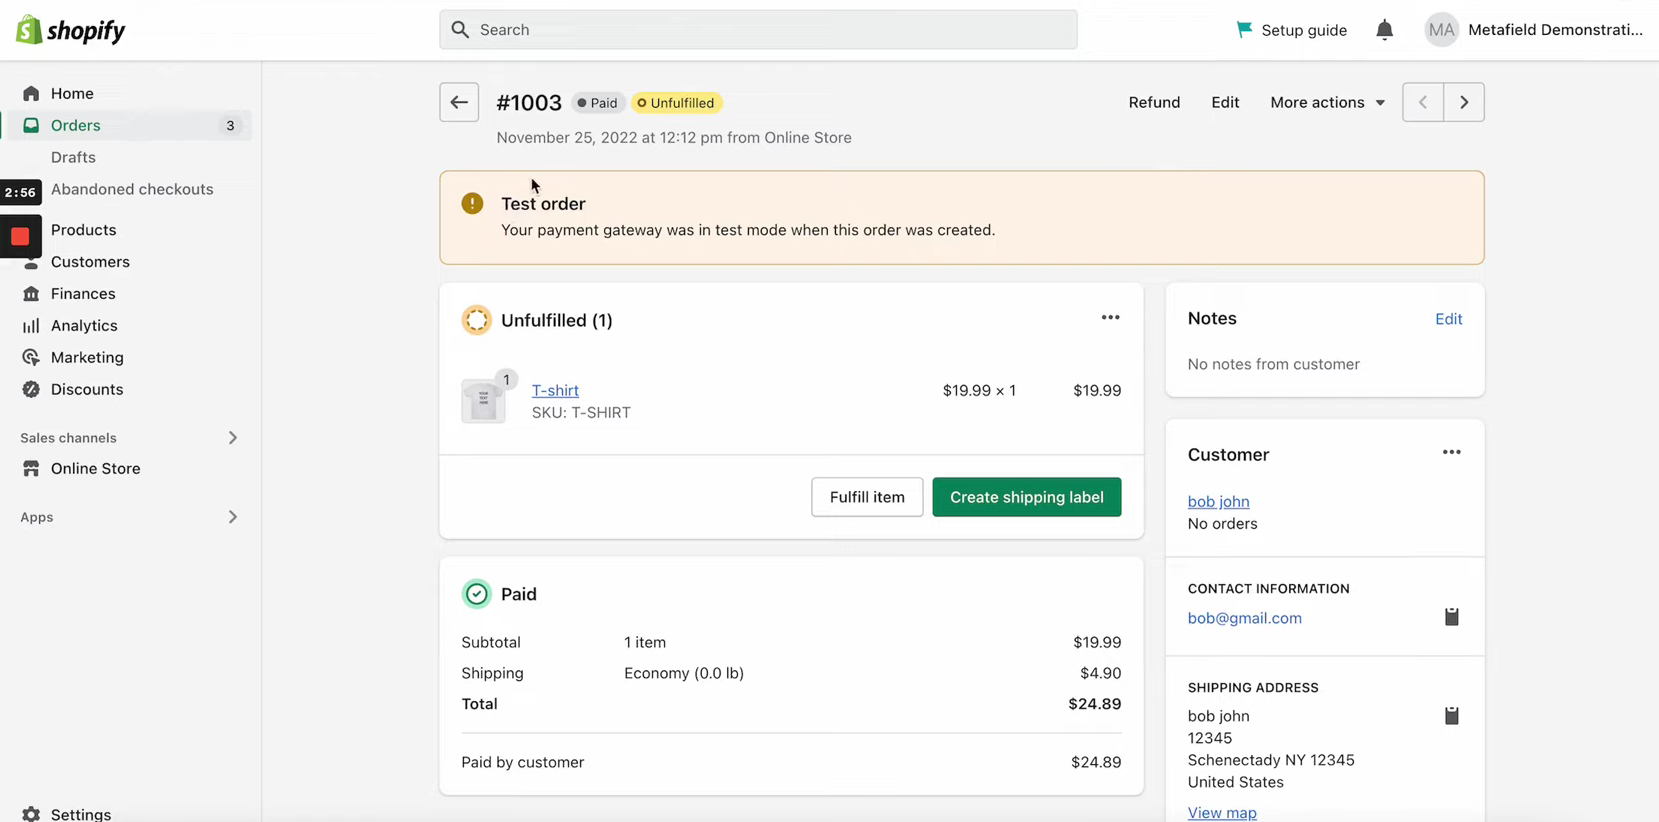
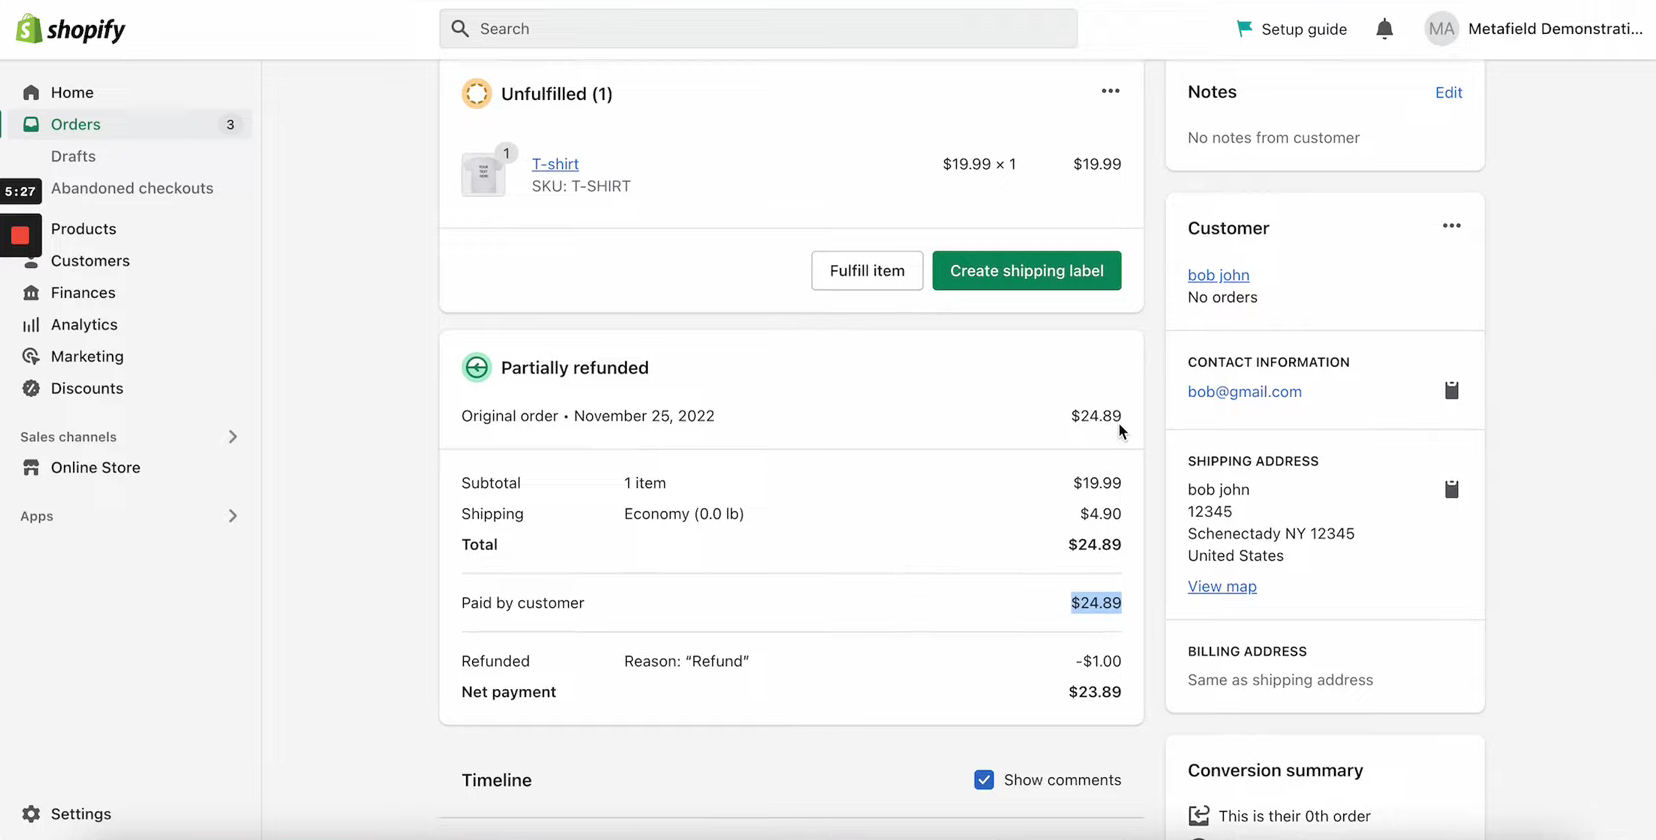
- You can see that the test order proceeded well, but is still unfulfilled. In original orders you can click "Create shipping label" which you will stick outside the packaging of the product that your customer has ordered. After completing the order, you can click "Fulfill item" to let Shopify know that the order is already done. To practice refunding, click Refund.
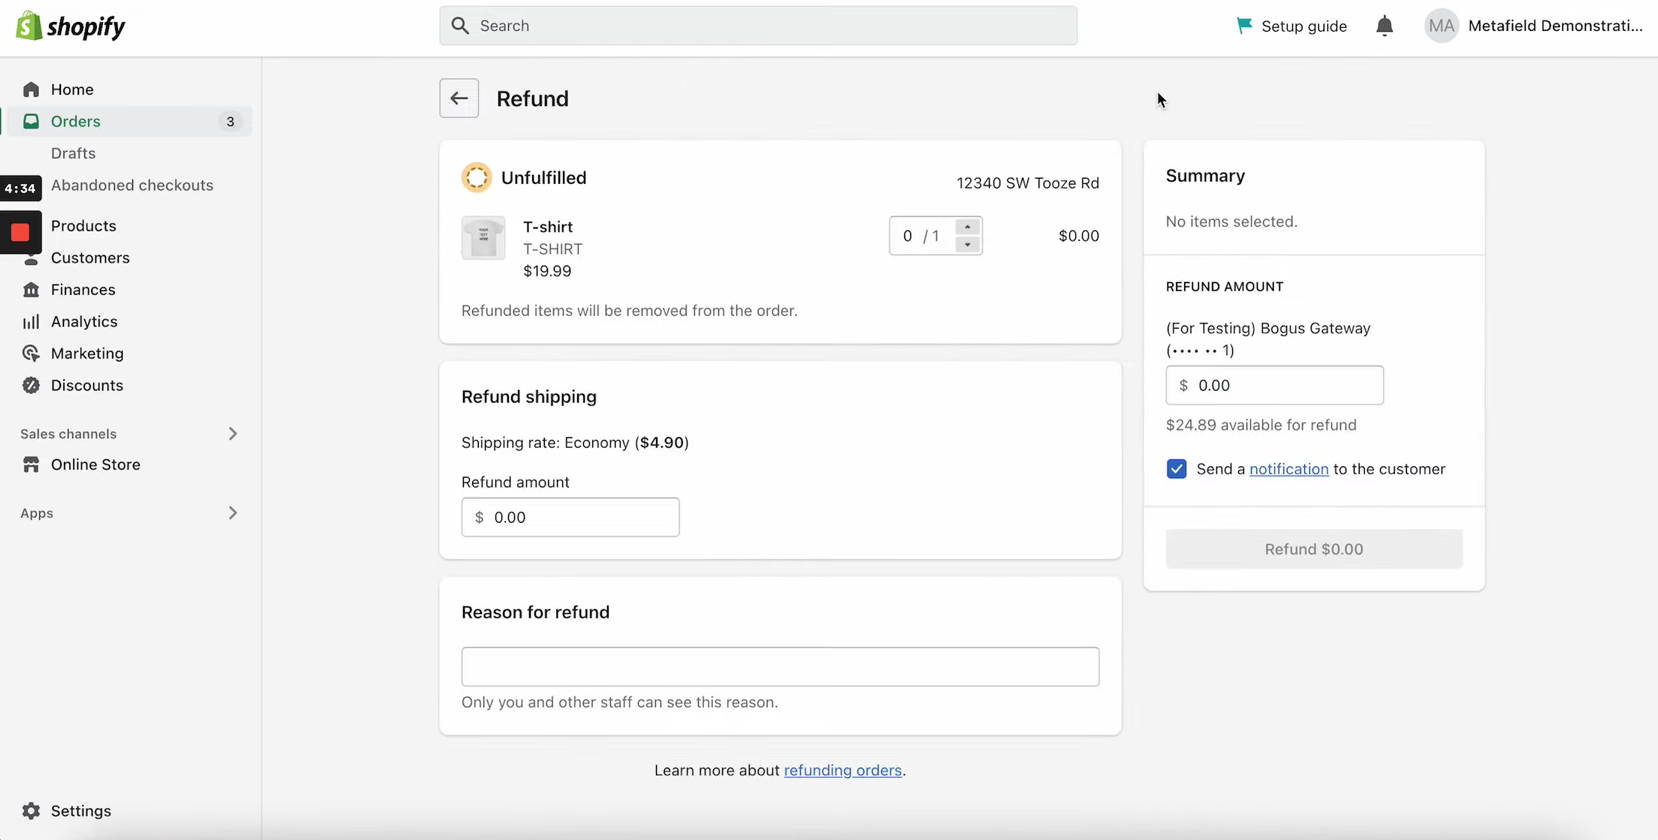
- You can refund the shipping rate by indicating the amount. You can also enter the reason for the refund in the blank field provided. Lastly, you can enter the refund amount of the product of your customer that you want to refund.
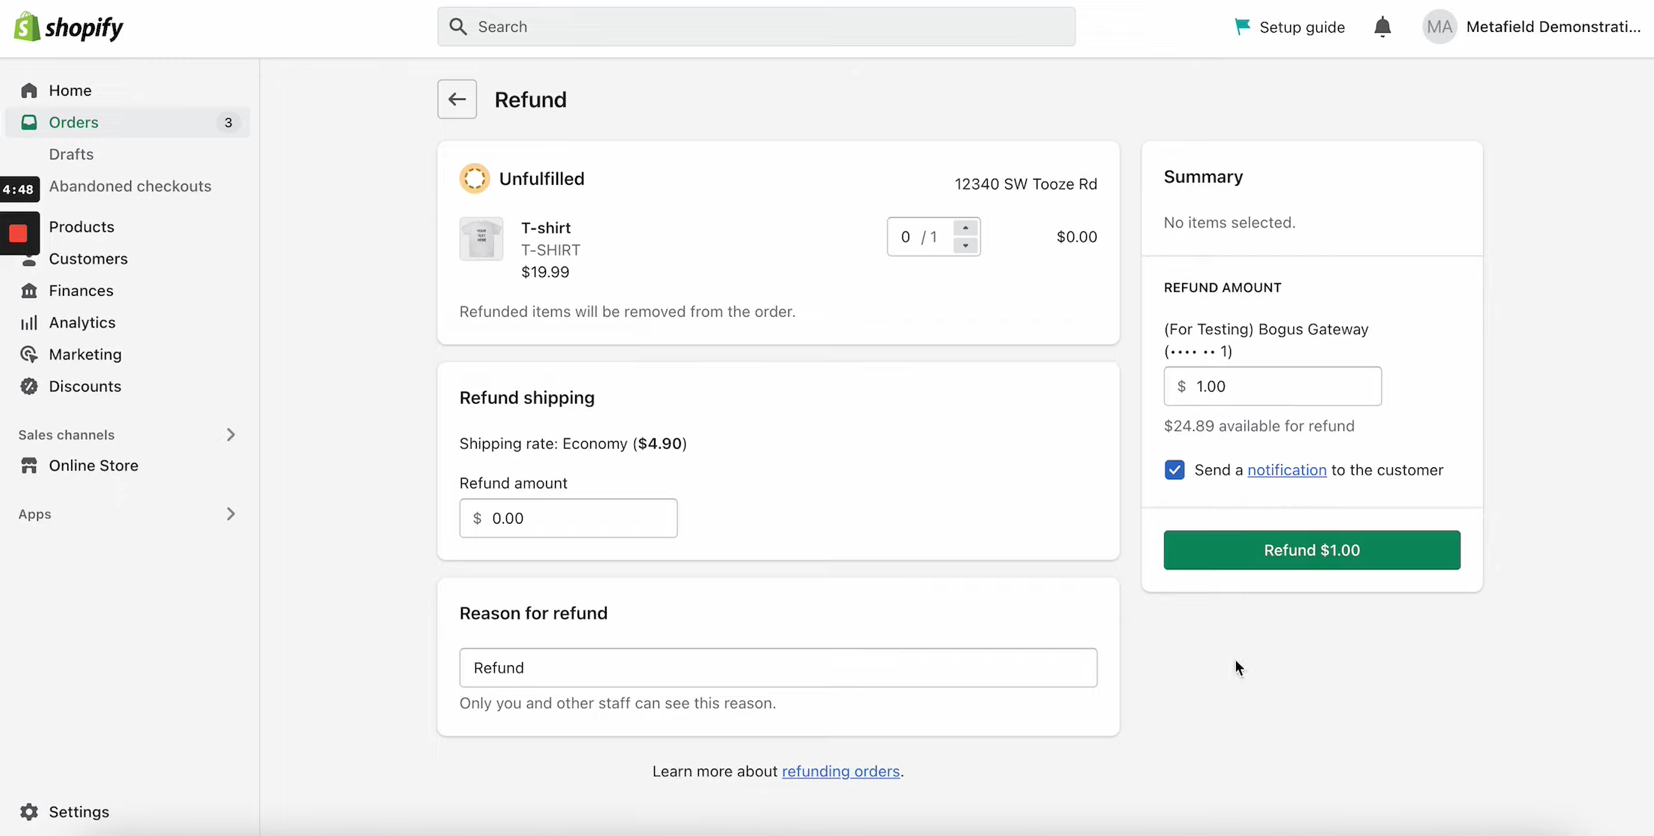
- After that, click the "Refund *amount*" button to finalize the refund process.
- The refund process would be recorded in the Orders page as well. The customers will be informed that their product would be refunded, if they received a wrong product or a damaged one.
Conclusion
You’re done! Always keep in mind that testing your Shopify store is necessary before launching it to the public to make sure that the functions of every button works properly and avoid customer dissatisfaction.
-
You need to have a Shopify store to do this task, and make sure that you have customized it already according to your preferences in the layout and color theme of every page.
-
The Bogus Gateway provider must be activated first before testing so your store can know that you are only testing it and it is not a real order.
-
To activate the Bogus Gateway while checking out the sample product, you can place 1 in the credit card number to simulate an approved transaction, 2 to simulate a declined transaction, and 3 to simulate a gateway failure**.**
-
In testing your store, you must try to think as a customer and see which aspects of your website are hard to navigate to. If you have taken note of these things, then you can make adjustments to make it user-friendly.
-
The outcome of testing your Shopify store allows you to learn about the problems and make solutions immediately so as to not affect your customers’ experience.