Setting Up Email Automation in Shopify using Klavio
To guide you in the step by step process of setting up the email automation for your Shopify store using the Klaviyo app.
Prefer a shortcut? 16 free tools do parts of this for you.
Aim: To guide you in the step by step process of setting up the email automation for your Shopify store using the Klaviyo app.
Optimal Outcome: To assist you in sending multiple emails to customers by using Klaviyo, which will also help in increasing productivity in your business because it is utilized to target specific groups of customers, such as individuals who have abandoned cart and abandoned checkout.
What do you need to start: To follow this SOP, you need to have a Shopify store account and Shopify app store where you can download and install Klaviyo.
Why is this SOP Important: Email automation is necessary in businesses nowadays, especially those who have a huge amount of customers. It is customer-centered, so it also has an objective to generate leads for your business. This repetitive emailing is beneficial to your business not only in terms of productivity, but also in improving brand recognition and establishing a great customer service which will attract more sales and potential customers.
When and Where to execute: To execute this SOP, you must set up your email automation individually on every objective that needs you to reach your customers. Some of these objectives include the campaign recognition and lead generation.
Who Should Be Doing This: This should be done by the person in charge of handling the Shopify store account that has knowledge on marketing.
Klaviyo Email Automation
Email automation is often used in marketing because of the efficiency that the process has, while maintaining to achieve the objectives of your business. It is the continuous sending of messages to the specified customer groups that encourages them to view your website to increase your website traffic and even offer discounts that are shown on email newsletters to improve the sales of a certain item that you want to remove from your store. Klaviyo can be used to schedule and activate emails that you want to send.
Execution
Resources/Tools & Set up
-
Shopify account
-
Shopify app store
Installing Klaviyo in Shopify
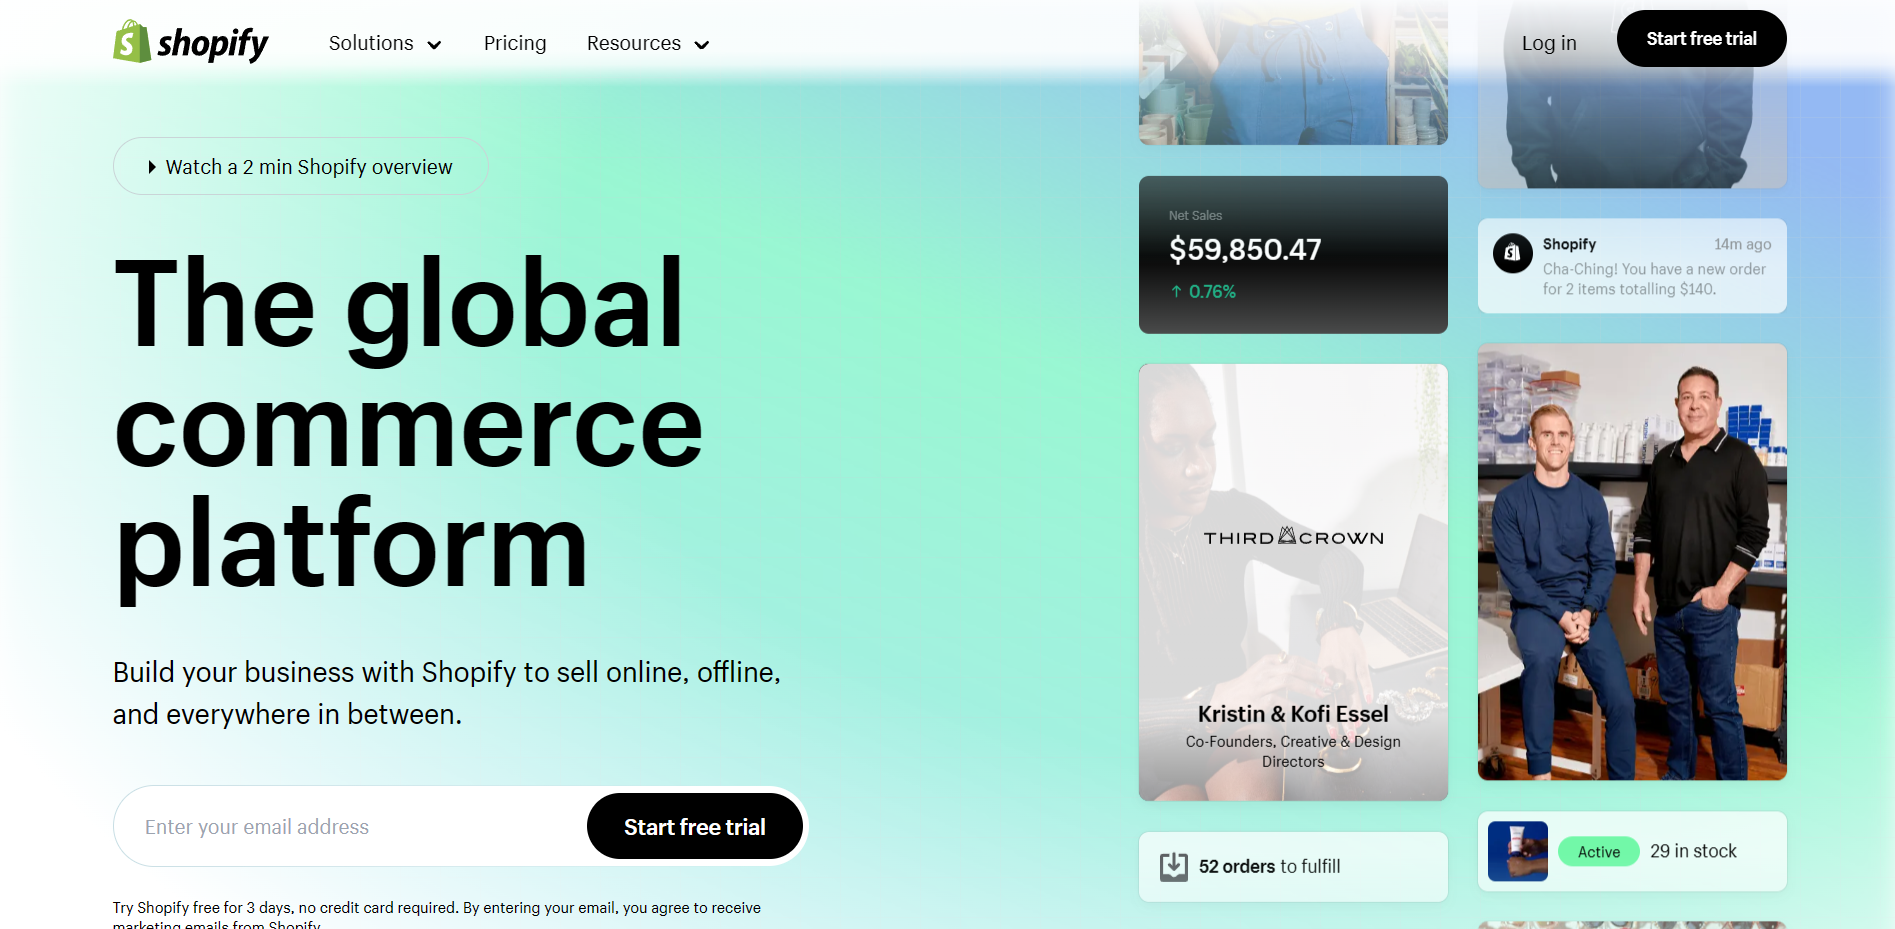
- Sign in to your Shopify store account by clicking “Log in” and entering your account details.
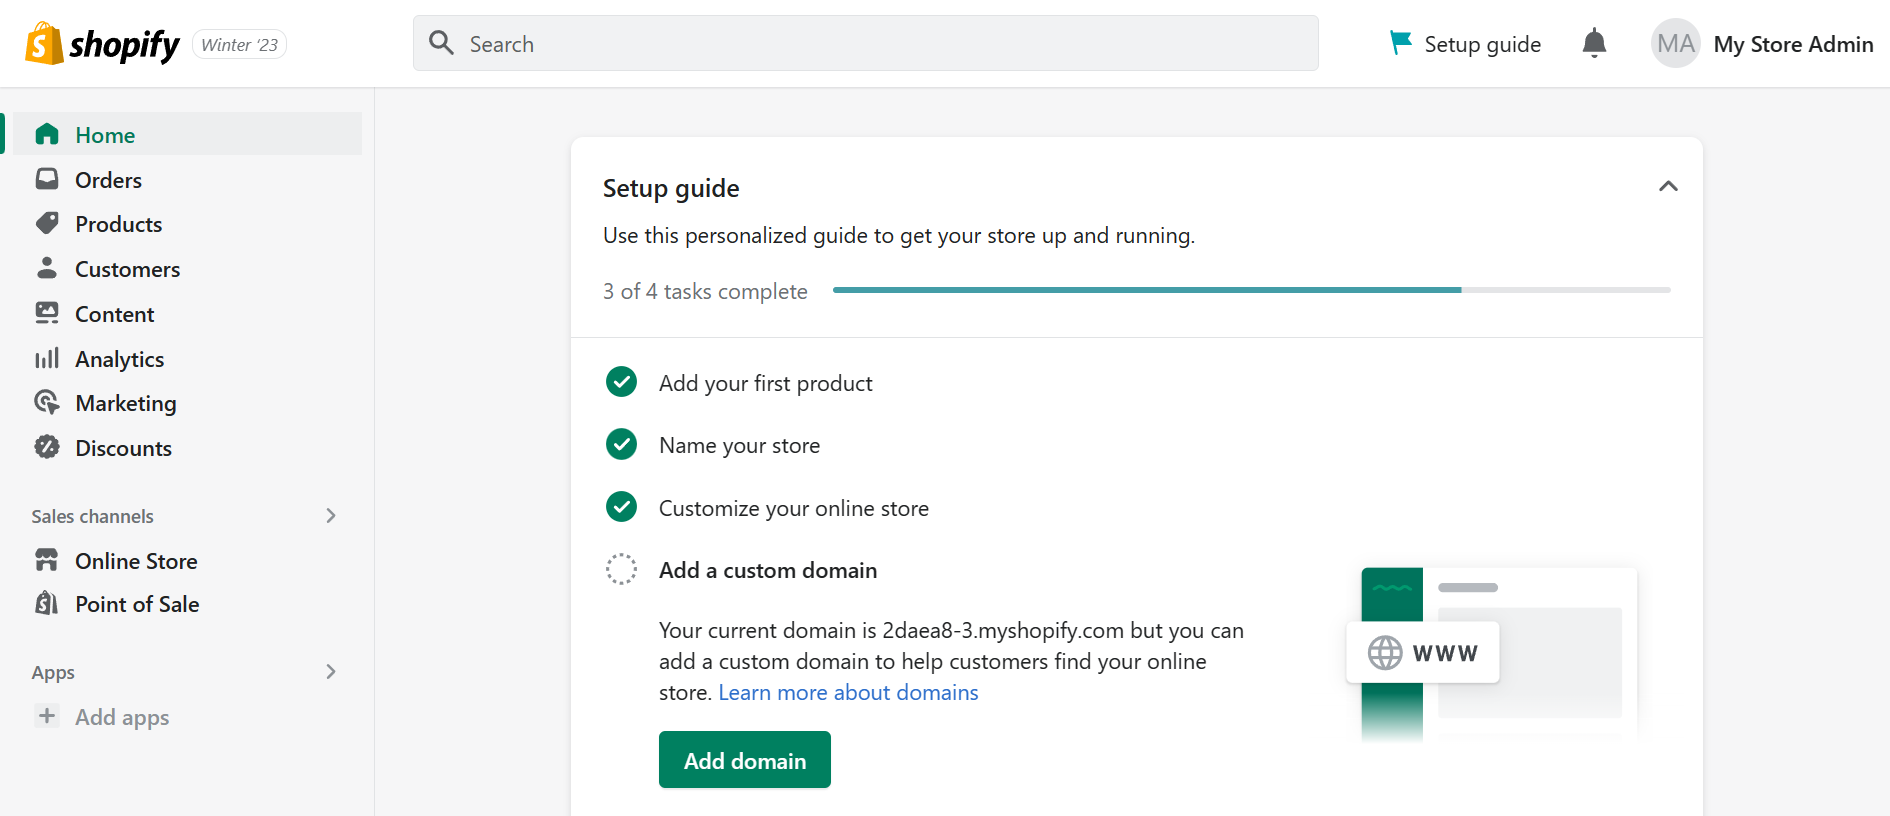
- Once you are redirected to the Shopify homepage, you will see a dashboard on the left. Click “Apps”.
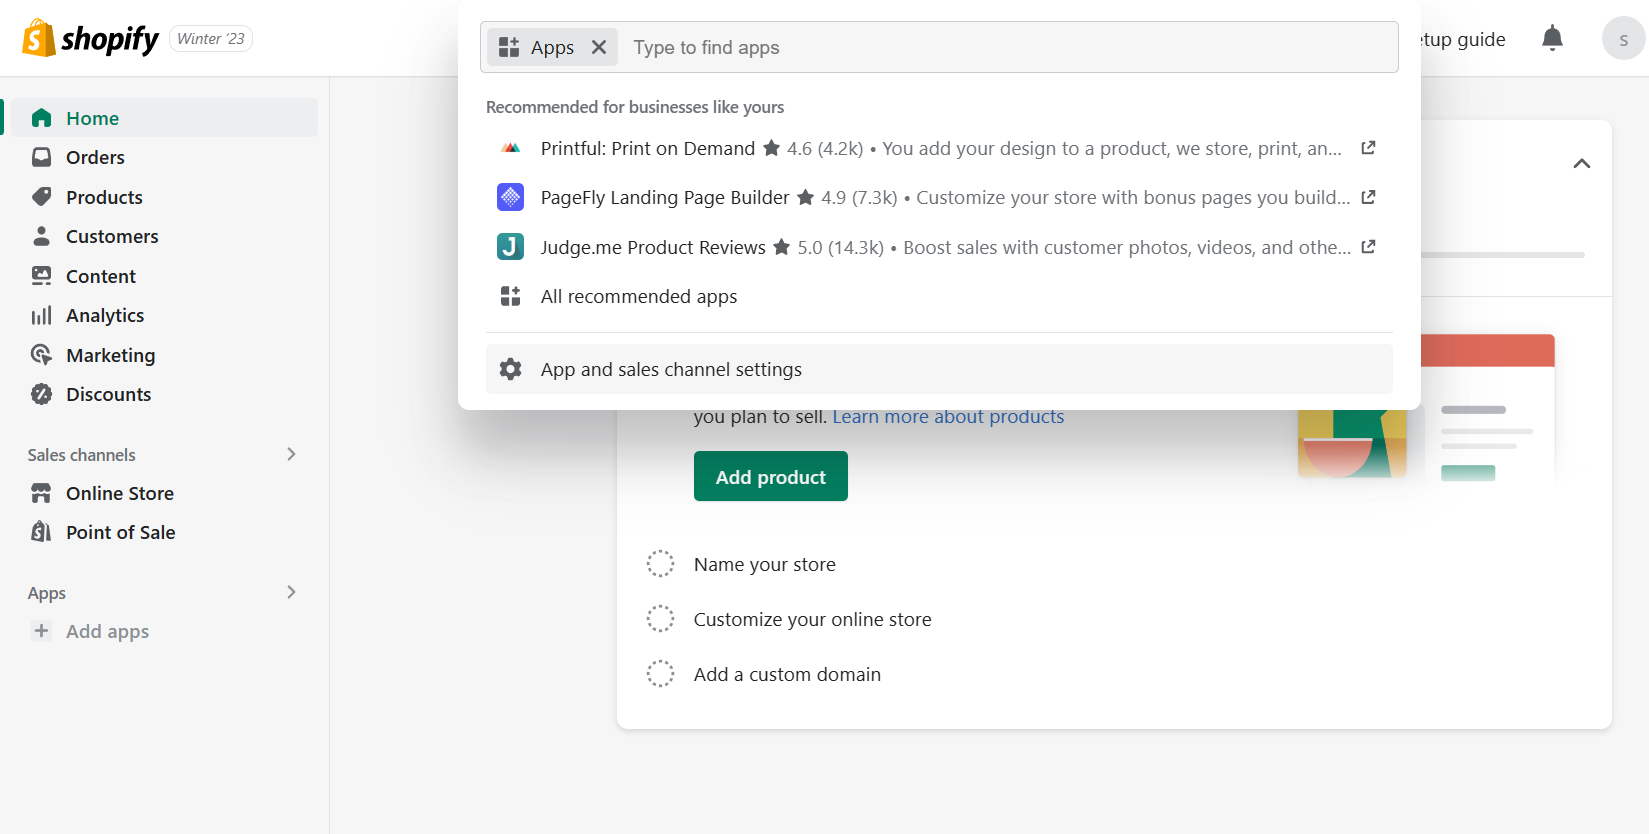
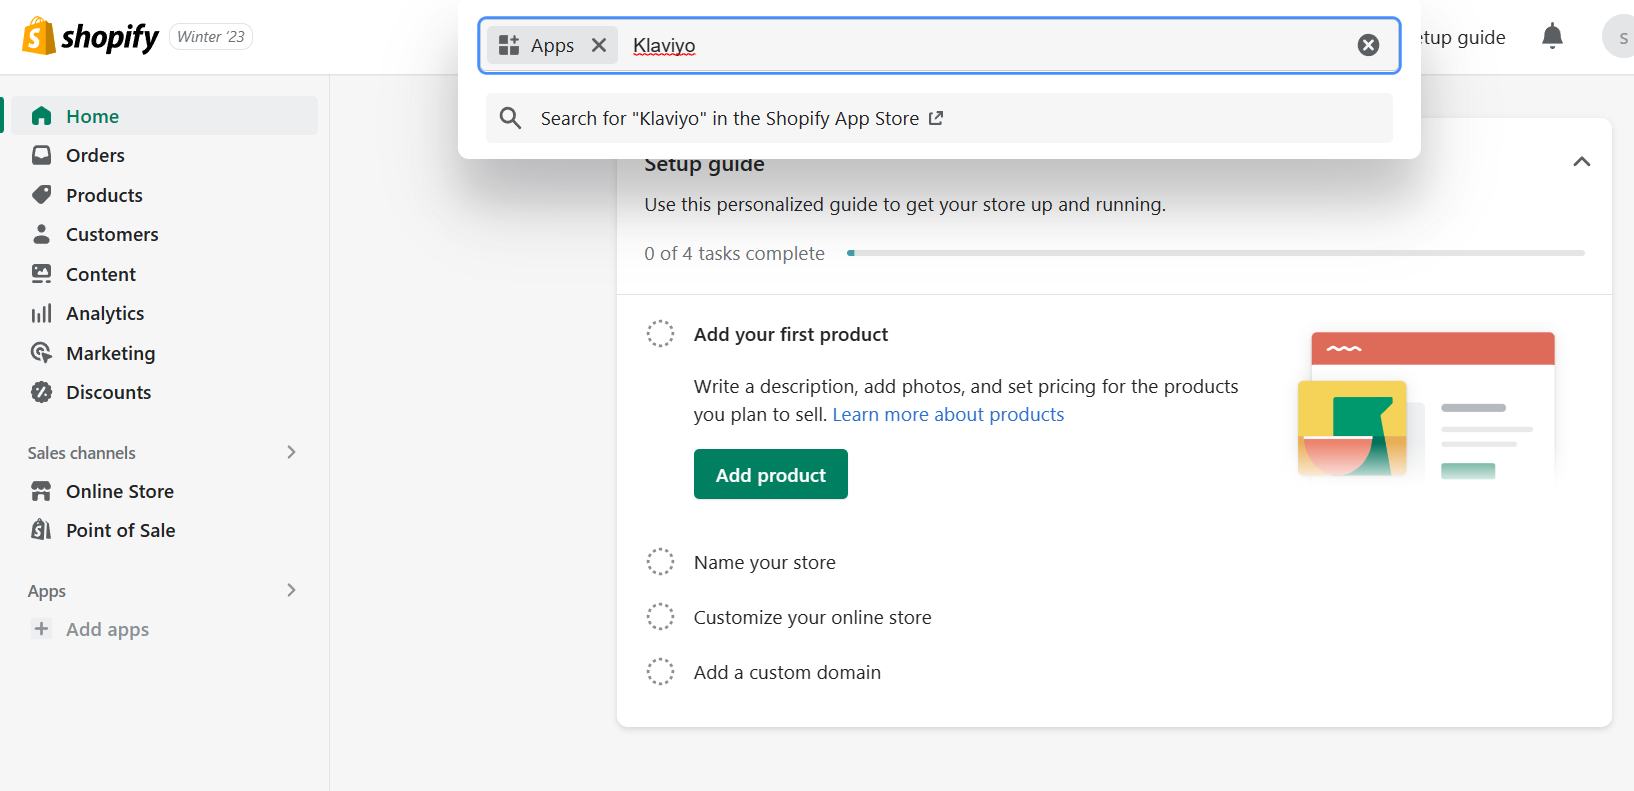
- After clicking Apps, a search bar will appear on the top of the site. This is where you will type “Klaviyo” to install the application.
- After typing Klaviyo, a search suggestion will appear below the search bar. Click the “Search for “Klaviyo” in the Shopify App Store”.
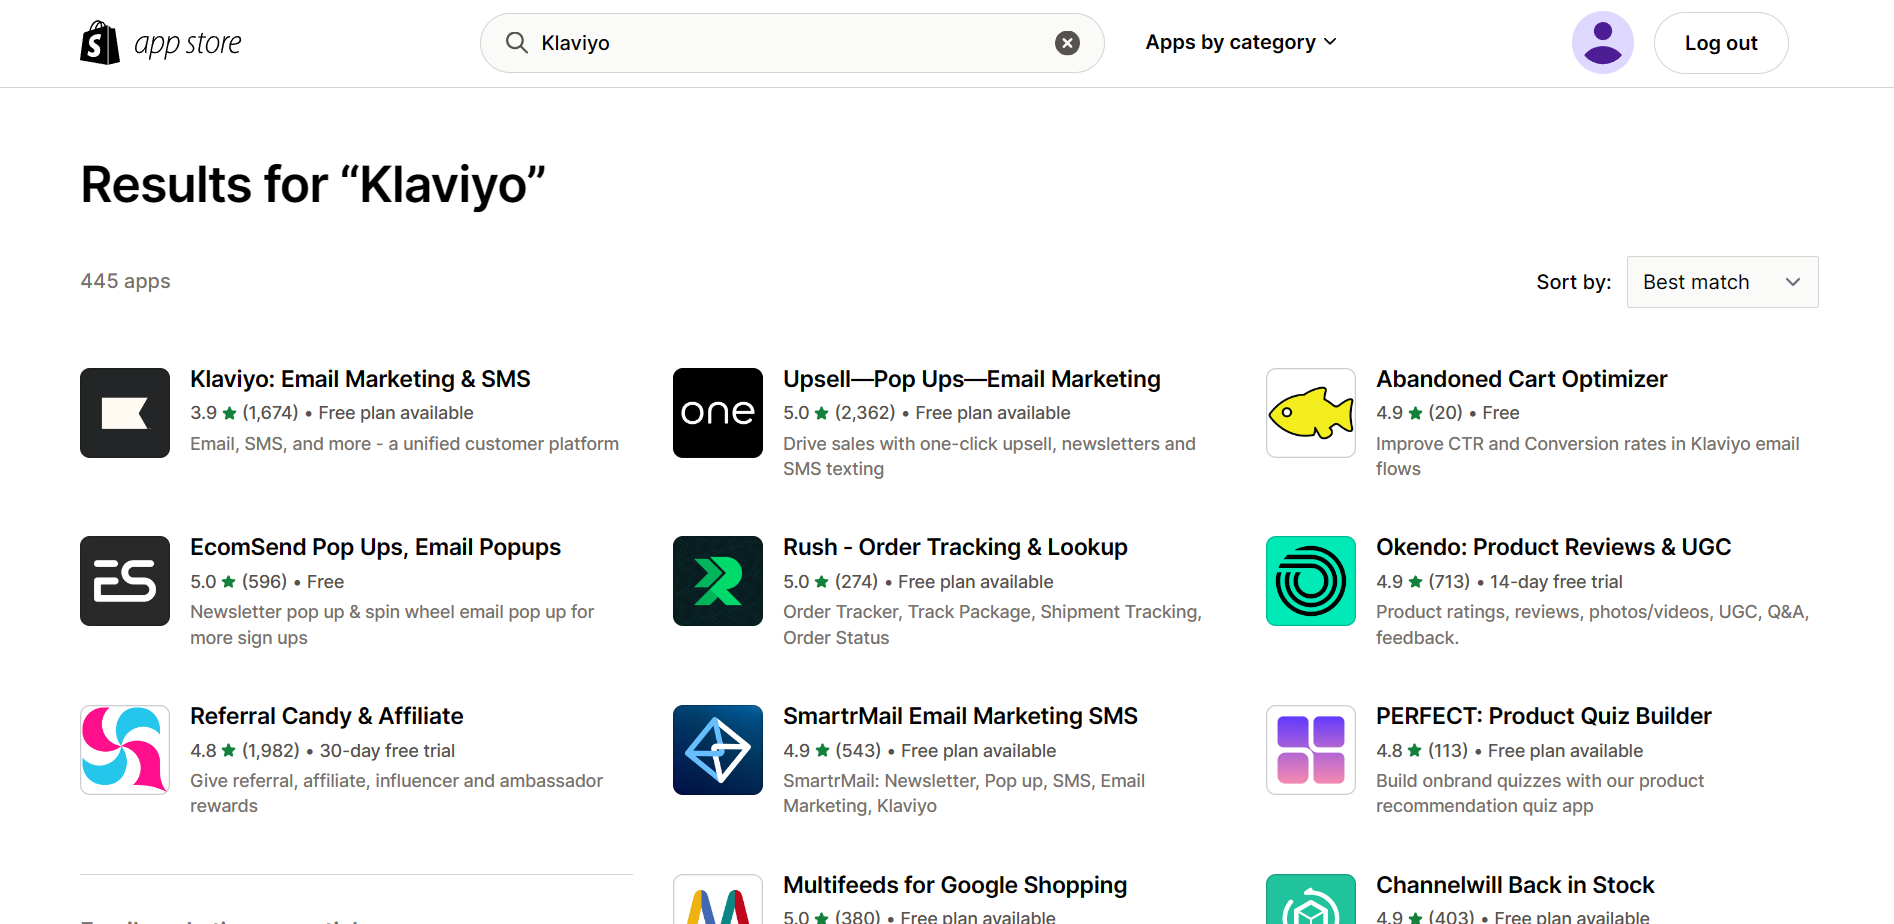
- After clicking the search suggestion, you will be redirected to the Shopify App Store tab which will show you results on your search. Click the first result that you will see, which is the “Klaviyo: Email Marketing & SMS”.
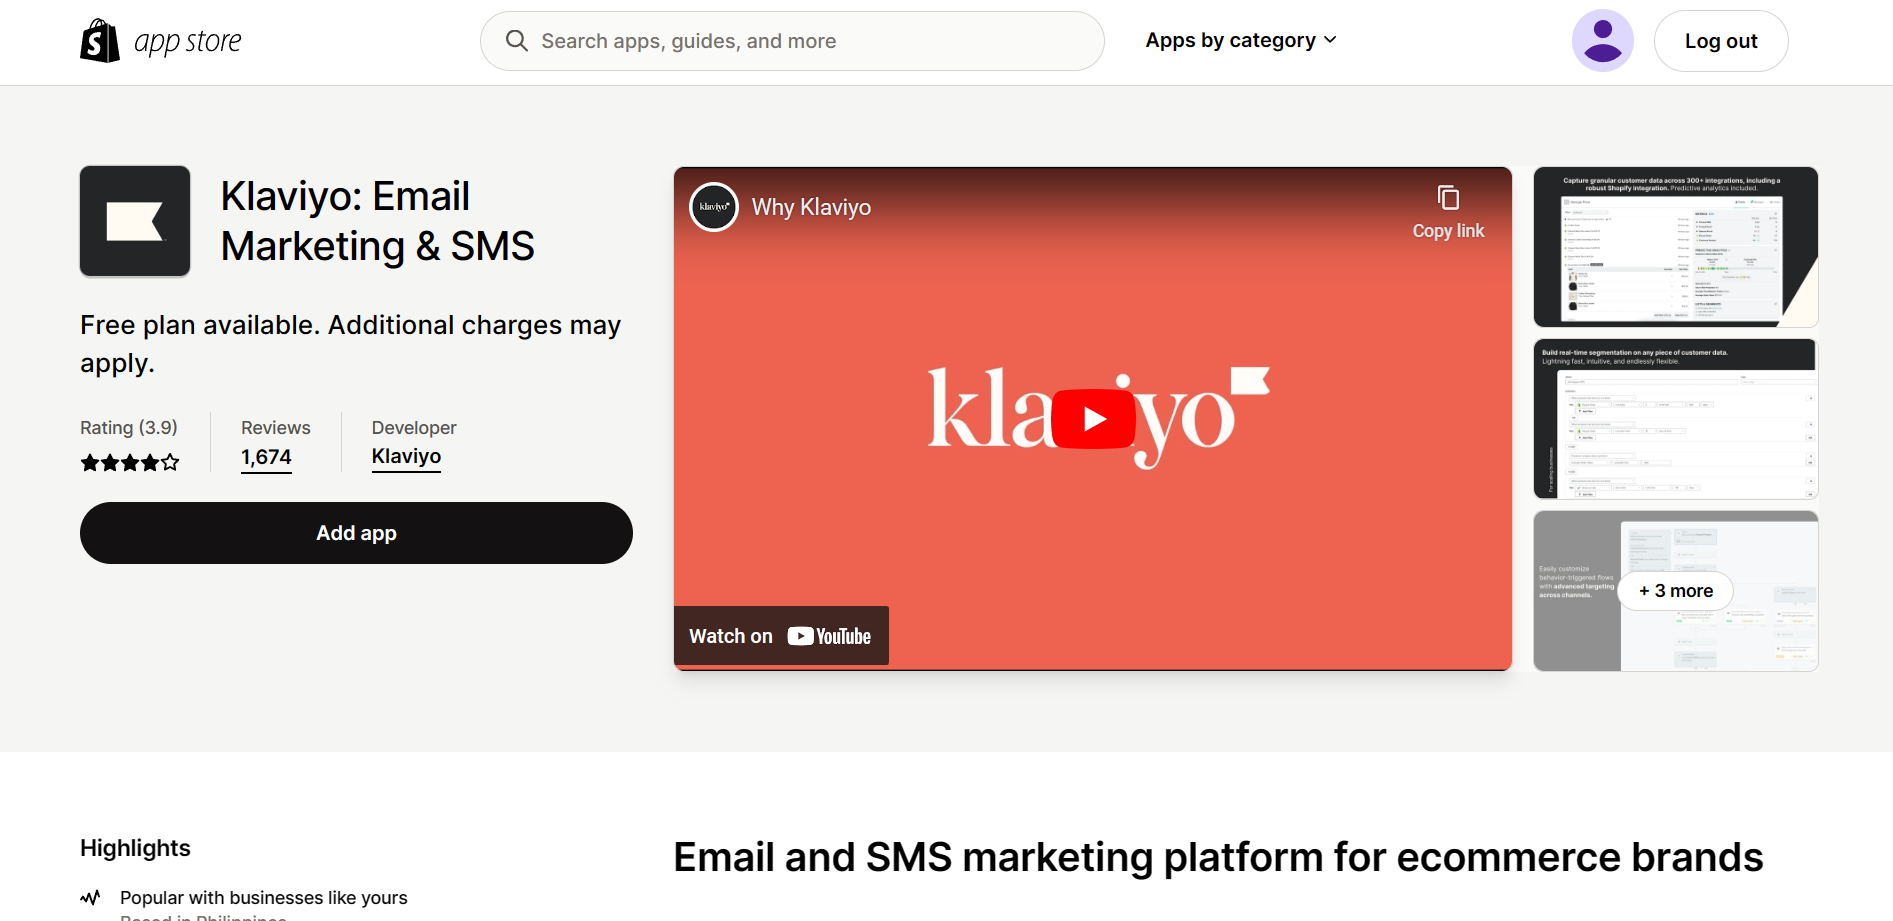
- As you can see, Klaviyo is an email and SMS marketing platform that can be utilized especially in your Shopify store. This marketing tool also has an available free plan, but other functions of the app may have additional charges. To add the app in your Shopify store, click the “Add app”.
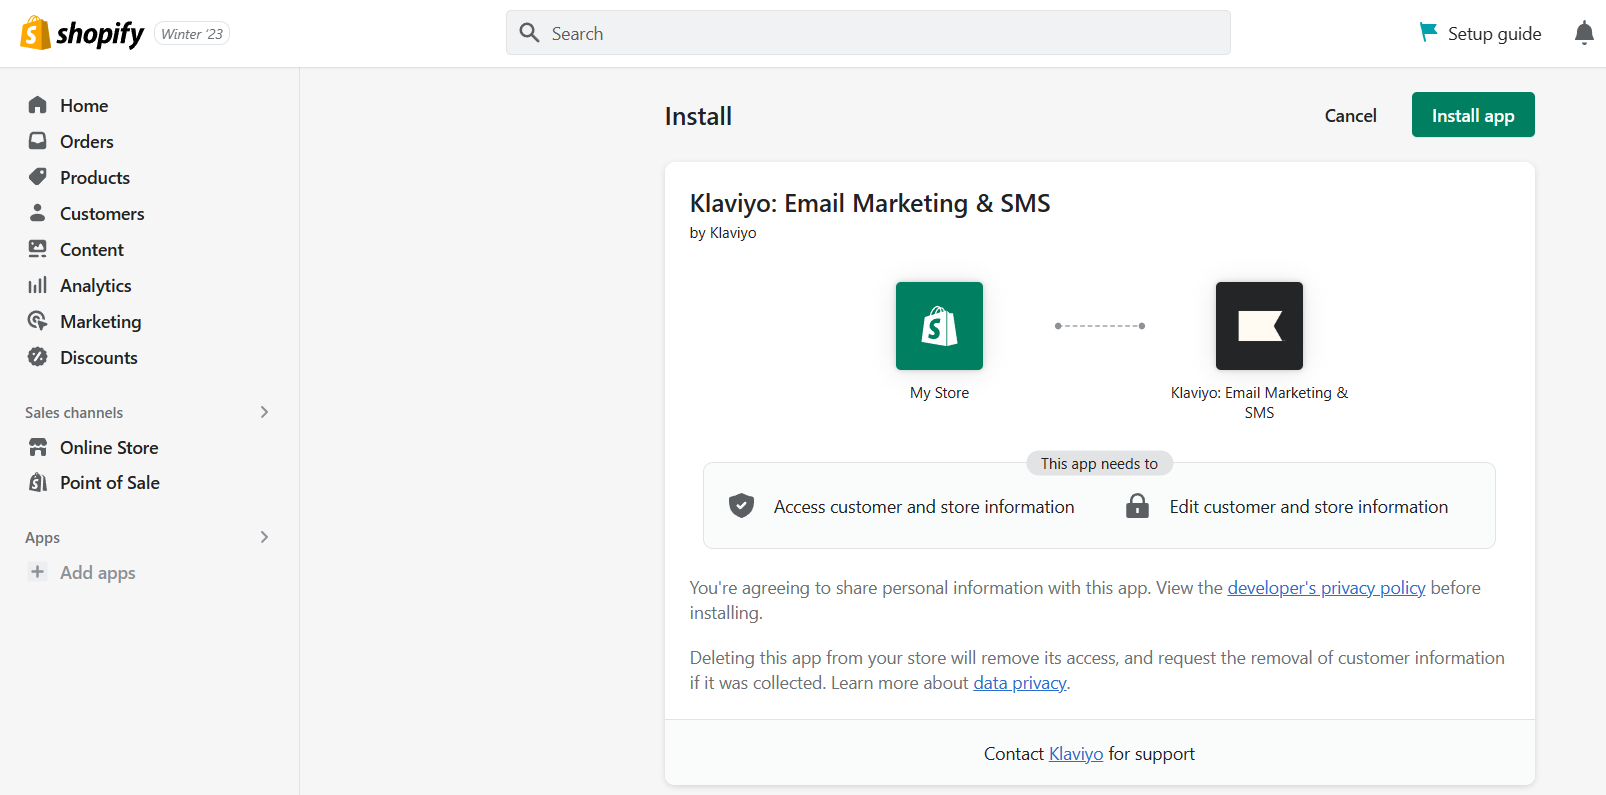
- You will then be redirected to the Shopify website to confirm the installation of the app. NOTE: Installing Klaviyo can give them access to customer and store information and edit customer and store information. If you are okay with this, click “Install app” to continue to process.
Creating Klaviyo Account
- After installing the app, you will be redirected to another tab where you have to create a Klaviyo account for your business. To continue with Integration, you must fill out the email address that you used on your Shopify store and the Phone Number that is connected to your business. Lastly, Create a Password that would protect your Klaviyo account.
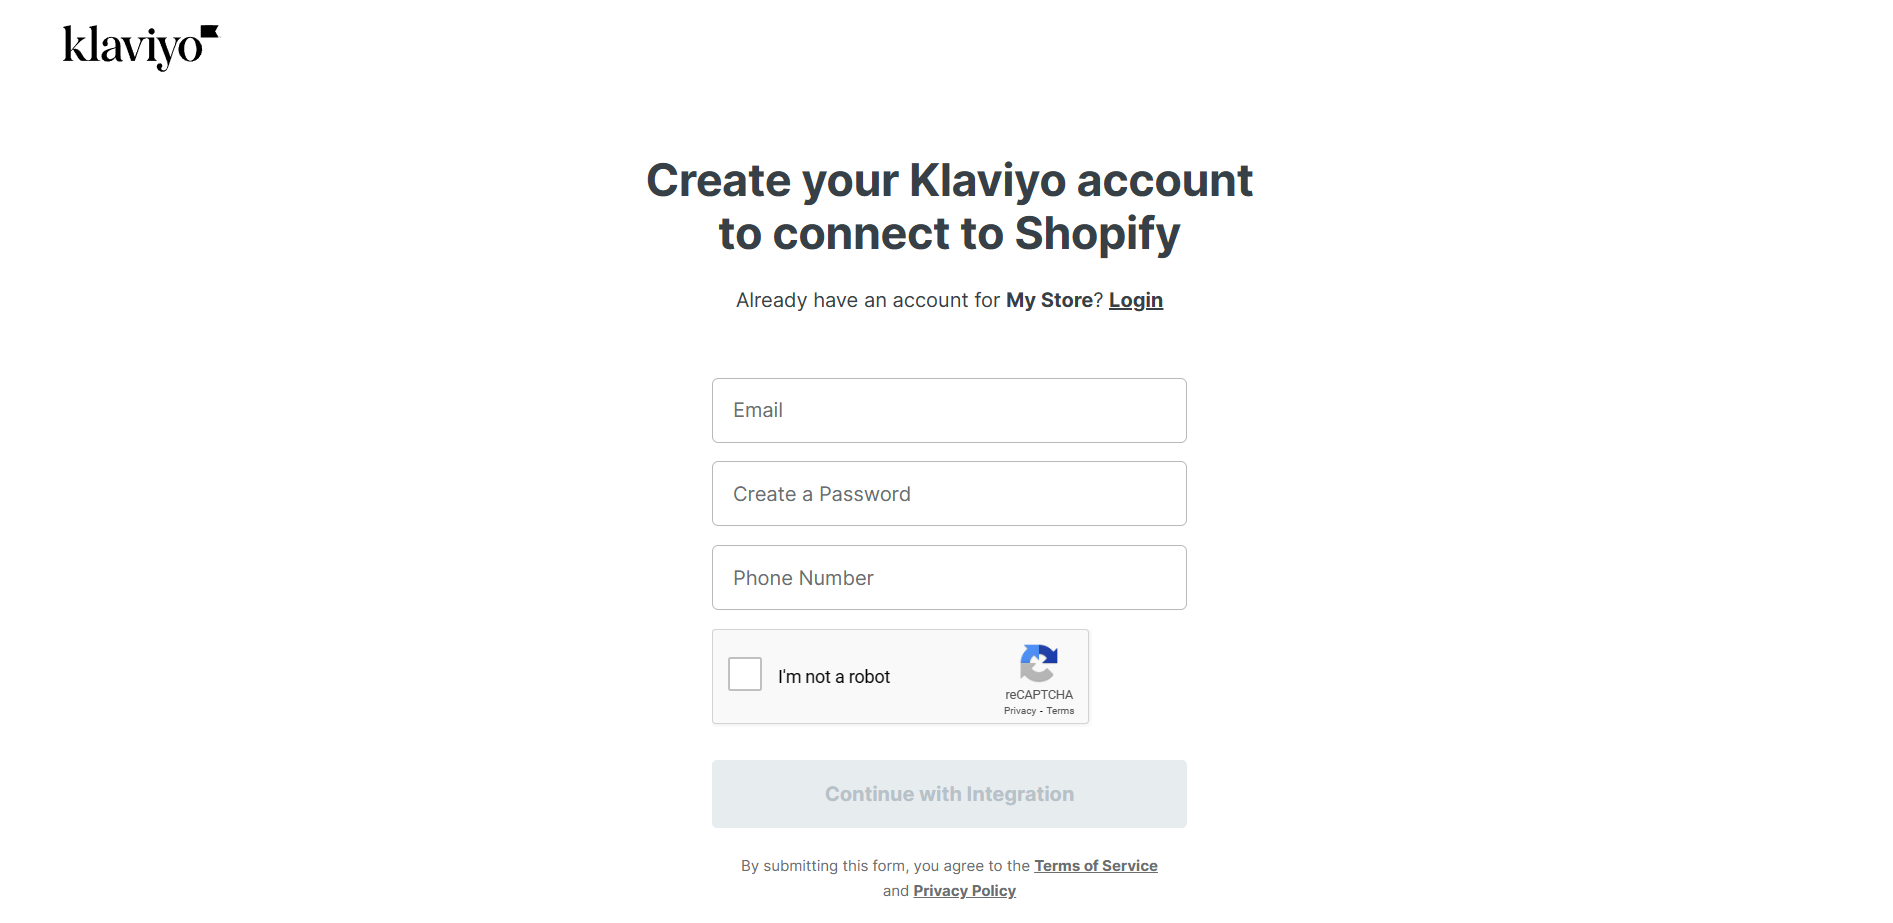
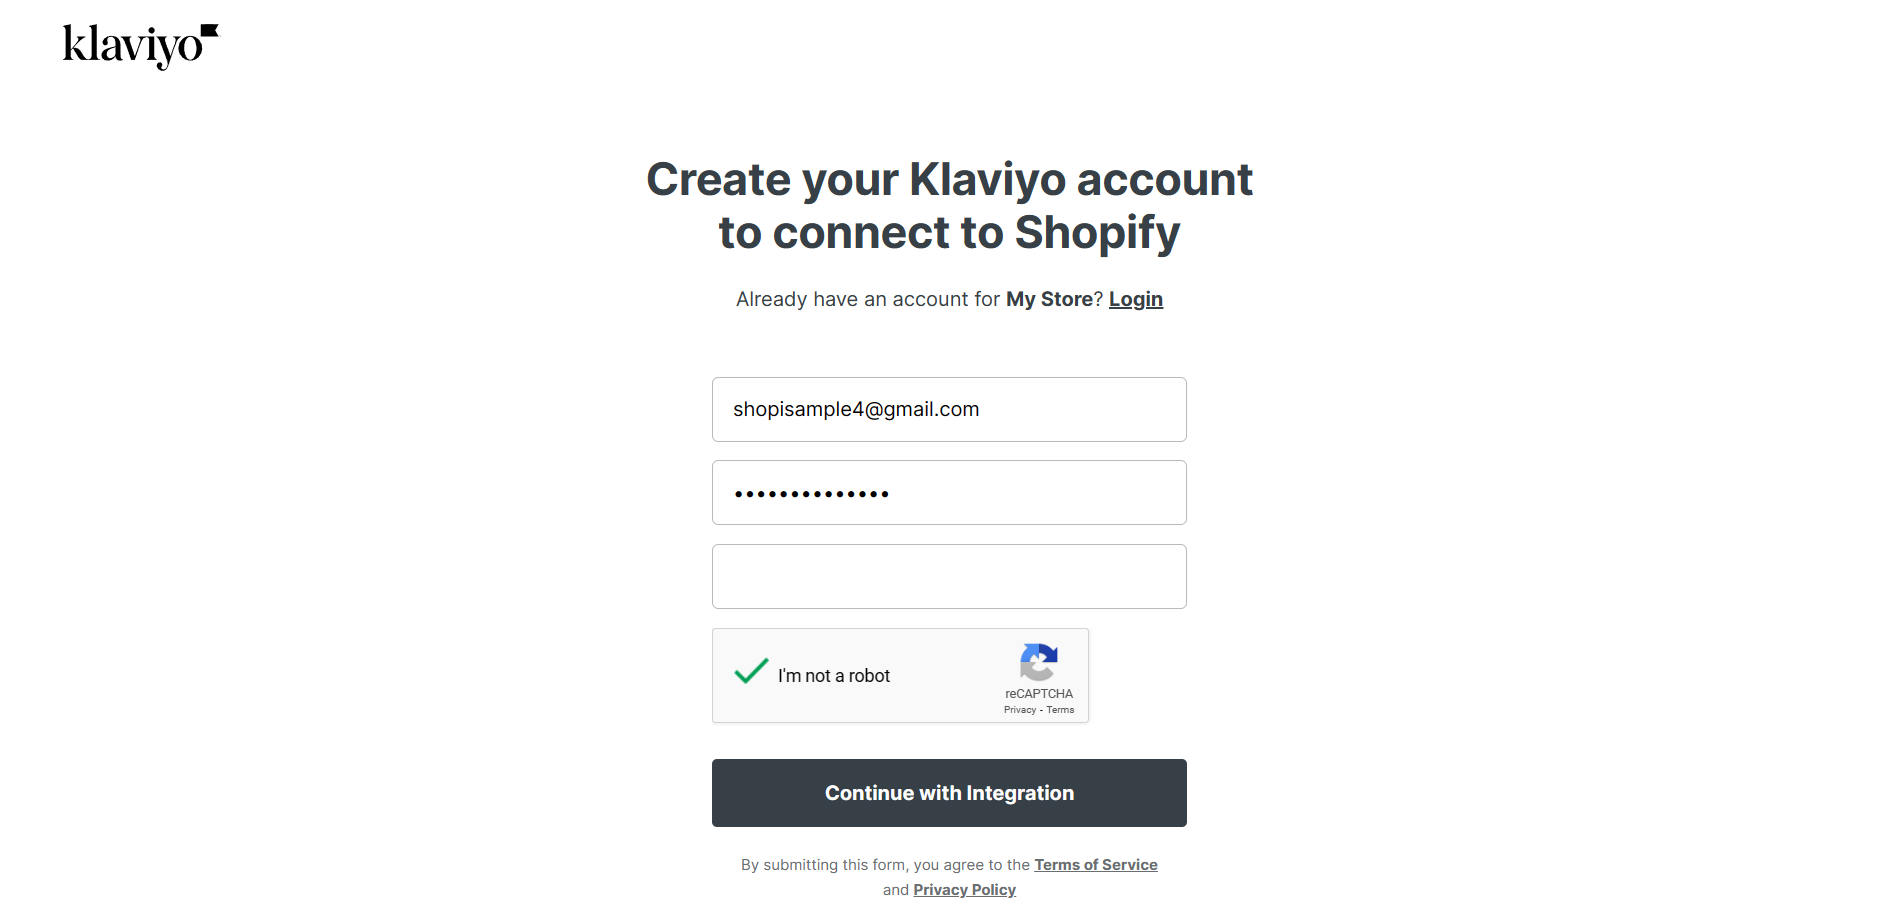
- After filling out the required fields, check the “I’m not a robot” checkbox to be able to click the “Continue with Integration”.
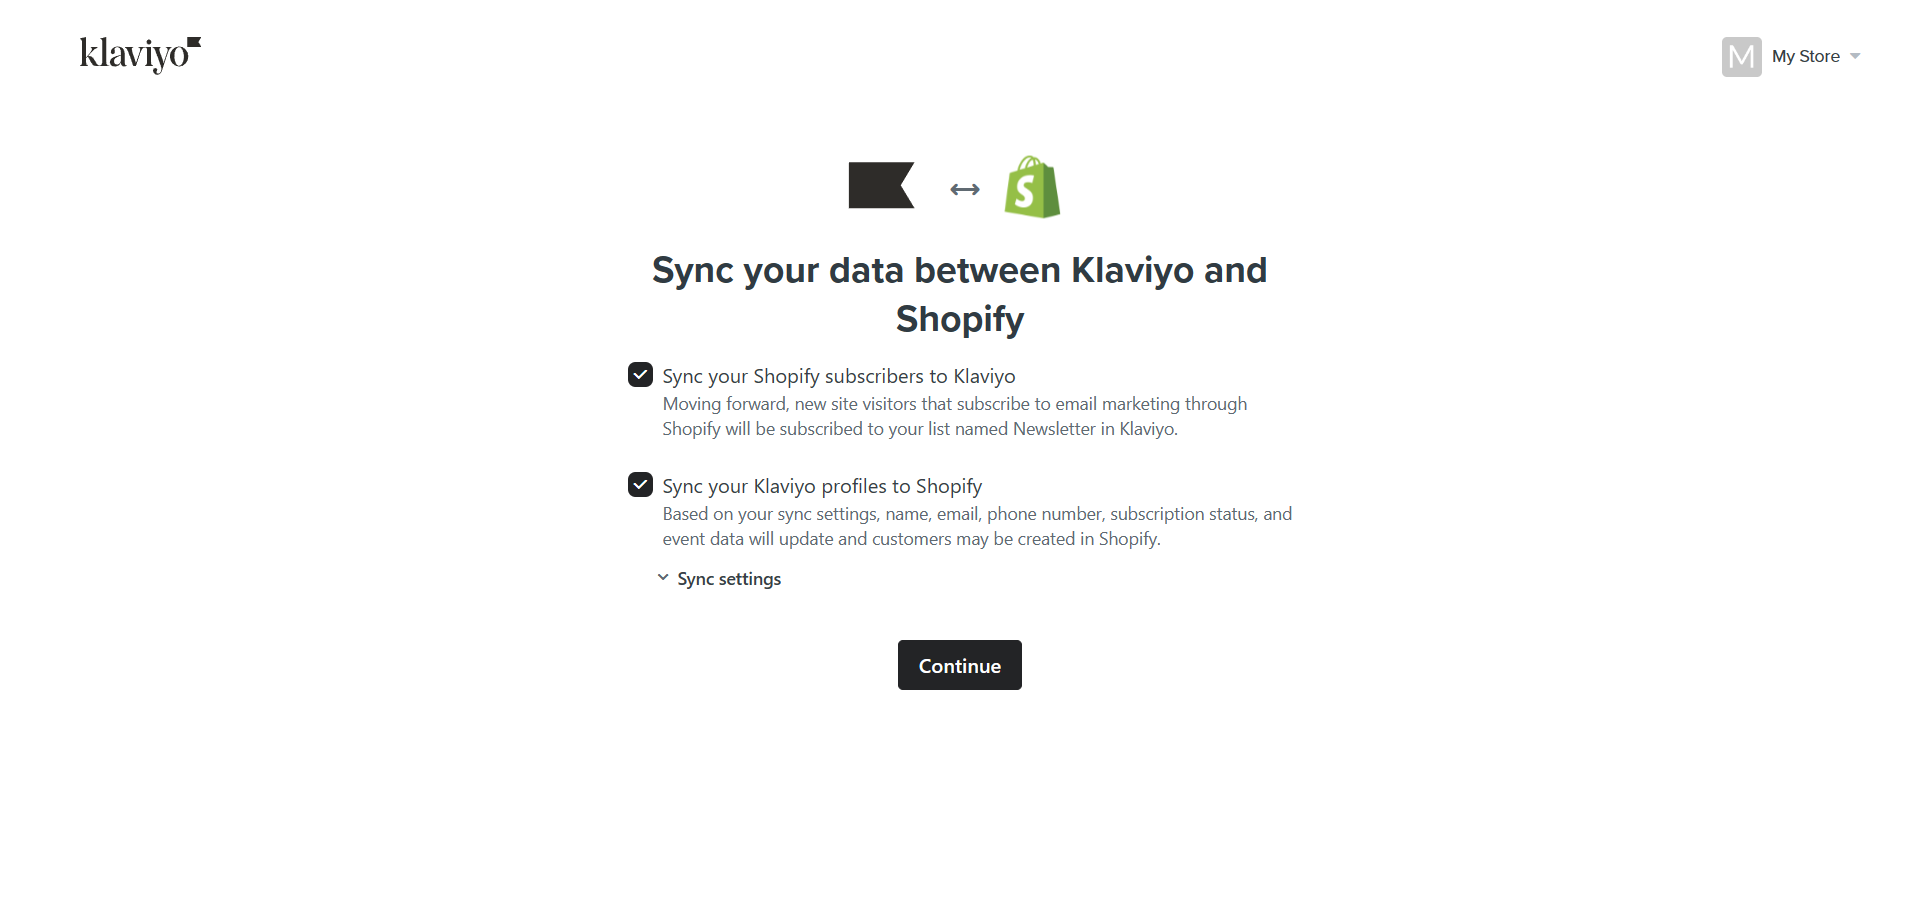
- After this, you will be asked to sync your data between Klaviyo and Shopify. This includes syncing Shopify subscribers to Klaviyo and Klaviyo profiles to Shopify. To allow this, check the checkbox of the option that you want to approve, then click Continue.
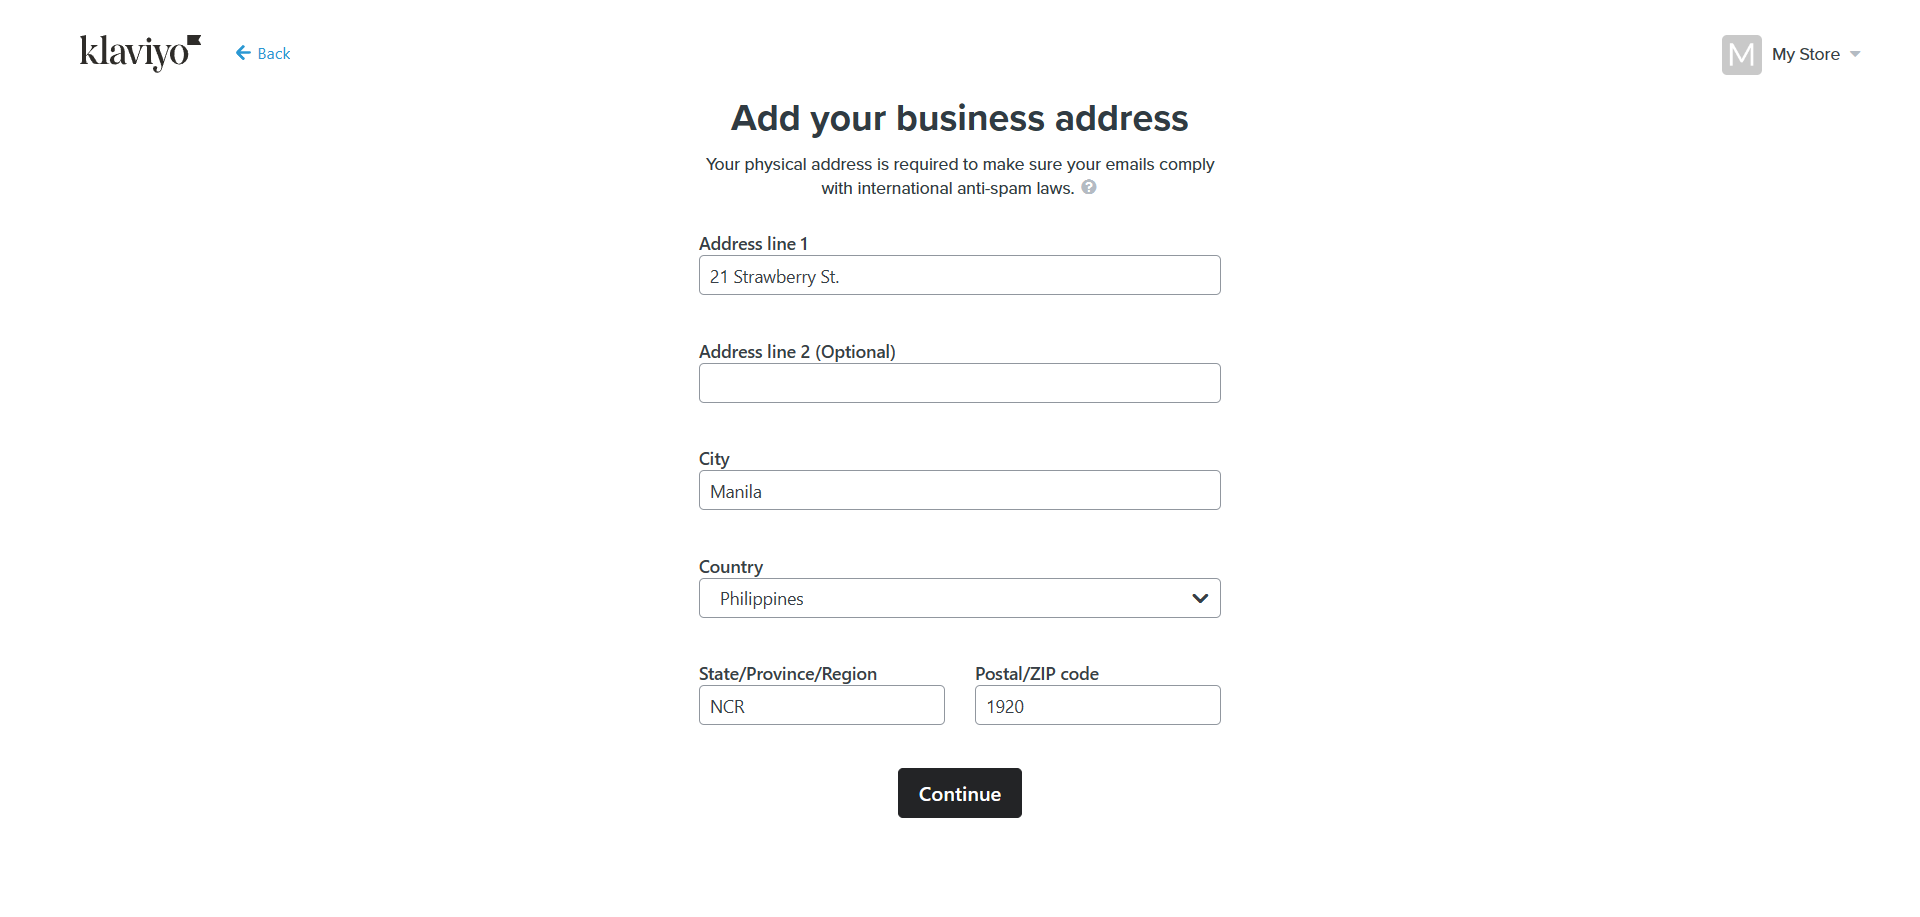
- After syncing your data, you will be asked to enter an Address line, City, State / Province / Region, and Postal / ZIP code where your business is addressed to comply with international anti-spam laws. Enter these details in the blank field as shown below.
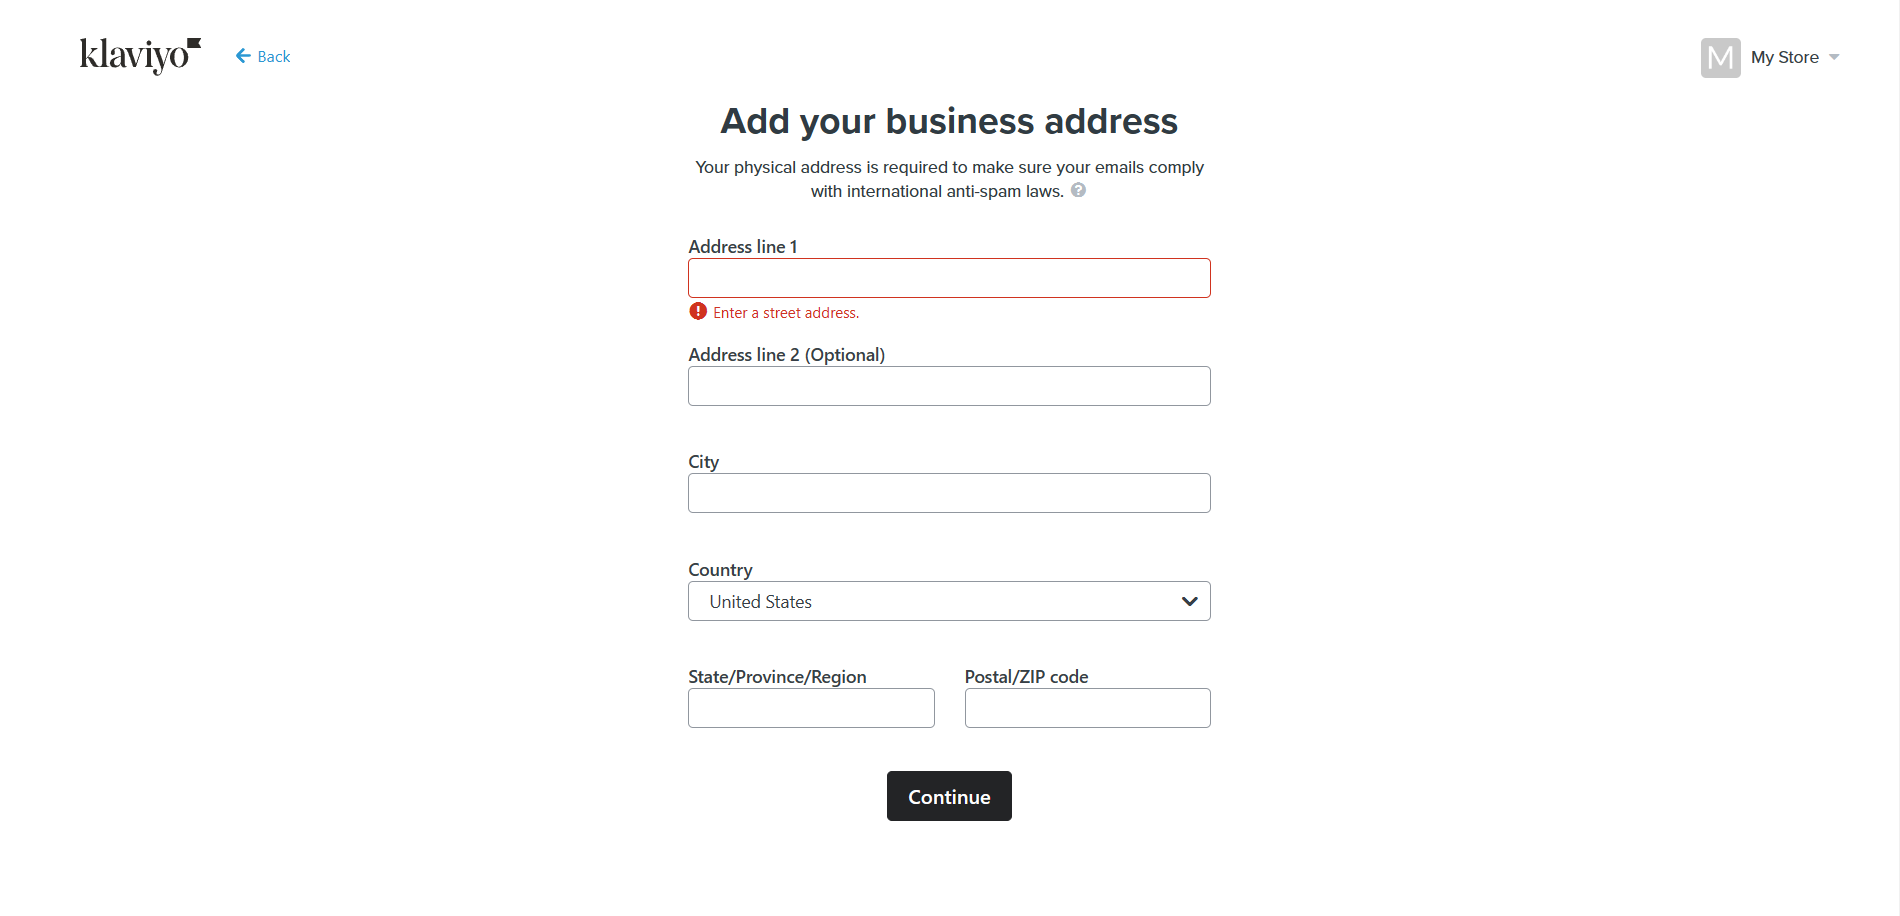
- After indicating your business address, click “Continue” to proceed with the process.
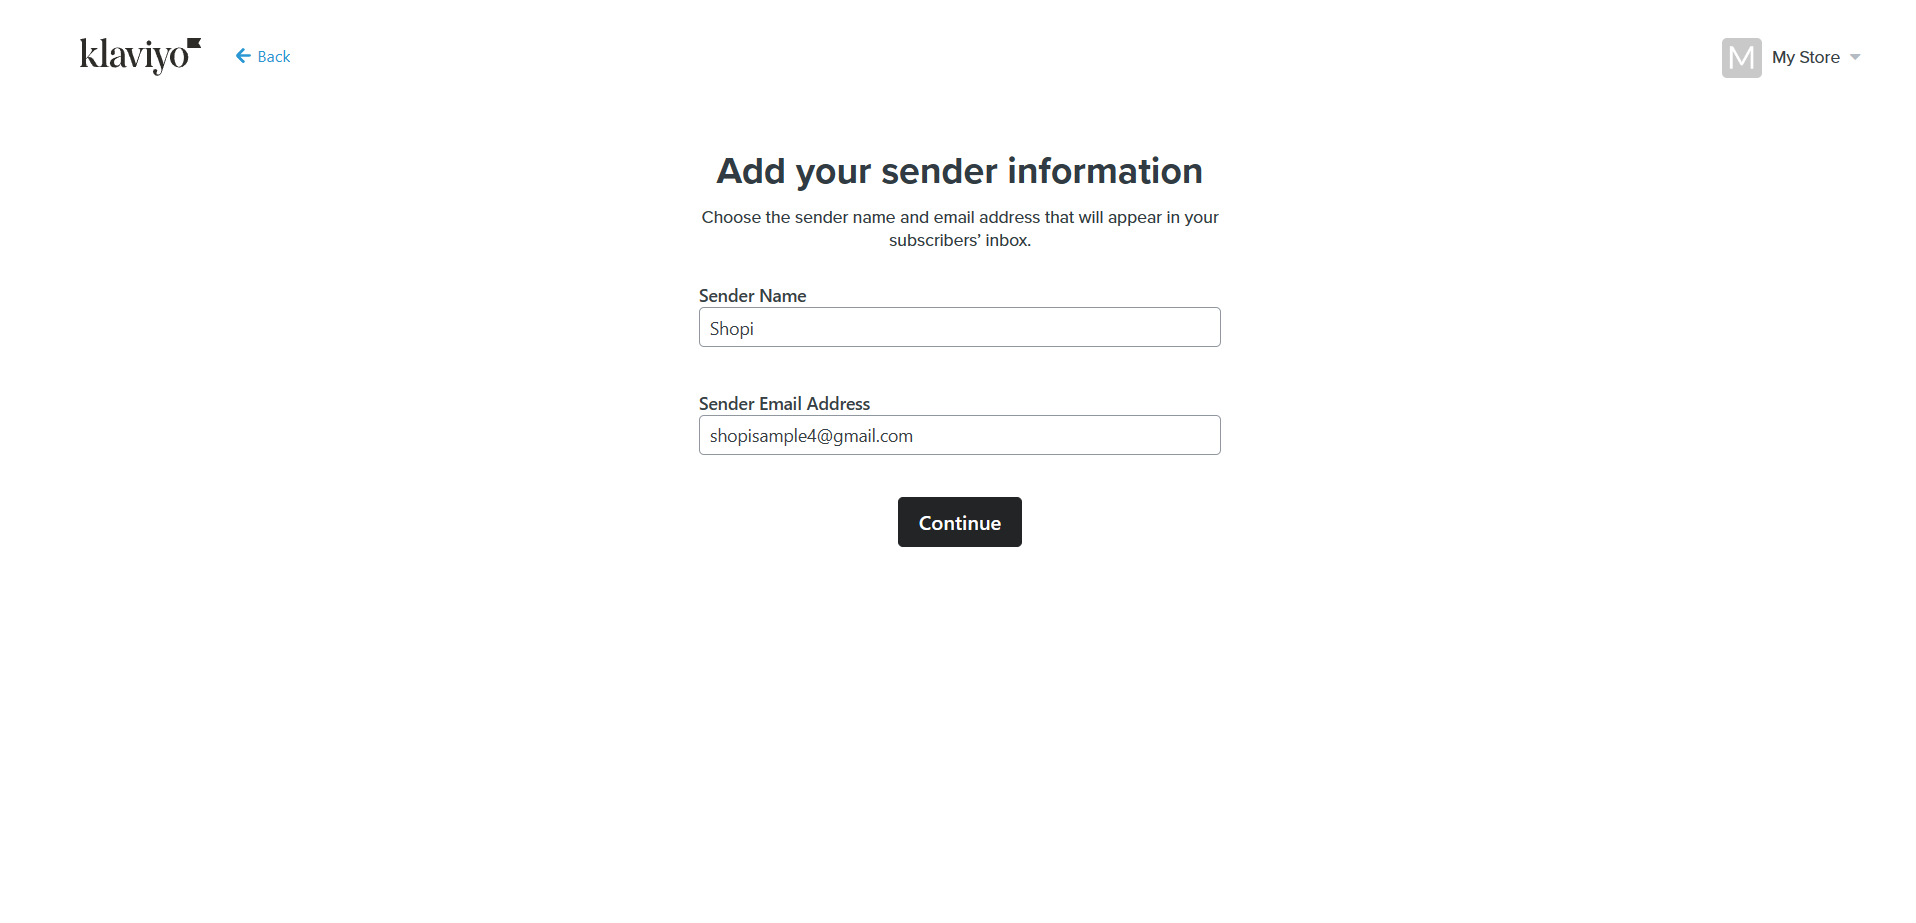
- Next step in creating your Klaviyo account is to Add your sender information. This is the name and email address that will appear in the email marketing format that you will send to your customers. Click the “Continue” button after entering the sender information.
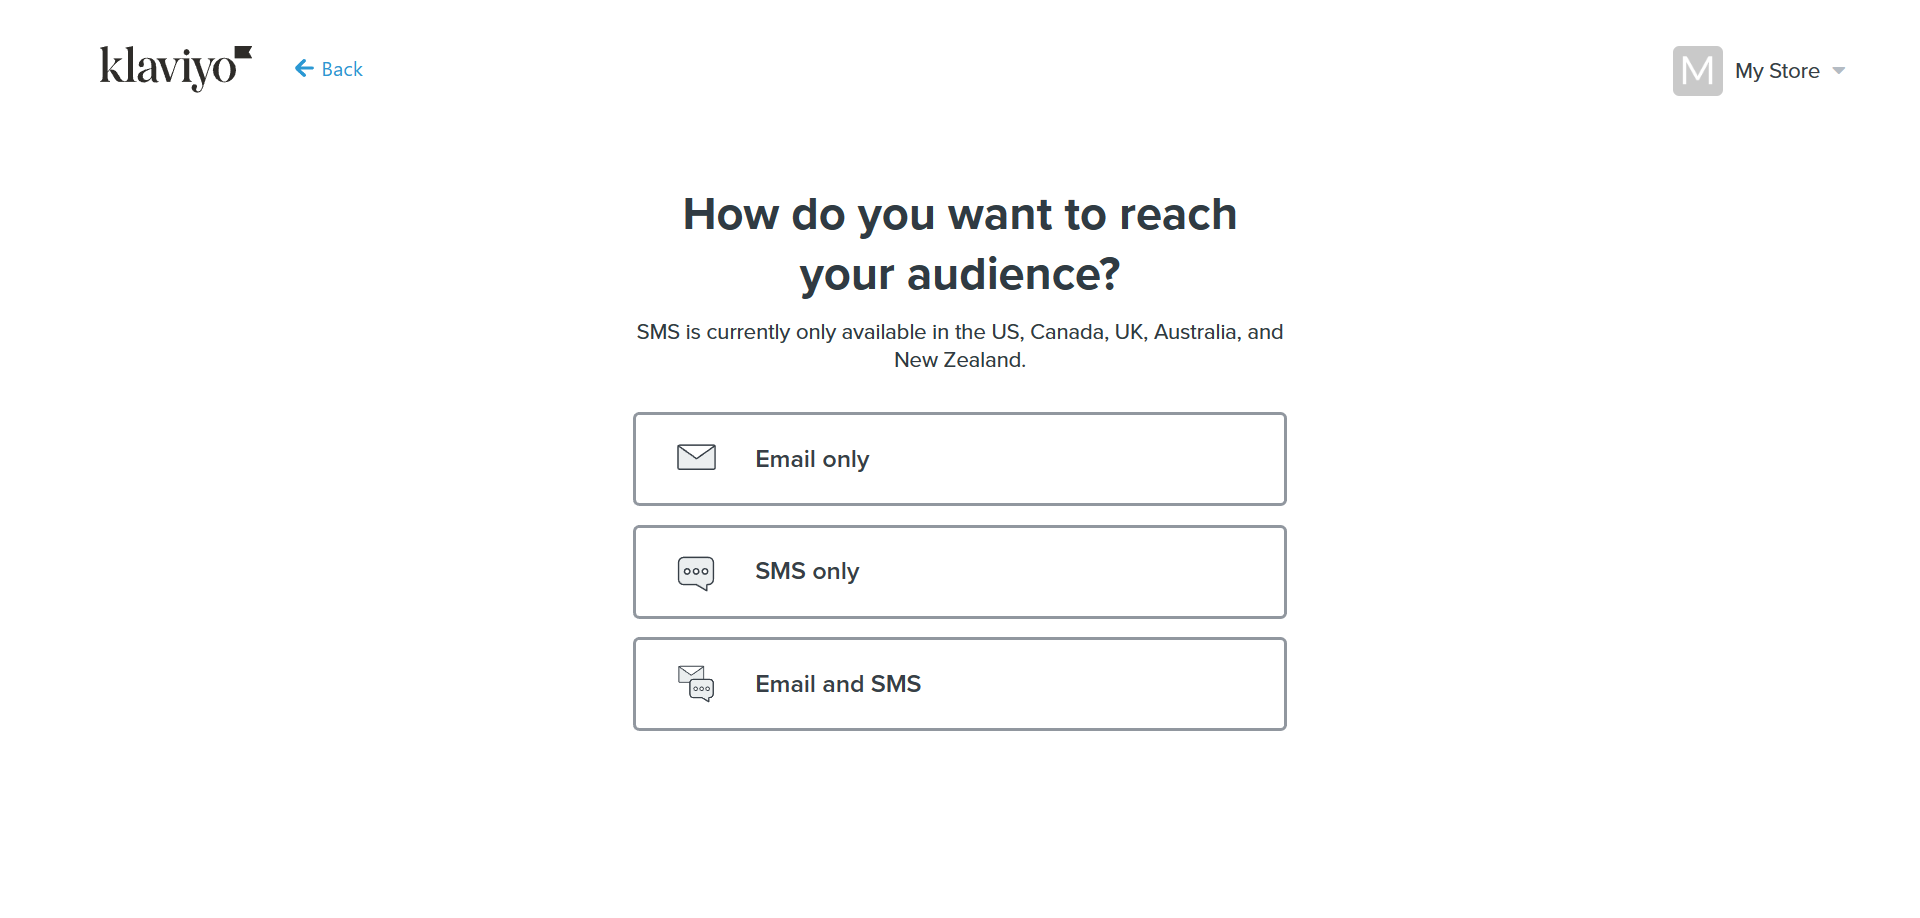
- After setting up your sender information, you will be asked about the methods that you want to utilize to reach your audience. You can use Email only, SMS only, or both Email and SMS marketing. However SMS is limited to US, Canada, UK, Australia, and New Zealand only, so be mindful of choosing especially if your business is not located in these countries. To set up email automation, click “Email only”.
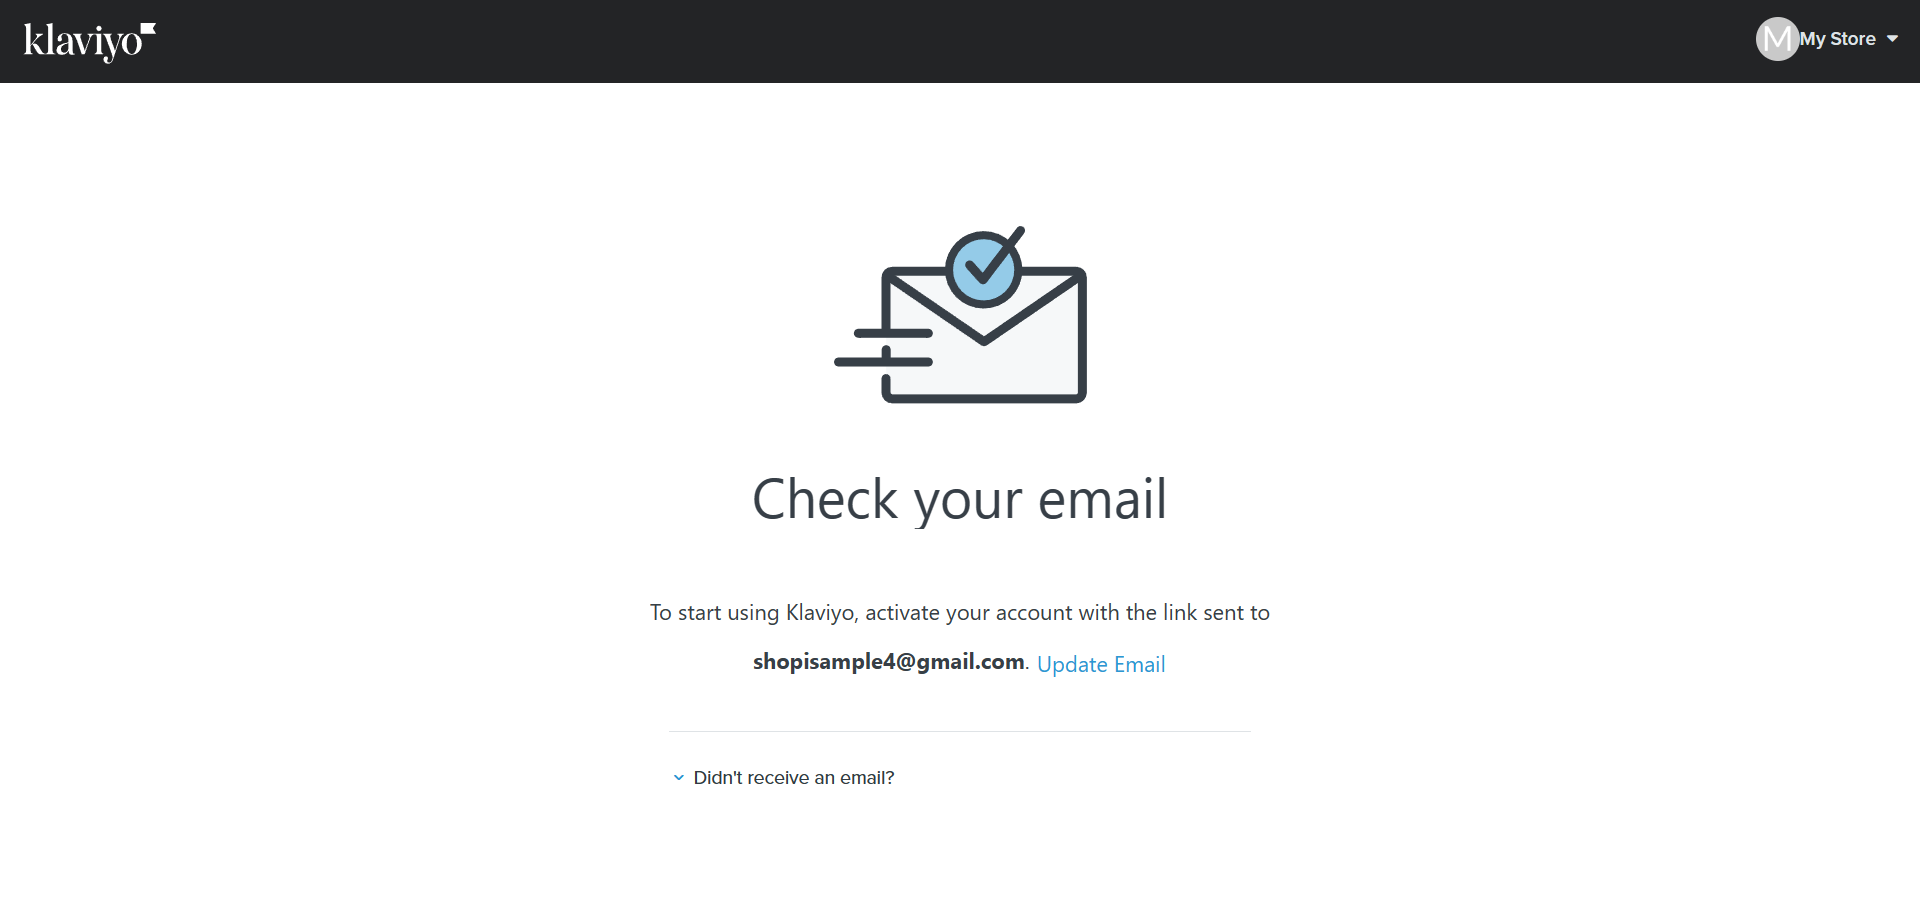
- After clicking your preferred method, you will be asked to check your email to confirm your account in Klaviyo.
- This is the official email that you will receive from Klaviyo to confirm your account. Click the “Confirm Email” to open your Klaviyo account and set it up according to your objectives.
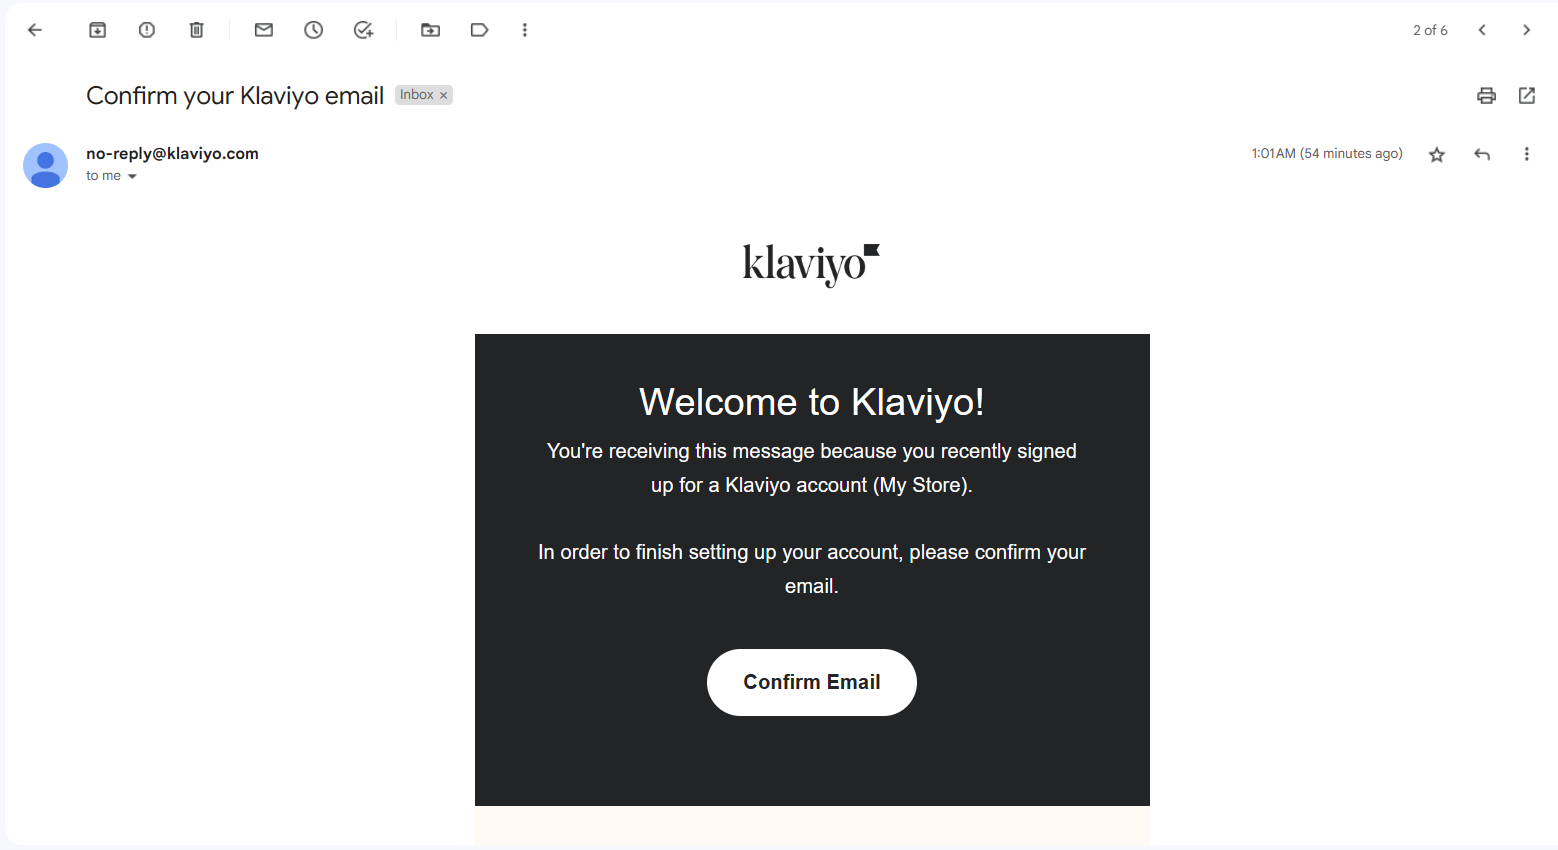
Setting up Klaviyo for Email Automation
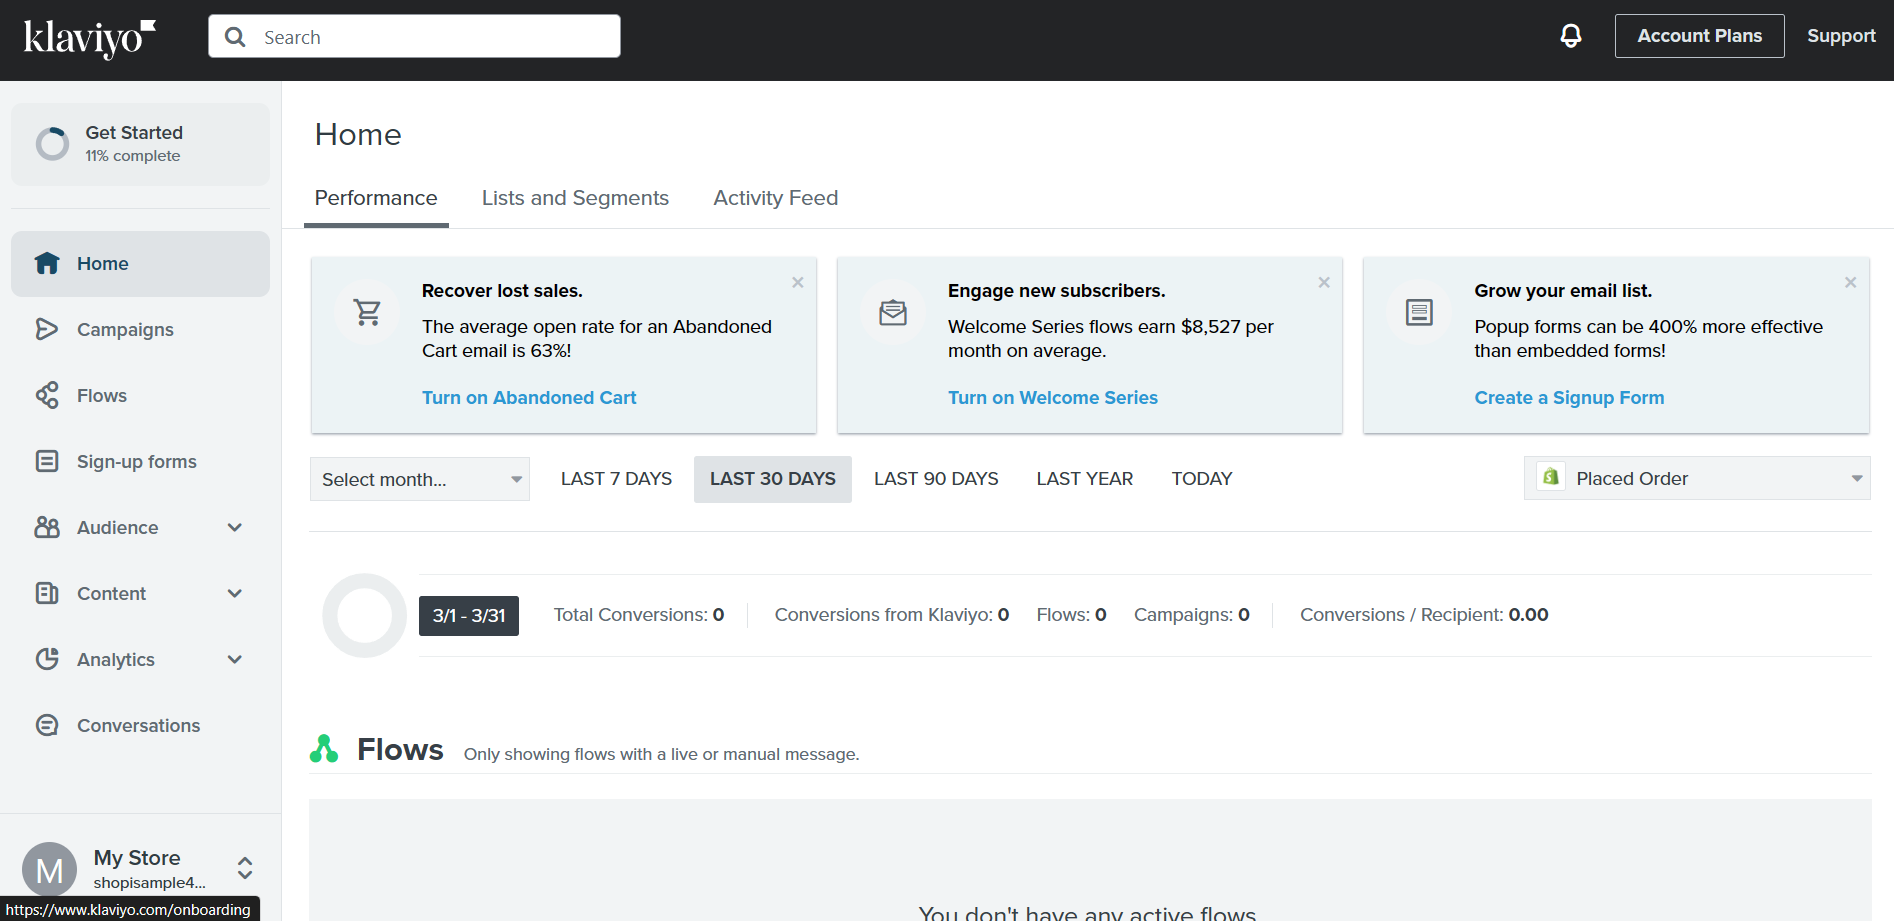
- To set up email automation, you must create a content format first, which you will send to your customers through Klaviyo. To set this up, click on “Content”.
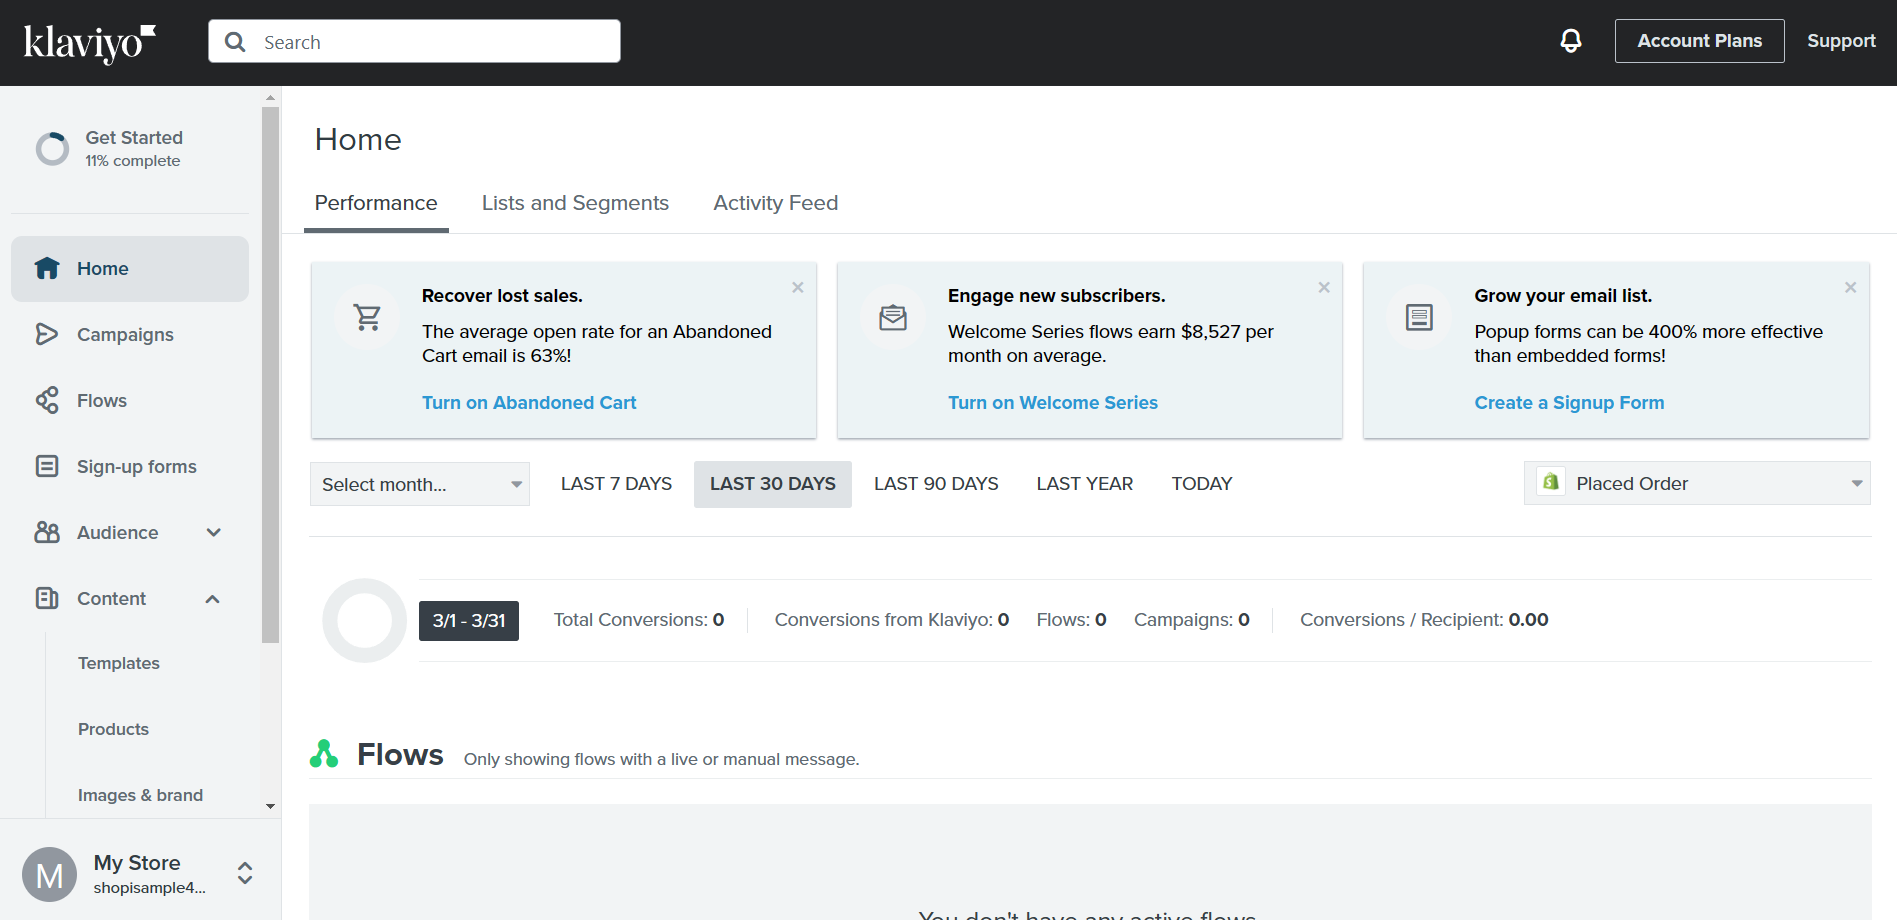
- Since Content is a drop down menu, subcategories will show after you click it. Click “Templates”.
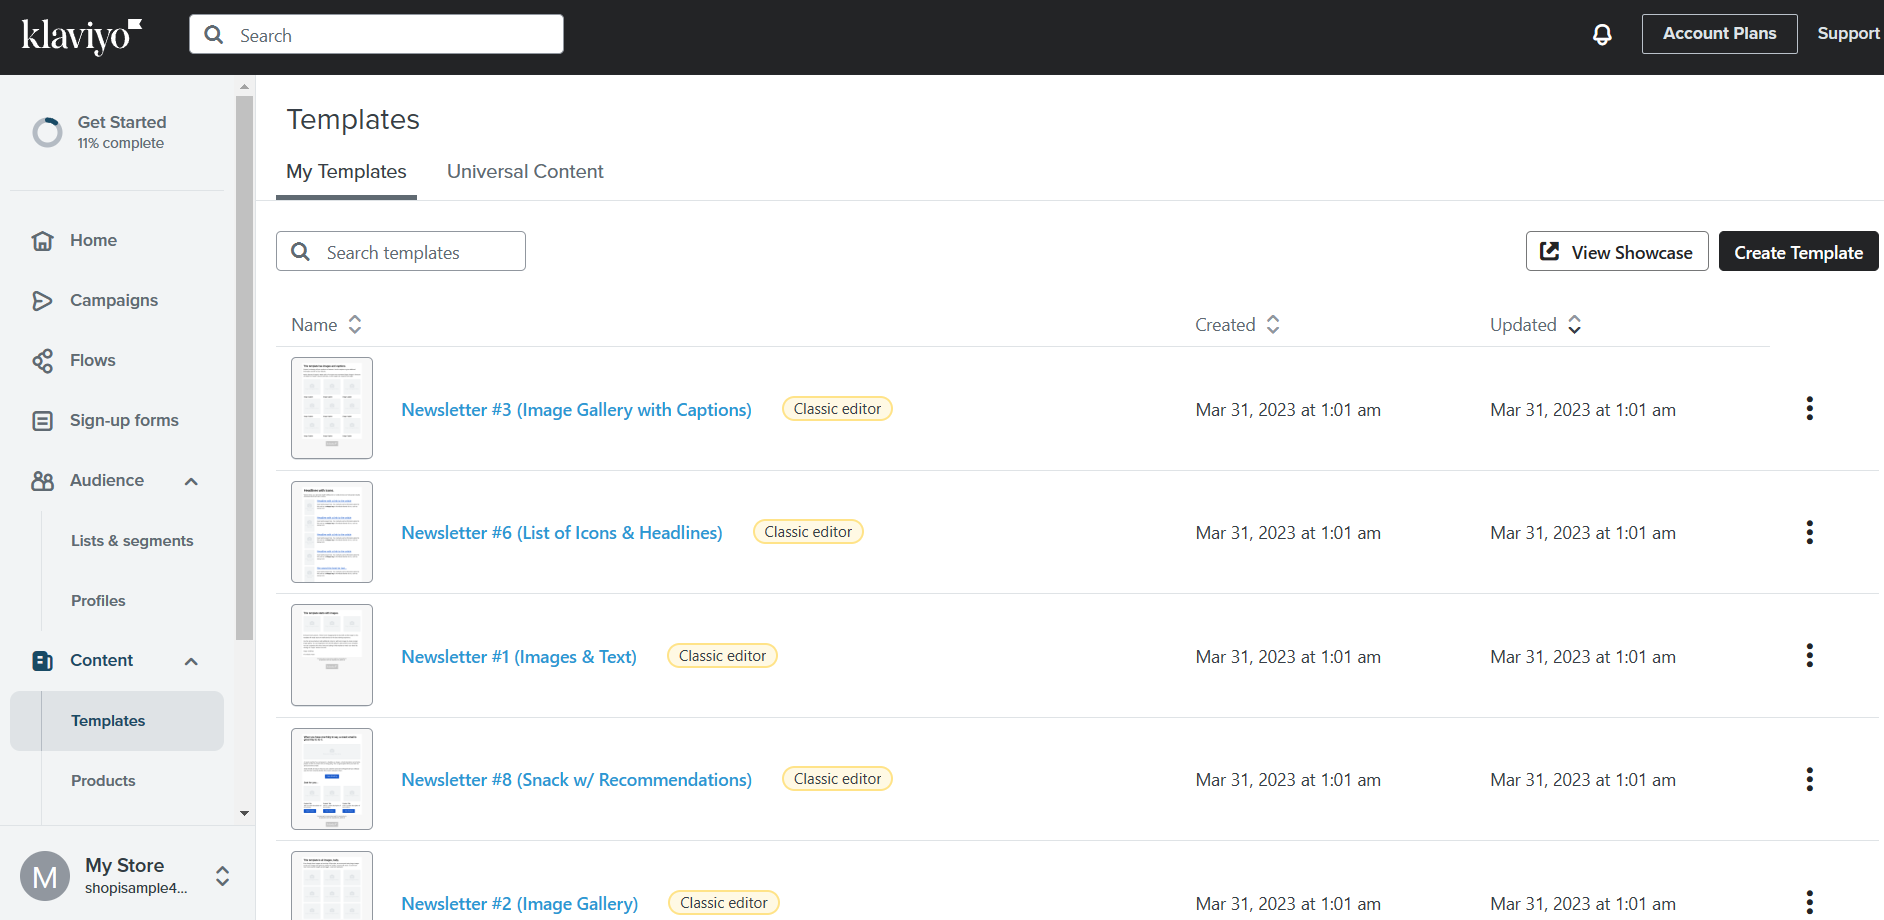
- Click “Create template” to create a personalized email for your business.
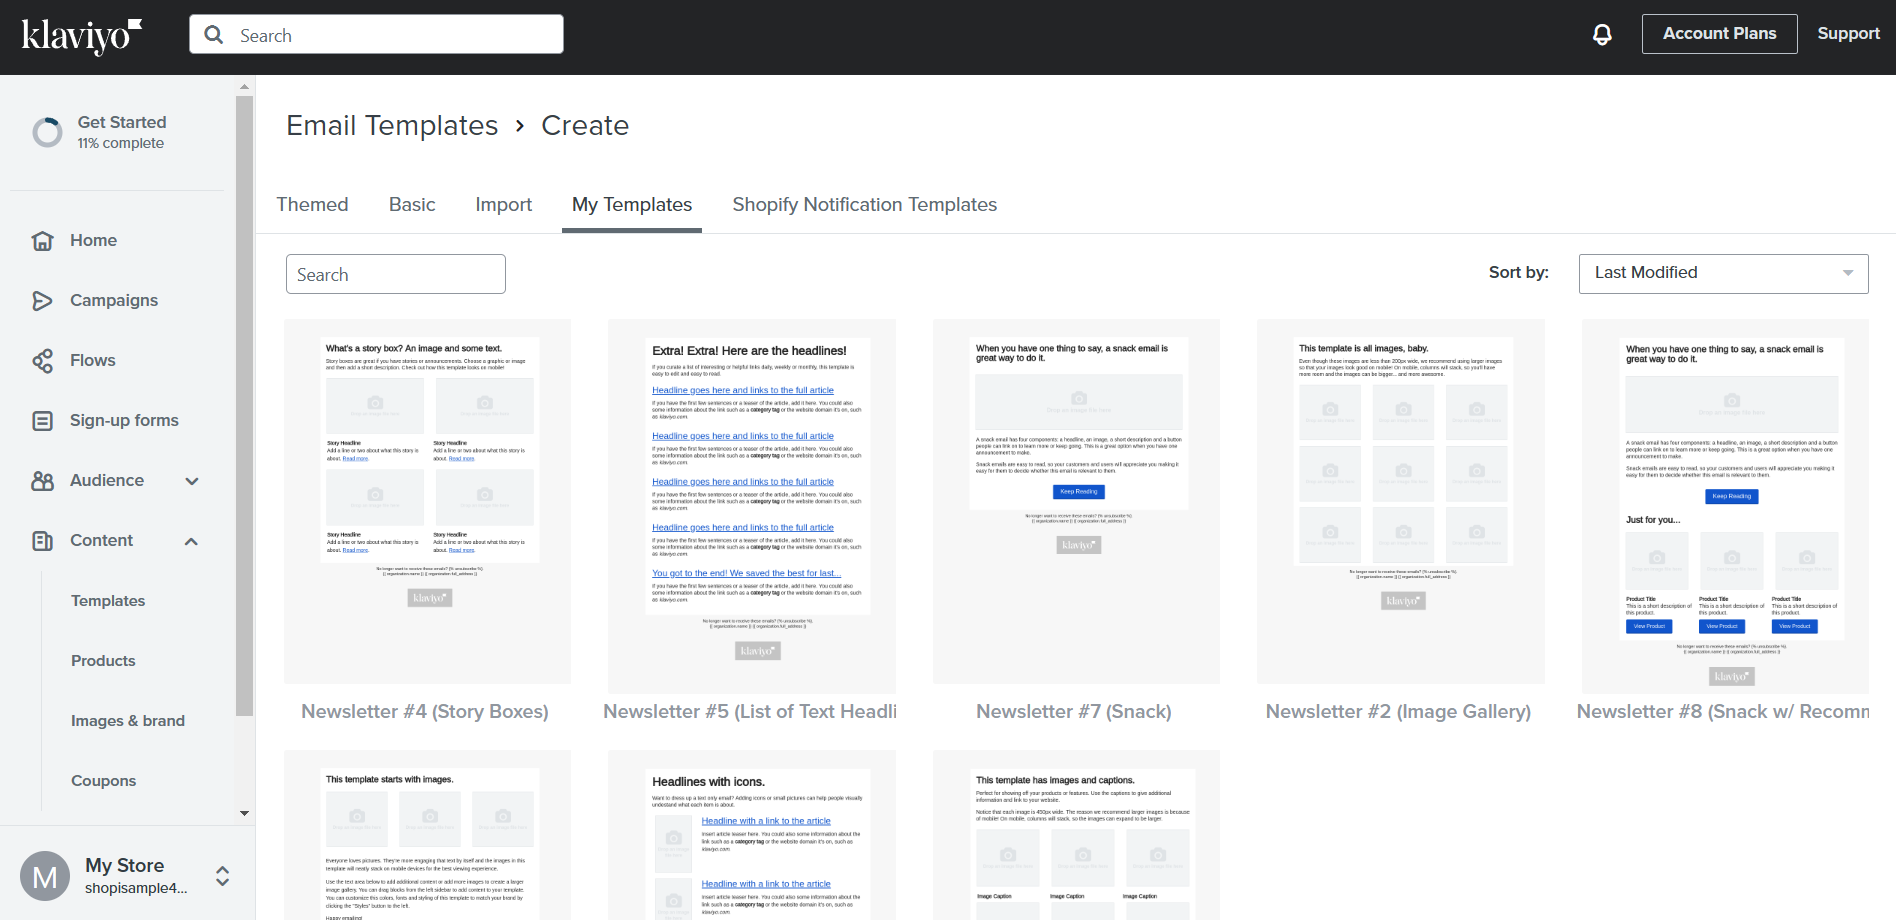
- As you can see below, the email templates are shown. This shows what the emails will look like after setting up your email automation. You can choose the templates on either of the following: Themed, Basic, Import, My Templates, or Shopify Notification Templates. In Themed templates, you can see templates for welcoming customers, occasion sales, limited time offers, birthday emails, and reminders. These templates may be customized depending on your preference.
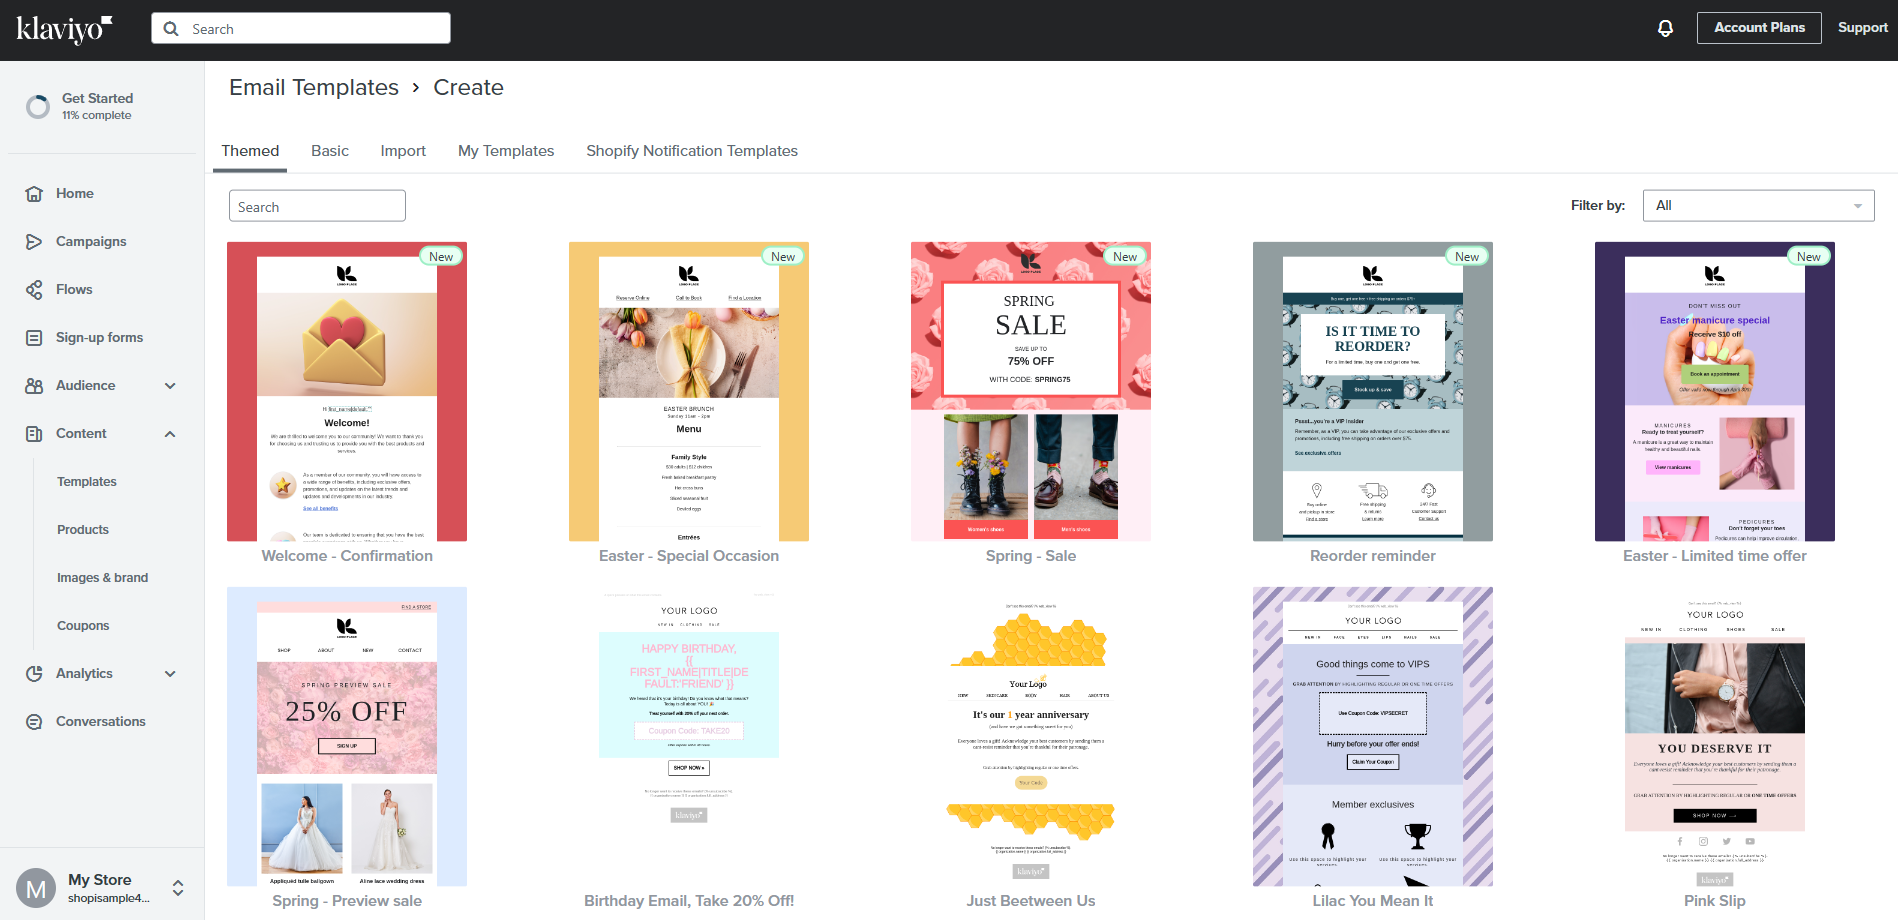
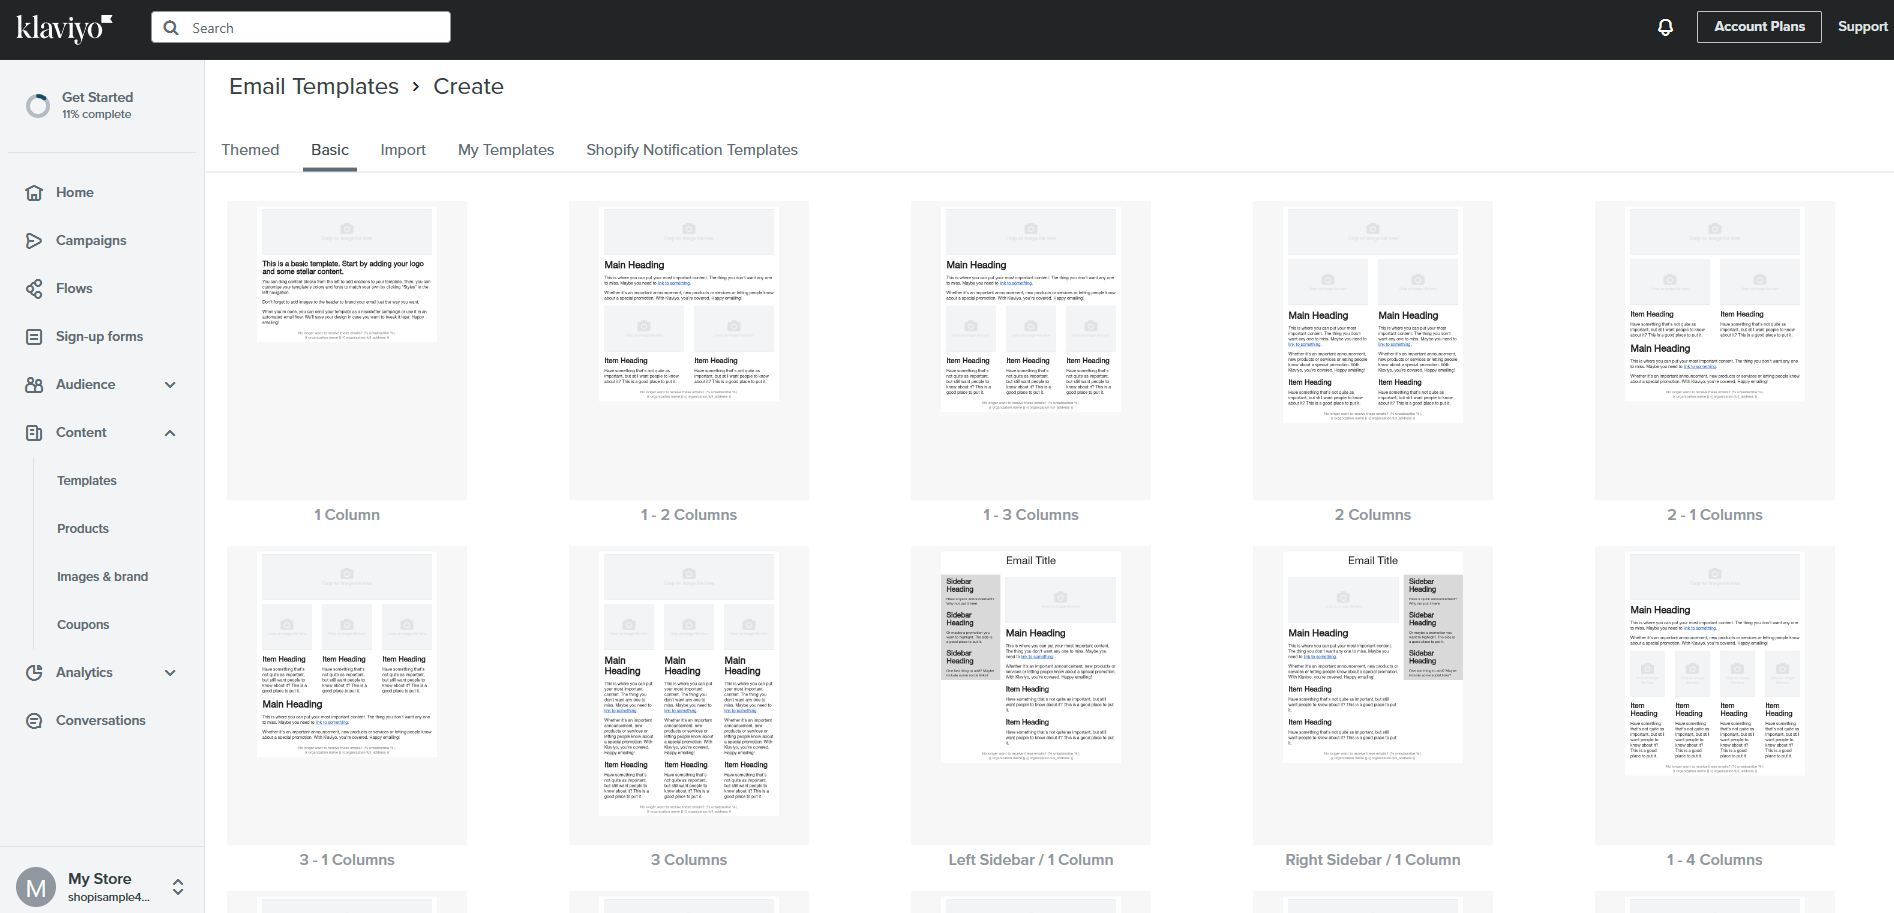
- In Basic templates, you will have a selection of templates, but with no design. This includes suggestions of sidebar and column placement, as well as the image position on the email. This can be useful if you want to start your template from scratch.
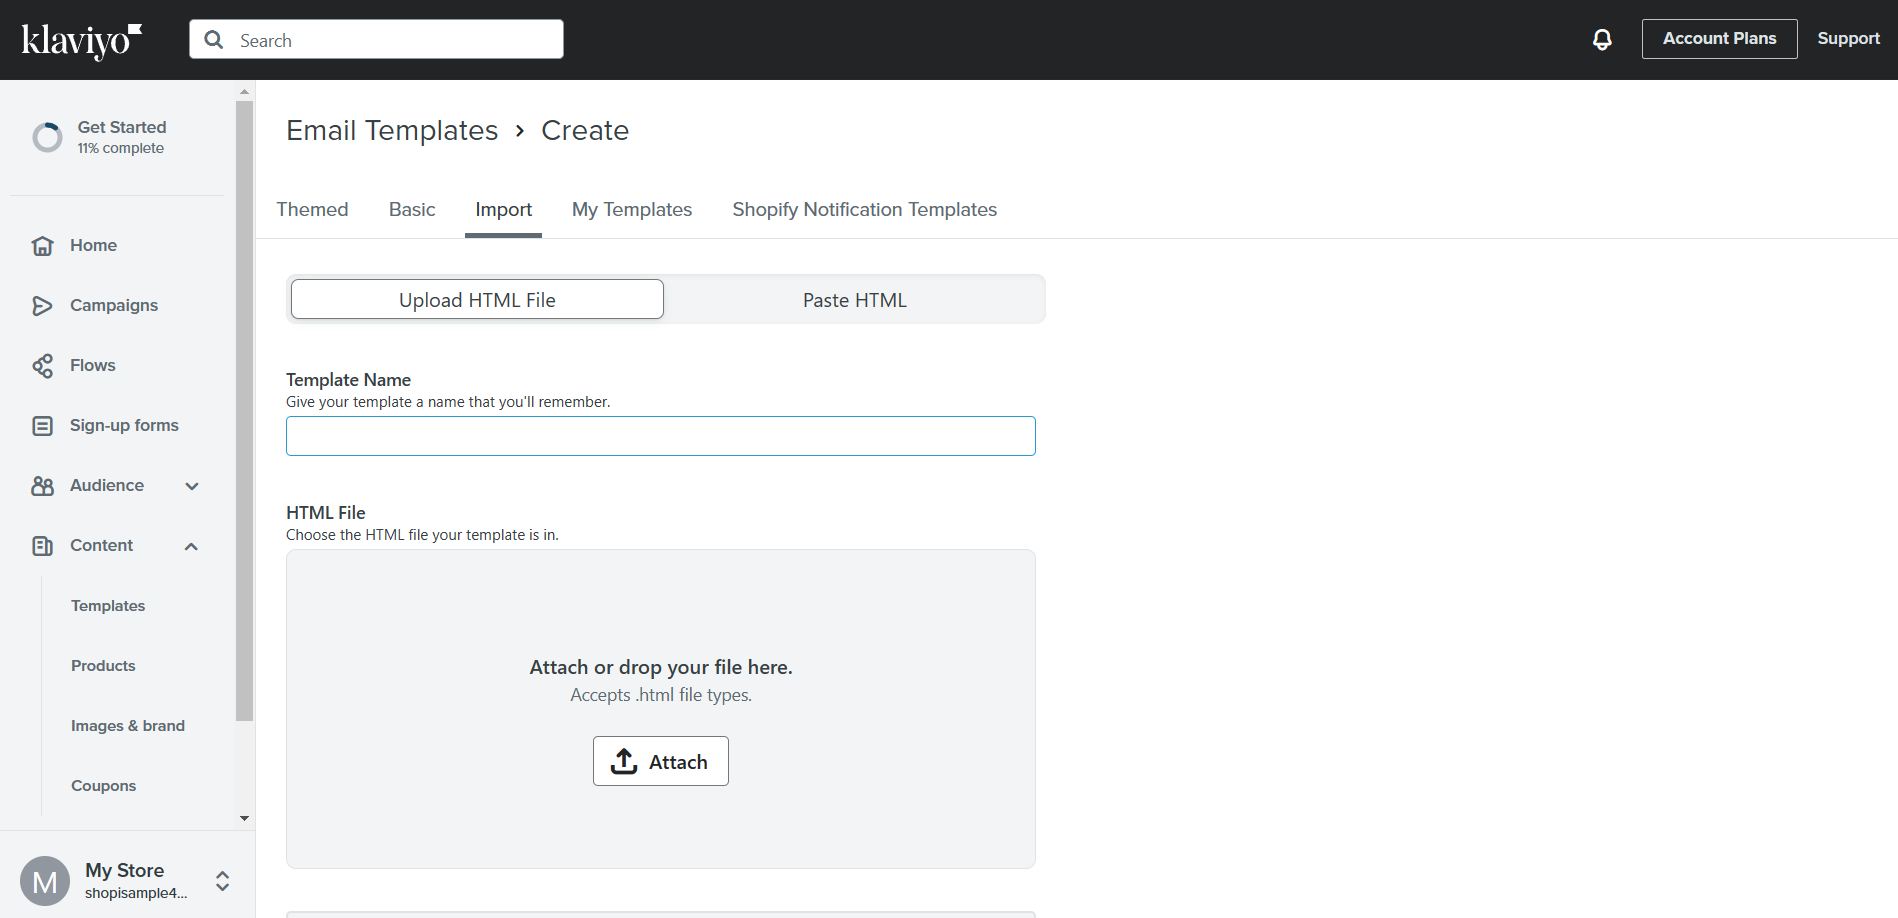
- You can import templates in Klaviyo. To do this, you must have the HTML file or link so you can upload or paste it on the Import option. Click “Attach” if you have an HTML file.
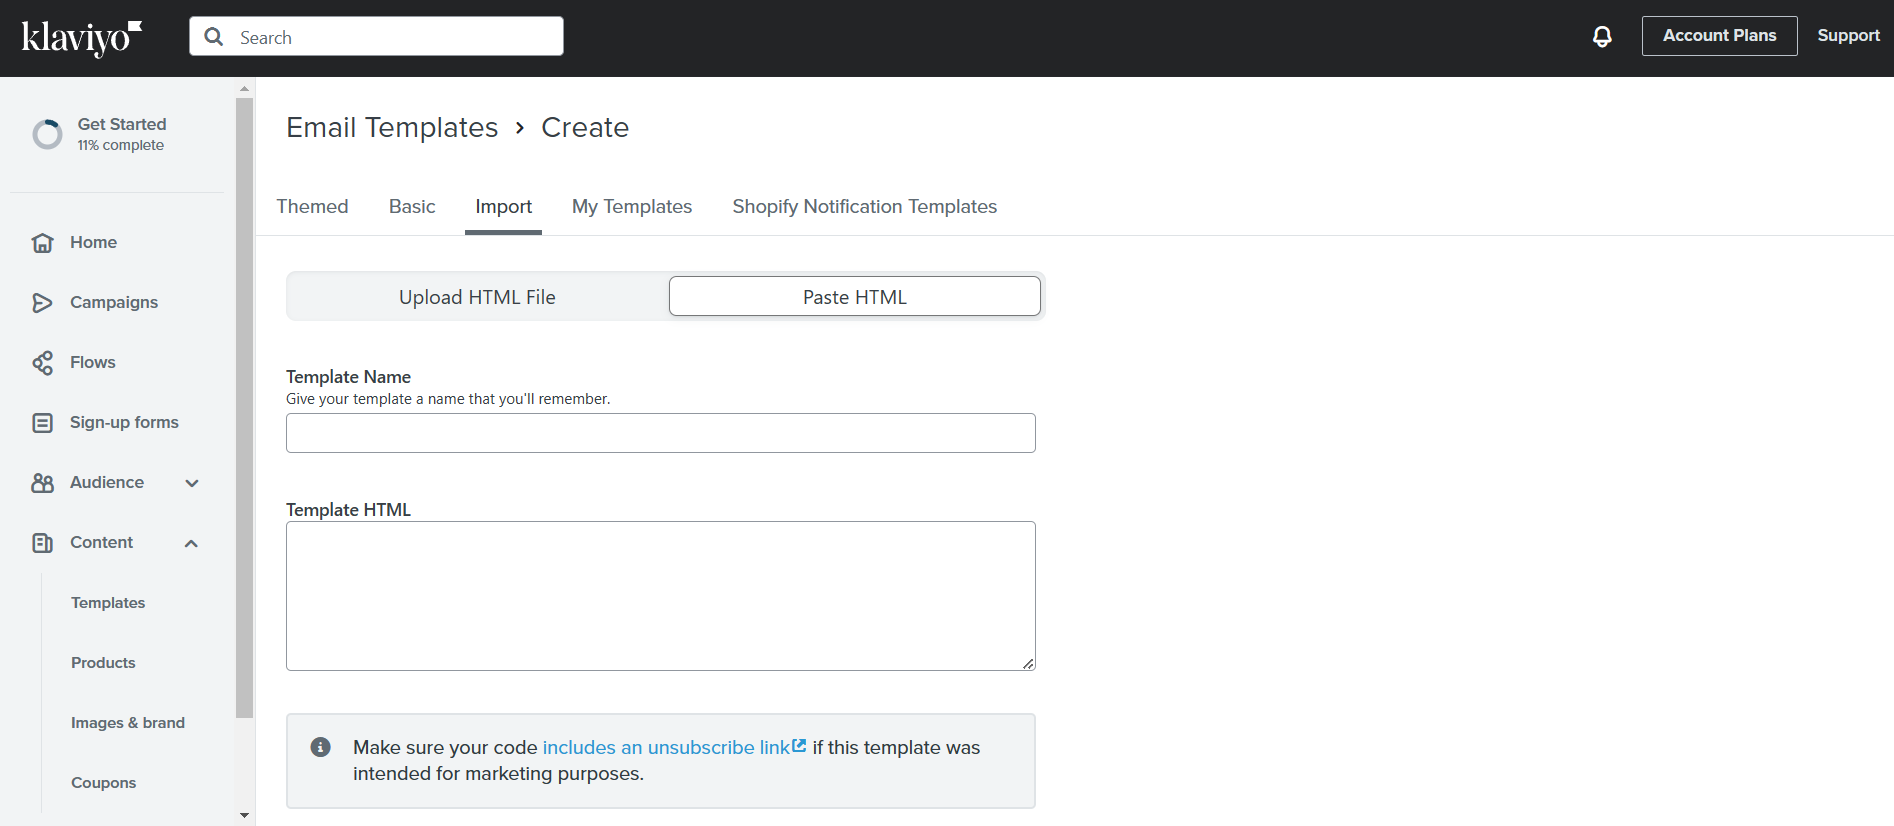
- For the HTML link, paste it on the blank field under “Template HTML”.
- In My Templates, you can find different formats and sample templates of the email newsletters that you can send to your customers through email automation.
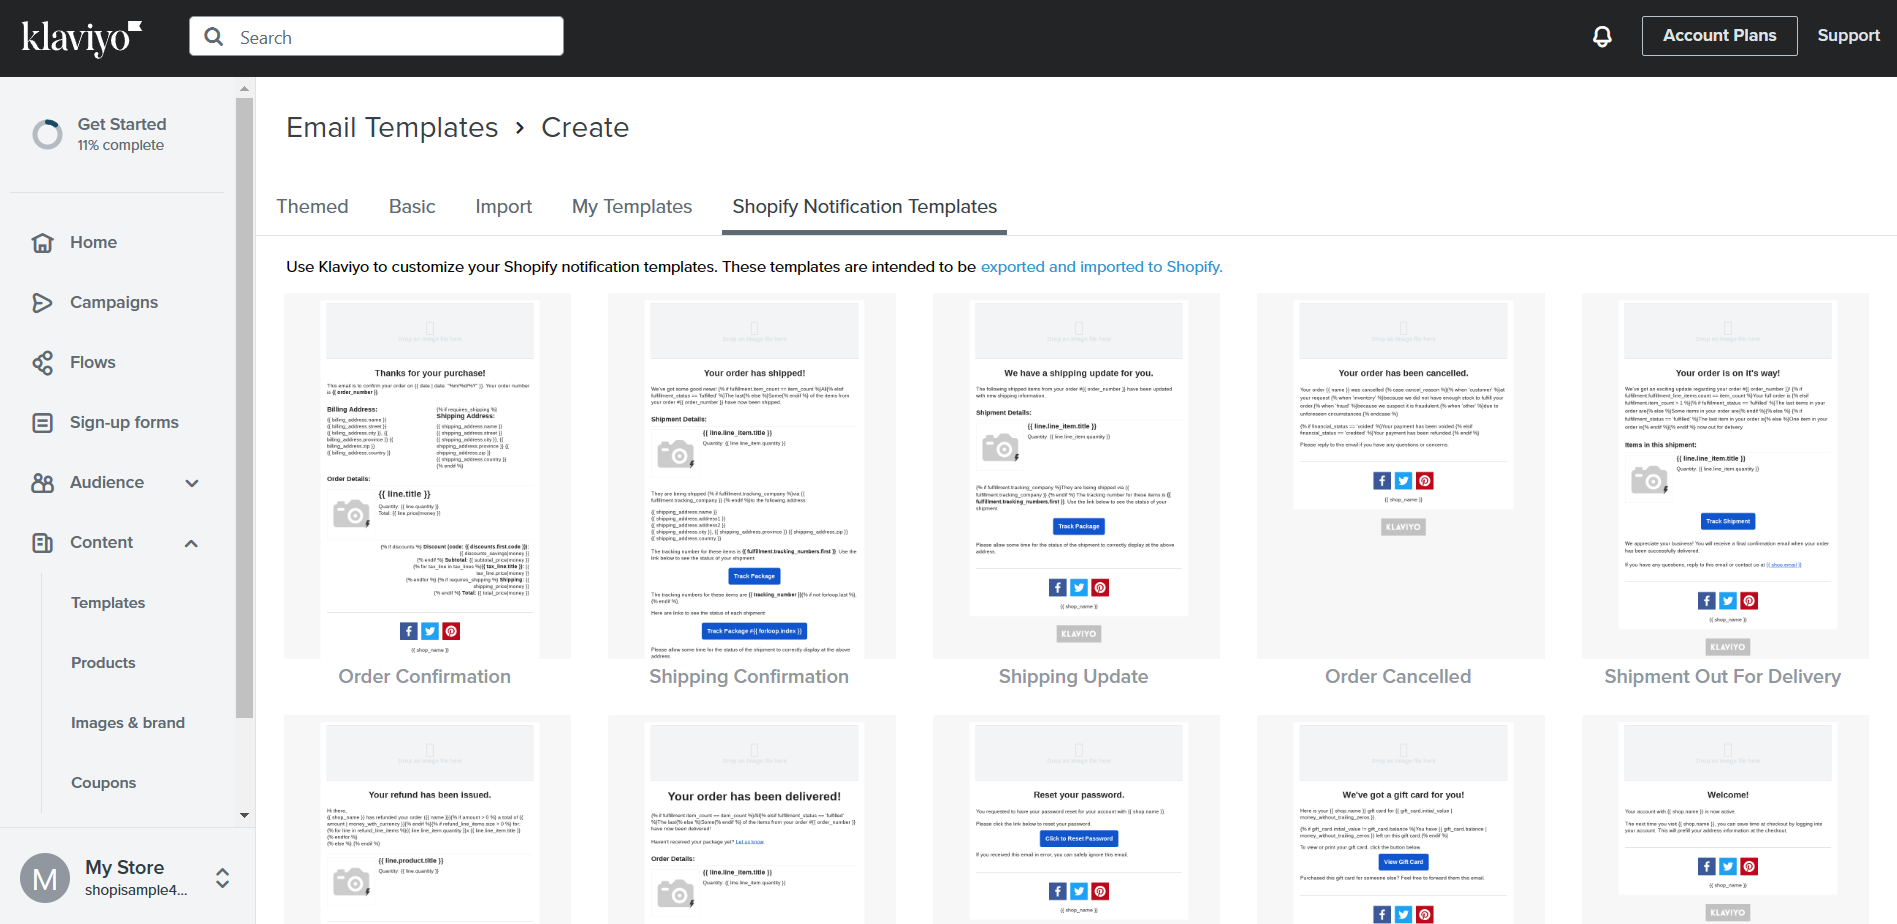
- Lastly, Shopify Notification Templates are templates about the business processes that take place when customers order. These processes include order and shipping confirmation, shipping updates, gift card notification, and even refund emails. These templates may be customized depending on your preference.
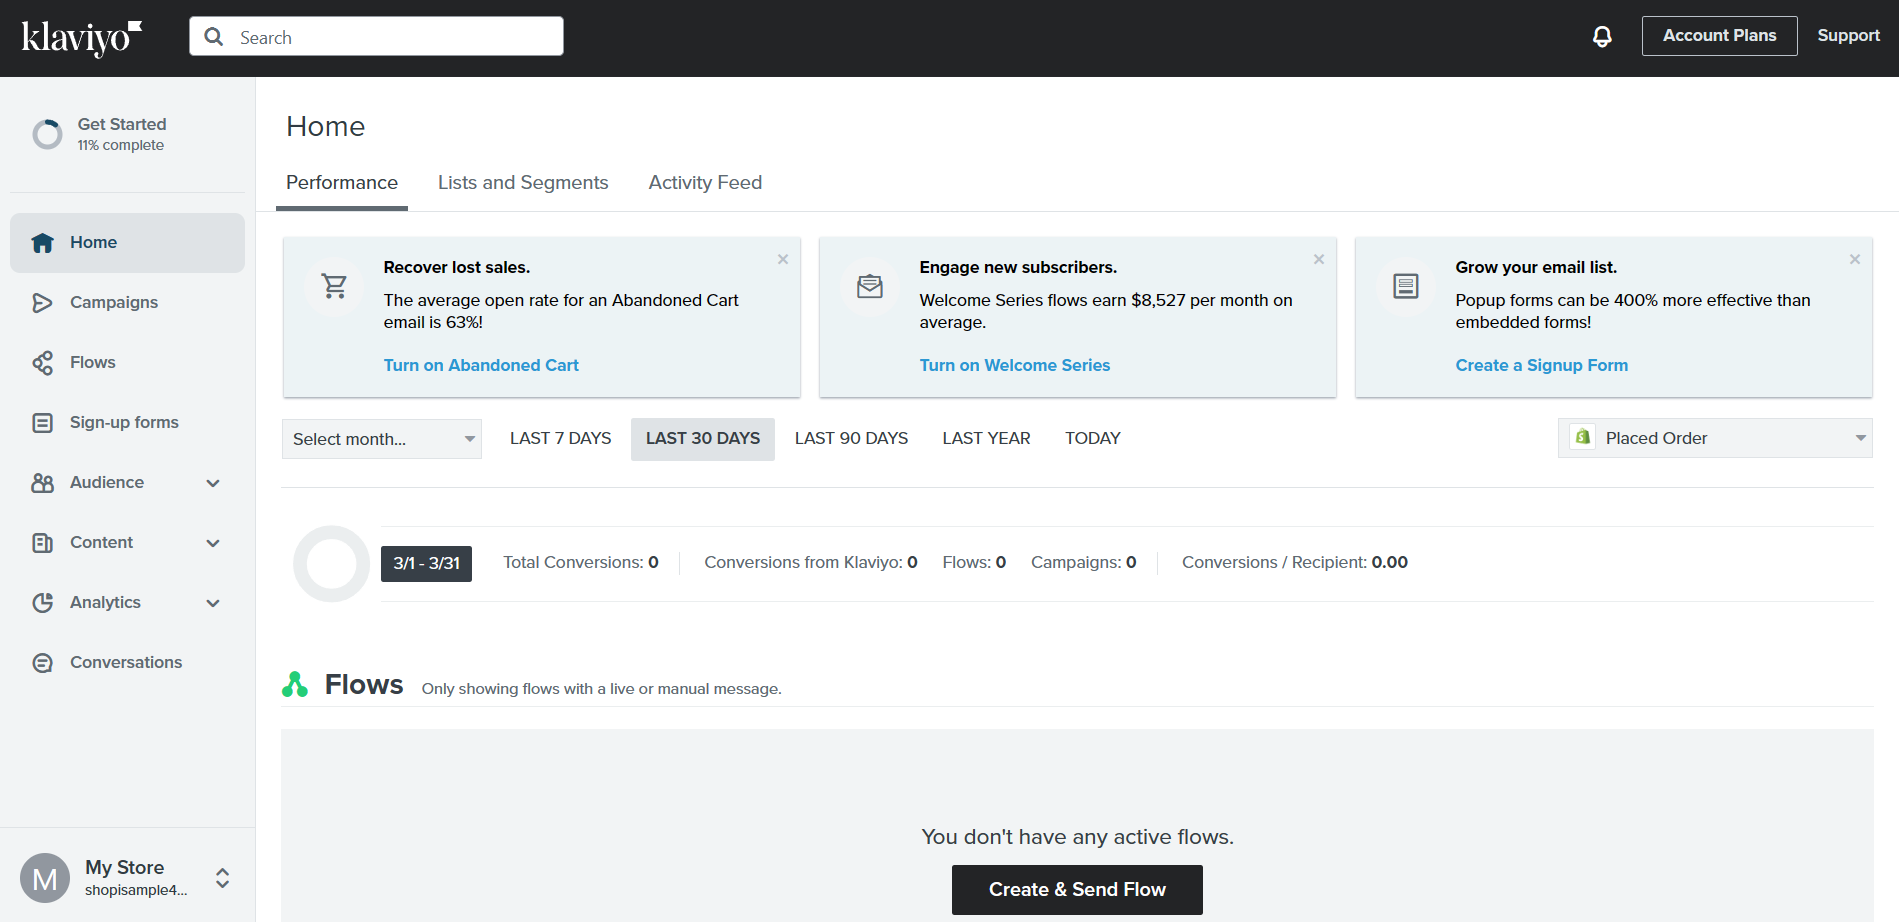
- After choosing and editing the template, you can now set up the audience which will receive this email newsletter. Click “Audience”.
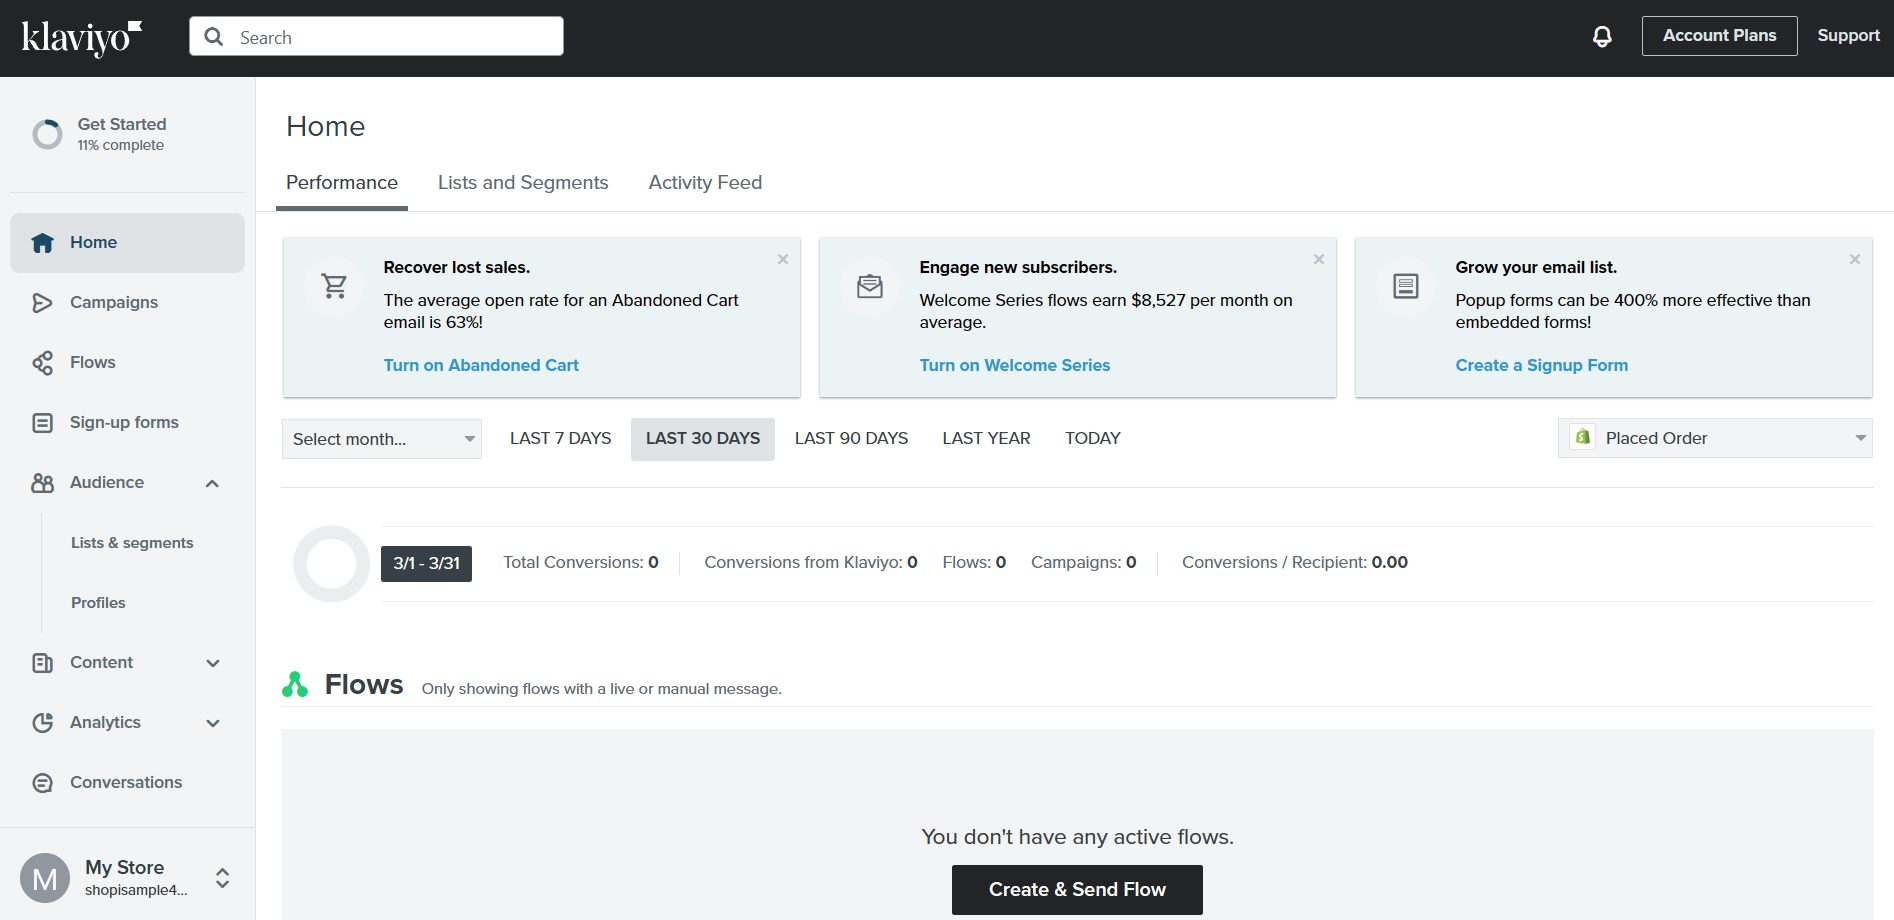
- Since Audience is a drop down menu, subcategories will show after you click it. Click “Lists & segments”.
- Click “Create List/Segment”.
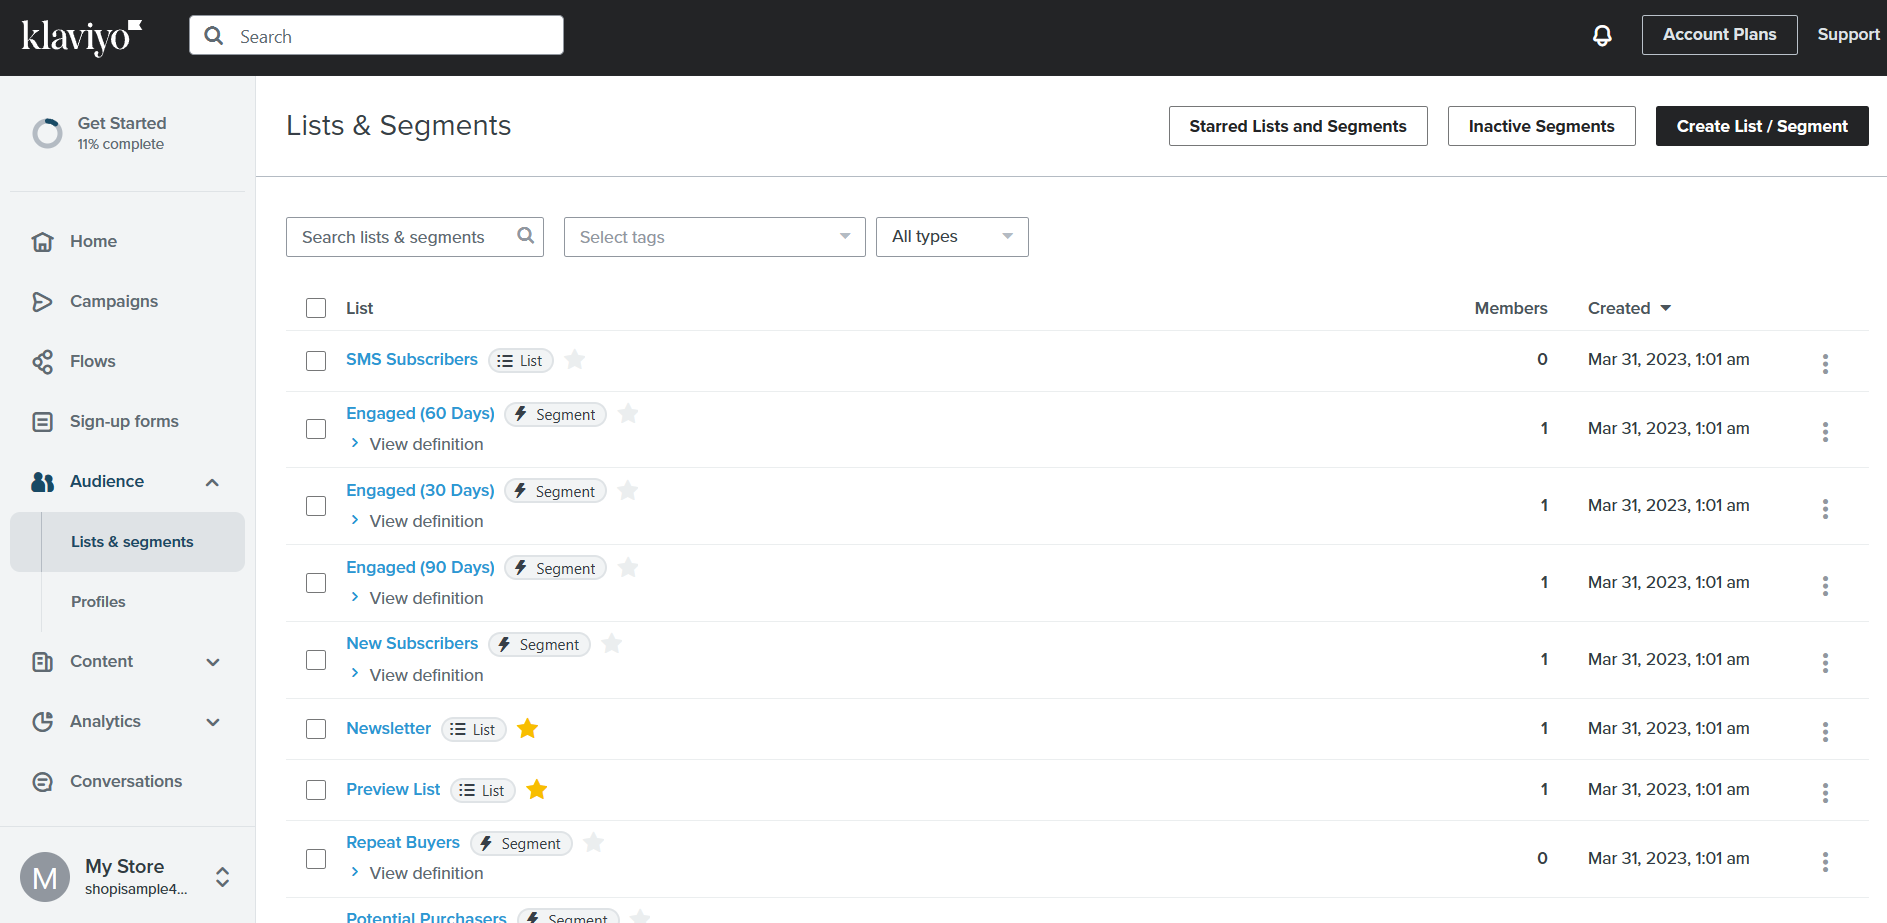
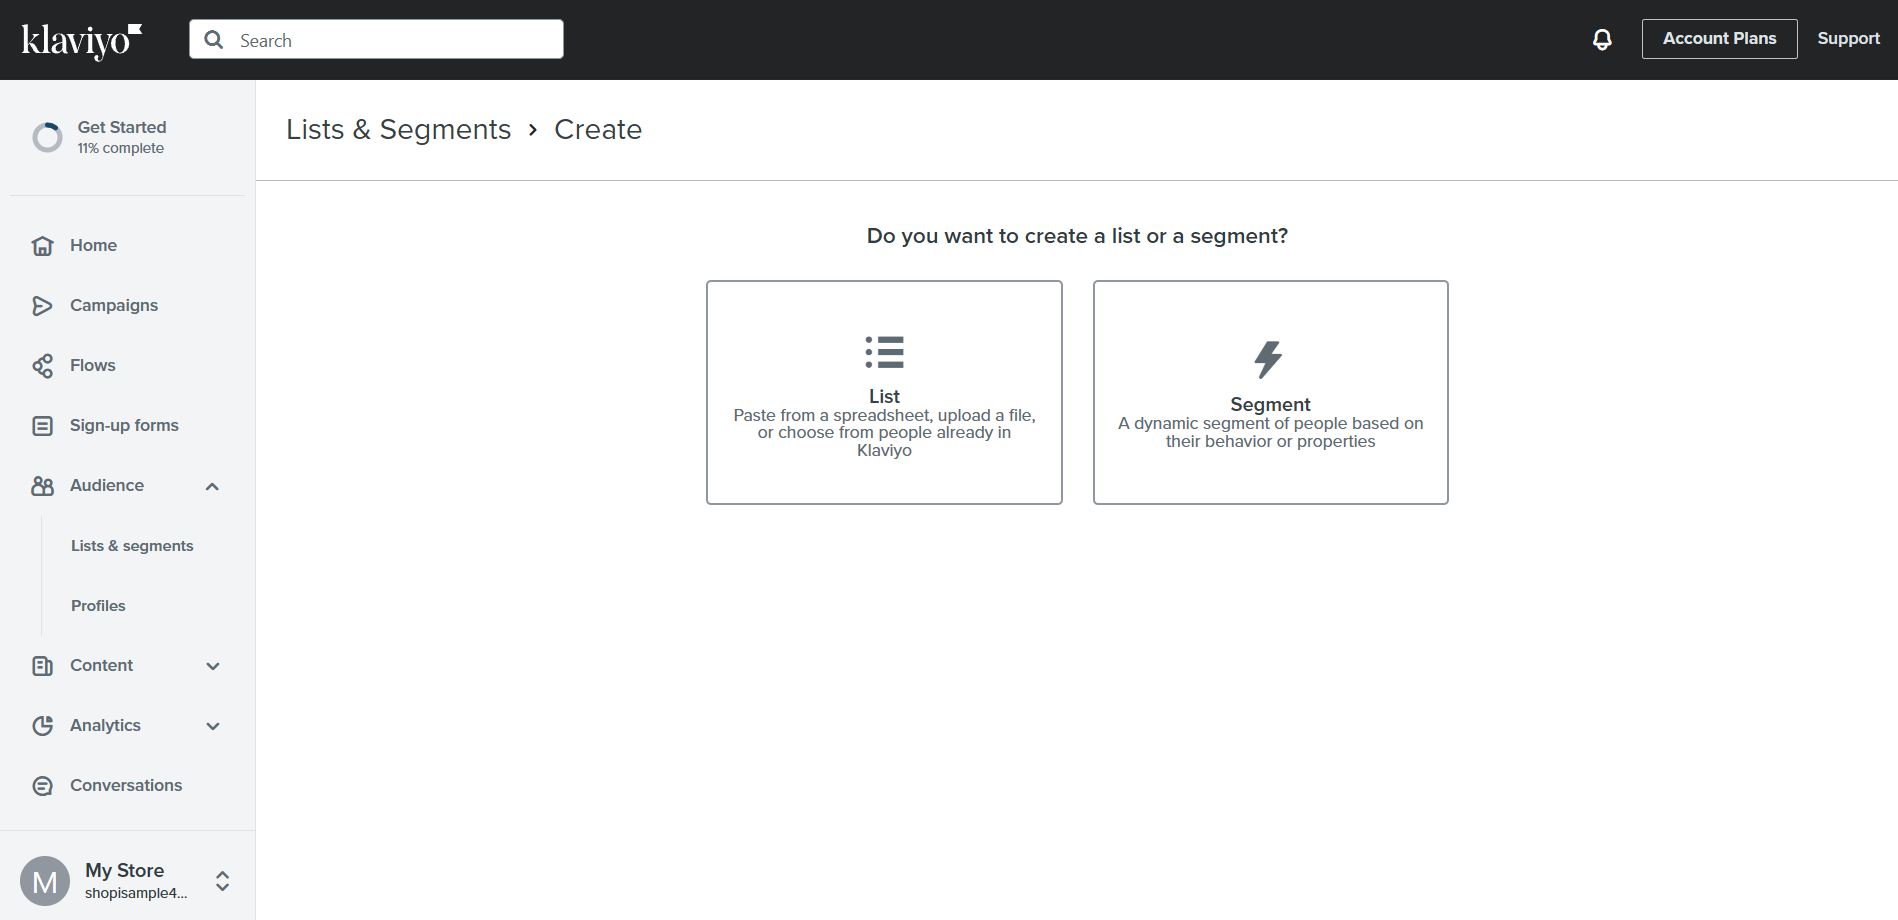
- To create a List or Segment, you must first understand the difference between the two. List is a list of people that you want to receive your emails, it may come from a spreadsheet file, paste from spreadsheet, or choose from people that are already in Klaviyo. Segment is a grouping of people based on their behavior or properties. Click your preferred option.
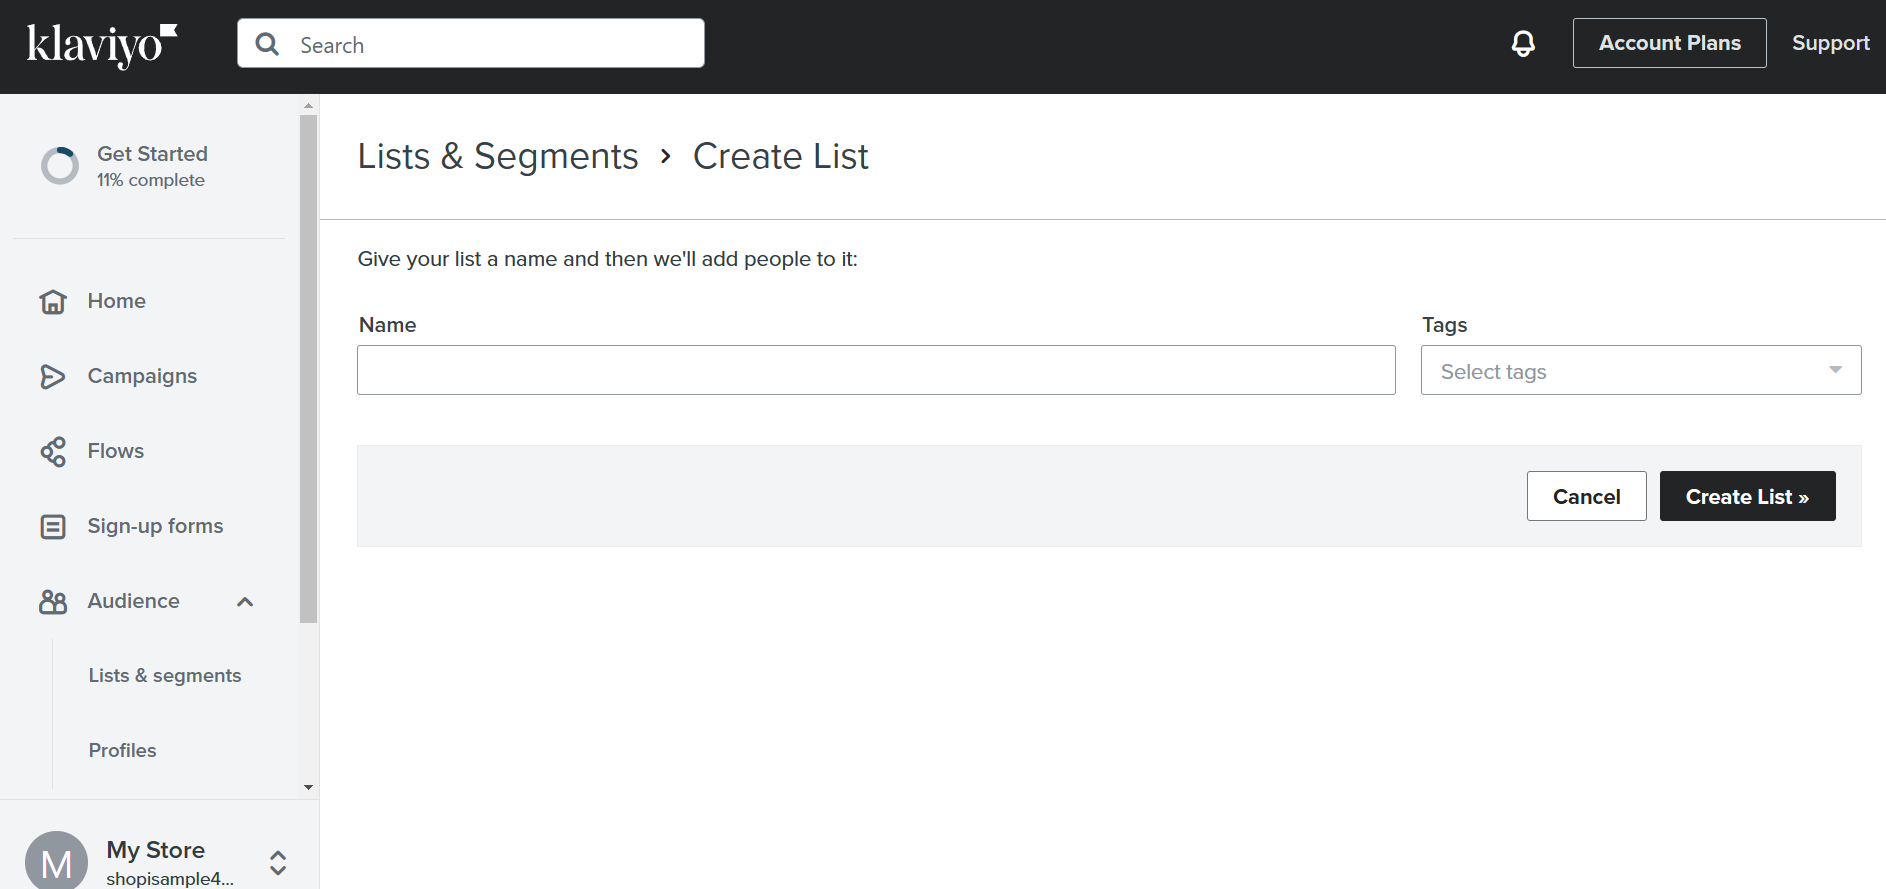
- To create a List, you will be asked to enter a name for that list and choose the tags by clicking the dropdown menu. After indicating both requirements, click the “Create List”.
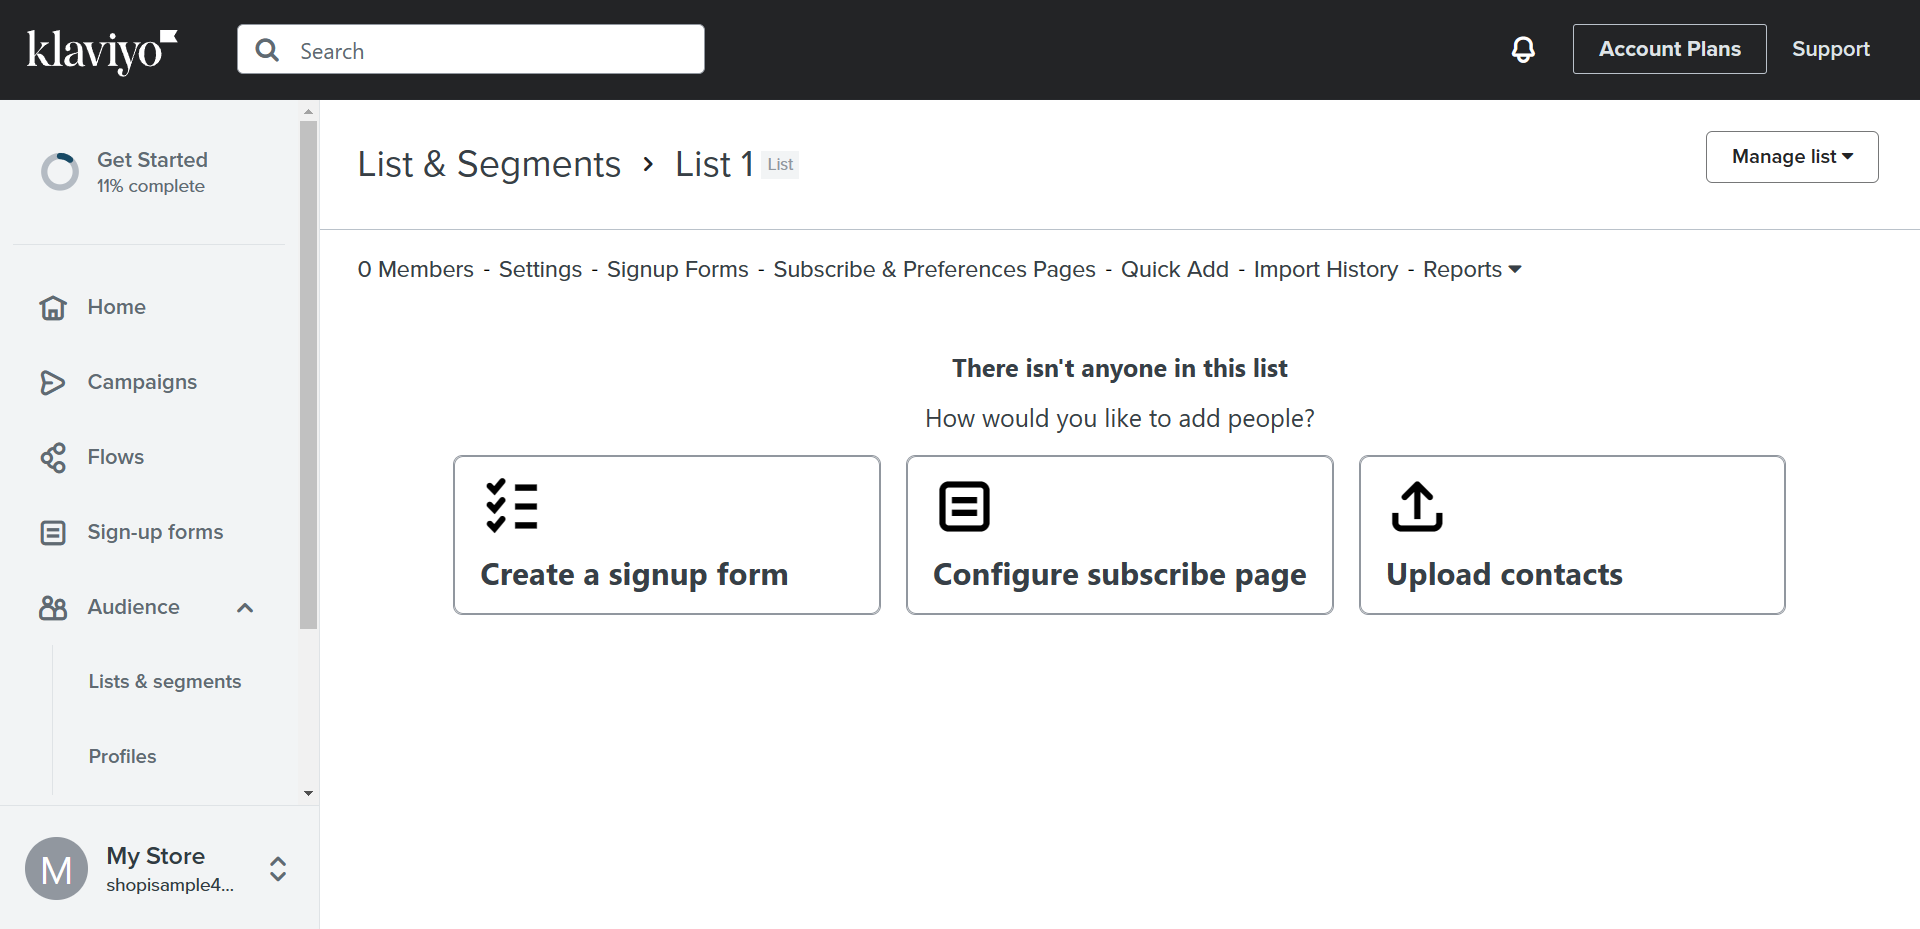
- After creating the List, you can add people by creating a signup form, configuring your subscribe page, or by uploading contacts. Click your preferred option.
- To create a Segment, you will be asked to enter a name for the segment and indicate the tags.
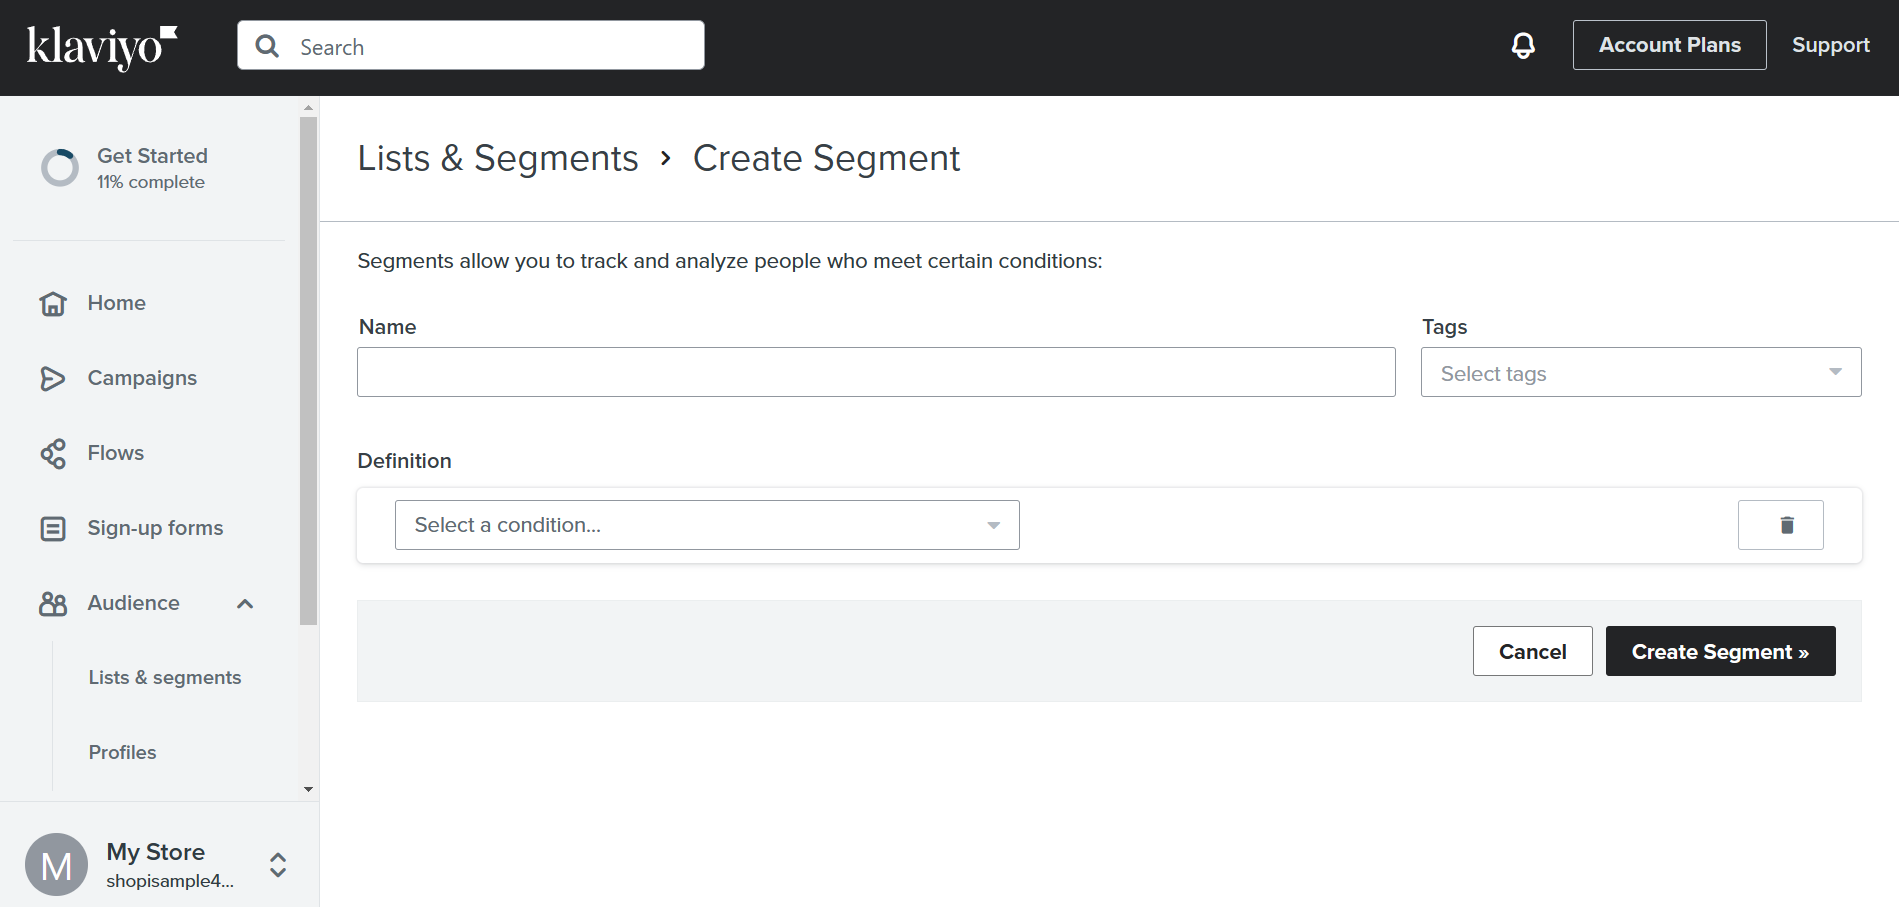
- In addition, you will also indicate a certain condition that customers must be in to be included in that segment. To do this, click the drop down menu under “Definition”.
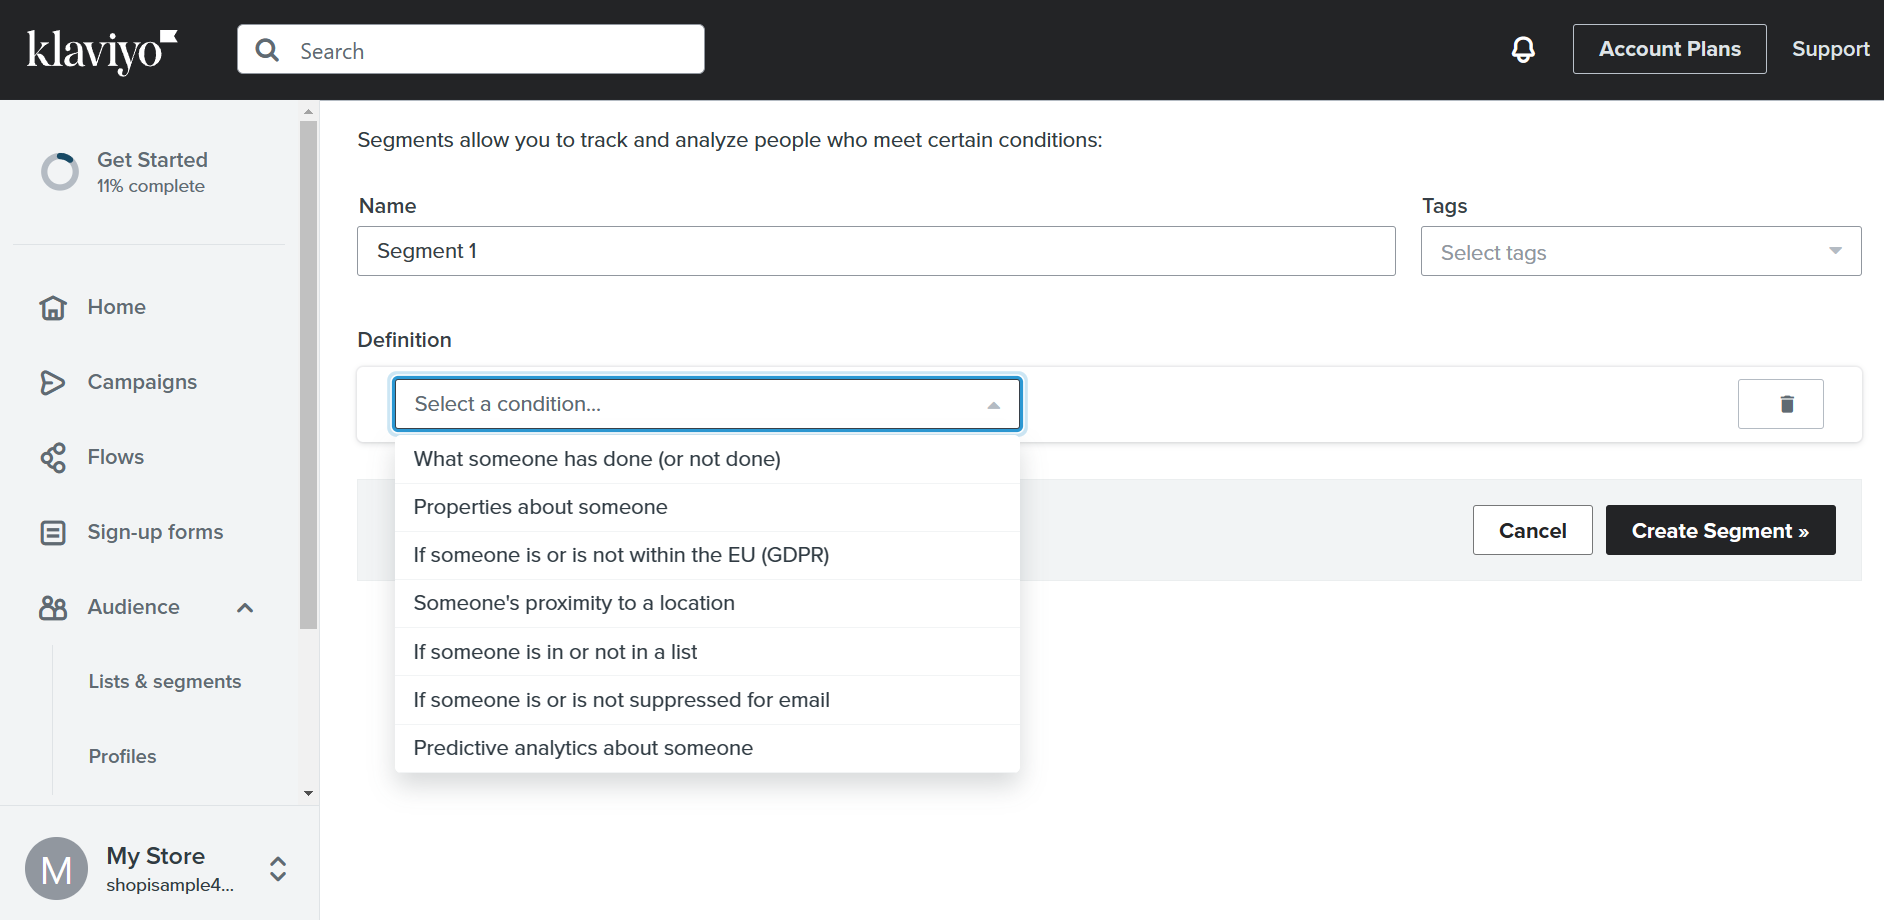
- These are some of the definitions that you can choose from. It may be about the person’s location, predictive analysis, or properties based on previous purchases. Usually, the condition most used is the “What someone has done (or not done)”. To choose a condition, click it.
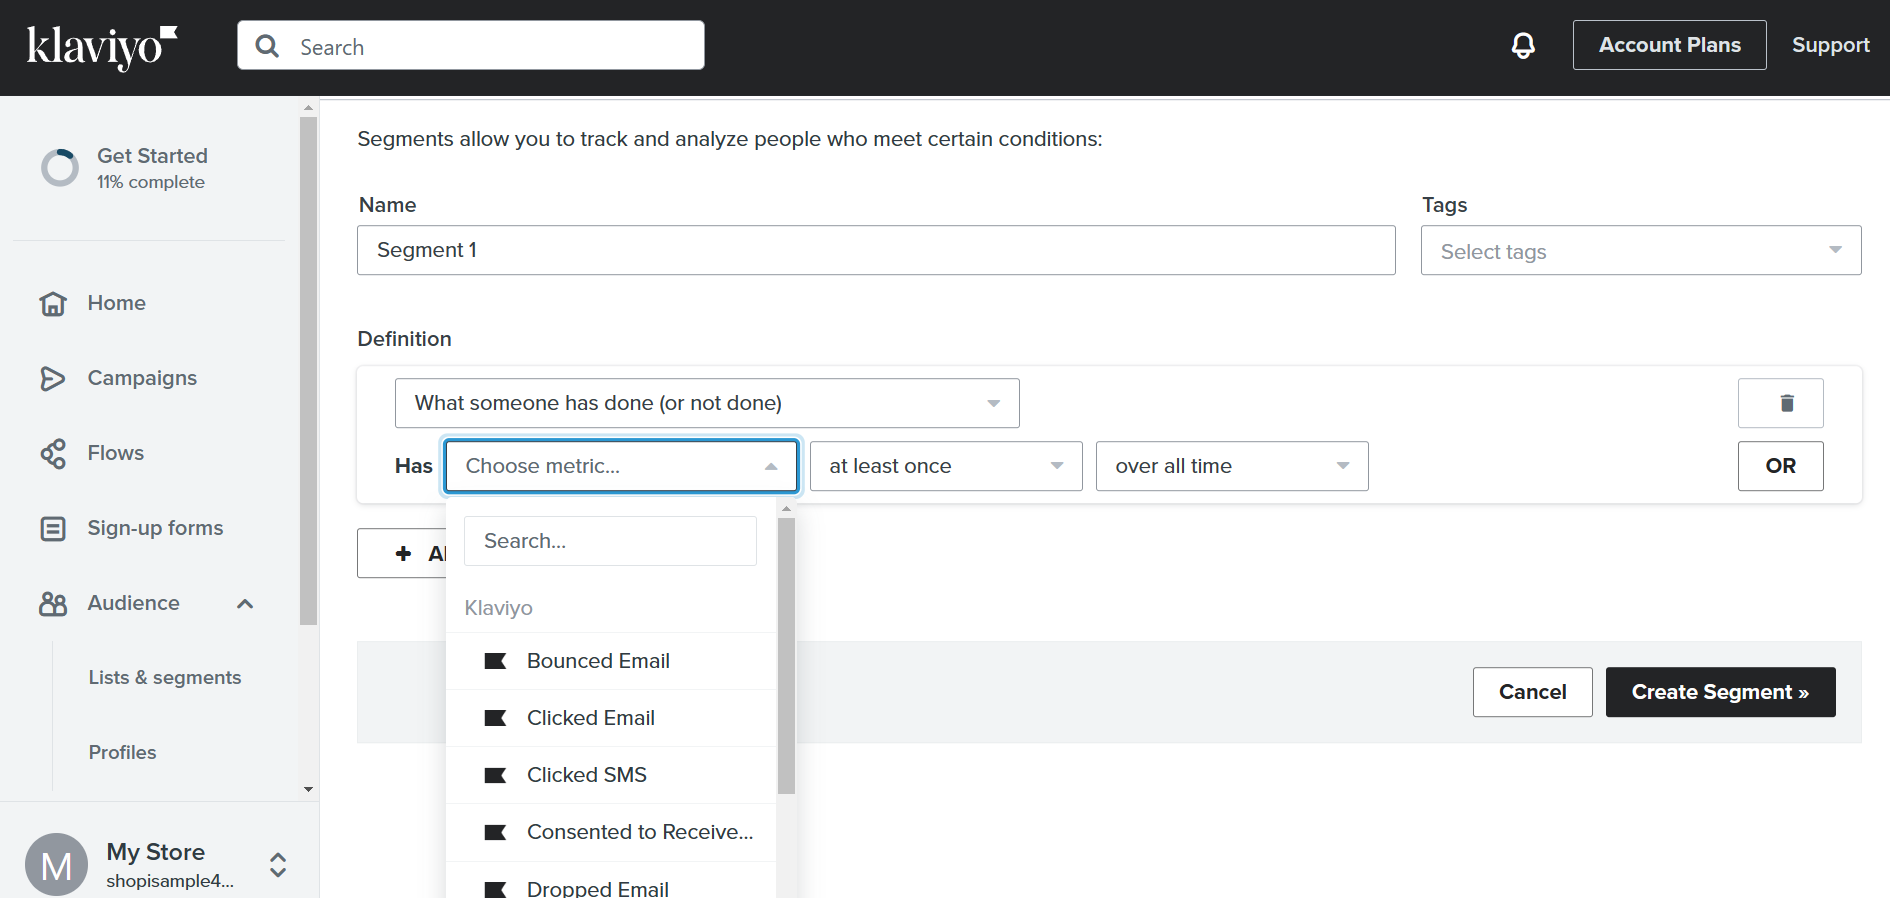
- You can choose the metric underlying the option that you chose. In this condition, you can choose people who have clicked or bounced your email.
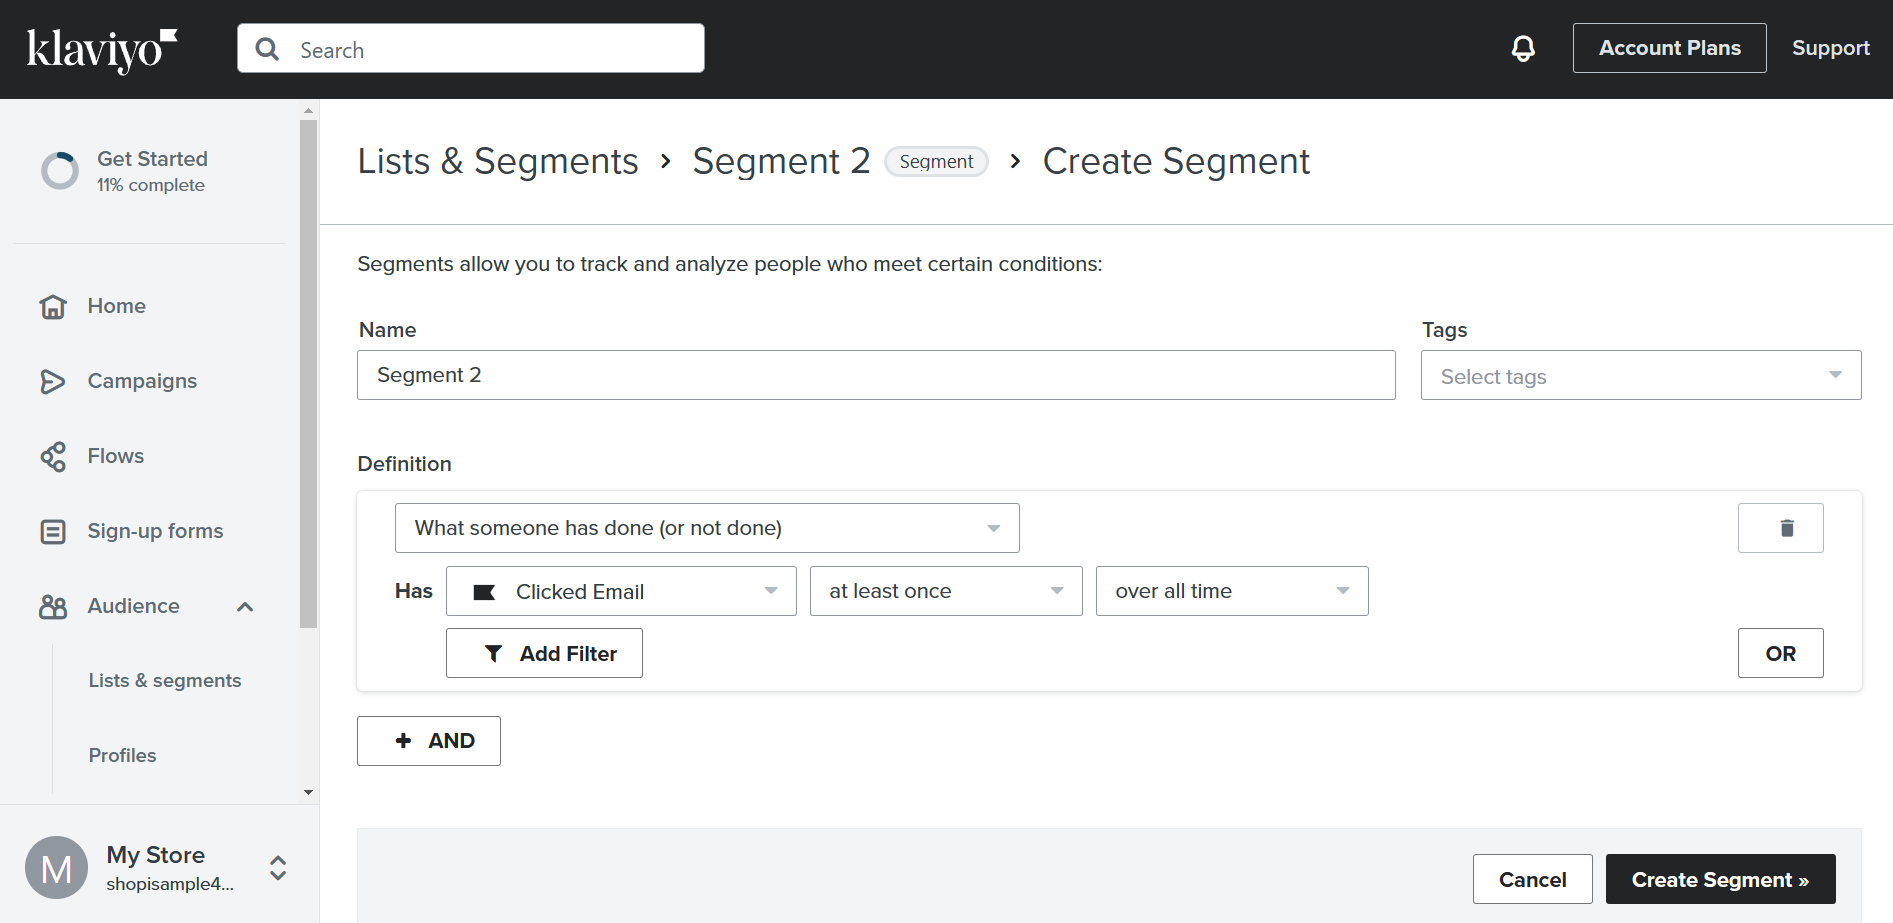
- After customizing the settings, click “Create segment”.
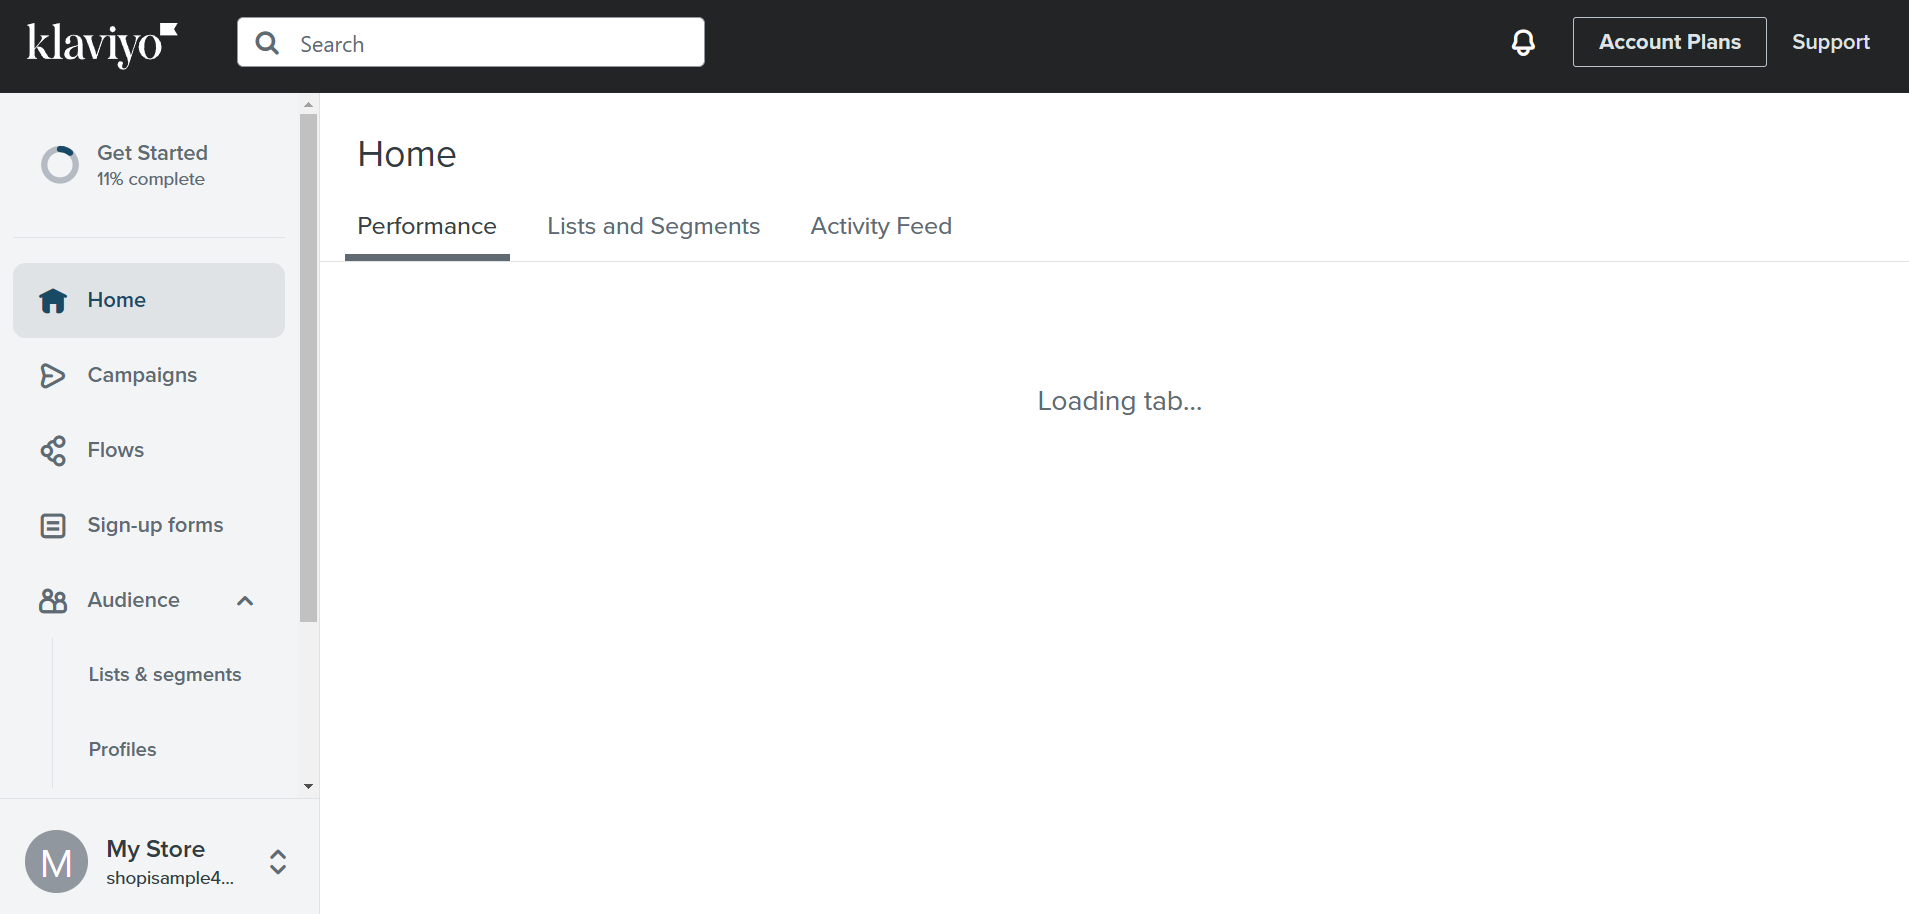
- After indicating the Lists & Segments, you can now create a Flow. Click “Flow” on the left sidebar.
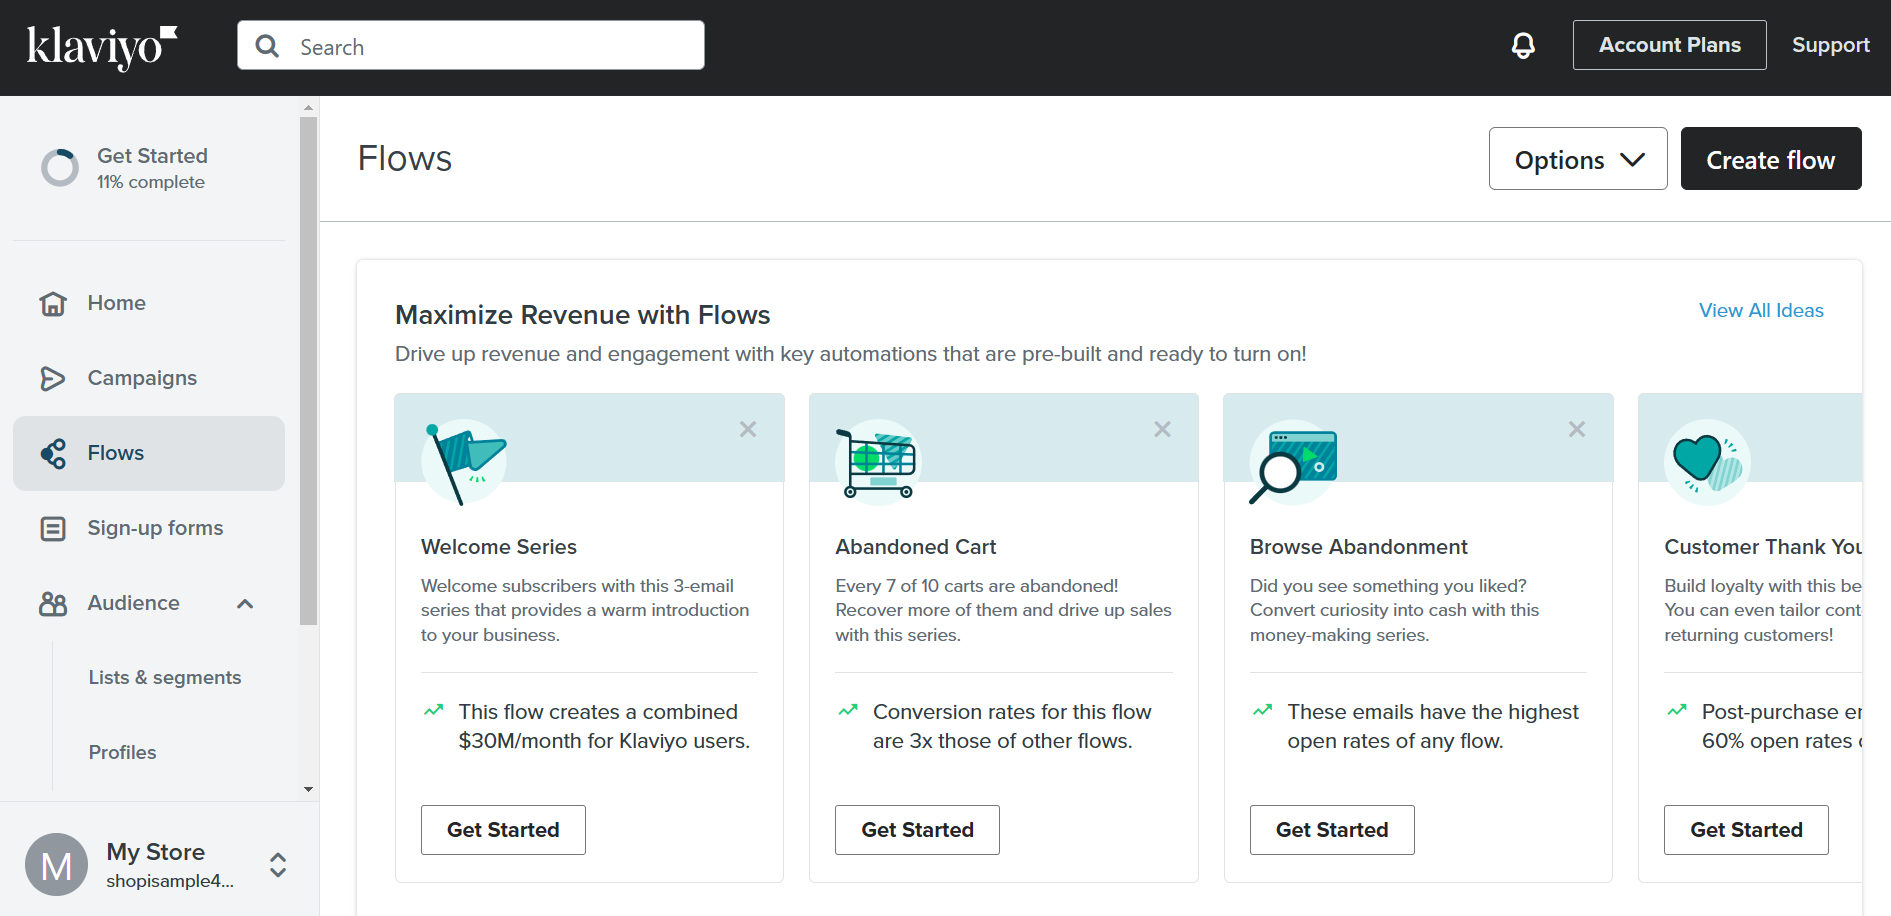
- You can choose Flows from different objectives as shown below. For example, if you want to welcome your customers, click the “Get Started” under Welcome Series.
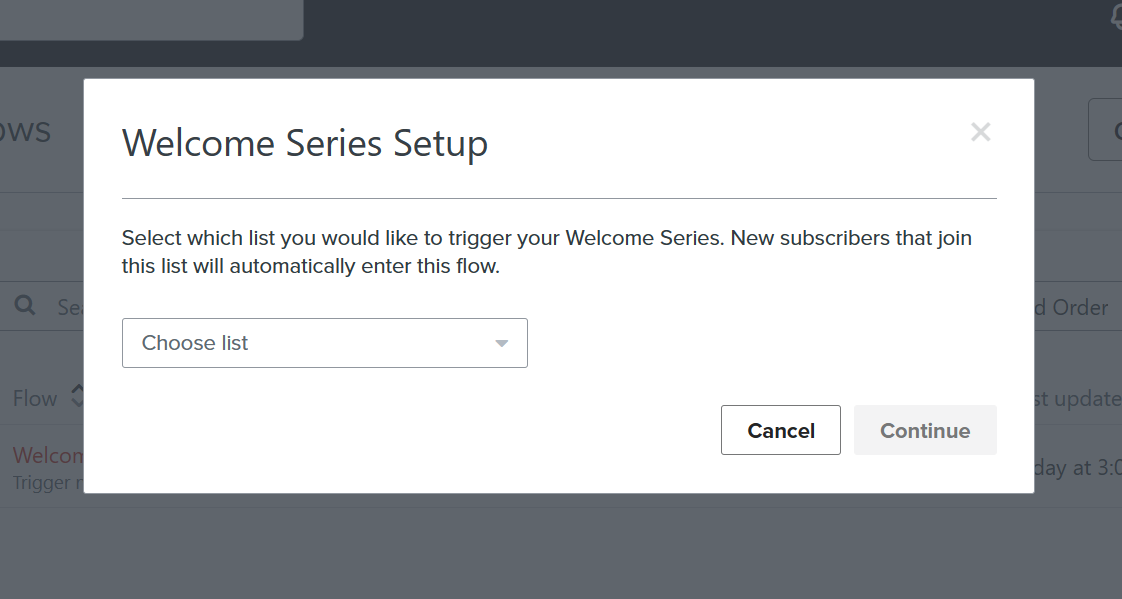
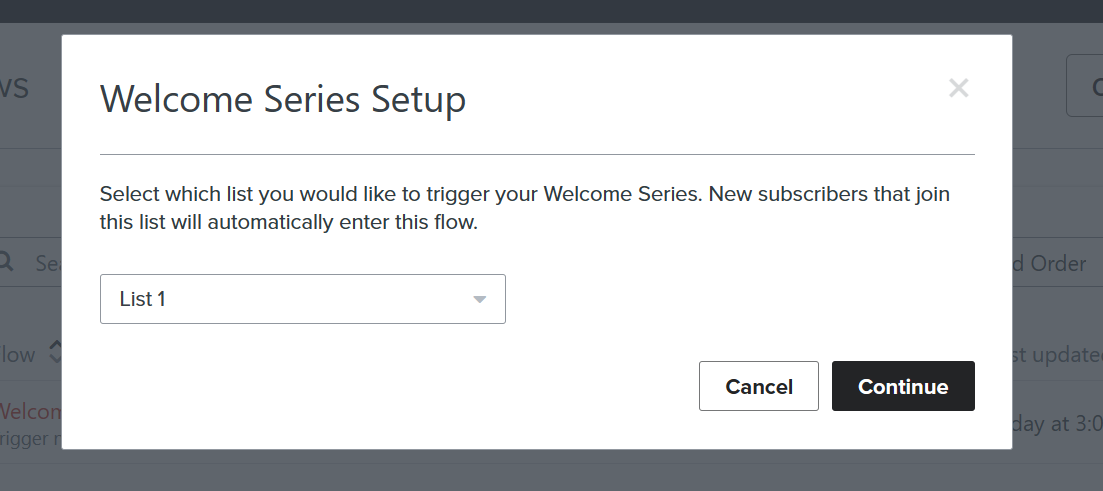
- You can then choose which List you want this email automation to be triggered to. Click the dropdown menu of “Choose list”.
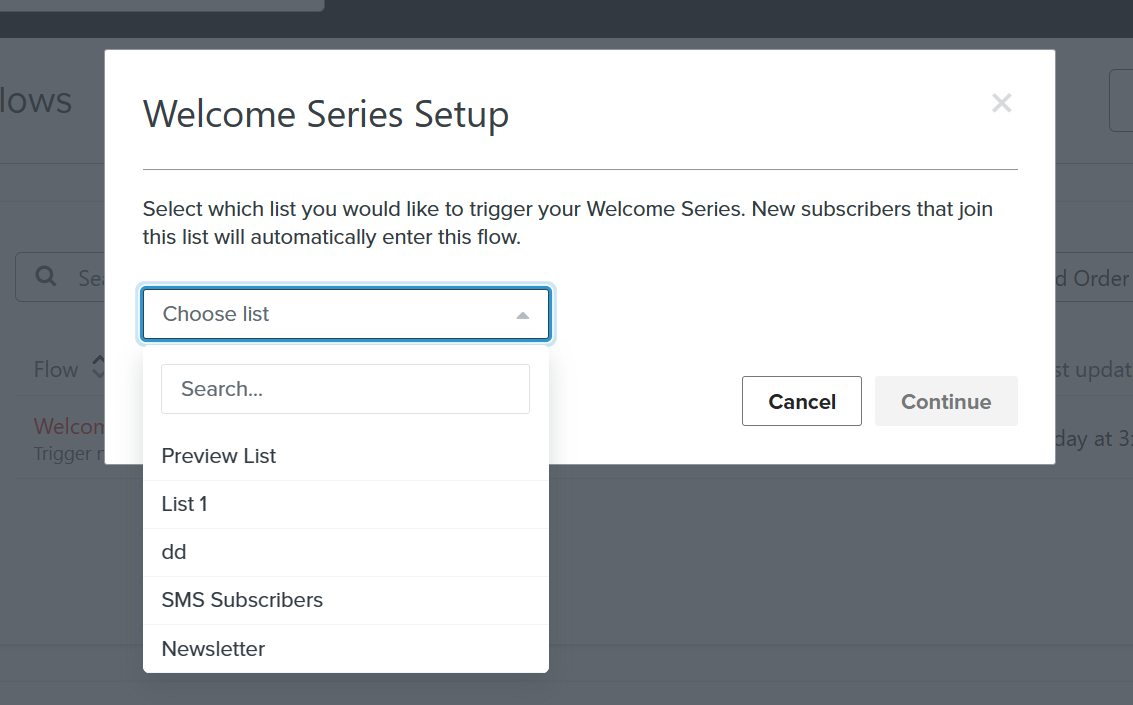
- Choose your preferred list for the Welcome Series by clicking it. For example, click “List 1”.
- After clicking your preferred list, click “Continue”.
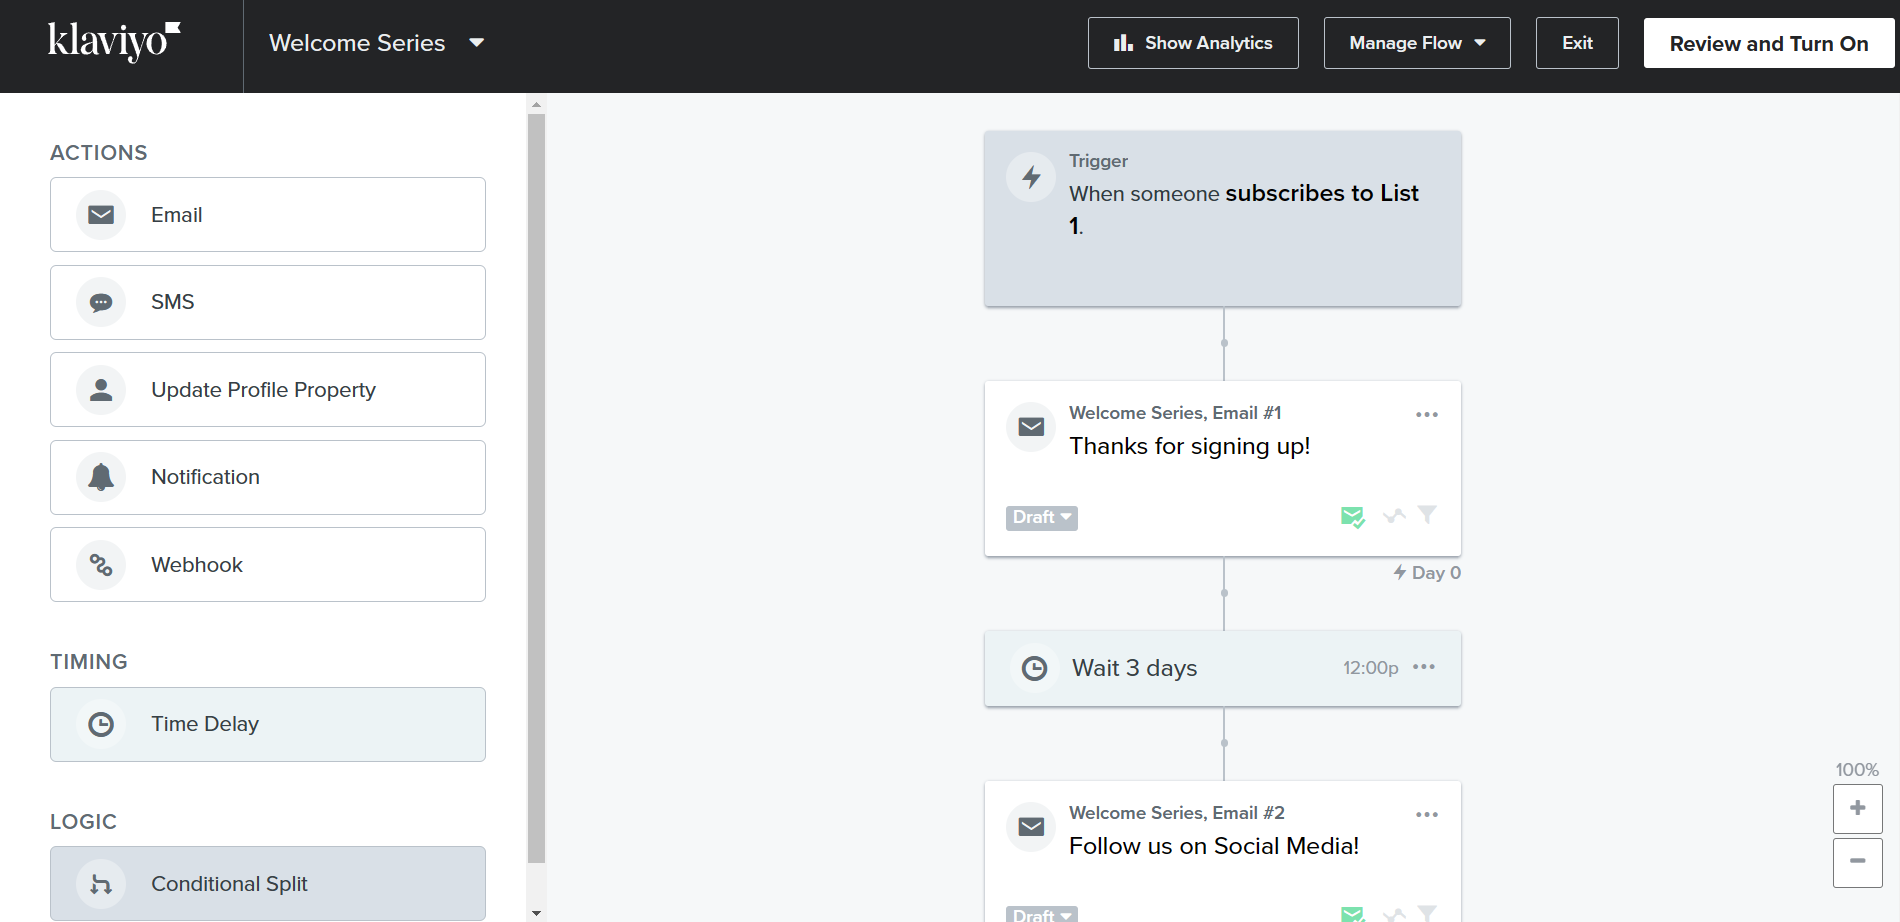
- You will be redirected to this page where you can see the flow of your series. As shown in the left sidebar, you can drag the preferred action, timing, or logic on the flow. But since there was a structured flow indicated on the right, you can just edit it out.
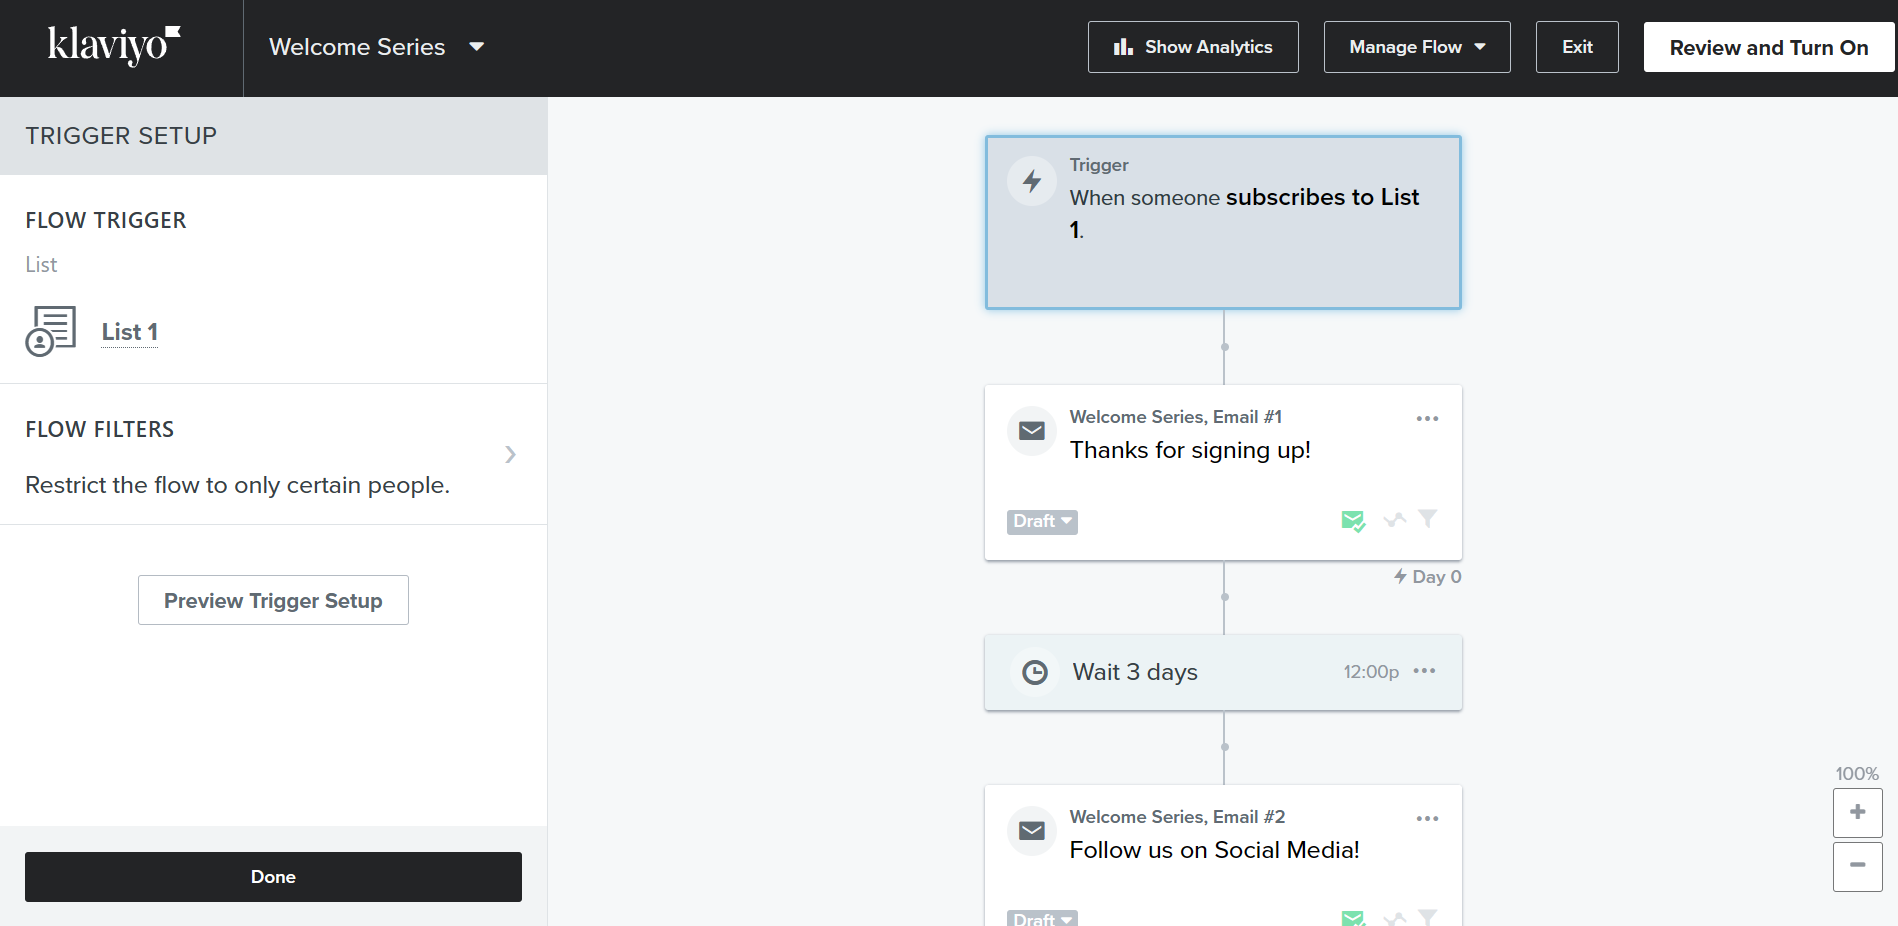
- To view the settings on a step in the flow, click that step to see the setup. As you can see, the Trigger in this flow is when someone subscribes to List 1. To move on to other steps, click “Done”.
- Next is the Email #1. After you click this step in the workflow, You can edit the content by clicking “Edit”.
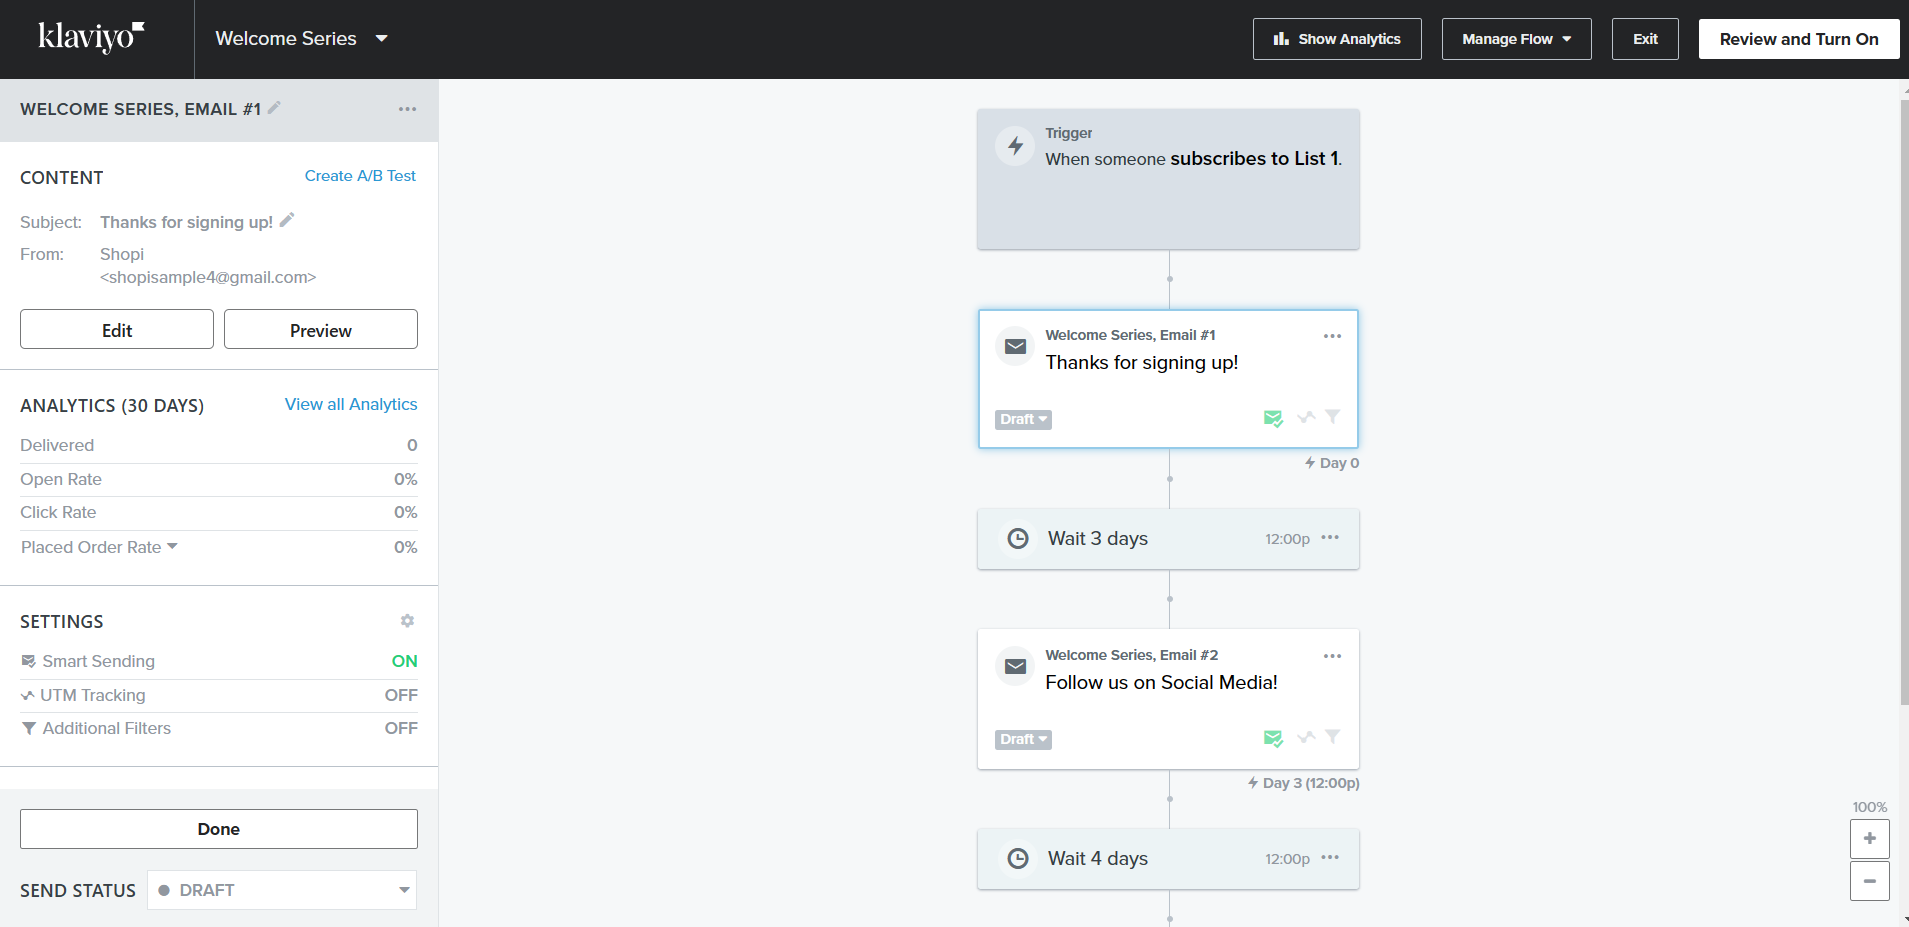
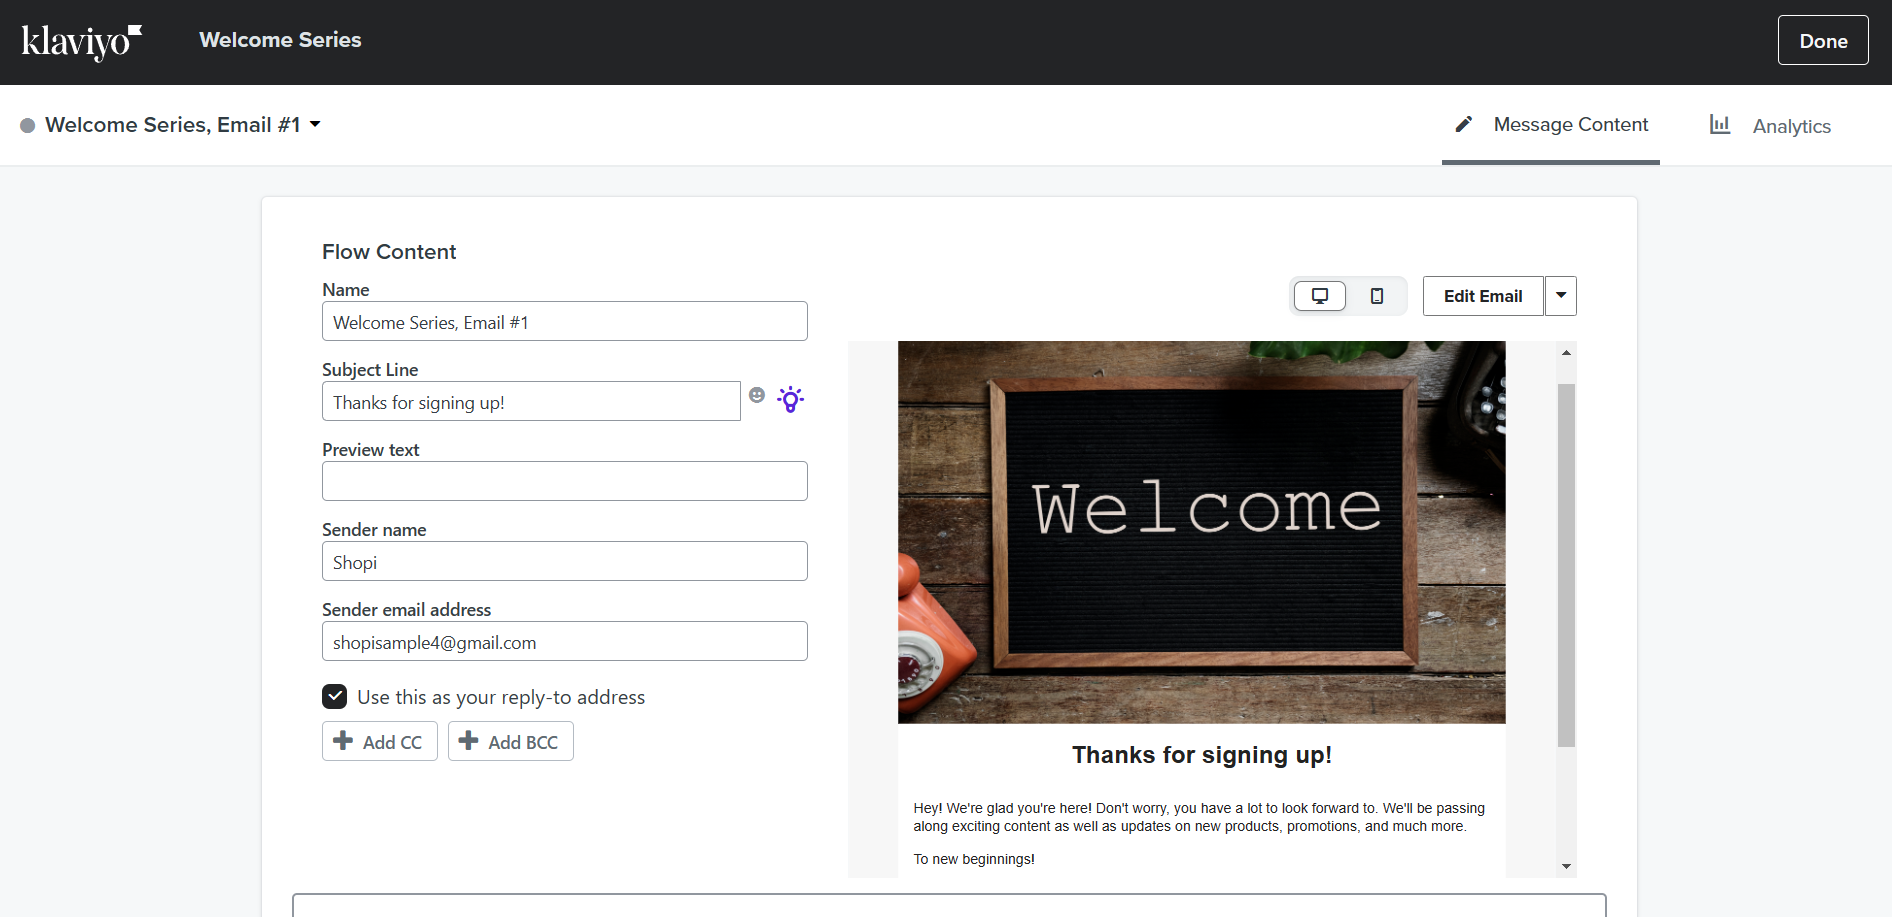
- You can edit the flow content according to your preferences. You can also see the sender name and email address that you have indicated earlier. To save this, click “Done”.
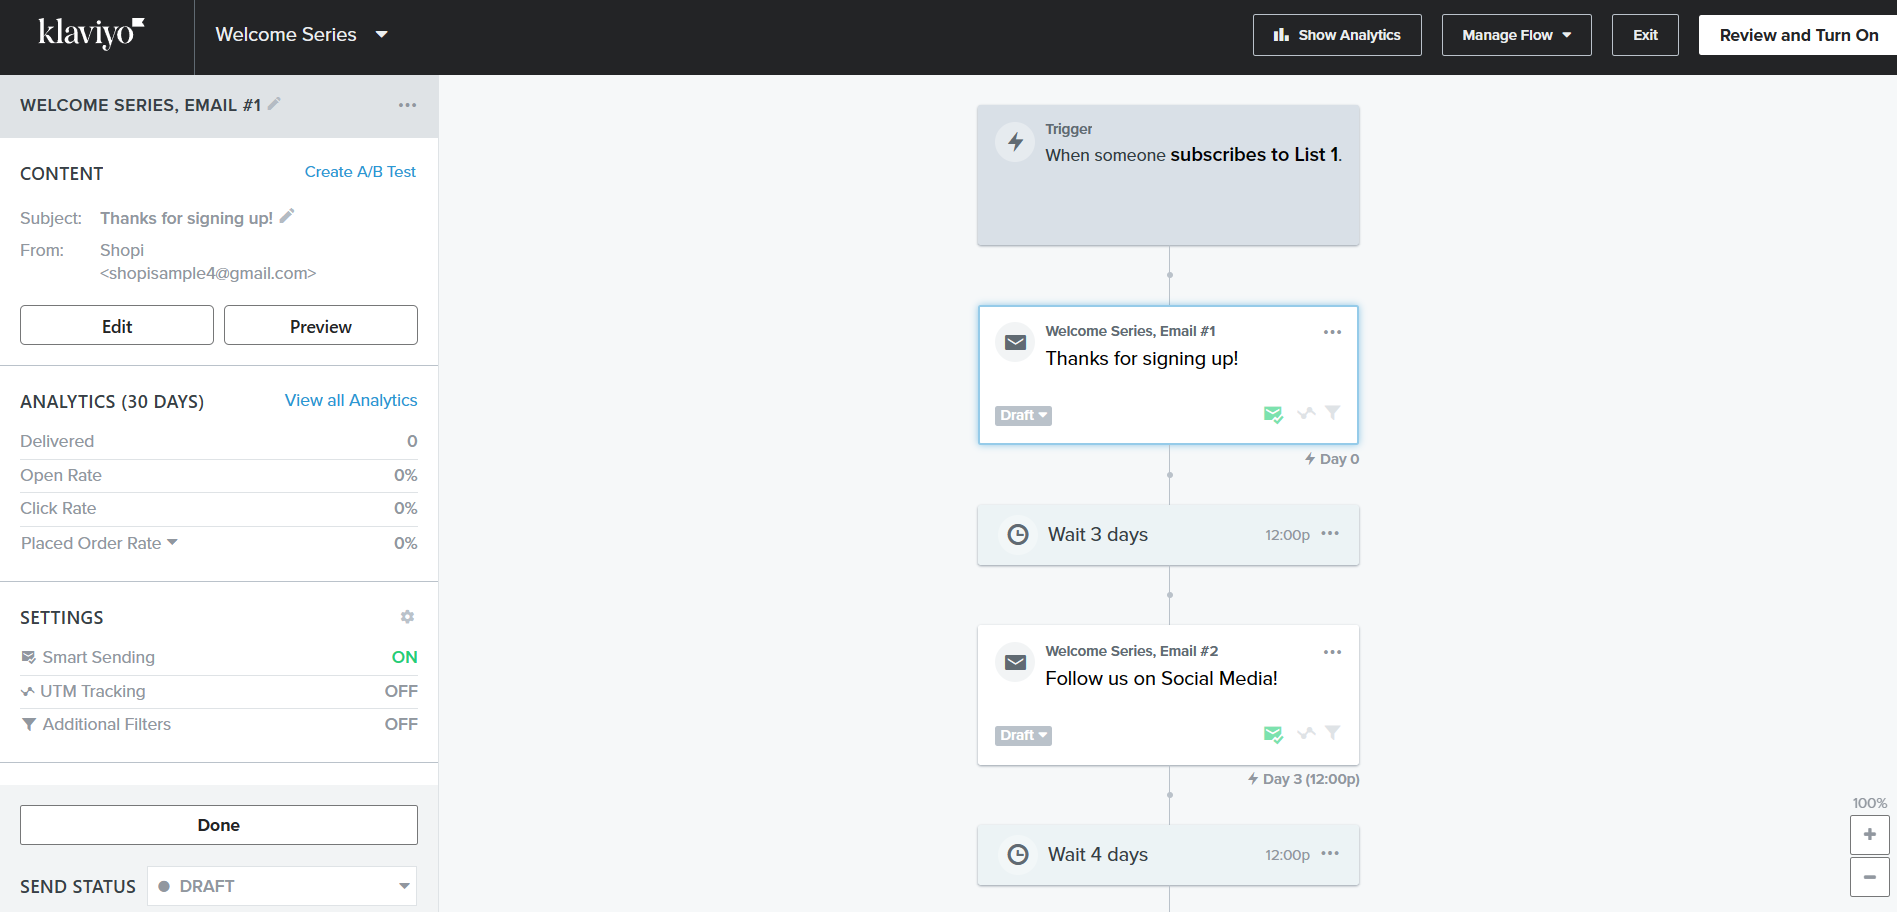
- You can also modify the settings on Smart Sending, UTM Tracking, and Additional Filters by clicking them.
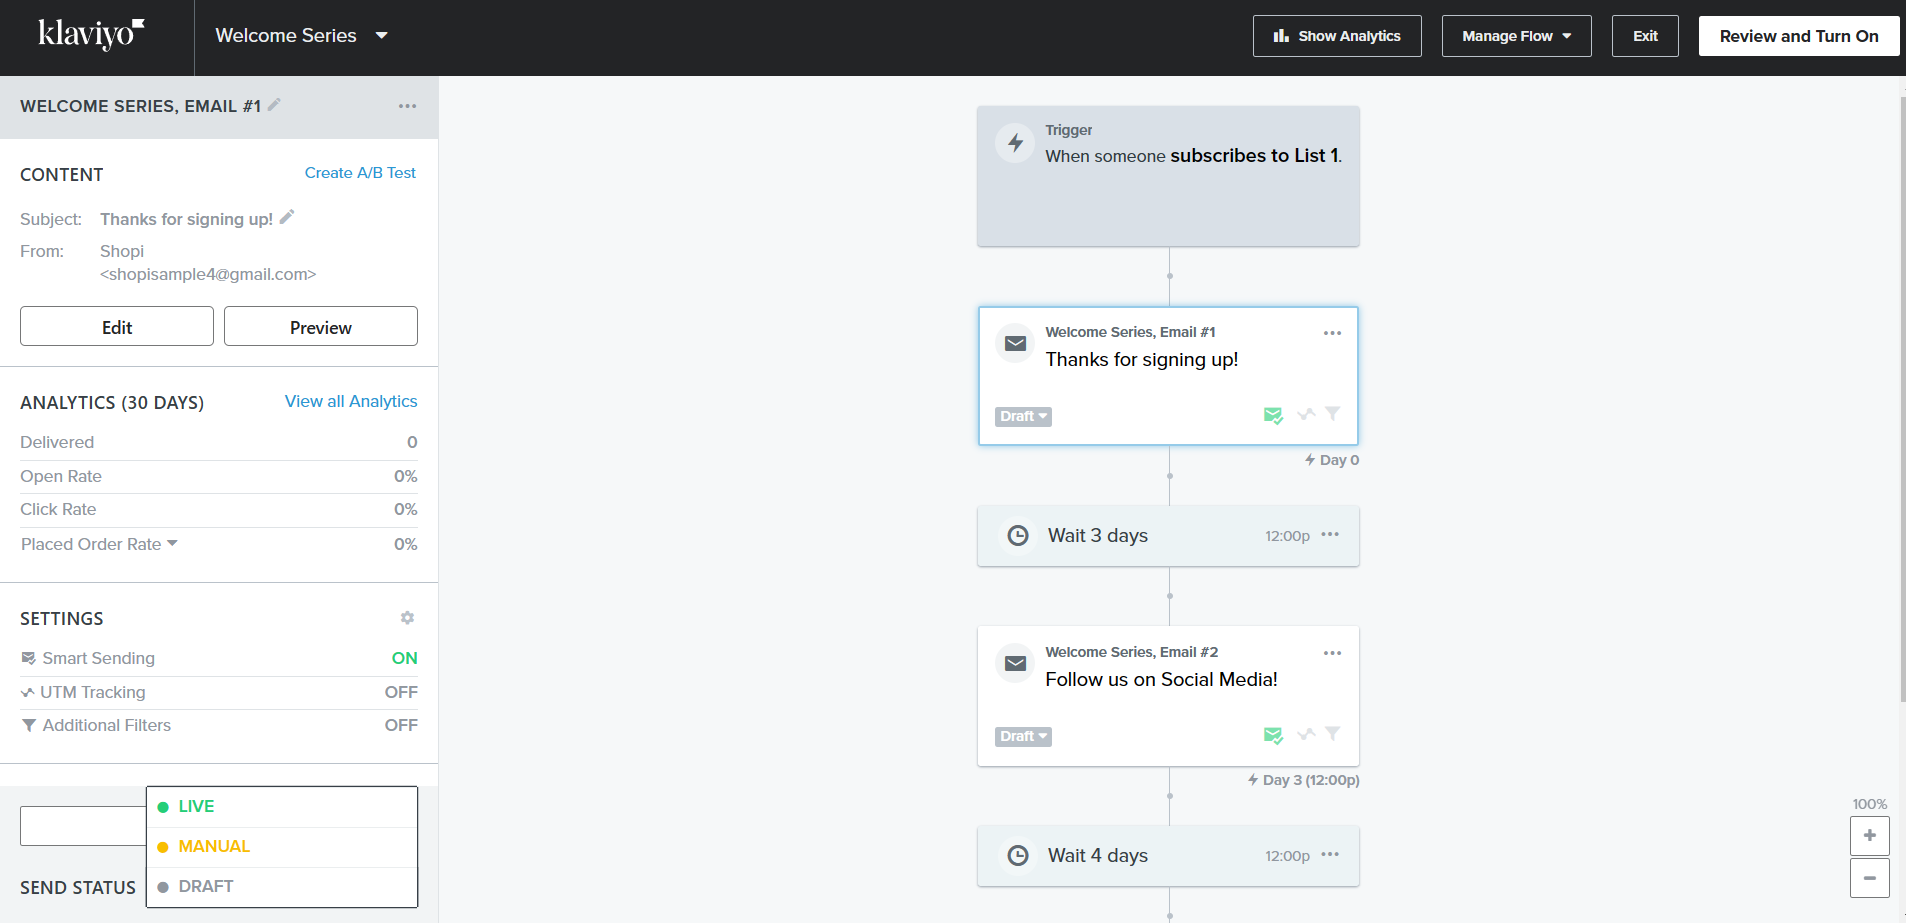
- You can also set the send status as Live, Manual, or Draft, but it is suggested to be Live so email will be sent in an instant.
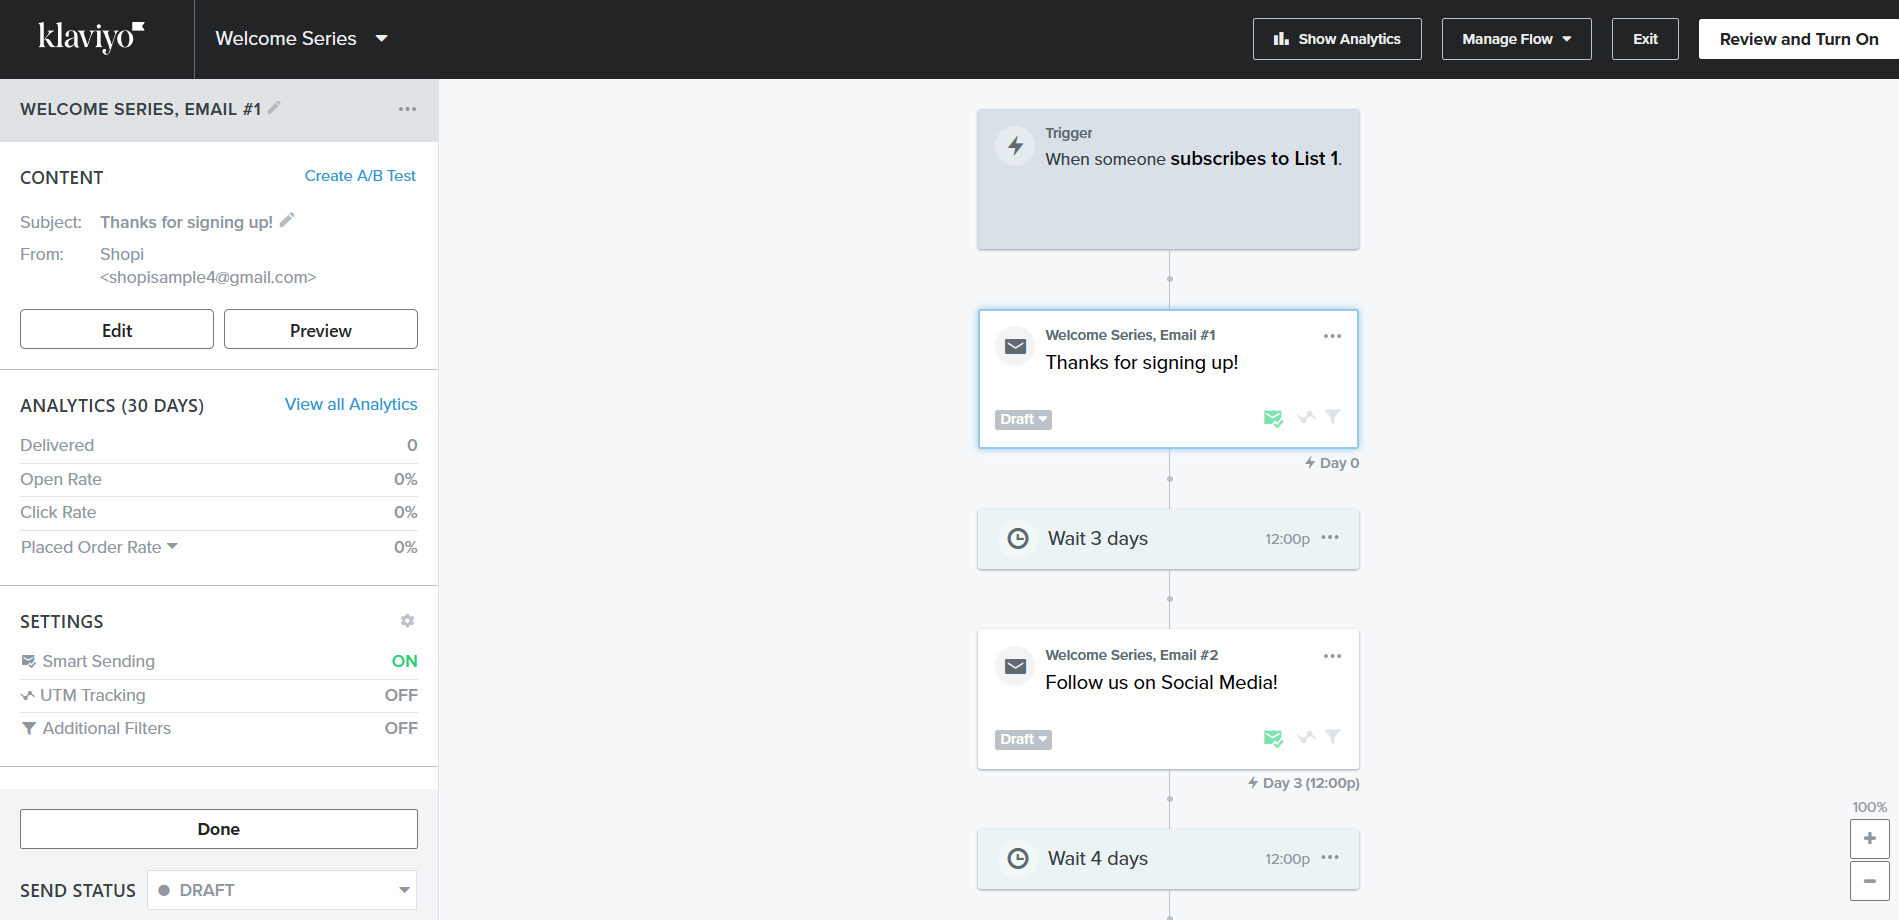
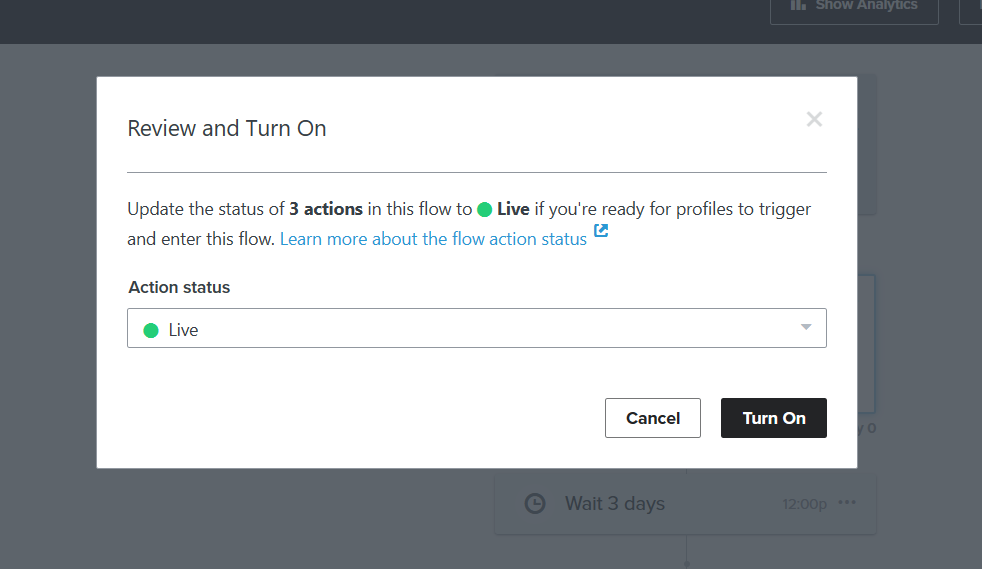
- After editing various steps in the flow, click the “Review and Turn On” button to save your flow for email automation.
- After you set the action status to Live, click “Turn On”.
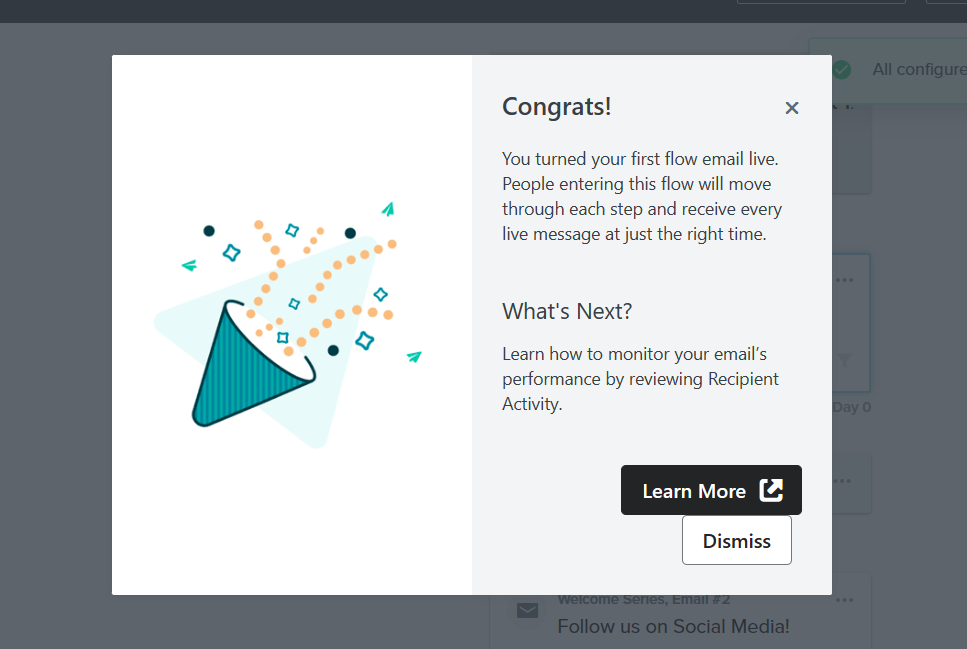
- After you see this tab, then you are done! You can repeat the process of setting up email automation in this SOP if you want to create more.
Conclusion
You’re done! Always remember that email automation works best in advertising your business to your loyal and potential customers. By doing this, you are improving customer retention and lead generation which will lead to increasing sales in your business.
-
To set up email automation, you must have a Shopify account and Shopify App Store to install Klaviyo.
-
To make a Klaviyo account, you must indicate your physical address and email contact to proceed with the next steps.
-
Aside from email marketing, you can also use SMS marketing in Klaviyo to promote your business and reach a wider set of people.
-
Editing the list and segments, content of email, and the flow of automations, should be in setup to allow email automations.
-
Make sure to set the action status to Live so the automation will start immediately.