Customizing Your Shopify Theme
To guide you through the different features on Shopify theme editor that can be utilized in customizing your Shopify store's theme.
Prefer a shortcut? 16 free tools do parts of this for you.

Aim: To guide you through the different features on Shopify theme editor that can be utilized in customizing your Shopify store's theme.
Optimal Outcome: Customizing your Shopify store's theme would improve your customers' experience with the functionalities of the website, and also their satisfaction on the speed and response of the website.
What do you need to start: To follow this SOP, you need to have an account in Shopify and access to Shopify Theme Store to incorporate other themes that might be suitable for your business industry..
Why is this SOP Important: Customizing your Shopify store theme is necessary because it may determine the success rate of your business. Customers' user experience also falls under customer service, as it makes their purchasing experience better if they can use your website with ease. There are cases where the website's theme appear to be overwhelming for customers, so it is something that you would want to avoid.
When and Where to execute: Shopify themes are ideally customized after organizing your products and customer lists and before you establish your online store. If you want to attract new customers by redirecting them to a customized theme, you need to take extra time to edit out every function indicated in your website.
Who Should Be Doing This: This should be done by the web developer and designer of the company's website.
Shopify Theme Customization
Shopify themes are existing templates of a Shopify store that can transform the visual appearance of your website for your customers. This customization is done to produce a unique output which will be in line with the products and services that your business offers. Customizing the Shopify theme includes several aspects of the store, which are the logo, layout, color palettes, and the content of each page in the website. As simple as it sounds, the theme of your store also affects your brand recognition, so it is an essential task for every business that wants to introduce its products in the online platform.
Execution
Resources/Tools & Set up
-
Shopify account
-
Shopify Theme Store
Choosing a Shopify Theme
- Sign in to your Shopify store account by clicking “Log in” and entering your account details.

- Once you are redirected to the Shopify homepage, you will see a dashboard on the left. Click “Online Store” located under Sales channels.
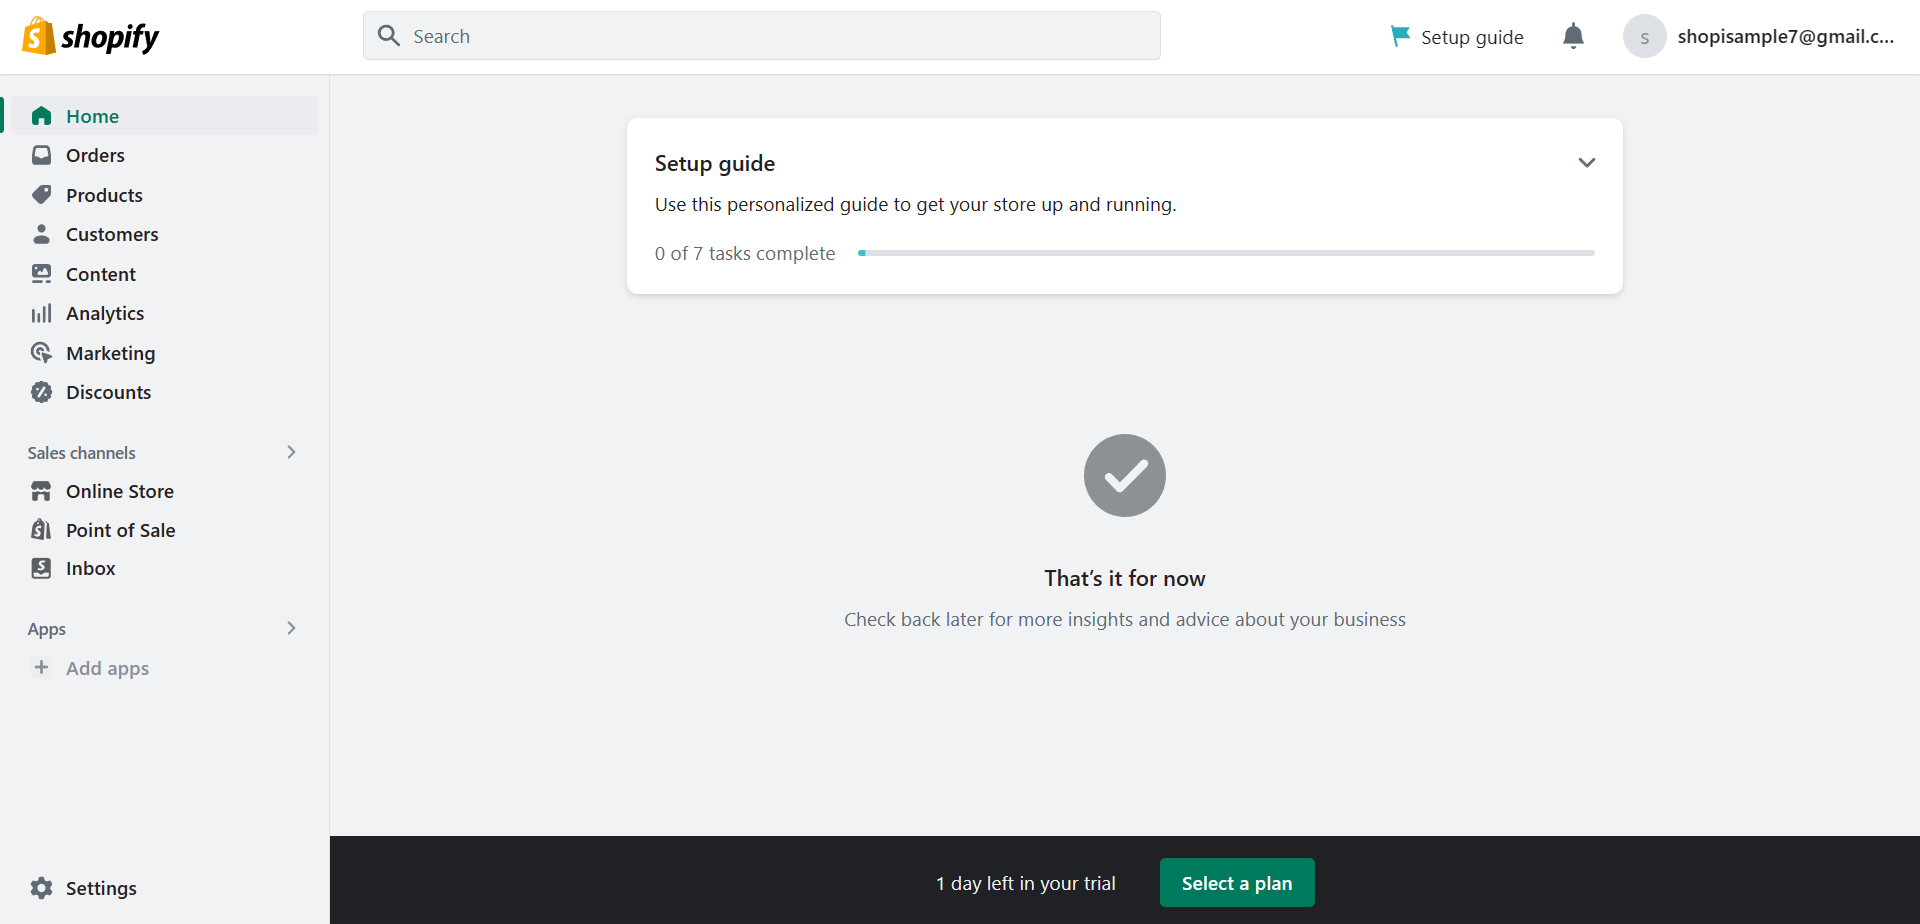
- After clicking the Online Store, subcategories will appear. Click the “Themes”.
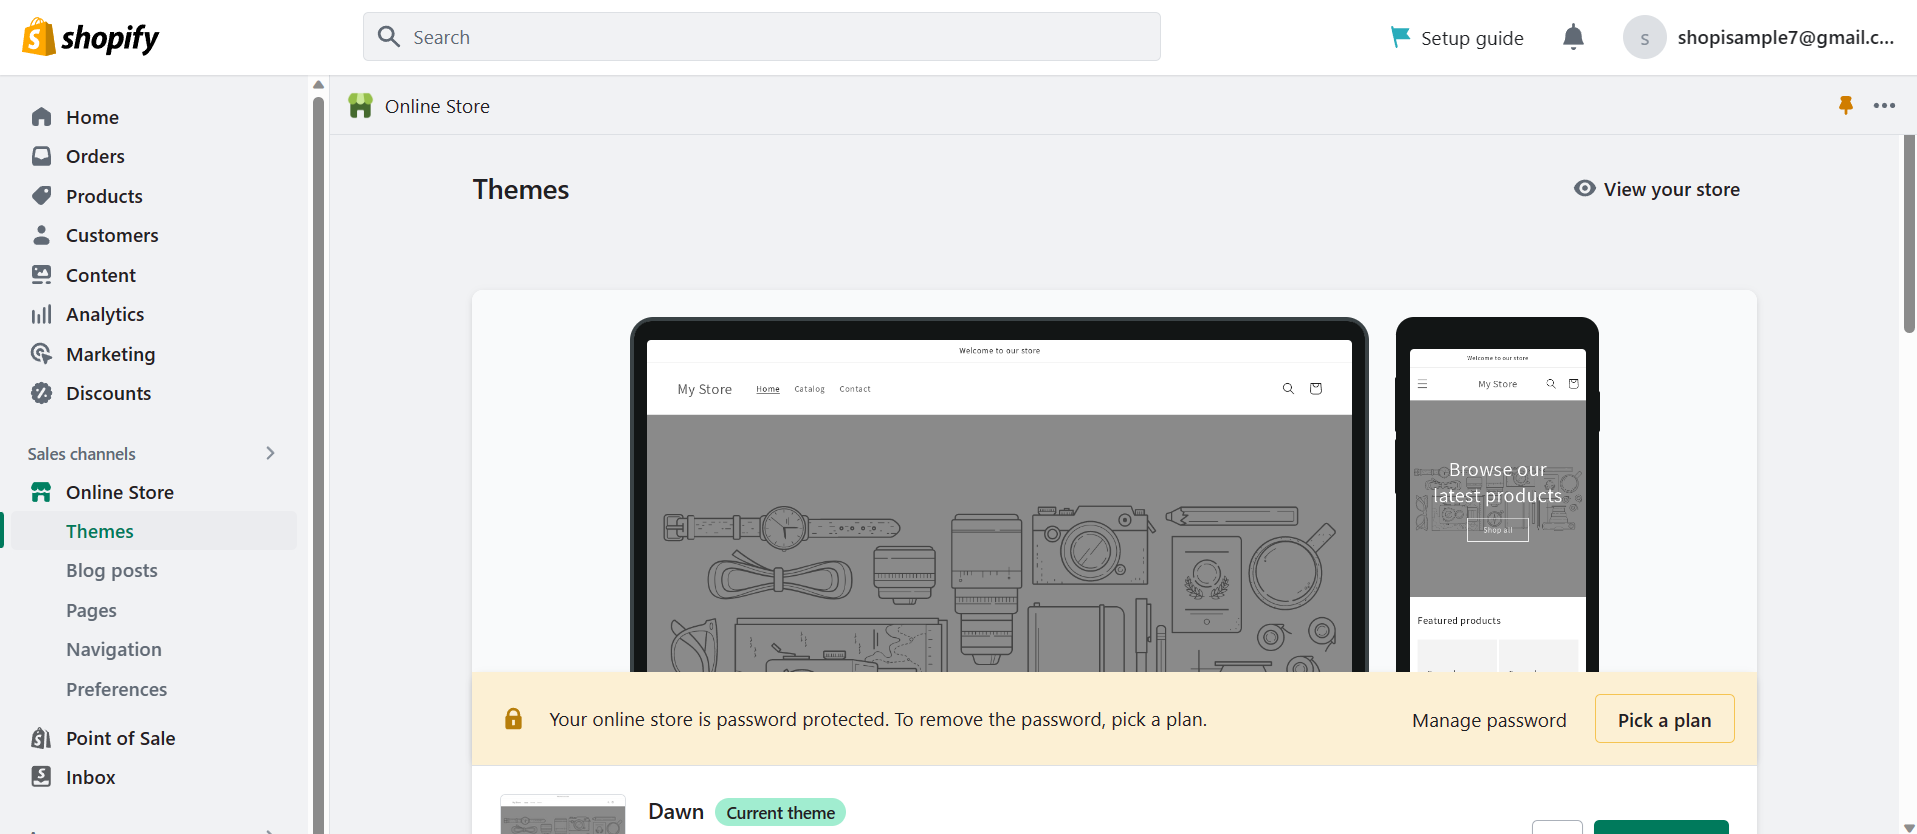
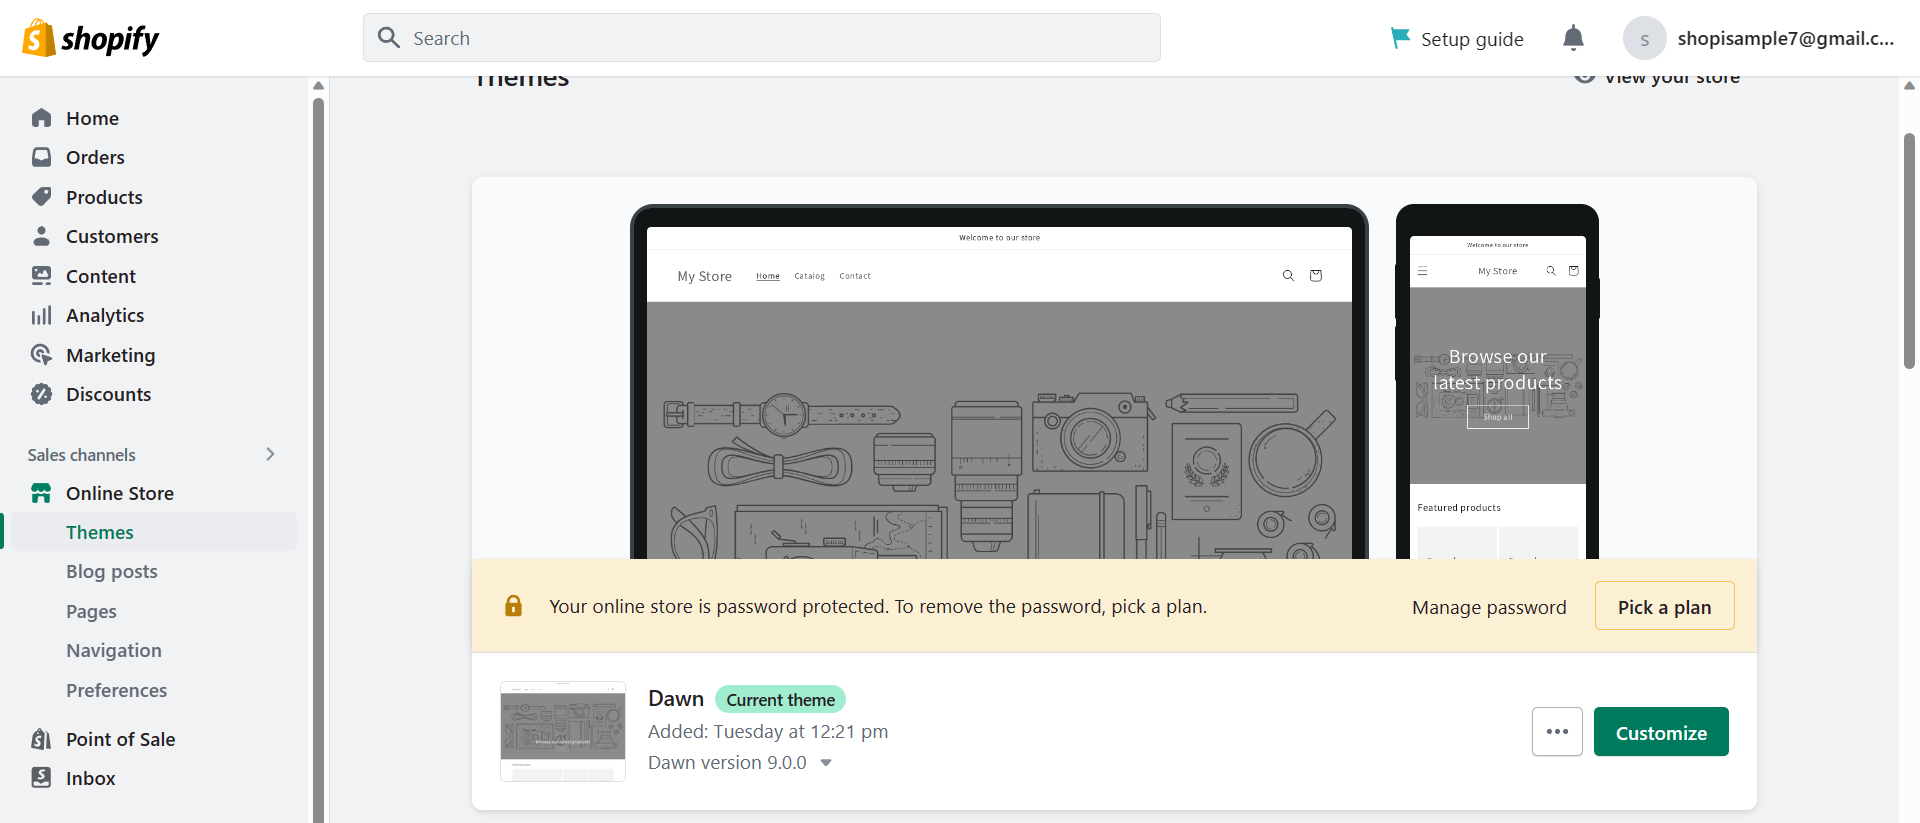
- In the Themes page, you can see a customizable theme provided by Shopify. Dawn standard theme is a free one which can only be published publicly after you pick a Shopify plan. You can customize it by clicking the Customize button.
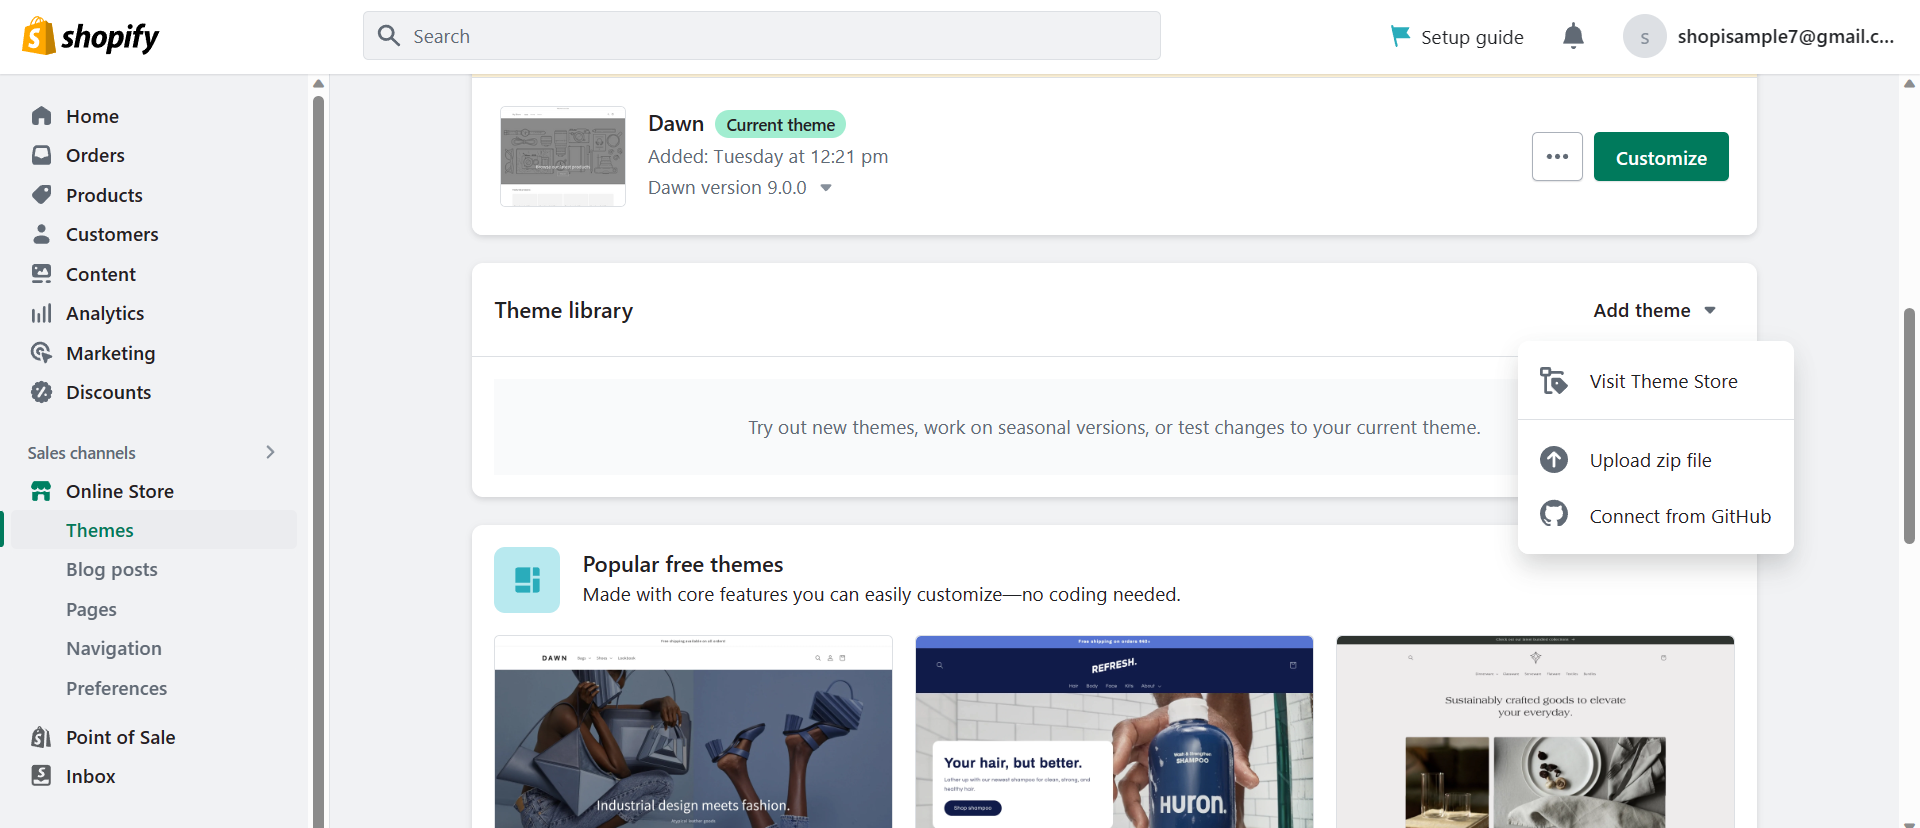
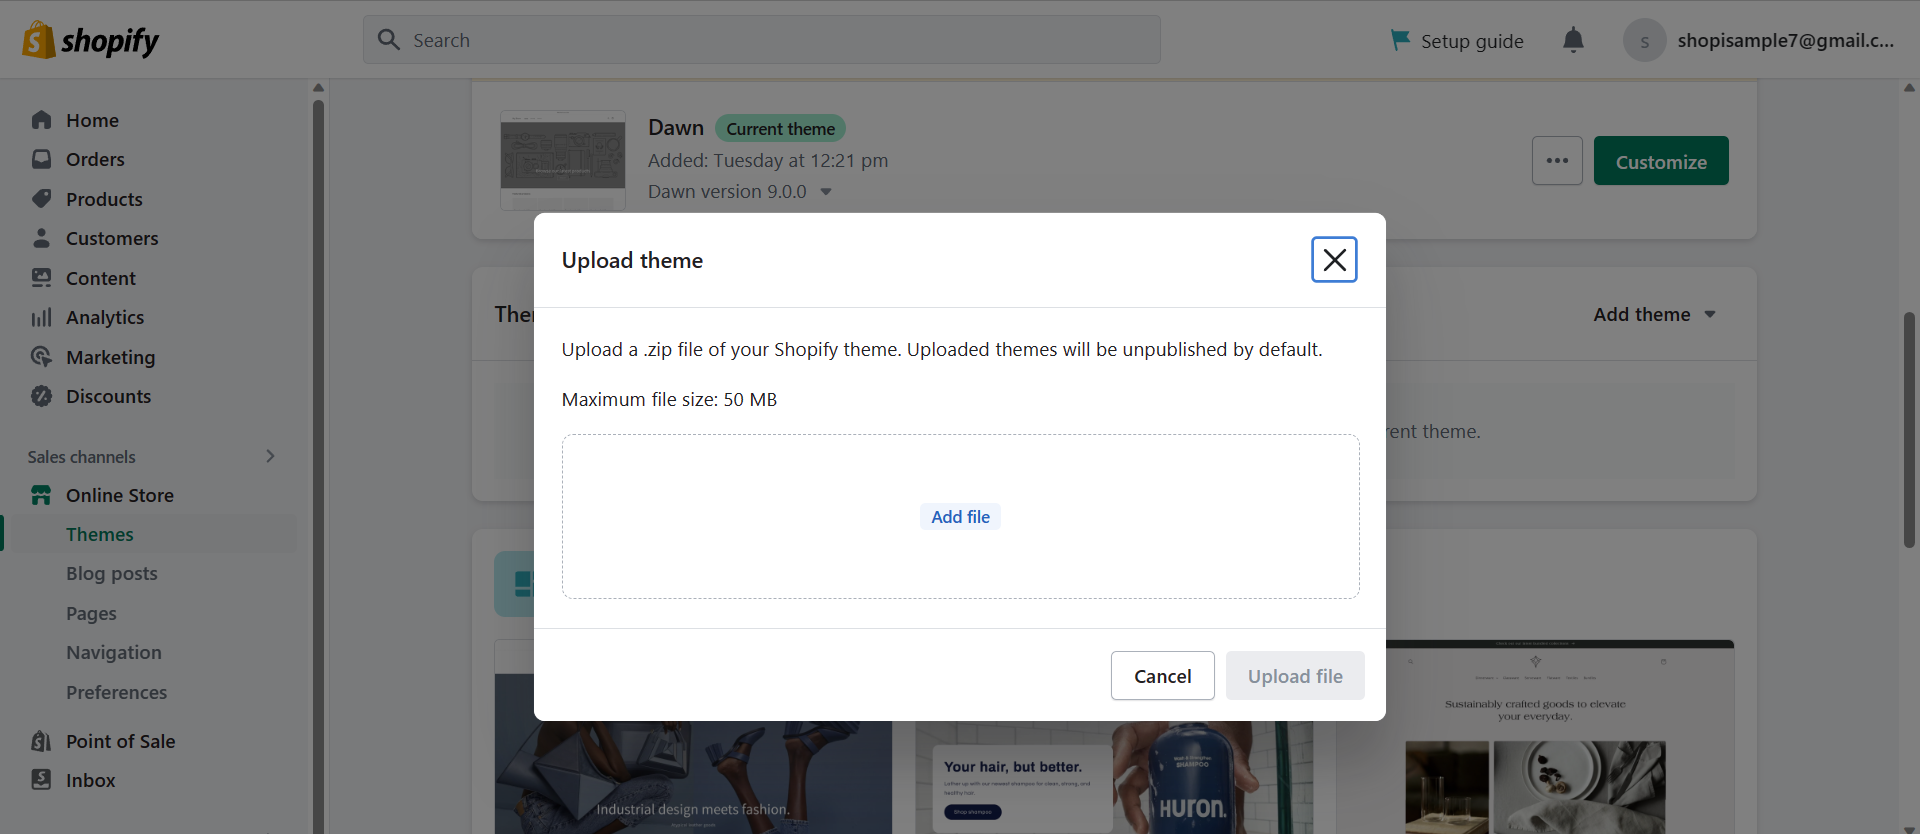
- On the other hand, if you want to pick another theme, you can scroll down the Themes page. Under the Dawn theme, you will see the Theme library. Click the “Upload zip file” under the “Add theme” drop down menu if you have a premade store website template in your desktop. NOTE: Make sure that your file is in zip format so there will be no obstacles in the process.
- You will be asked to upload the theme by clicking the “Add file” button inside the box. After uploading your file, you can click the “Upload file” button and it should appear in your Theme library.
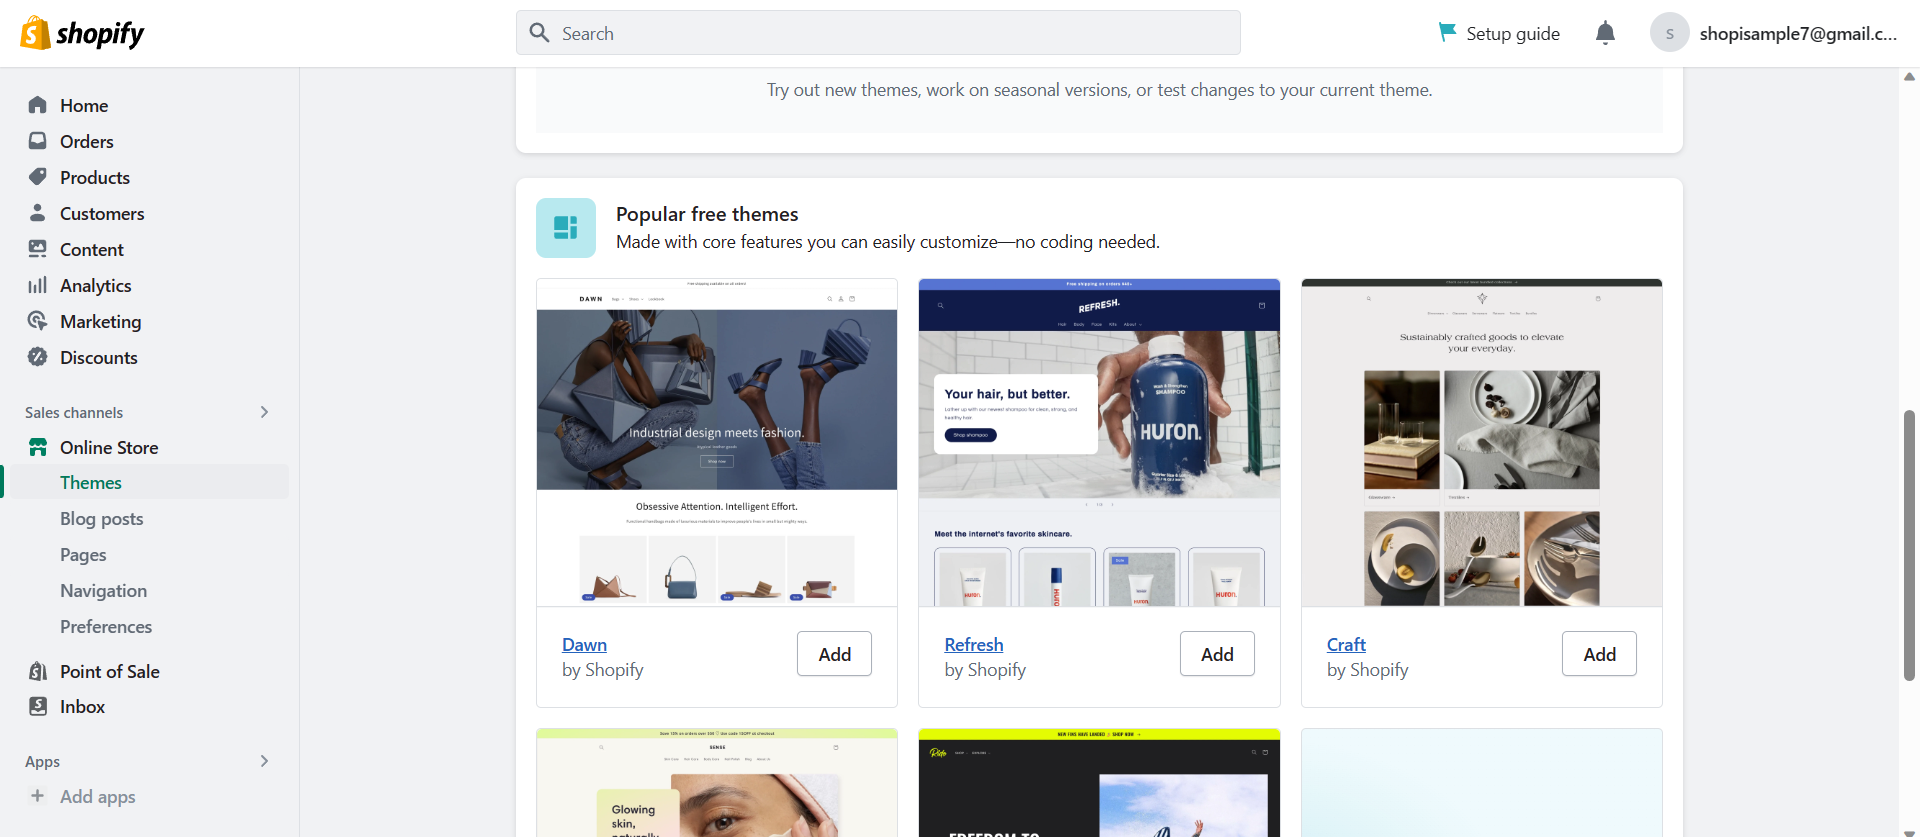
- Scroll down to the Popular free themes. You can incorporate these themes for free because they are also provided by Shopify. Click the “Add” button to do it.
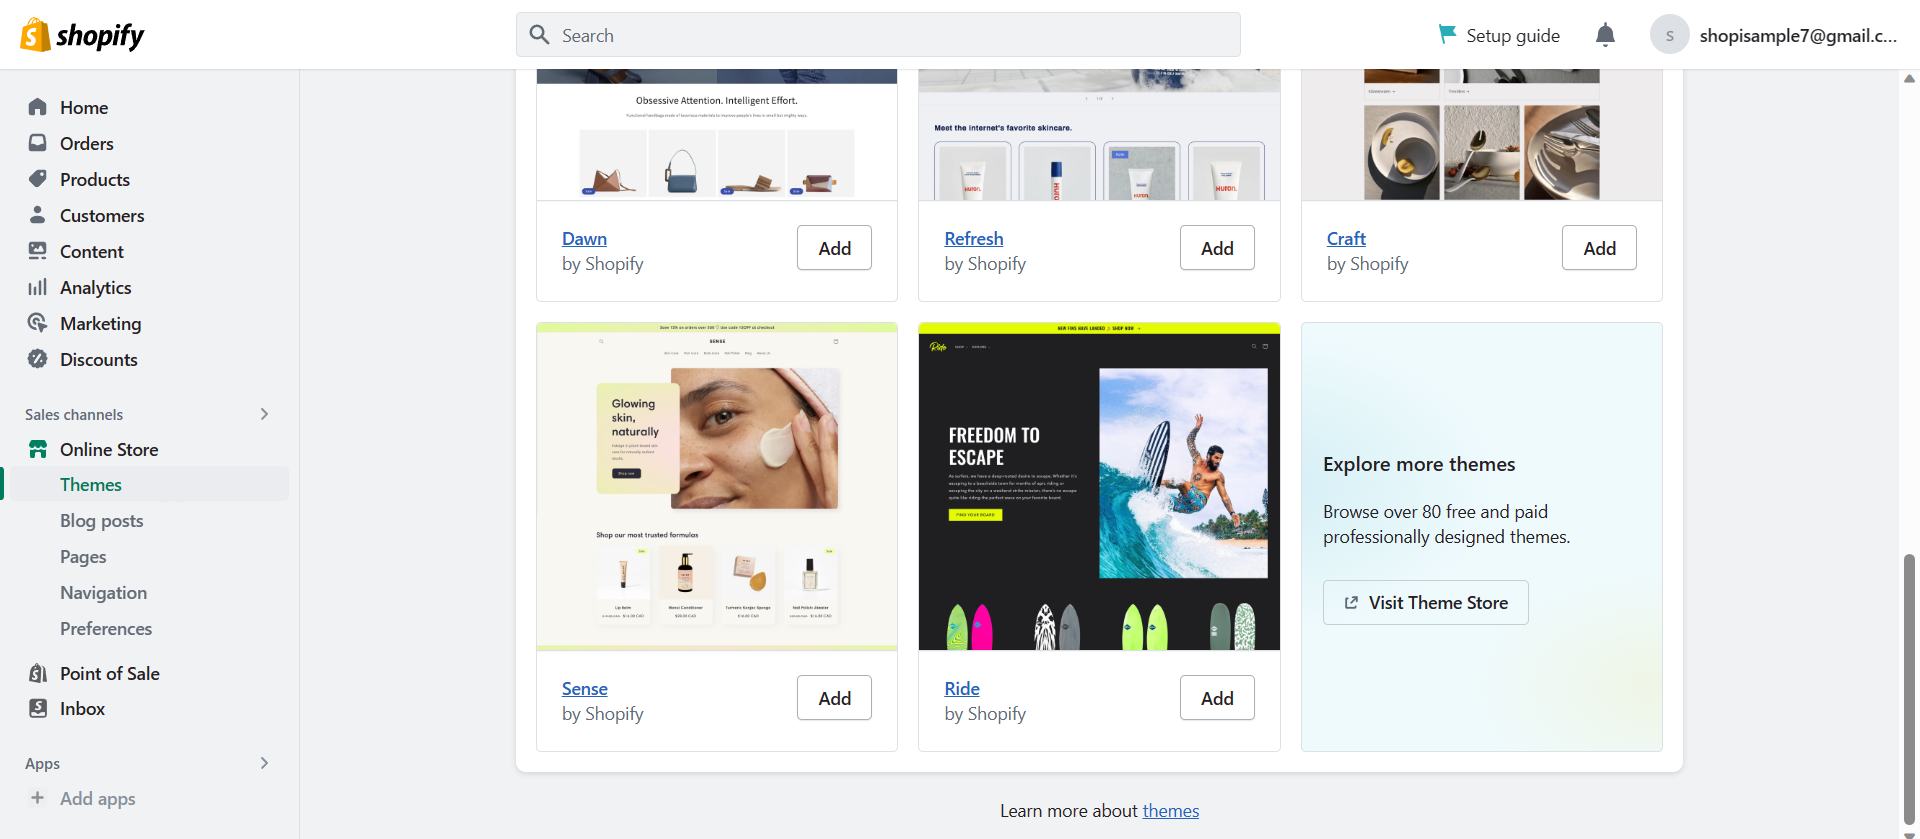
- You can explore more themes, free and paid, in the Theme Store. To browse more themes, you can click the “Visit Theme Store” button.
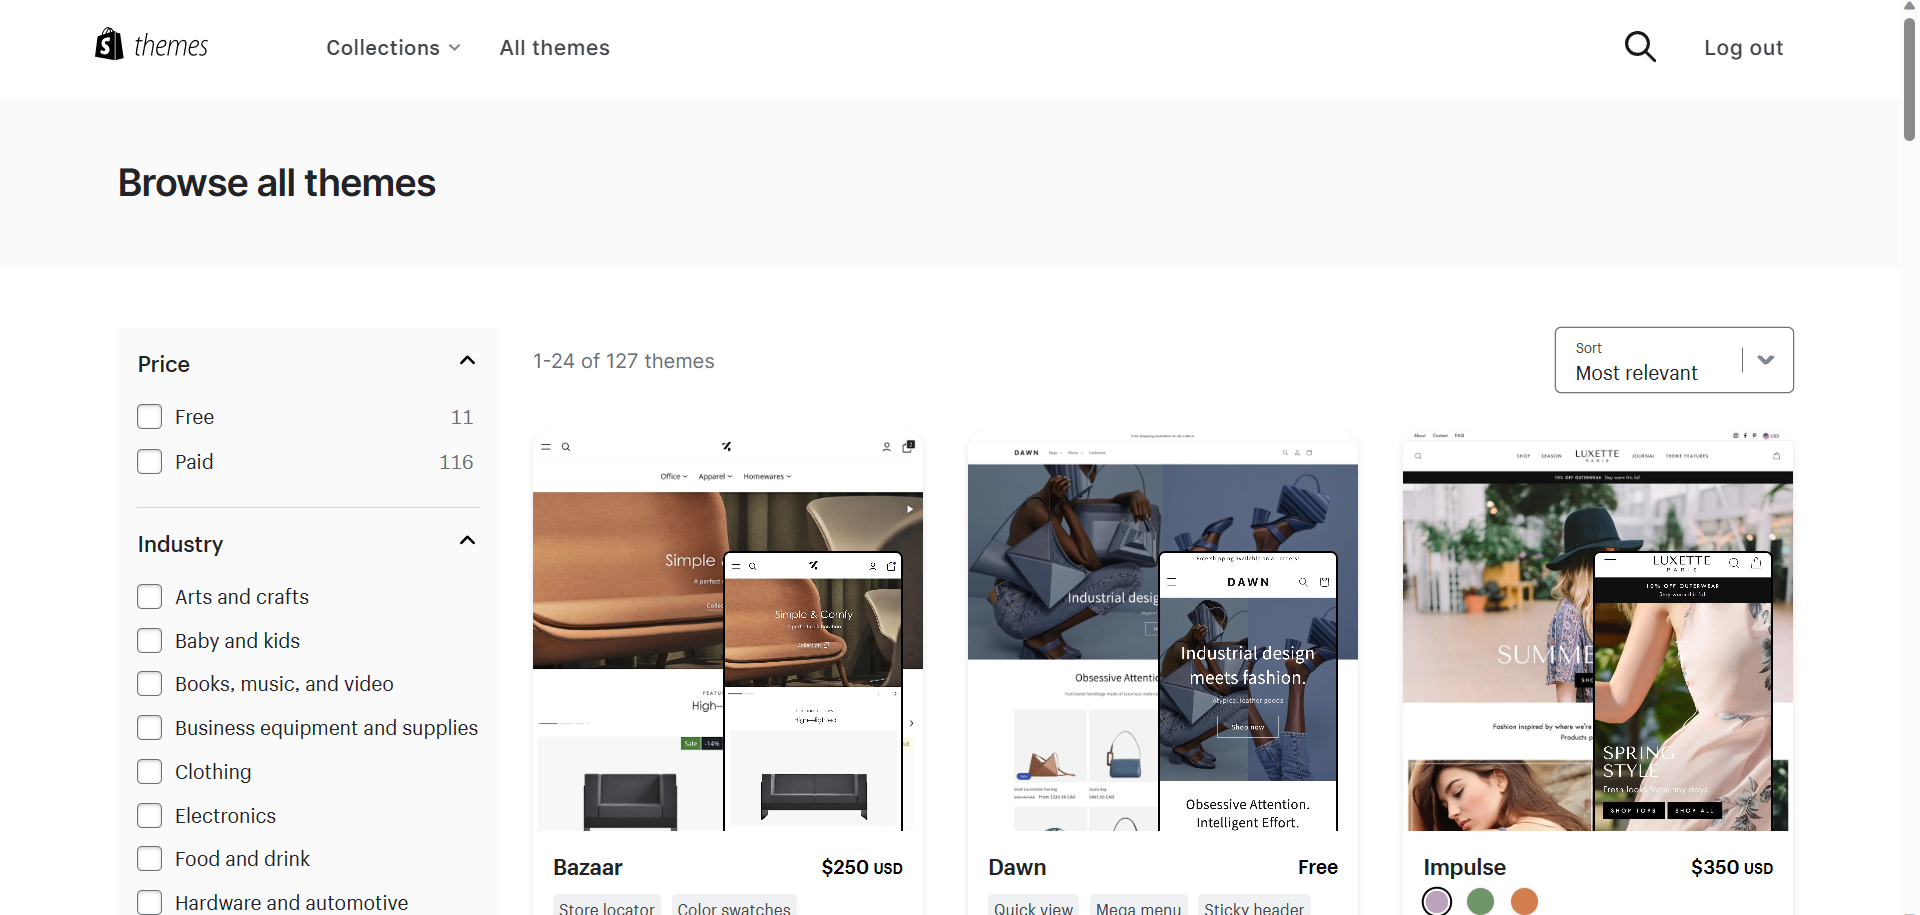
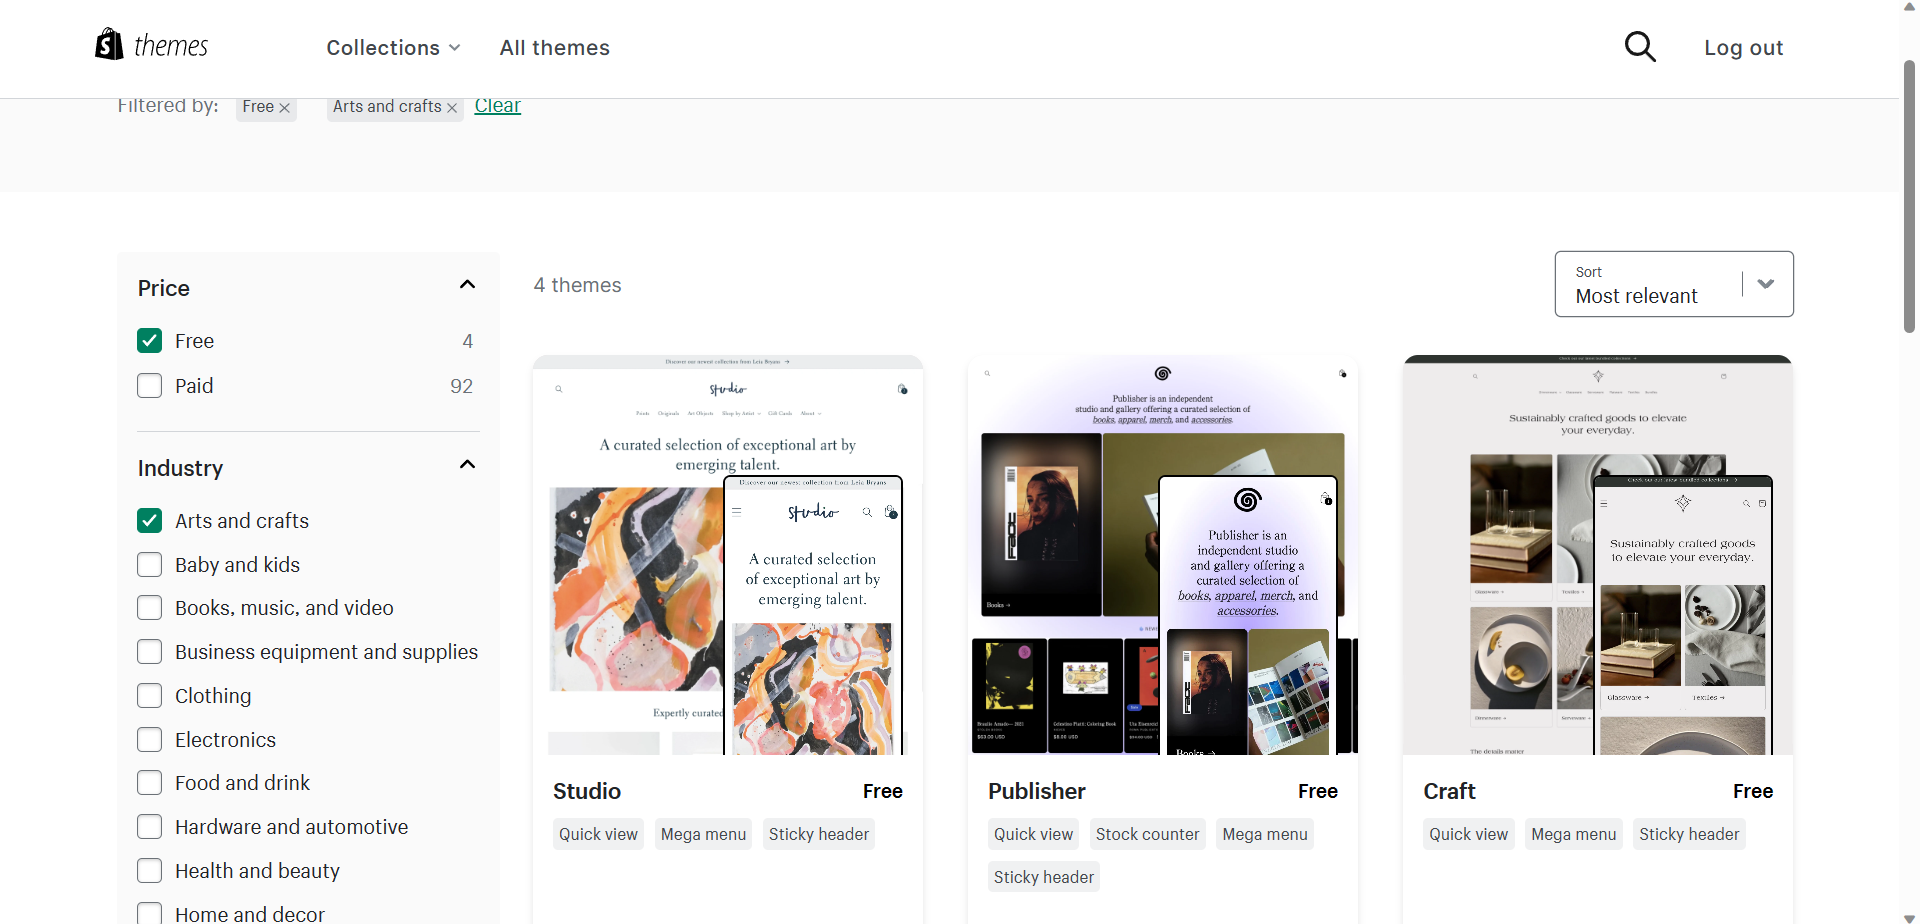
- You will be redirected to the Theme Store. You can browse the themes in here by scrolling down, or you can also utilize the filters in the left side of the site which are categorized in Price and the Industry.
Customizing a Shopify Theme
- If you want to use a free theme that can be used in the Arts and crafts industry of your store, you can check the checkbox beside them and you will see the available themes.
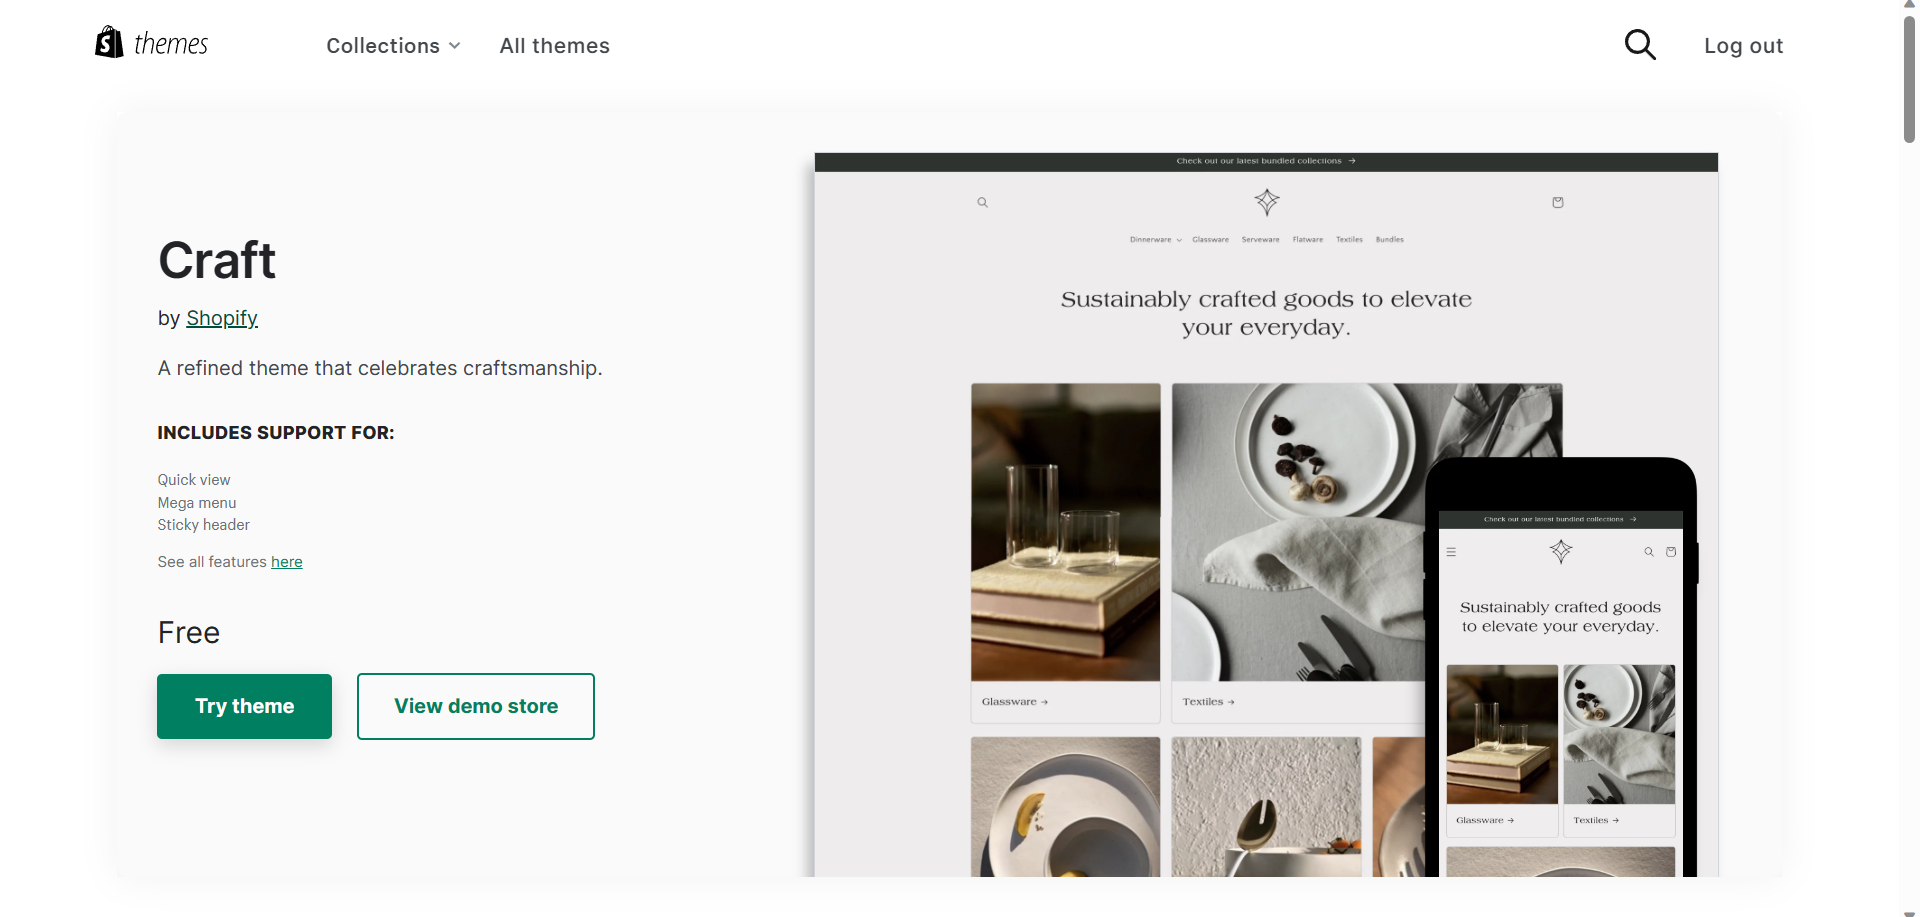
- Click the “Try theme” to utilize a template from the Theme store.
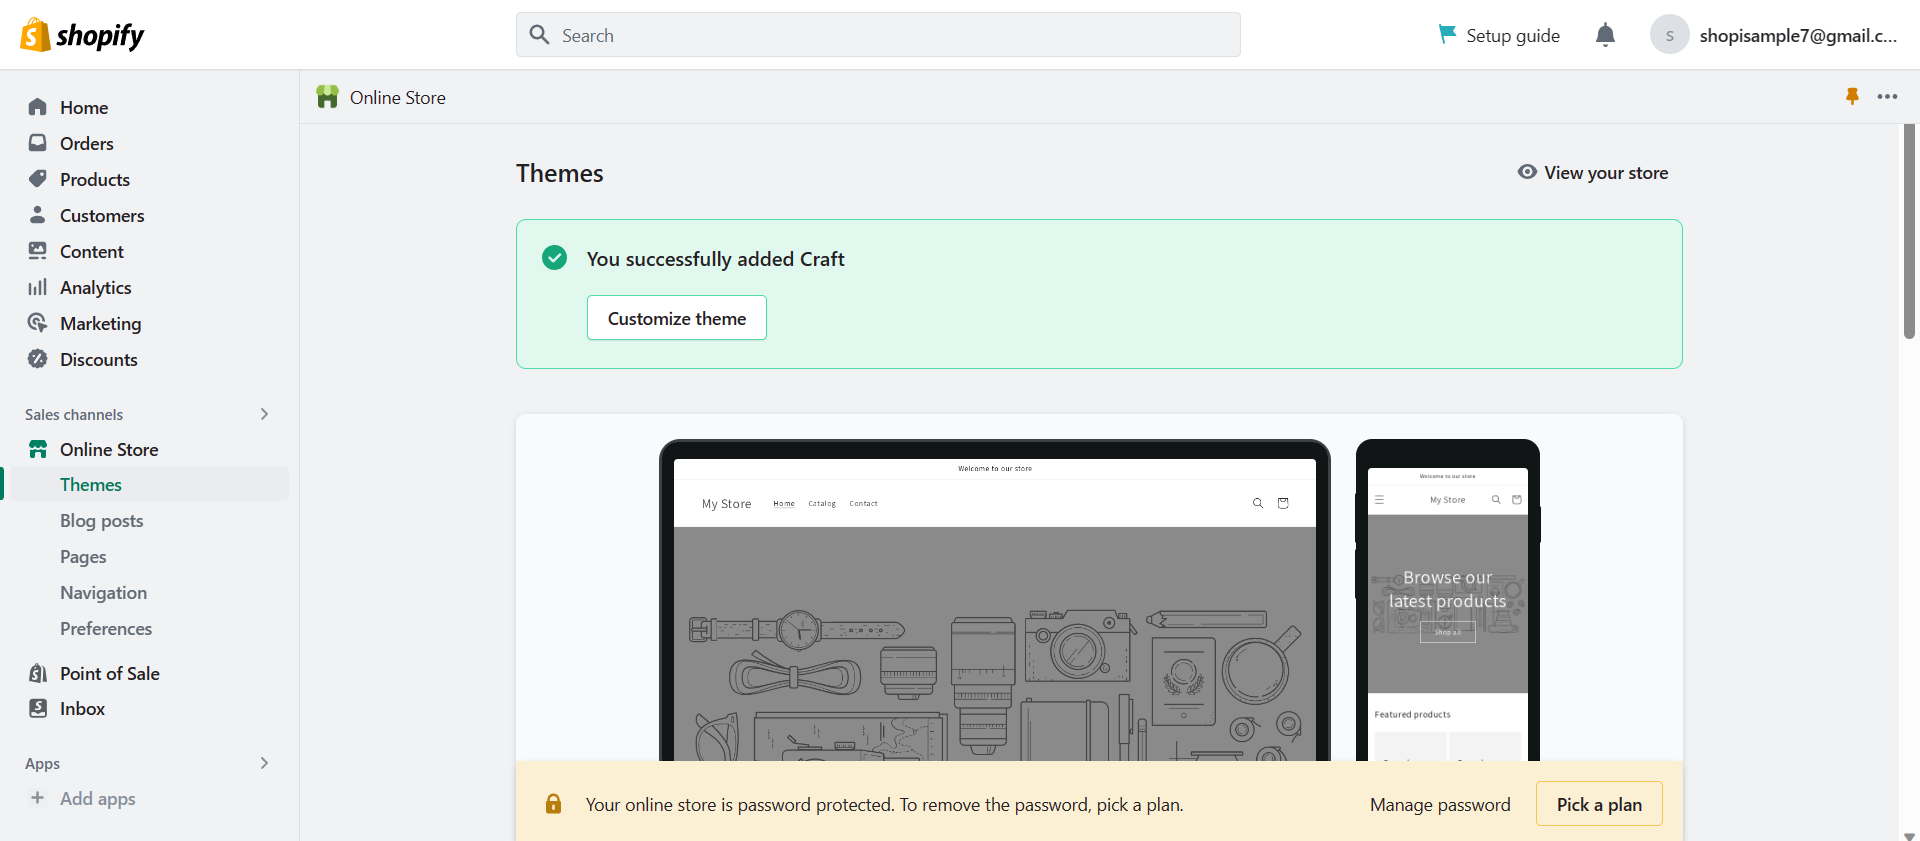
- After successfully incorporating a Shopify theme, you can customize it by clicking "Customize theme".
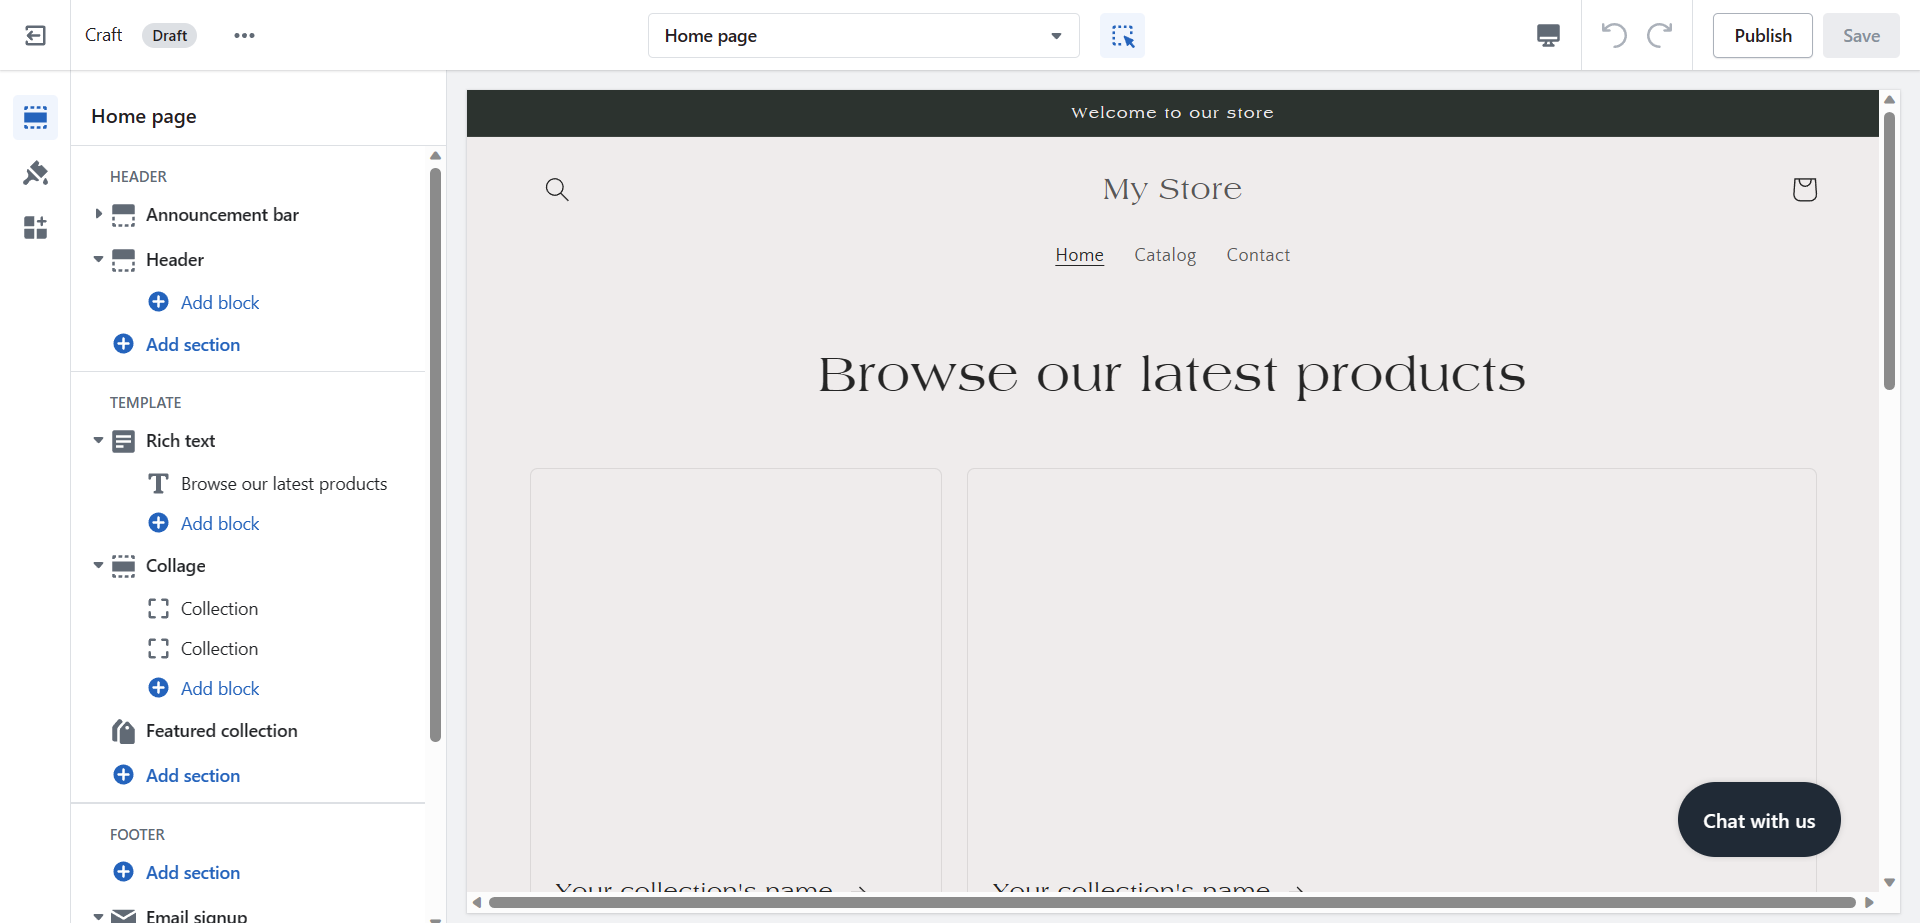
- You will be redirected to your Shopify store’s theme template. At first, the customization tools of Shopify may seem overwhelming but it is actually easy to learn. The left side of the site shows the layout of the sections in a page. These sections are categorized into three: Header, Template, and Footer. To see other pages click the dropdown menu beside the Home page.
- After clicking the drop-down menu, you can now see the pages involved in your Shopify store. This includes the Product page, Cart page, Checkout page, and even Blog posts page, if you have one.
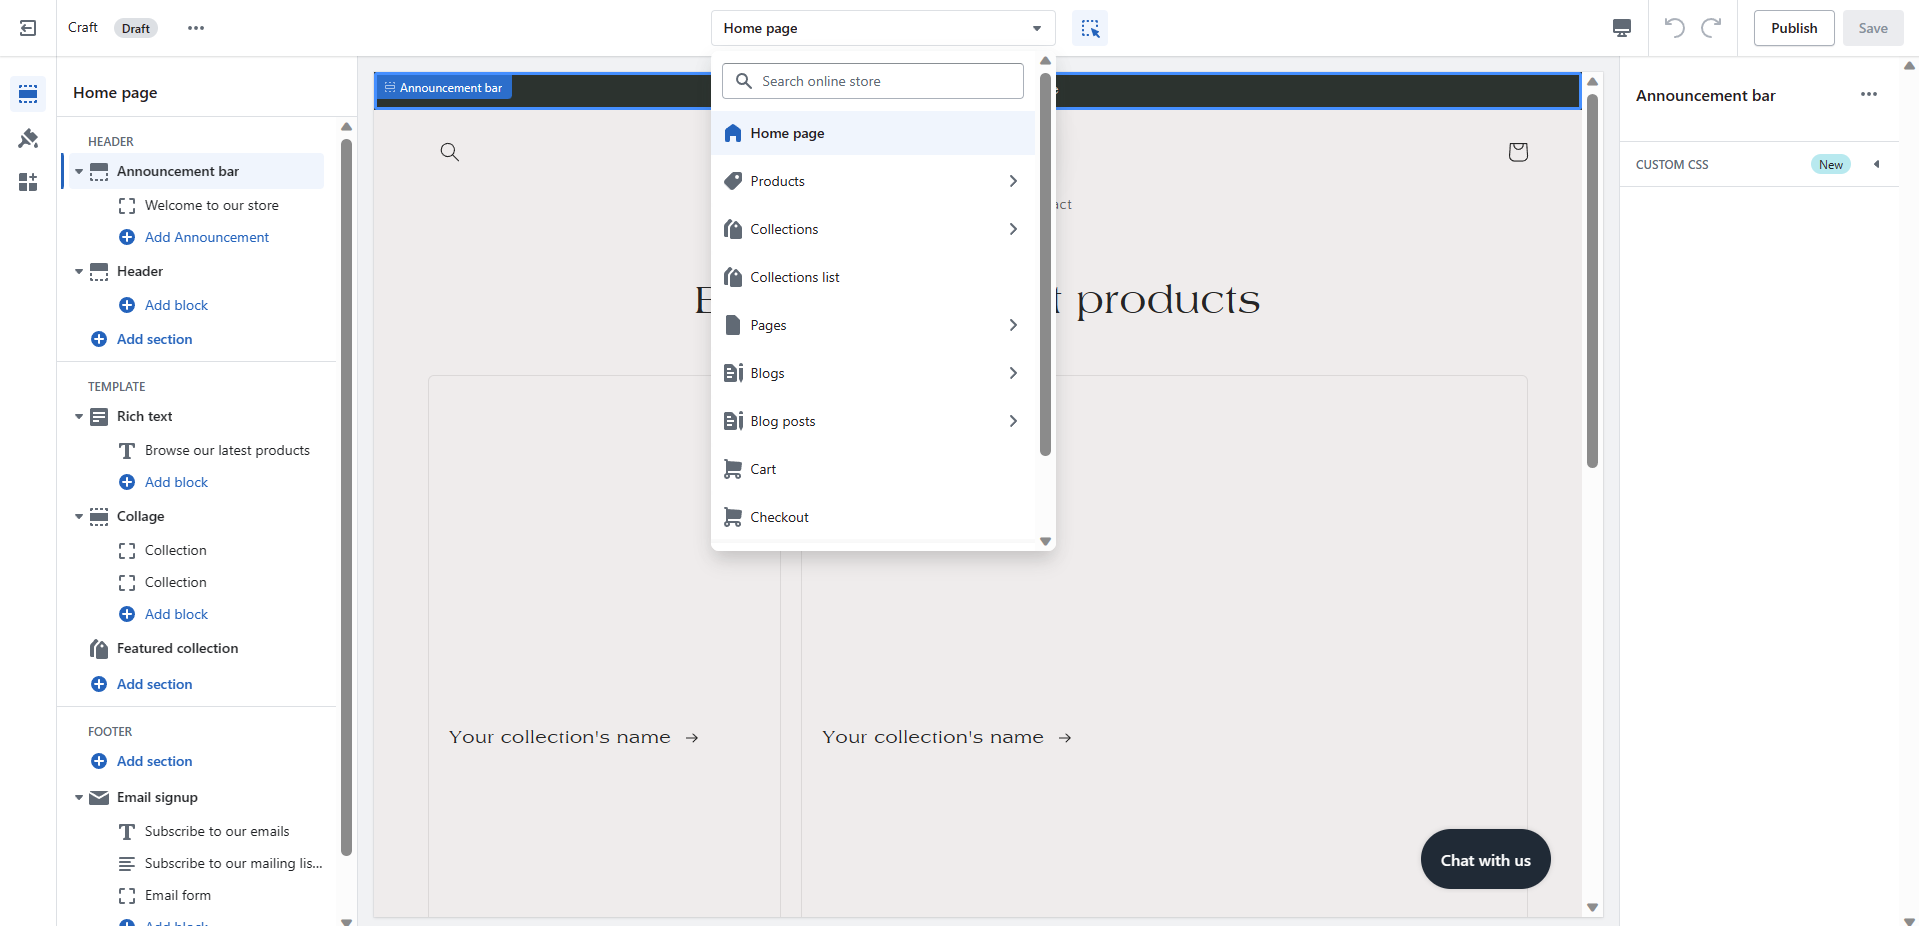
- In the Home page of your Shopify store, you can see the Header section. NOTE: After editing the Header section, it would reflect on all of your pages because Header appears on every page. Some of the customizable features in this section are the Desktop logo position, Menu, Desktop menu type, sticky header, and Color scheme.
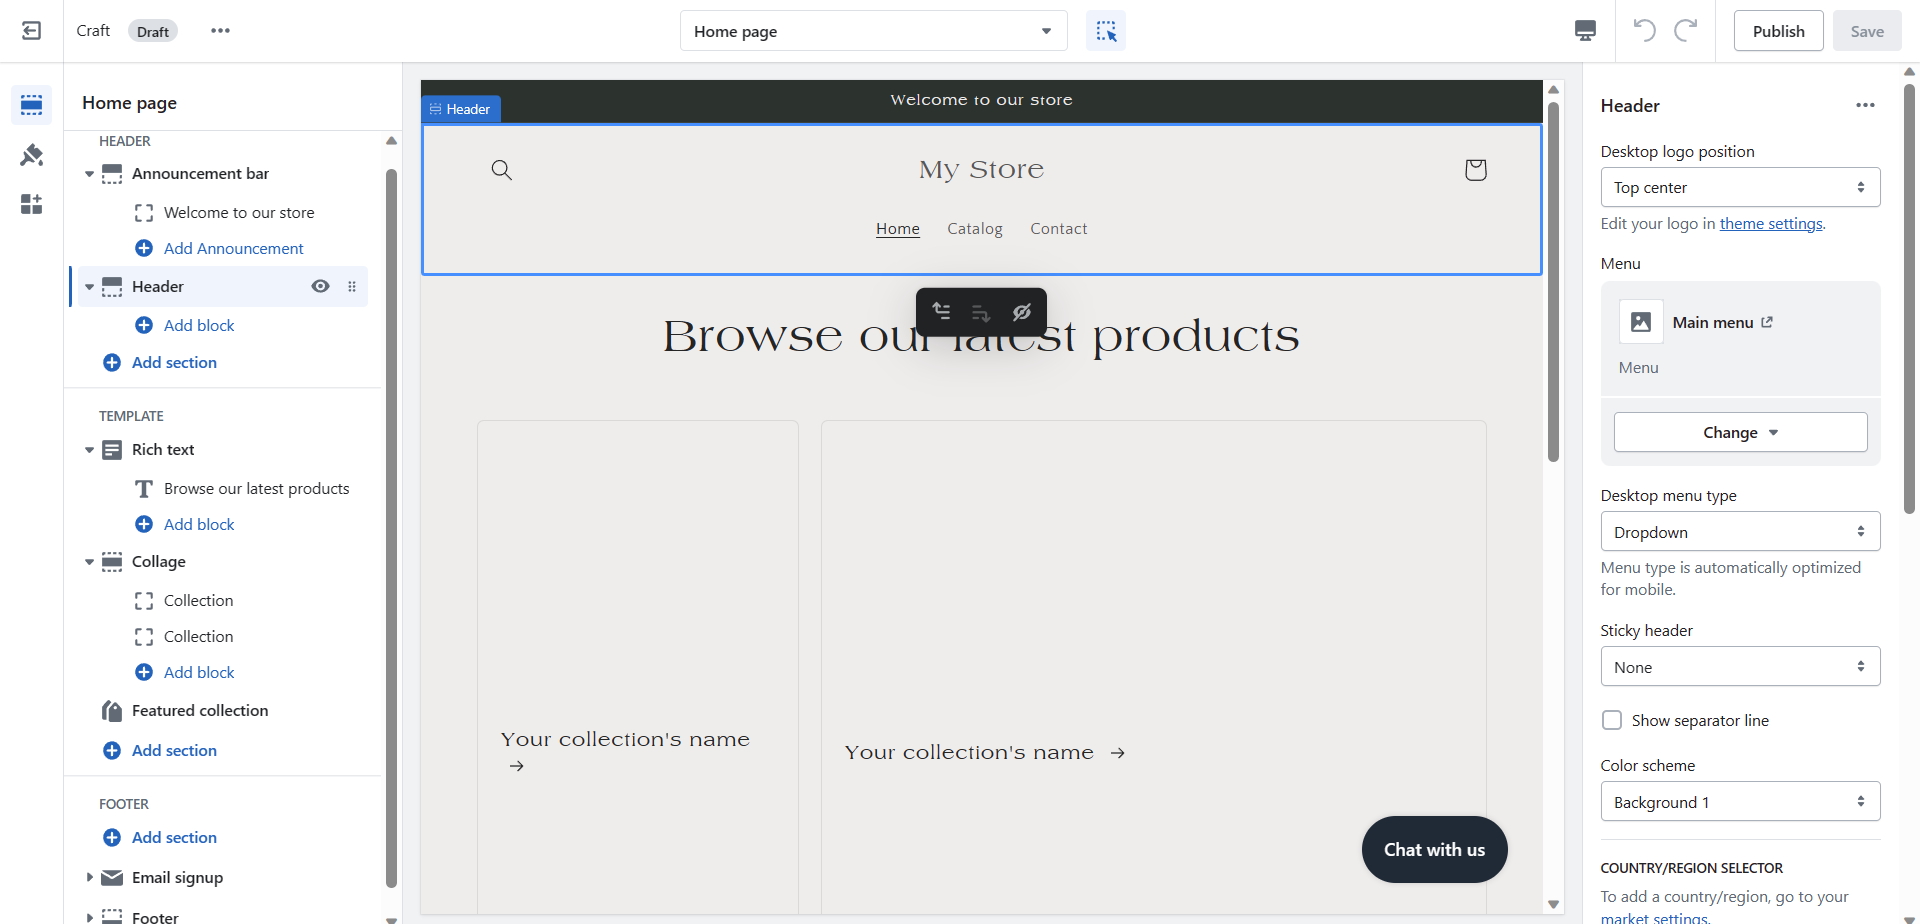
- You can also enable the country/region and language selector in the Header. Mobile logo position, Spacing, and Section padding are also customizable.
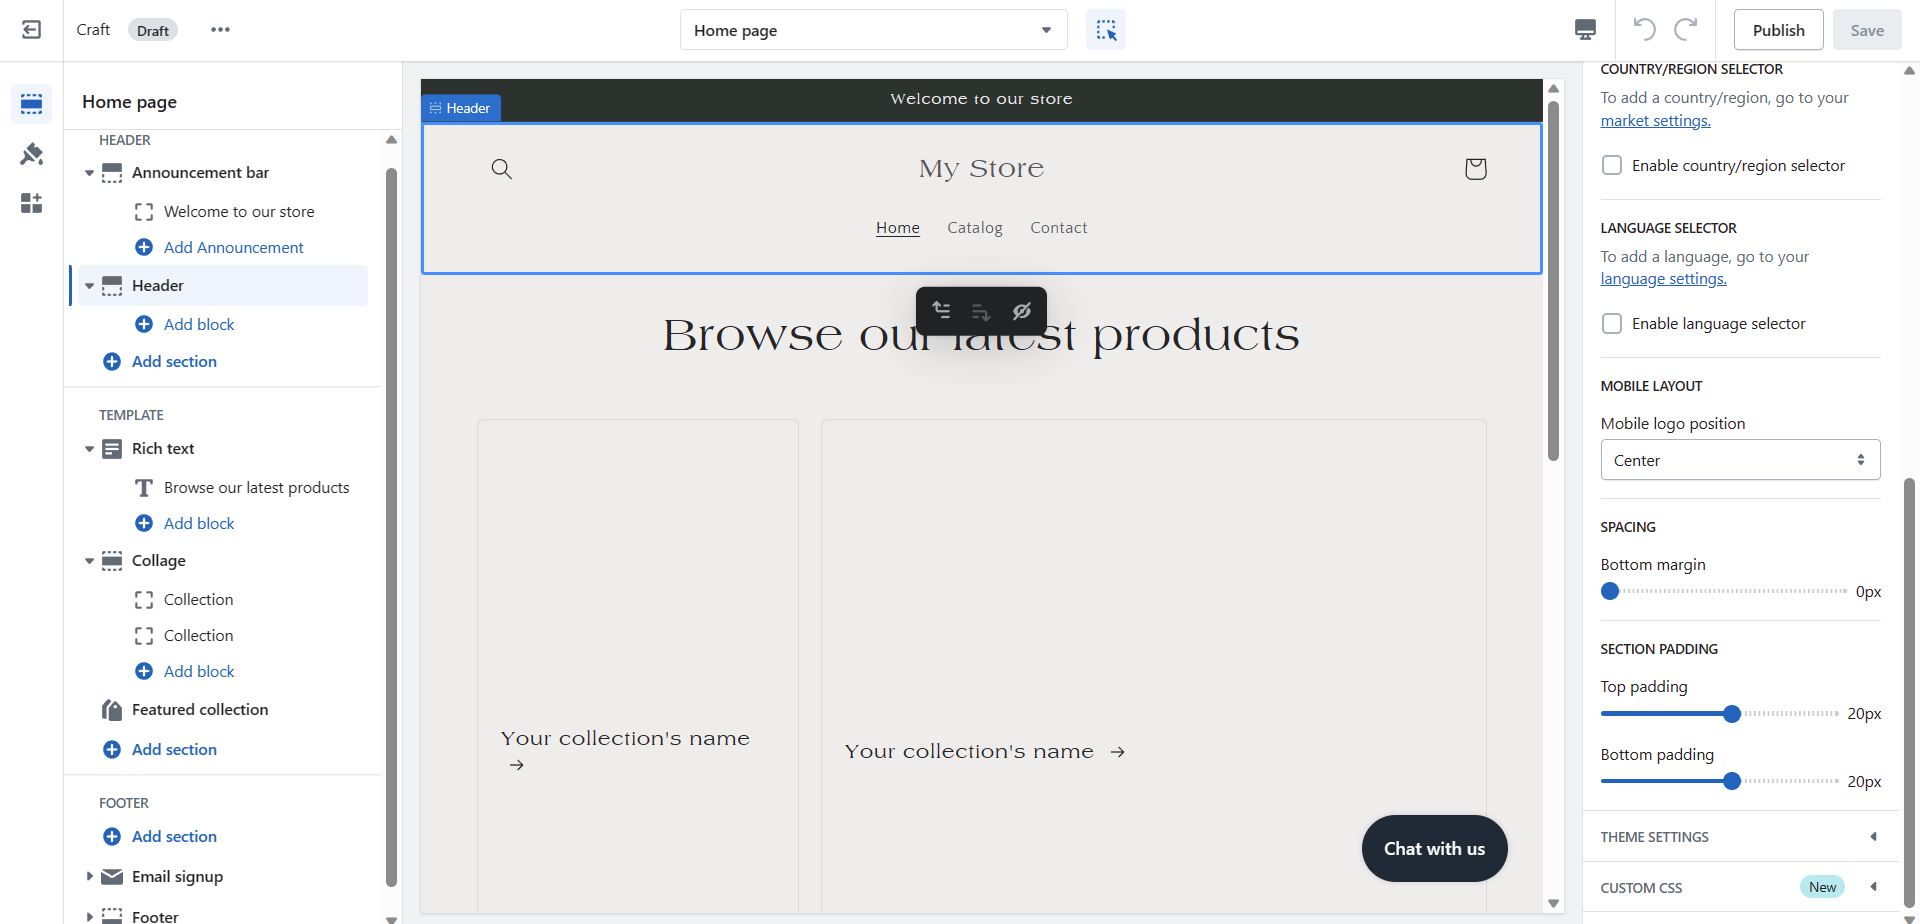
- Under the Template section, you can edit the Rich text, Collage, and Featured collection. The Rich text section can be customized based on the Desktop content position, Content alignment, Color scheme, and Section Padding.
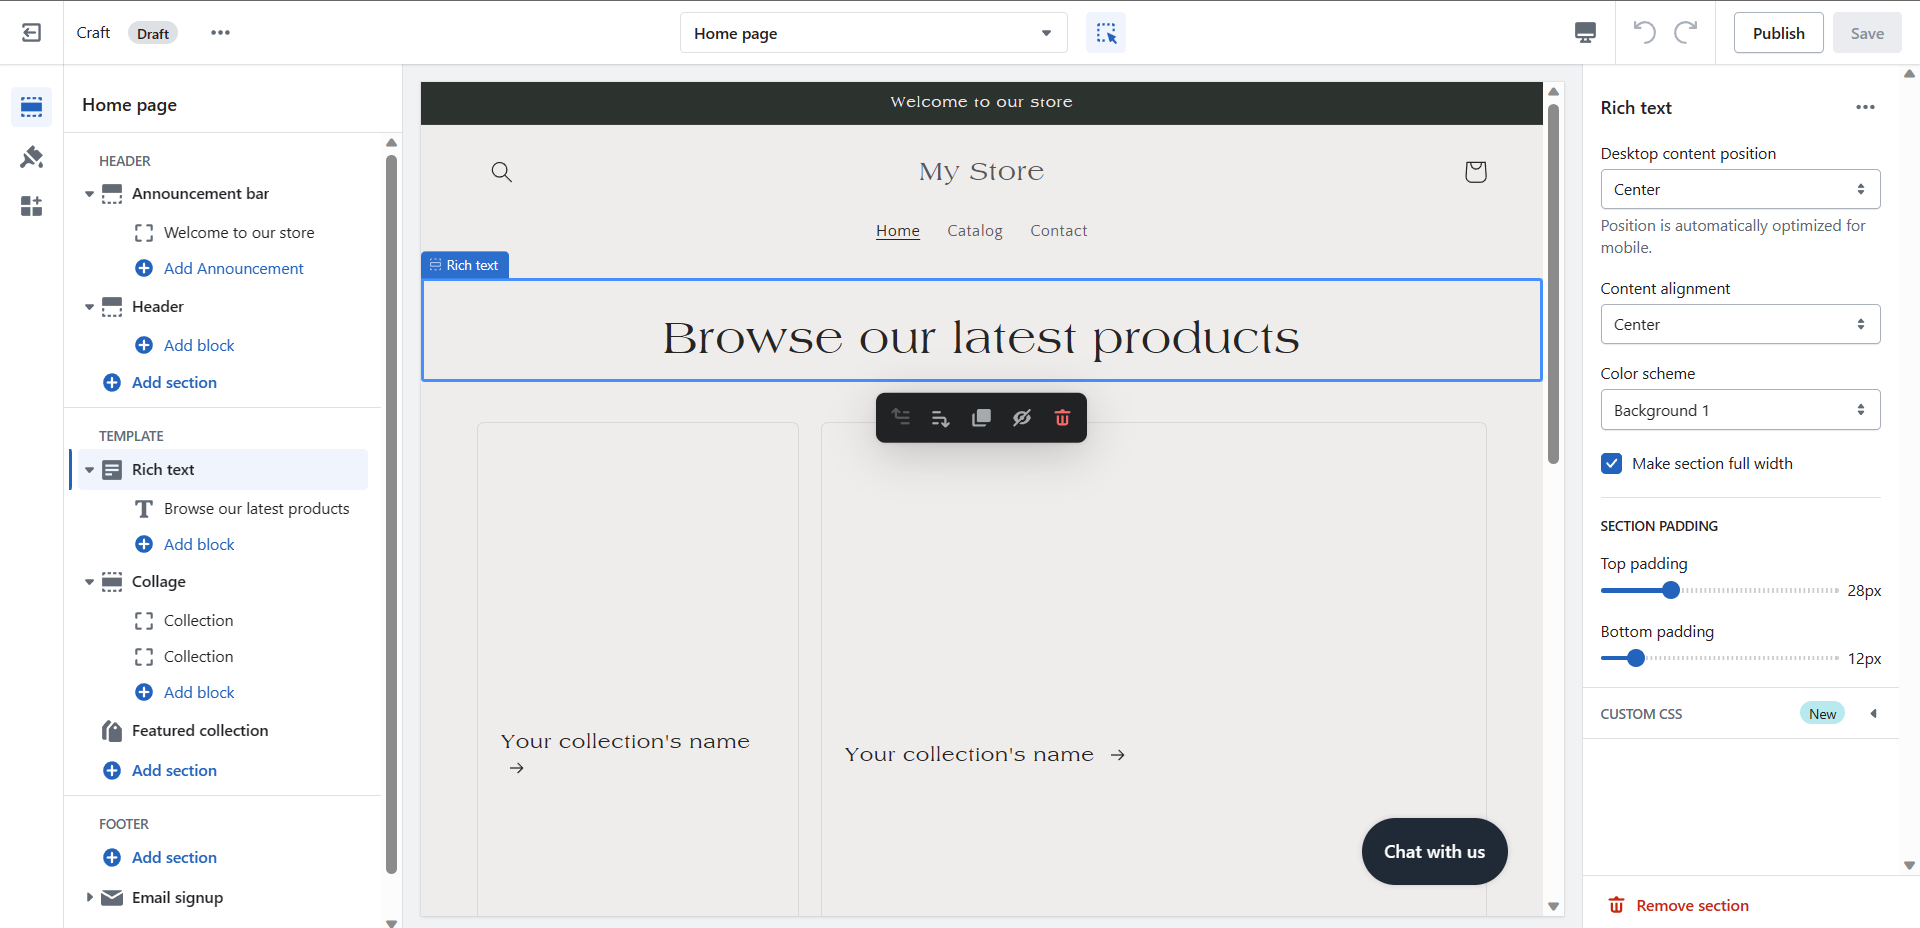
- Next is the Collage section, where you can edit the Heading, Heading size, Desktop layout, Mobile layout, Card style, and Color scheme of your website's product collection page.
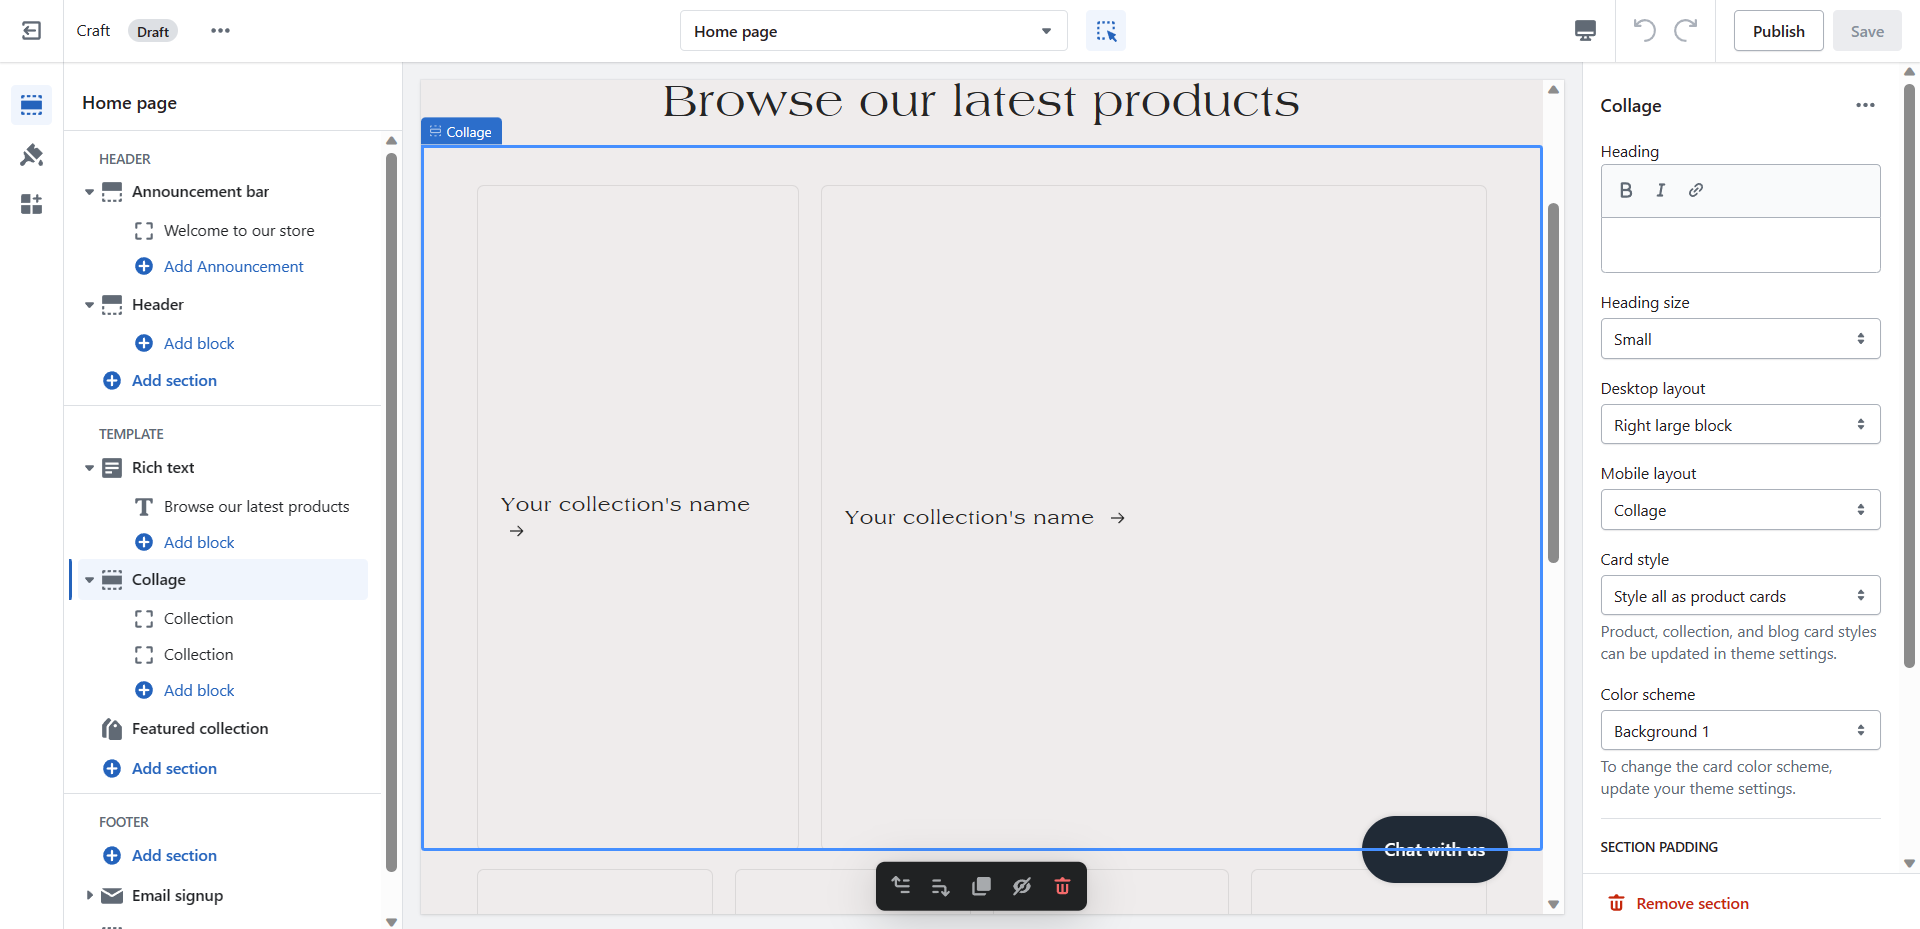
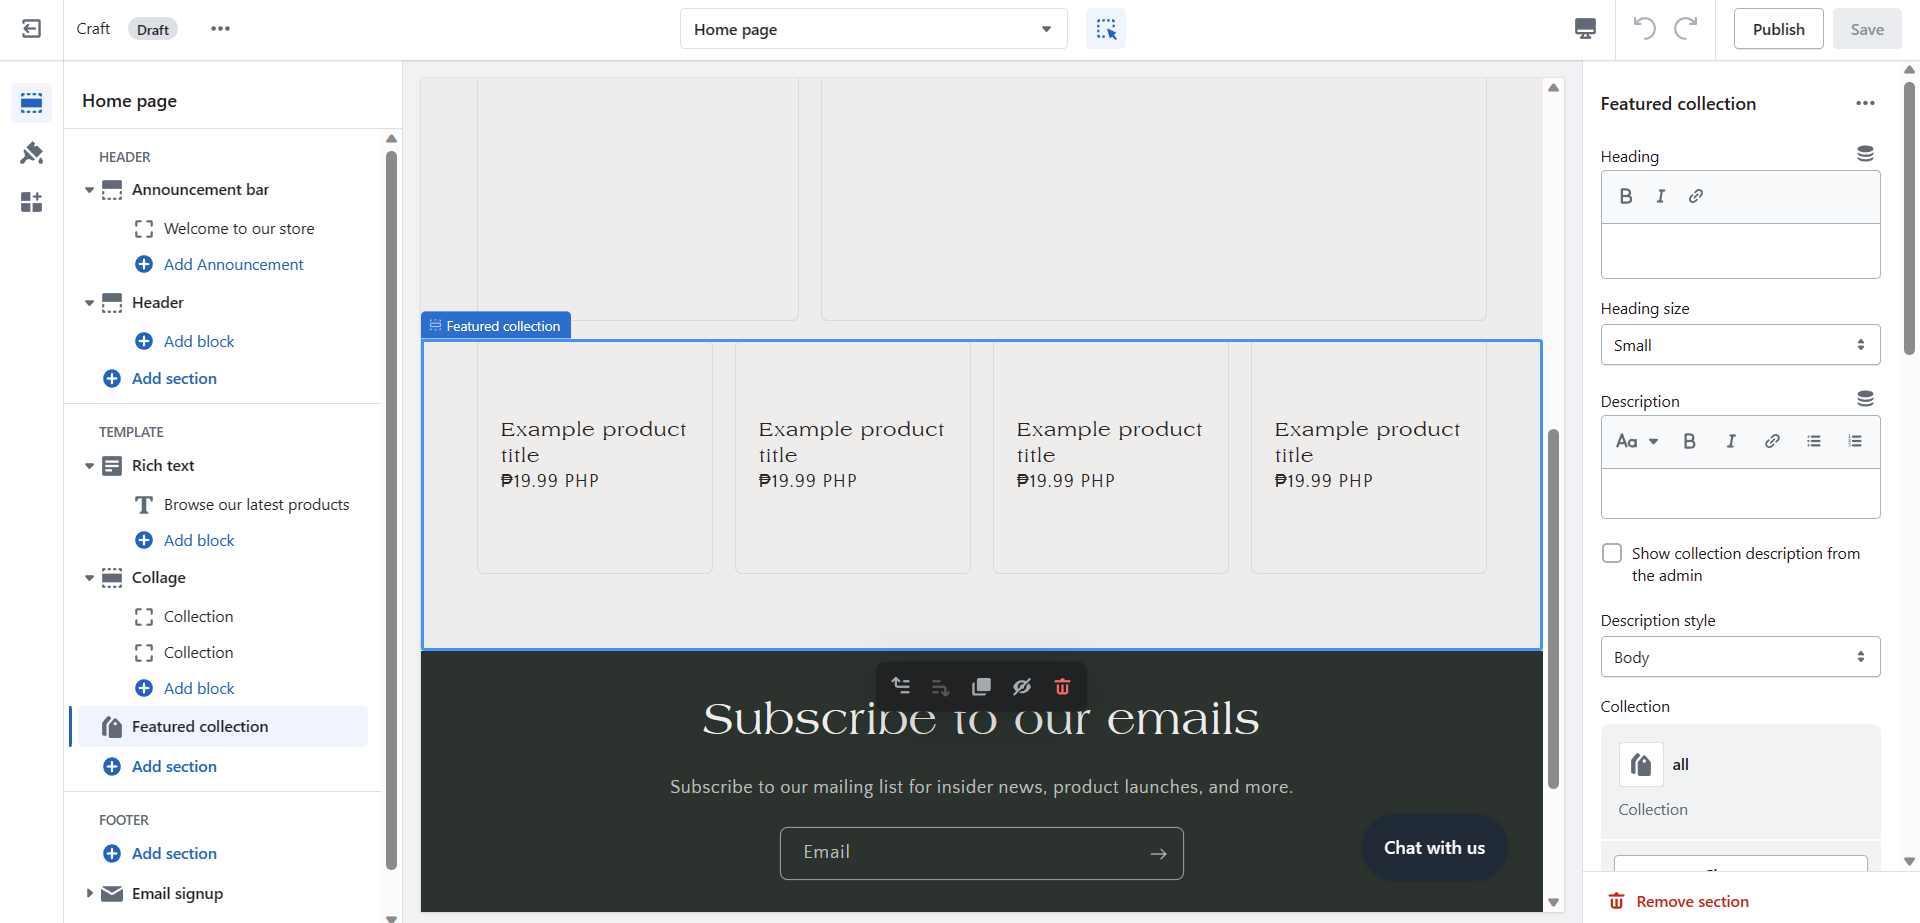
- After the Collage section, you can now customize the Heading, Heading size, Description, and Description size of your collection. you may also choose the collection that you want to showcase under Collection.
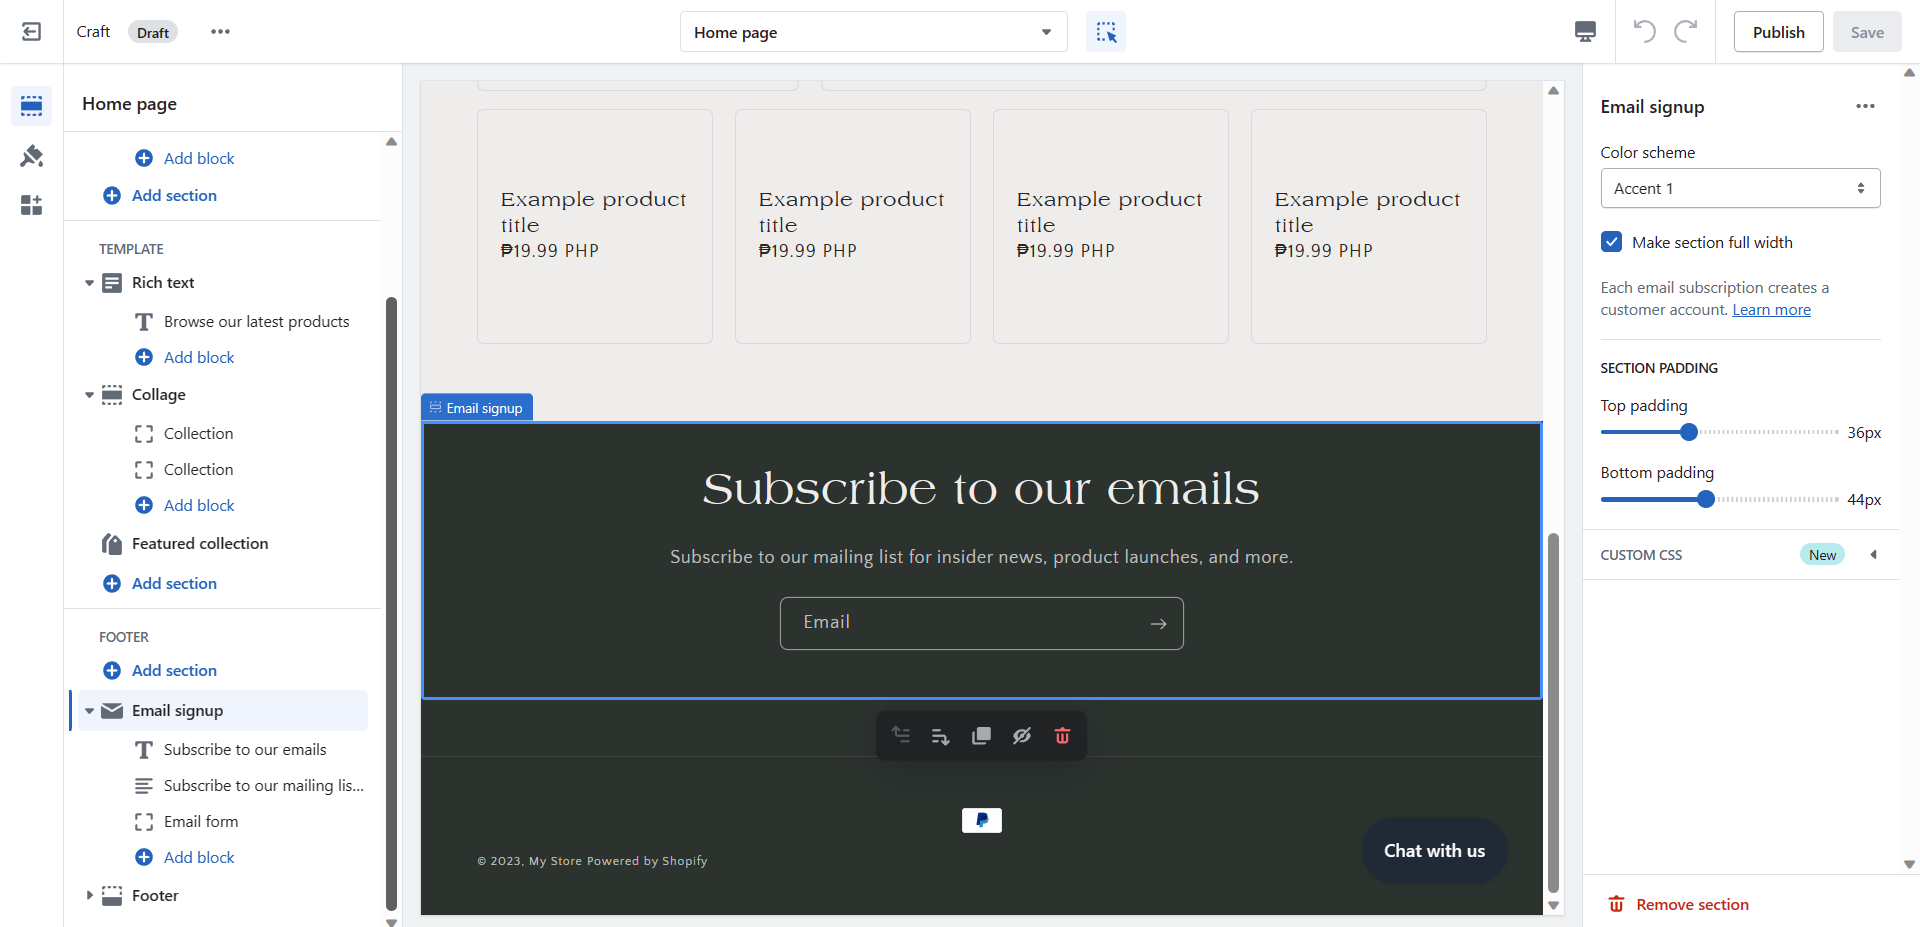
- In the Footer part of the page, you can edit the Email signup and the Footer. The Email signup is added in this section primarily for contact and promotions. You can edit the Color scheme and Section padding in this field, and you can edit the texts indicated under the Email signup tab.
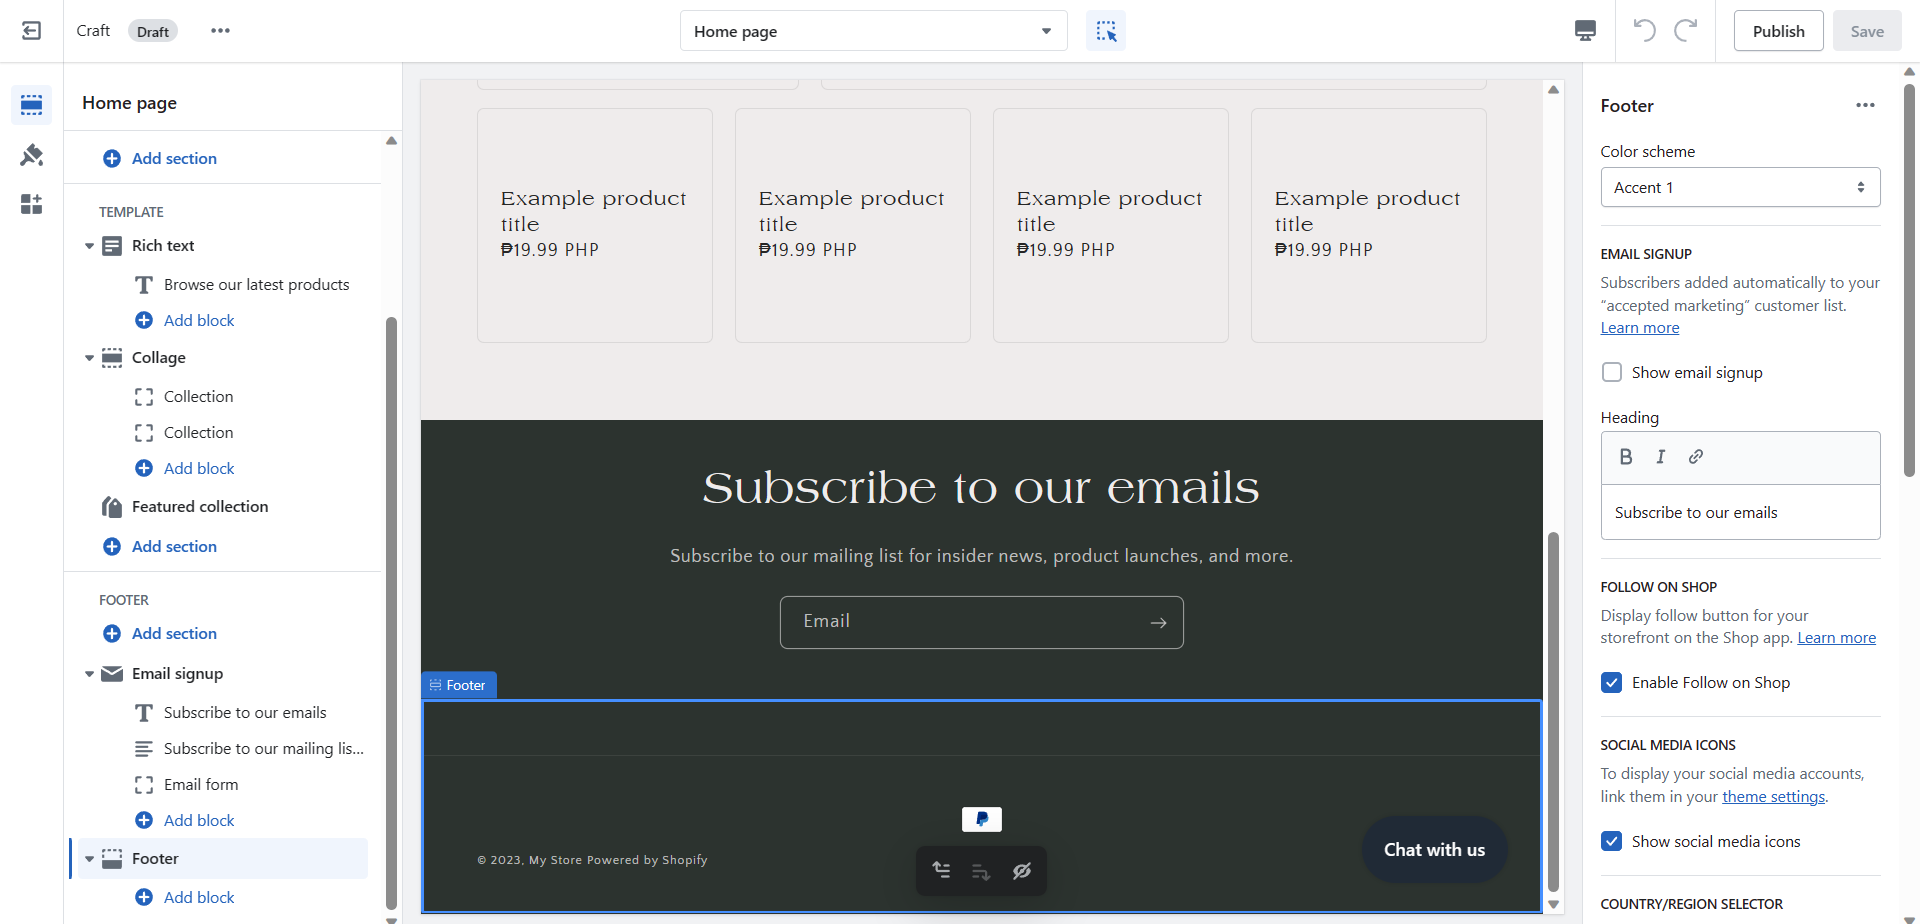
- Lastly, the Footer section contains a block where you can see the Courtesy and Chat with us button. You can also indicate social media icons in this area of the page.
- You can add a section in any of these parts of the pages. For example, if you click the "Add section" under the Template, you can see several Theme sections and choose from it by clicking it.
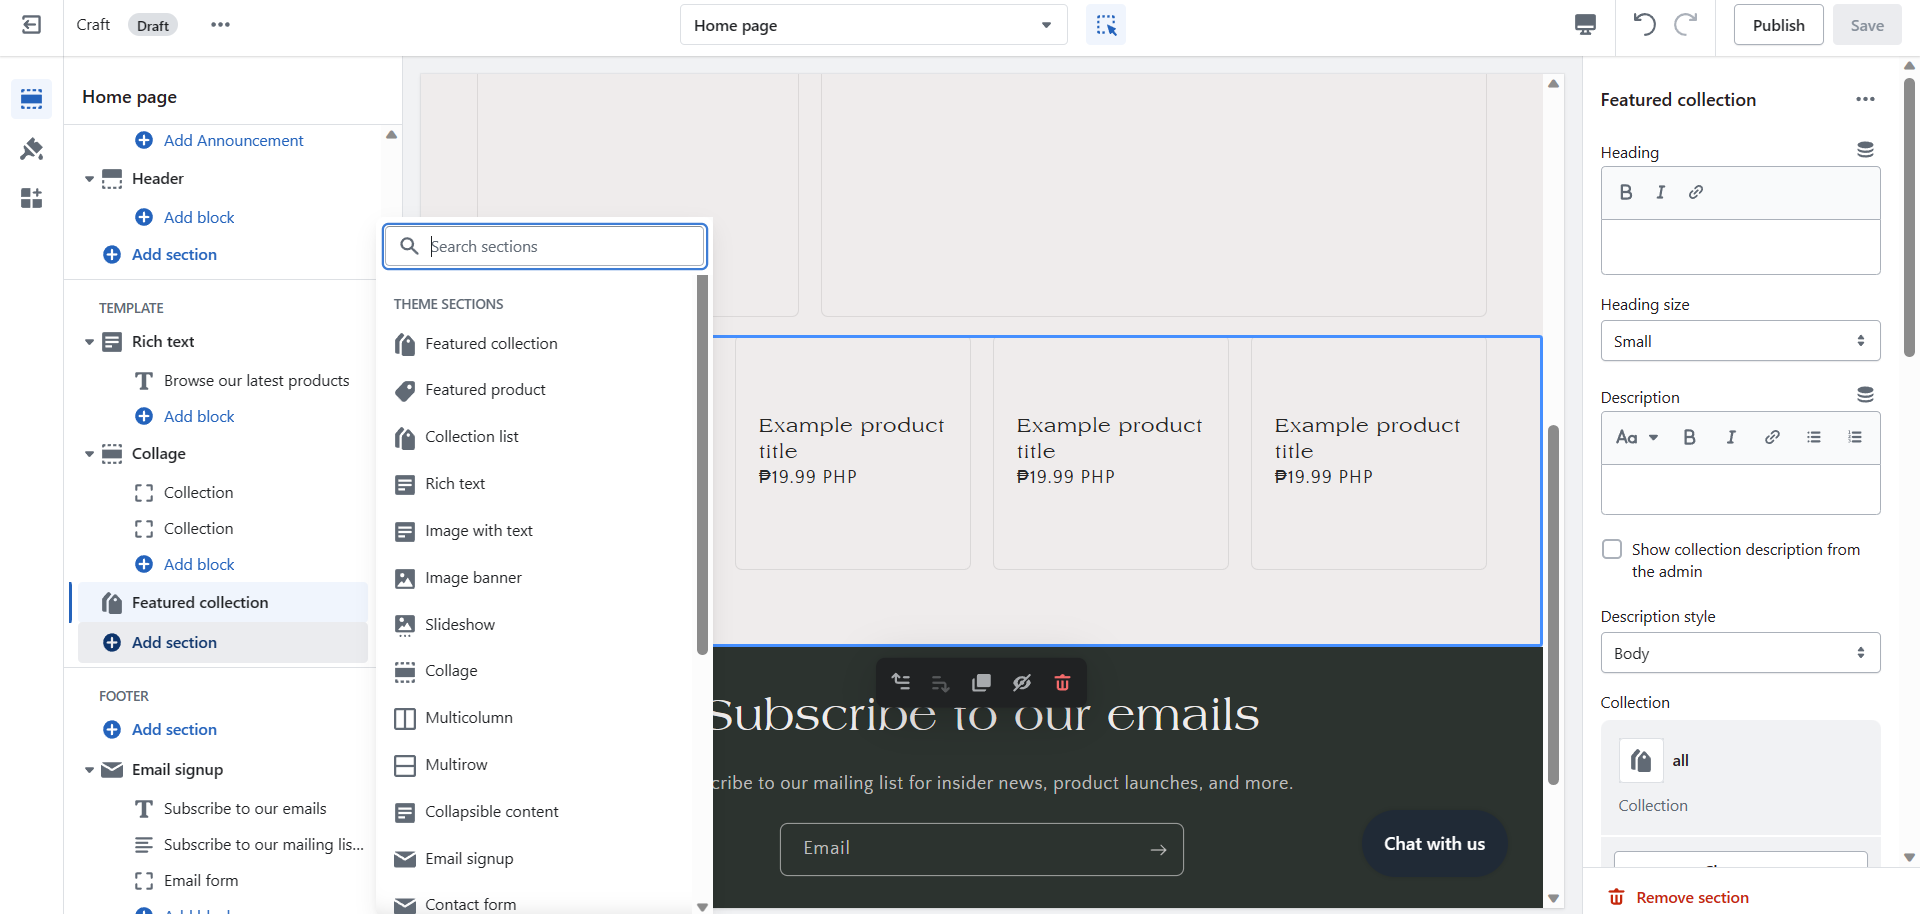
- If you add a Video section, this is how it will turn out and you can see its customizable features on the right side of the website. You can edit the Heading and Heading size, as well as add the video by selecting it or embedding.
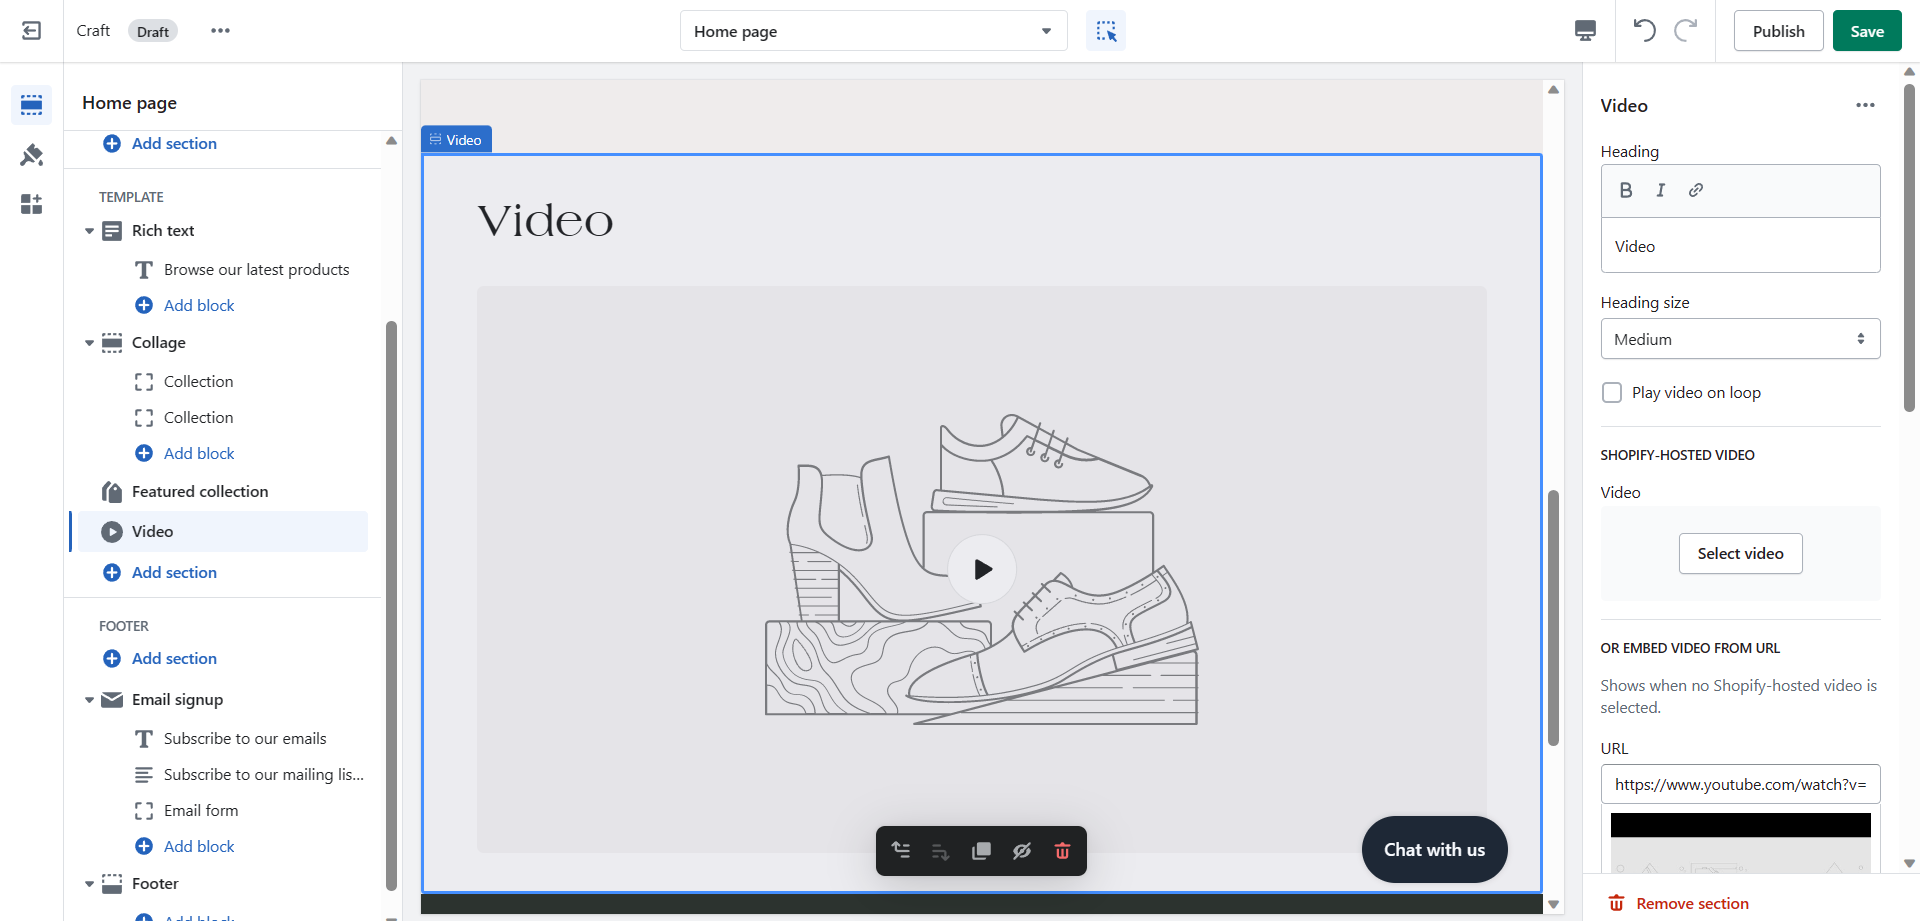
- Next is the Theme settings. This is where you can get creative on the displays on your website such as Logo, Colors, Typography, Layout, Buttons, Variant pills, Inputs, Product cards, Collection cards, Blog cards, Content containers, Media, Dropdowns and pop ups, Drawers, Badges, and etc. These are some of the most noticeable features of the store, so it is important to check the sizes and colors after creating them.
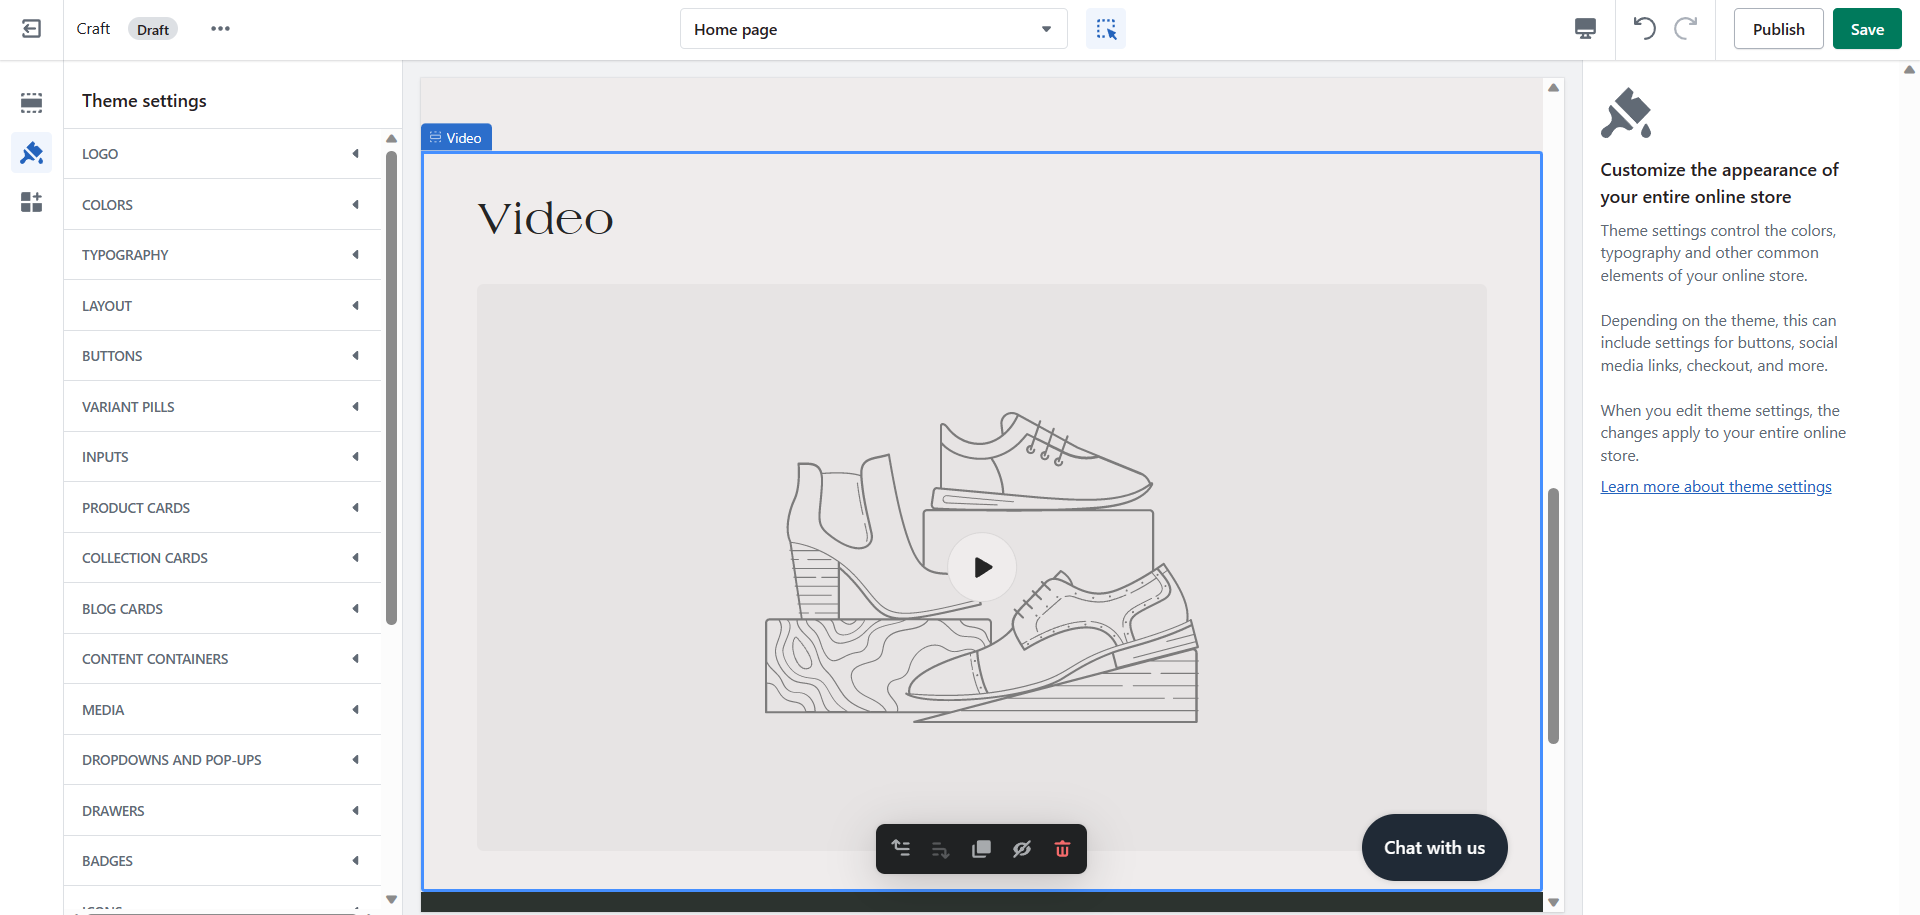
- First is the Logo. In the website, the Logo of your business must be evident and big enough to be seen. However, it should not block other functions of the website to avoid customer dissatisfaction. You can edit the logo by first uploading the image of your premade business logo, then modifying the desktop logo width and uploading the Favicon image.
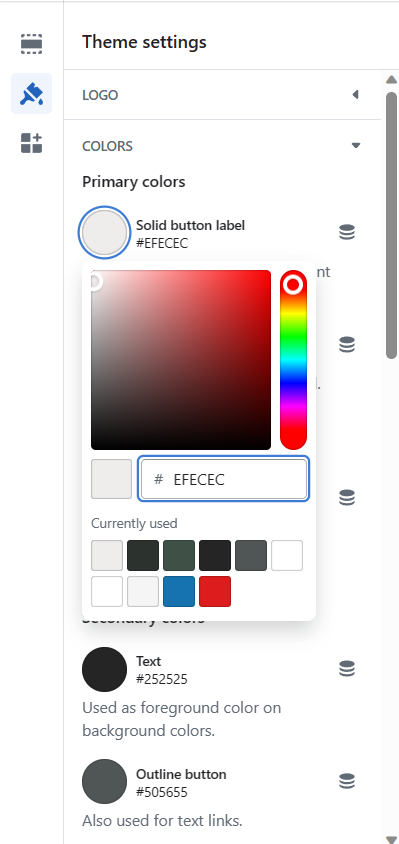
- Next are the Colors. This is where your website color system is based from. This is applied on several functions and features of the website, such as Buttons, Outlines of buttons, Headline texts, and etc. You can choose a specific color by typing it in the # field or you can drag the circle inside the color picking range.
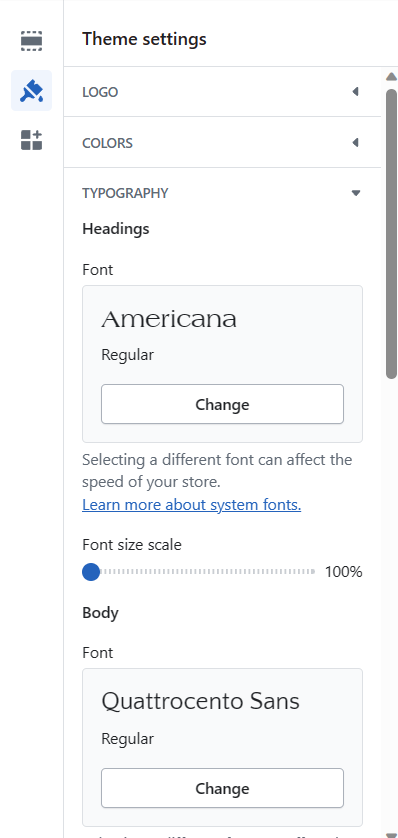
- Next is the Typography, where you can edit the font of the Headings and Body and change their sizes. You can change the font by clicking the "Change" button.
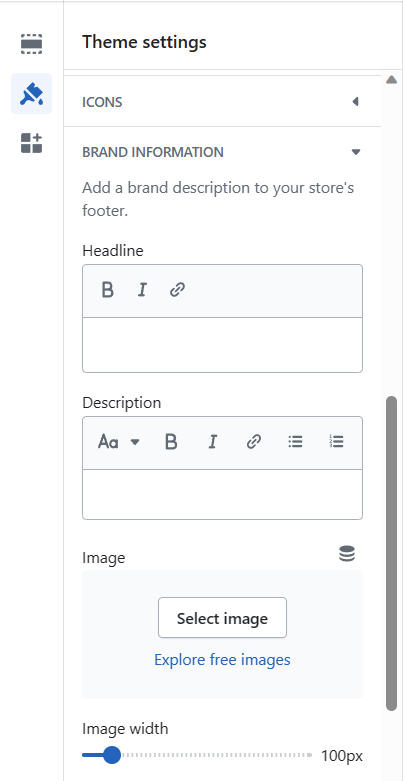
- Another aspect of the theme that you can customize is the Brand Information, where you can add a brand description to your Shopify Store Website's footer. You can edit its Headline and Description, and you can also indicate an image related to your business.
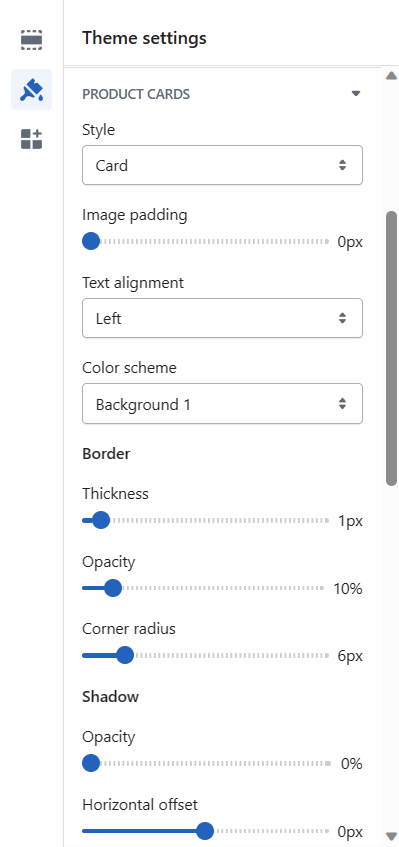
- Next are the Product cards, which would be how the products are positioned in your store's layout. The style, image padding, text alignment, color scheme, border, and shadow are modifiable.
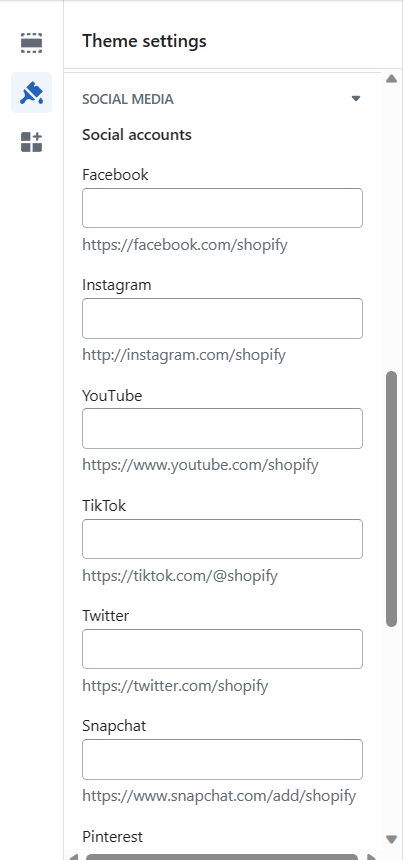
- Next is the Social media accounts of your business. For validity and promotion, indicating your account links in this field is highly preferable. You can insert your Facebook, Instagram, Youtube, TikTok, Twitter, and even Snapchat links so your customers can find you on these sites.
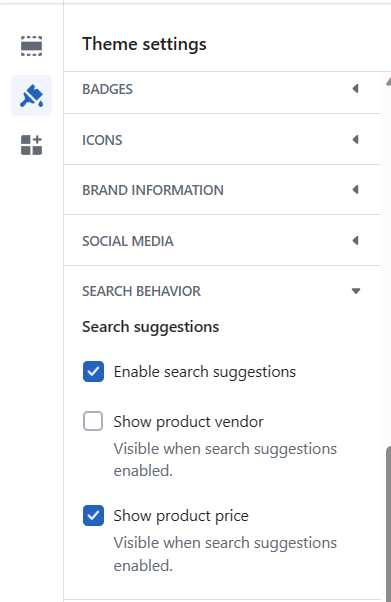
- Lastly, the Search behavior can also be modified. You can indicate whether you want to enable search suggestions for your customers, show product vendor, or show product price to the customers, by activating it through clicking the checkbox.
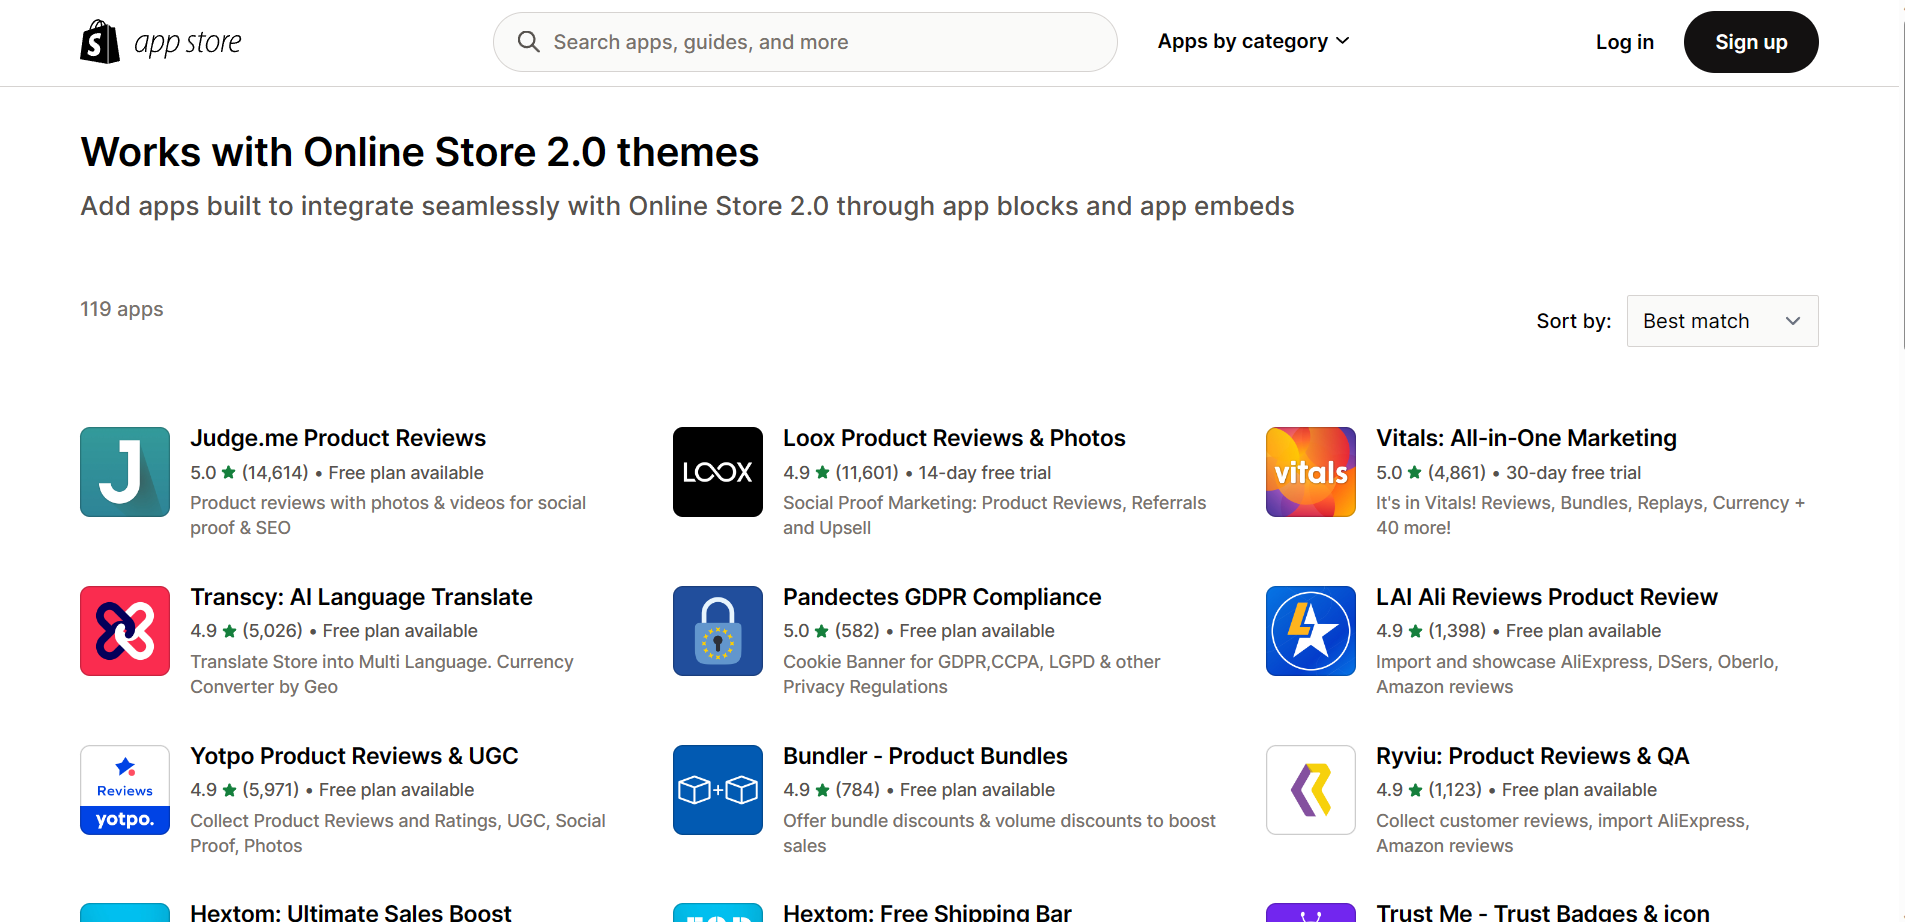
- By clicking this button, you will be able to incorporate a Shopify app to your website.
- You will be redirected to the Shopify App Store, where they show you a list of apps that work with Online Store 2.0, which is the current version of Shopify store theme. To use these apps, click and install them.
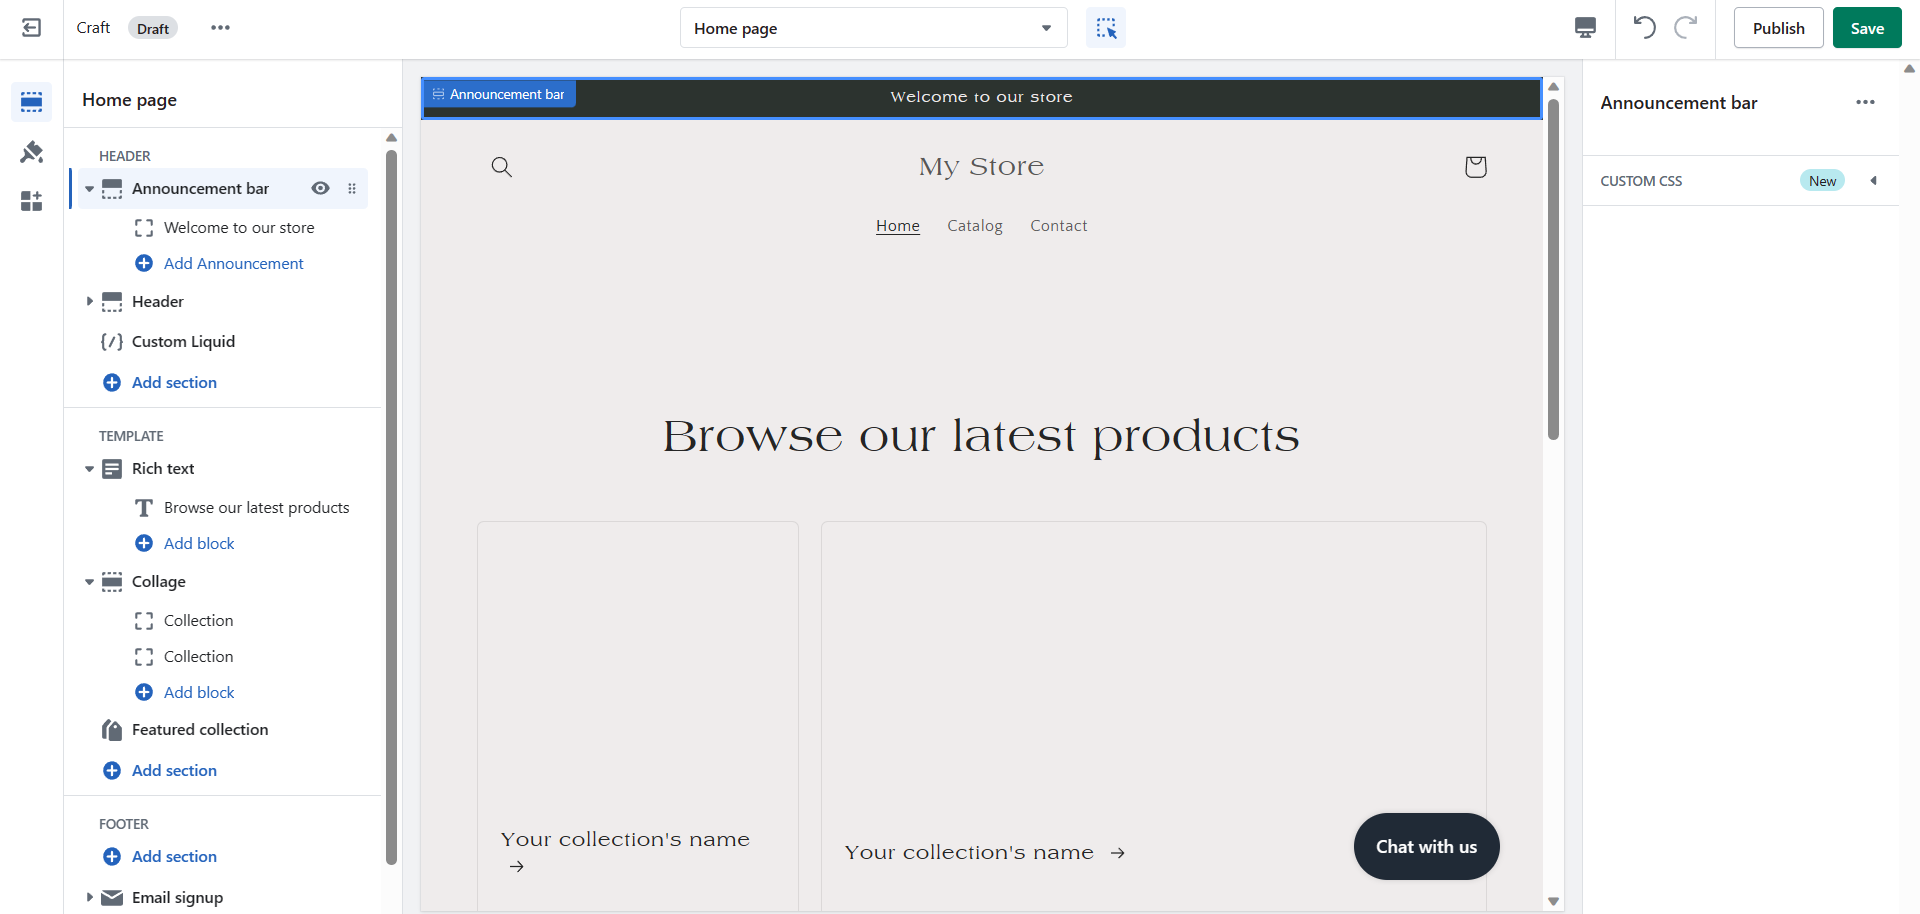
- After modifying the parts of your Shopify store theme, you can now click the "Save" button so that you can edit it out later or if you already want to publish it.
Conclusion
You’re done! Always remember that customizing your Shopify store's theme has a significant effect on your business because it aligns with your objectives that is to meet customer satisfaction and generate sales by attracting new and retaining existing customers.
-
Aside from Shopify's Dawn theme, you can incorporate other themes from the Shopify Theme Store. These themes may be paid or free, or they can also vary from every industry indicated in the filters.
-
Header and Footer are two sections which all of the pages contain, so keep in mind that once you modify it, it will reflect to all the pages.
-
The products listed in your Products page and the Collections that you have also listed in the Collection page at Shopify would easily be reflected in your Shopify theme and you would not have to add them one by one.
-
Avoid repetitive symbols and use a color palette that suits your industry and your products. Make sure that every icon would be aligned in the Header and that they have the same sizes. As much as possible, minimal blank spaces in your website would be perfect.
-
After making sure that every customization is within your liking, do not forget to save it so that it can reflect to your website.