A Guide for Setting Up SMS Automation on Your Shopify Store
To walk you through setting up SMS automation on your store in Shopify.
Prefer a shortcut? 16 free tools do parts of this for you.
Aim: To walk you through setting up SMS automation on your store in Shopify.
Optimal Outcome: To gain assistance from sending multiple categorized SMS to your customers which will deem effective especially in marketing your products to induce sales and also increase productivity because of the automation system.
What do you need to start: To follow this SOP, it is important that you have already created an account in Shopify and you must also have access to the Shopify store to install Klaviyo, an Email and SMS automation software.
Why is this SOP Important: SMS automation is essentially one of the best marketing strategies out there because of the diversity of people that you can reach through text messages. In addition to this, there may also be some people who do not have an email or do not check their email often, so it is relatively easy to arrange an SMS automation instead.
When and Where to execute: This SOP is executed when you need to welcome your customers, remind them of their abandoned cart or checkout, or even in giving out discount sales to people.
Who Should Be Doing This: This should be done by the person-in-charge of marketing or sales.
SMS Automation
SMS automation refers to the automatic sending of SMS to customers or customer groups. To automate SMS sending is not a time-consuming process, because you just need to make and follow a flow where you will set a trigger action, SMS content, and time delay, for it to work. Unlike manual SMS sending where you take your time in constructing and sending the text messages, SMS automation allows you to use software to speed up the process and incur no charges.
Execution
Resources/Tools & Set up
-
Shopify store account
-
Klaviyo
Installing Klaviyo in Shopify
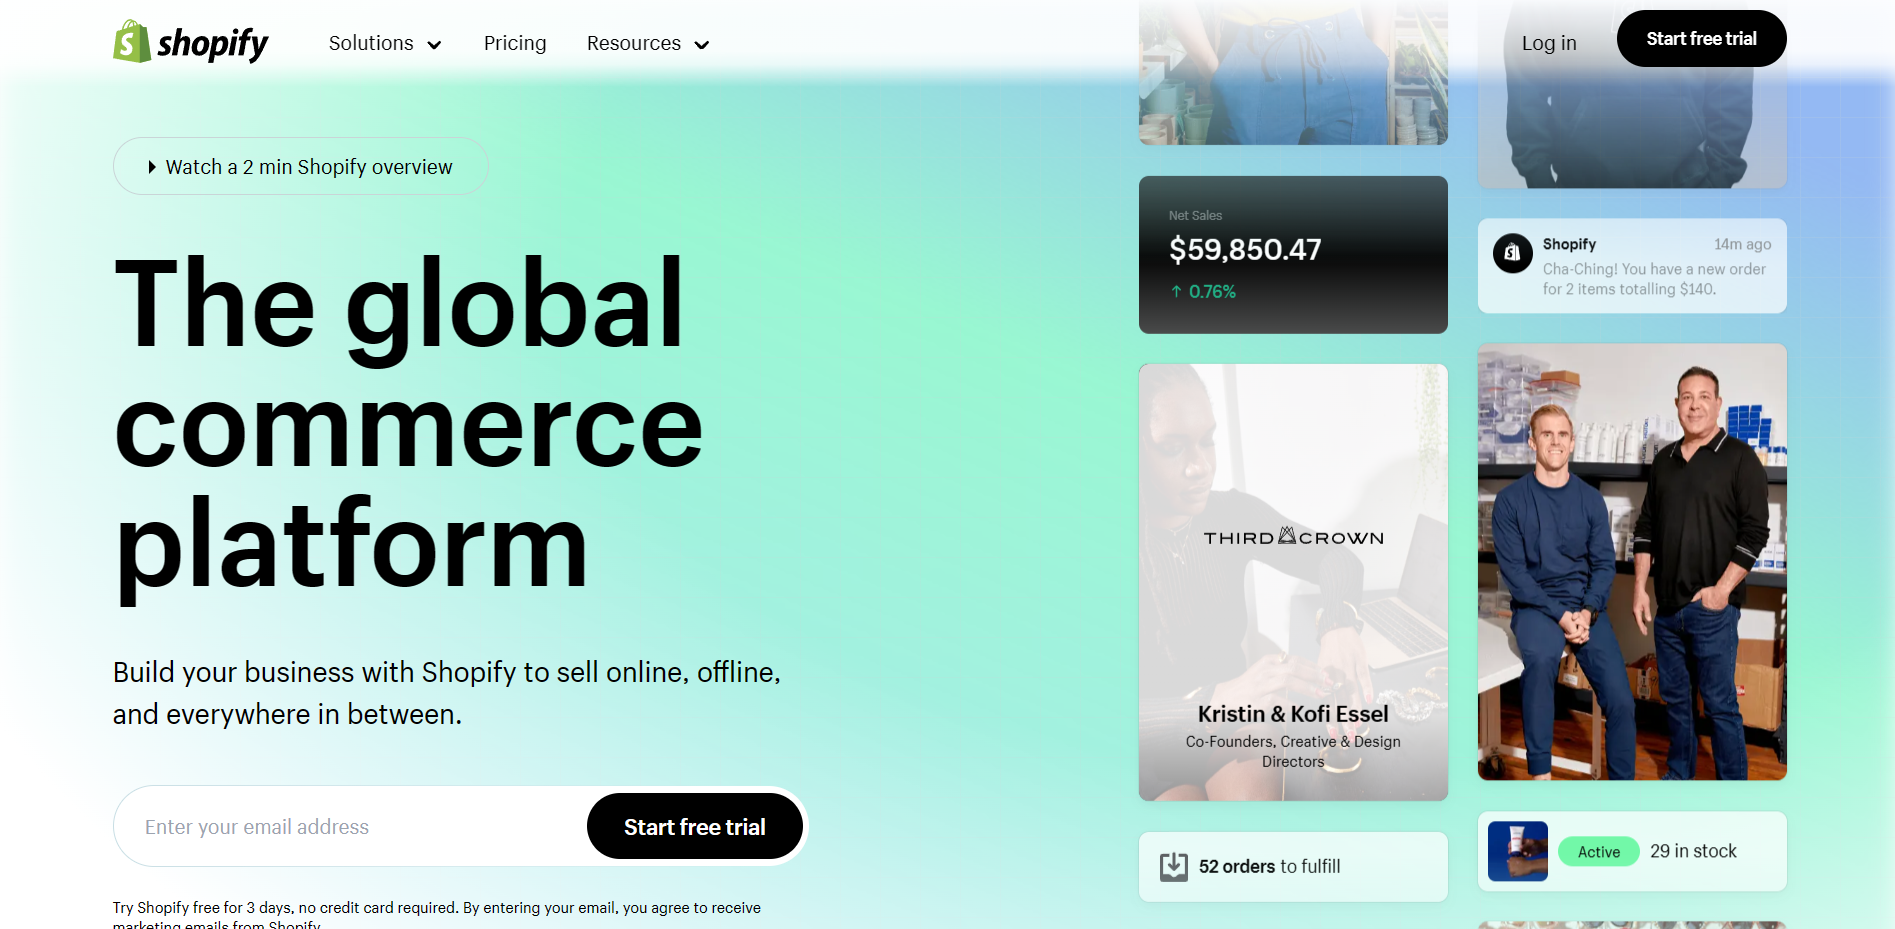
- Sign in to your Shopify store account by clicking “Log in” and entering your account details.
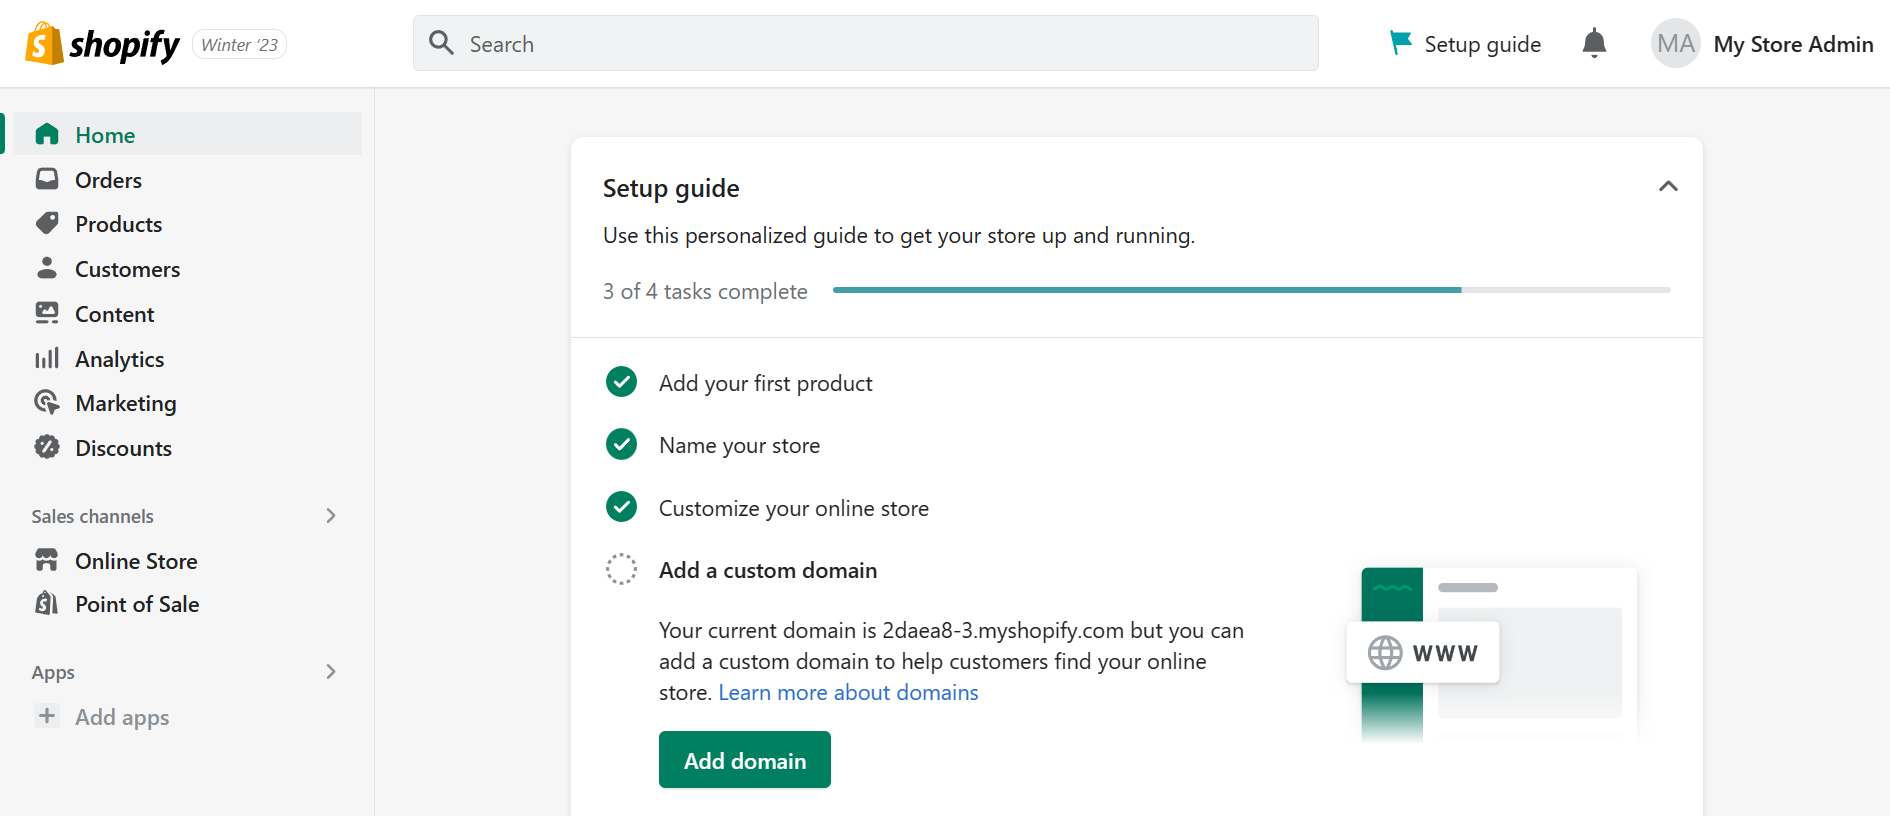
- Once you are redirected to the Shopify homepage, you will see a dashboard on the left. Click “Apps”.
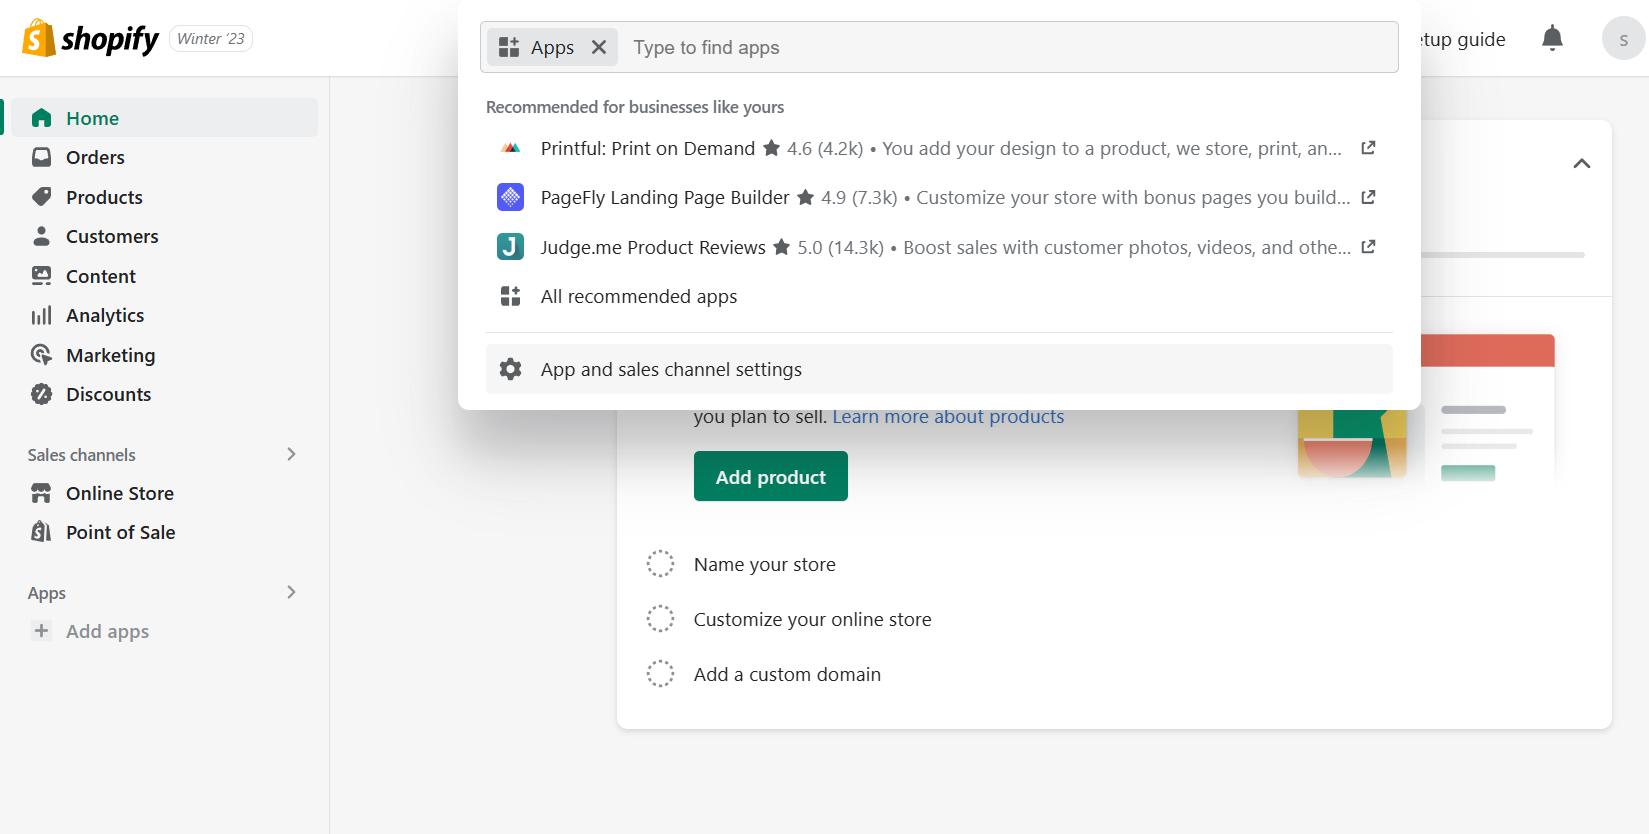
- After clicking Apps, a search bar will appear on the top of the site. This is where you will type “Klaviyo” to install the application.
- After typing Klaviyo, a search suggestion will appear below the search bar. Click the “Search for “Klaviyo” in the Shopify App Store”.
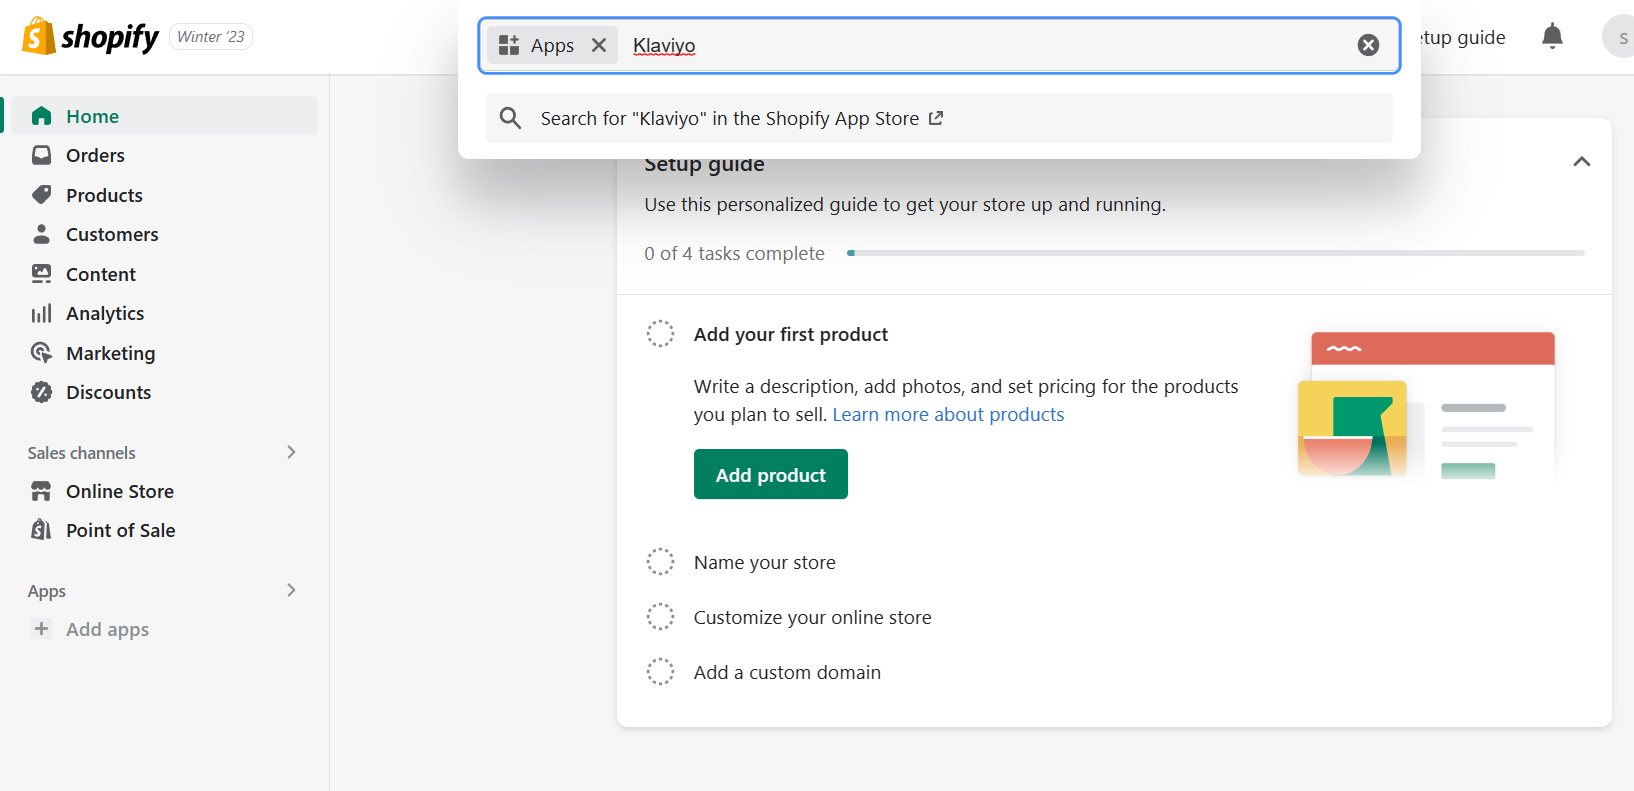
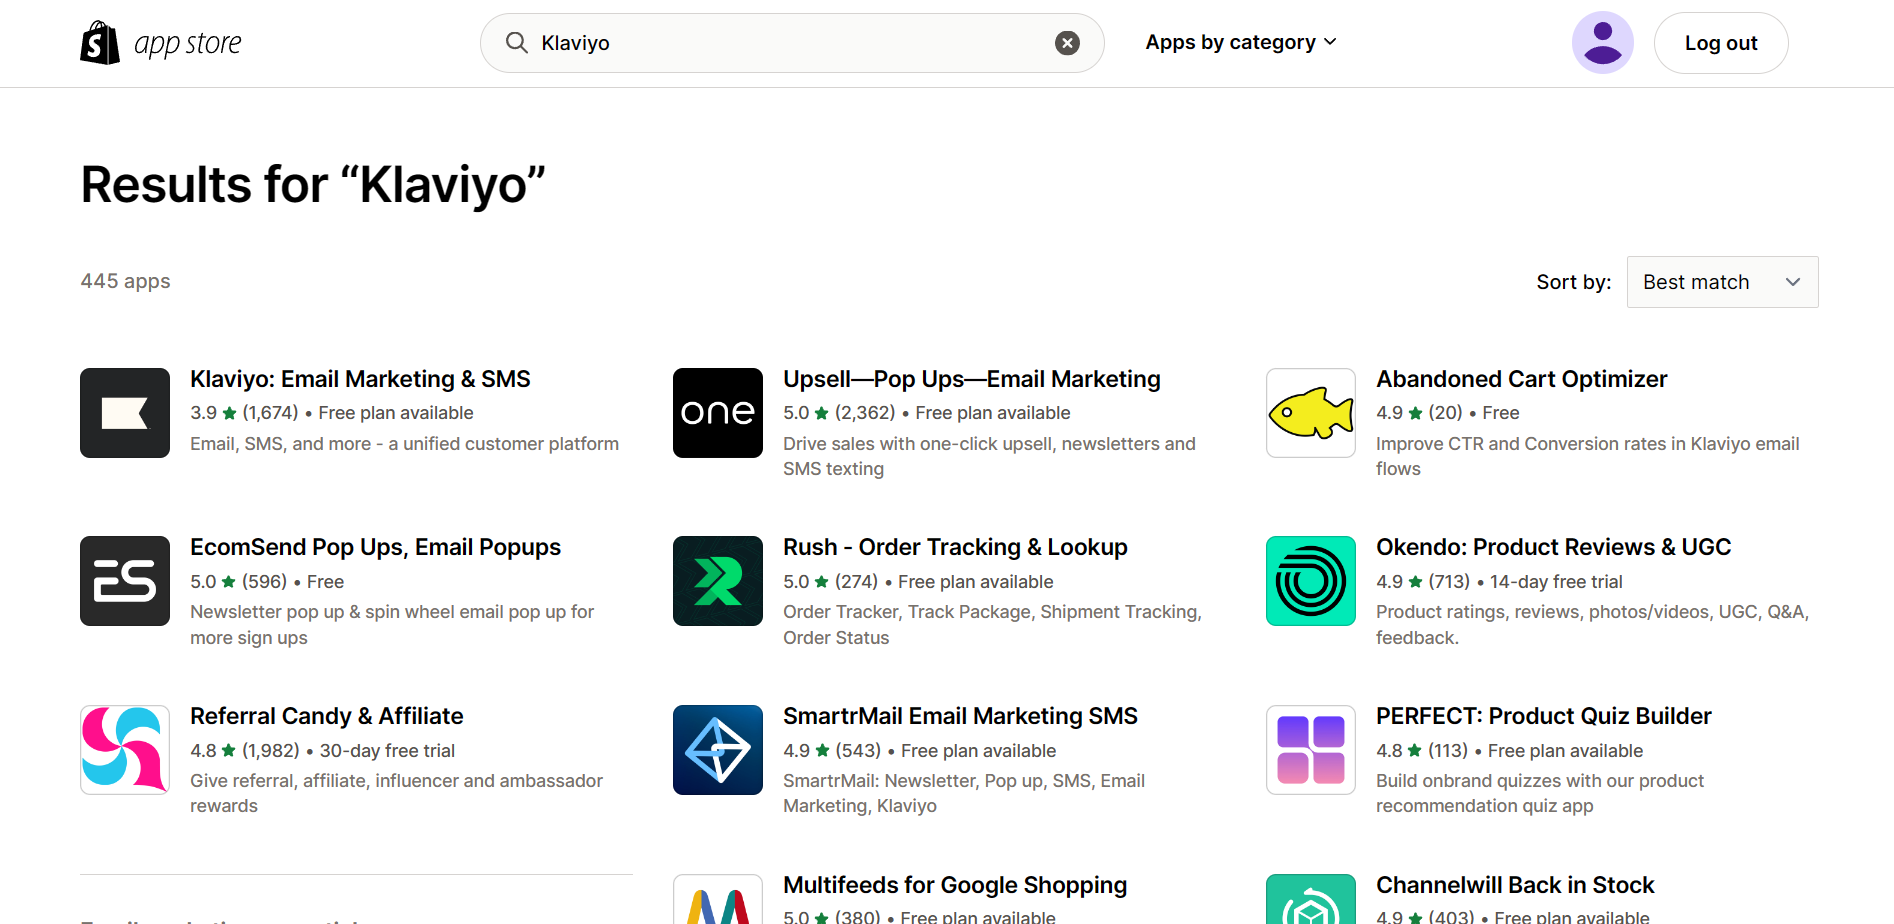
- After clicking the search suggestion, you will be redirected to the Shopify App Store tab which will show you results on your search. Click the first result that you will see, which is the “Klaviyo: Email Marketing & SMS”.
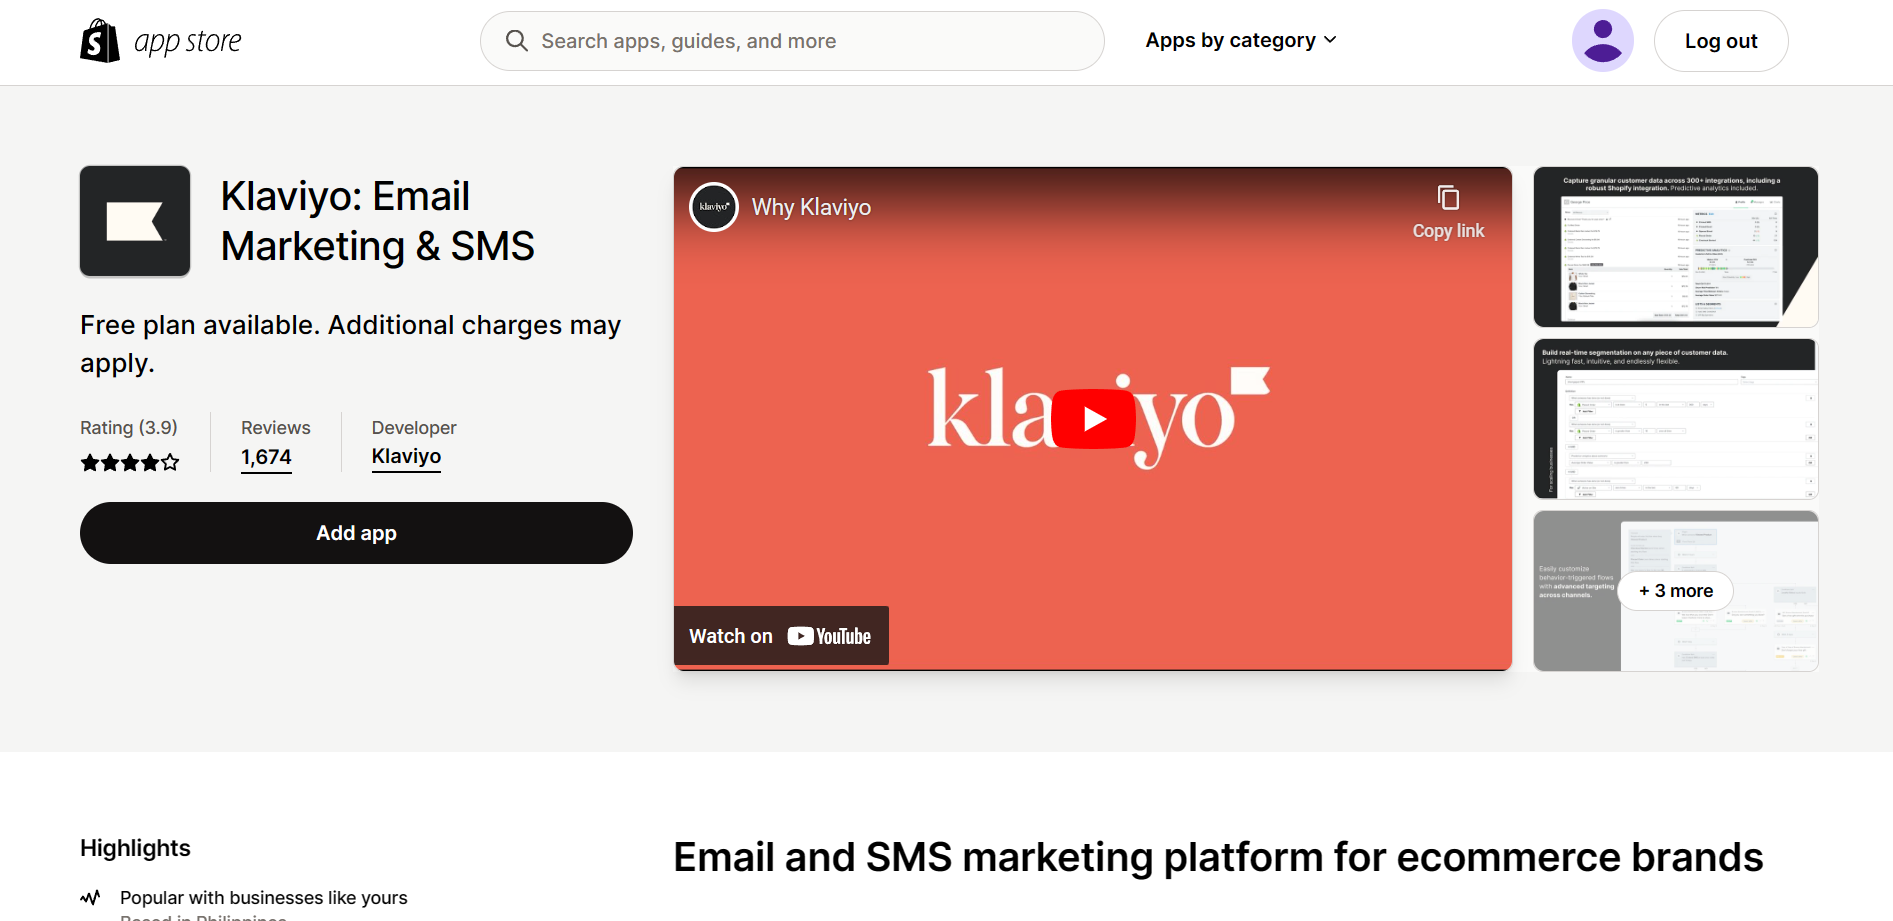
- As you can see, Klaviyo is an email and SMS marketing platform that can be utilized especially in your Shopify store. This marketing tool also has an available free plan, but other functions of the app may have additional charges. To add the app in your Shopify store, click the “Add app”.
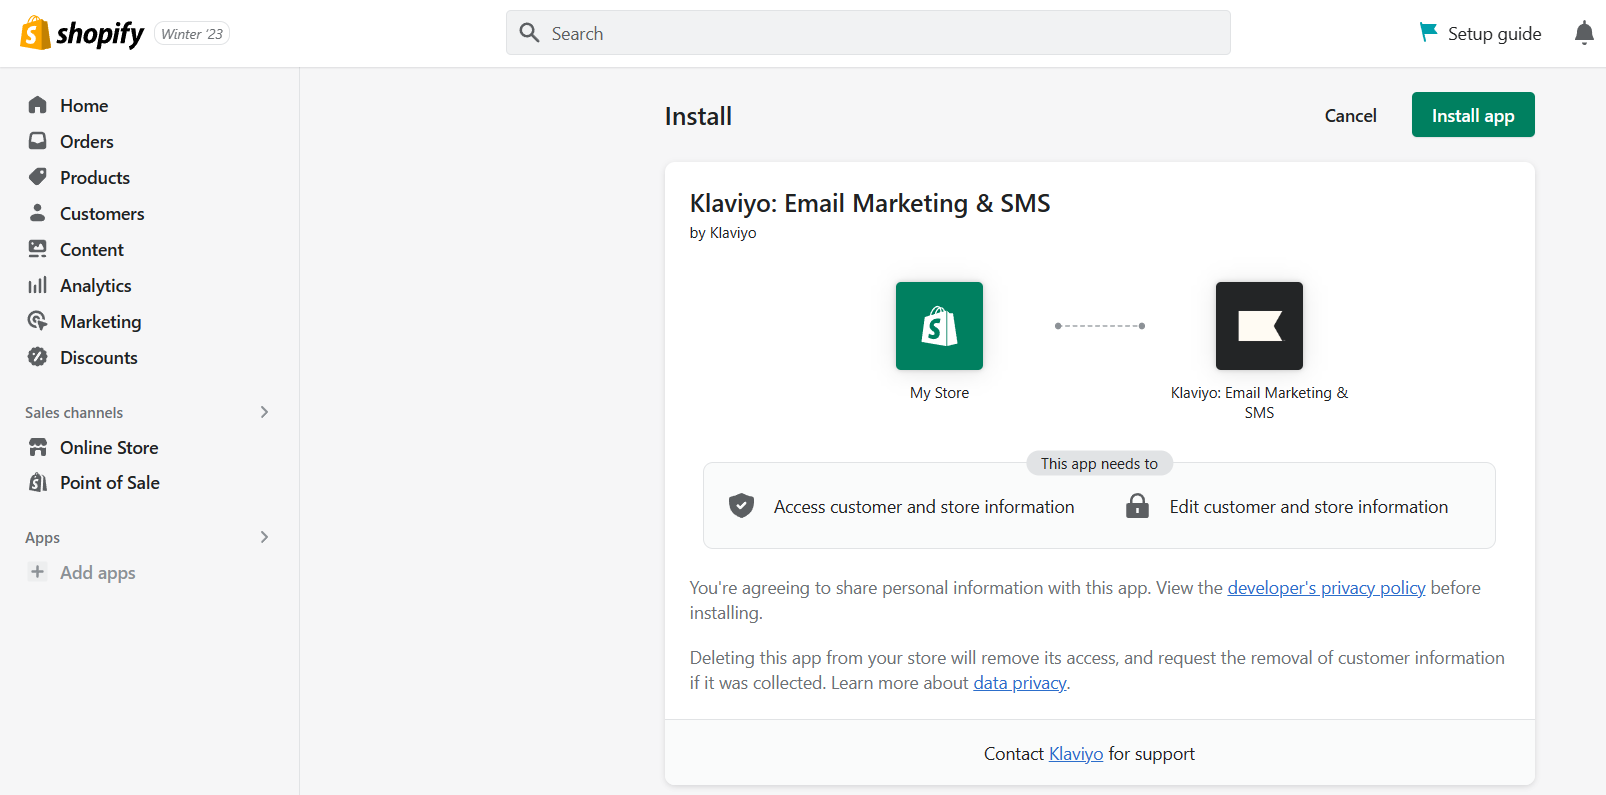
- You will then be redirected to the Shopify website to confirm the installation of the app. NOTE: Installing Klaviyo can give them access to customer and store information and edit customer and store information. If you are okay with this, click “Install app” to continue to process.
Creating Klaviyo Account
- After installing the app, you will be redirected to another tab where you have to create a Klaviyo account for your business. To continue with Integration, you must fill out the email address that you used on your Shopify store and the Phone Number that is connected to your business. Lastly, Create a Password that would protect your Klaviyo account.
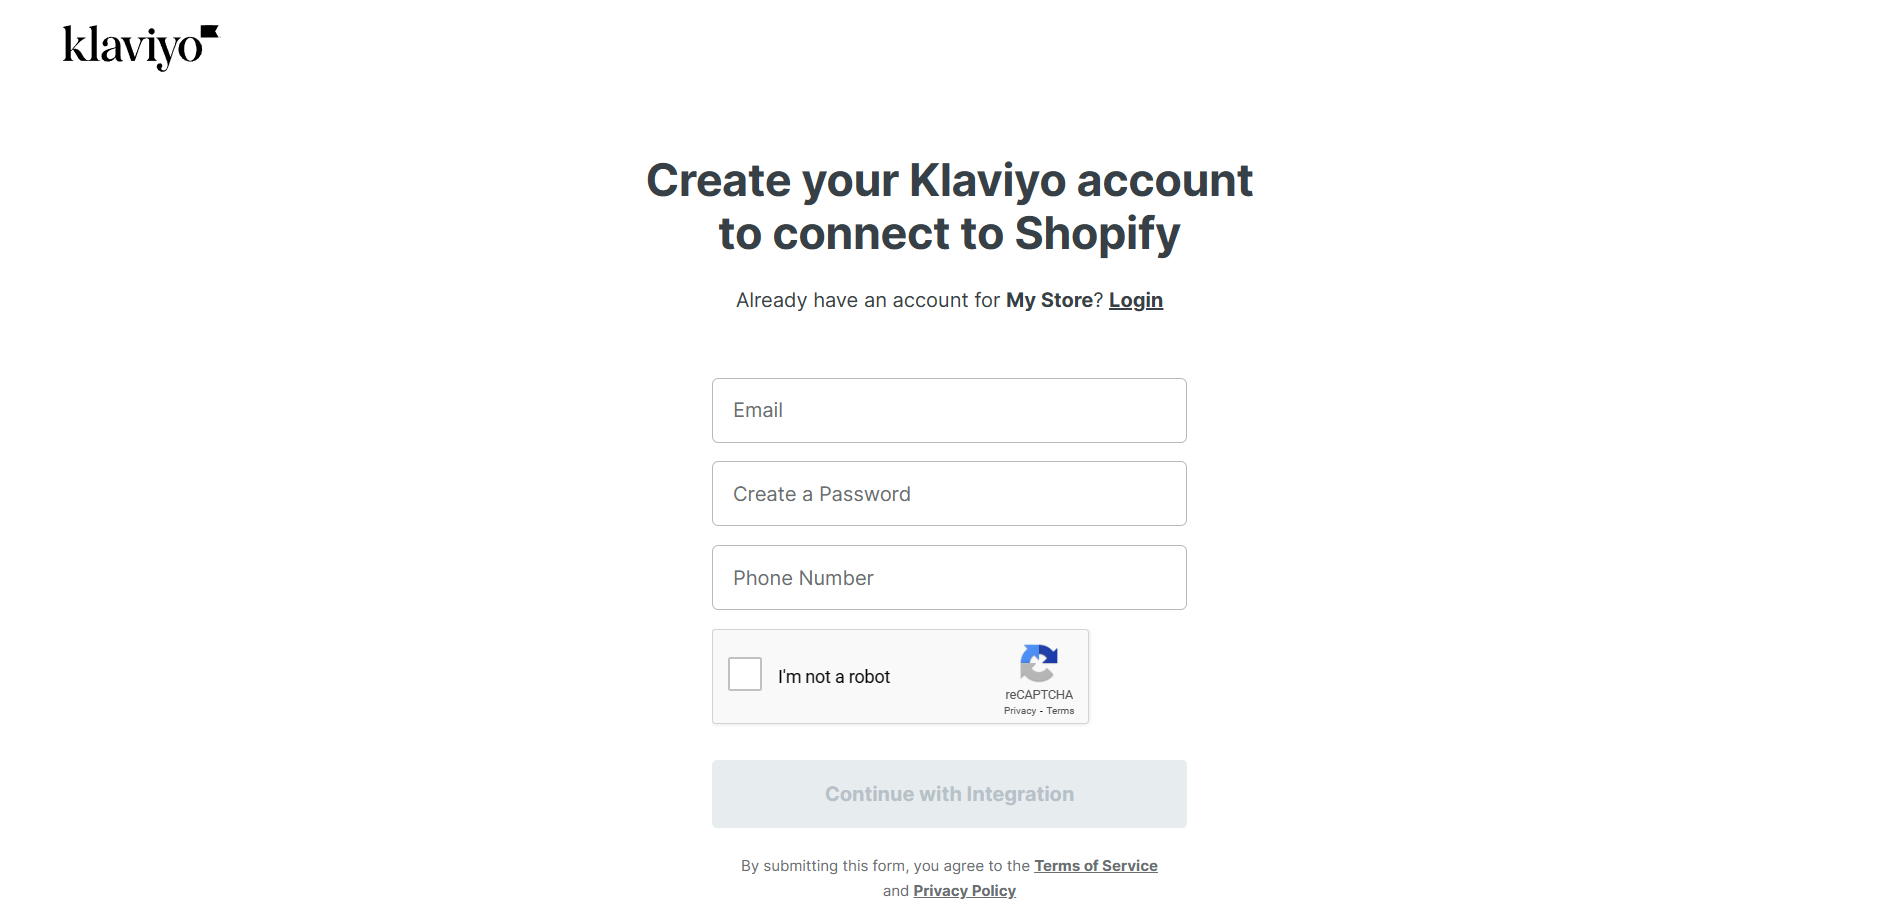
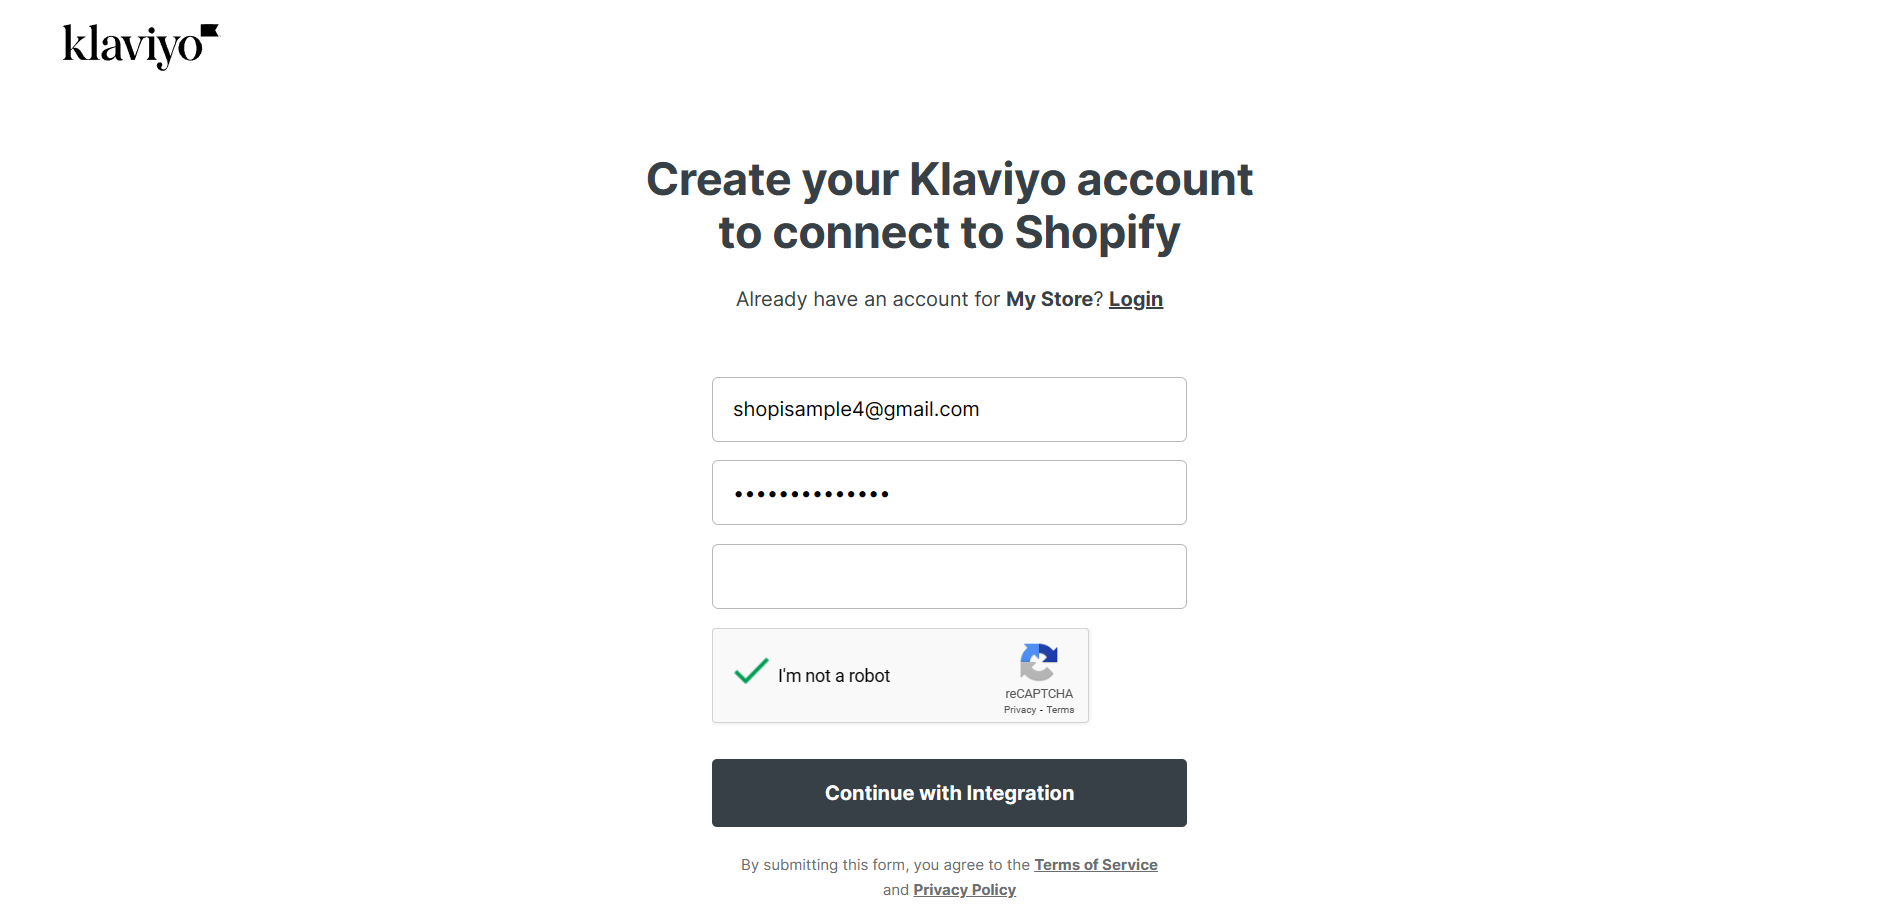
- After filling out the required fields, check the “I’m not a robot” checkbox to be able to click the “Continue with Integration”.
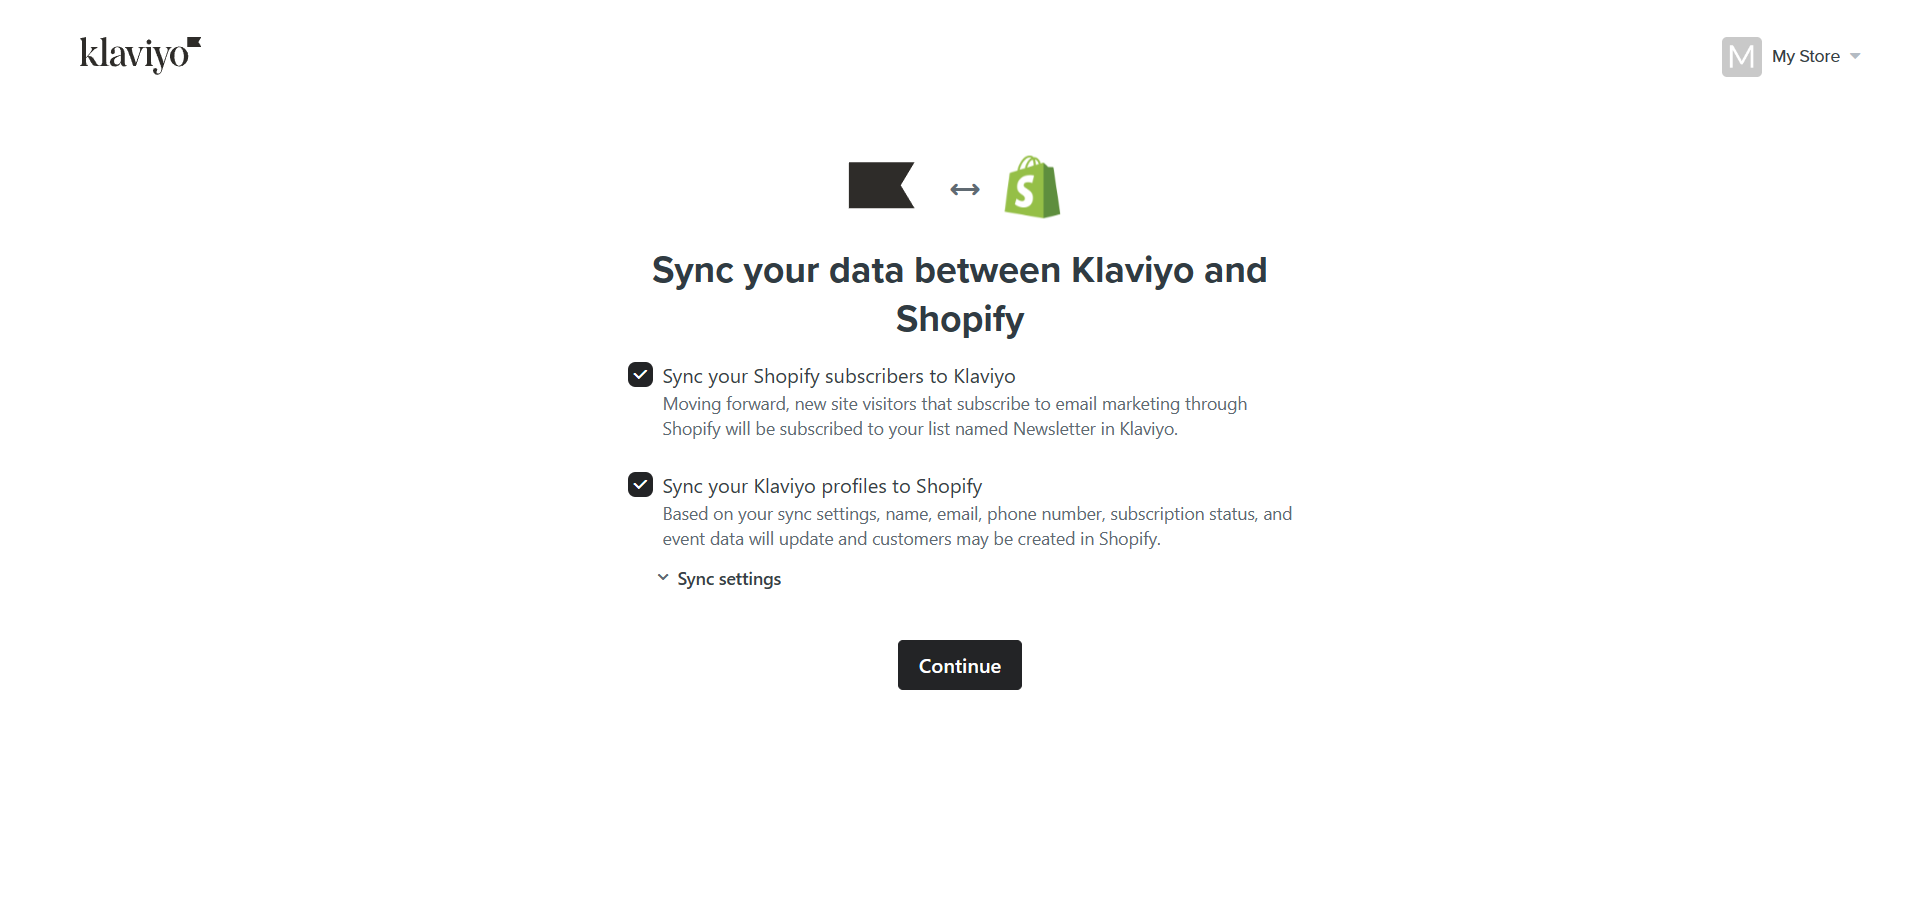
- After this, you will be asked to sync your data between Klaviyo and Shopify. This includes syncing Shopify subscribers to Klaviyo and Klaviyo profiles to Shopify. To allow this, check the checkbox of the option that you want to approve, then click Continue.
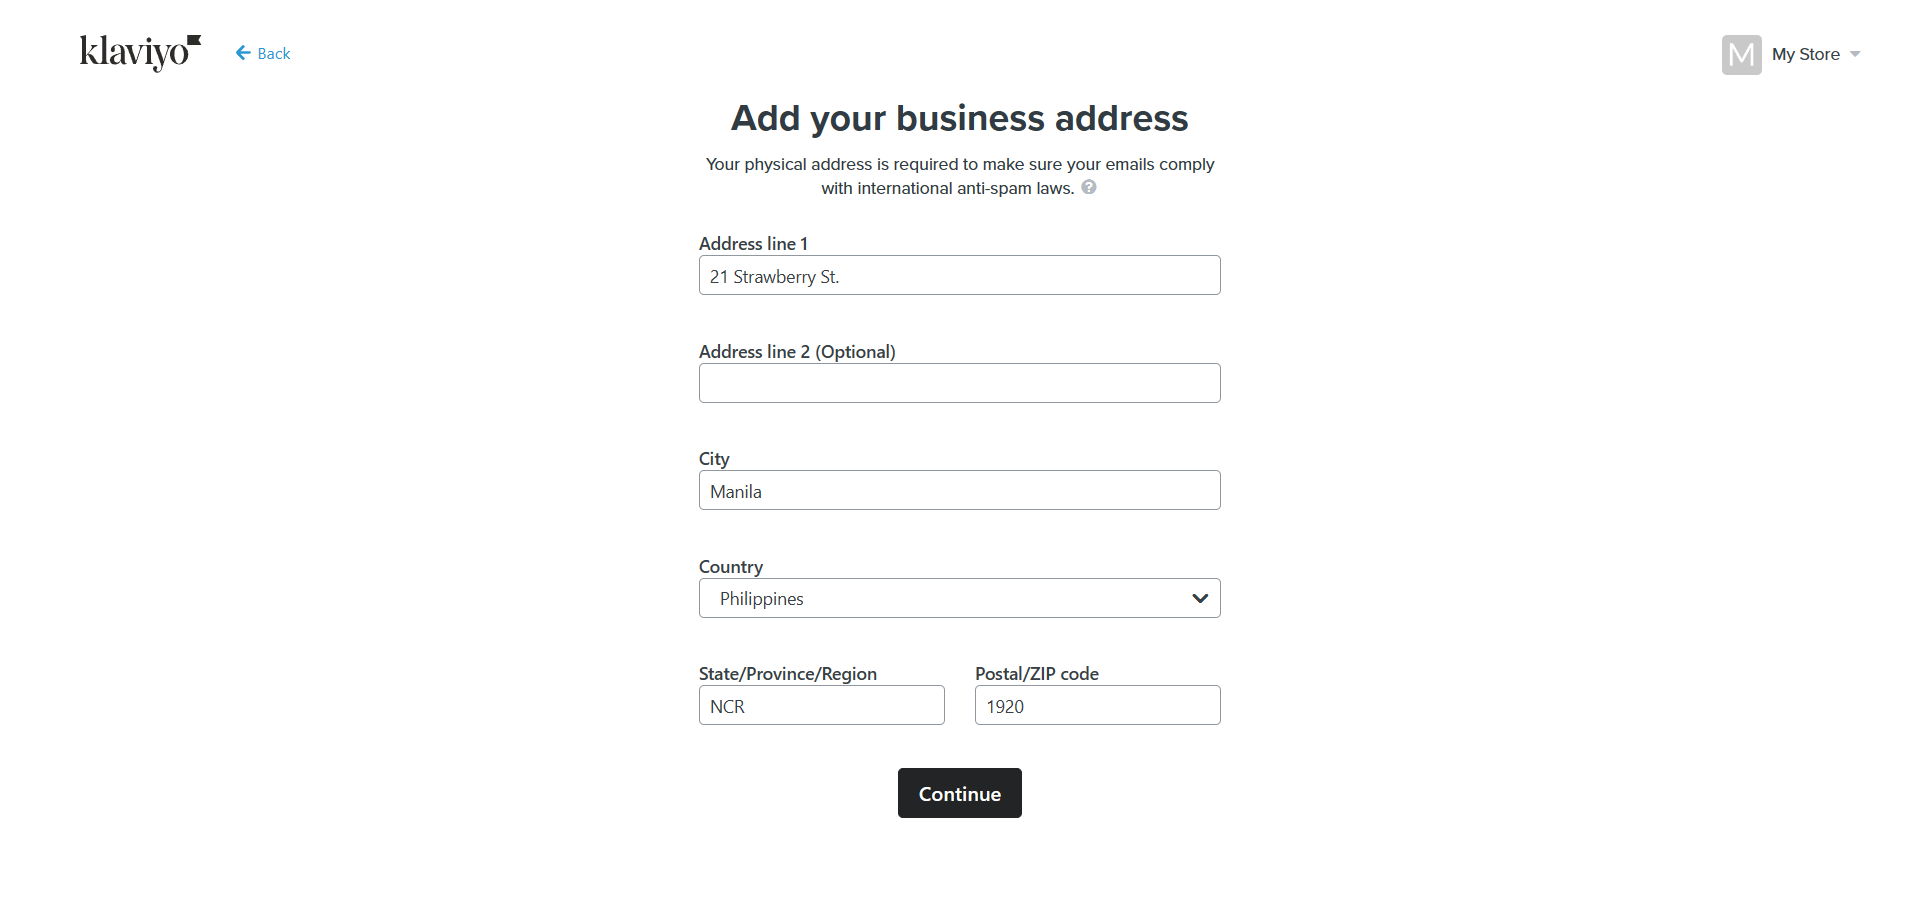
- After syncing your data, you will be asked to enter an Address line, City, State / Province / Region, and Postal / ZIP code where your business is addressed to comply with international anti-spam laws. Enter these details in the blank field as shown below.
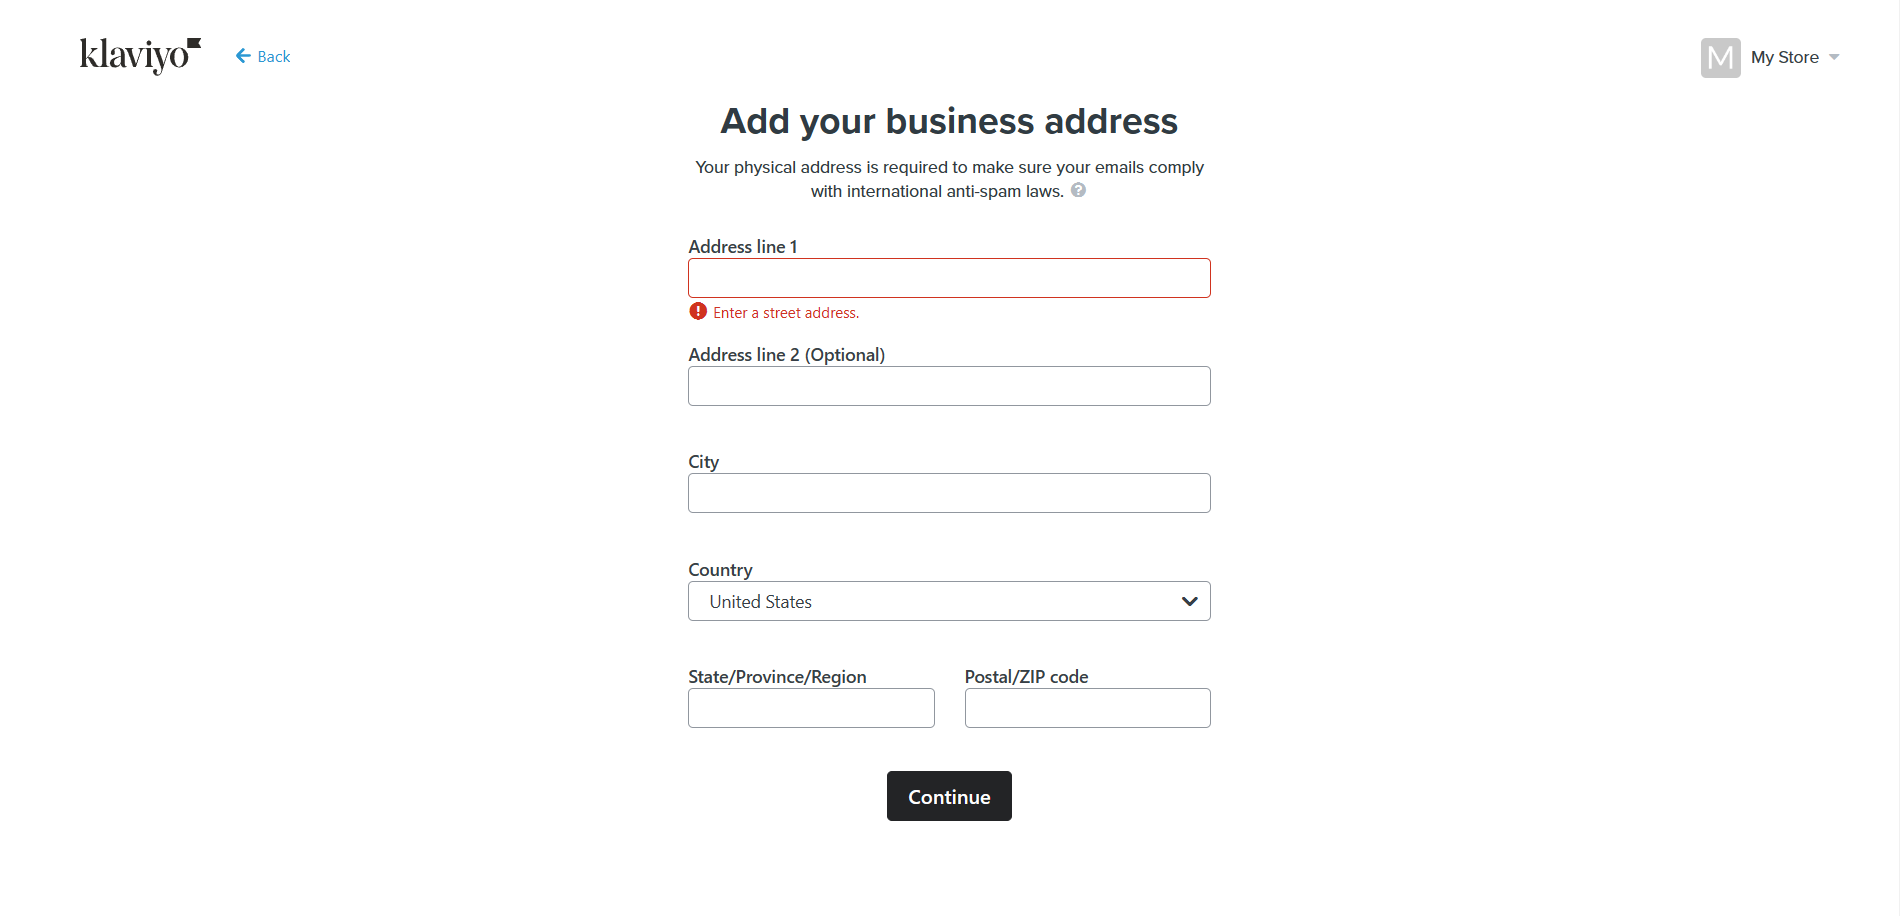
- After indicating your business address, click “Continue” to proceed with the process.
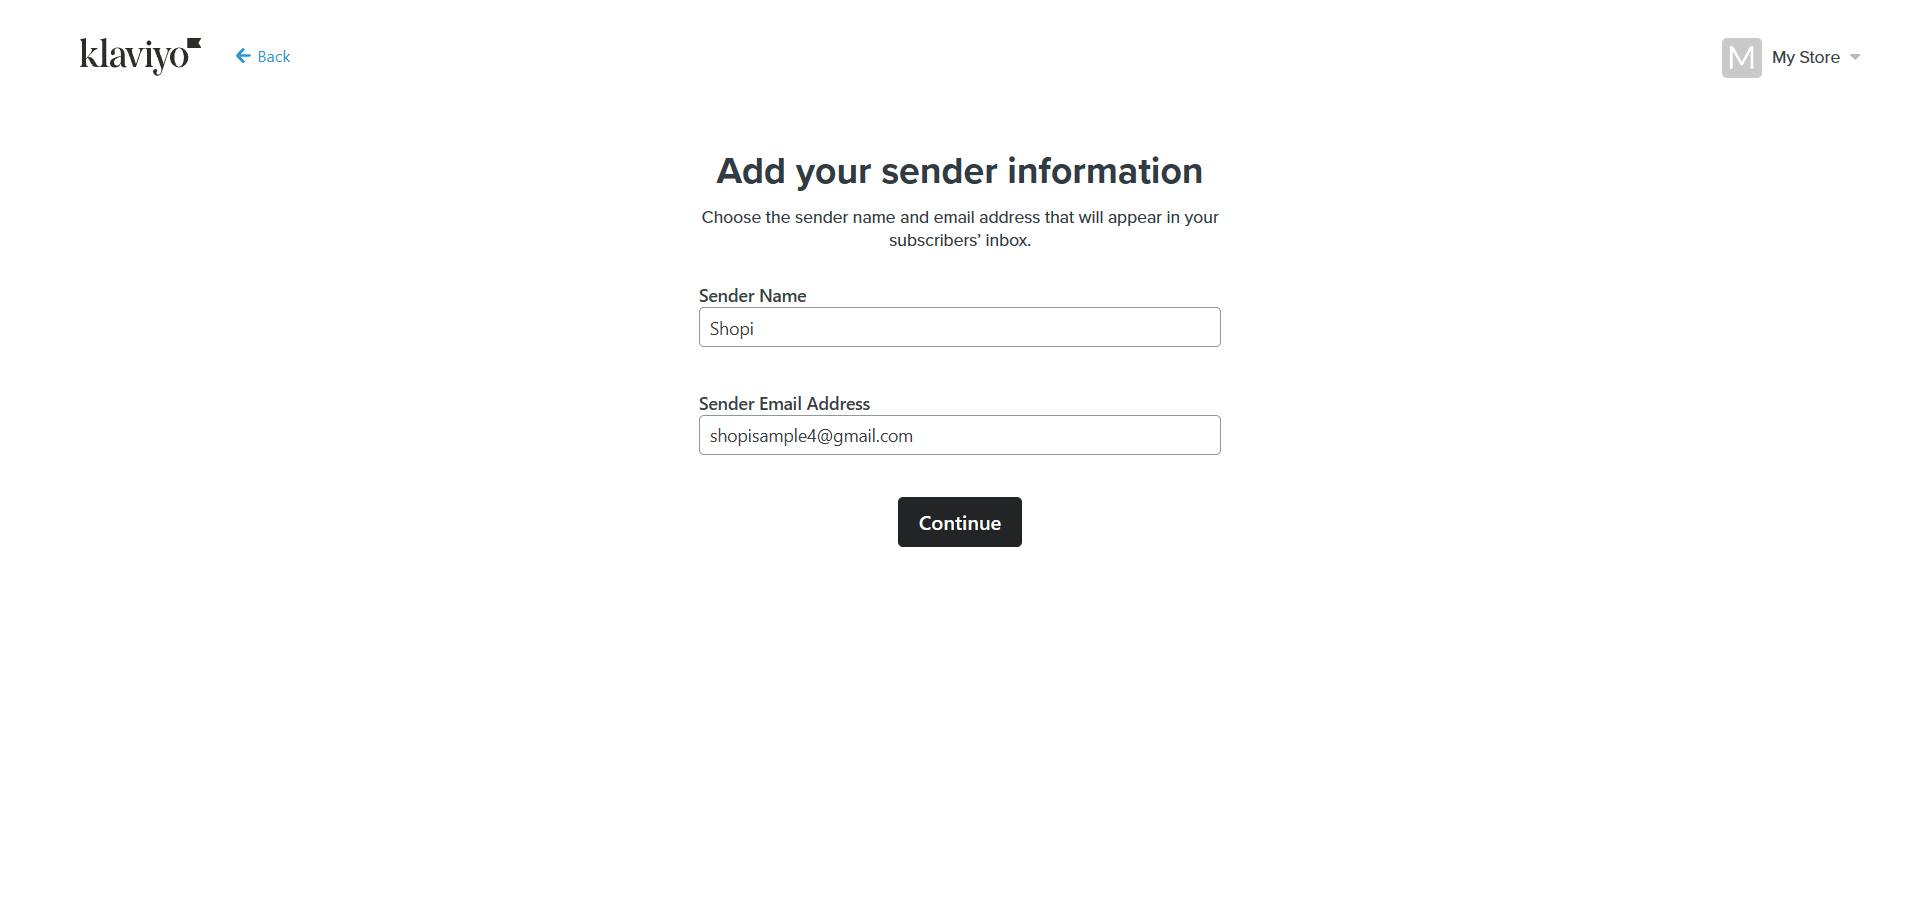
- Next step in creating your Klaviyo account is to Add your sender information. This is the name and email address that will appear in the email marketing format that you will send to your customers. Click the “Continue” button after entering the sender information.
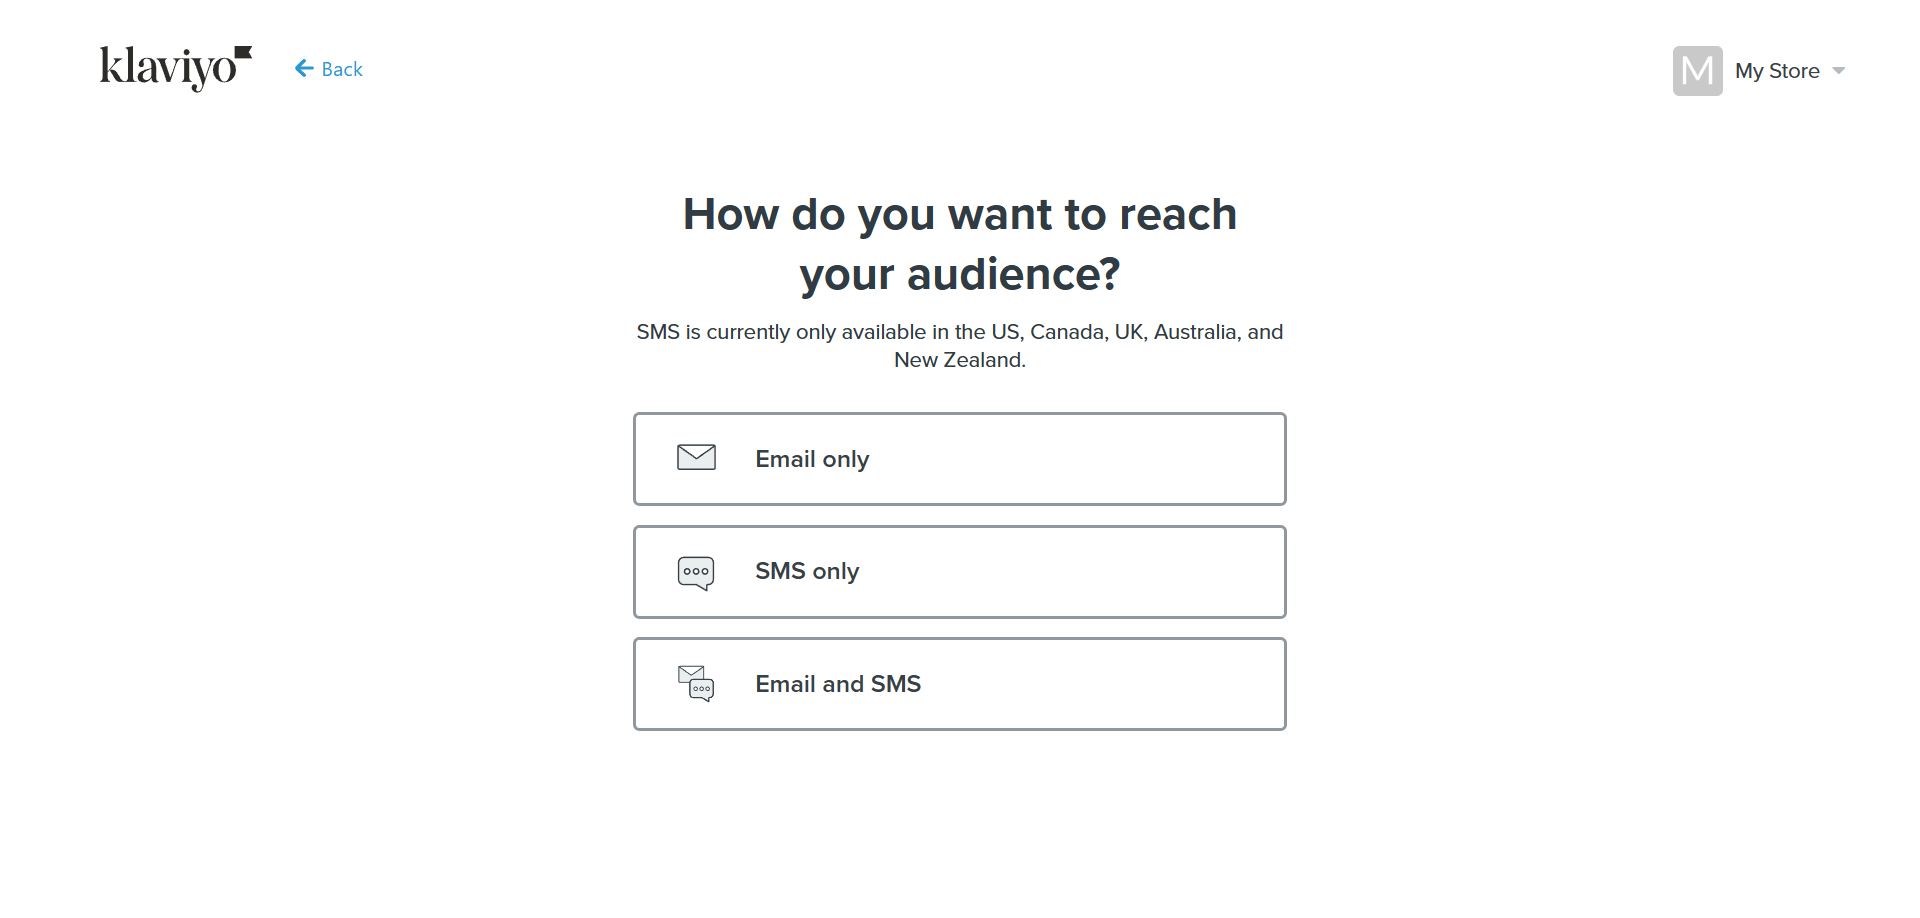
- After setting up your sender information, you will be asked about the methods that you want to utilize to reach your audience. You can use Email only, SMS only, or both Email and SMS marketing. SMS is available to US, Canada, UK, Australia, and New Zealand. To set up SMS automation, click “SMS only”.
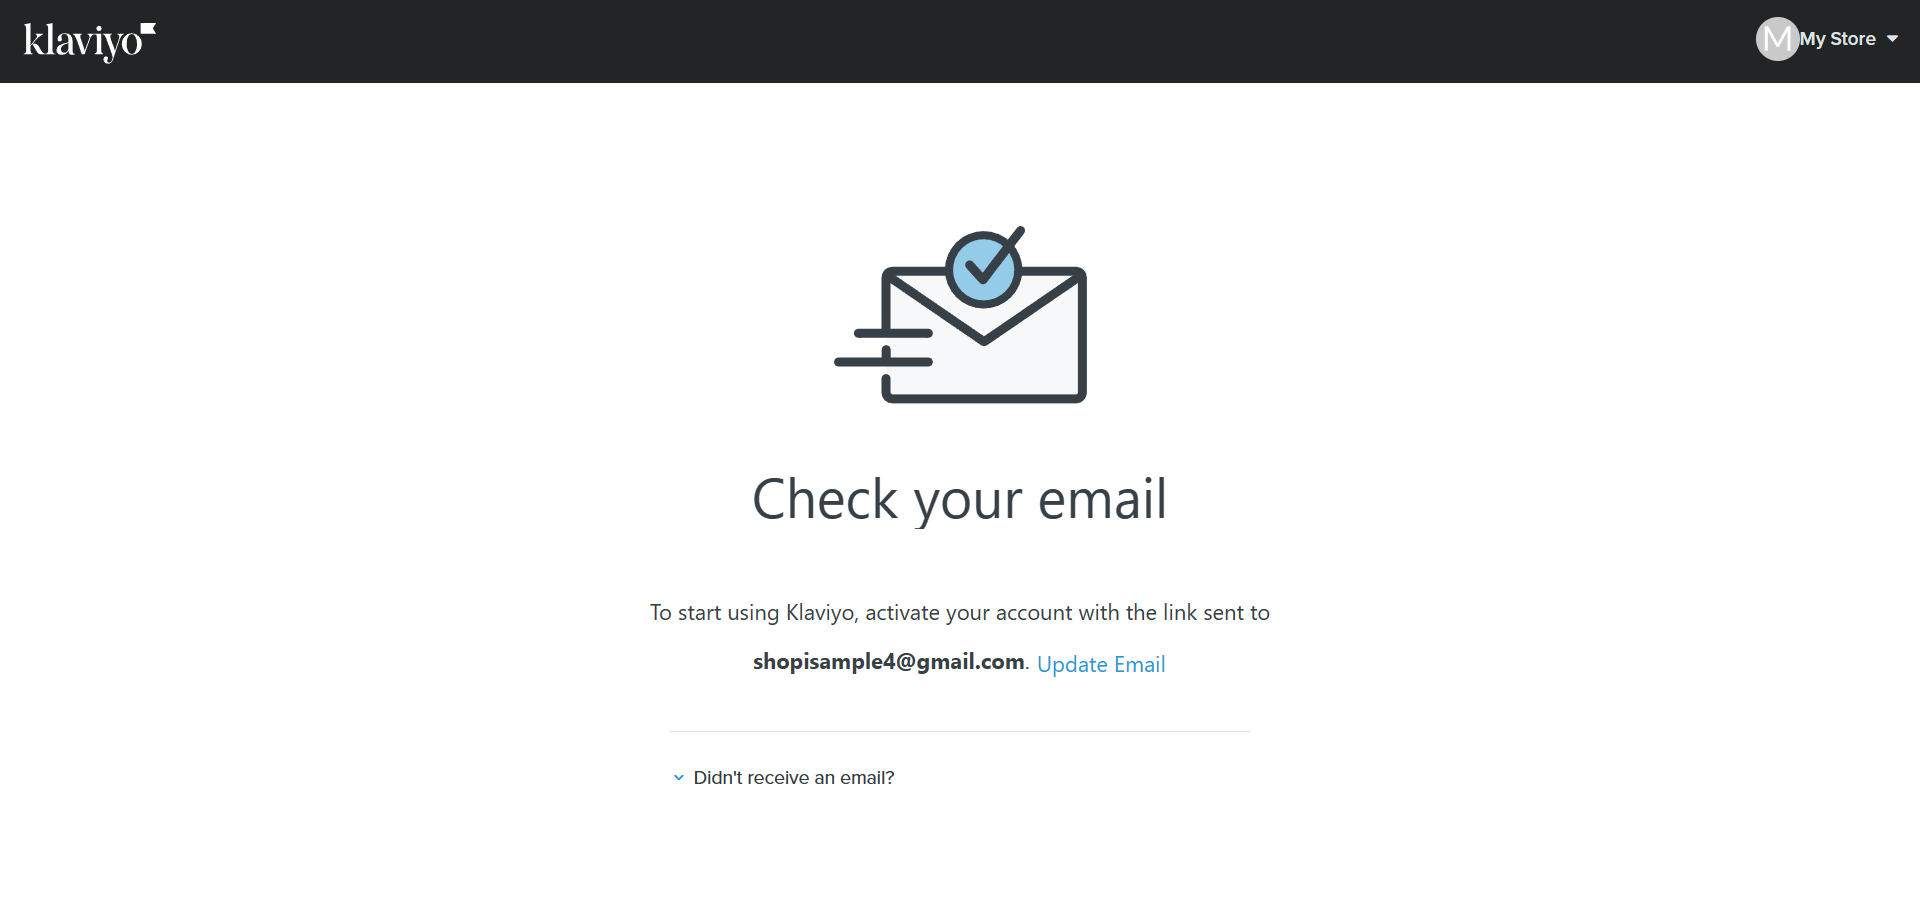
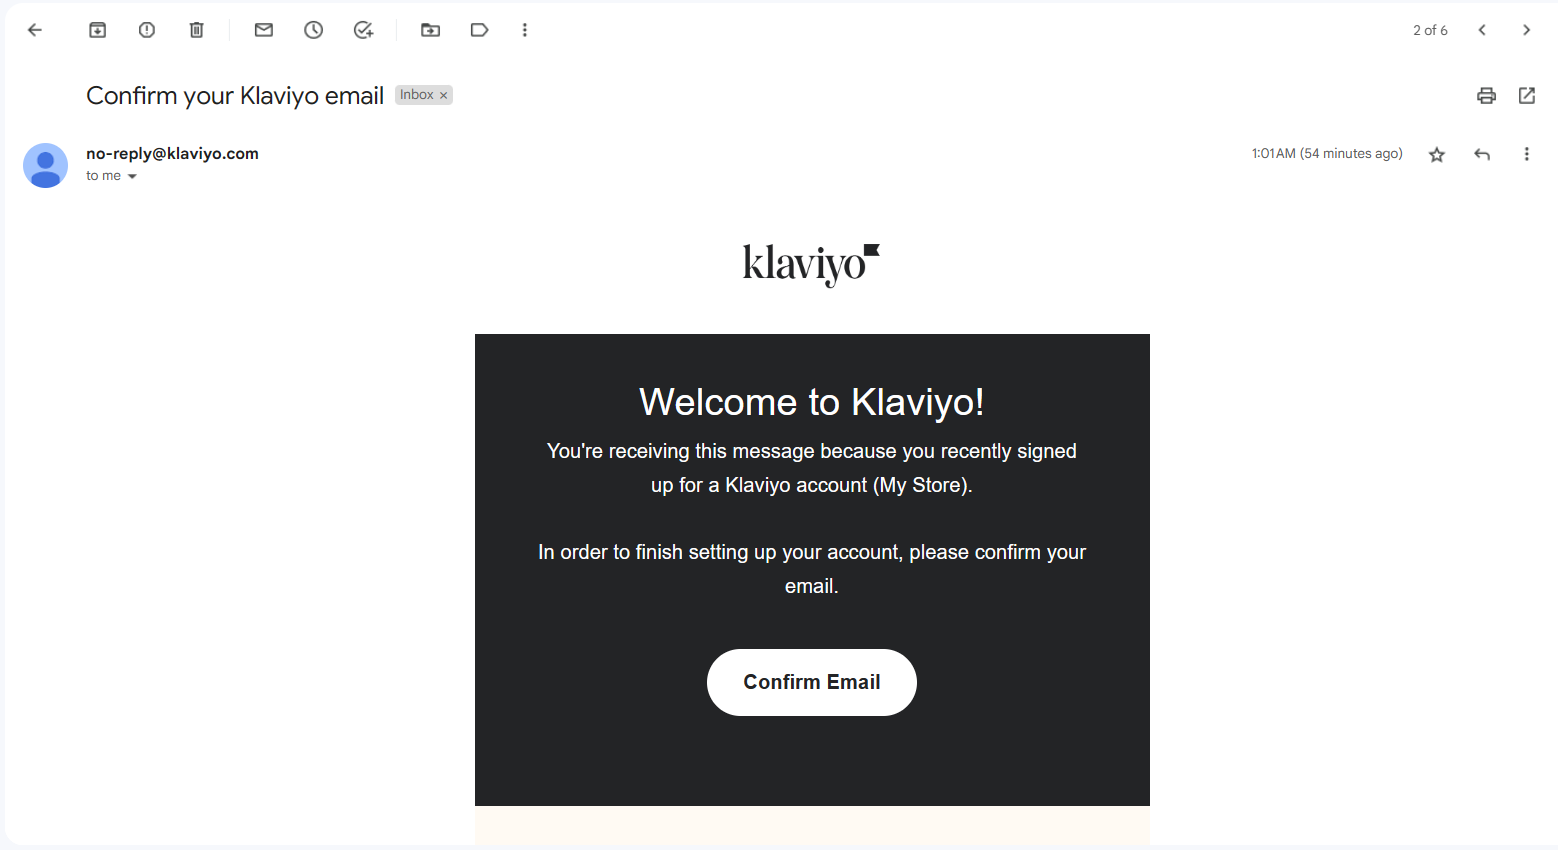
- After clicking your preferred method, you will be asked to check your email to confirm your account in Klaviyo.
- This is the official email that you will receive from Klaviyo to confirm your account. Click the “Confirm Email” to open your Klaviyo account and set it up according to your objectives.
Setting up Klaviyo for SMS Automation
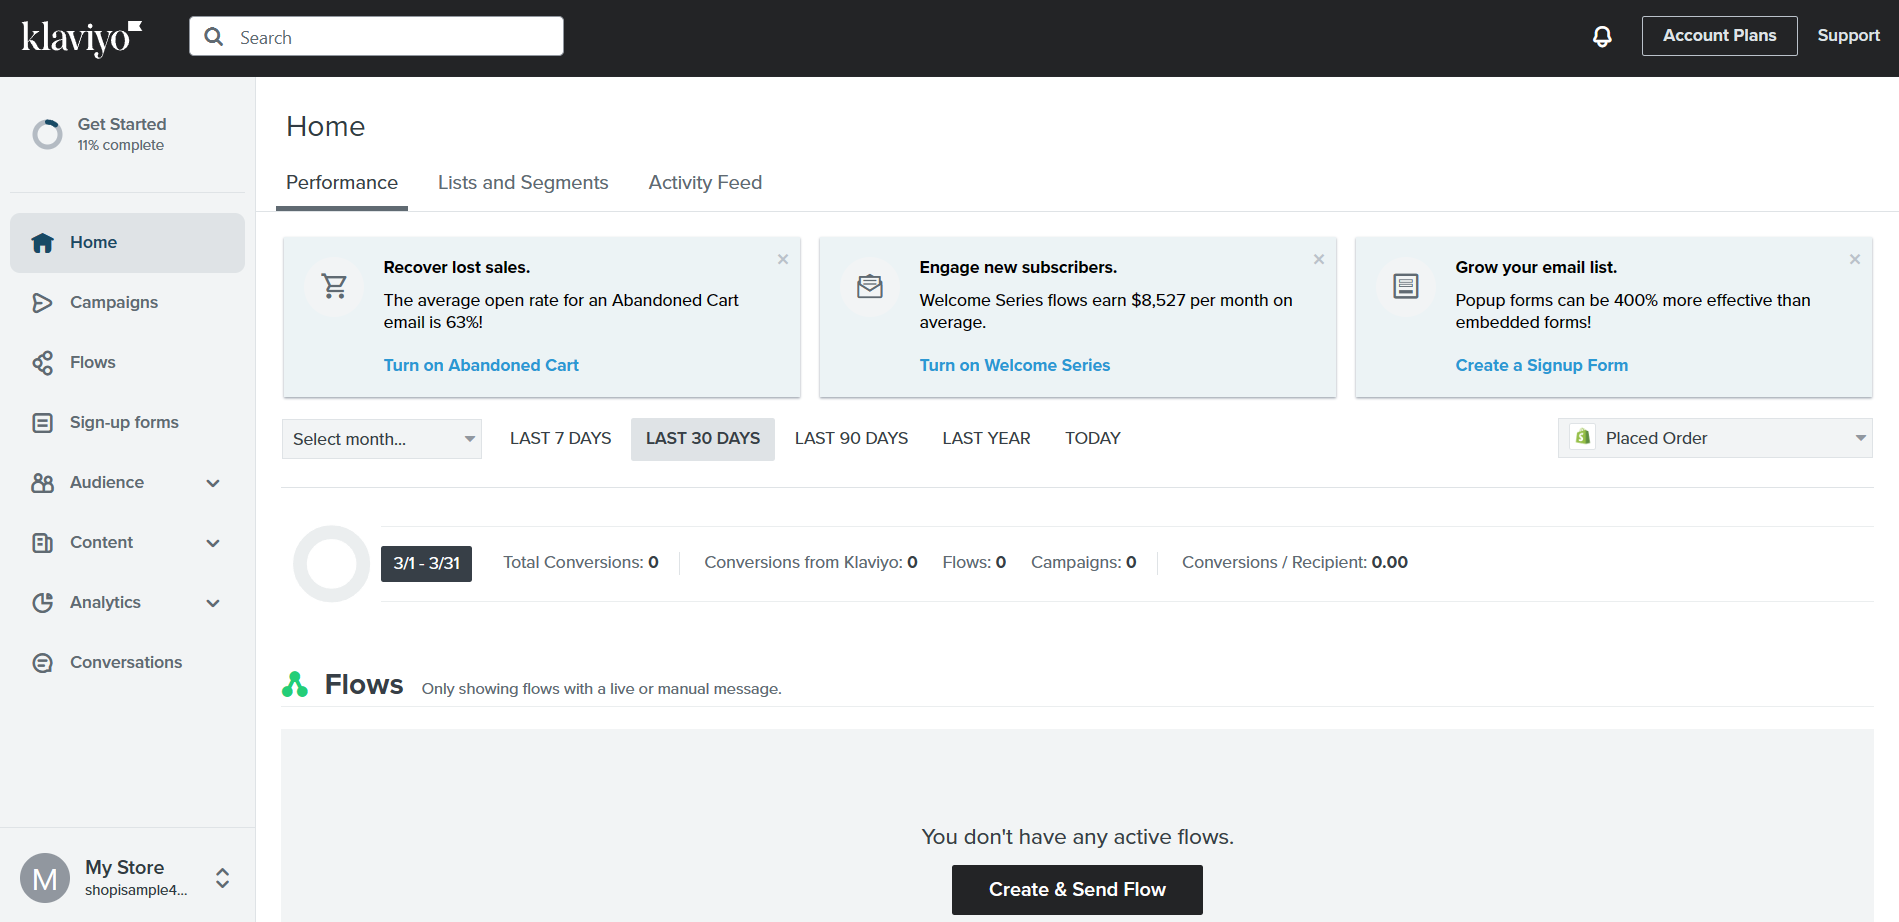
- To set up SMS automation, you may now set up the audience which will receive the text messages. Click “Audience”.
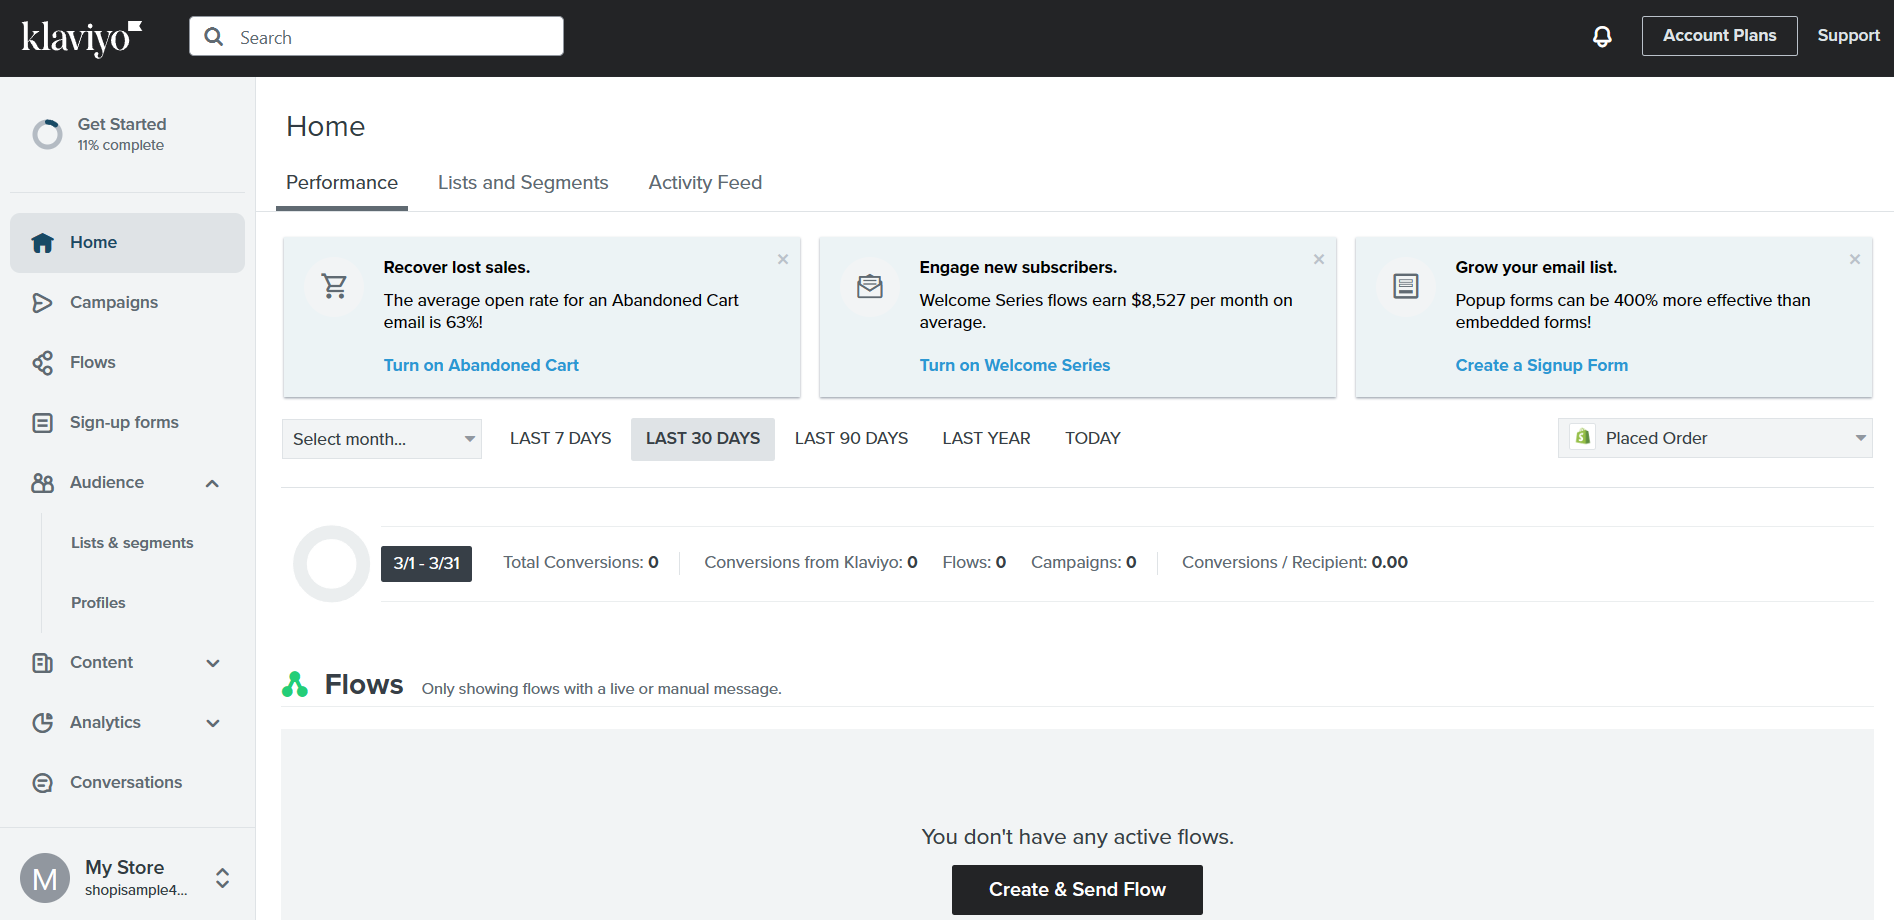
- Since Audience is a drop down menu, subcategories will show after you click it. Click “Lists & segments”.
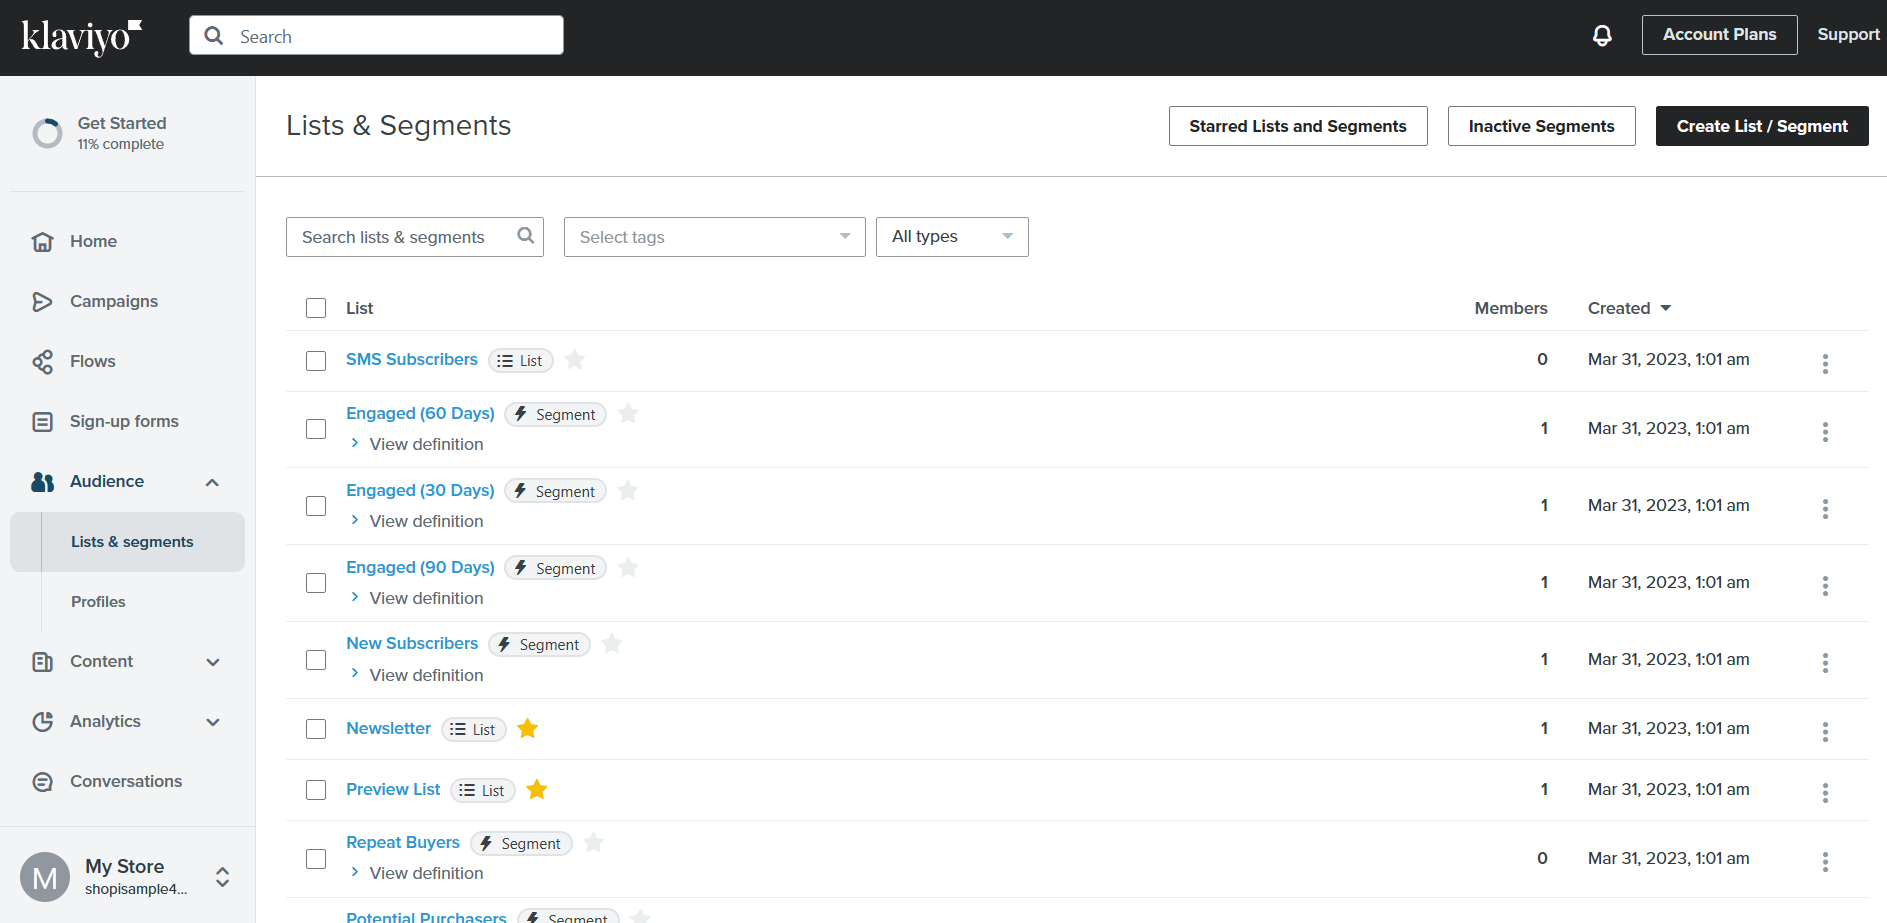
- Although Klaviyo has prepared some lists and segments, you can create a new one by clicking “Create List/Segment”.
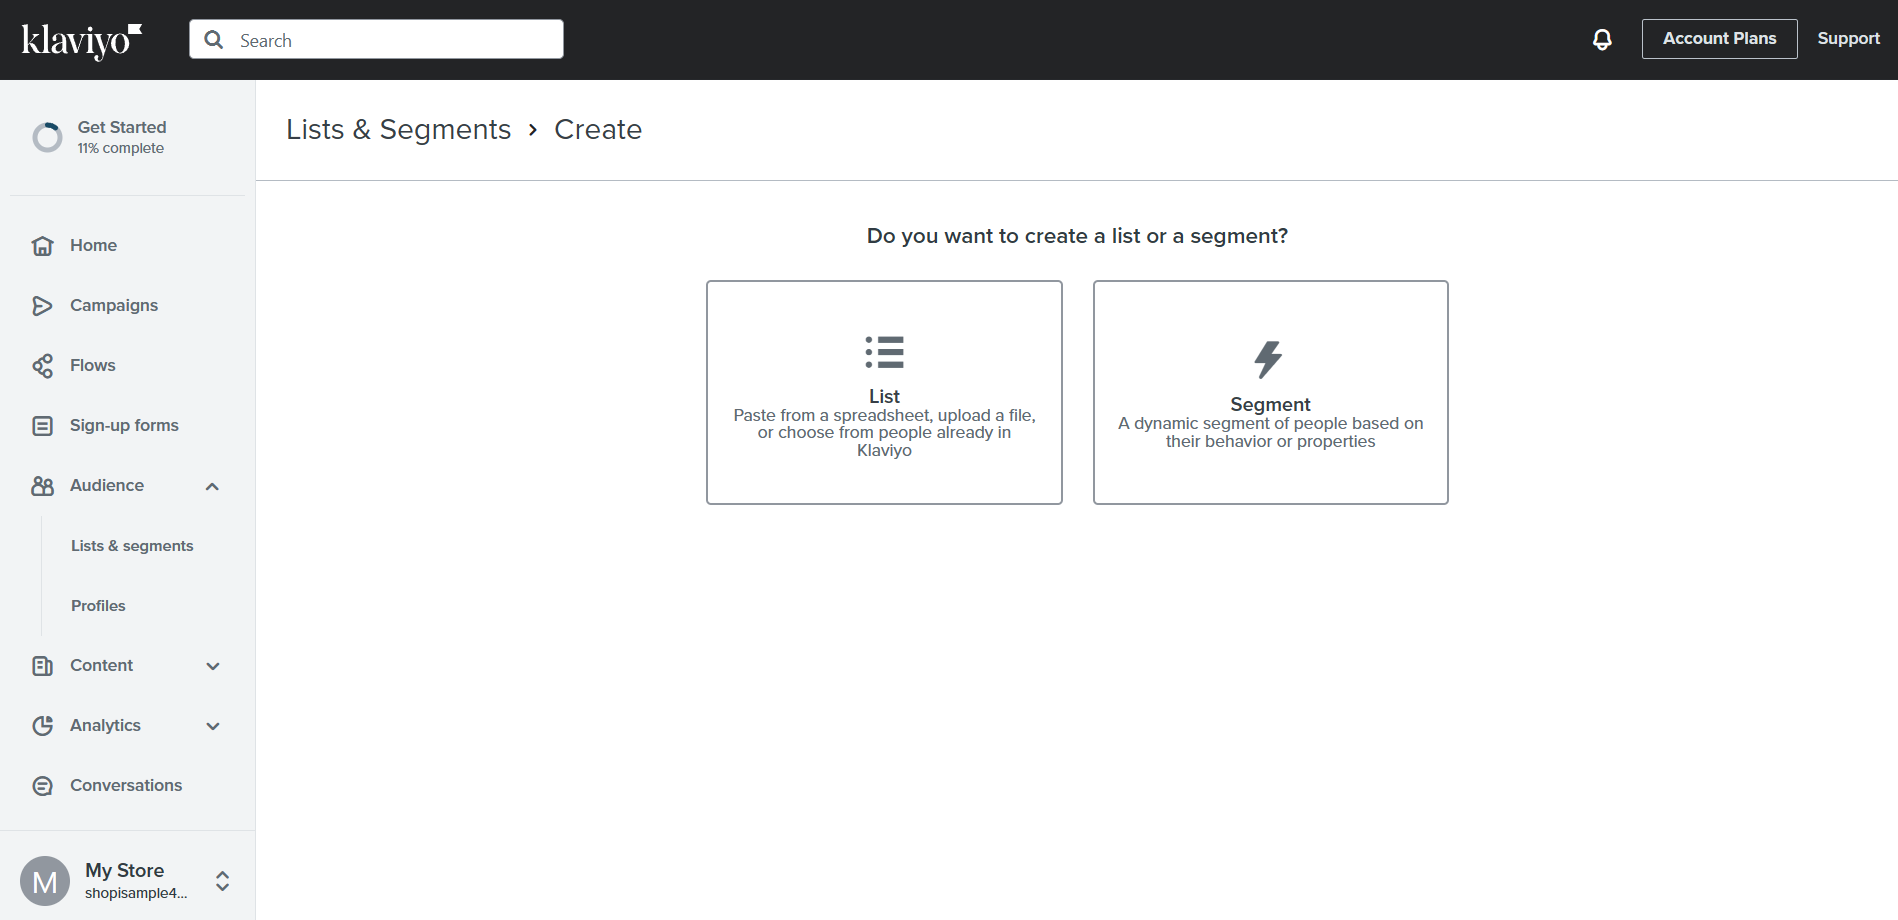
- To create a List or Segment, you must first understand the difference between the two. List is a list of people that you want to receive your emails, it may come from a spreadsheet file, paste from spreadsheet, or choose from people that are already in Klaviyo. Segment is a grouping of people based on their behavior or properties. Click your preferred option.
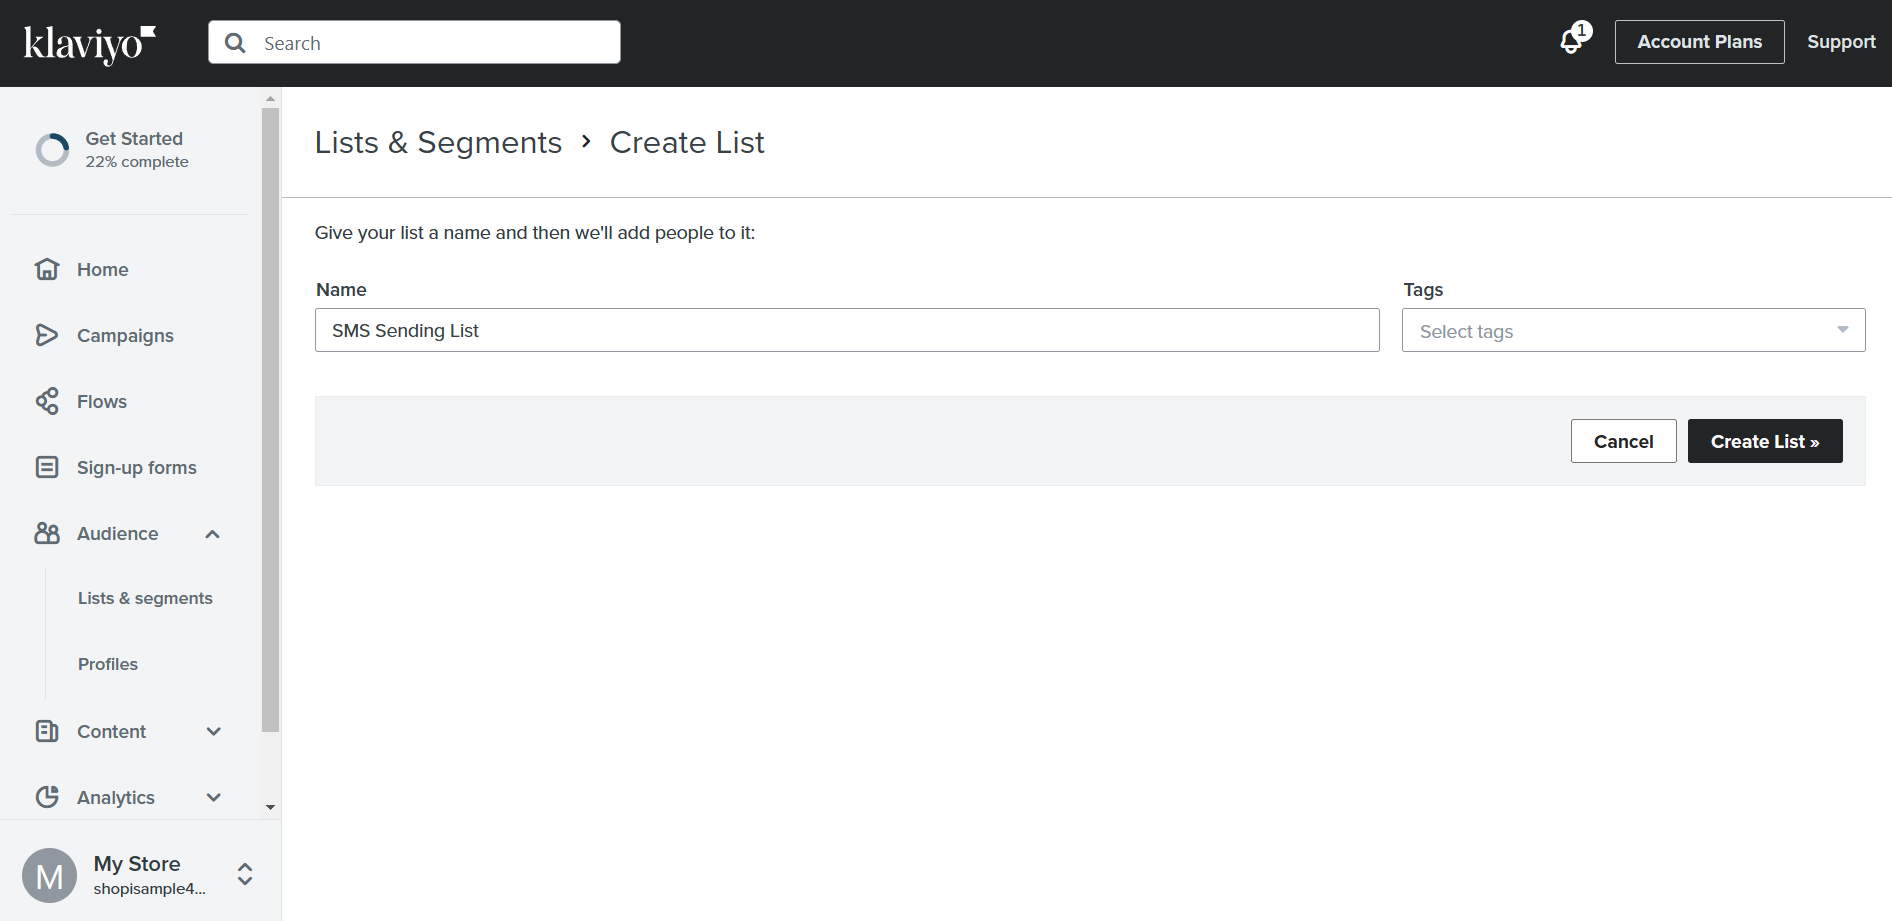
- To create a List, you will be asked to enter a name for that list and choose the tags by clicking the dropdown menu. After indicating both requirements, click the “Create List”.
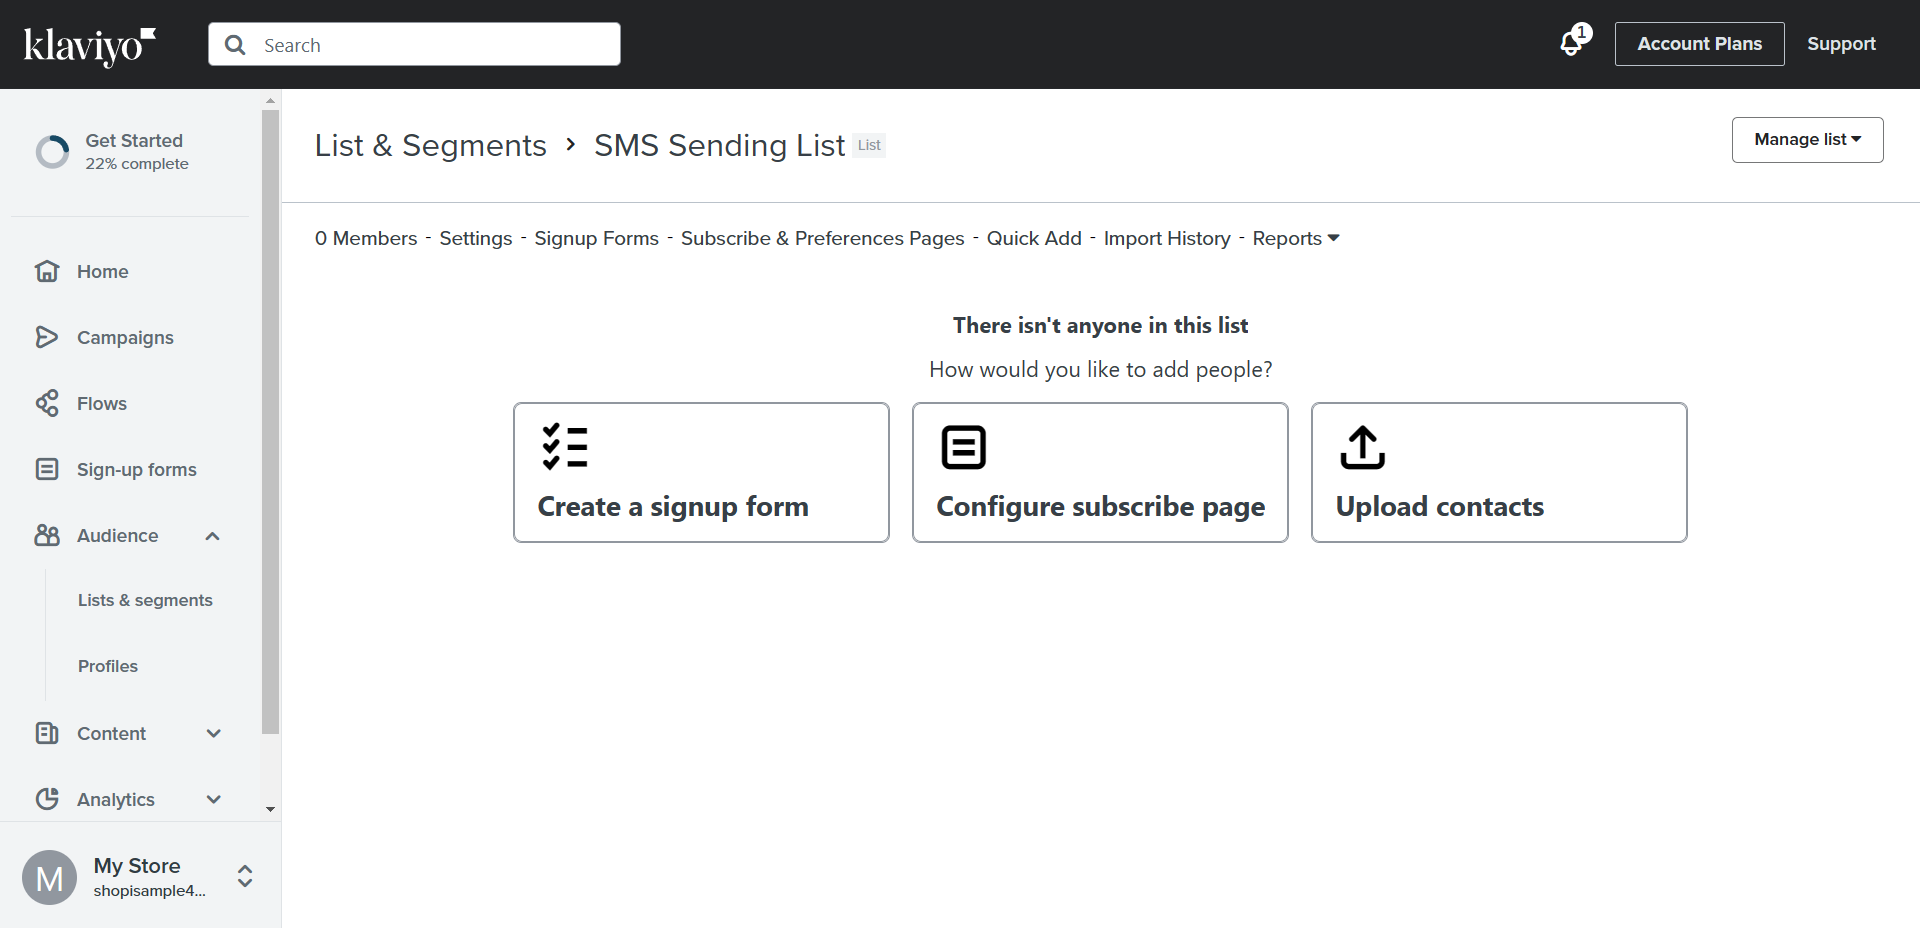
- After creating the List, you can add people by creating a signup form, configuring your subscribe page, or by uploading contacts. Click your preferred option.
- To create a Segment, you will be asked to enter a name for the segment and indicate the tags.
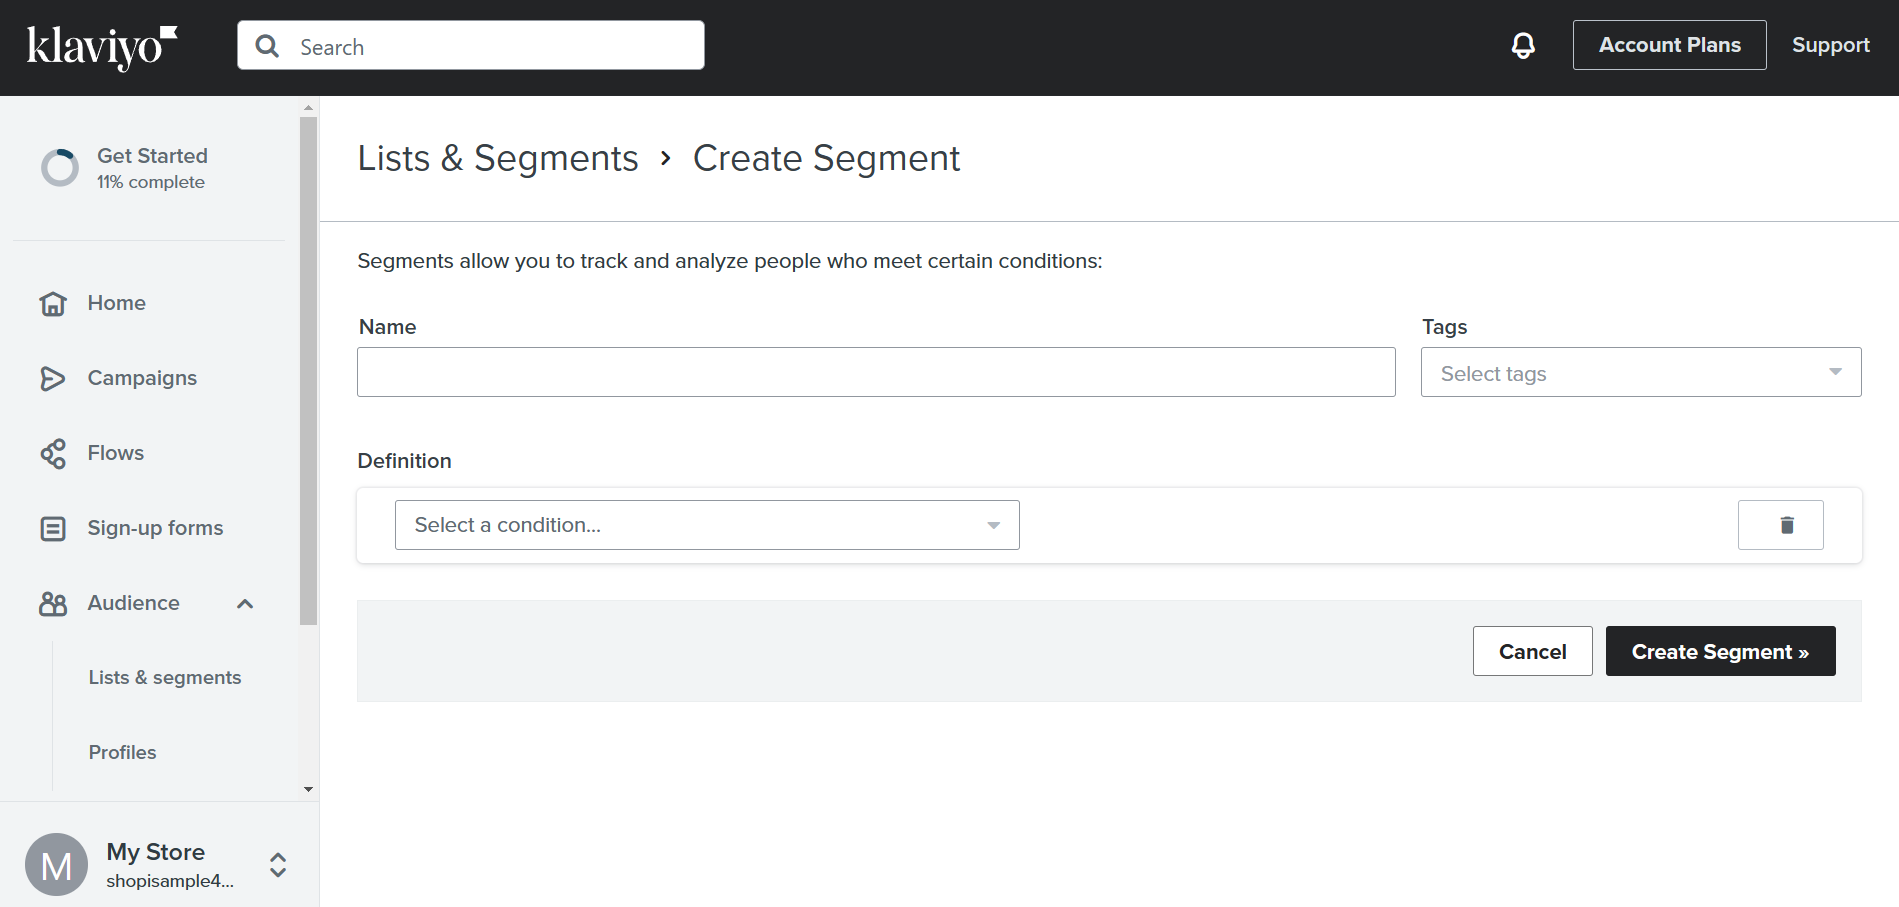
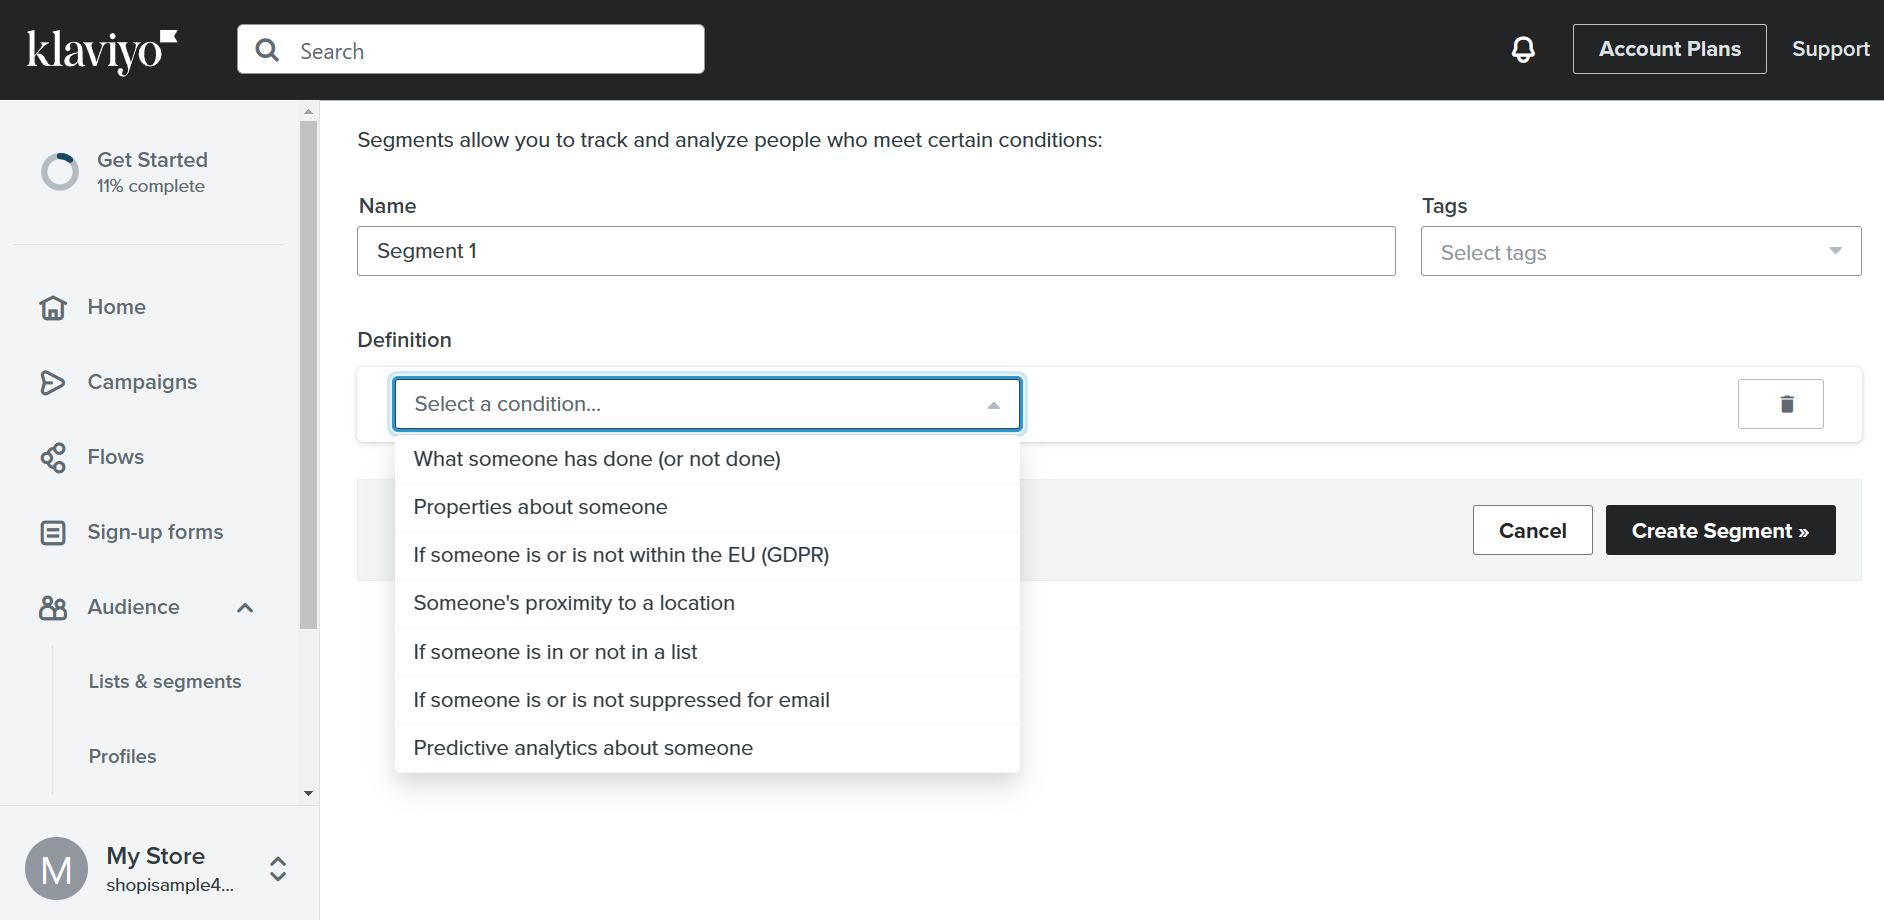
- In addition, you will also indicate a certain condition that customers must be in to be included in that segment. To do this, click the drop down menu under “Definition”.
- These are some of the definitions that you can choose from. It may be about the person’s location, predictive analysis, or properties based on previous purchases. Usually, the condition most used is the “What someone has done (or not done)”. To choose a condition, click it.
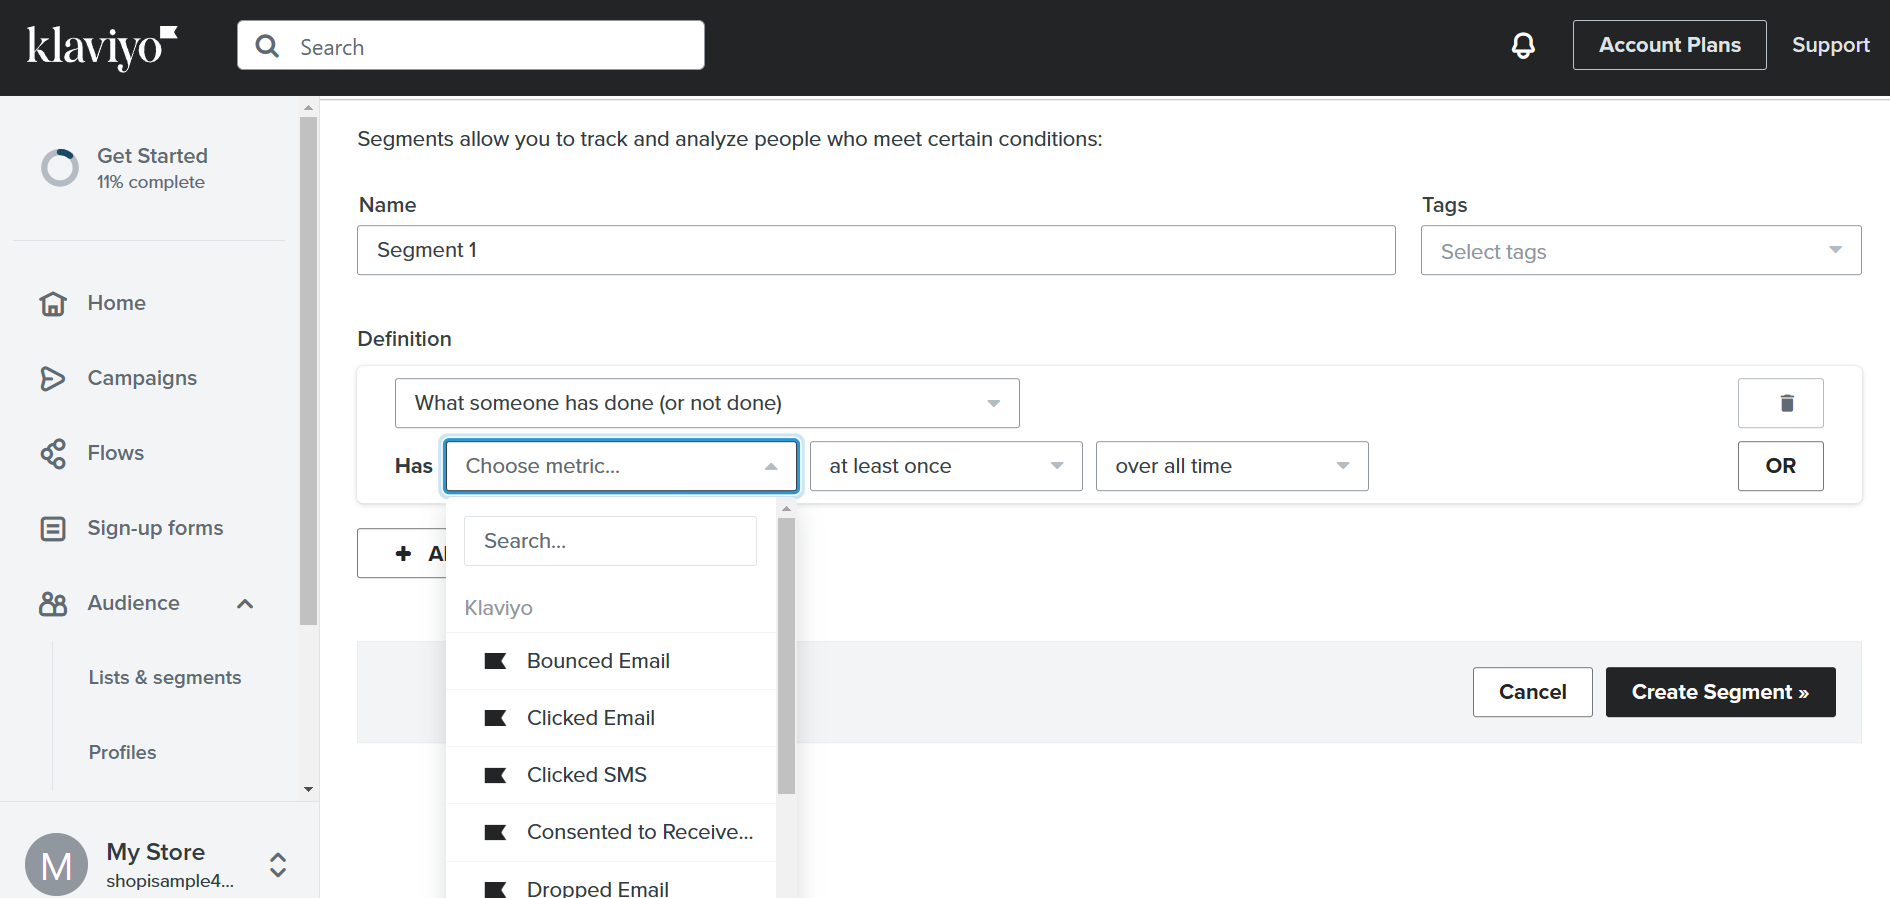
- You can choose the metric underlying the option that you chose. In this condition, you can choose people who have clicked or bounced your email.
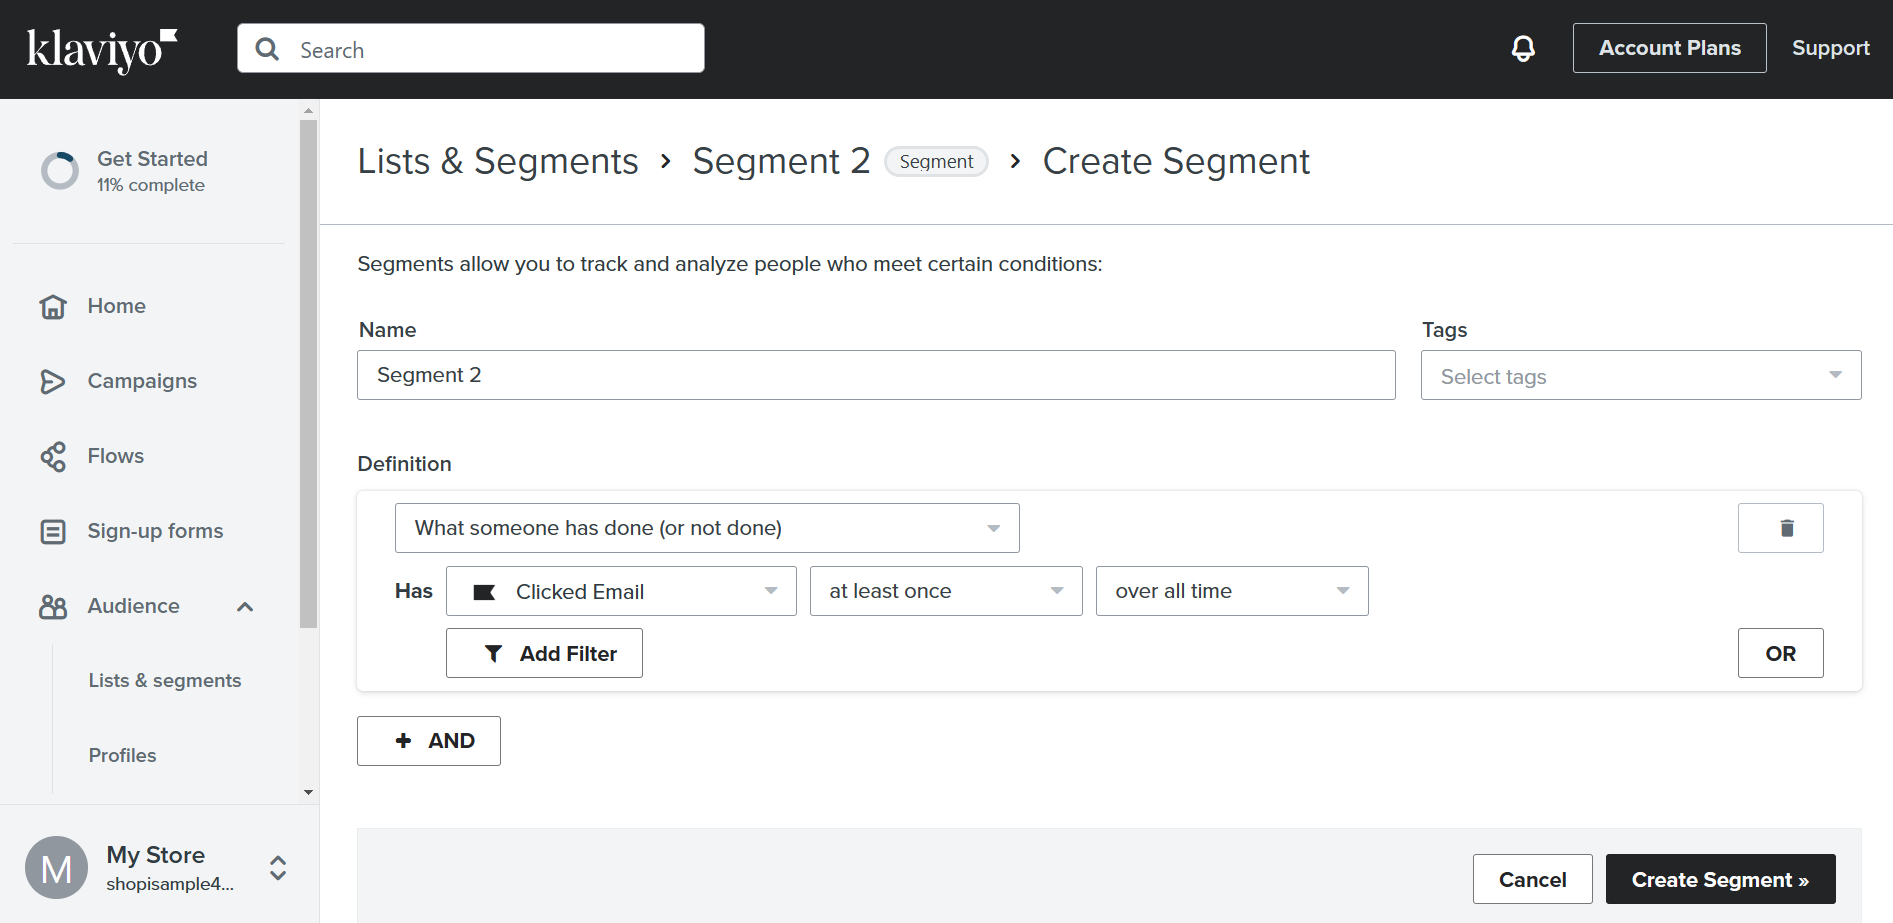
- After customizing the settings, click “Create segment”.
- After indicating the Lists & Segments, you can now create a Flow. Click “Flow” on the left sidebar.
- Click “Create flow” to create a flow for your SMS Subscribers.
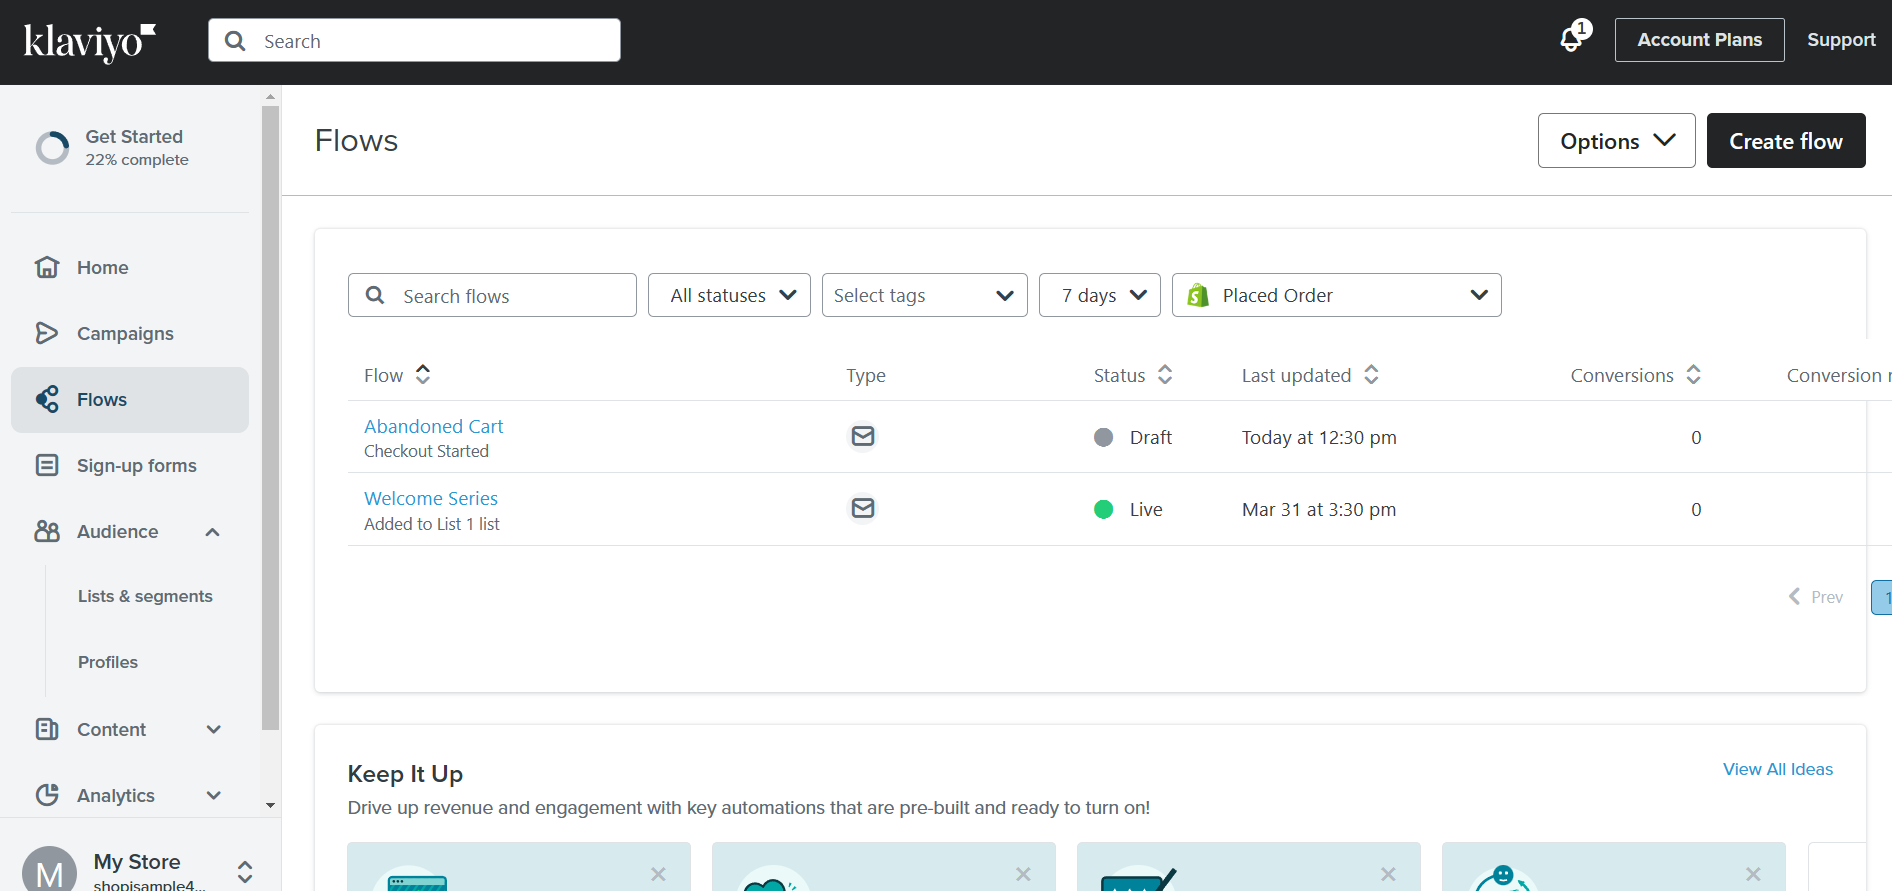
- Then, click the SMS icon to see formats in this type of marketing automation.
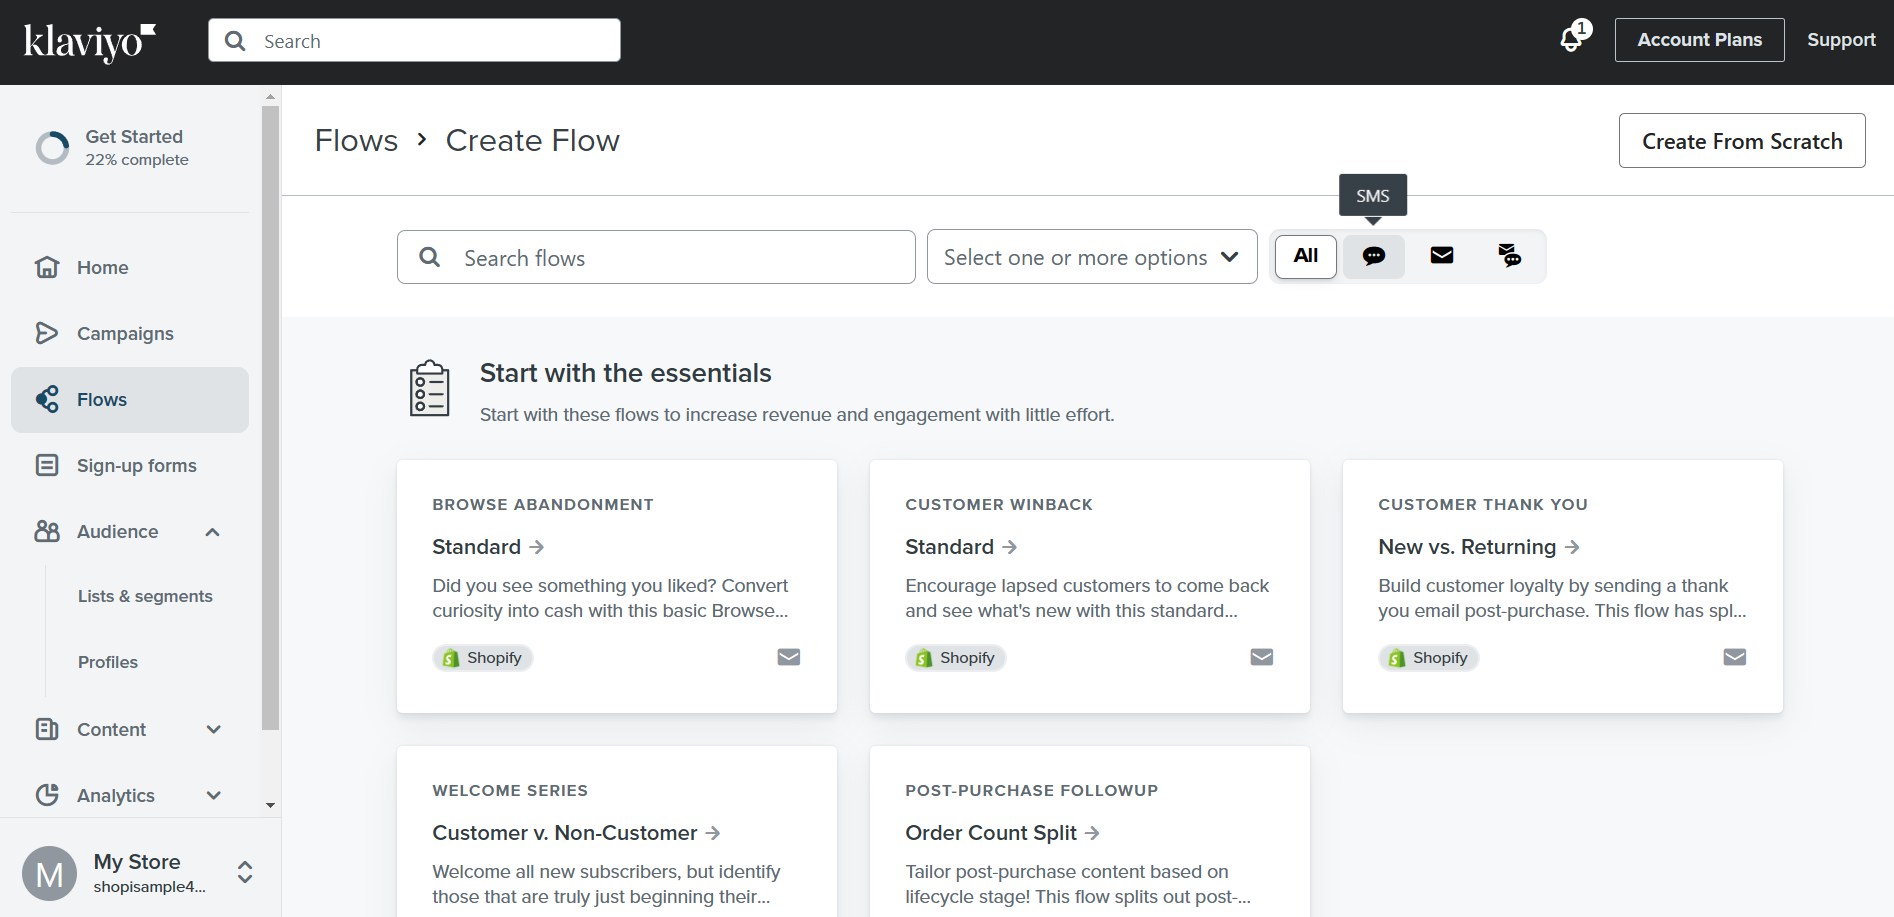
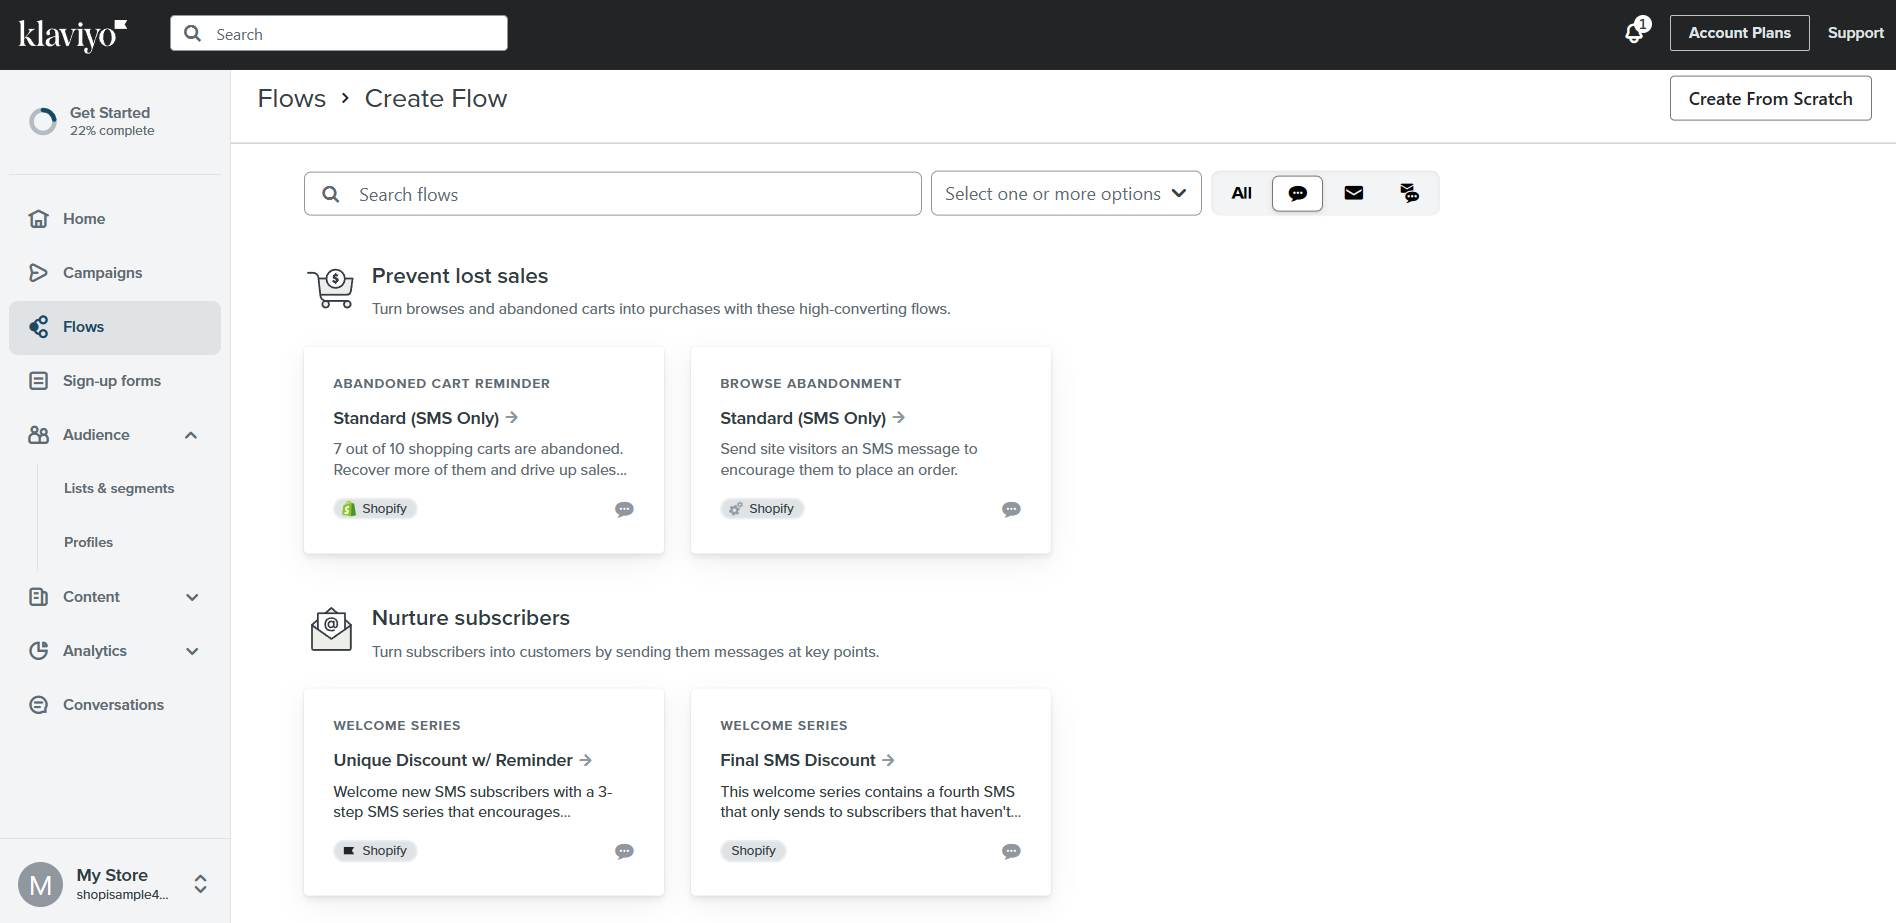
- You can choose the format among the given examples. If you want to remind your customers of their abandoned checkouts, click the Abandoned Cart Reminder. If you want to welcome your new SMS subscribers, click the Welcome Series.
- Click the “Create flow” button.
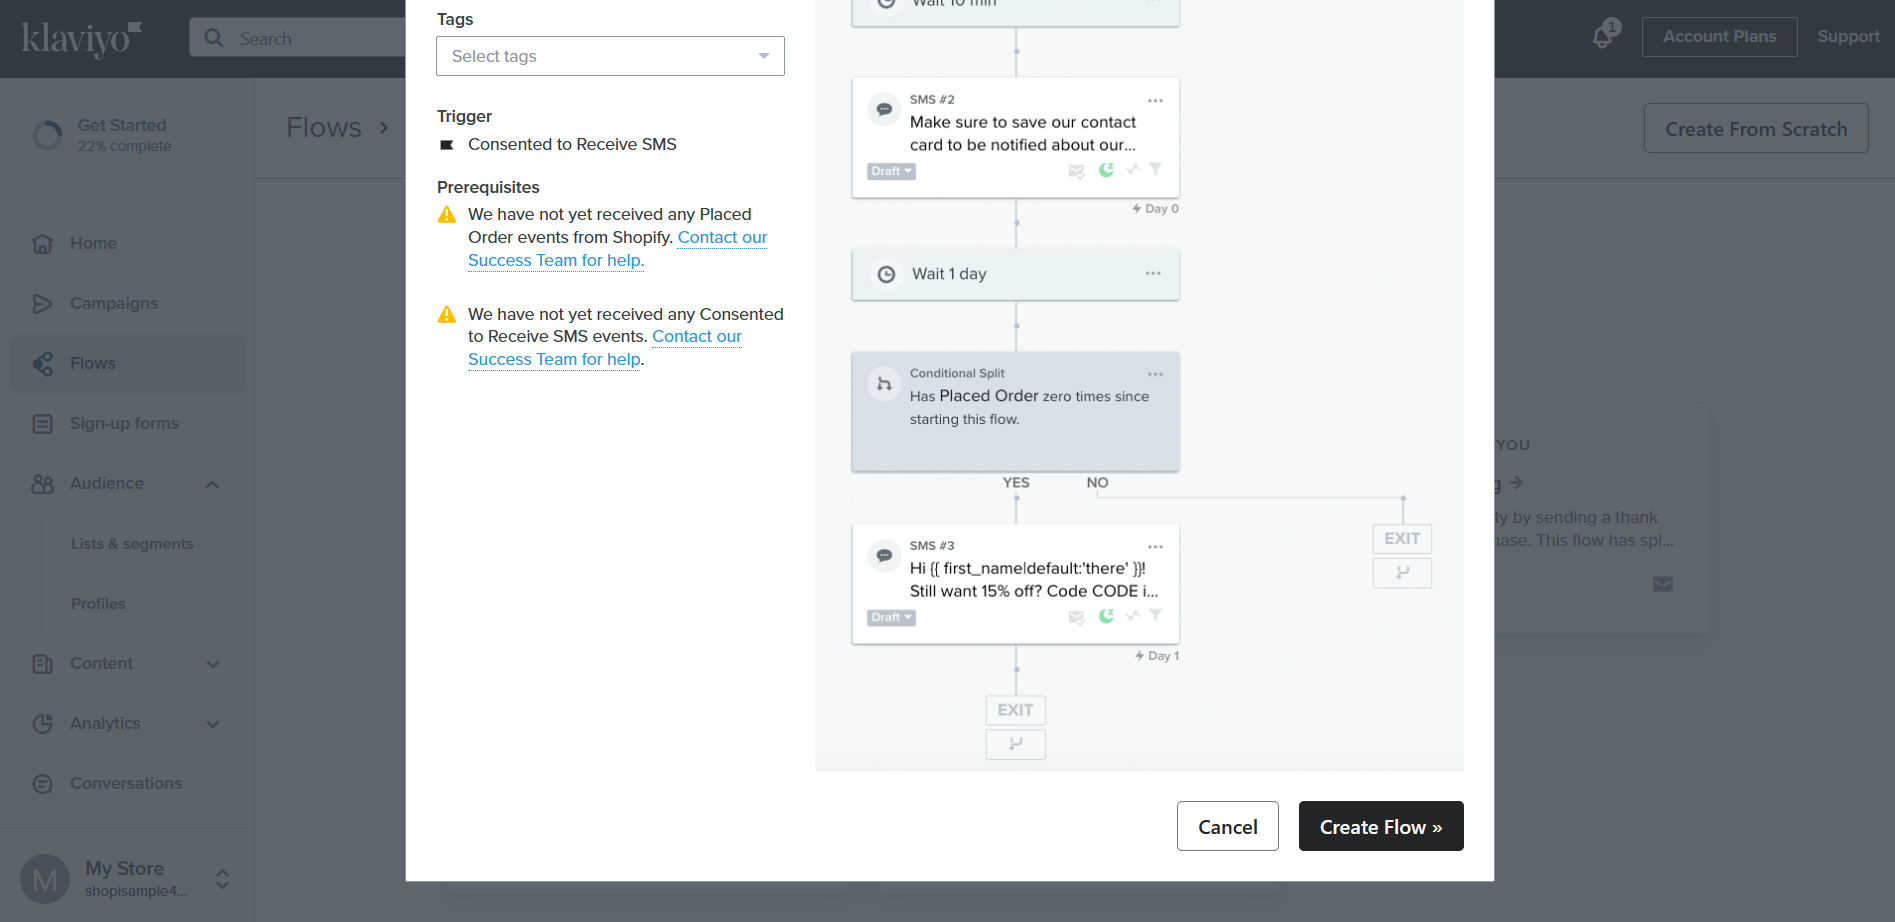
- As you can see, you need to confirm your sending information first before you can send SMS messages. To do this, click “Confirm sending info”.
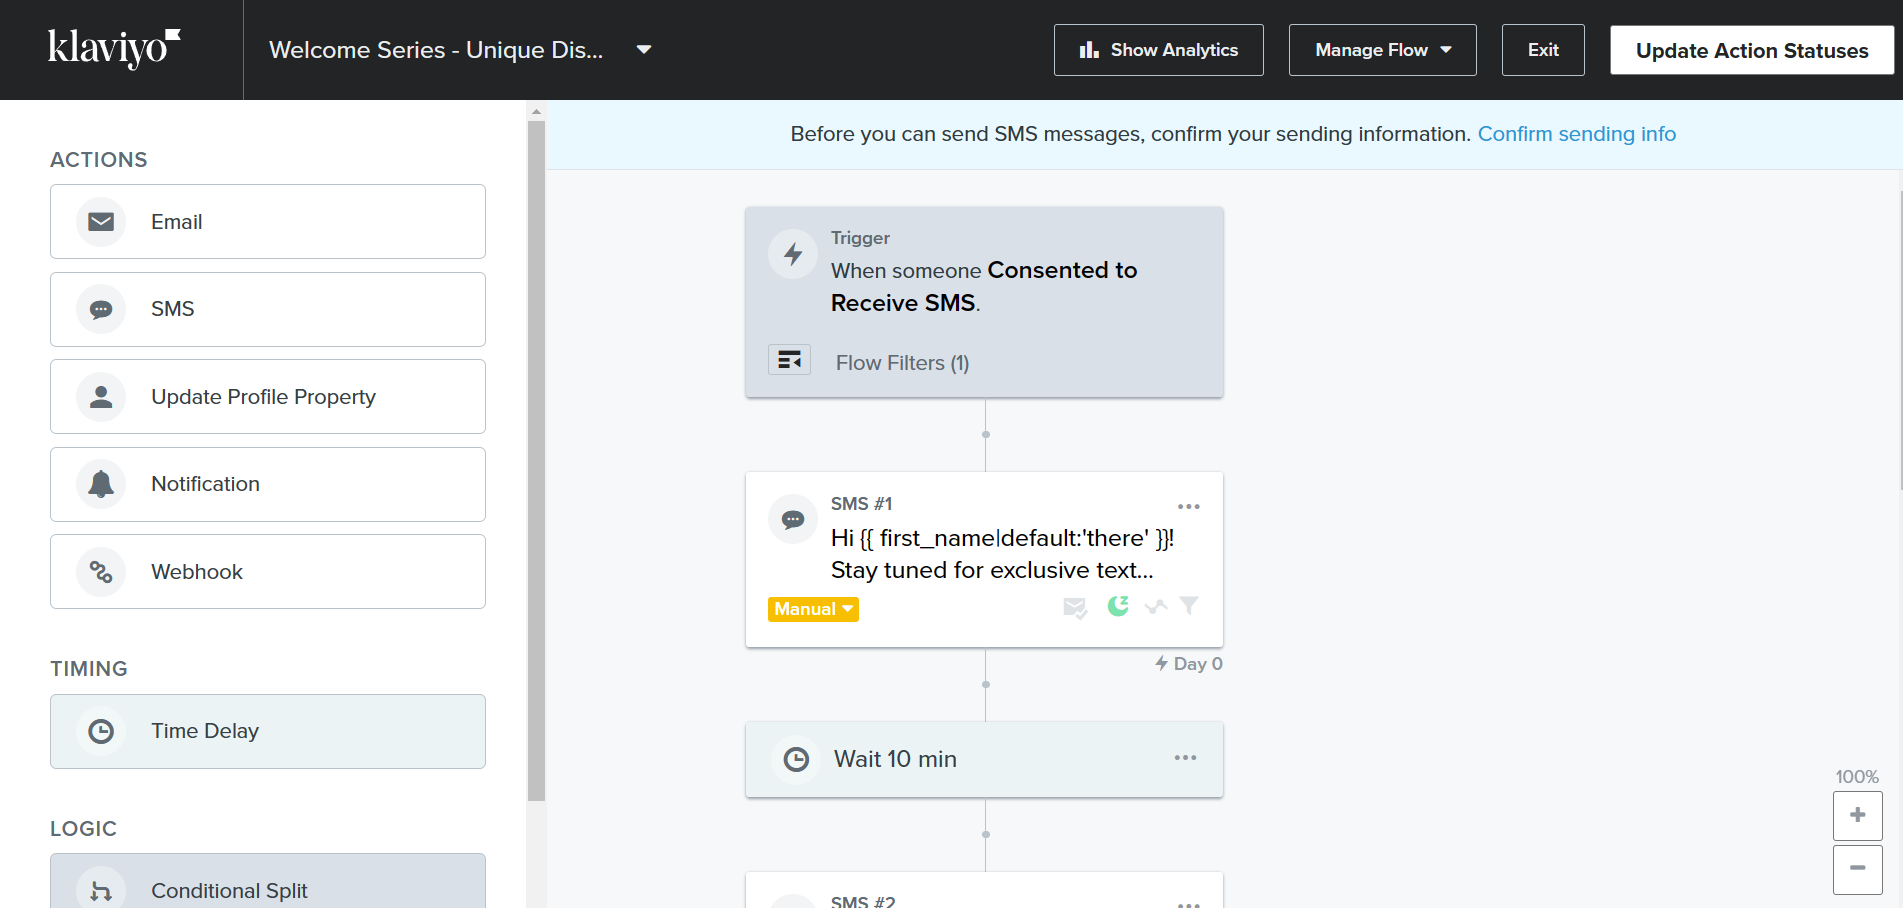
- To set up SMS, you must choose the country that your business is located. After clicking your country, click Next.
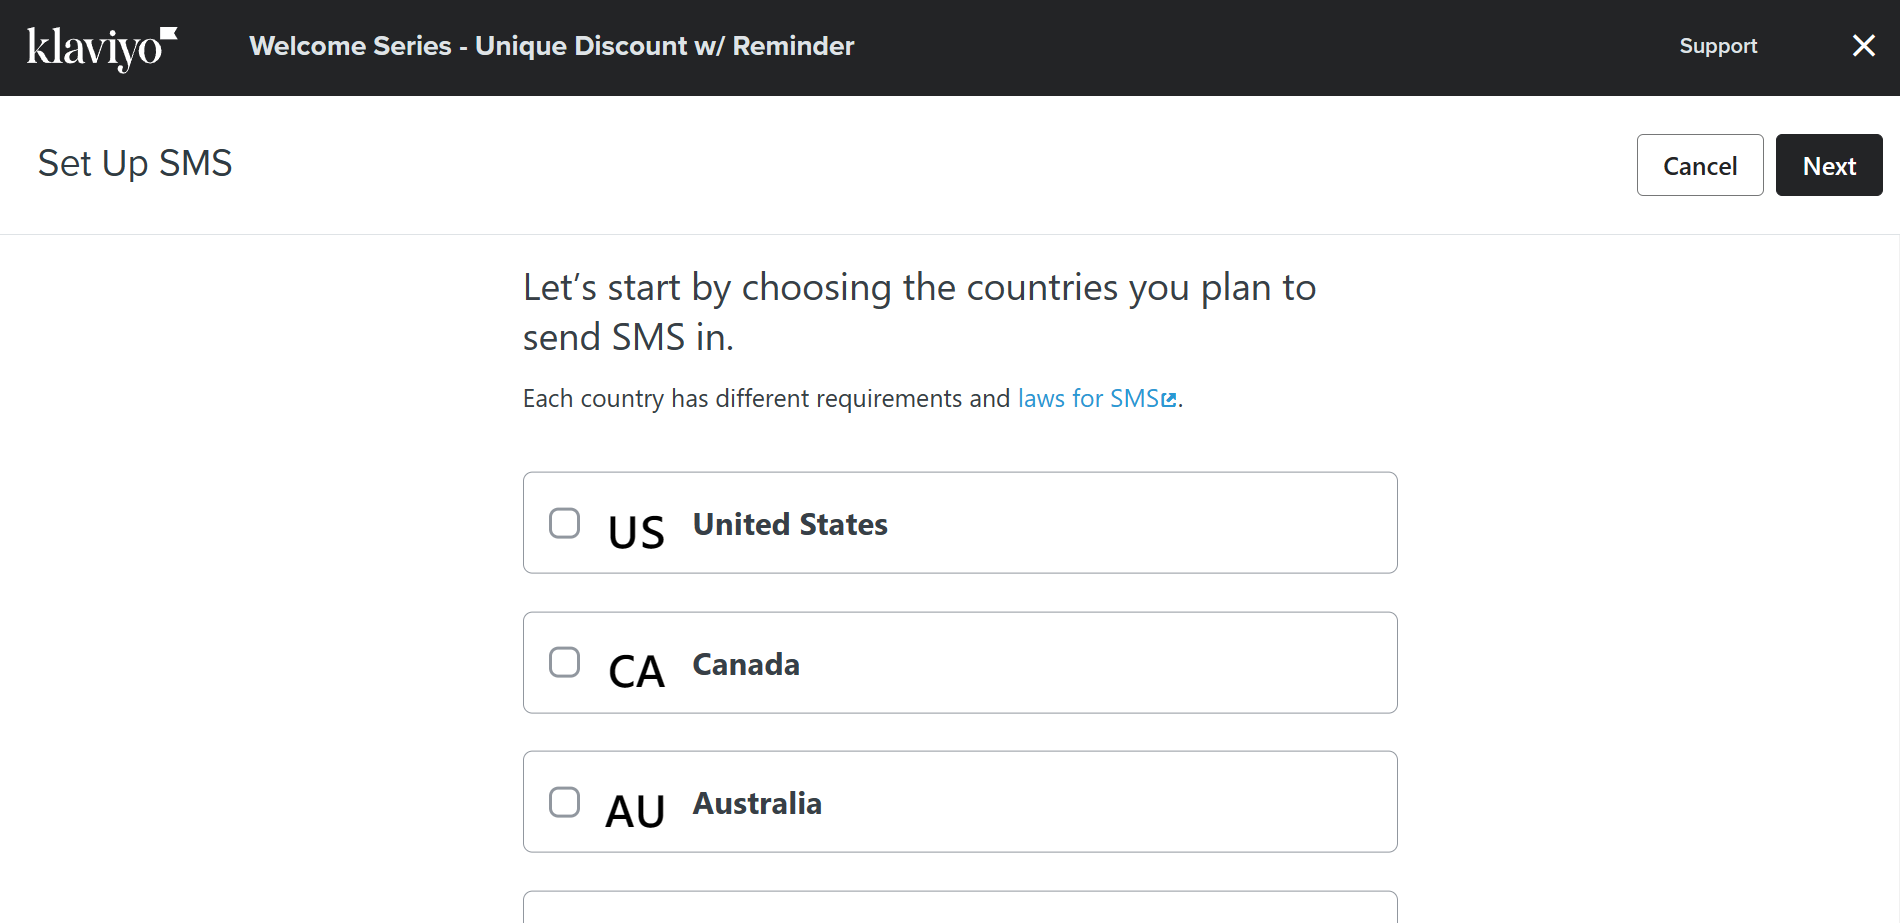
- After entering your country, you will be asked about your company information. This includes your first and last name, Address line, City, Country, State, and ZIP code. After entering these information, click Next.
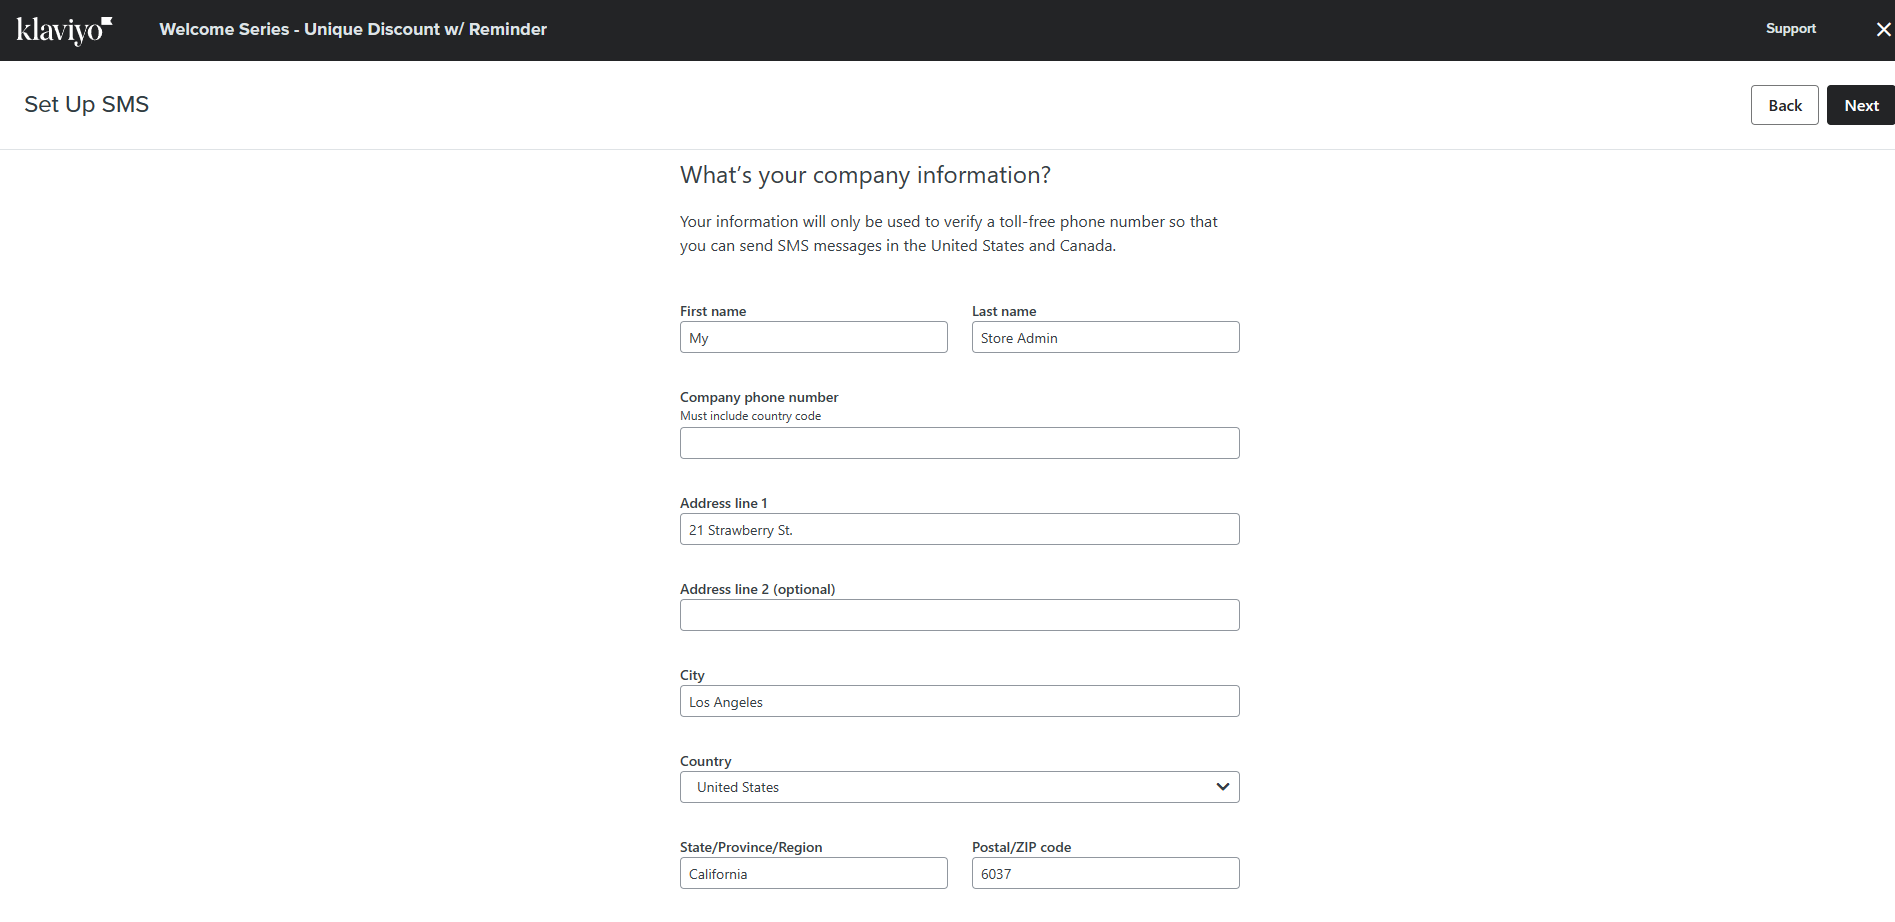
- Next, you will be asked about your Company name that will serve as the signature after every SMS sent to your customers. Click Next after entering your company name.
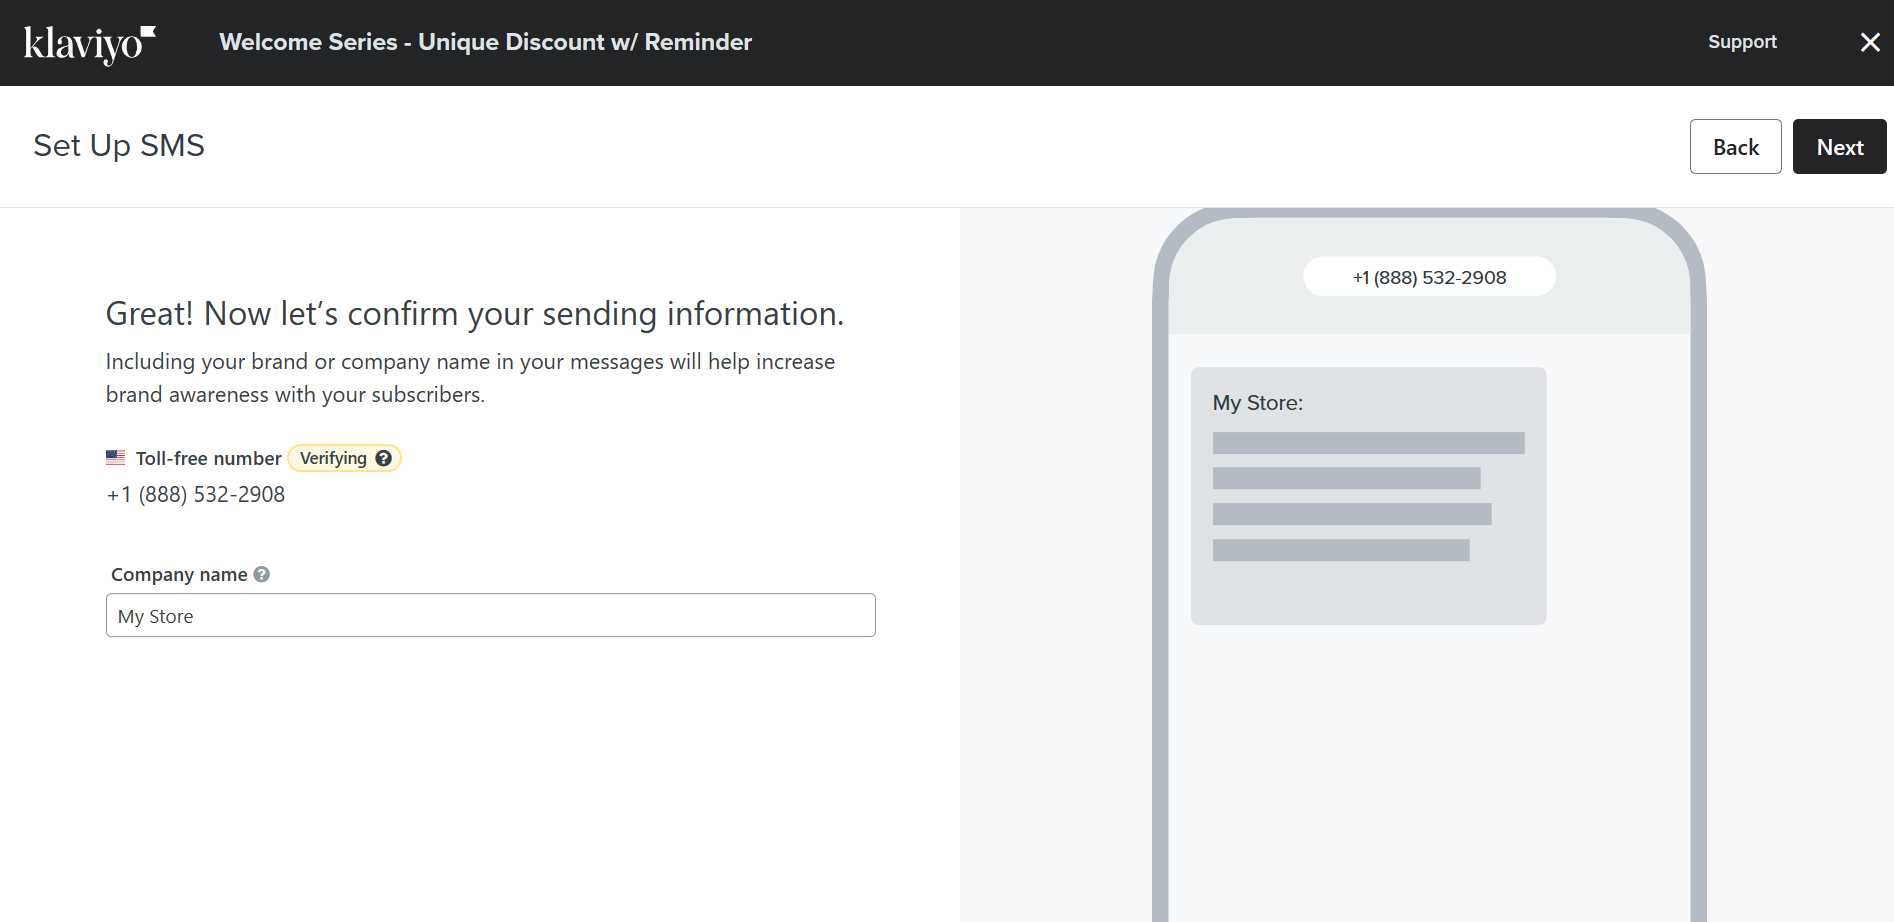
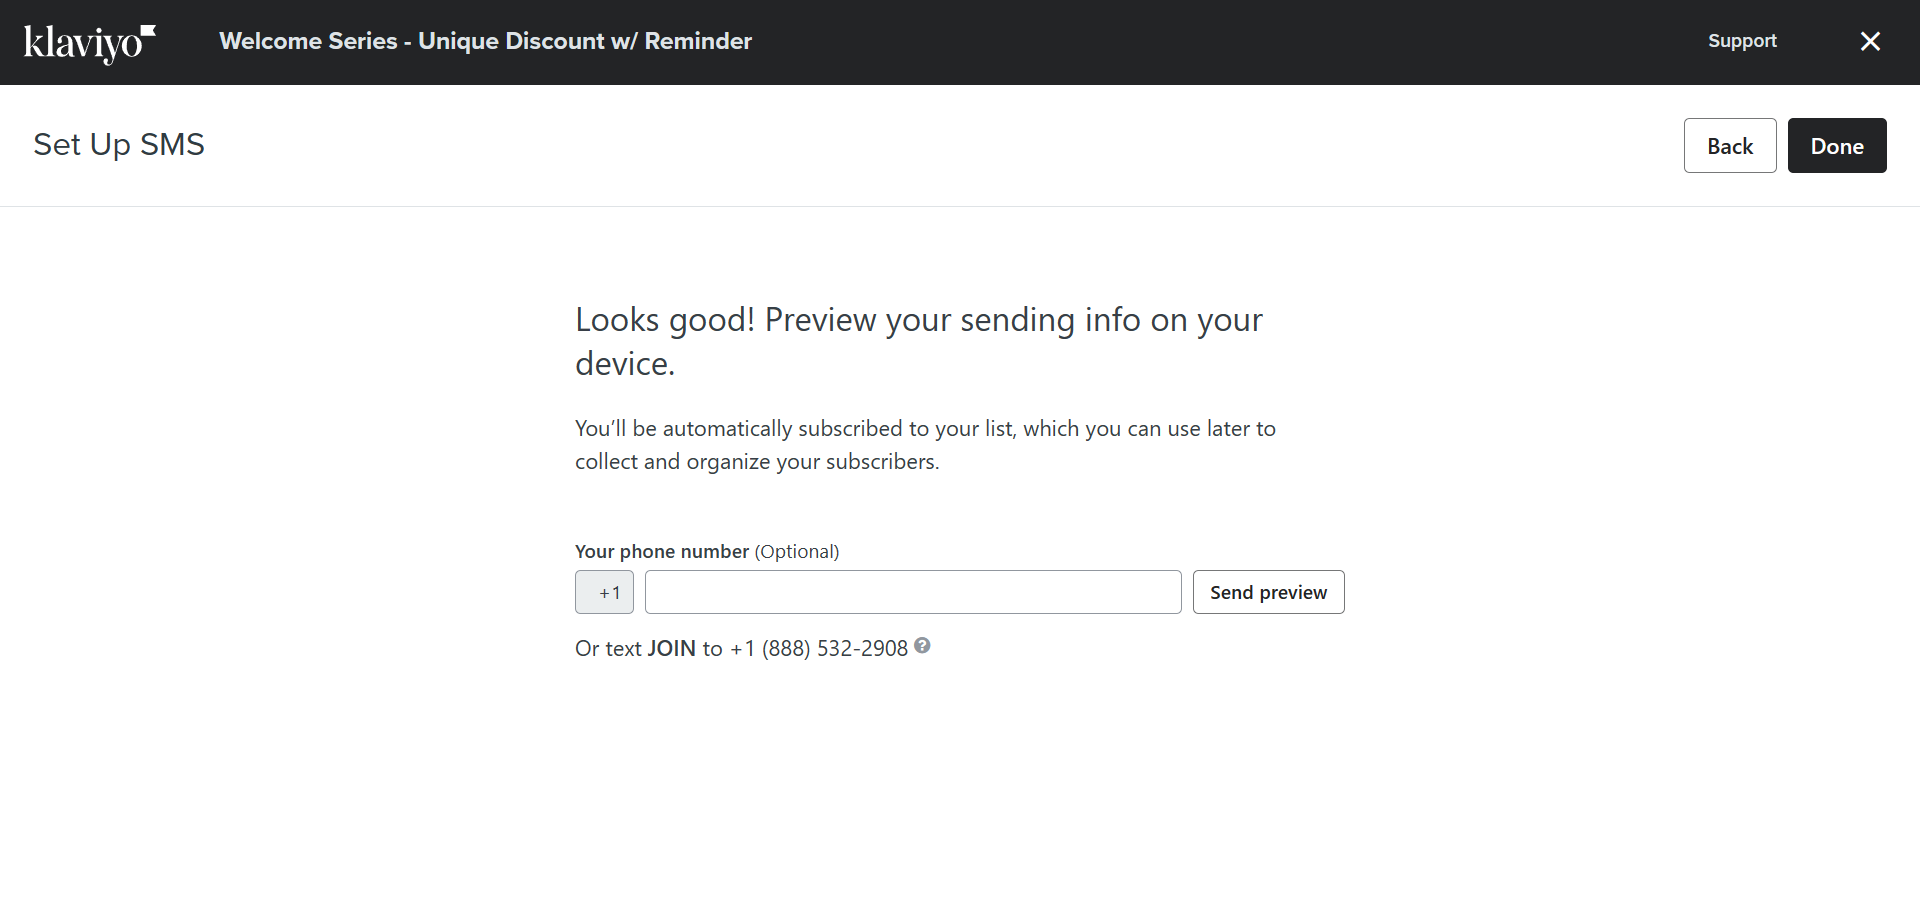
- If you want to preview your sending information, enter your phone number in the blank field and click “send preview”. If you do not want a preview, just click Done.
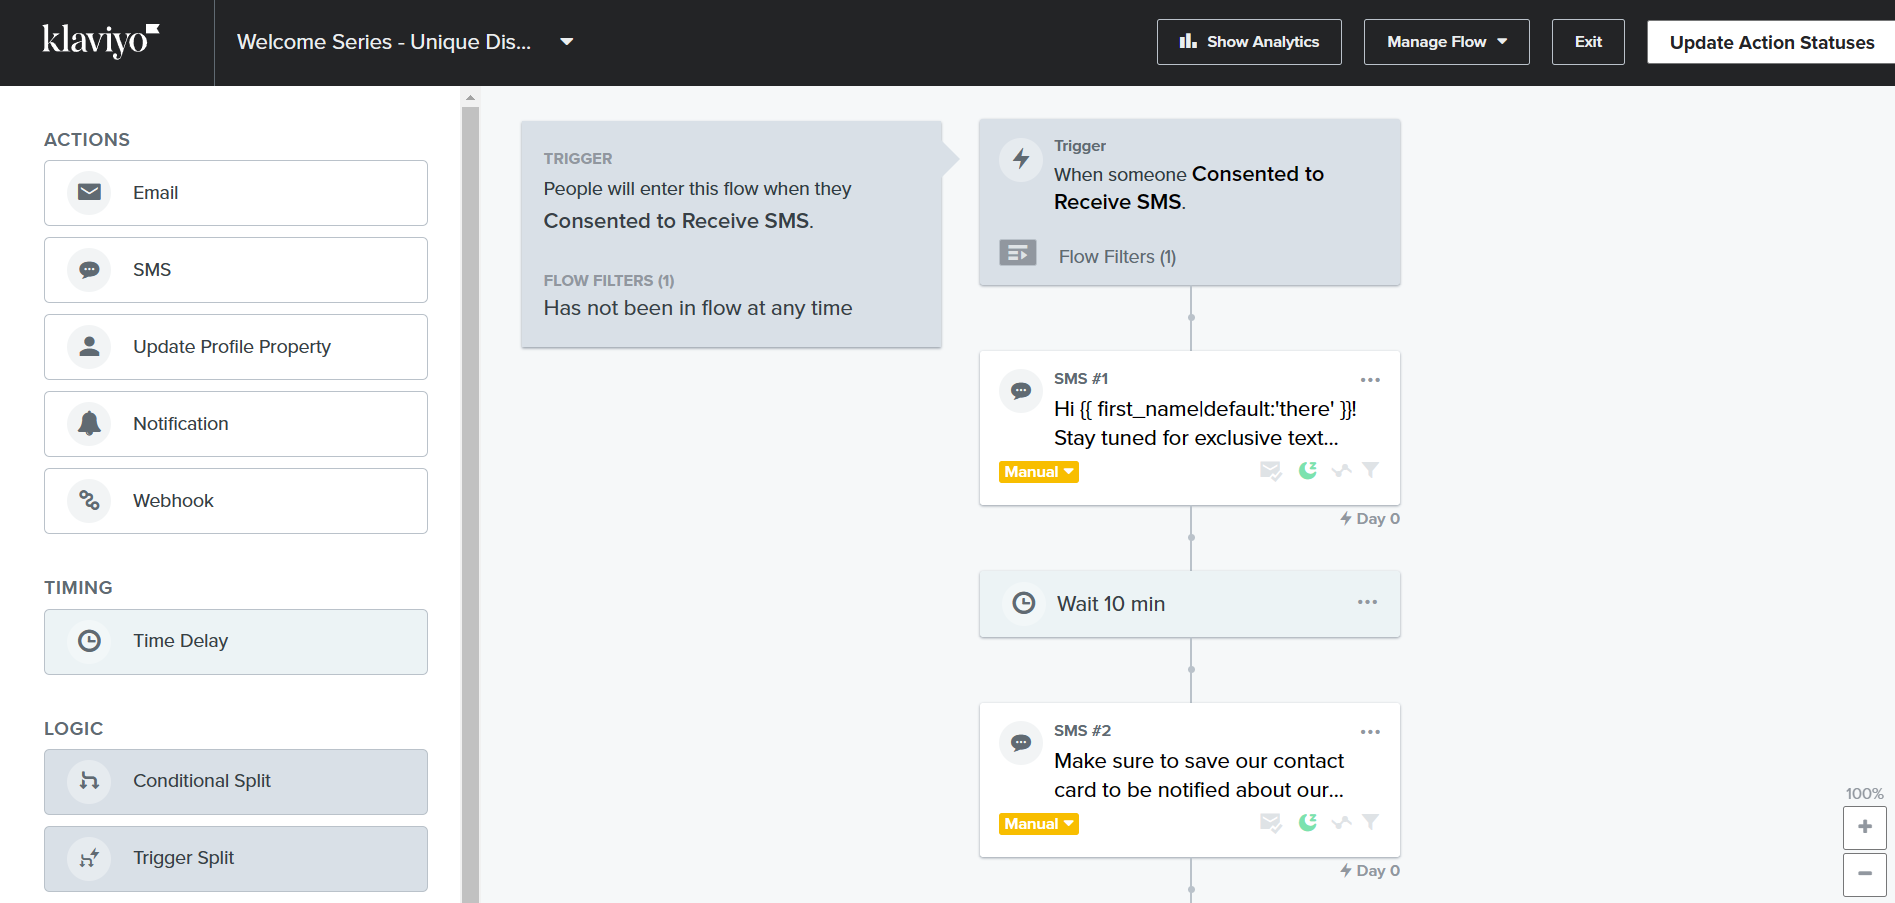
- Back to the Flow, you can edit a particular step if you click it. For example, click the Trigger.
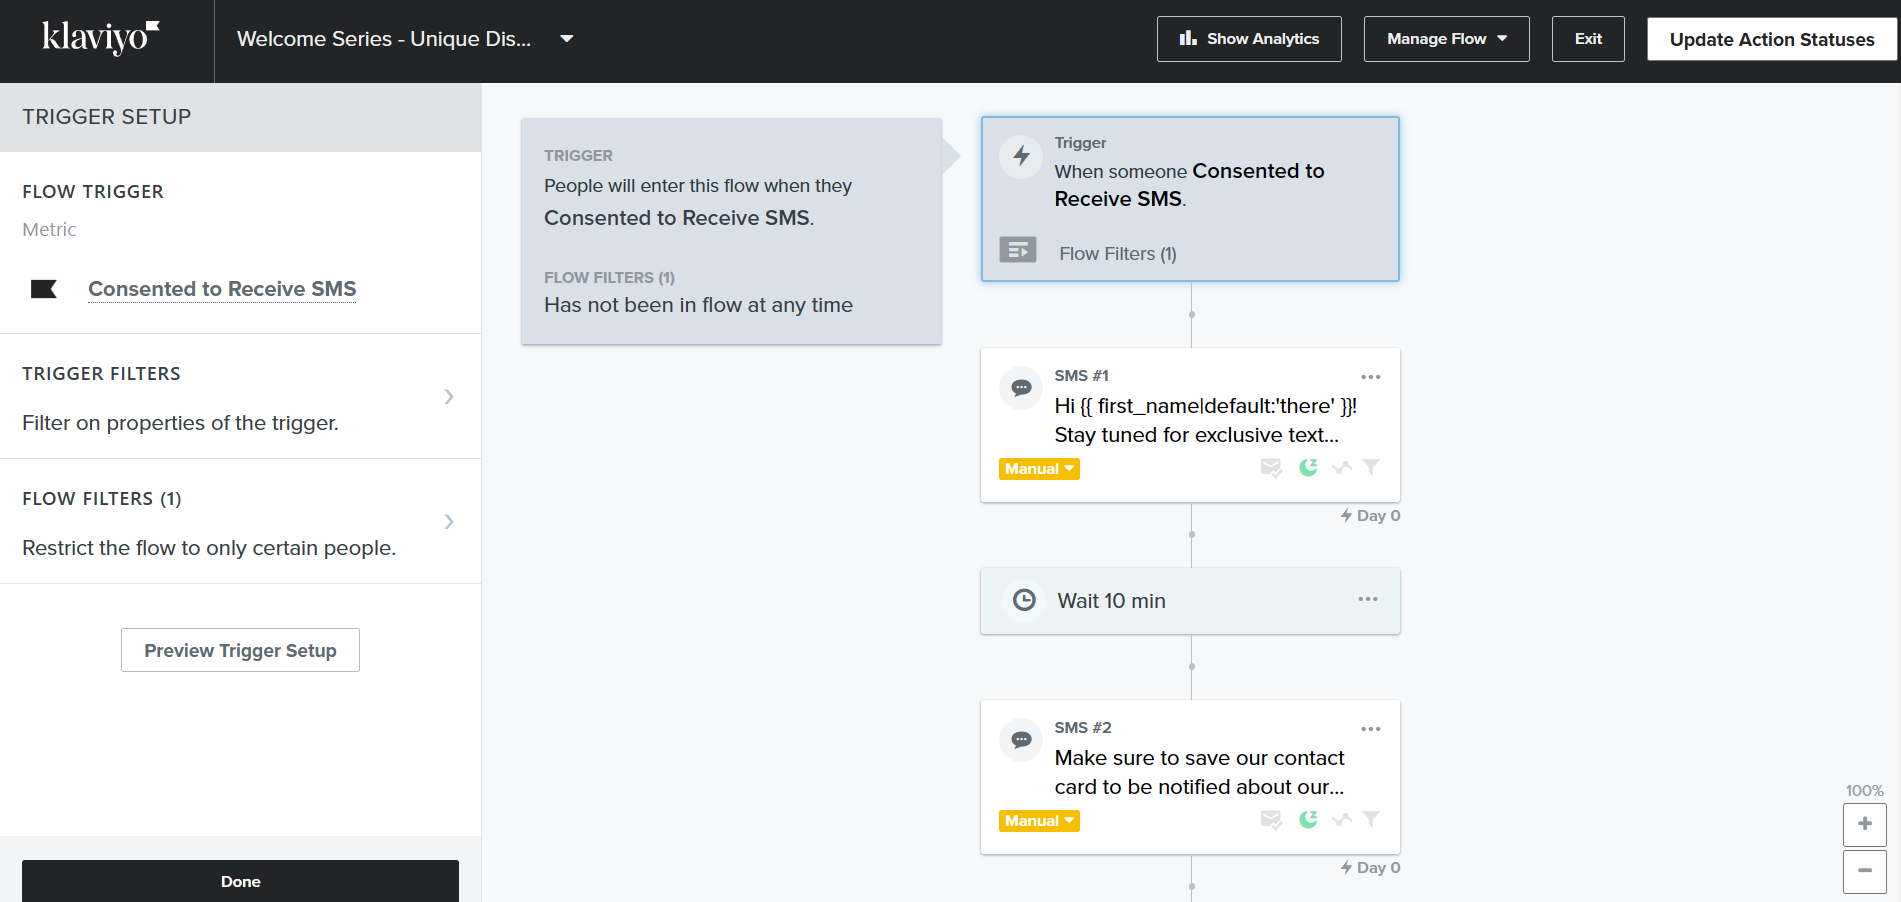
- You can see the Trigger setup on the left side of the site where you can edit the Trigger filters and Flow filters on that specific step if you click it. If you don't want to change anything, click Done.
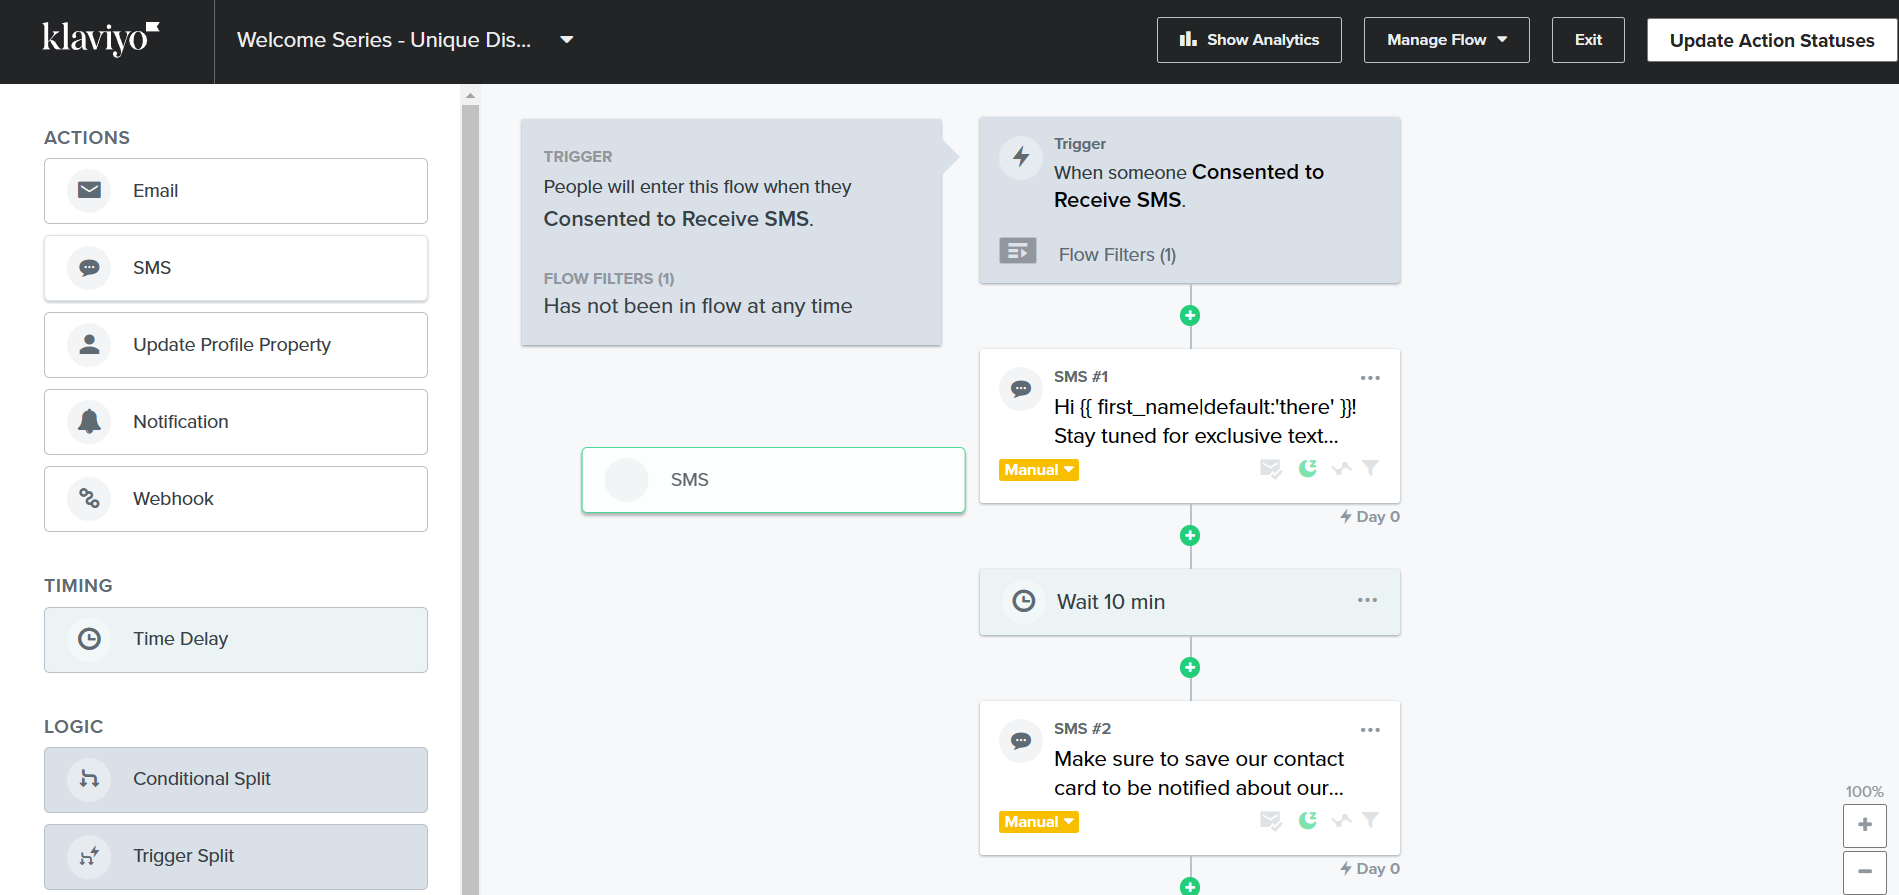
- To add an SMS, you can drag the SMS action to your preferred step in the flow.
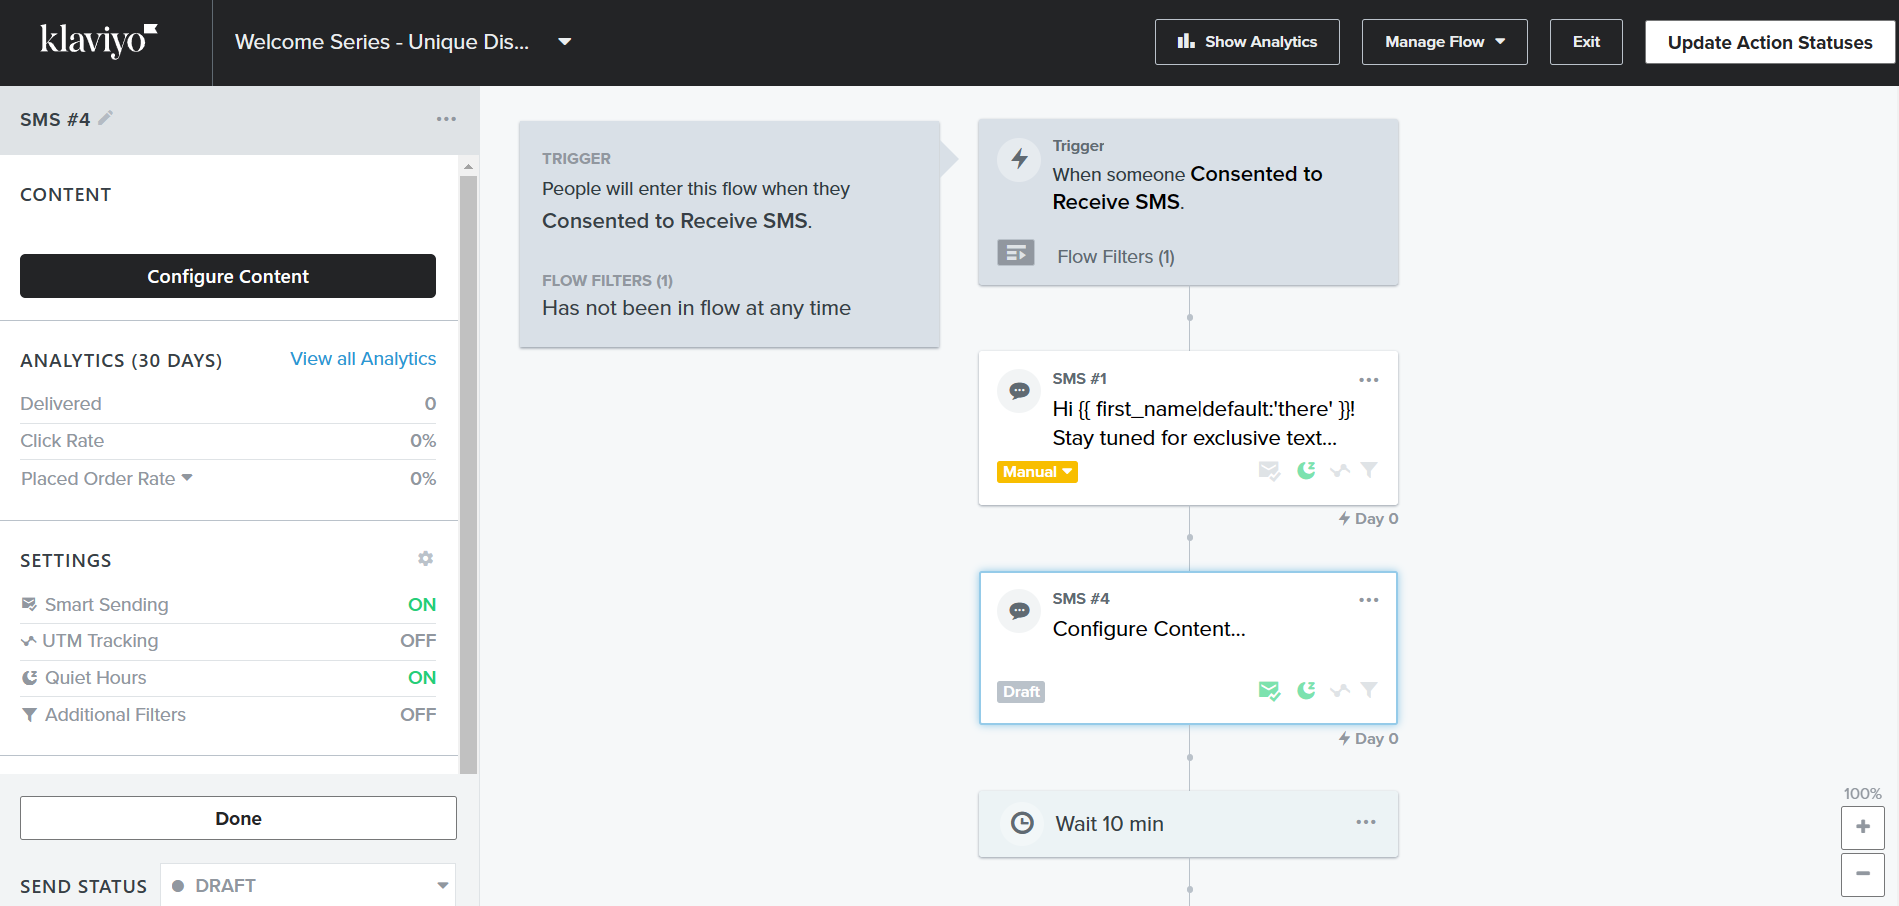
- After dragging it to its place, you may now edit its content by clicking “Configure Content”.
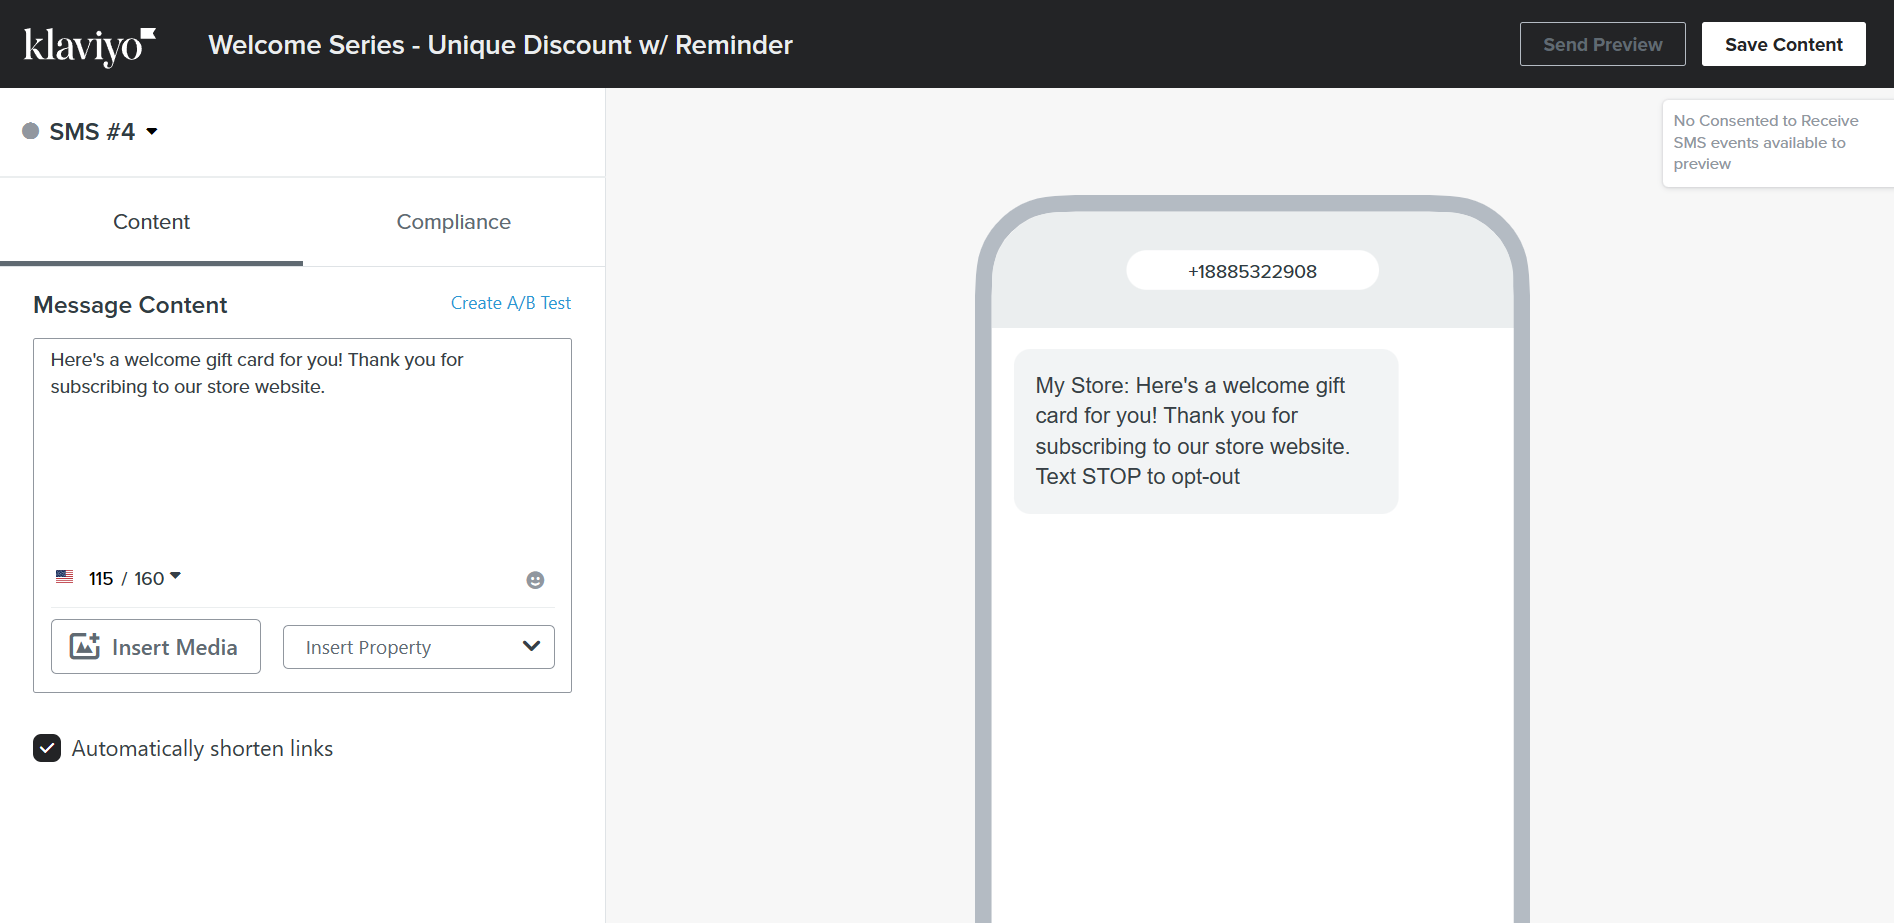
- You can edit the message content by typing it inside the box as indicated below. You can also opt to insert media by clicking “Insert Media”. After configuring your content, click “Save Content” to record it to your SMS automation flow.
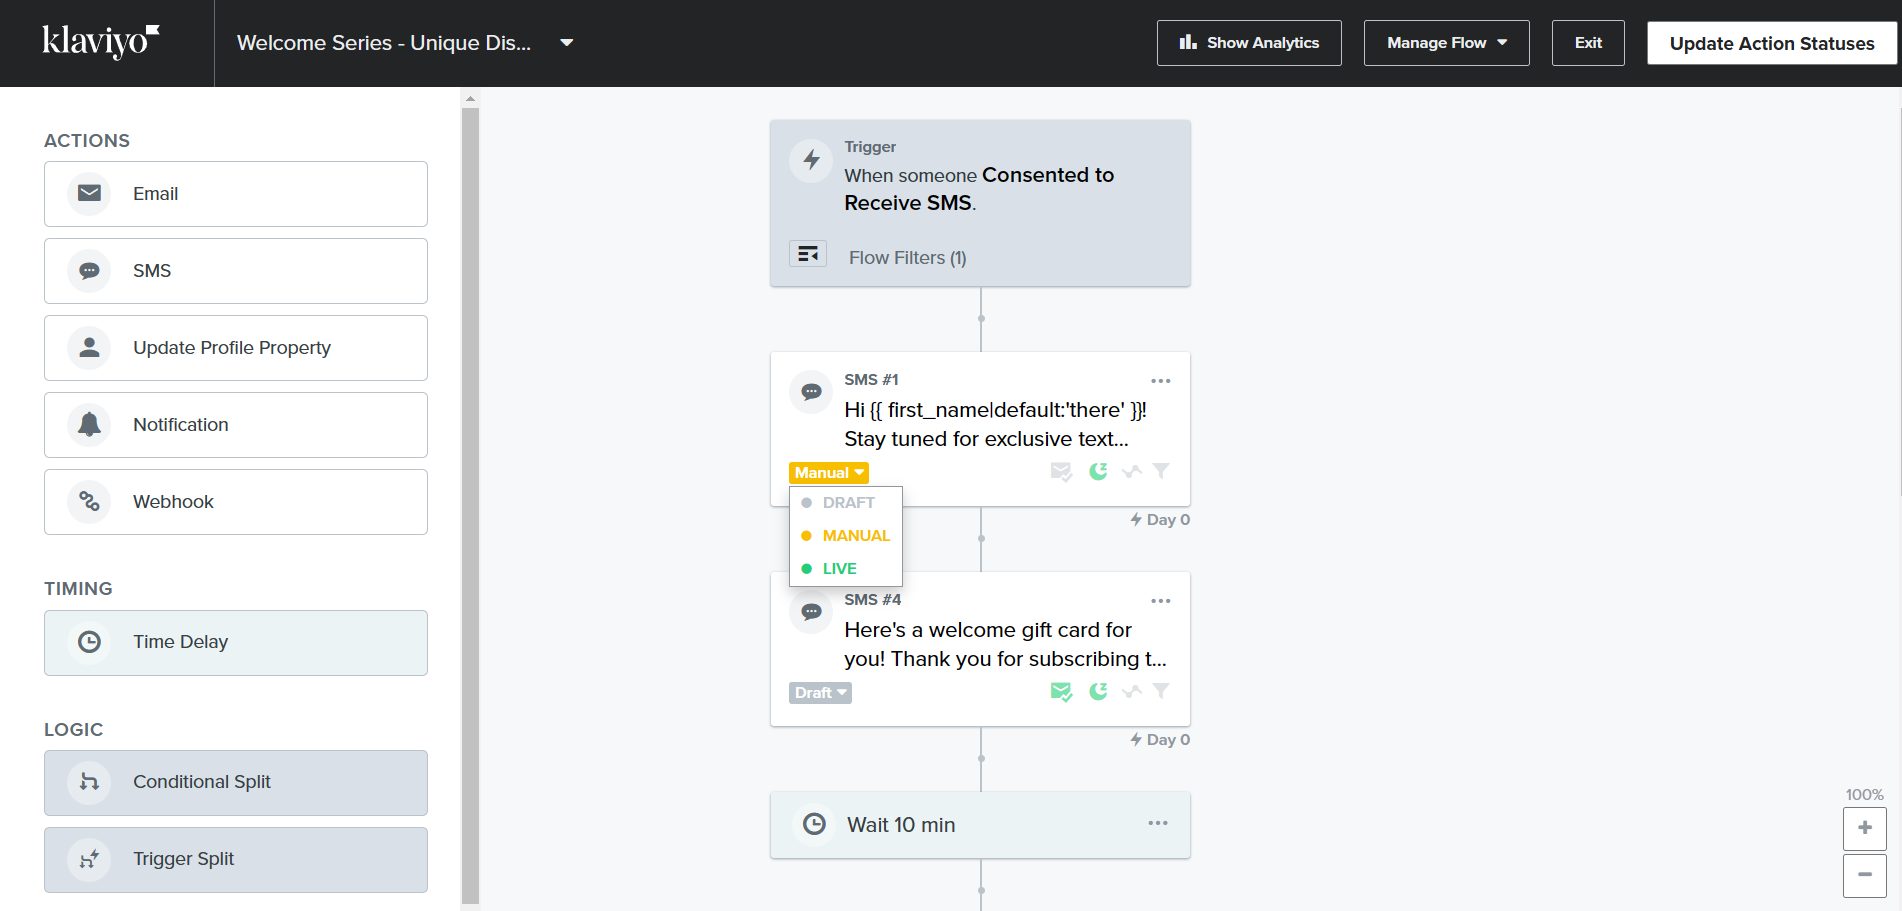
- Make sure to set every SMS content sending status to “Live”.
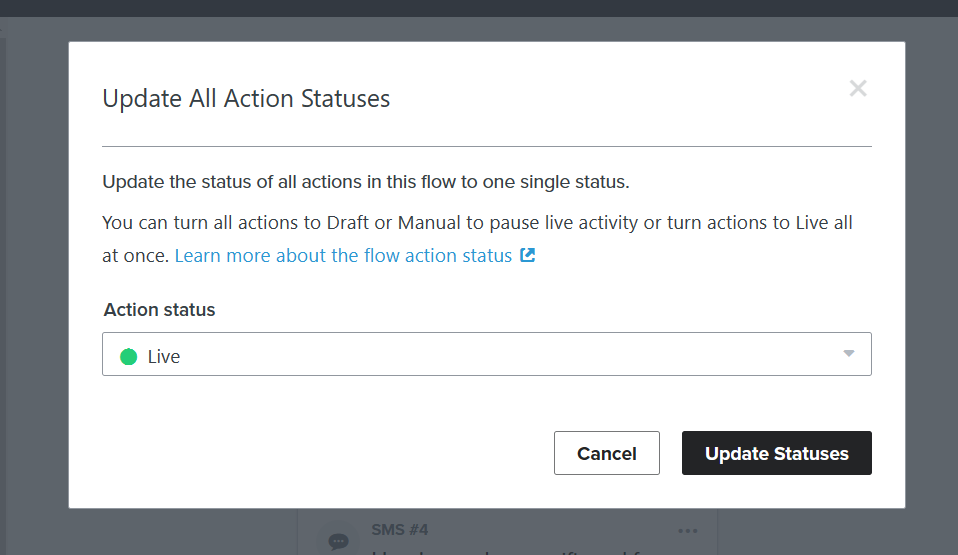
- After updating and reviewing every step, click “Update Action Statuses” and click the dropdown menu to set it to “Live”, so you would not have to manually update it. Then click “Update Statuses”.
Conclusion
You’re done! Always remember that SMS automation is helpful for your business especially for boosting sales and keeping loyal customers. Aside from email automation, this is an additional automation system that removes manual reaching out to customers and sends them text messages depending on the conditions indicated on the software that you prefer to use.
-
To start SMS automation, you must have an account in Shopify and access to Shopify app store to install Klaviyo.
-
Klaviyo has different formats for every event that a customer may belong to, including the abandoned cart and checkout, welcoming sales, and thank you formats.
-
Confirming your sending information is relevant to activate SMS automation. It is activated by providing your country, company information, and company name.
-
Make sure to set the sending status to Live so that the SMS automation will start immediately for any set triggers.
-
Arranging the steps of SMS automation by using a flow allows you to organize and see the analytics in each step, including the number of sent messages to the customers.