How To Add A 301-Redirect to Shopify
The main purpose of this process is to add a 301-Redirect to Shopify.
Prefer a shortcut? 16 free tools do parts of this for you.
Aim: The main purpose of this process is to add a 301-Redirect to Shopify.
Optimal Outcome: A 301-Redirect is successfully added to Shopify which helps maintain search engine rankings and directs traffic to the correct pages on the site.
What do you need to start: You must have a Shopify account to start this process.
Why is this SOP Important: The 301-Redirect helps preserve any search engine rankings the original page had, and ensures a positive user experience by directing visitors to the correct page.
When and Where to execute: Following installation and page creation for your Shopify account, you must be able to do this process.
Who Should Be Doing This: The person responsible for website management or analytics must be accountable to this process.
What is 301-Redirect?
A 301 redirect is a permanent redirect from one URL to another. It is important for Shopify because it helps maintain search engine rankings and directs traffic to the correct pages on the site. When a Shopify store changes a URL or removes a page, a 301 redirect can be used to redirect visitors and search engines to the new or relevant page. This helps preserve any search engine rankings the original page had, and ensures a positive user experience by directing visitors to the correct page. Without 301 redirects, broken links and 404 errors can negatively impact a site's SEO and user experience.
Execution
Create 301-Redirect to Shopify
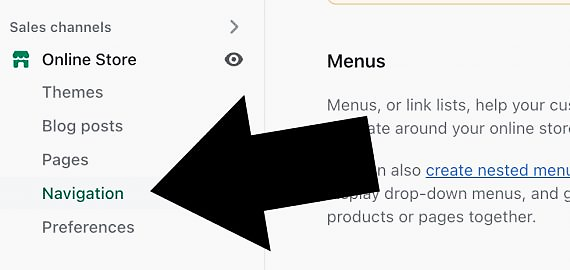
- Log in to your Shopify account. Head to the admin area, click the Online Store, and then click Navigation.
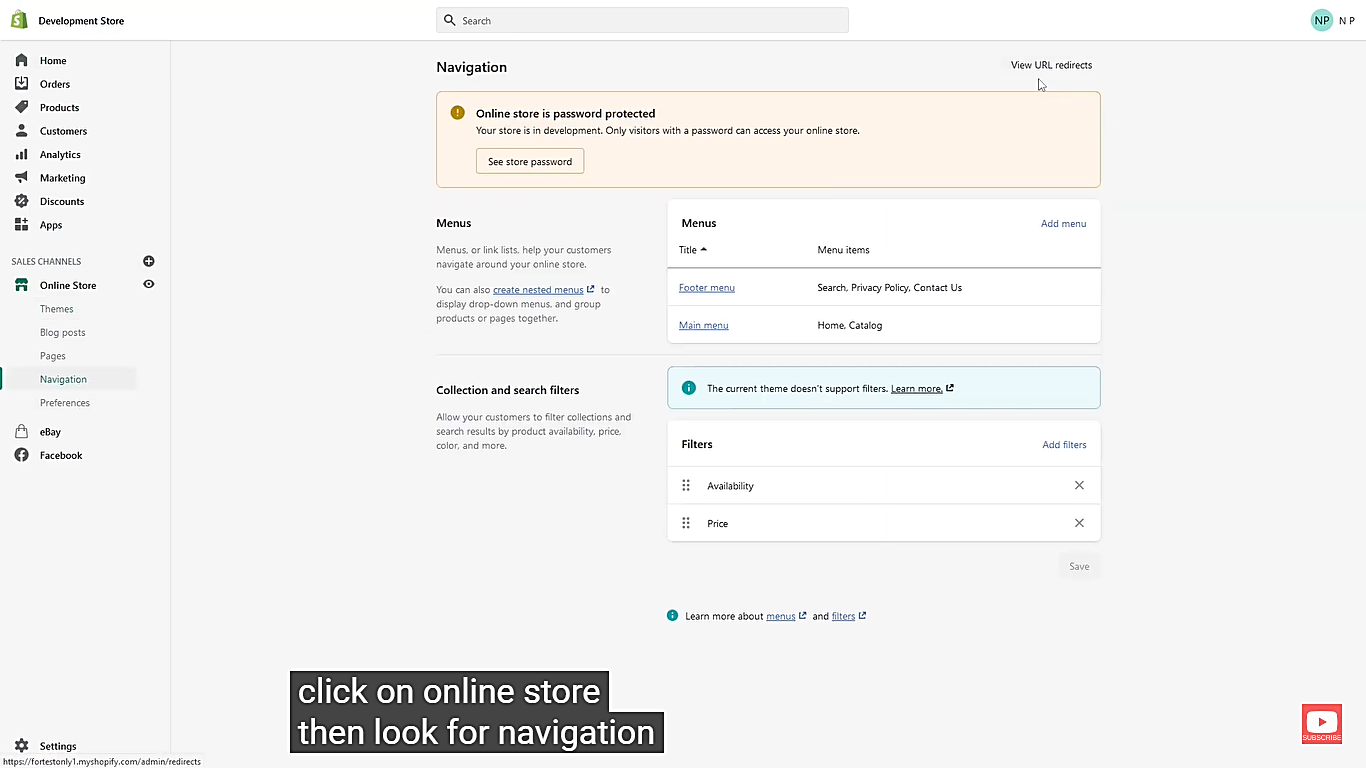
- Click on view URL redirects at the top corner of your dashboard.
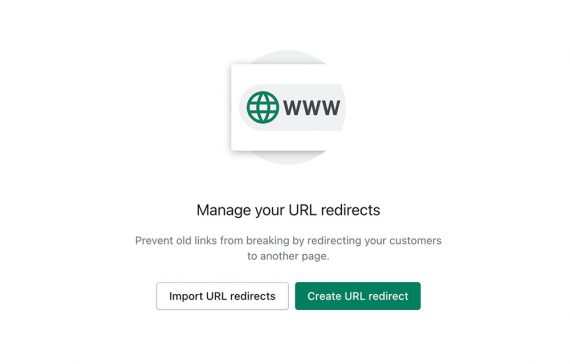
- Click on create URL redirect.
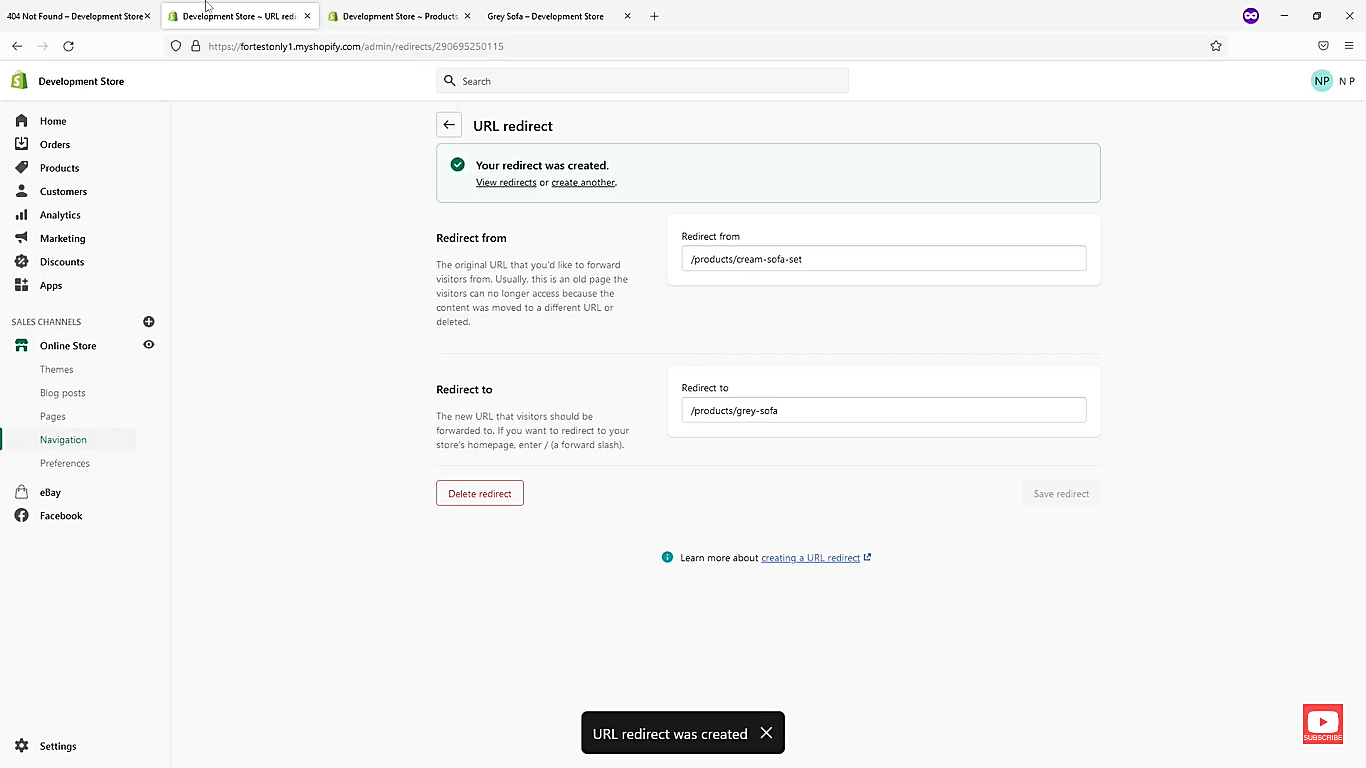
- You will be redirected to the URL redirect page – redirect from and redirect to.
Insert the URL of the previous product or page in the "from" path and the URL of the new product or page in the "to" path.
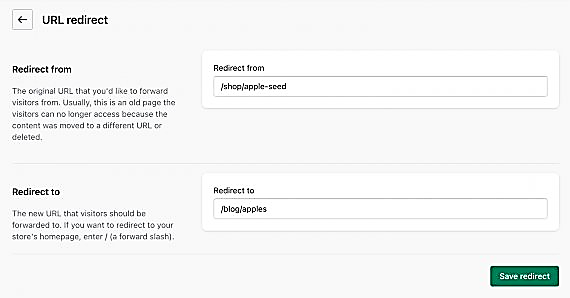
Enter the old URL (“Redirect from”) and the new (“Redirect to”).
- Click Save to create the 301-Redirect.
Bulk upload 301-Redirect
- Log in to your Shopify account. Head to the admin area, click the Online Store, and then click Navigation.
- Click on view URL redirects at the top corner of your dashboard.
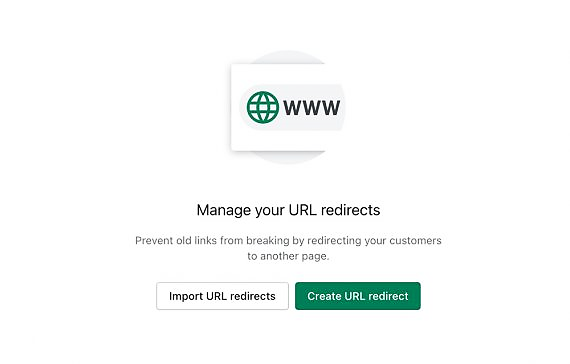
- Click on Import URL redirects.
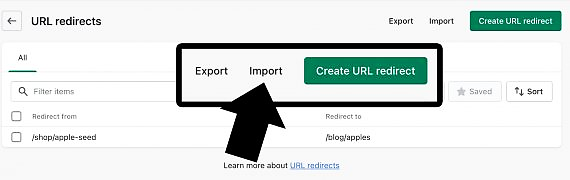
- The website structure changes after making a single 301 URL redirect, and the "Import" link appears on the upper right side of the page, displaying a table of all redirects.
- A business may submit a CSV file containing hundreds of redirects at once by using the straightforward interface that Shopify presents in a popup window as shown below.
Click the Add file (CSV template) to import the bulk 301 redirects.
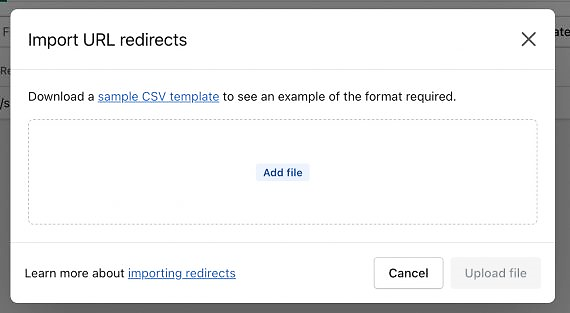
- Click the Upload file button.
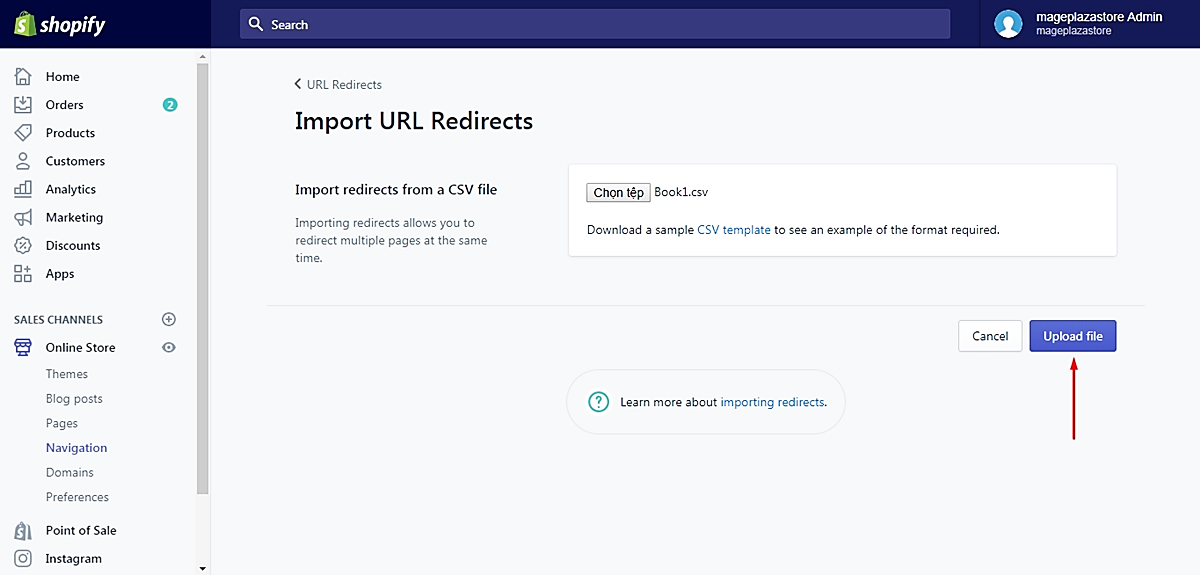
- Congratulations. You have successfully created your redirect.
Conclusion
You’re done! Remember that a 301 redirect is a URL change that takes place permanently. It is crucial for Shopify since it maintains search engine rankings and sends visitors to the appropriate website pages. There are several reasons why you might need to create a 301 redirect, including:
-
To preserve search engine rankings: If you have updated your website's URL structure or moved pages to a new location, a 301 redirect will help preserve any search engine rankings that the old pages had. Without a redirect, search engines will see the old pages as 404 errors, which can negatively impact your SEO.
-
To improve user experience: If a visitor clicks on a link to a page that no longer exists or has been moved, they will be directed to a 404-error page. This can be frustrating for users and may cause them to leave your website. A 301 redirect ensures that visitors are automatically redirected to the correct page, improving their experience on your site.
-
To update outdated links: If you have outdated links on your website or other websites are linking to pages that no longer exist, creating a 301 redirect will ensure that visitors are directed to the correct page.
Overall, creating a 301 redirect is a best practice for maintaining your website's SEO and providing a positive user experience.
Execution Checklist:
Here is a step-by-step guide on how to create a 301 redirect in Shopify:
-
Log in to your Shopify account.
-
Go to the Online Store section and click on Navigation.
-
Click on the URL Redirects option.
-
Click on the Add URL Redirect button.
-
In the Redirect from field, enter the old URL that needs to be redirected.
-
In the Redirect to field, enter the new URL where the old URL will redirect.
-
Choose the type of redirect you want to create. In this case, it should be a 301 permanent redirect.
-
Click on the Save button to create the redirect.
That is it! You have successfully created a 301 redirect in Shopify. Repeat these steps for any additional redirects you need to create. It is important to note that the old URL will no longer be accessible and will automatically redirect to the new URL.