A Guide to Setting Up Customer Support with Gorgias
To walk you through setting up customer support with Gorgias by activating help desk and live chat.
Prefer a shortcut? 16 free tools do parts of this for you.
Aim: To walk you through setting up customer support with Gorgias by activating help desk and live chat.
Optimal Outcome: To be able to provide instant and accurate answers for clients who need immediate response on their questions and boost productivity because of employee reassignment.
What do you need to start: To follow this SOP, you need to have an account in Shopify and an access to the Shopify App Store where you will be able to install Gorgias.
Why is this SOP Important: Setting up customer support is one advantageous step to retain loyal and satisfied customers through conversing answers to their inquiries in a calculated manner. This supports one-on-one live chat with the client to reinstate the reputation of your business brand and the products that you sell to the market. In addition to this, loyal customers have been proven to boost referrals which is another beneficial way if you have great customer service.
When and Where to execute: Setting up customer support is utilized by sales and marketing agents to answer specific questions about your products and implement direct connection between your company and the customers.
Who Should Be Doing This: This task must be done by the customer service team or sales.
Customer Support
Customer support, contrary to popular beliefs, does not only revolve around answering the inquiries and concerns of the clients. It also aims to introduce essential information about the company and its products or services to its potential customers. For the customers to be satisfied with the interaction, careful assessments of questions and statements are necessarily considered in customer support. Employees who work in this field are professionally trained to strengthen the connection between the customers and the business.
Execution
Resources/Tools & Set up
-
Shopify account
-
Shopify App Store
Installing Gorgias in your Shopify
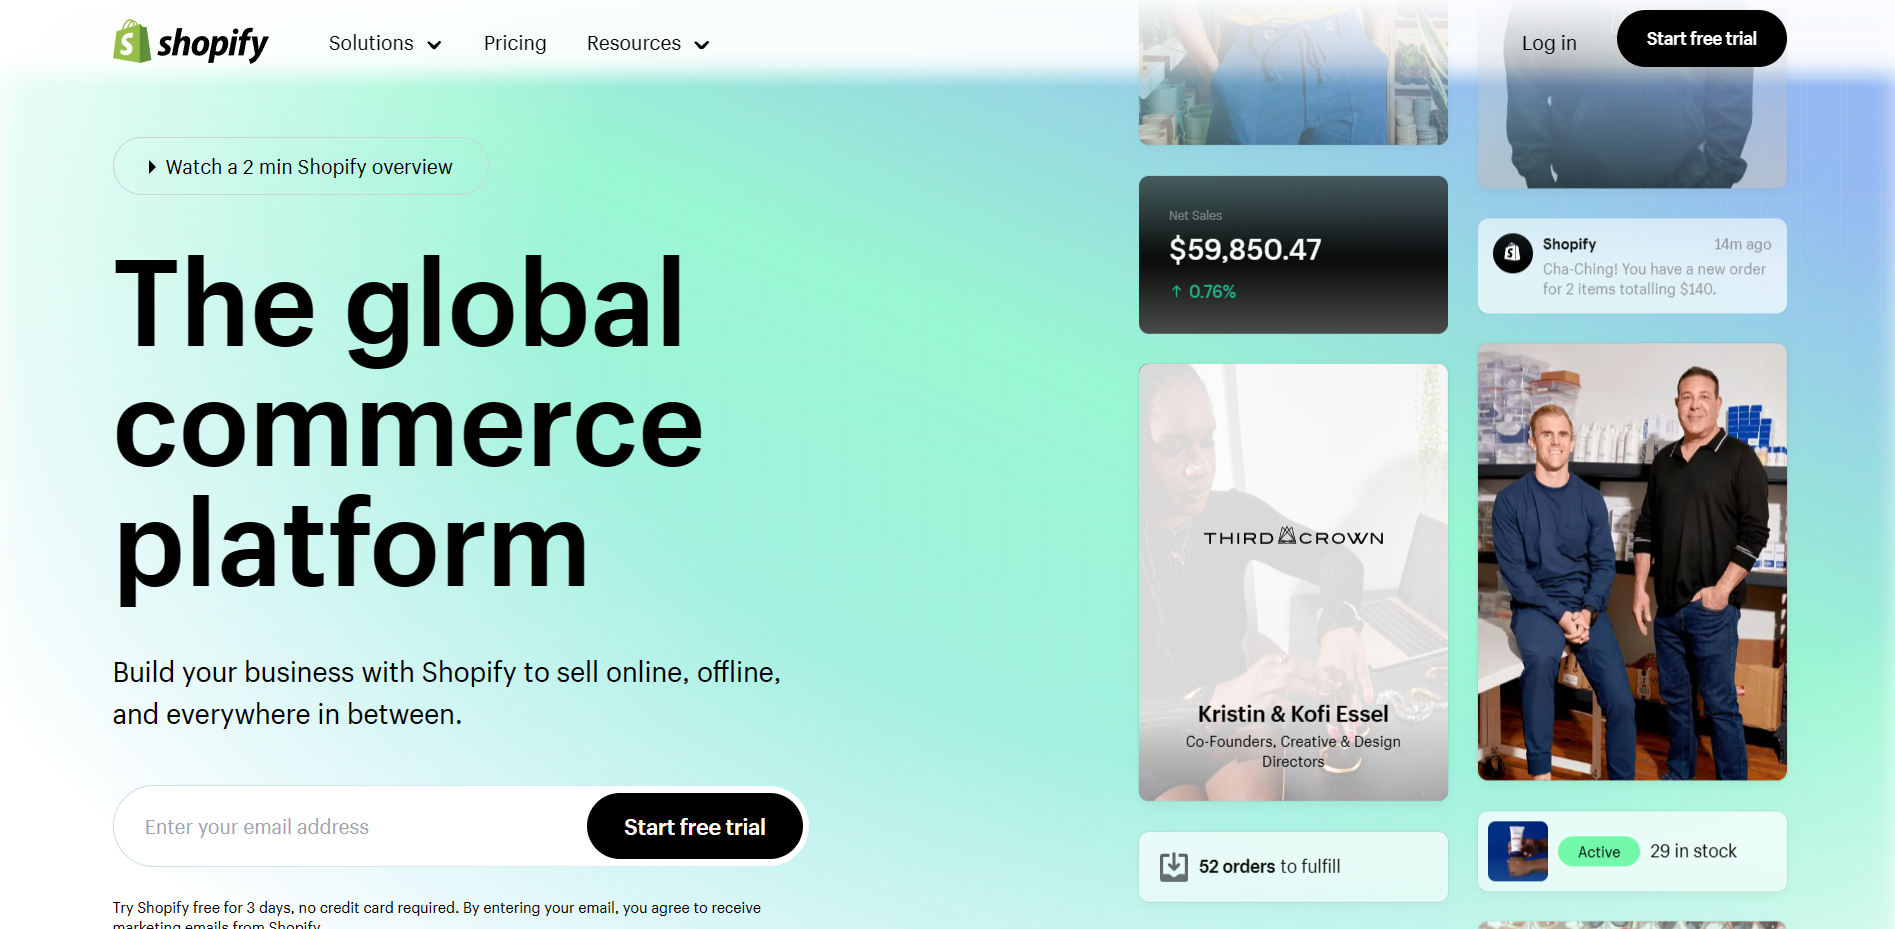
- Sign in to your Shopify store account by clicking “Log in” and entering your account details.
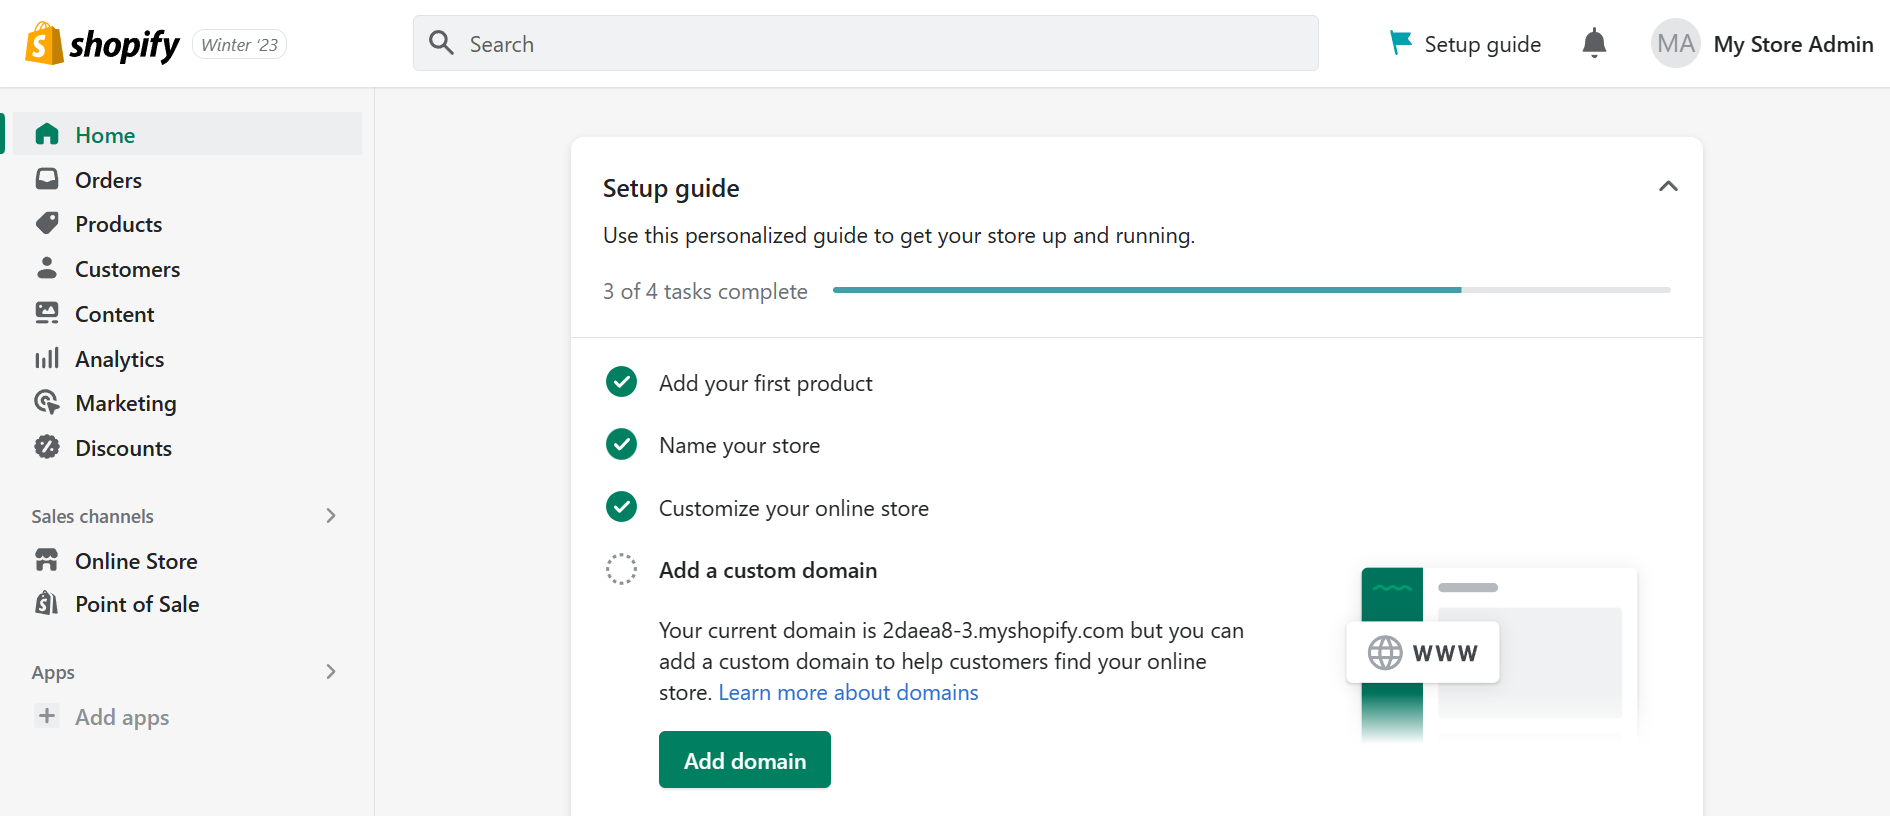
- Once you are redirected to the Shopify homepage, you will see a dashboard on the left. Click “Apps”.
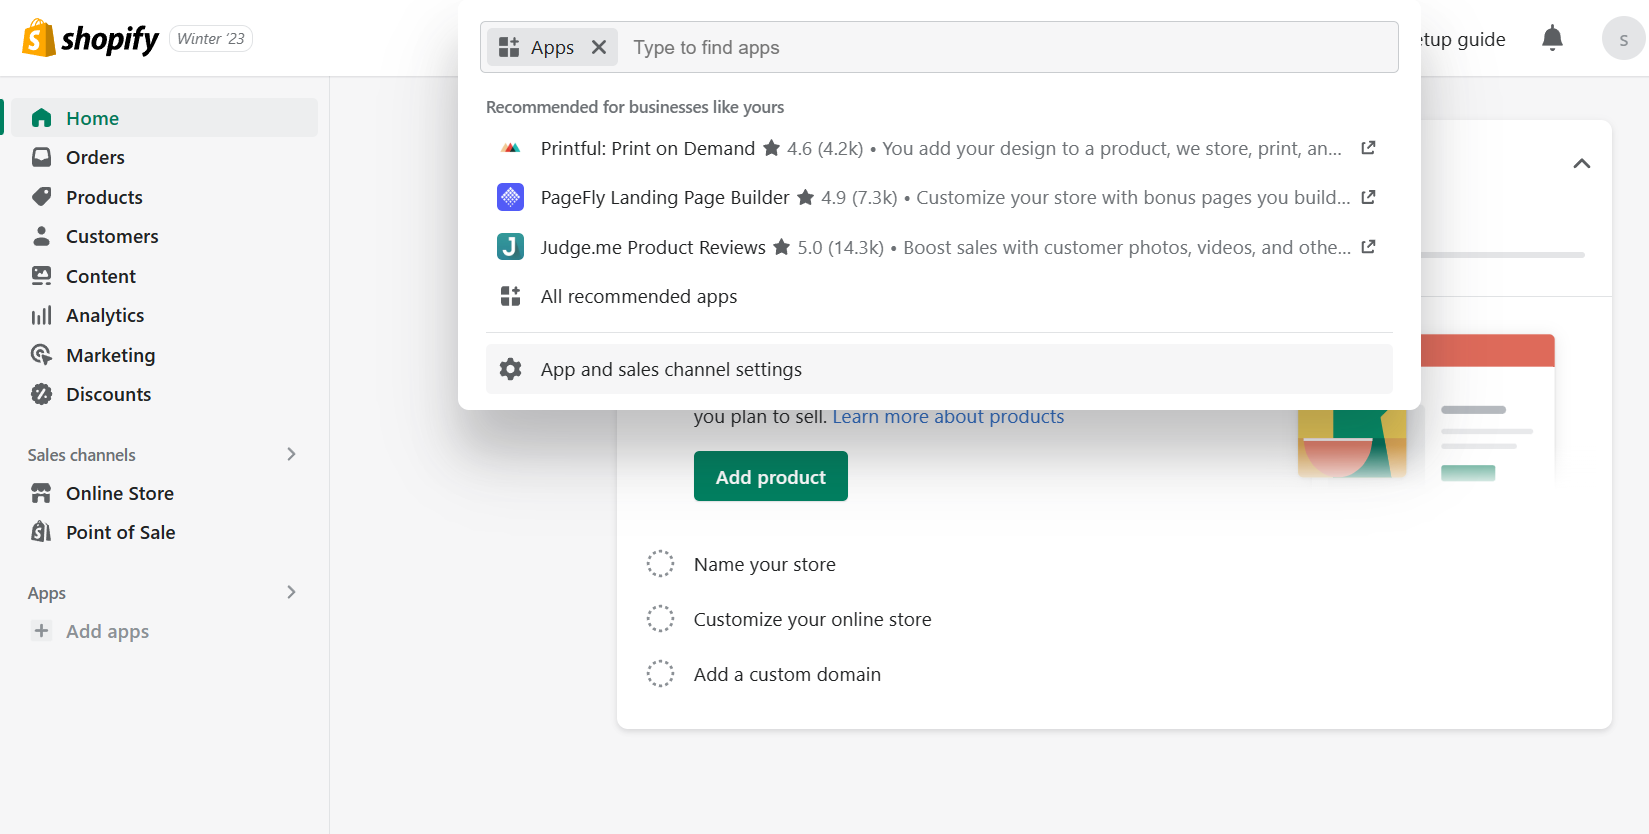
- After clicking Apps, a search bar will appear on the top of the site. This is where you will type “Gorgias” to install the application.
- After typing Gorgias, a search suggestion will appear. Click “Search for “Gorgias” in the Shopify App Store”.
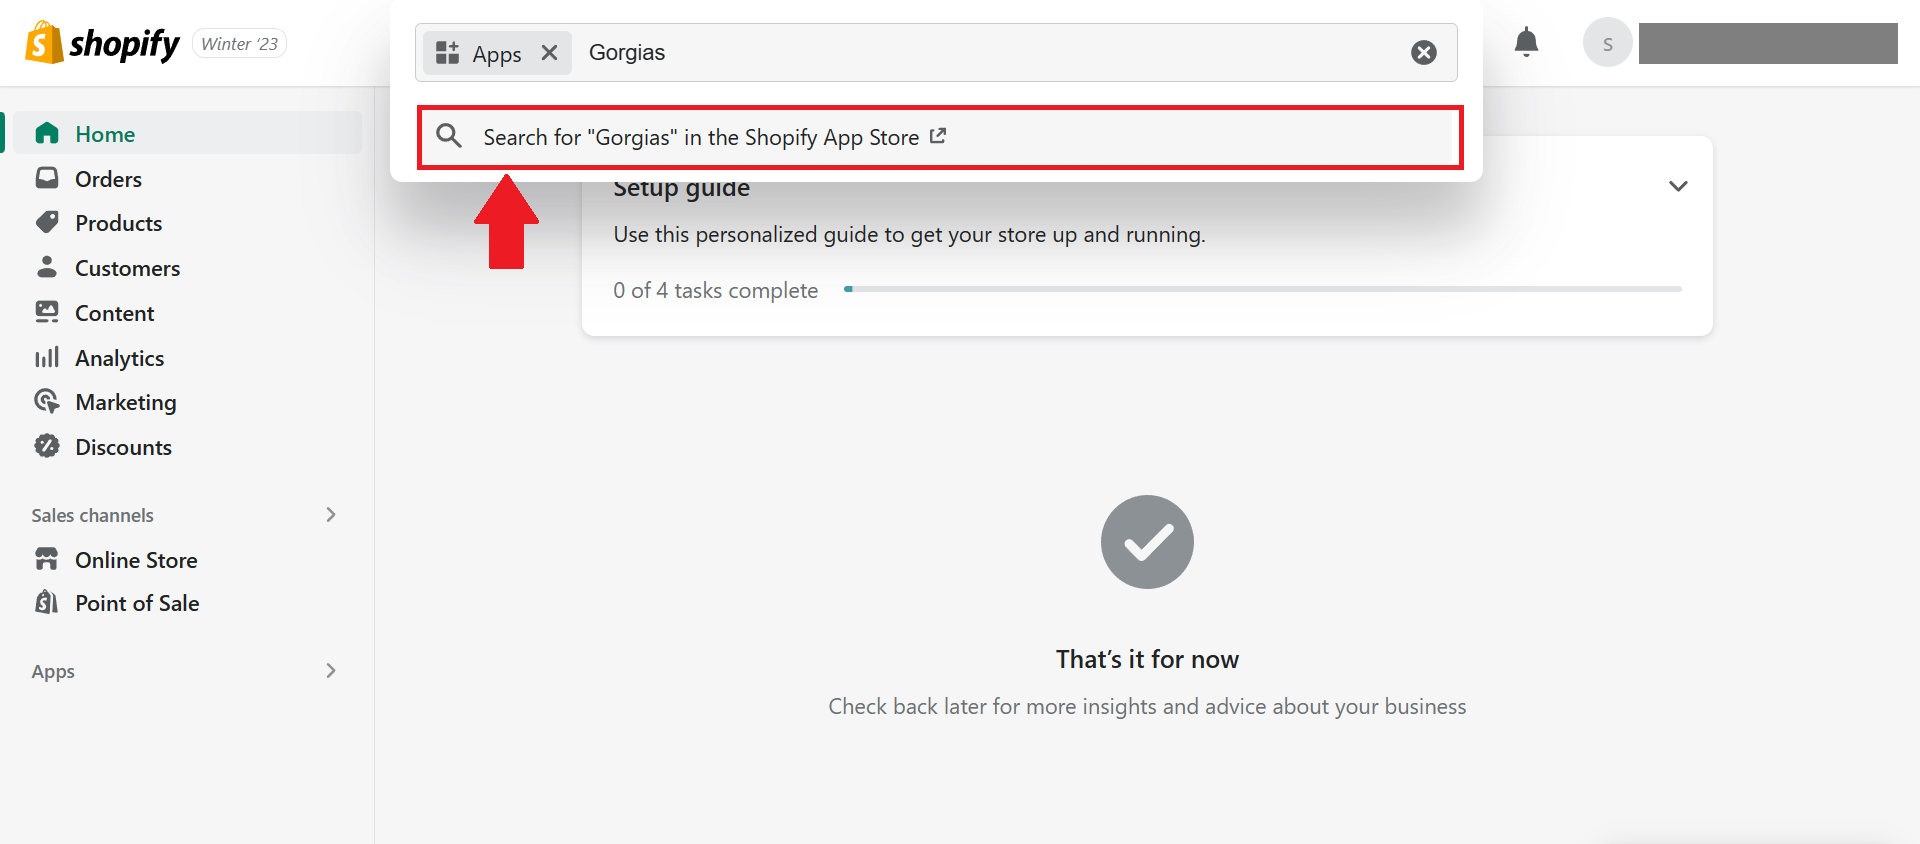
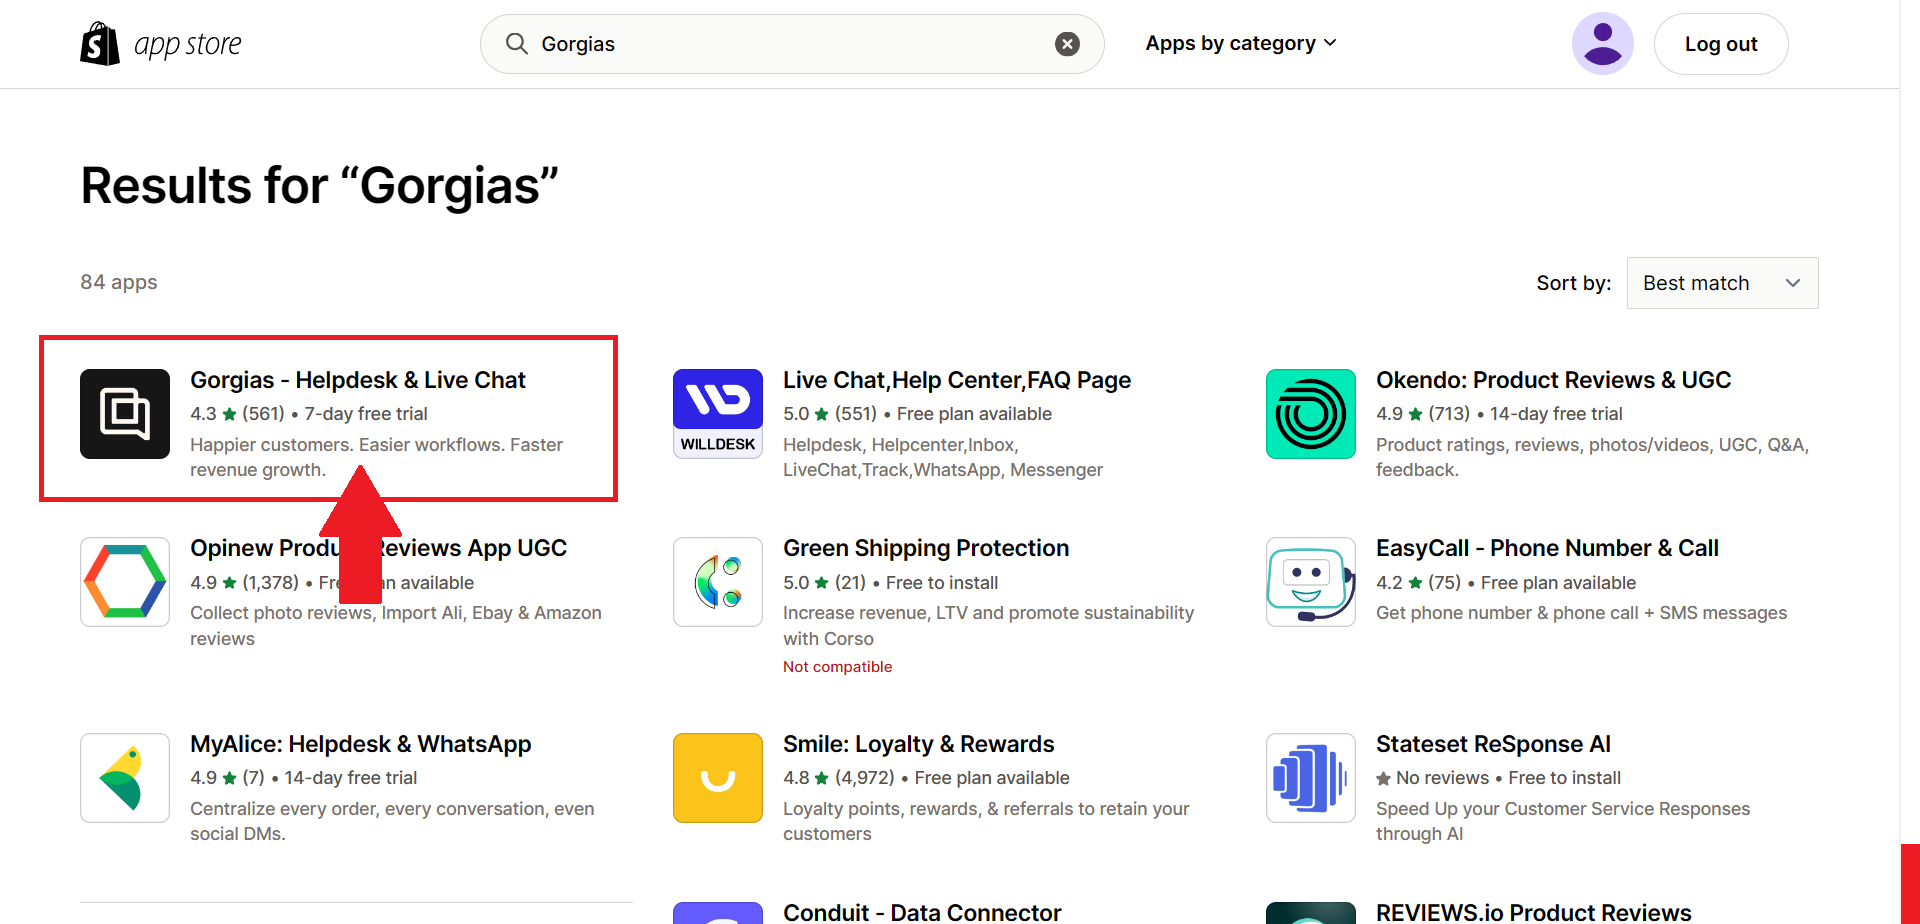
- You will be redirected to another tab, where all the search results for Gorgias are located. Click “Gorgias - Helpdesk & Live Chat”.
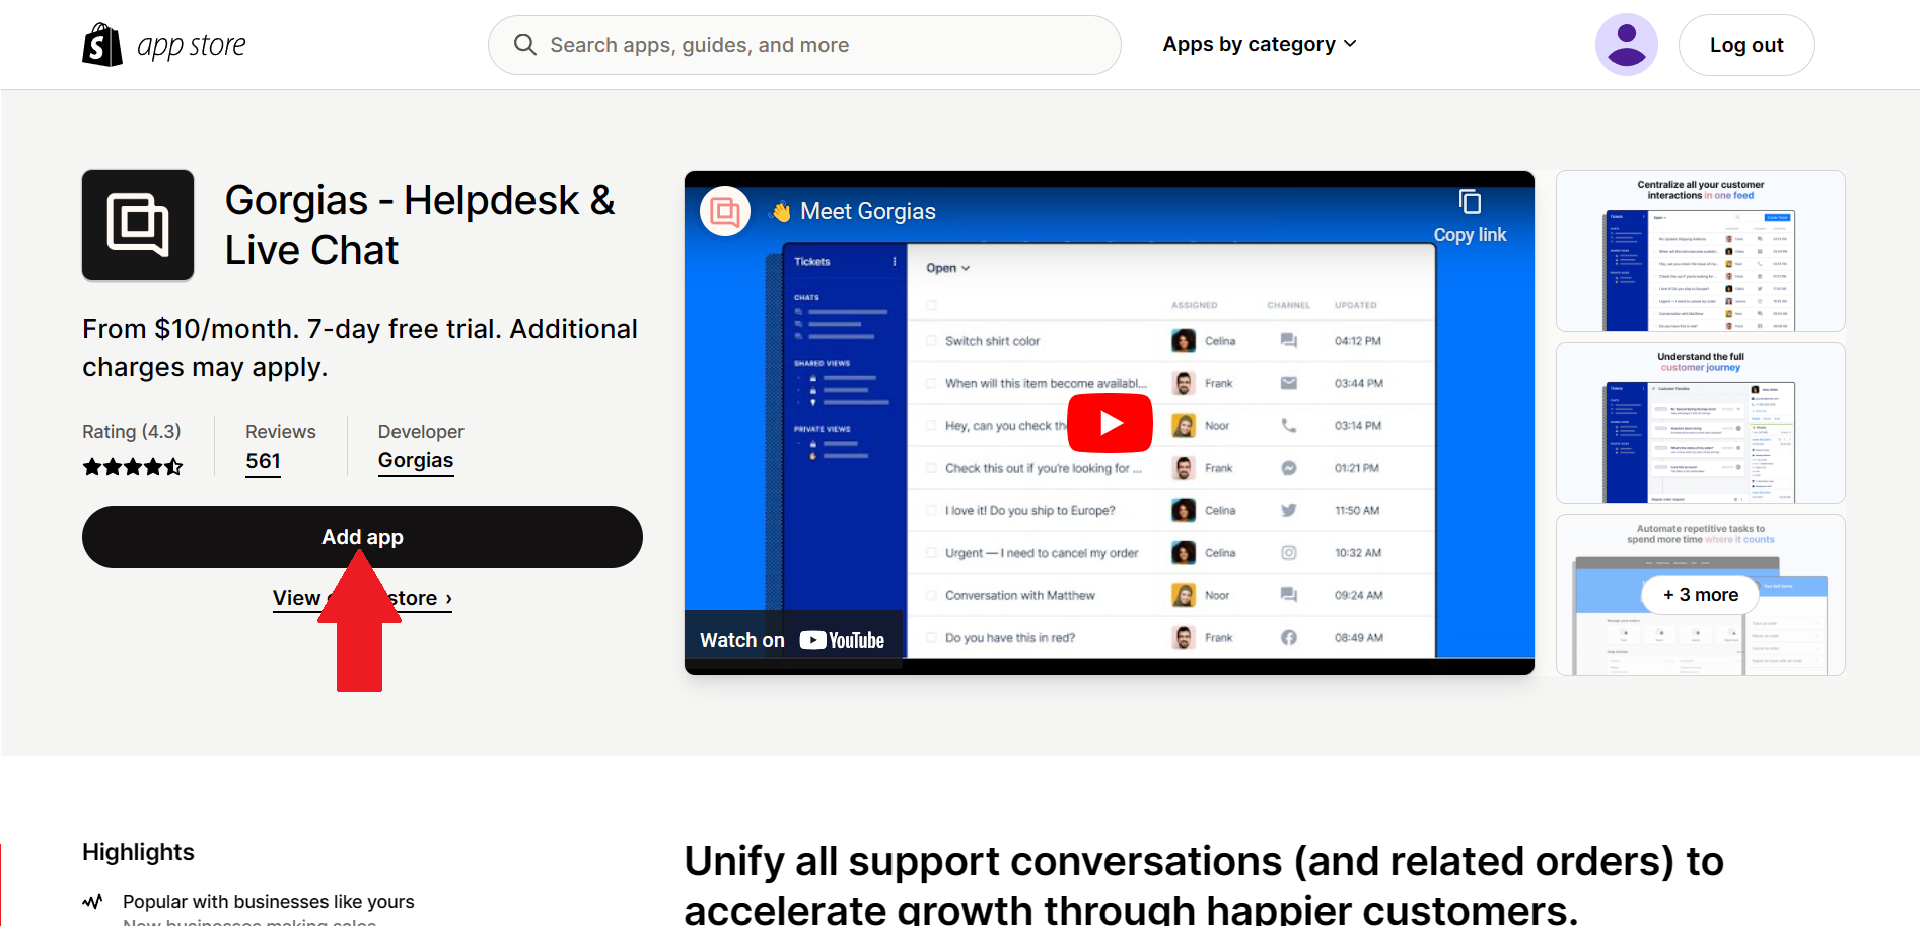
- After you click Gorgias - Helpdesk & Live Chat, the developer of the app should be Gorgias. As you can see, it is a paid app with a 7-day free trial on the first 7 days to see whether or not you are suitable for the functions of the software. To add this on your Shopify store, click “Add app”.
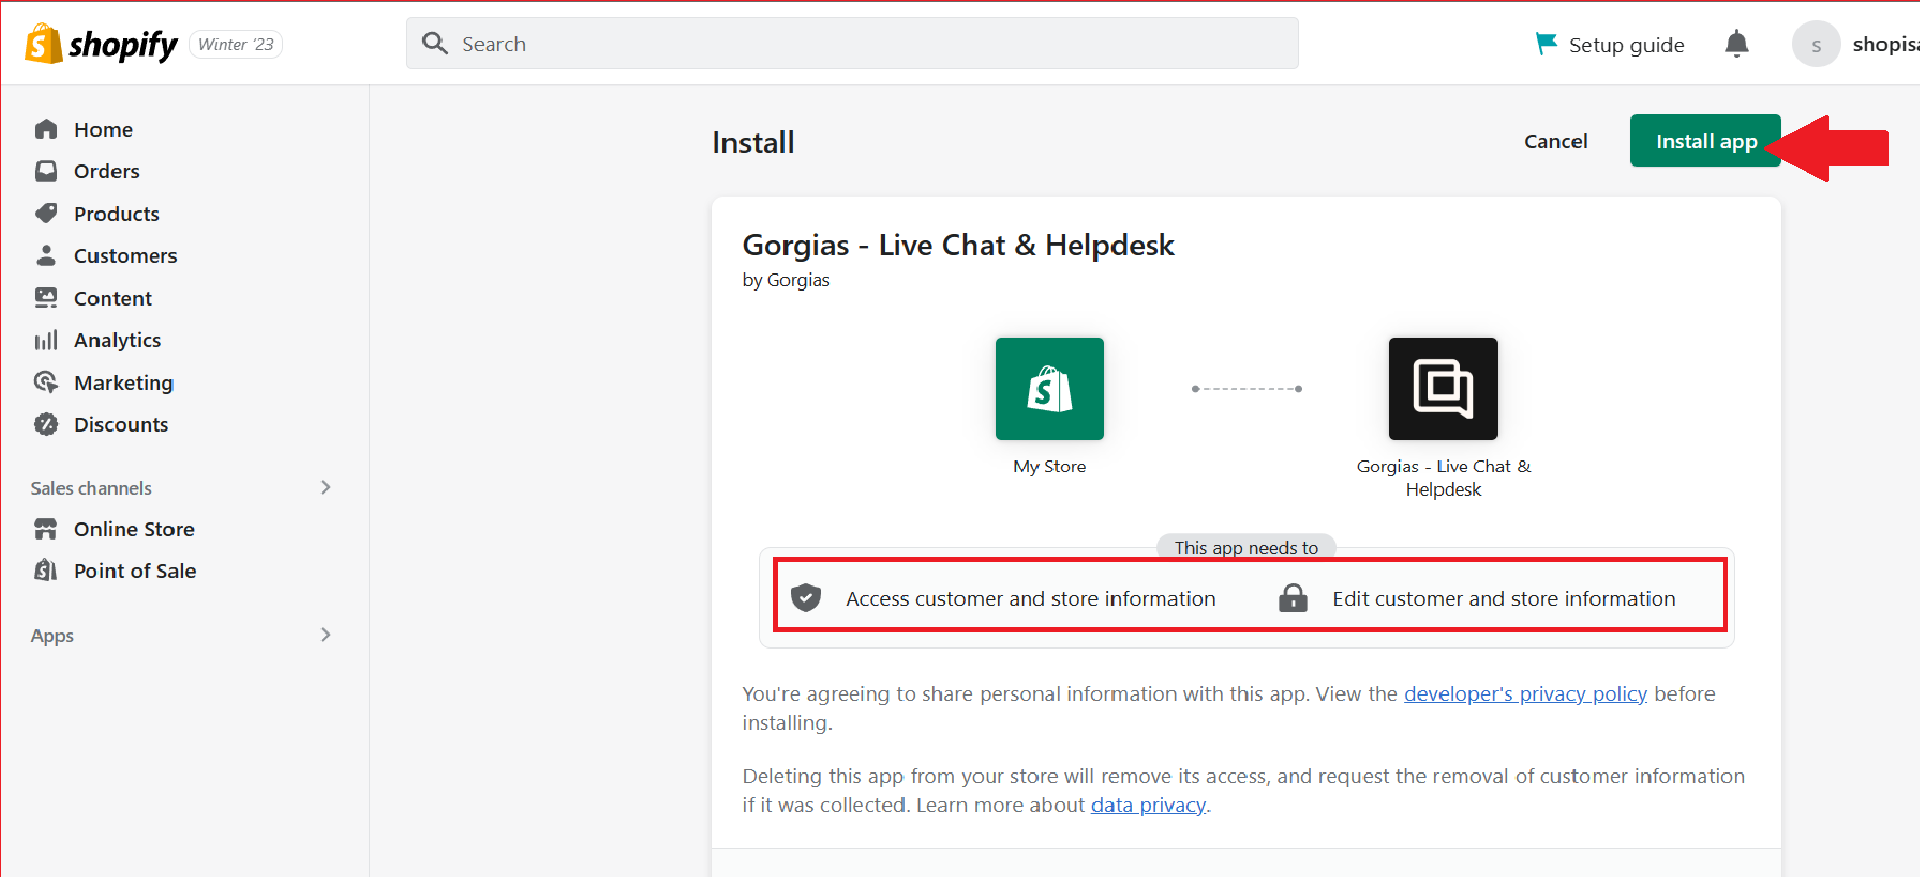
- Next, you will be redirected to the installation of the app. To function, Gorgias needs to have access to customers and store information and edit them. Make sure that you agree to these terms before proceeding to installation. After reviewing the privacy policy, click the “Install app” button.
Creating Gorgias Account
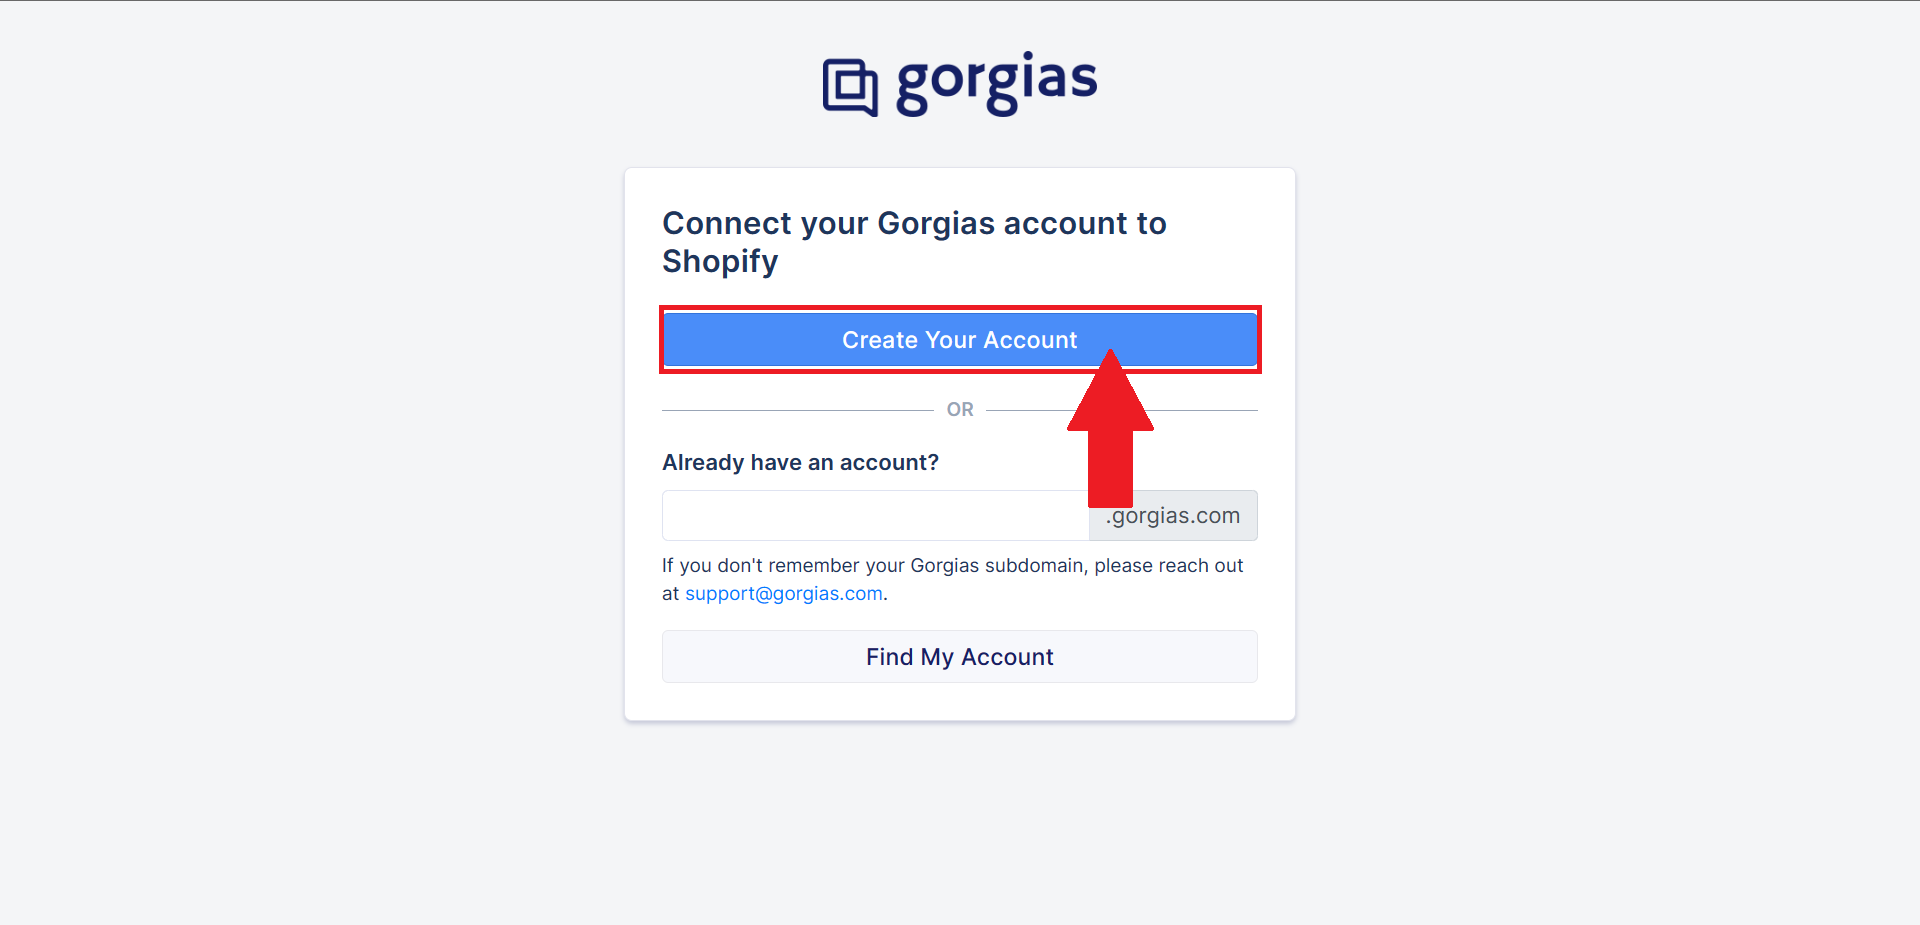
- After installing Gorgias, you will be redirected to this page where you will have to create an account to connect Gorgias to your Shopify store. Click “Create Your Account” to create an account for Gorgias.
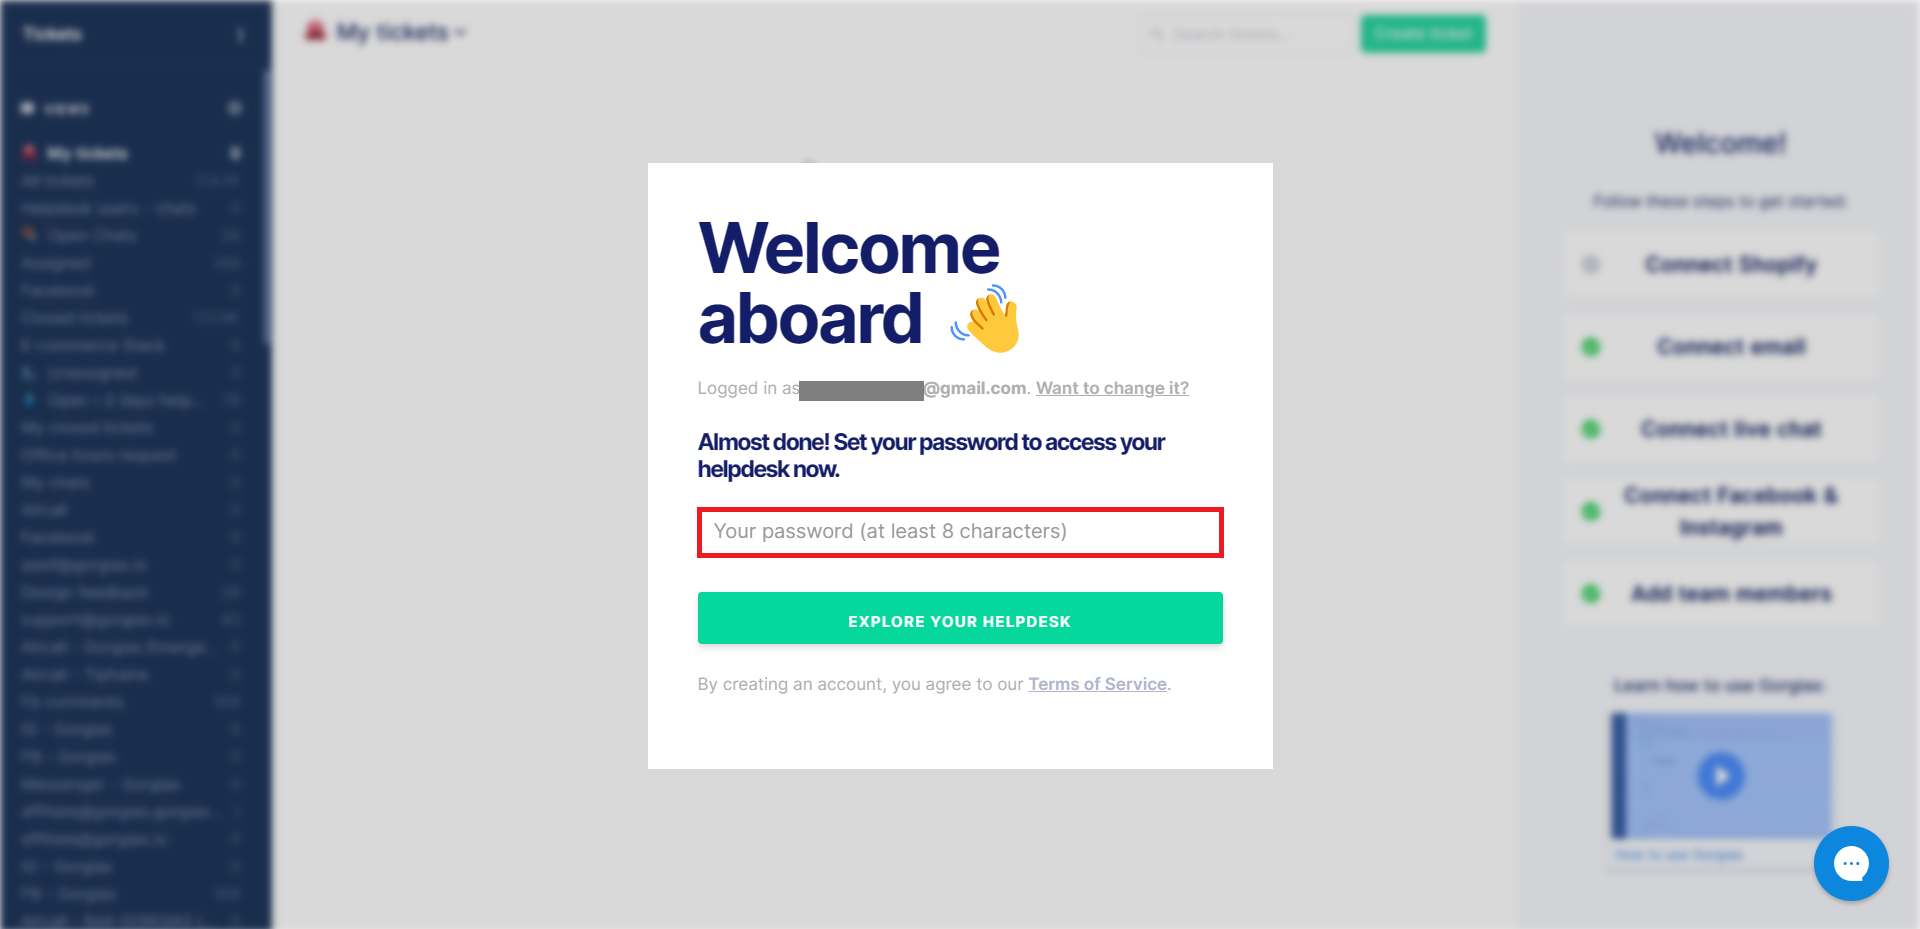
- The Shopify account that is signed in to your personal computer or desktop would be automatically connected after you click to create an account. To access the helpdesk, you need to provide your password in your Shopify store when you log in. Enter it in the blank field as shown below.
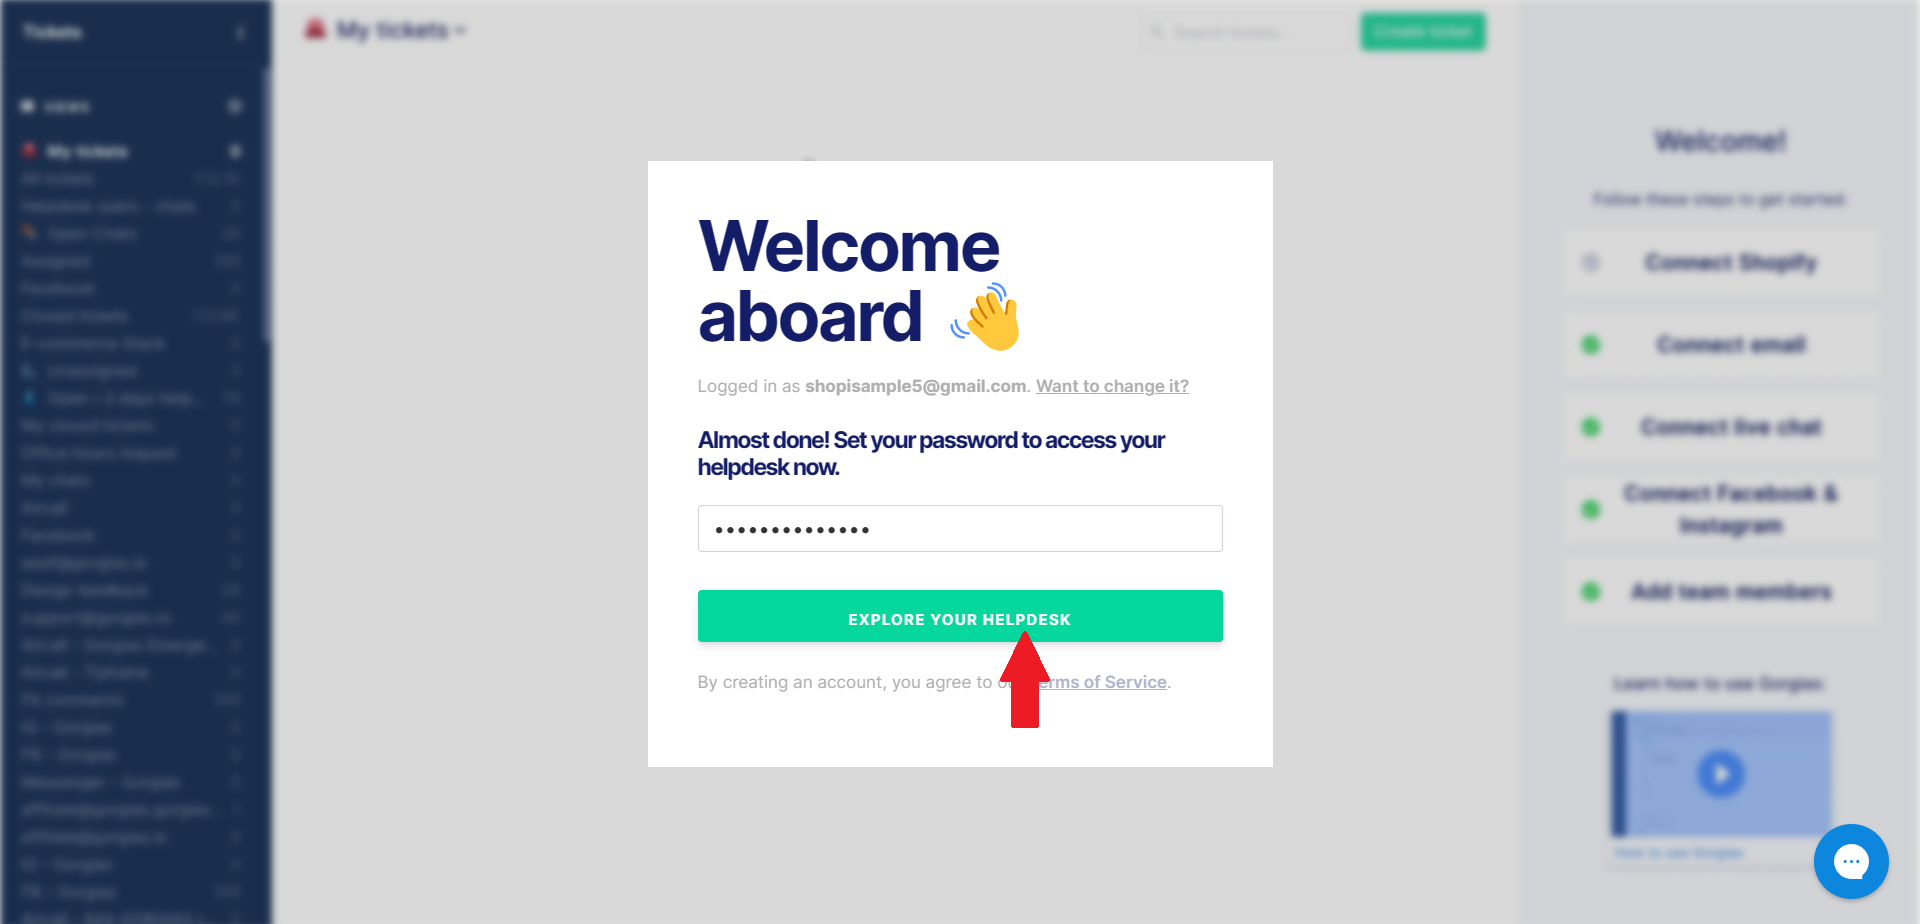
- Click the “Explore your helpdesk” button after entering your password.
- To get started, set up your helpdesk by entering your Shopify website’s URL and also the URL of your helpdesk in the blank spaces provided below.
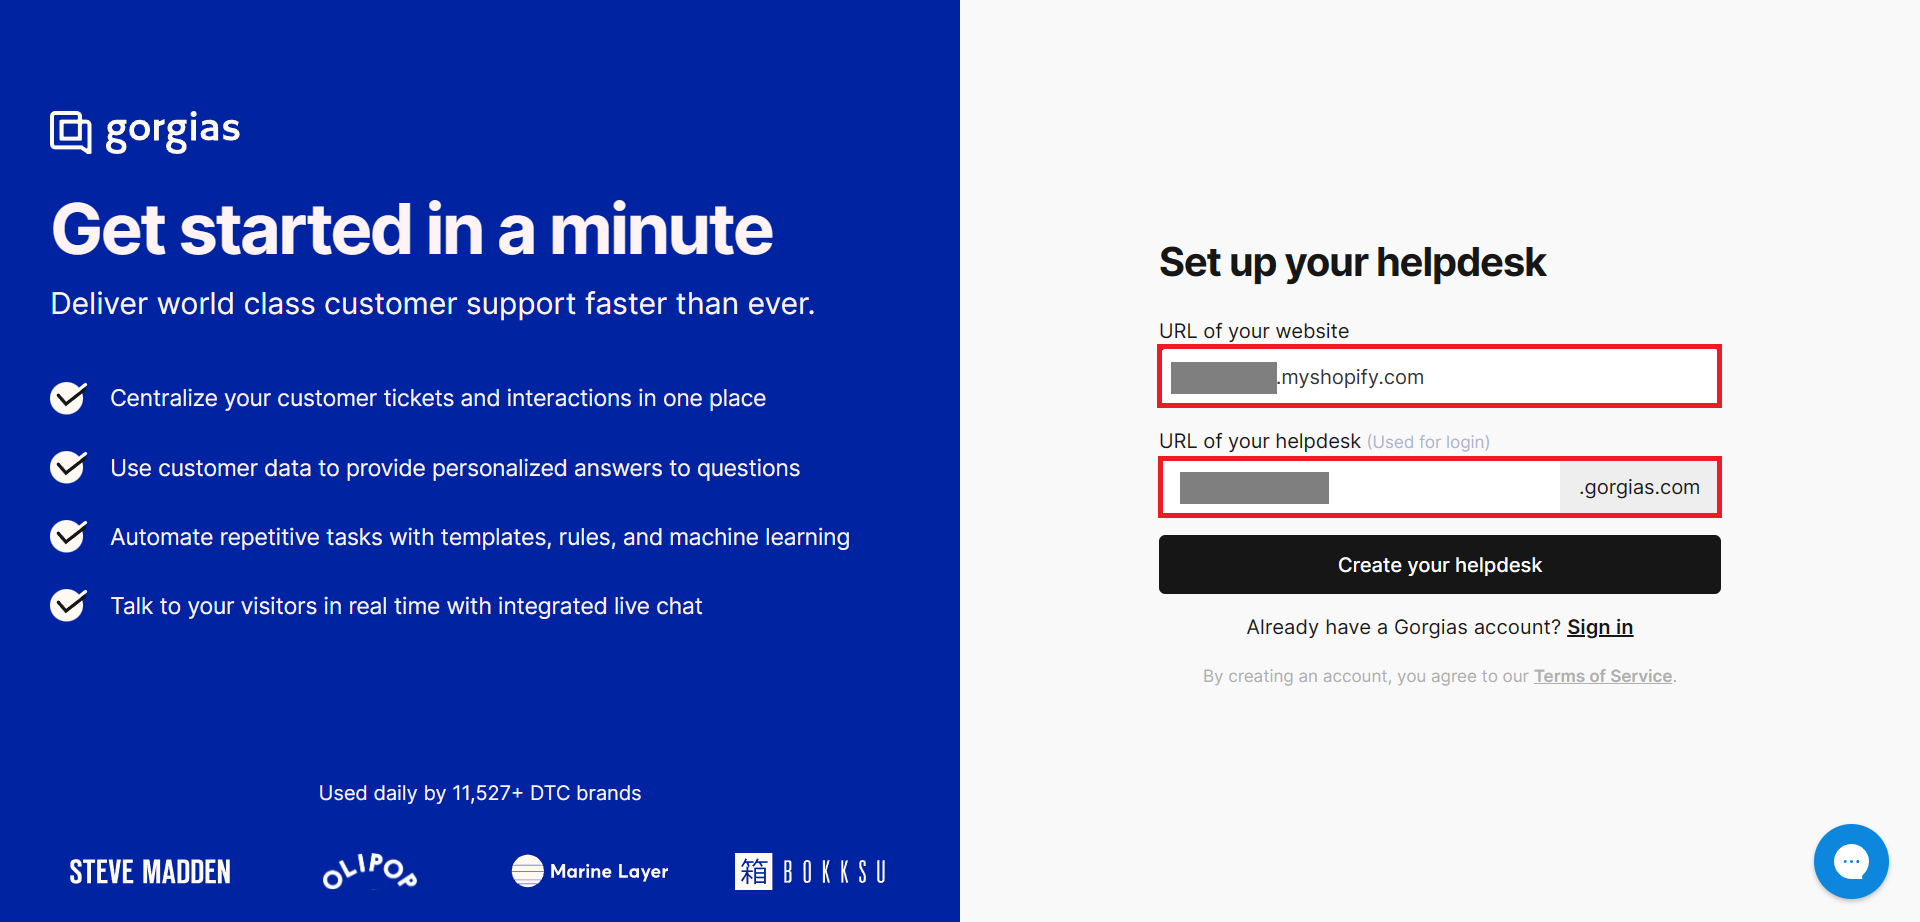
- After finalizing the information, click the “Create your helpdesk” button.
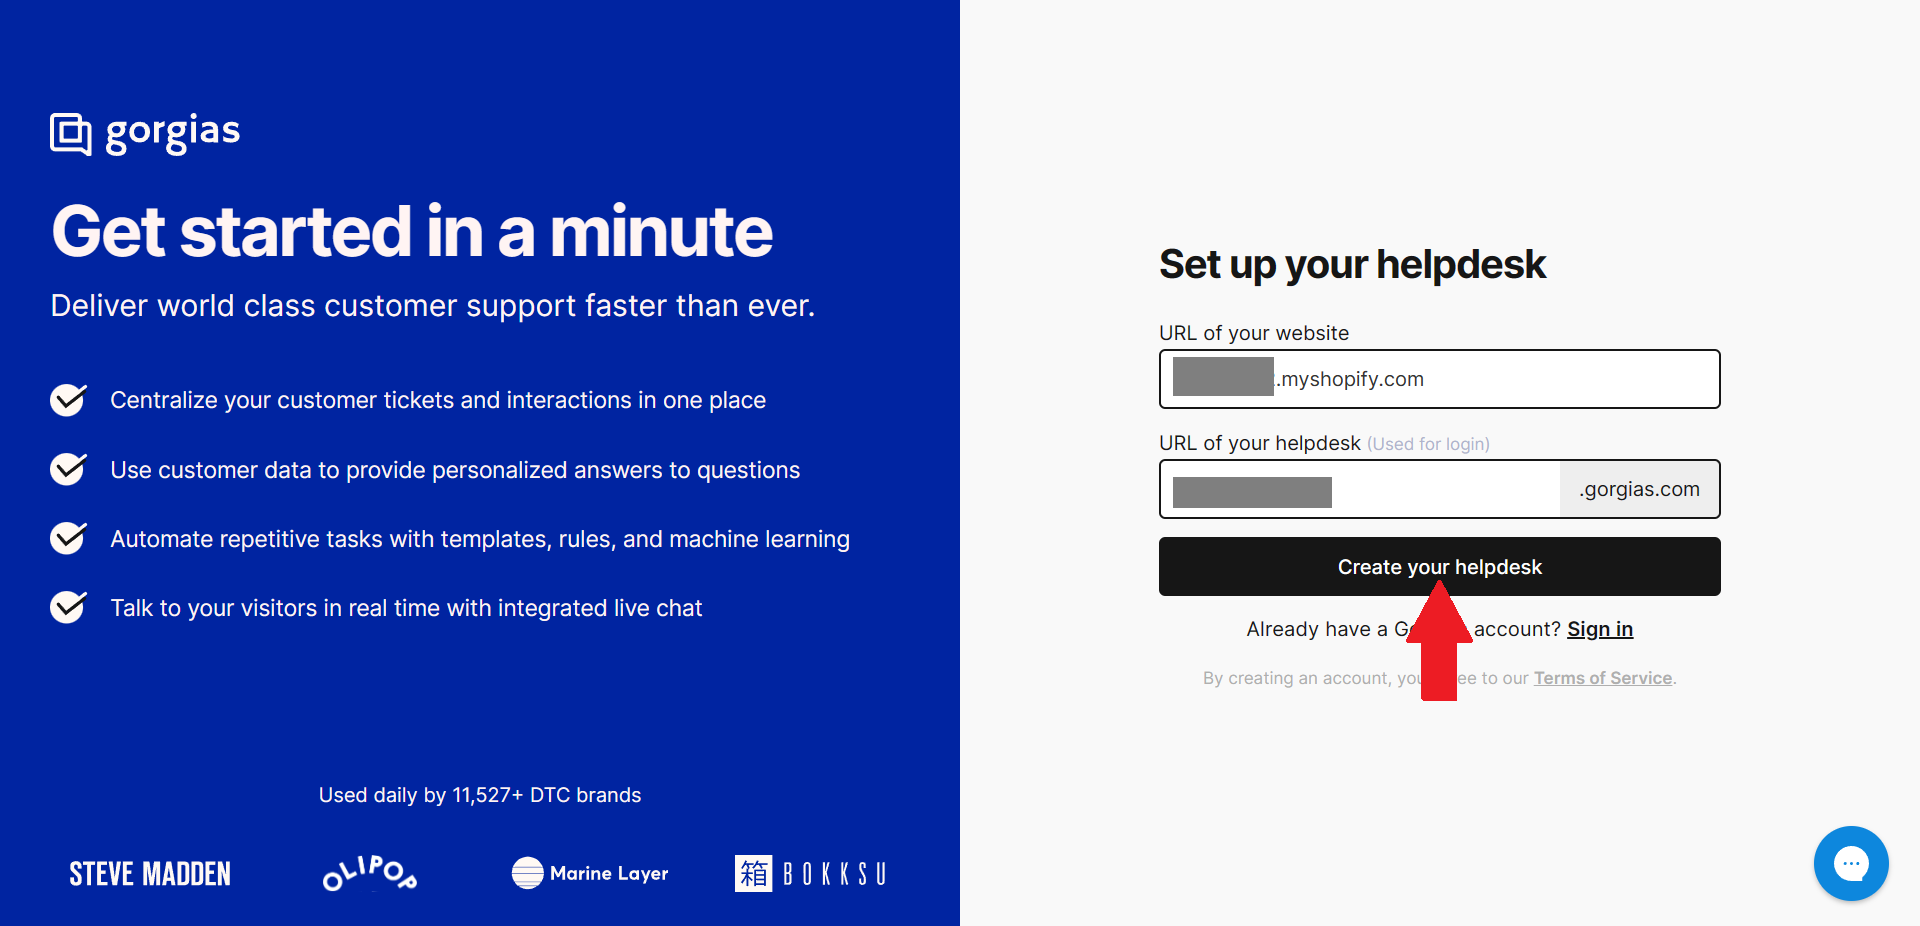
Creating Gorgias Account
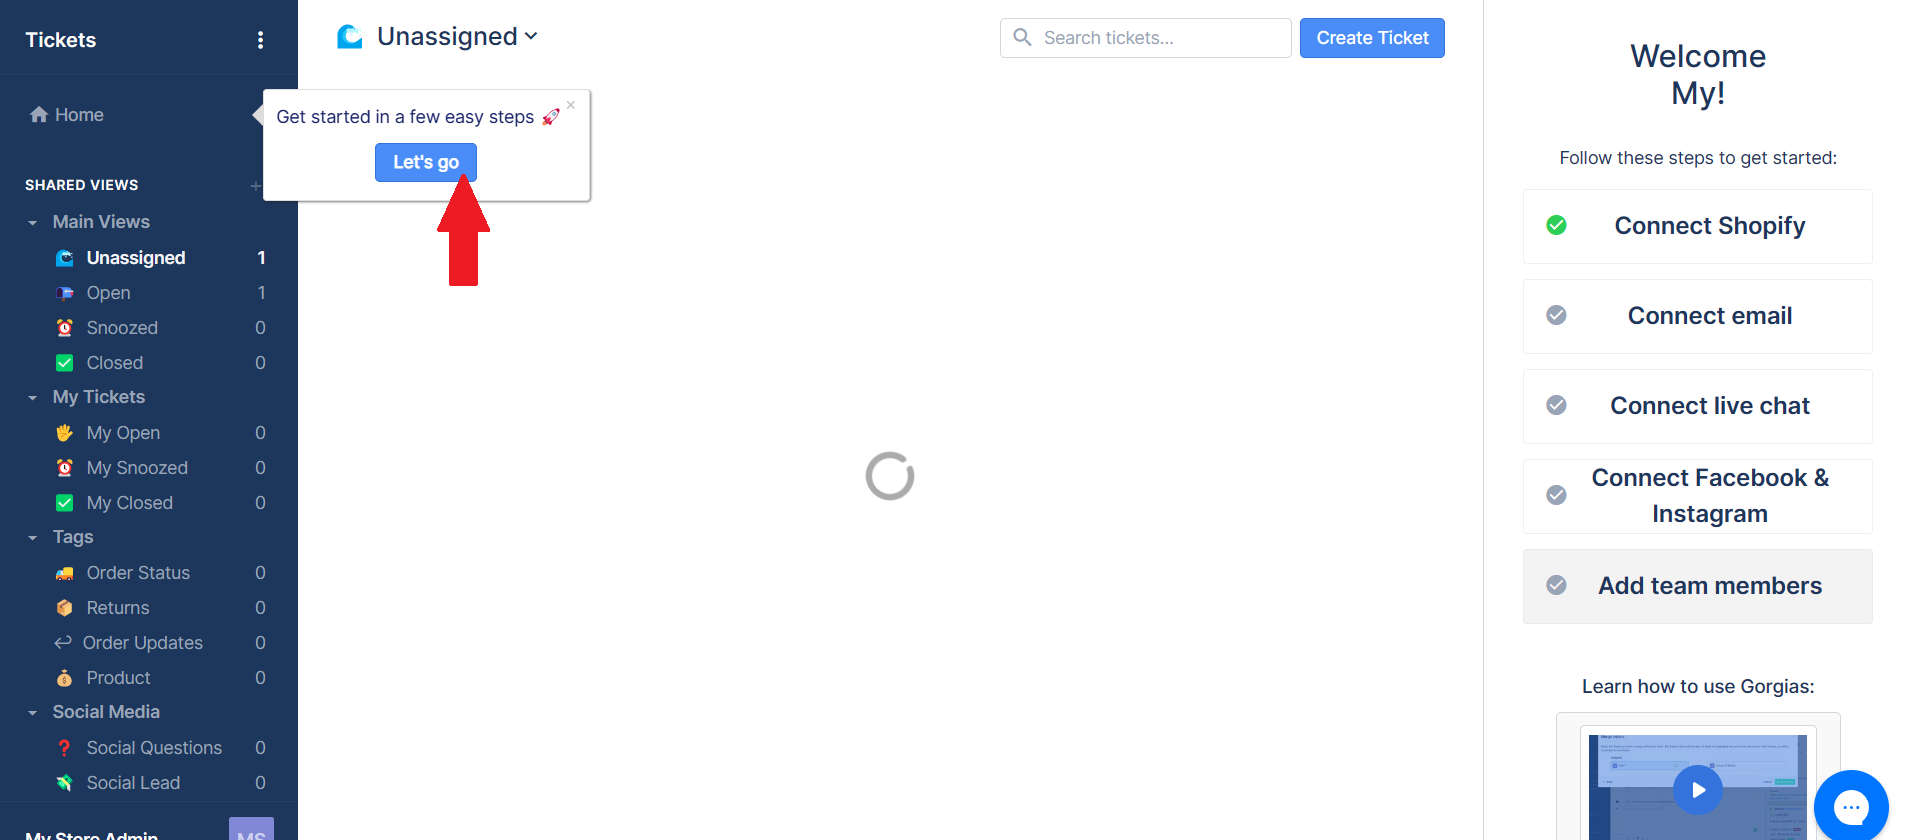
- After creating a Gorgias account, you will be redirected to this page. Click the “Let’s go” button to get started.
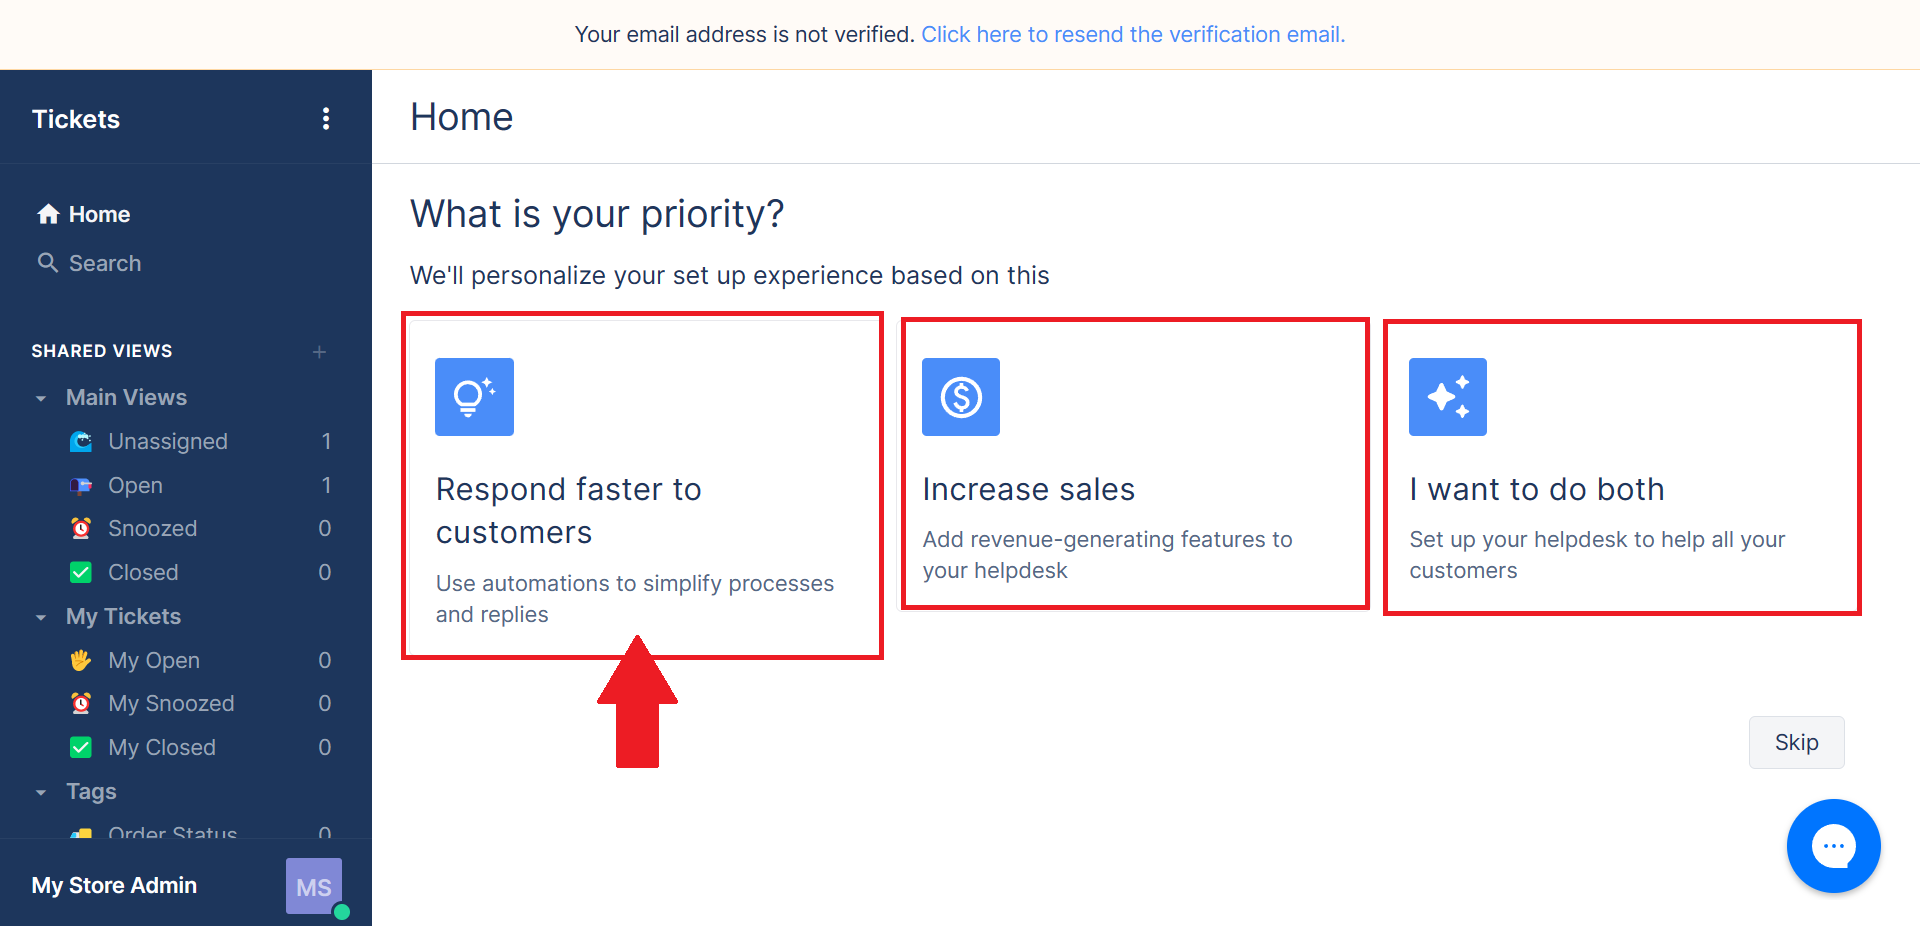
- First, you will be asked about your priority objective on why you installed Gorgias. Since you want to set up customer support, you would want to opt for “Respond faster to customers” or “I want to do both” options. If you want to focus on replying faster to your customers, click the first one.
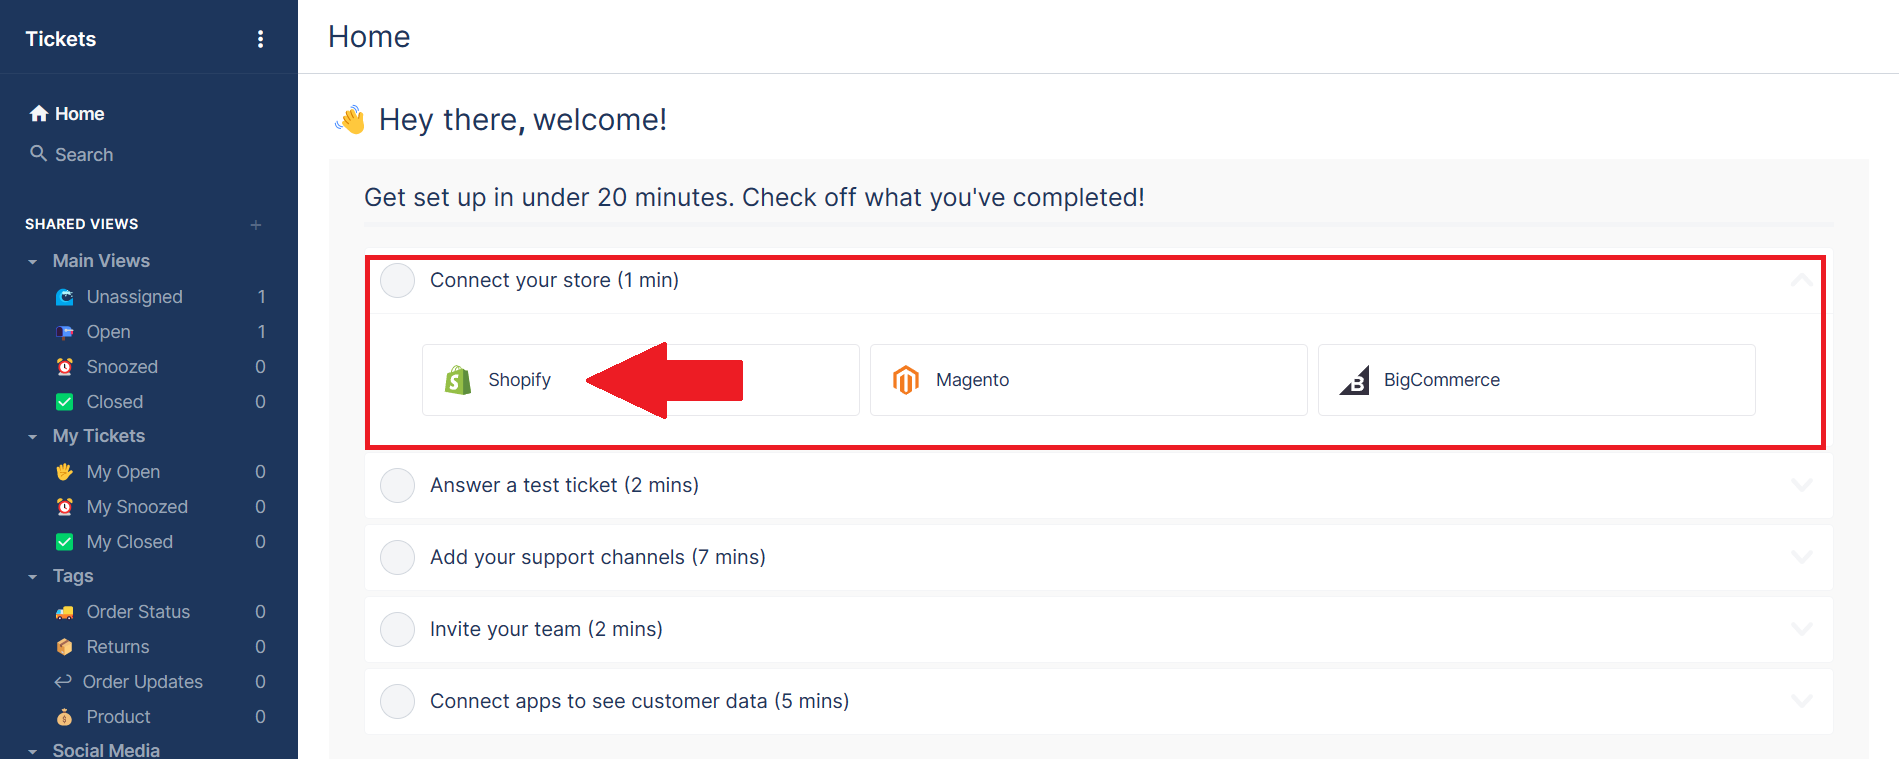
- After clicking the option, you will be asked to set up your Gorgias account by connecting your store first. To connect your Shopify store, click the Shopify option.
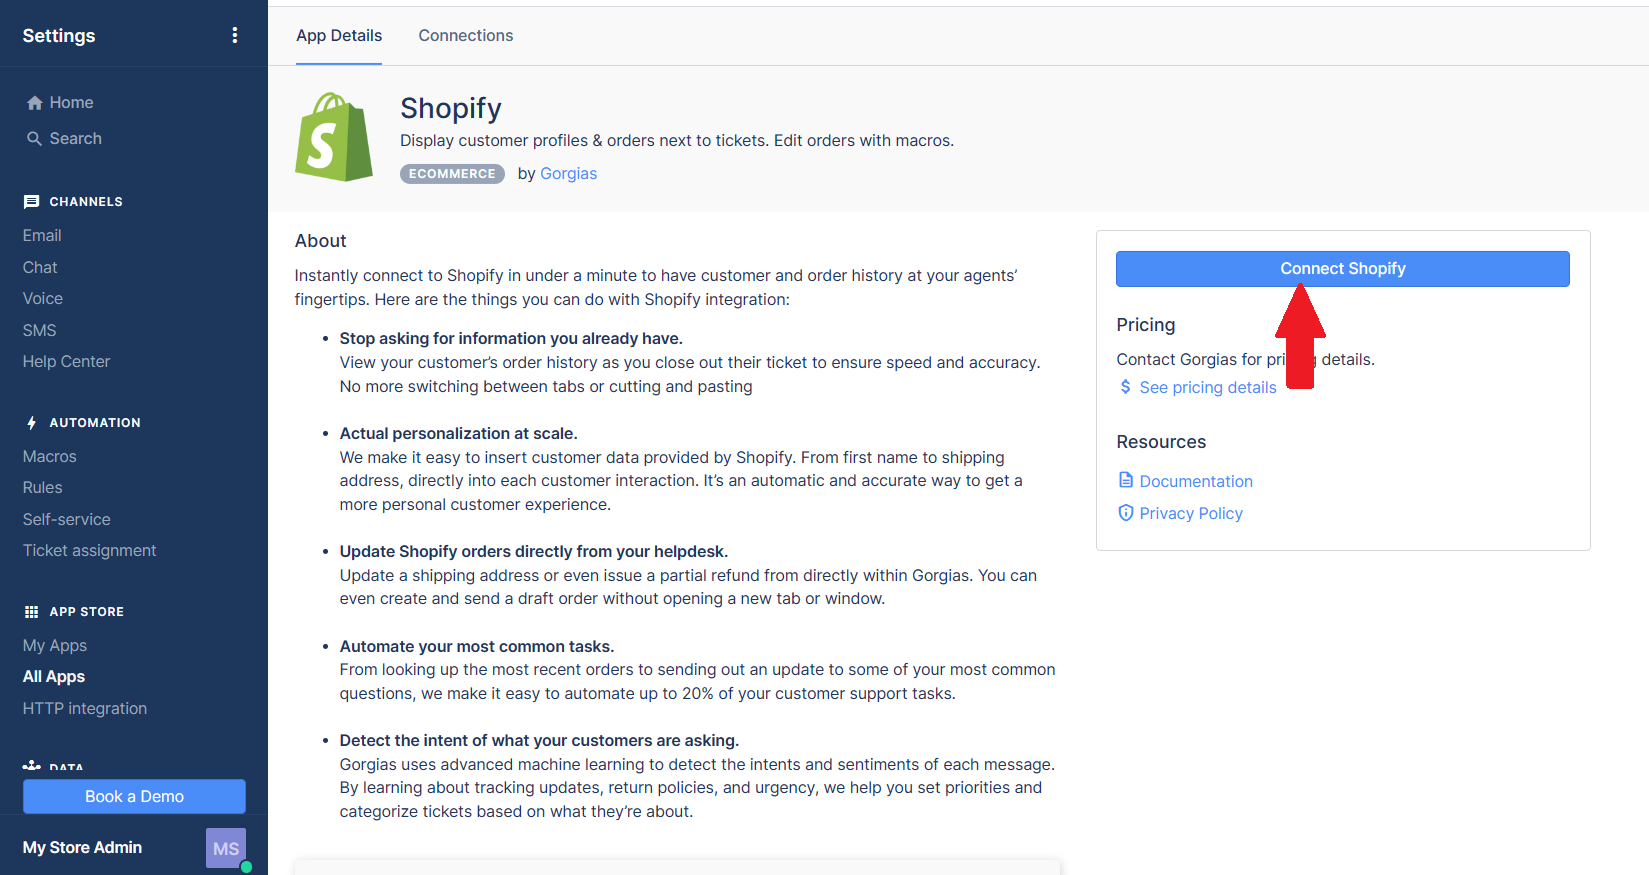
- To connect your Shopify account, you can click “Connect Shopify''. Gorgias integration with Shopify displays different advantages as seen in this page. You can view your customers’ order history, automatically insert your customers’ data especially in speeding up the shipping process, automate customer support tasks, and organize the tickets.
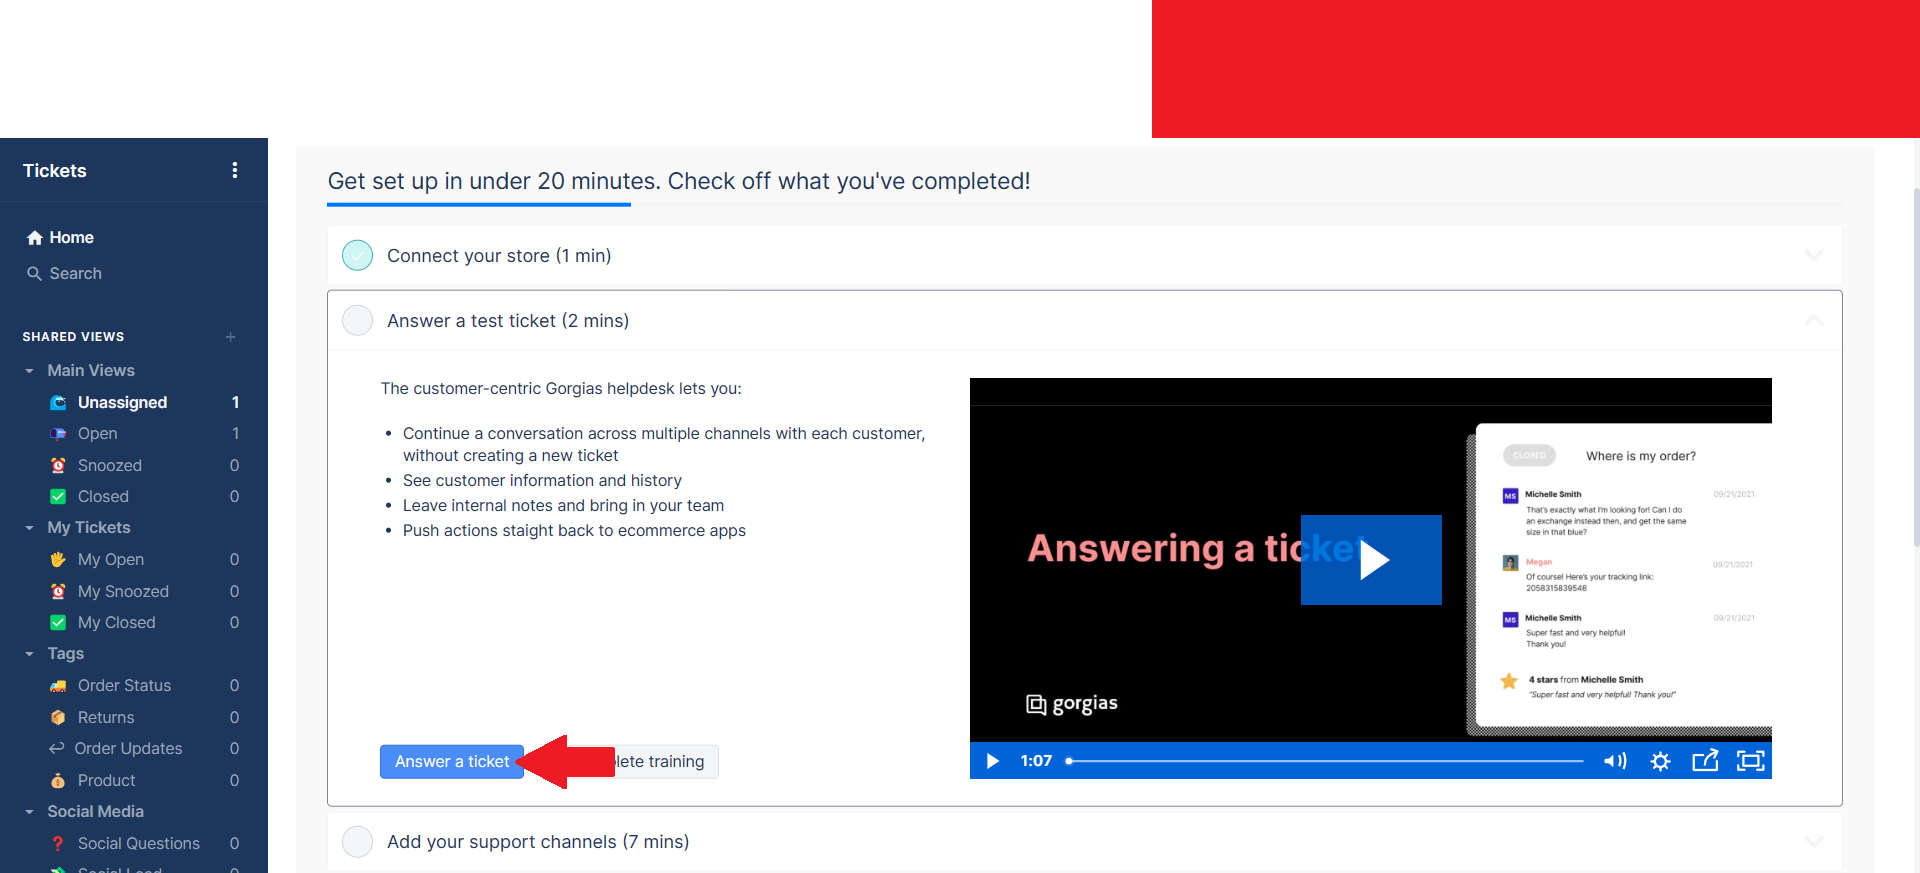
- Next is to Answer a test ticket. Click the “Answer a ticket” button to try this feature.
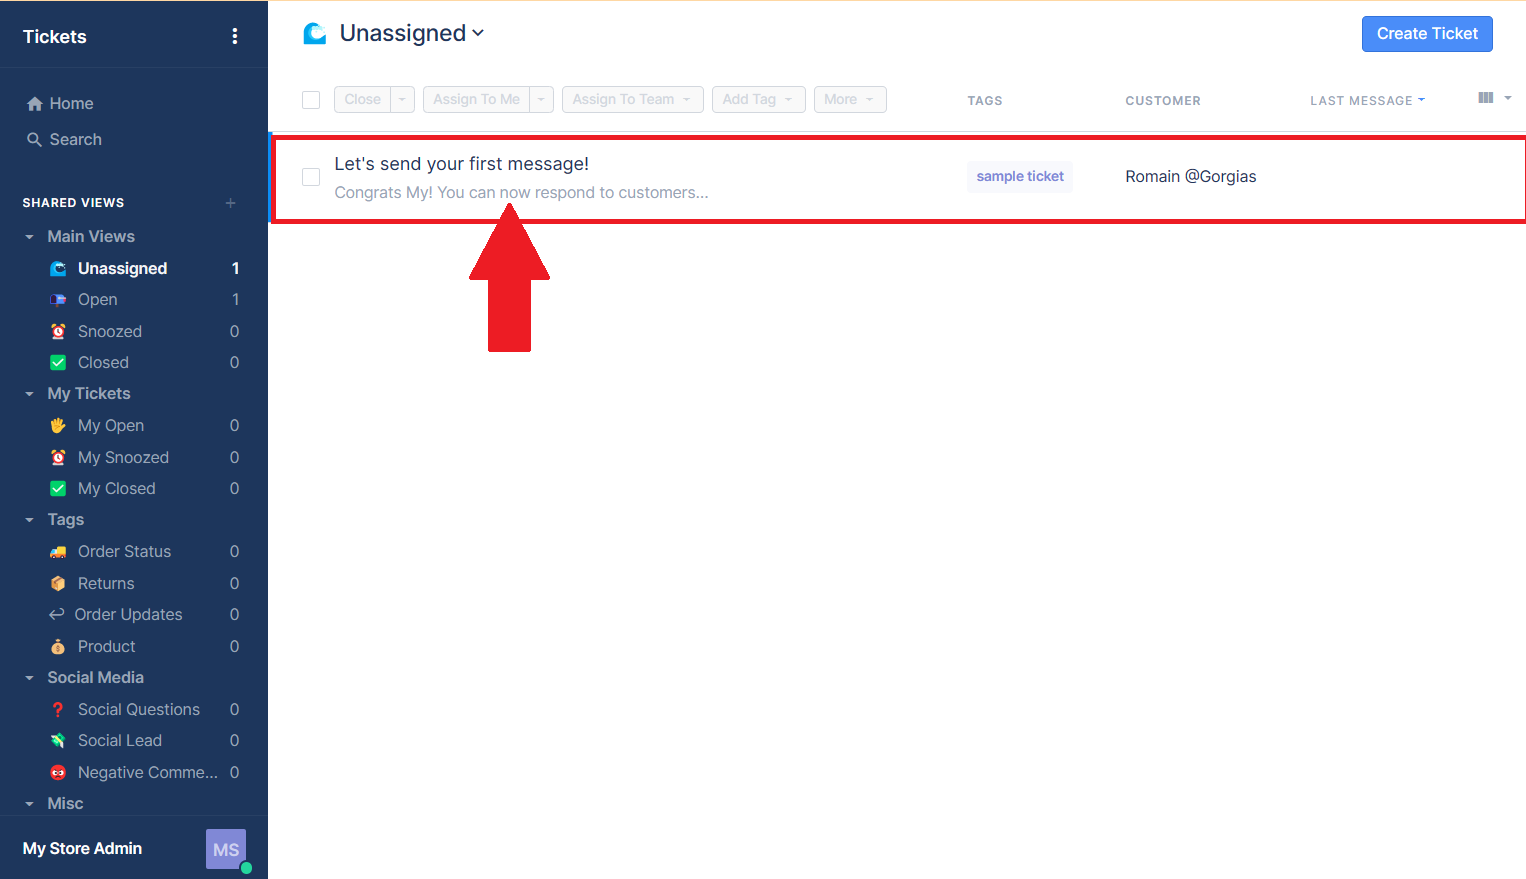
- Open this sample ticket by clicking it.
- In this sample ticket, you can see the sample last order from a customer on the right side of the site. This is to see details of their orders so the chat agents would no longer need to ask about the order details.
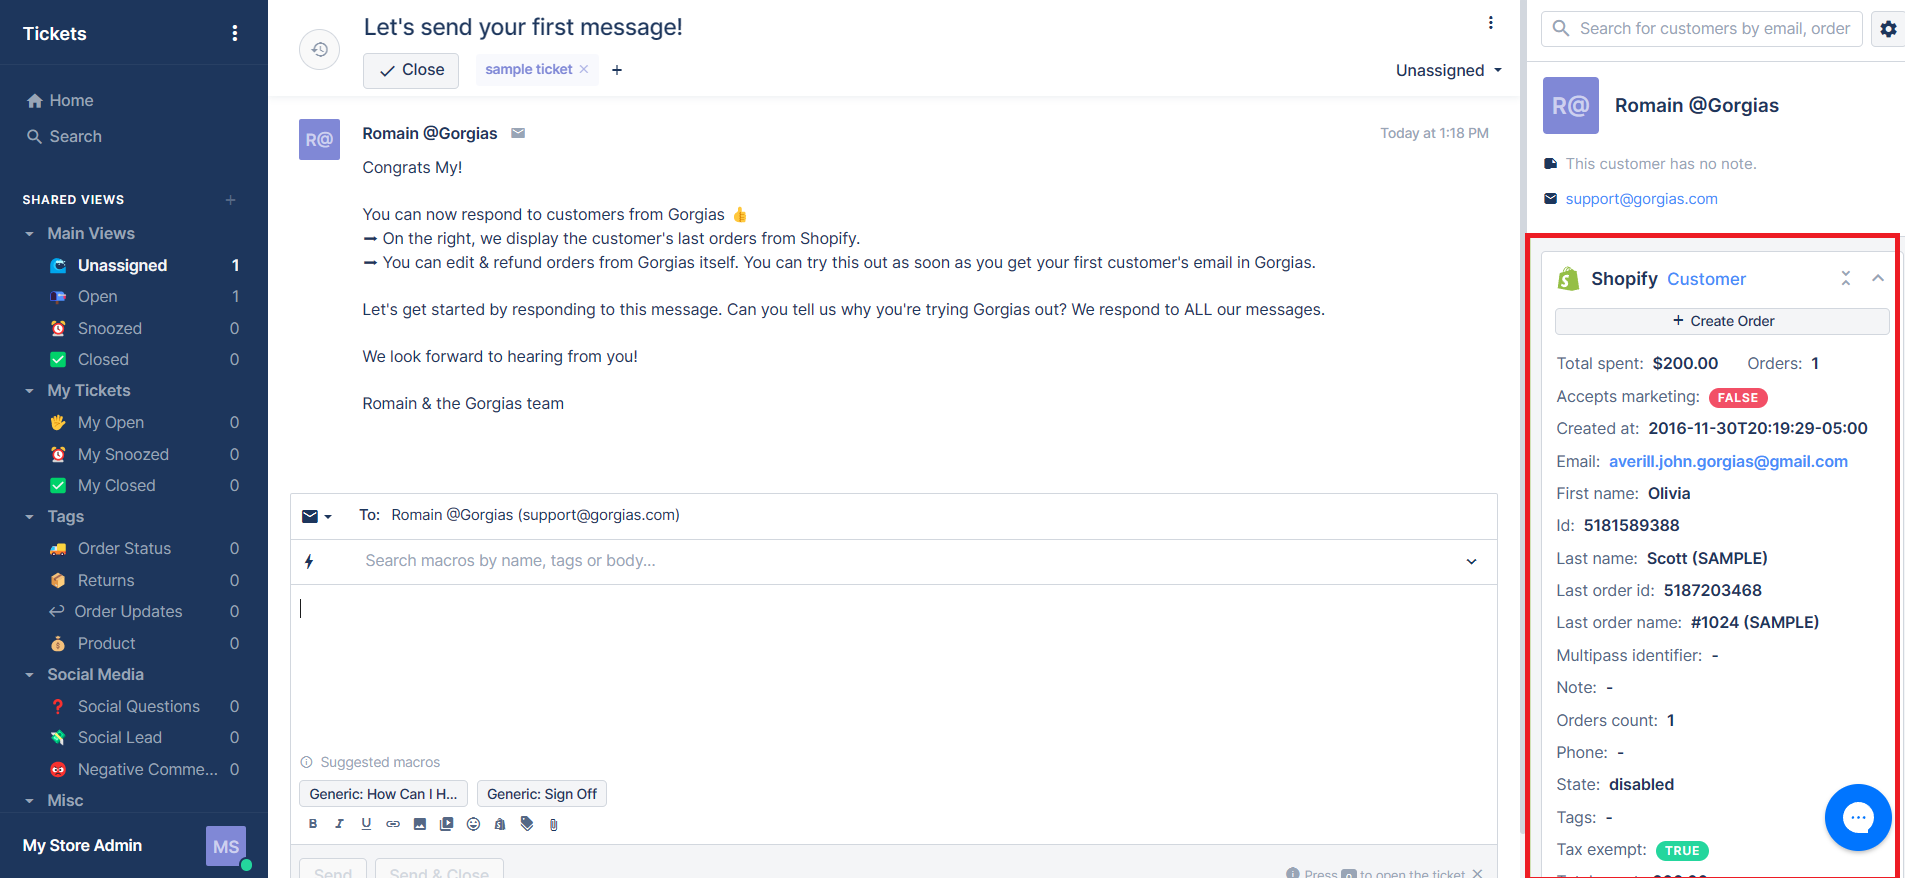
- Below the ticket, you can see a text box where you would want to create a message. This is powered by Rich Text Editor and there are also suggestive messages when you click the Macros field.
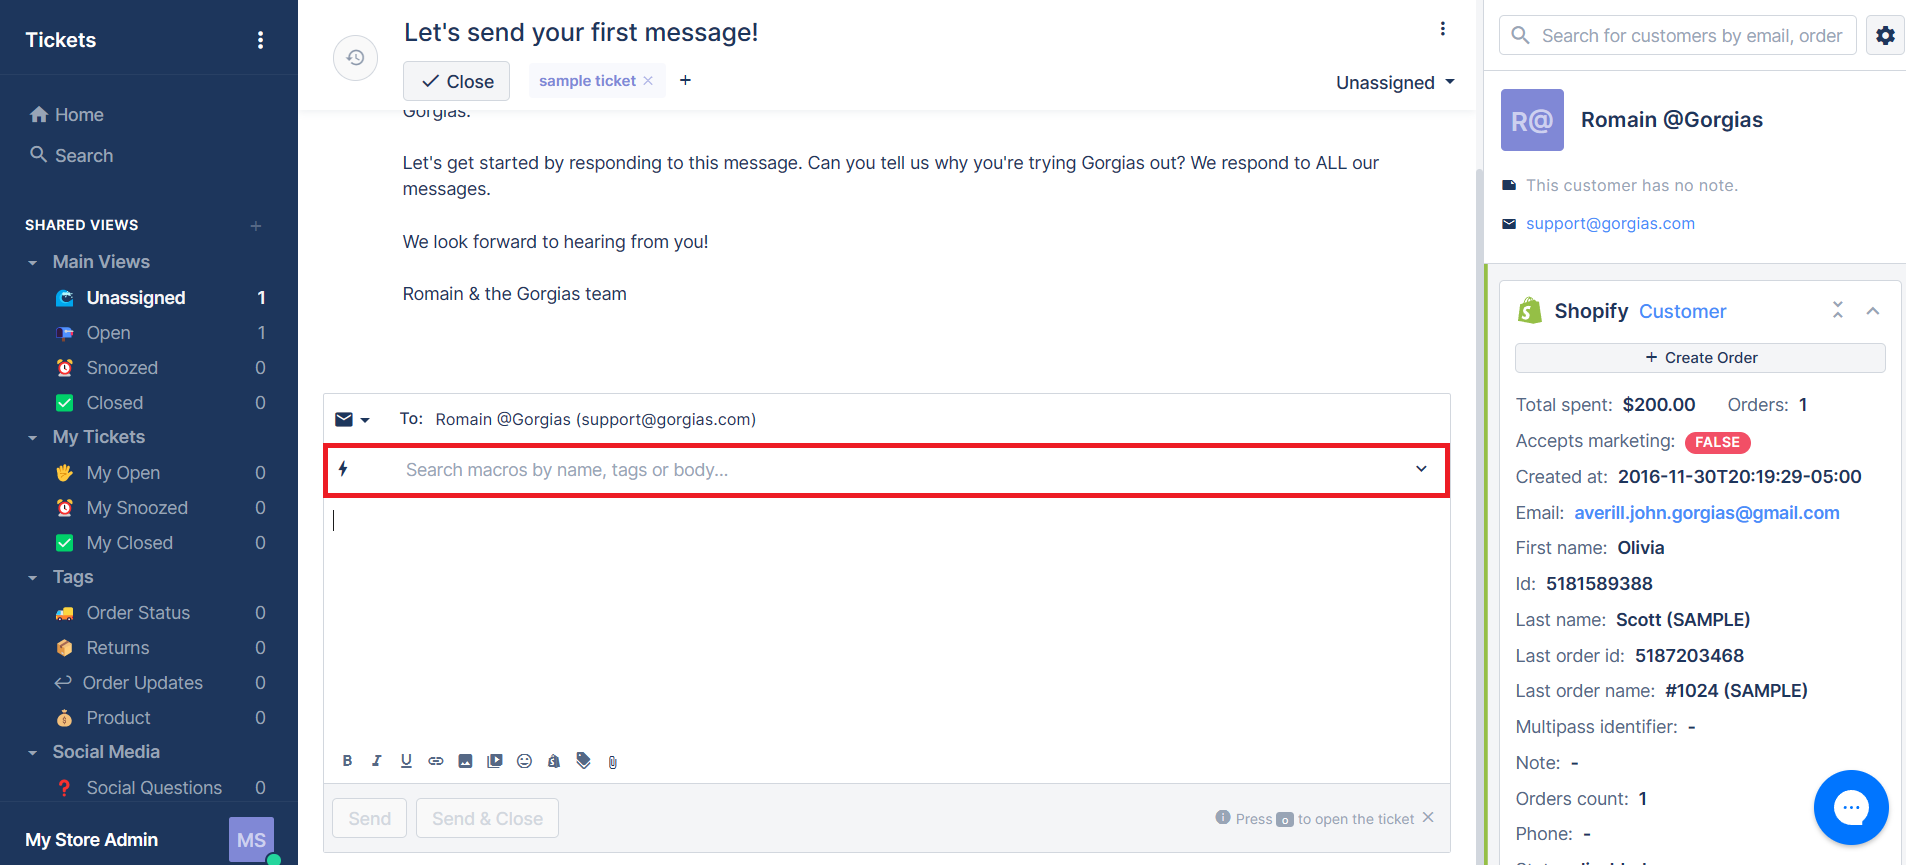
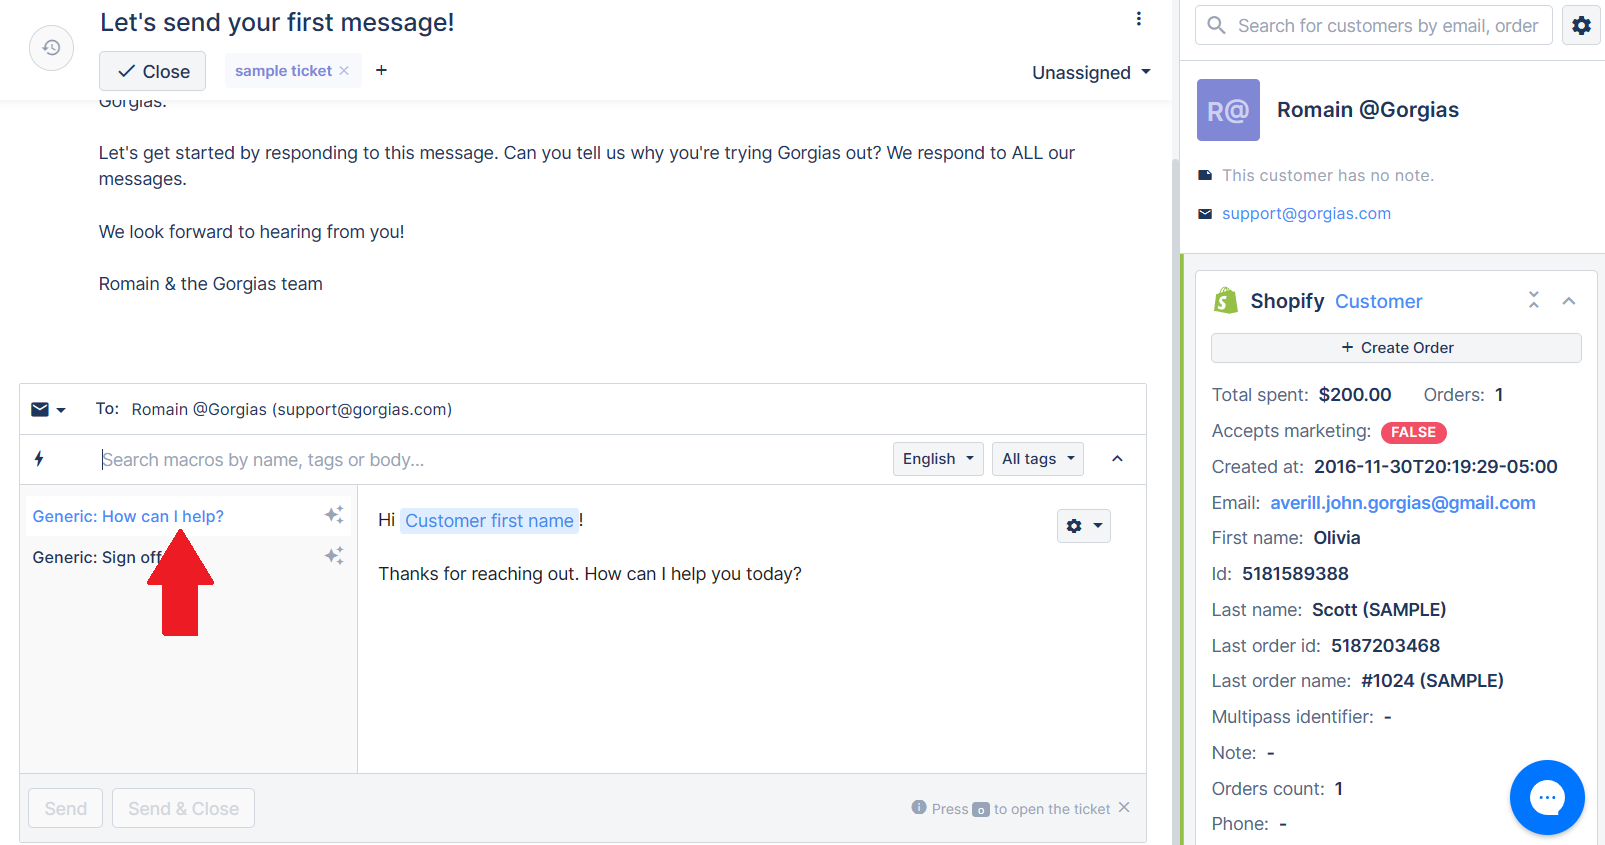
- If you click that, you can see a sample format of a customer support email message. You can adapt this by clicking the title indicated on it.
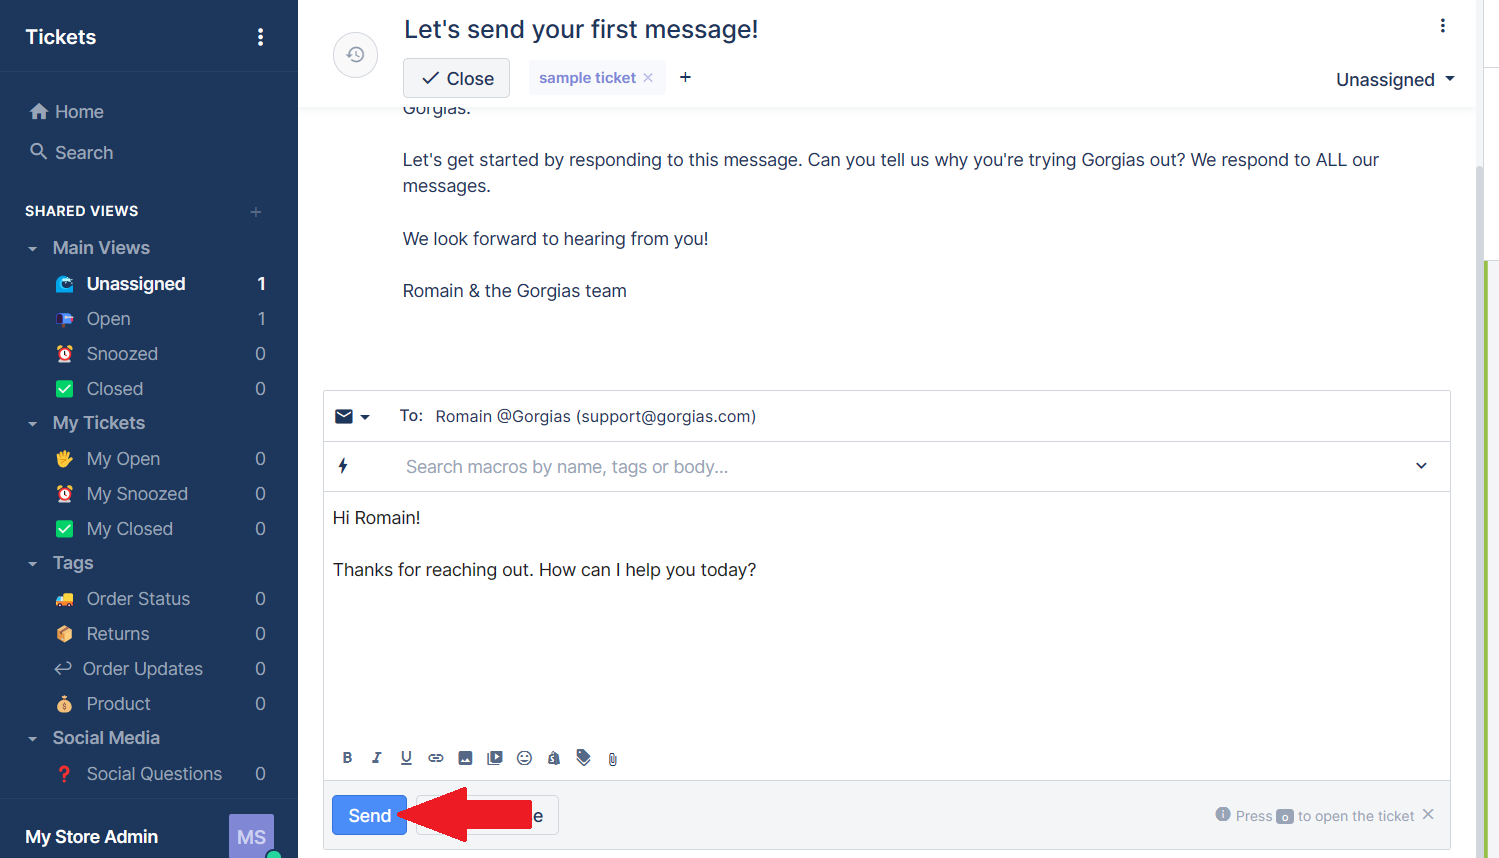
- You have successfully created a customer support message. You can send it by clicking the “Send” button.
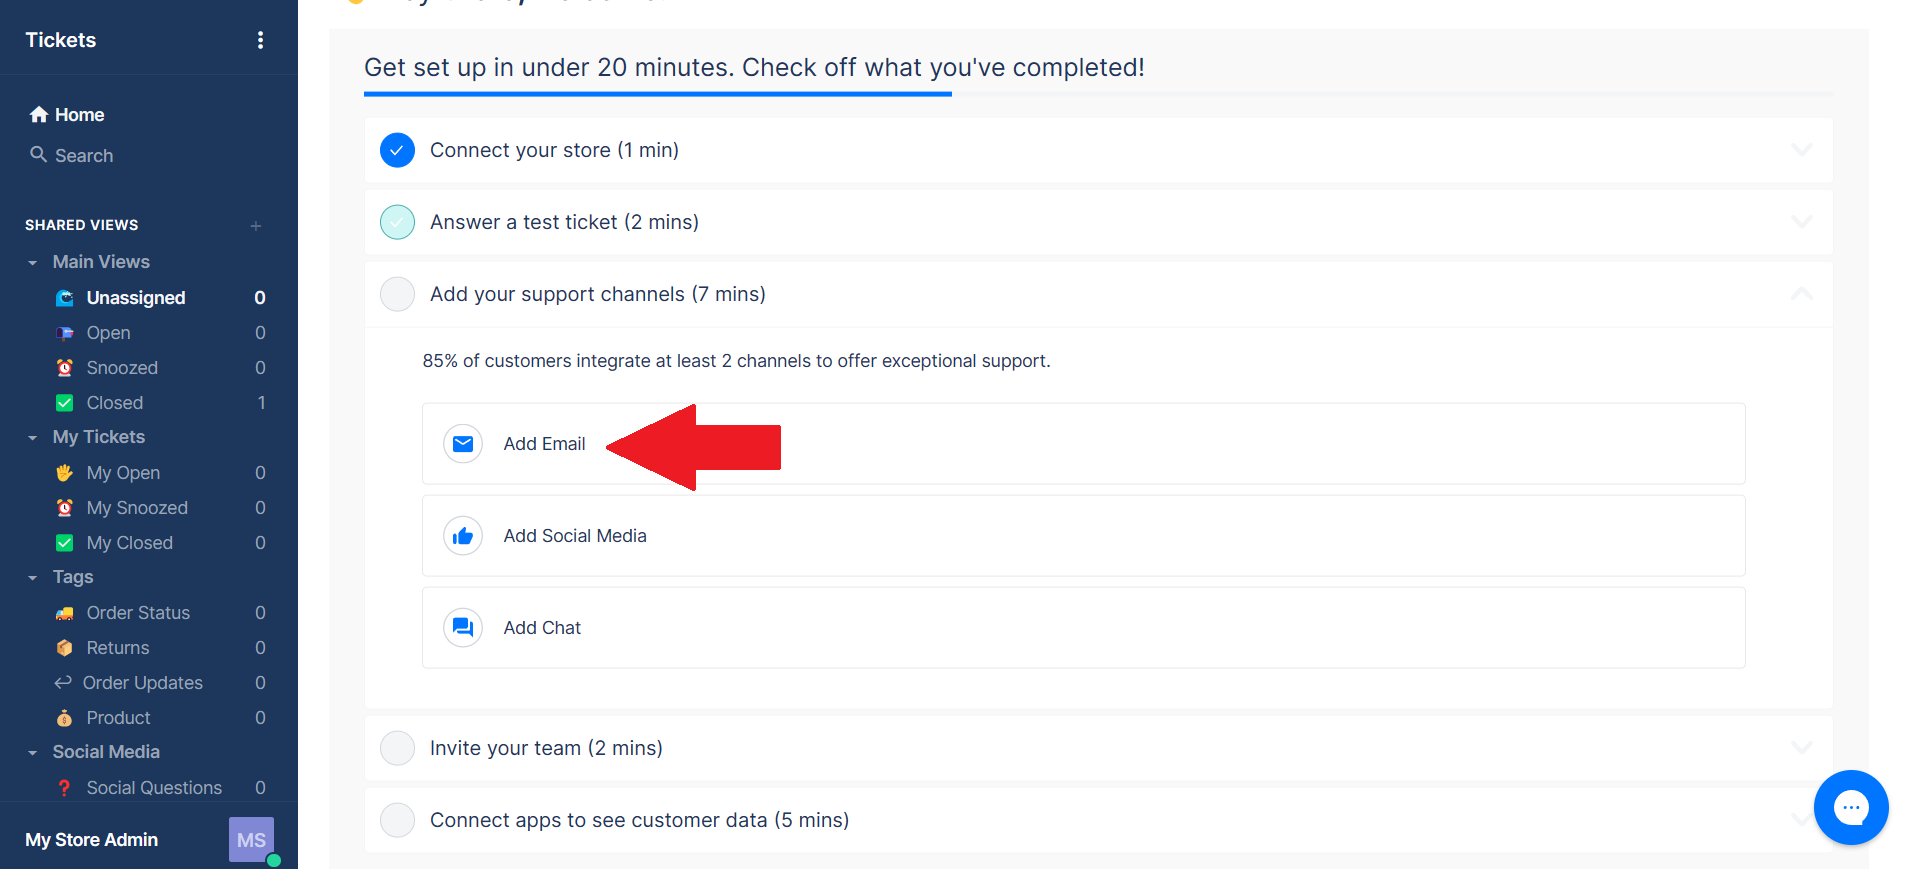
- Next step in setting up your customer support system in Gorgias is to Add your support channels. In this step, you can add either the Email, Social Media, or the Chat. To add the Email, click the “Add Email”.
- There are three options from which you can add your email address. First is the Google Email Account, next is the Office365 Email Account, and lastly, you can connect other email providers such as Yahoo Email Accounts. Click your preferred option.
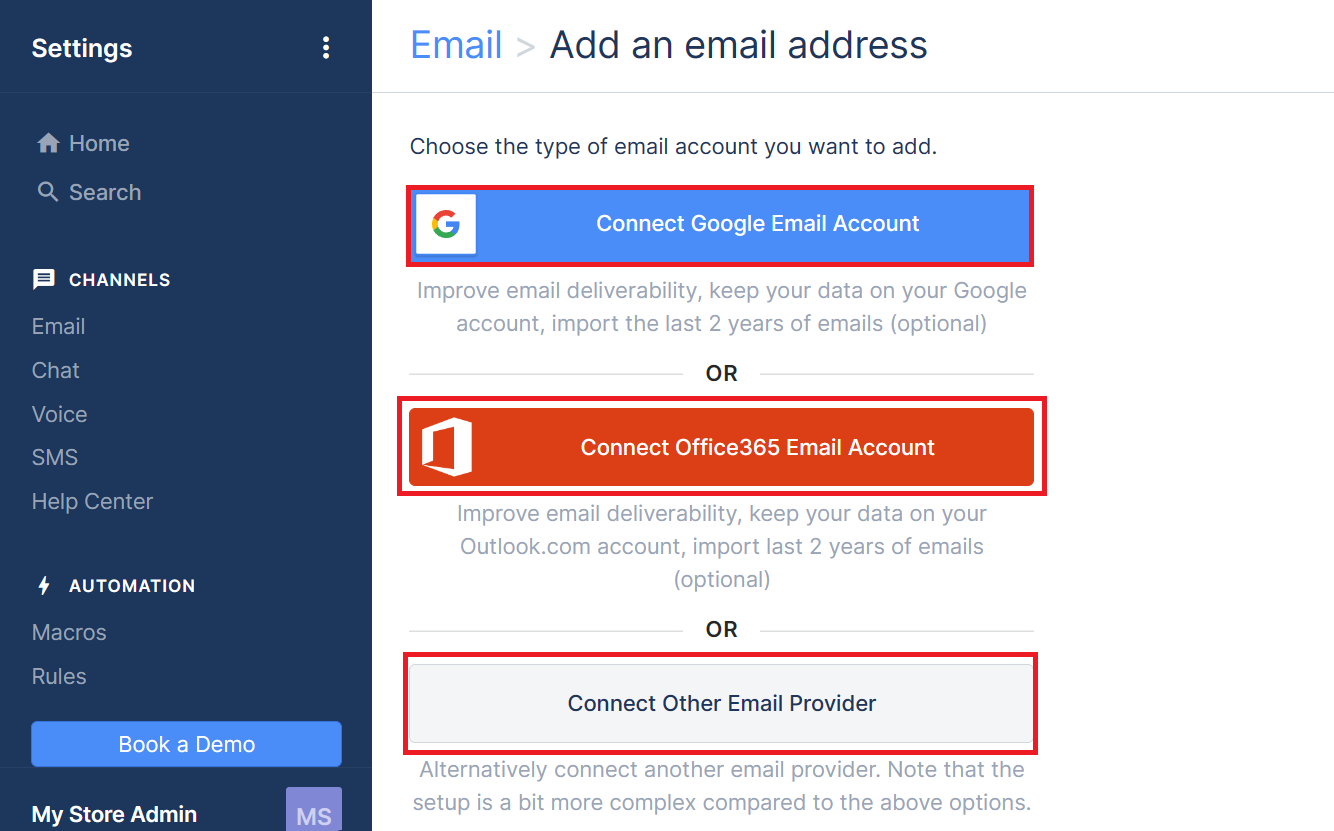
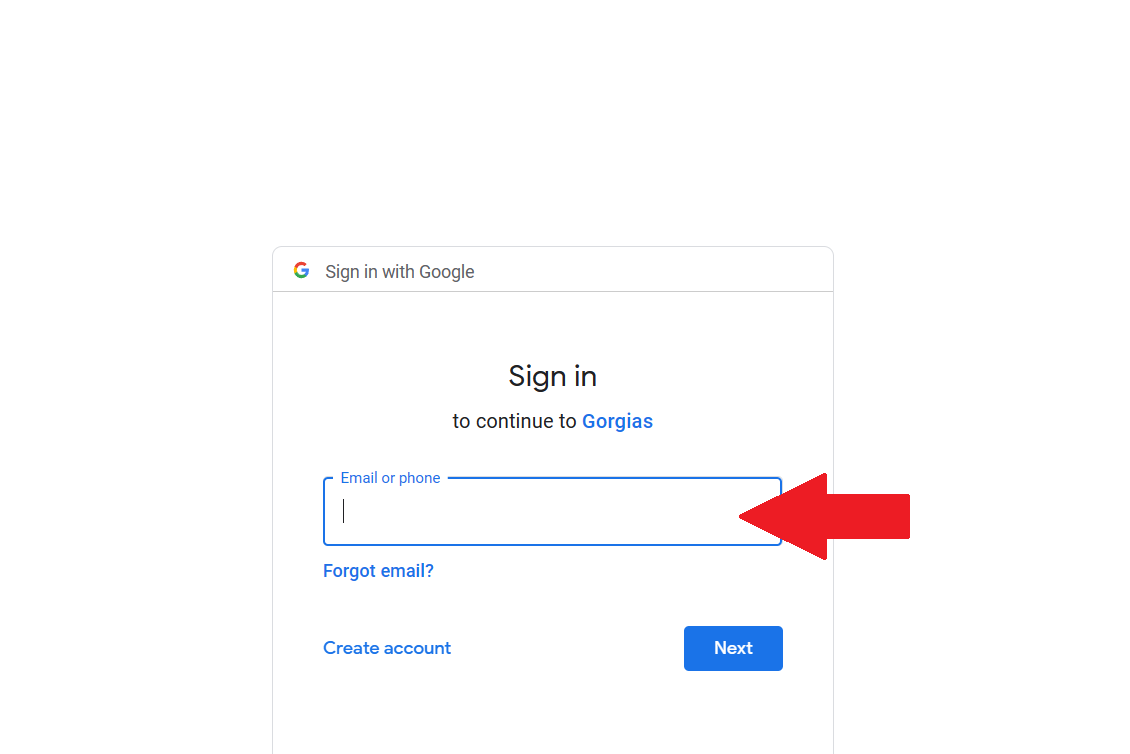
- Sign in the account that you have utilized when making your Shopify store.
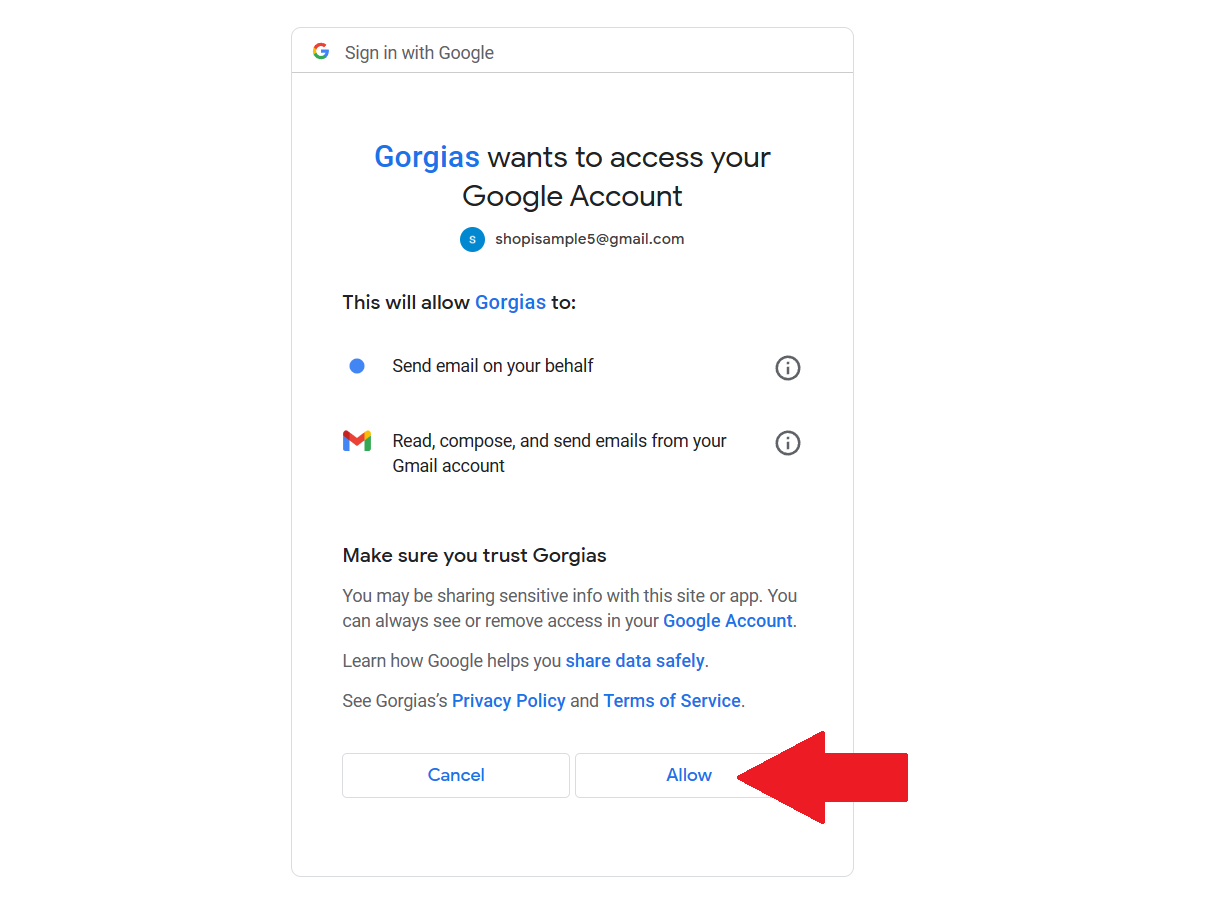
- Read the conditions for Gorgias to be able to access your Email account, because this will be used to send emails on your business’ behalf. If you want to allow the sharing of your business personal information to Gorgias, then click “Allow”.
- To add the Chat, click the “Add Chat” button.
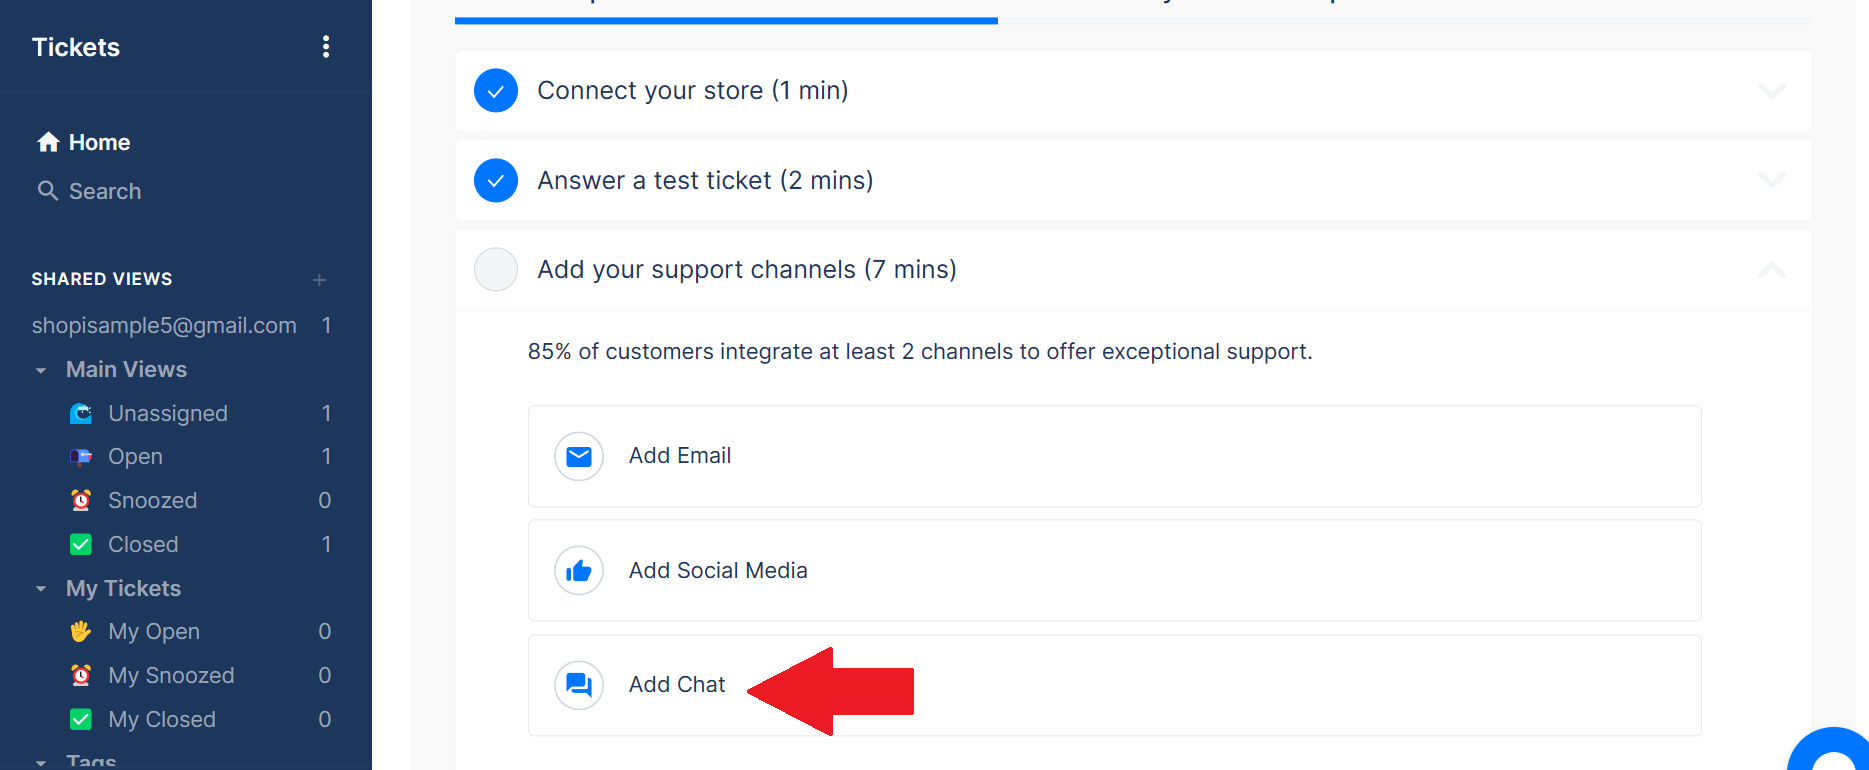
- Click the “Add Chat” button.
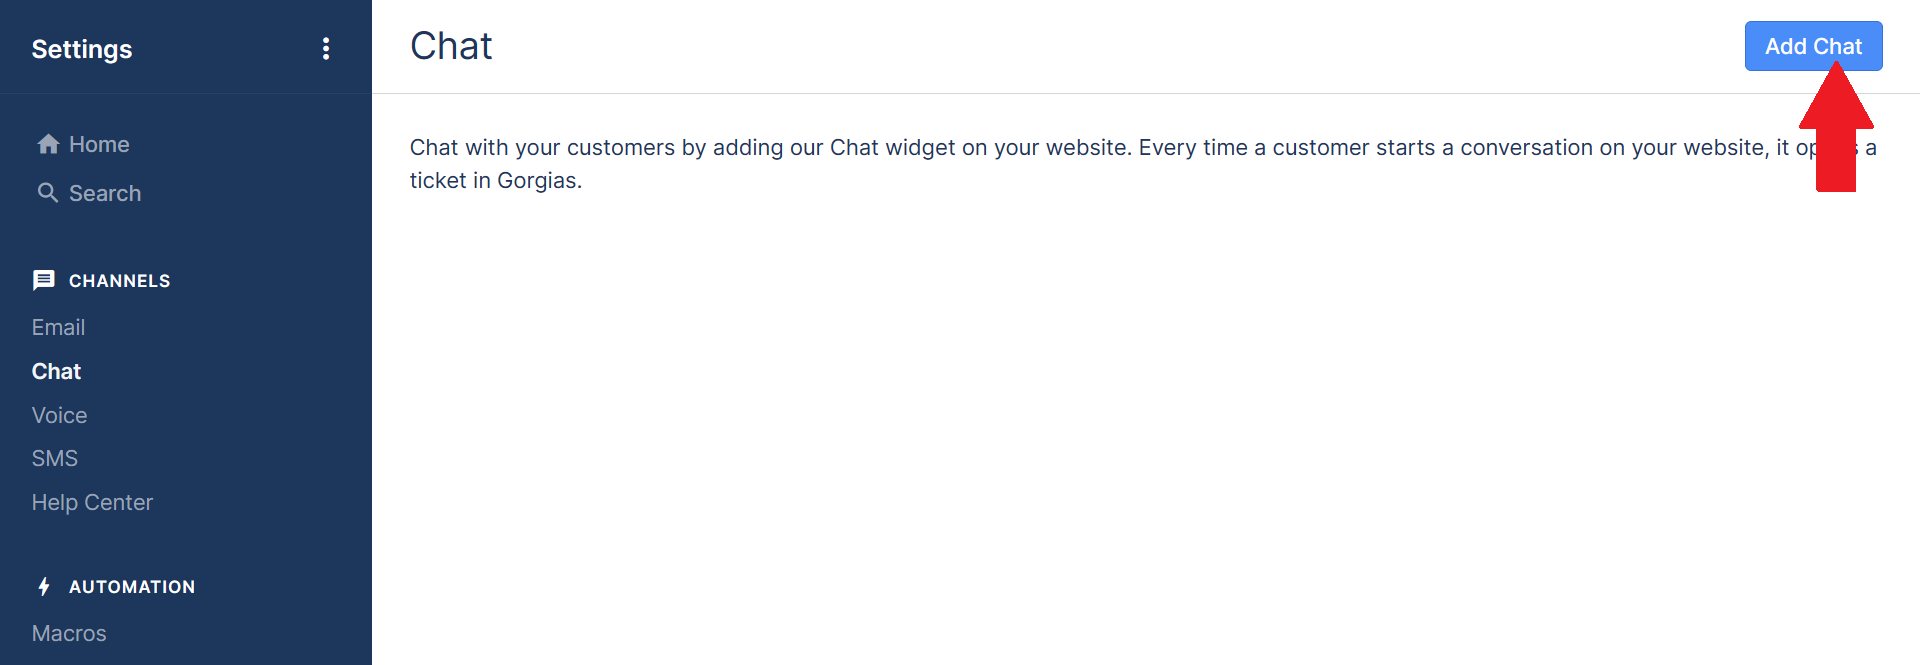
- You can now set a New chat integration. Here, you will be able to send automatic messages when a customer chats with an inquiry. Click During Business Hours and set the chat integration in Shopify store.
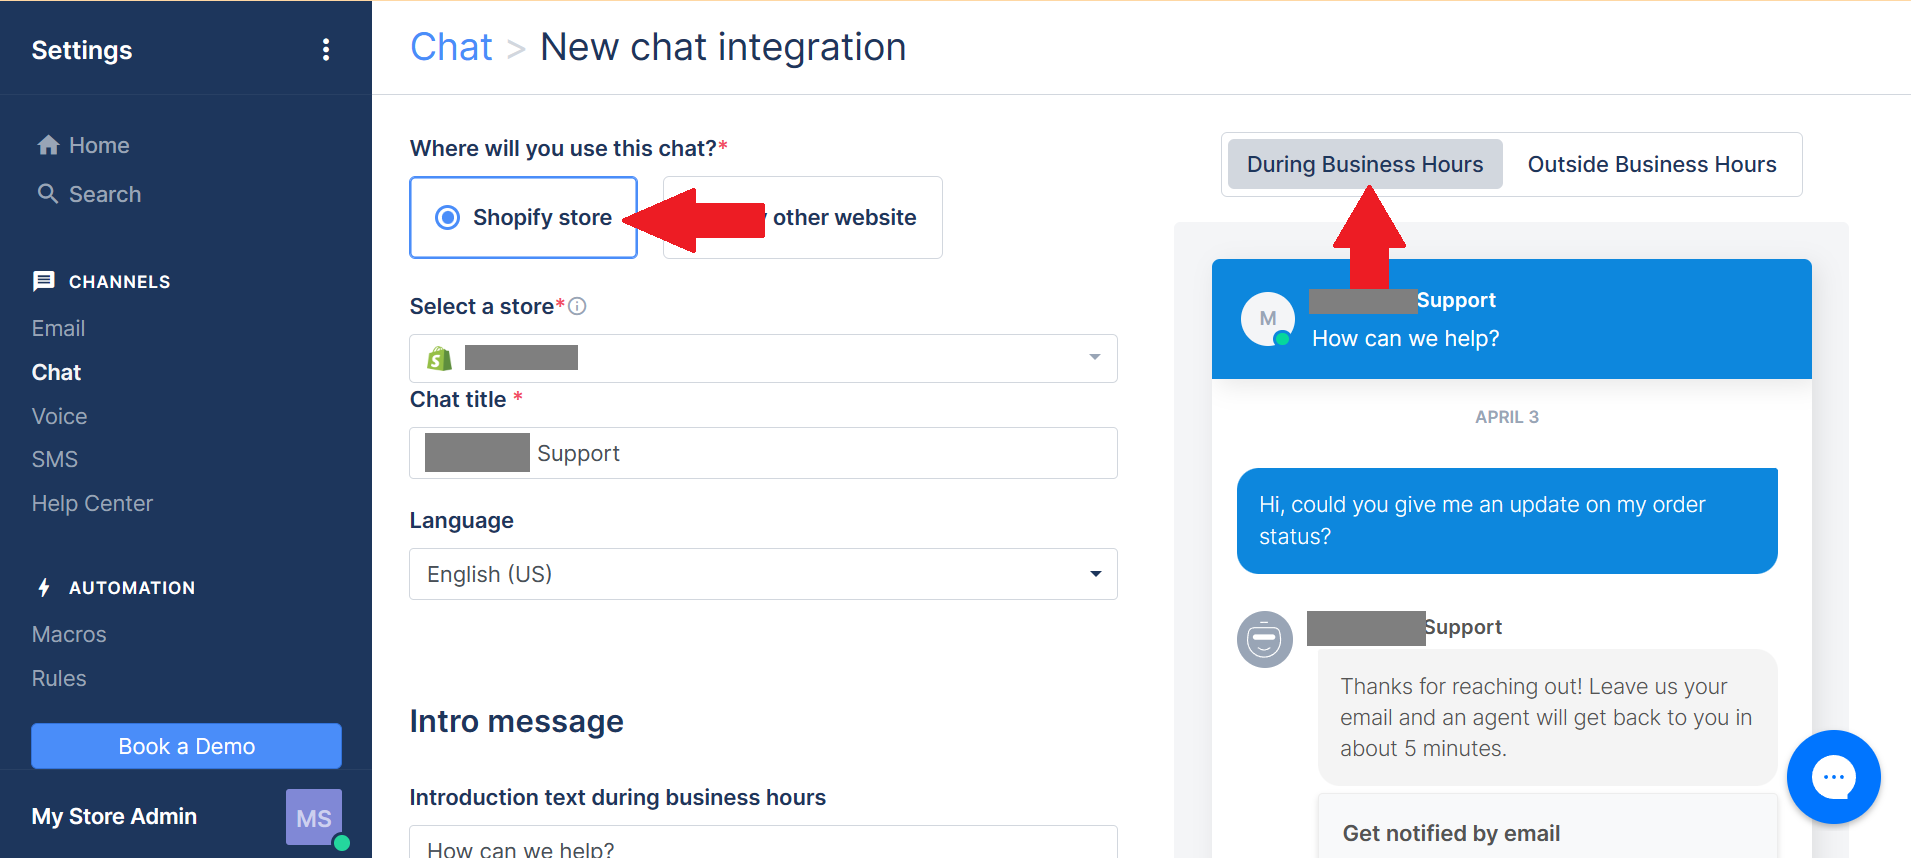
- Select the Shopify store, and edit the Chat title as well as the language. If you are based internationally, it is best to use English (US). To change the language, click the dropdown menu under it and click your preferred language.
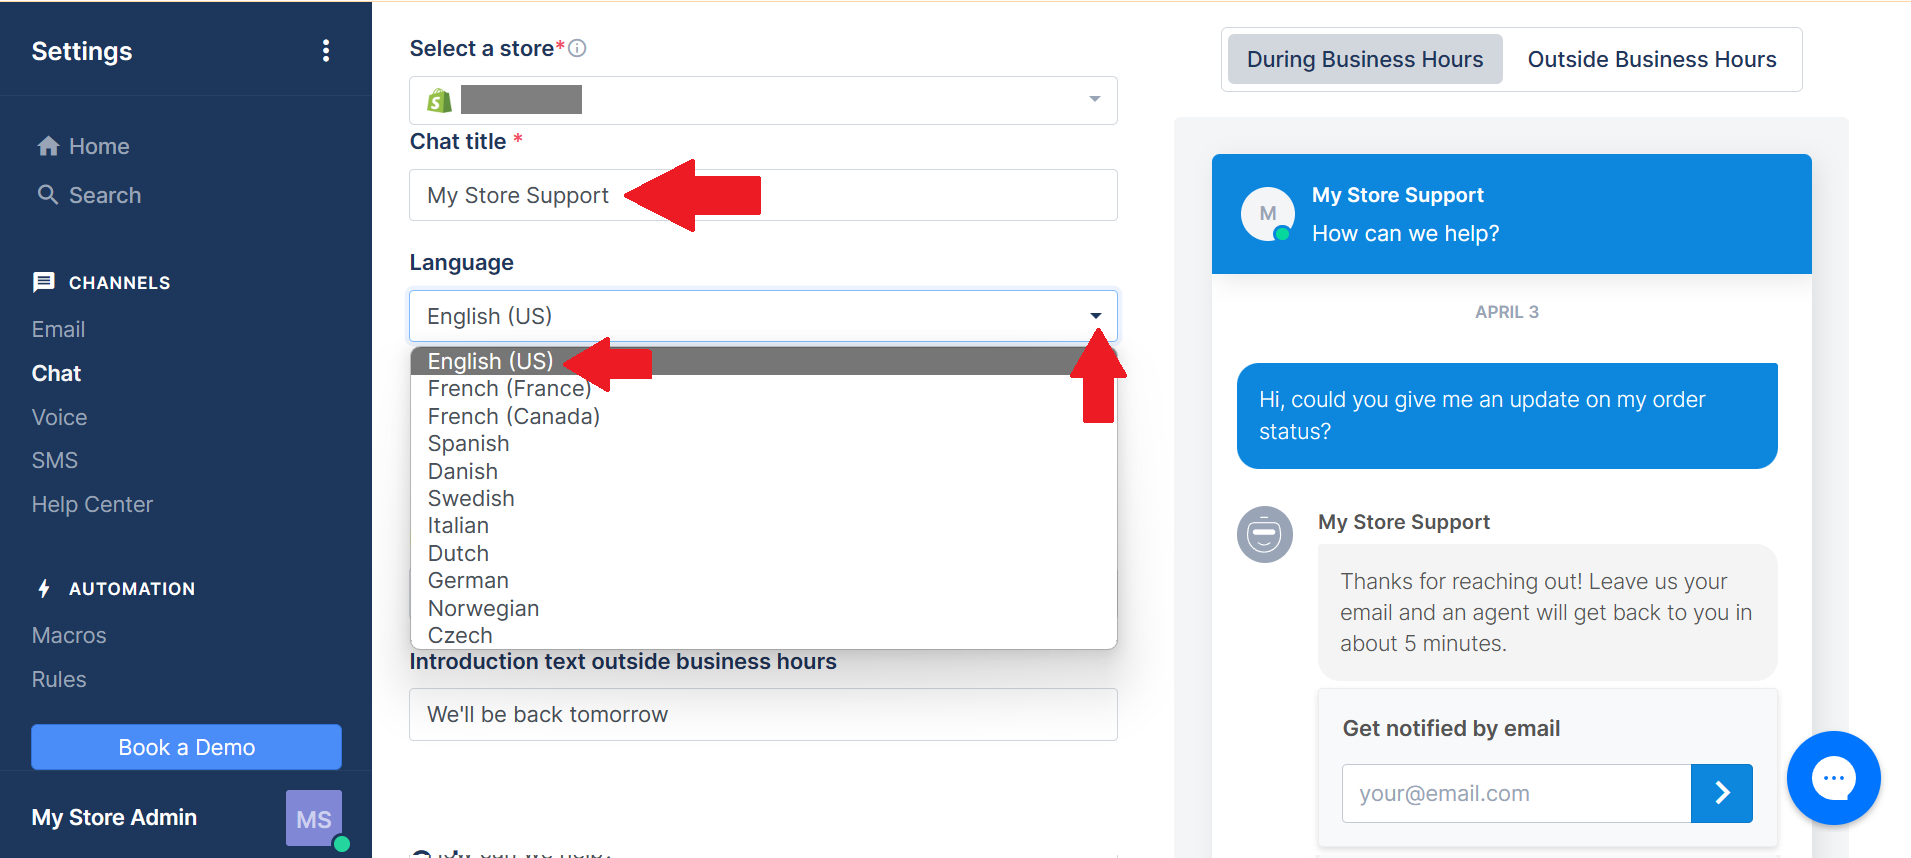
- It is necessary to set an introductory message to greet your clients whenever they opt to chat with your customer support. Edit these messages under the Intro message, and click in the fields allotted for it. NOTE: There must be different intro messages during and outside business hours to notify your customers that there might be delay on your reply.
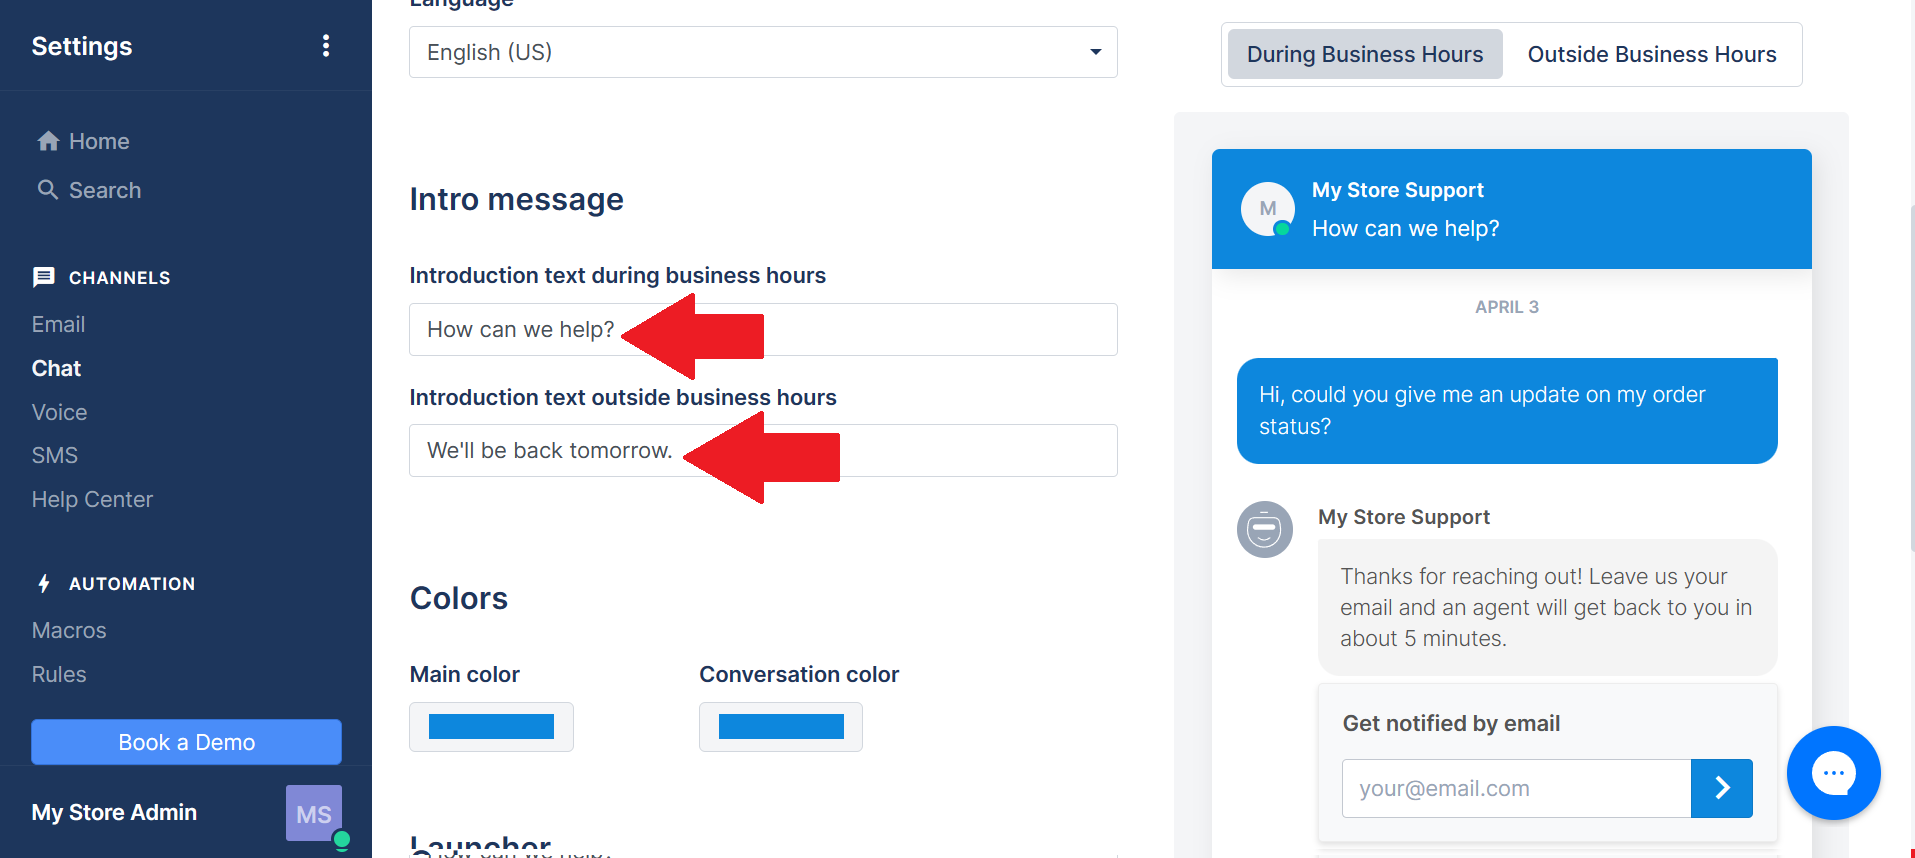
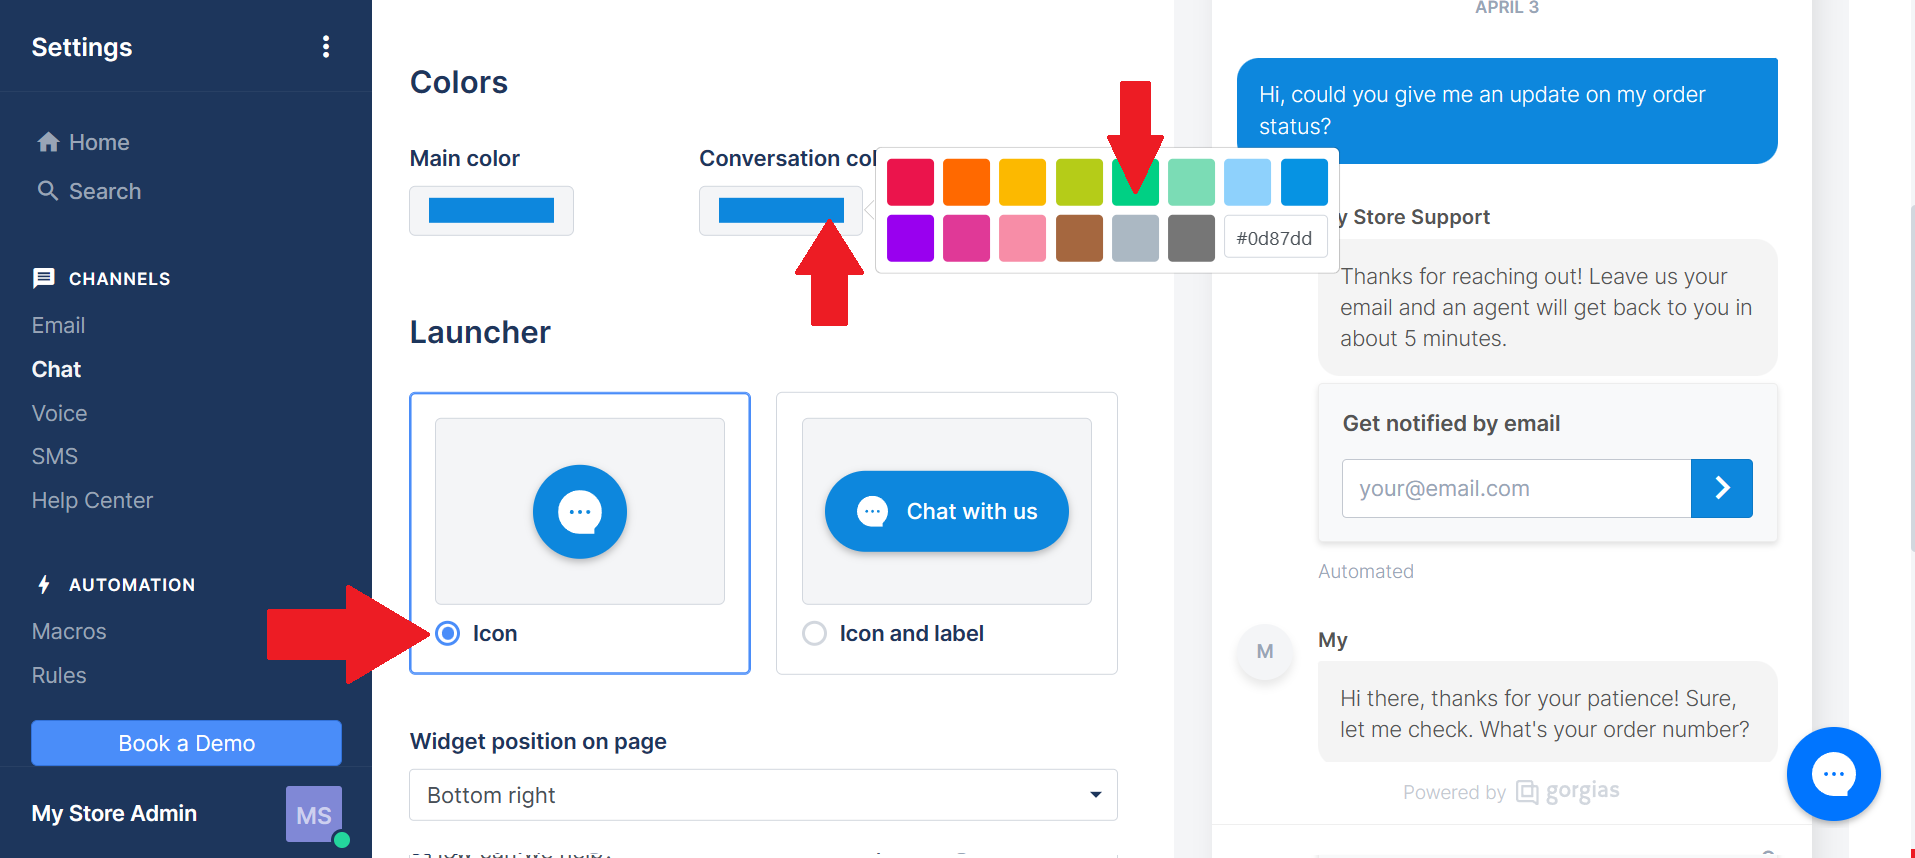
- You can also modify the Main and Conversation colors of the chat display by clicking it and choosing from the selection of colors. The Launcher is the icon or icon with a label that a customer may click if they want to chat with customer support in your store. Click your preferred Launcher.
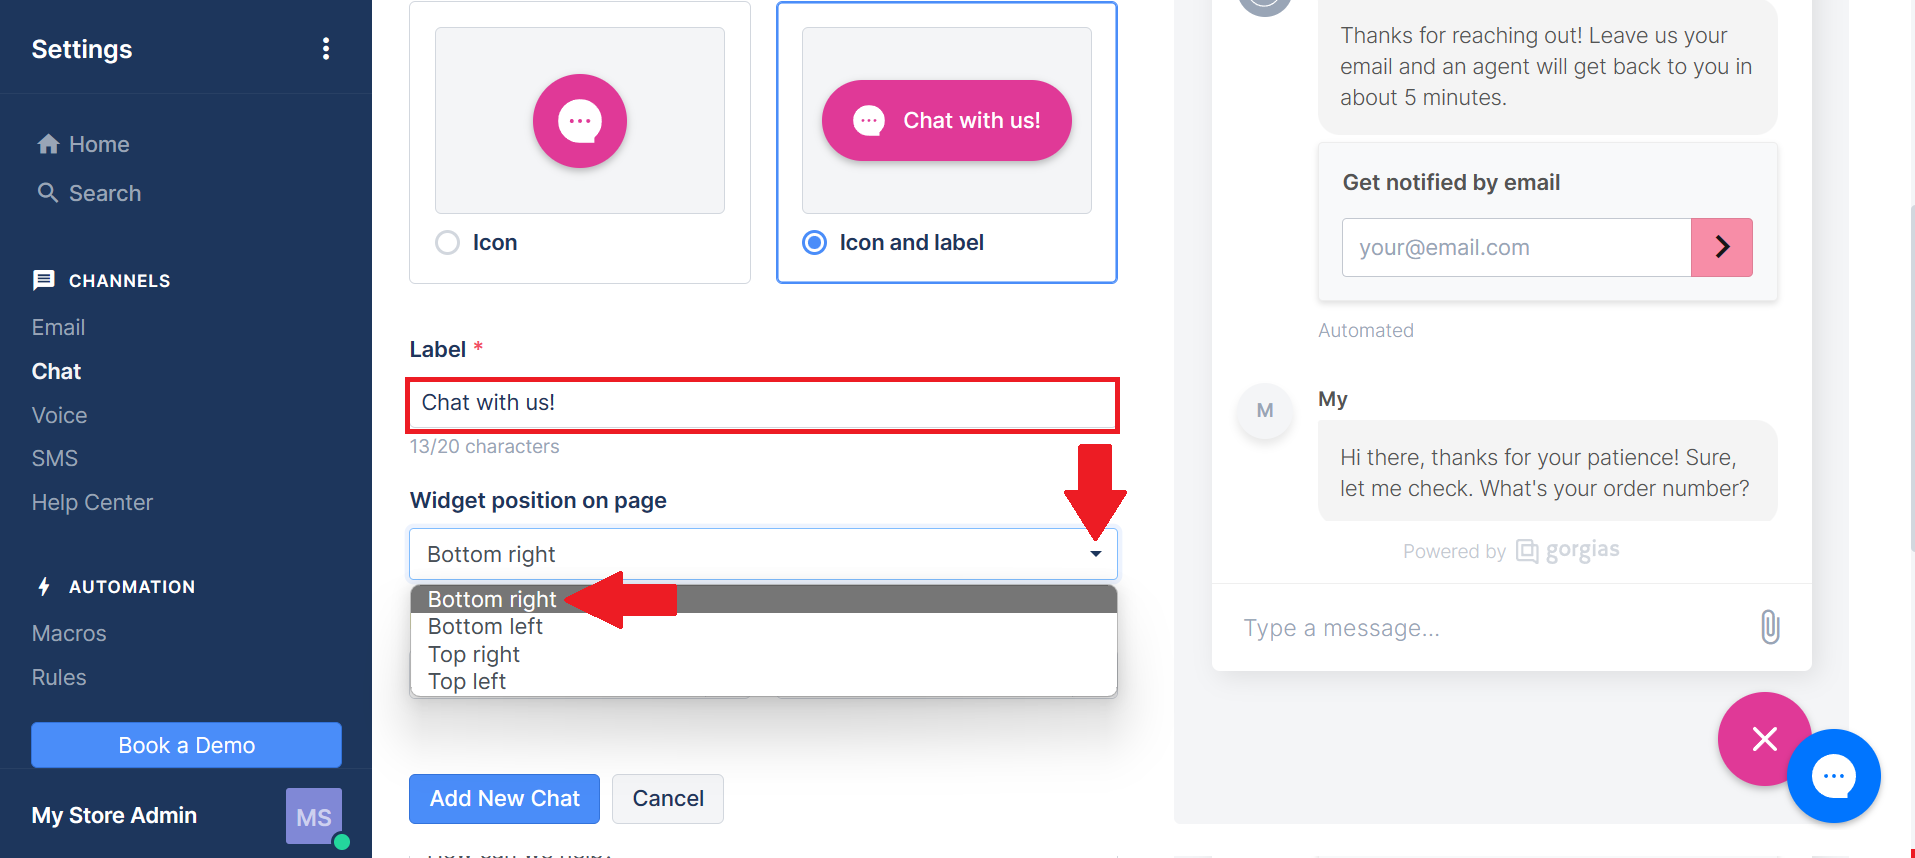
- In addition to the Launcher settings, you can also edit the label for it and its widget position on the page. Edit the label by clicking the field under it and choose the widget position after clicking the dropdown menu.
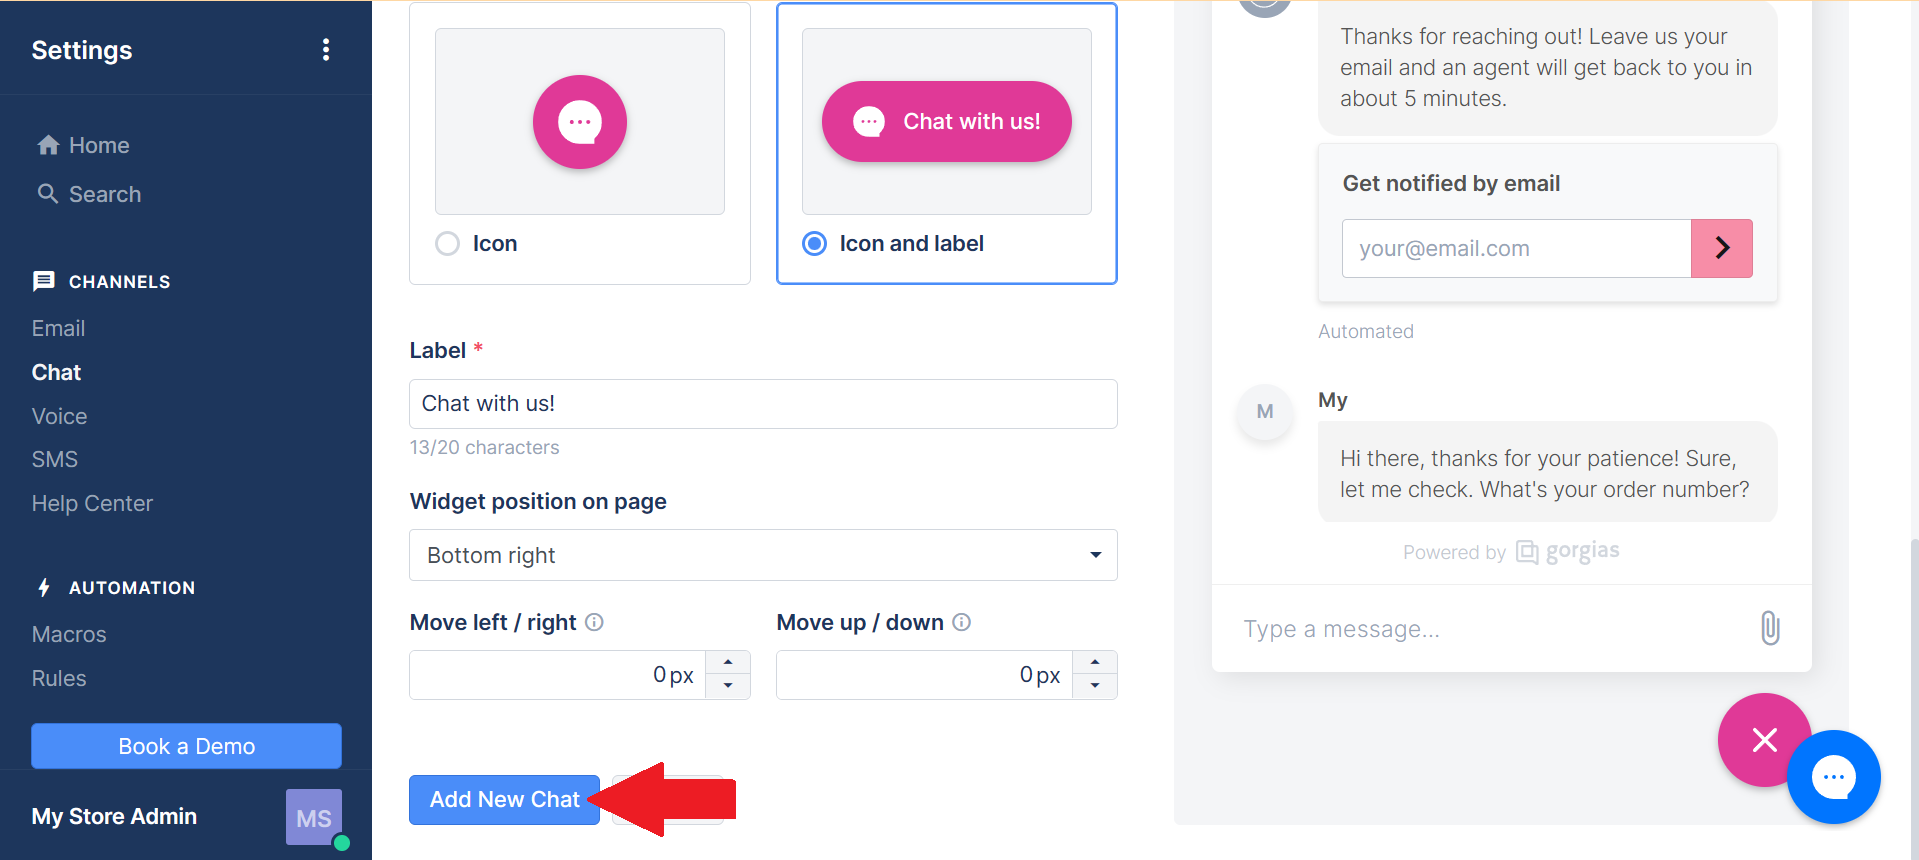
- After finalizing the information, click the “Add New Chat” to save your preferences.
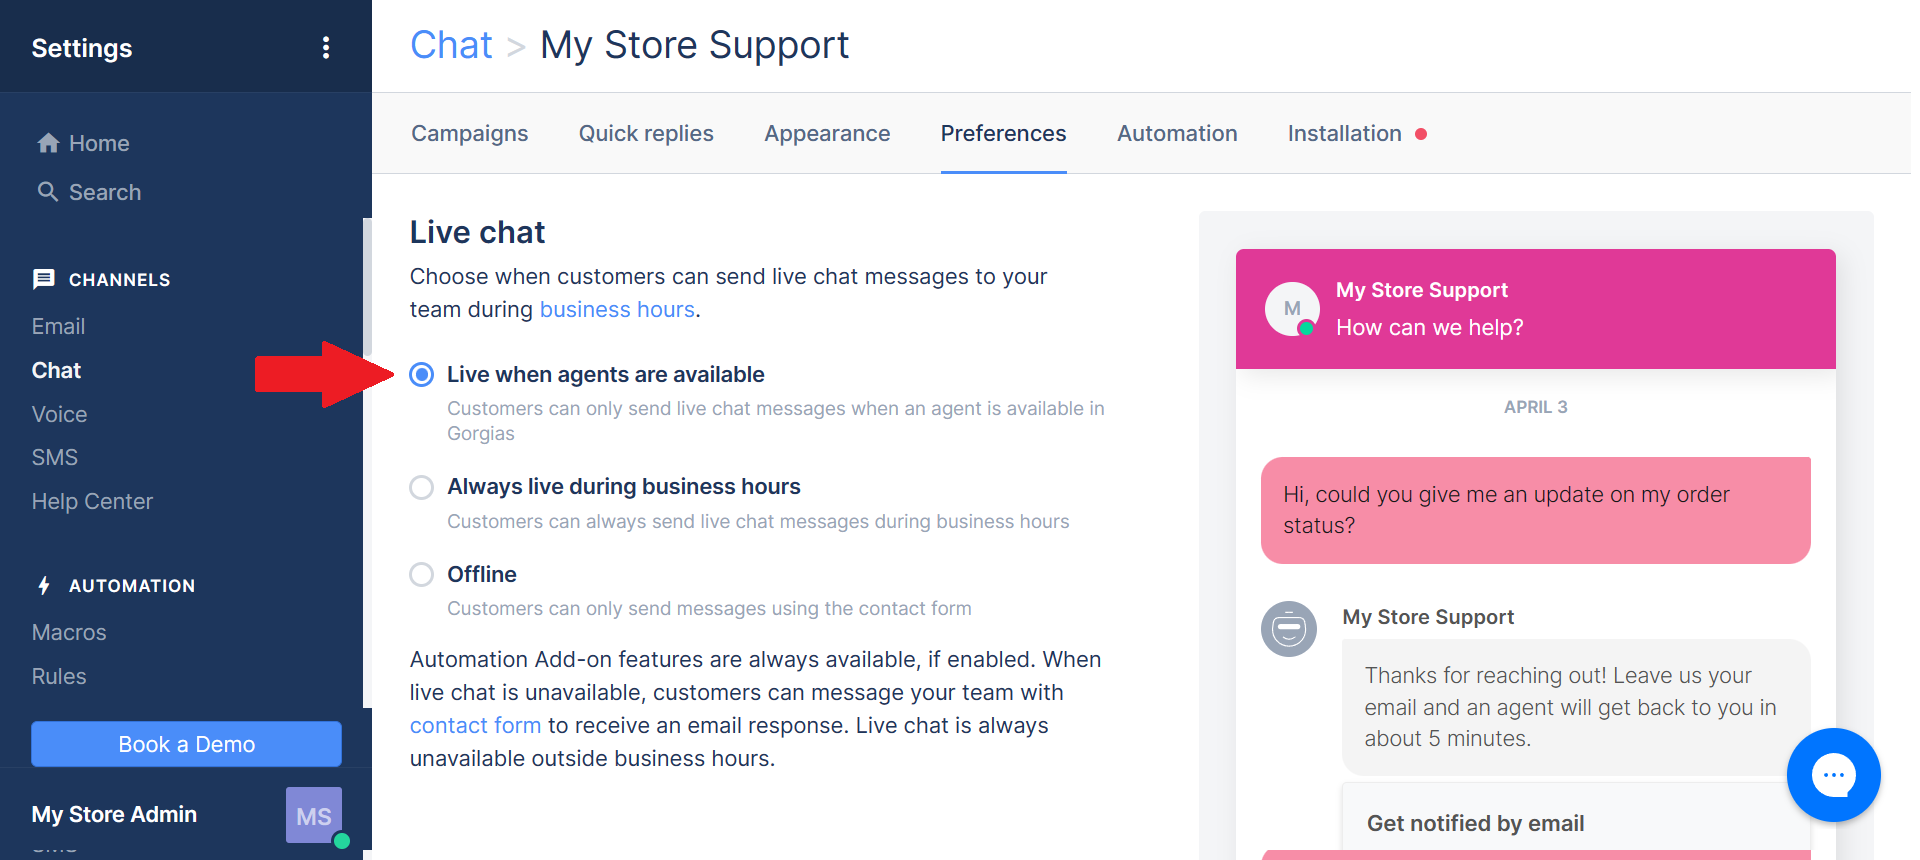
- In addition to the layout, you can also change the settings of the Live chat through Preferences. You can go live when agents are available or you can go live during business hours. Click the circle beside the option to choose it.
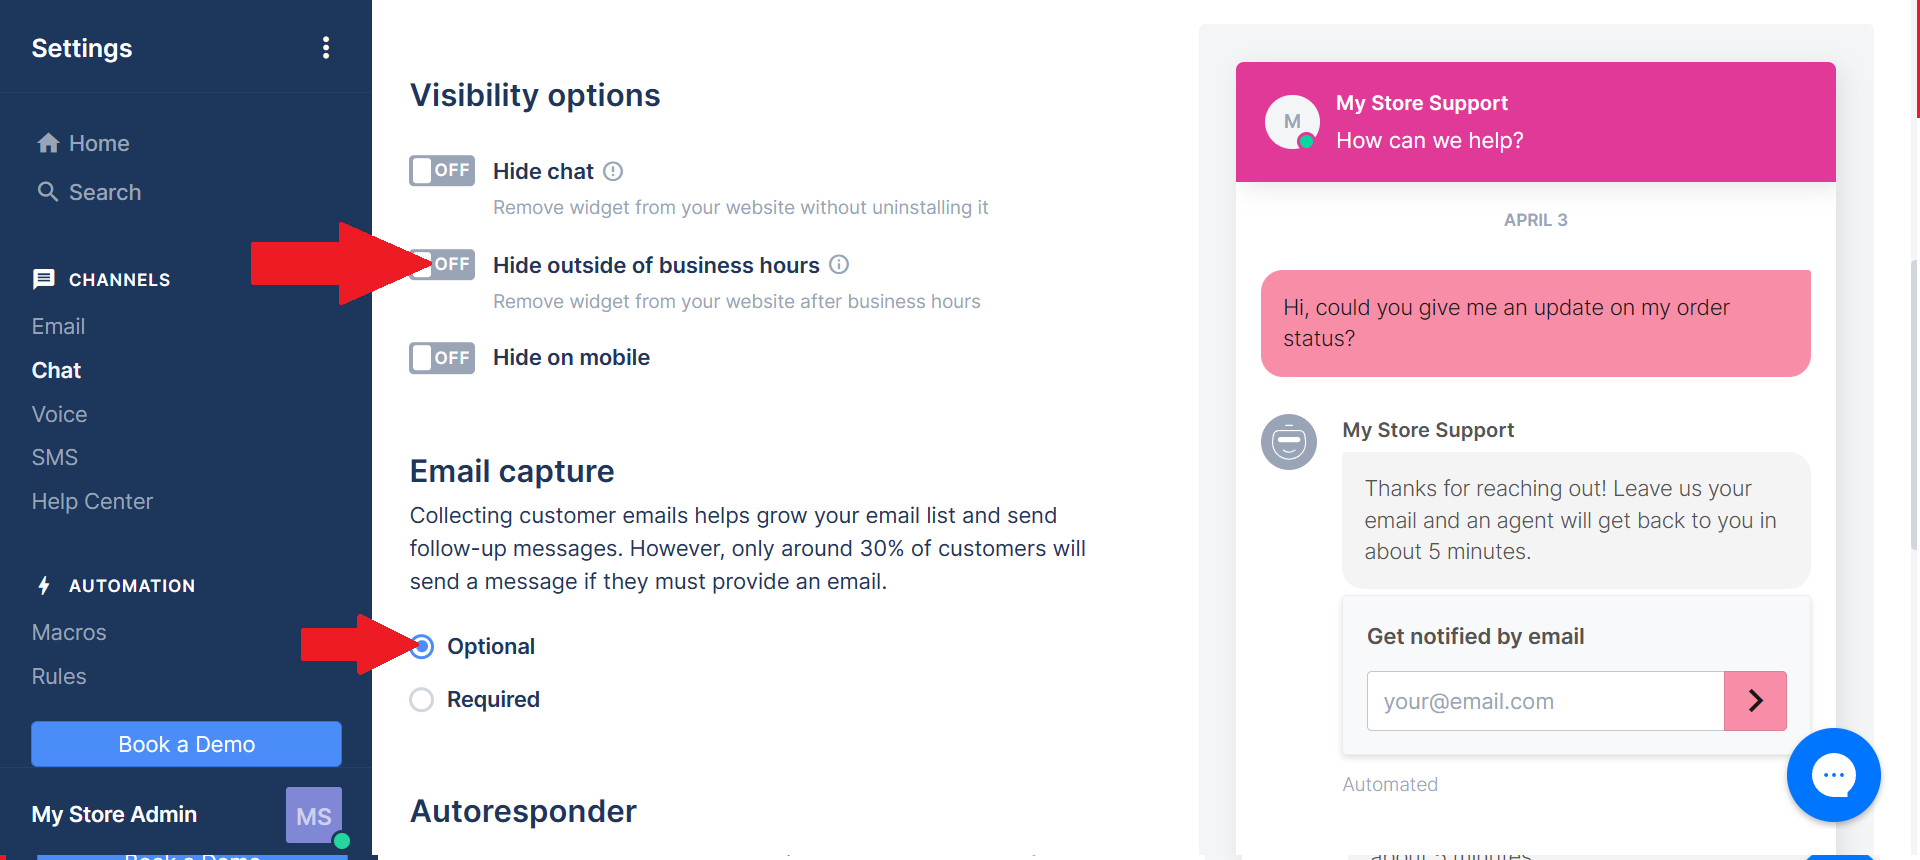
- Next is the Visibility options and the Email capture. Visibility options allow you to Hide chat, Hide widget outside of business hours, and Hide widget on mobile. To activate it, click the toggle on. Collecting emails through Email capture can be required or optional, so choose whether it is necessary to collect for your business.
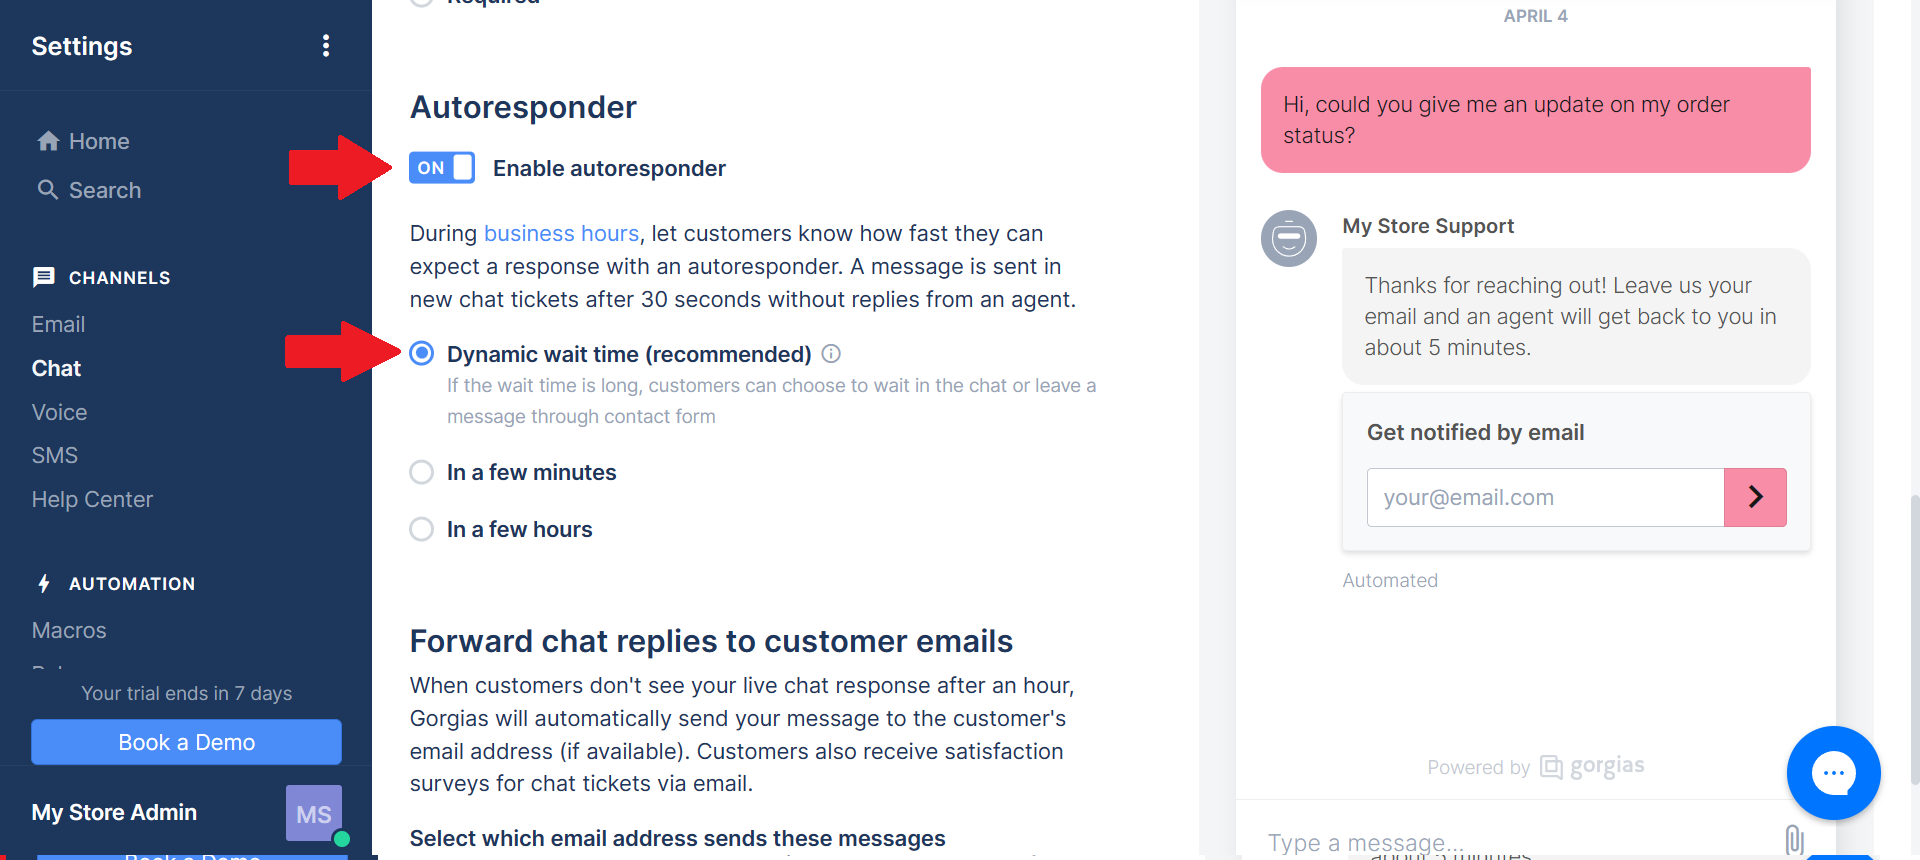
- Next is the Autoresponder which you can enable by toggling on. You can also choose an autoresponder time when your customers will be replied with in estimation. You can set it in a few minutes or hours, or you can also set a dynamic waiting time.
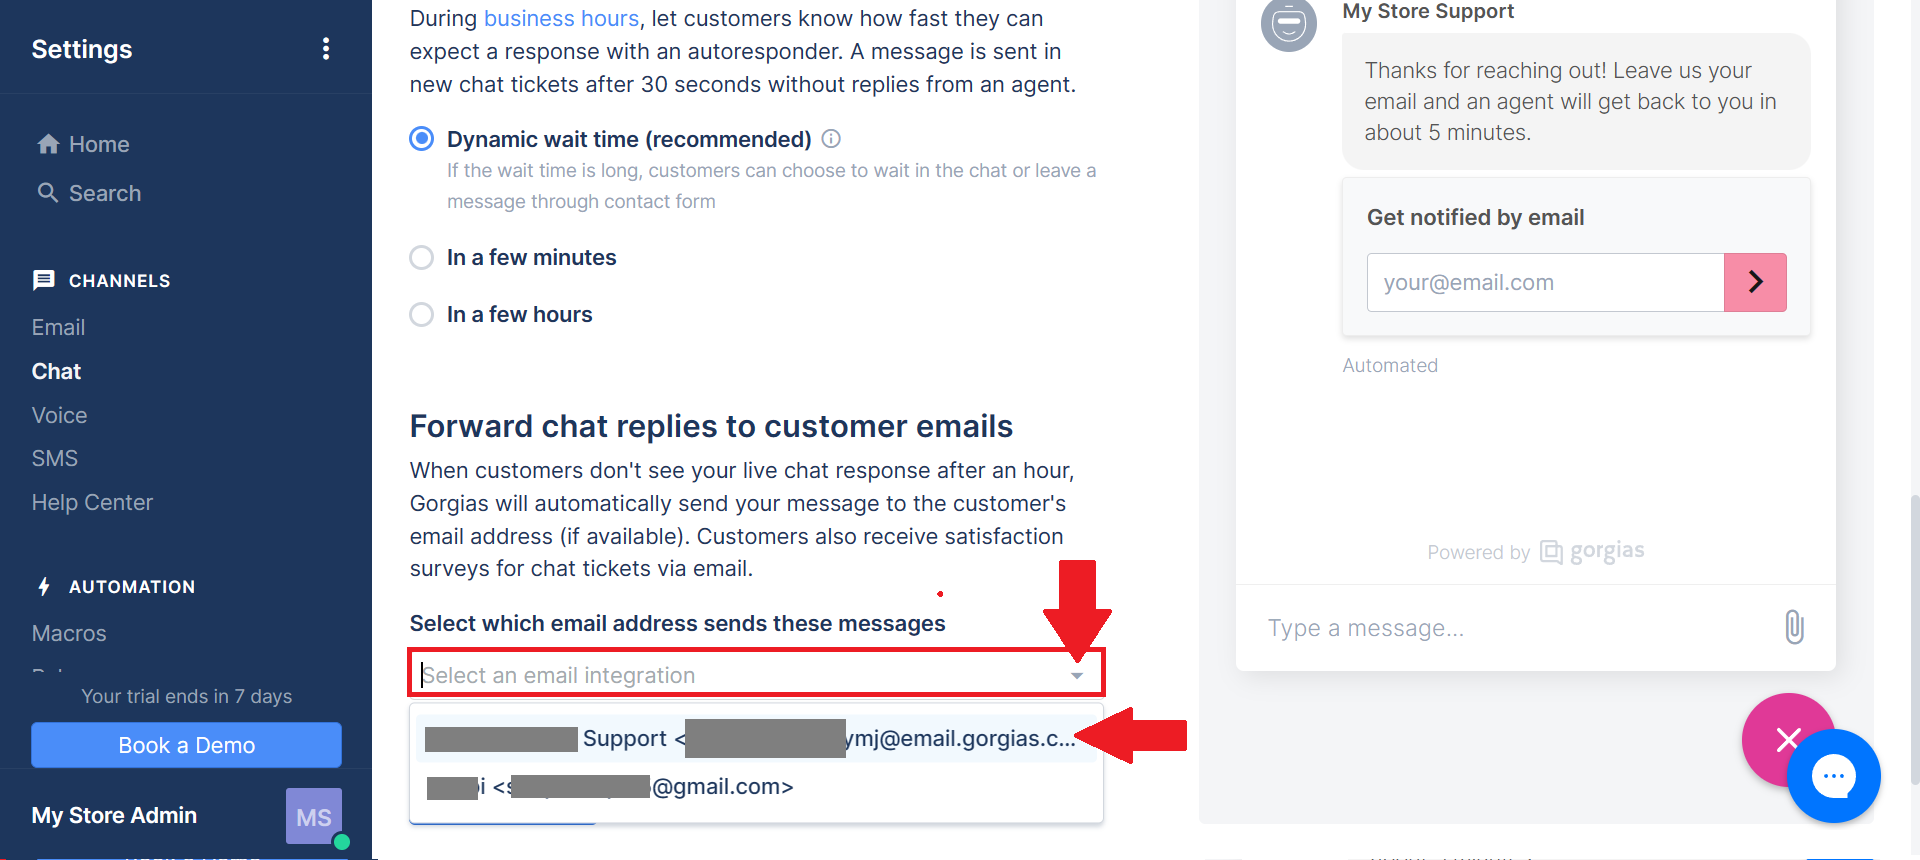
- Lastly, forward chat replies to customer emails can be set up by selecting the email address to be utilized in sending the automated and manual customer support messages. Edit this by clicking the dropdown menu and choosing among the options.
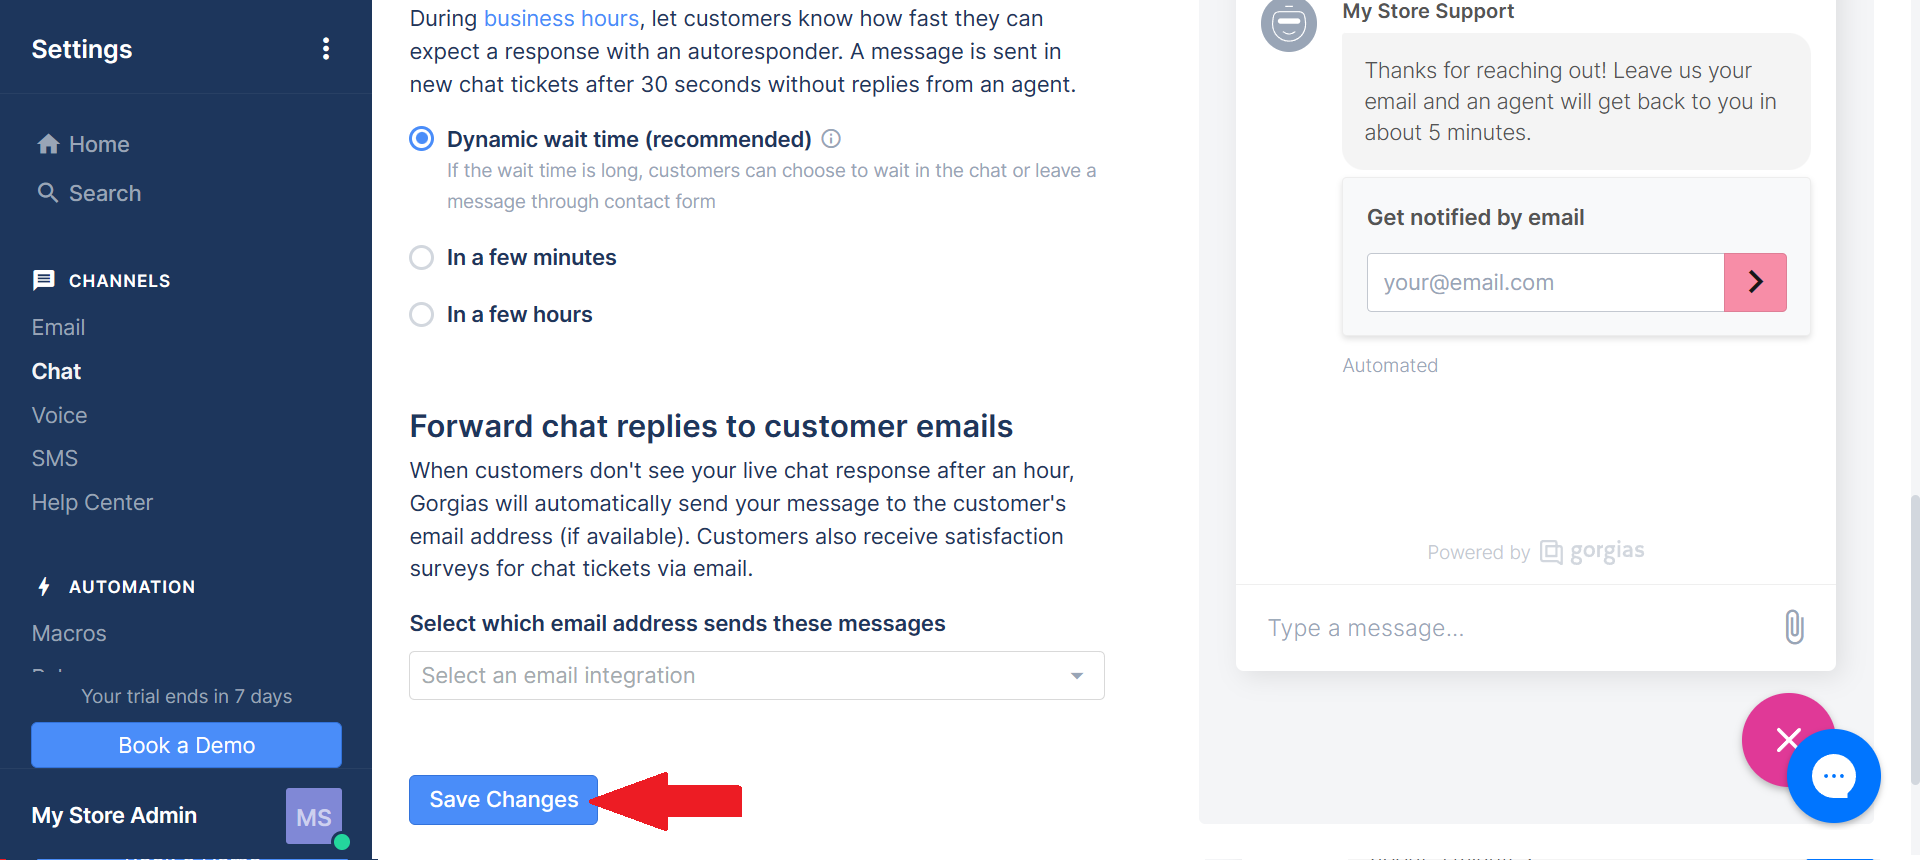
- To save these settings in your customer support messaging, click “Save Changes”.
Conclusion
You’re done! Always remember that setting up customer support is helpful especially in retaining customers for your business. A company that is known to bring great experience to its customers will always keep its loyal customers and bring new ones which leads to inducing sales and brand recognition.
-
To set up customer support with Gorgias, you must have an account in Shopify and an access to Shopify store so that you can install Gorgias. You can bind Gorgias into Shopify and other selling platforms such as Magento as indicated in their app.
-
From icons, content messages, and color of the chatbox, you may customize features on Gorgias that would encourage customers to click and seek answers to their inquiry about your business products.
-
There are additional settings regarding the responding system of the software, where you can revise and analyze every chat from the customer and how your automated reply would be.
-
You can set different message replies for during business hours and outside business hours to inform your customers of your availability to answer their questions.