Adding Instagram to the Messenger Channel in Shopify Inbox
To guide you in a step-by-step process on adding your business' Instagram to the Messenger Channel in your Shopify Inbox.
Prefer a shortcut? 16 free tools do parts of this for you.

Aim: To guide you in a step-by-step process on adding your business' Instagram to the Messenger Channel in your Shopify Inbox.
Optimal Outcome: By adding Instagram, you will be able to utilize the maximum capacity of the Messenger Channel app to your Shopify store because it provides you with an organized platform where you can monitor the progress of your accounts for your business.
What do you need to start: To follow this SOP, you will need to have an account and Shopify and access to the Messenger Channel and Shopify Inbox, which you can install from the Shopify App Store. You will also need to have an account in Instagram, specifically created for your business.
Why is this SOP Important: When the Messenger for Instagram in the Messenger Channel is connected to the Shopify Inbox, you will be able to view, send, and receive messages in your Instagram business account using the Shopify Inbox. Activating this feature allows you to navigate through your Instagram messages without the additional steps and track it.
When and Where to execute: This SOP is executed if you want to be able to use your Shopify Inbox to use the Messenger to Instagram feature to manage your business' inquiries and feedback regarding your products.
Who Should Be Doing This: This should be done by the customer support team or representative from your company.
Instagram Messenger Channel
The connection between Shopify Inbox and Instagram account through the Instagram Messenger Channel allows your business to send and receive messages regarding your business in a timely and productive manner through the utilization of Shopify Inbox. By completing the steps on adding this feature, you can improve customer support by regularly replying to your customers in Instagram. This includes the story replies and mentions for your business where you can easily send item links directly.
Execution
Resources/Tools & Set up
-
Professional Instagram Account
-
Shopify App Store
Installing Shopify Inbox
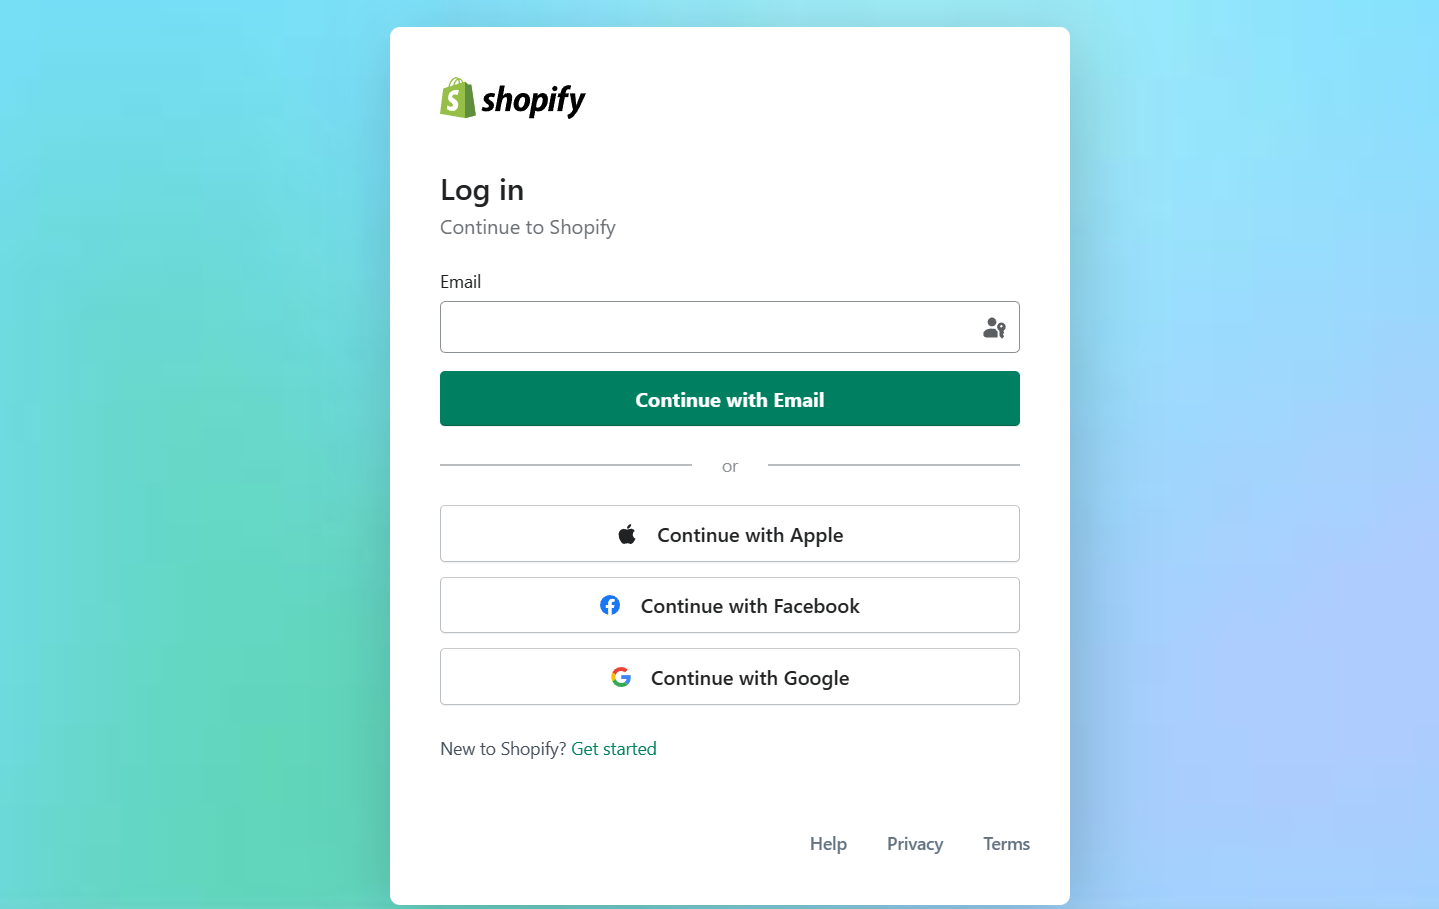
- Log in to your business Shopify account using either your email, Apple, Facebook, or Google account.
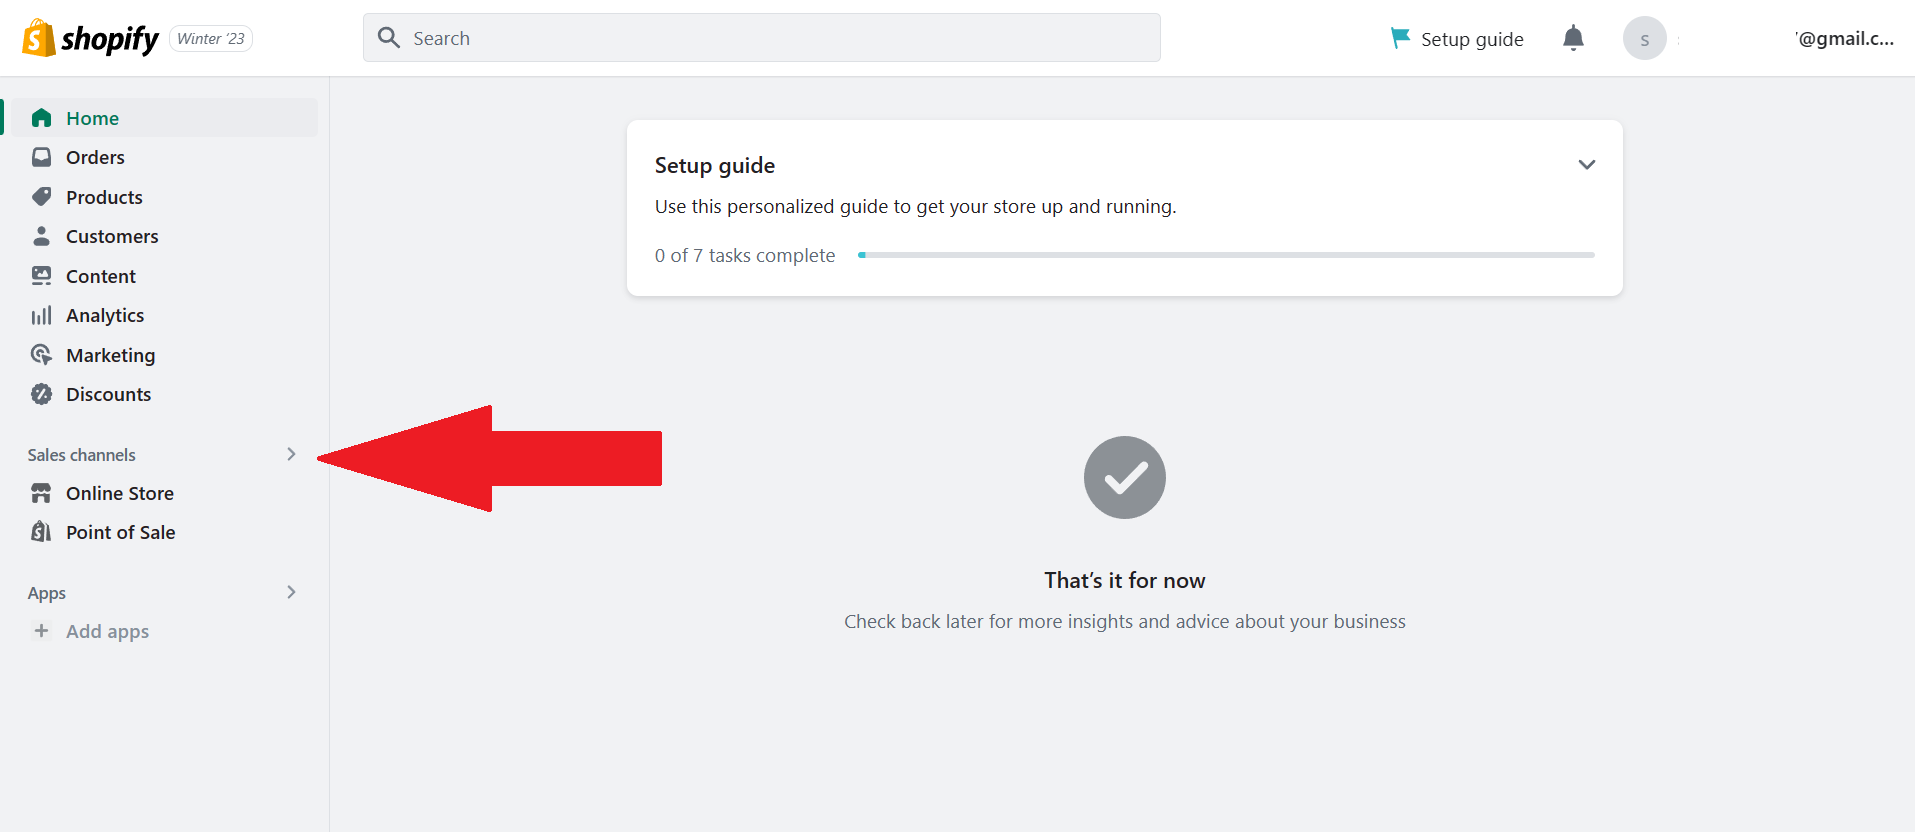
- In the Dashboard located on the left side, click on “Sales Channels” that is located on the left side of the site.
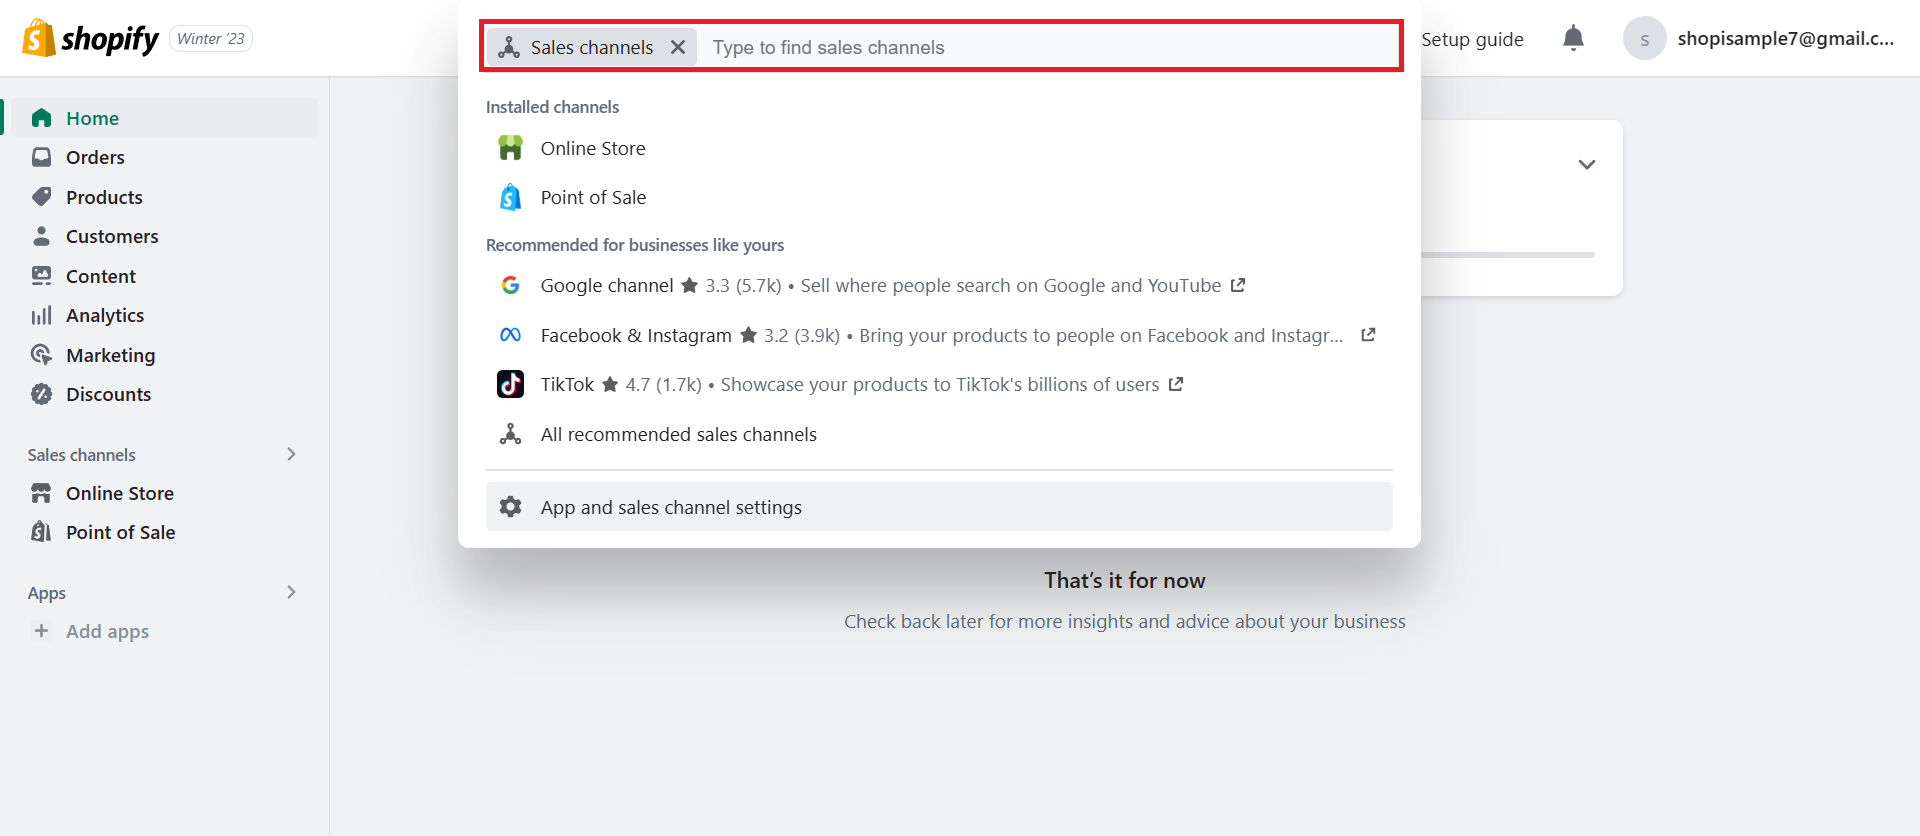
- A filtered search bar will appear. Type “Shopify Inbox” in this field.
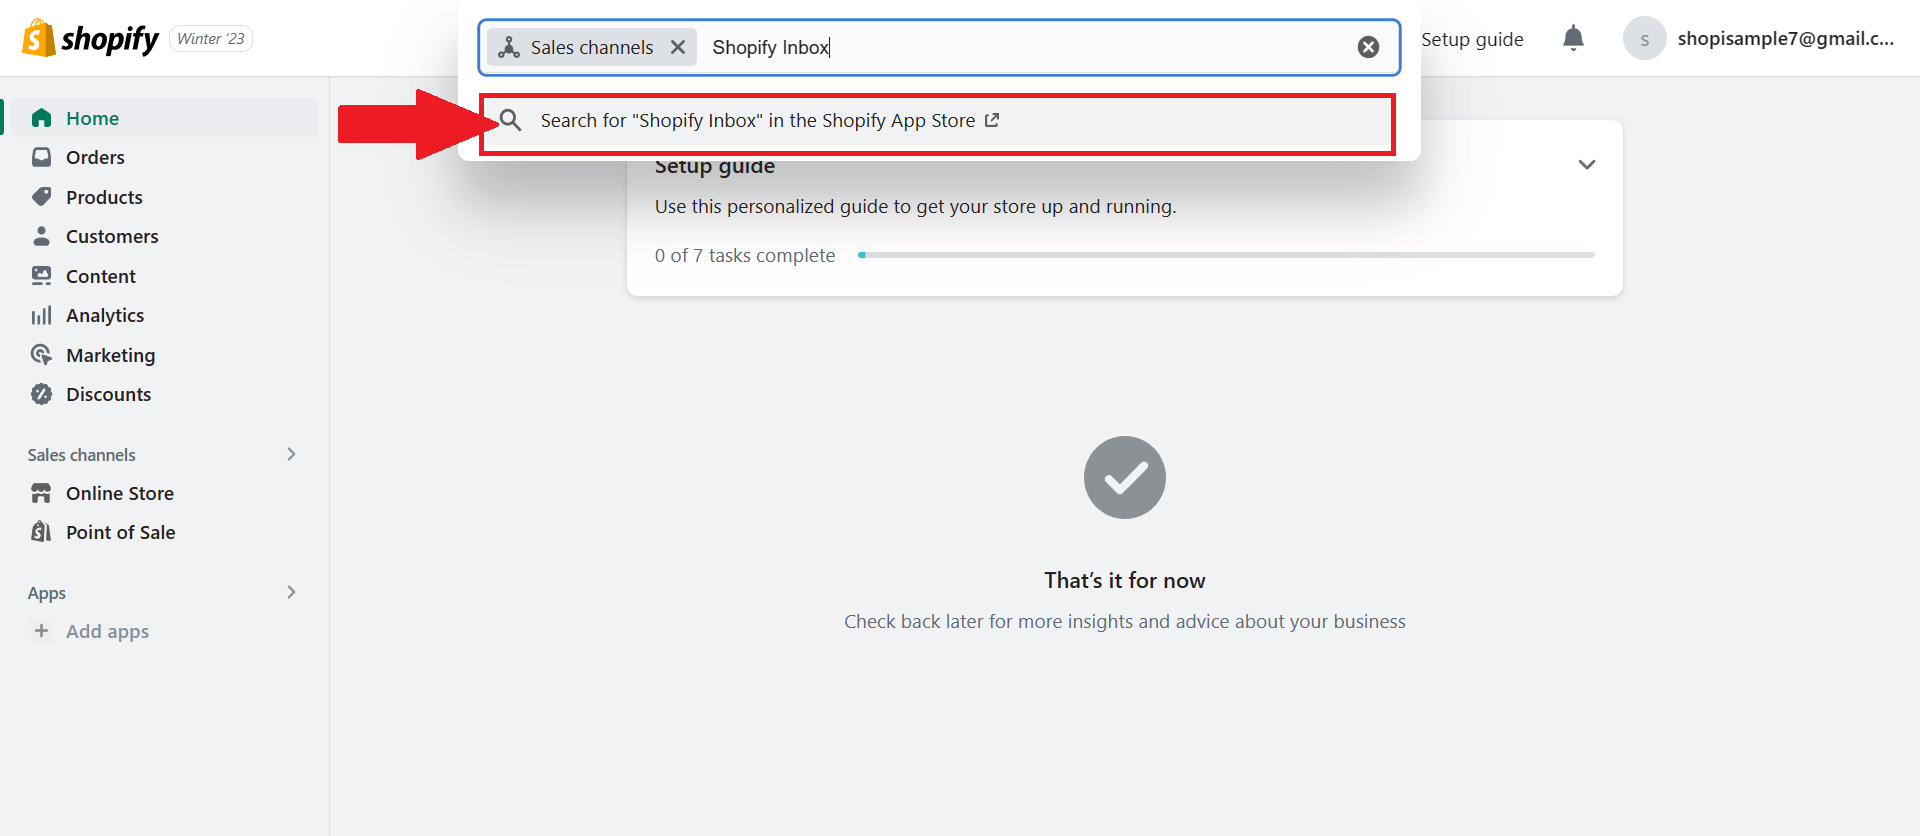
- Click the suggested input by the search box, which is the “Search for “Shopify Inbox” in the Shopify App Store”.
- You will be redirected to the Shopify App Store. Click the “Shopify Inbox” to install the app to your Shopify account.
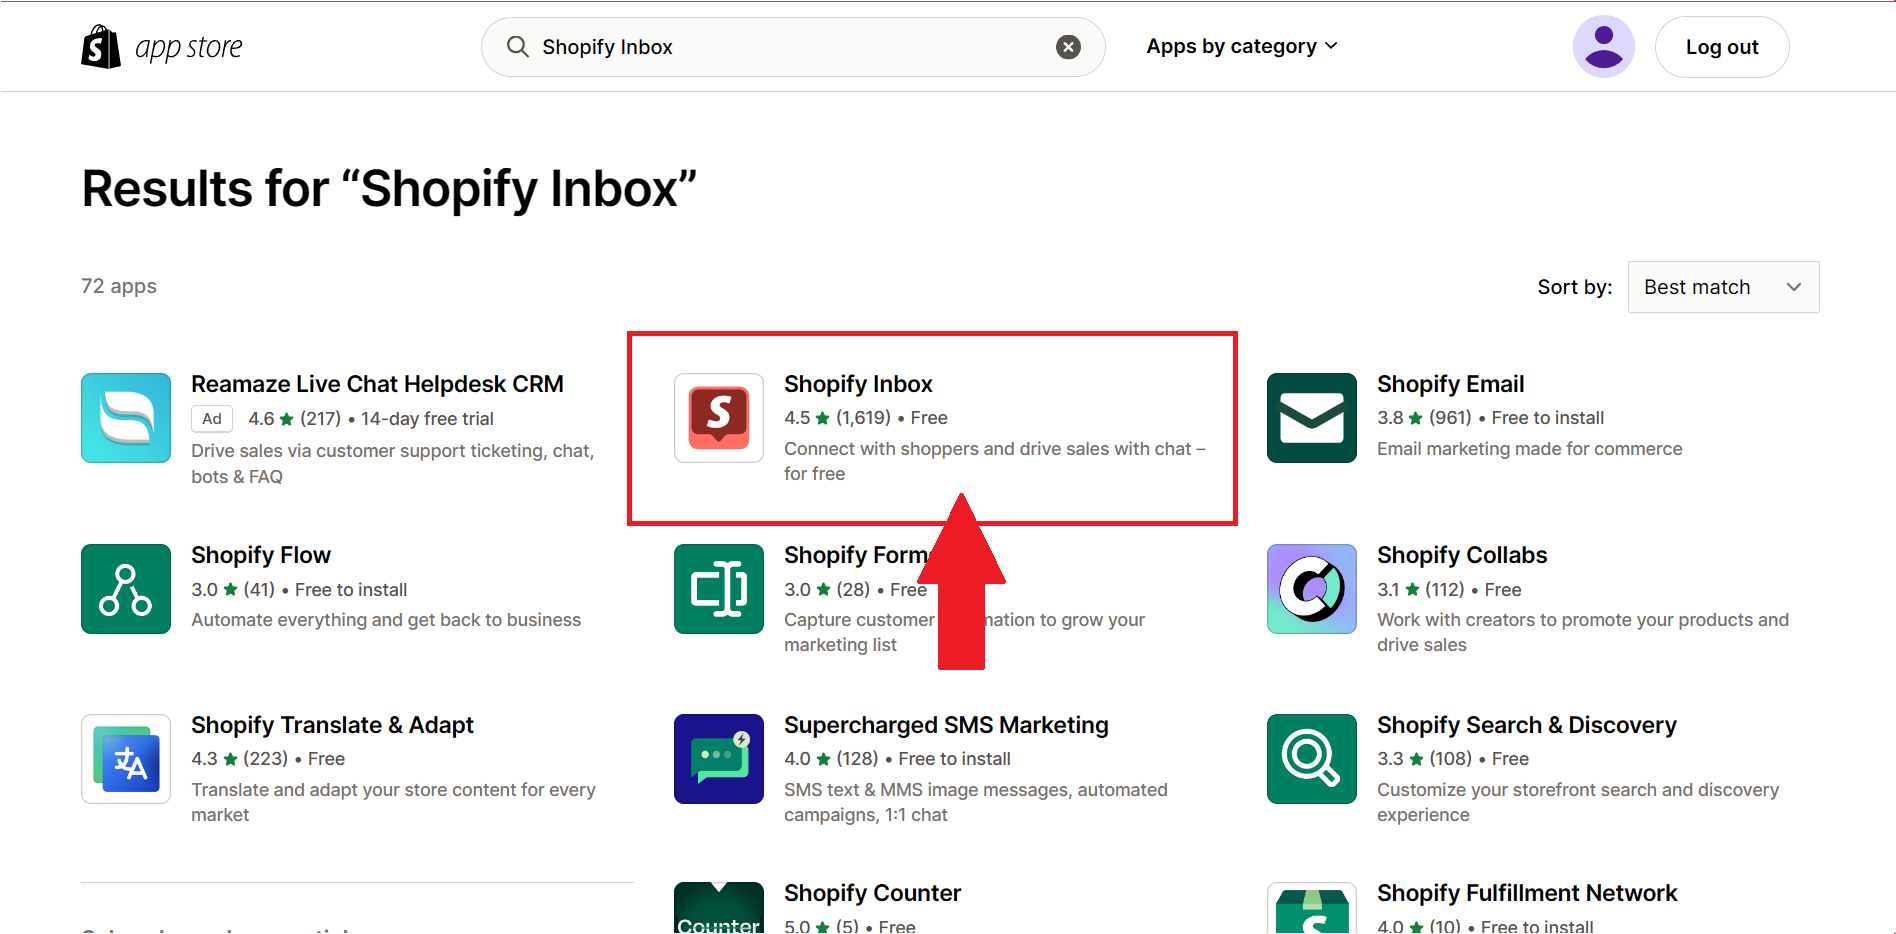
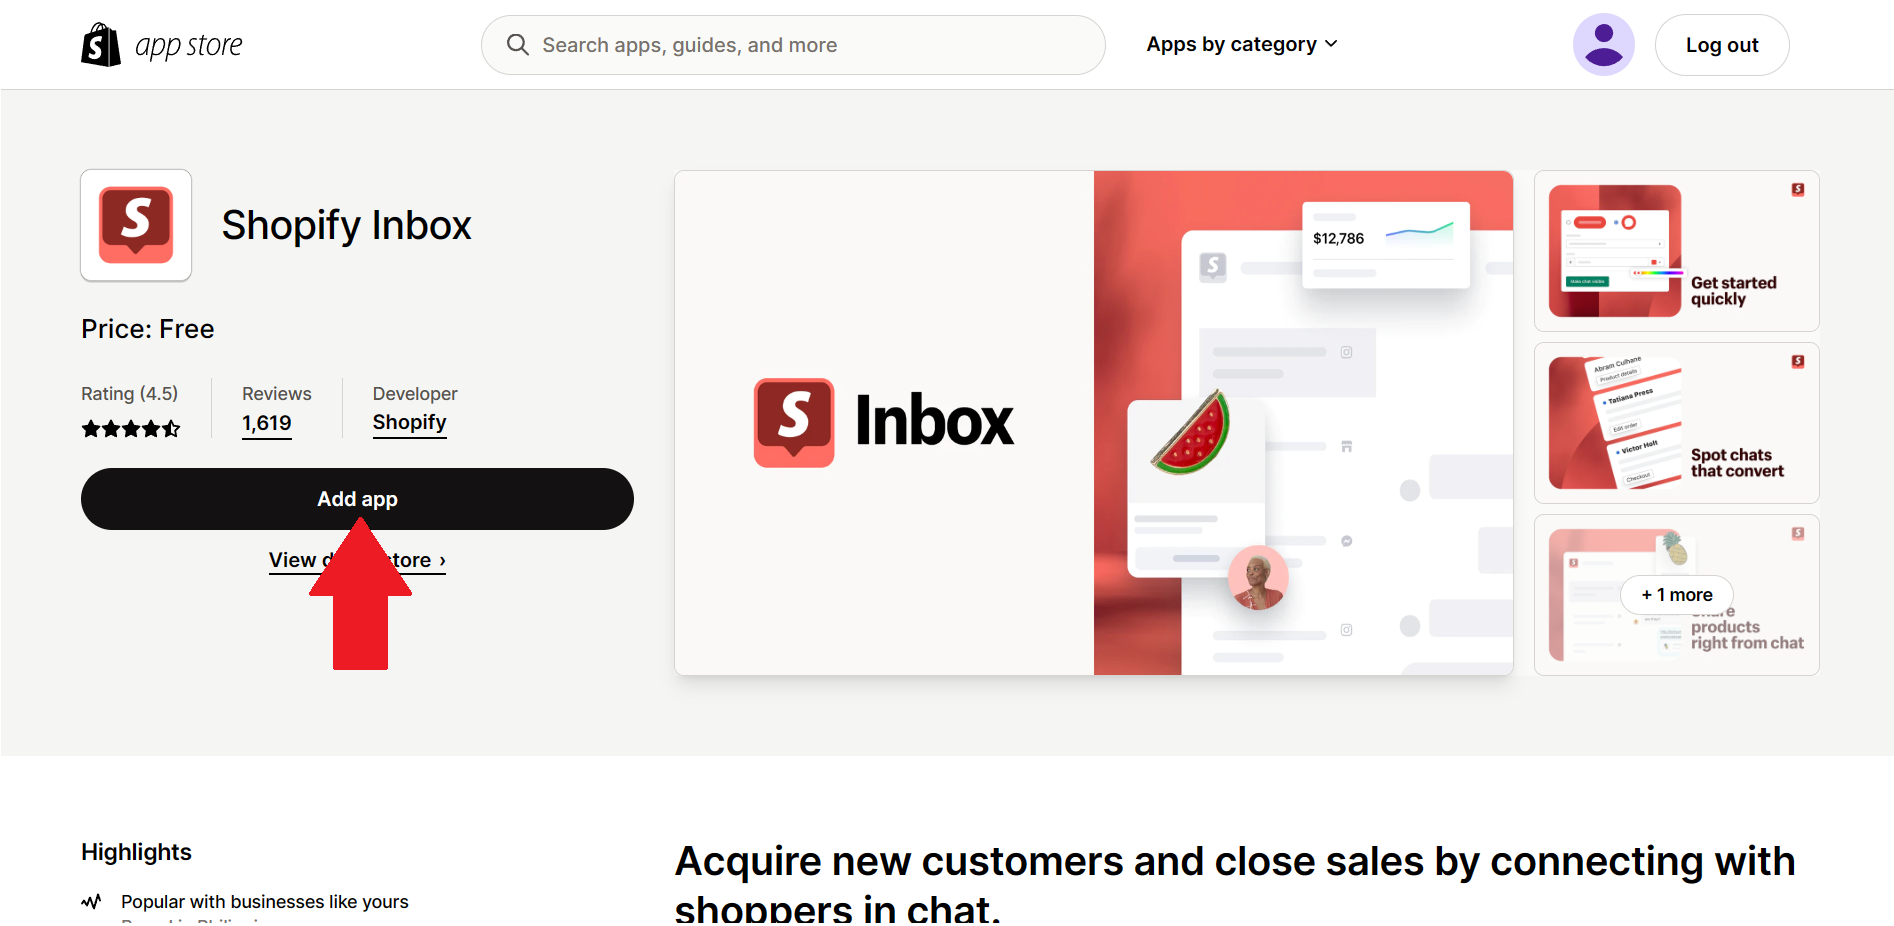
- Using Shopify Inbox, you can connect with your customers through different platforms in one application. This increases the efficiency of messaging and answering the inquiries. Click the “Add app” button.
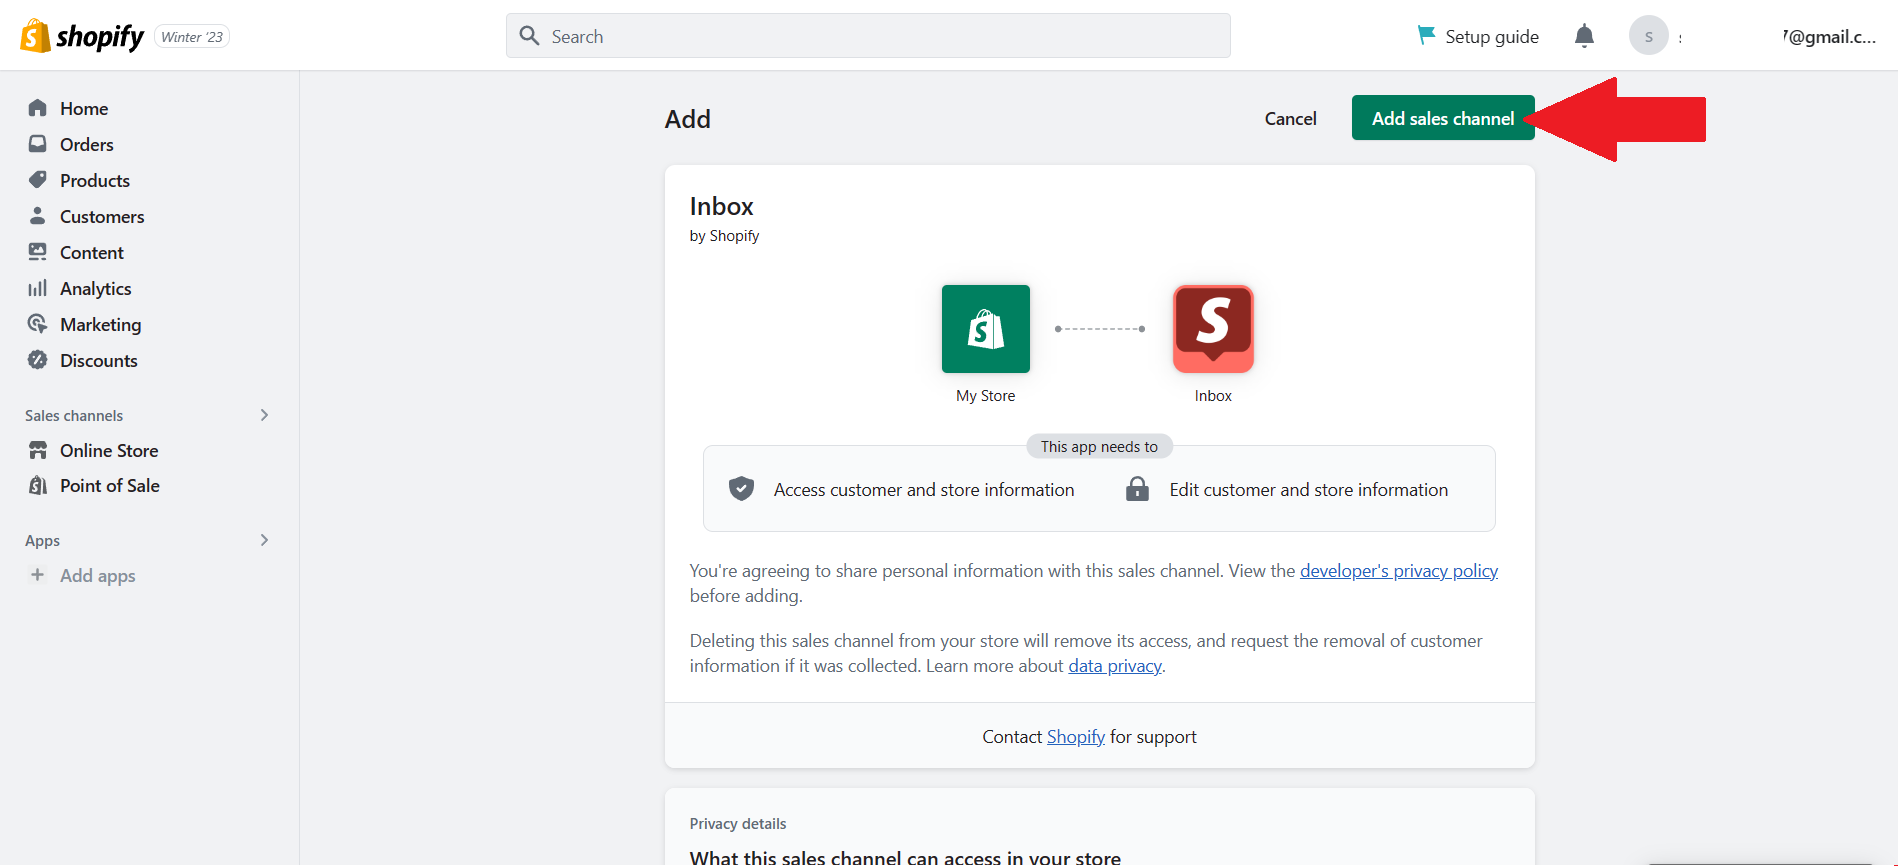
- You will then be redirected to the Shopify website to confirm the installation of the app. NOTE: Installing Shopify Inbox can give them access to customer and store information and edit customer and store information. If you are okay with this, click “Add sales channel” to continue to process.
Installing Messenger Channel
- In the Dashboard located on the left side, click on “Sales Channels” that is located on the left side of the site.
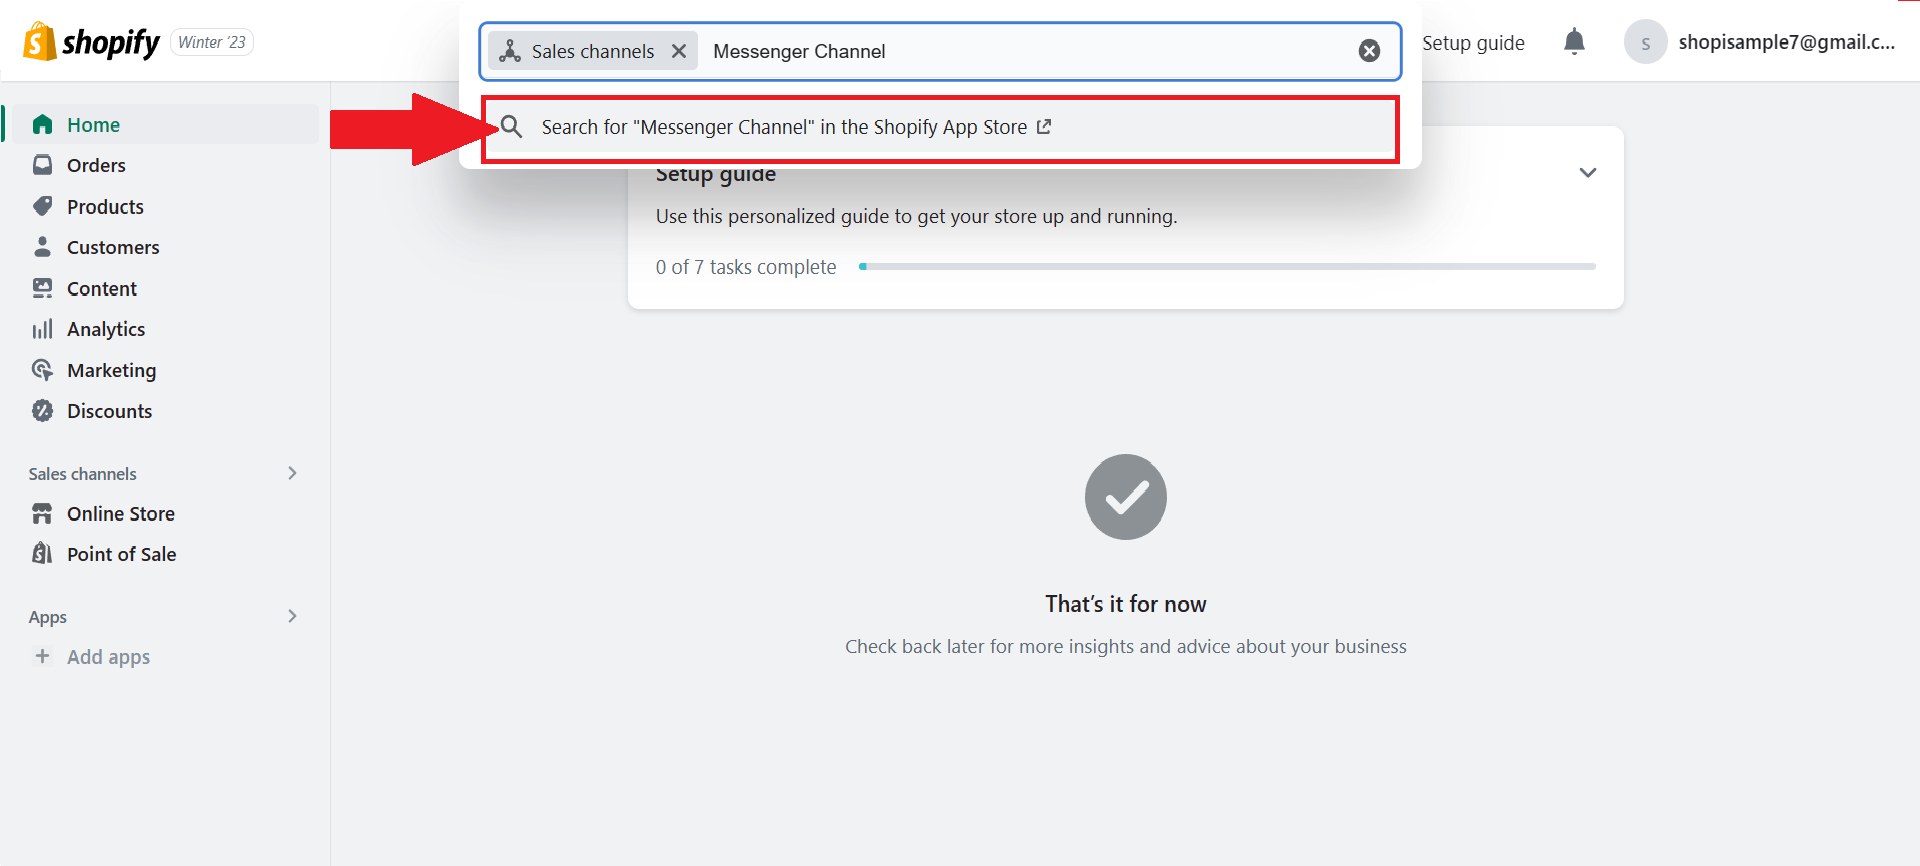
- A filtered search bar will appear. Type “Messenger Channel” in this field.
- Click the suggested input by the search box, which is the “Search for “Messenger Channel” in the Shopify App Store”.
- You will be redirected to the Shopify App Store. Click the “Messenger channel” to install the app to your Shopify account.
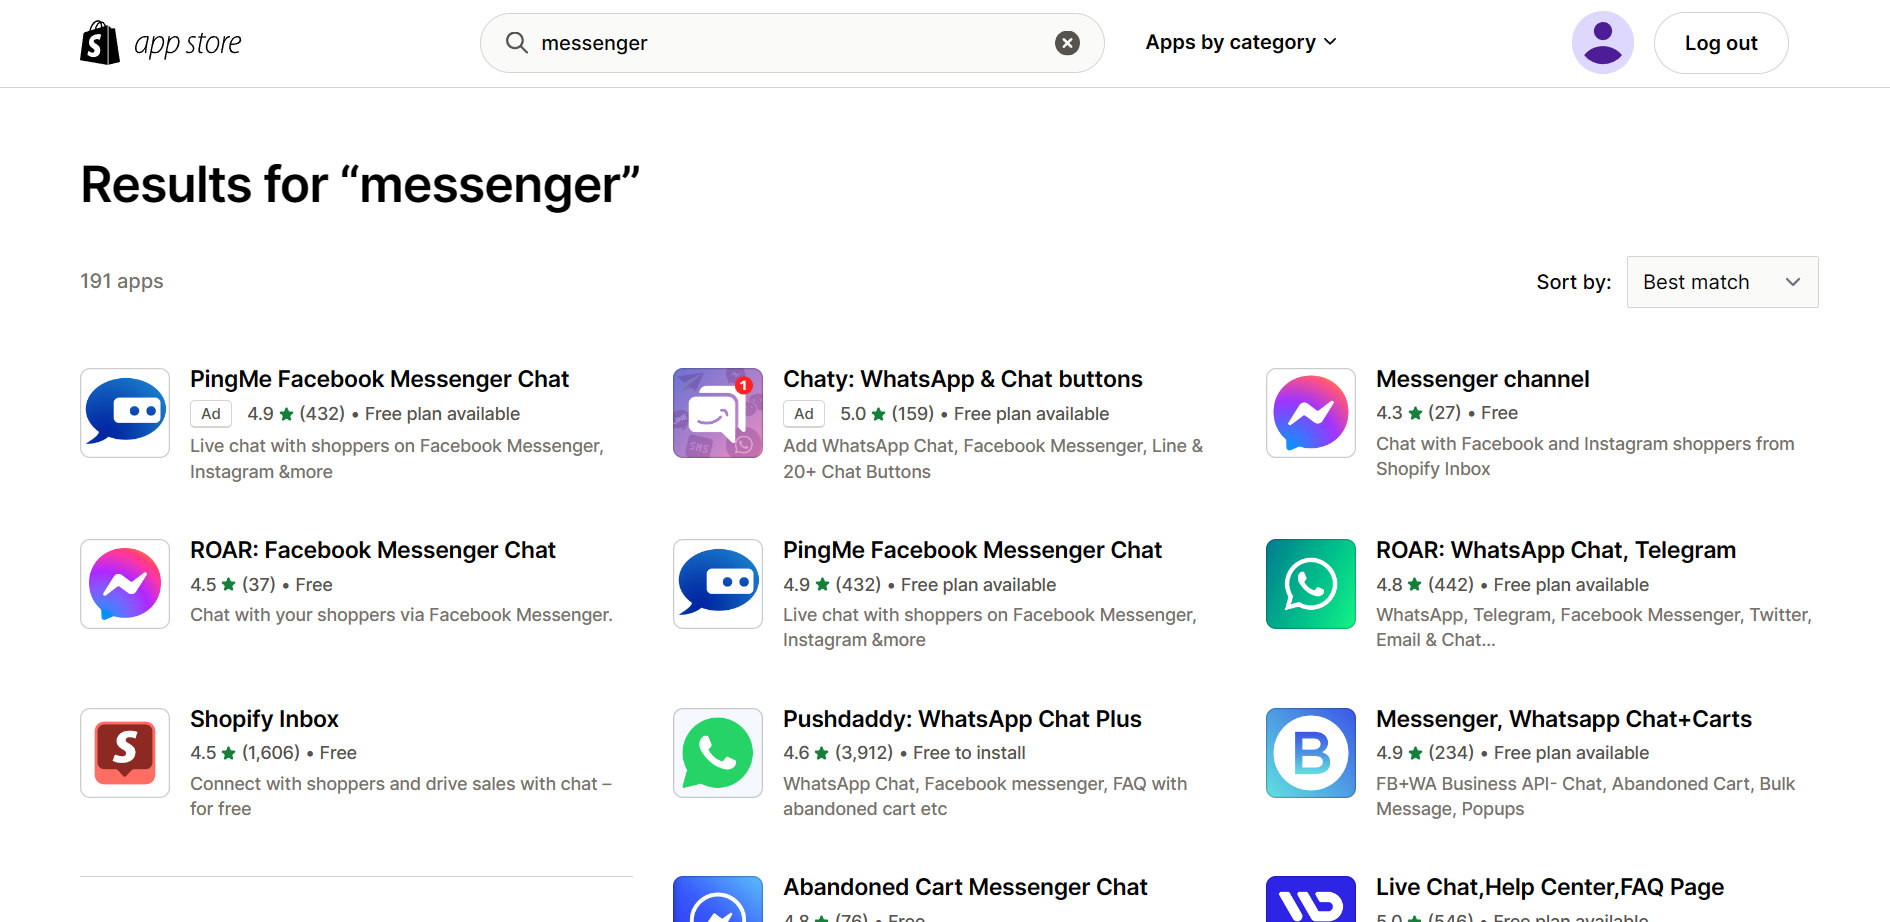
- Using Messenger channel, you can connect with your customers from your Facebook and Instagram business accounts in one application. This increases the efficiency of messaging and answering the inquiries. Click the “Add app” button.
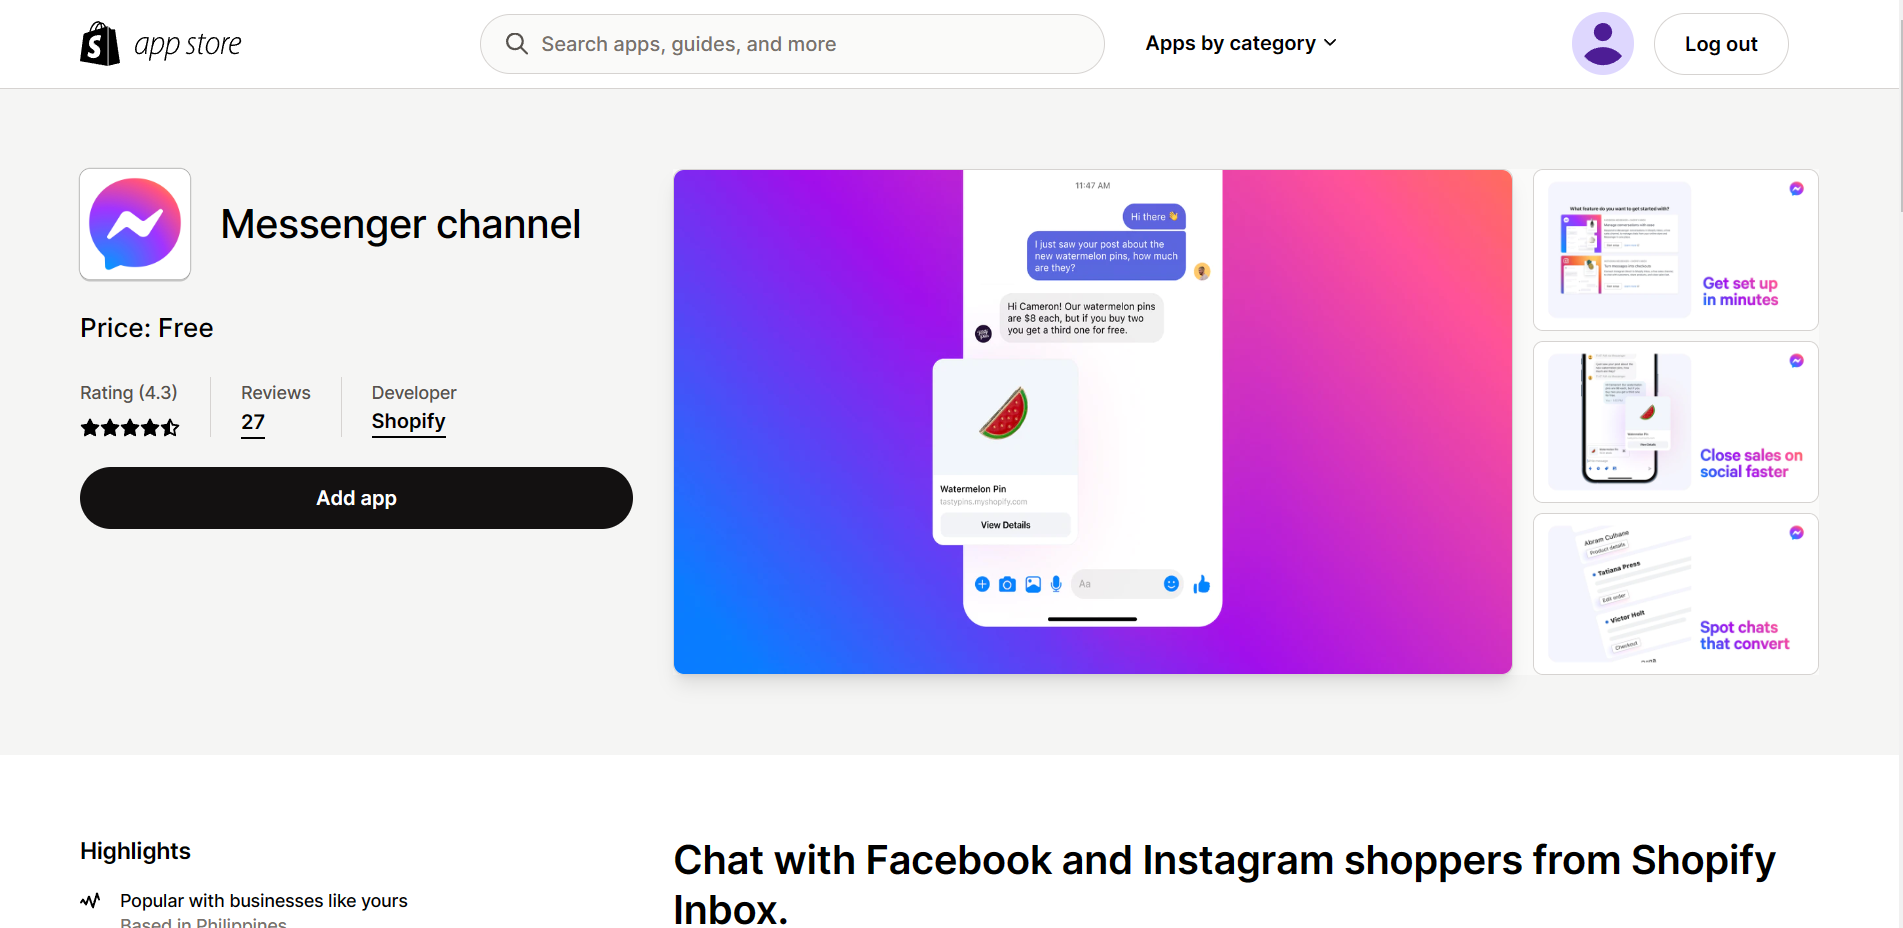
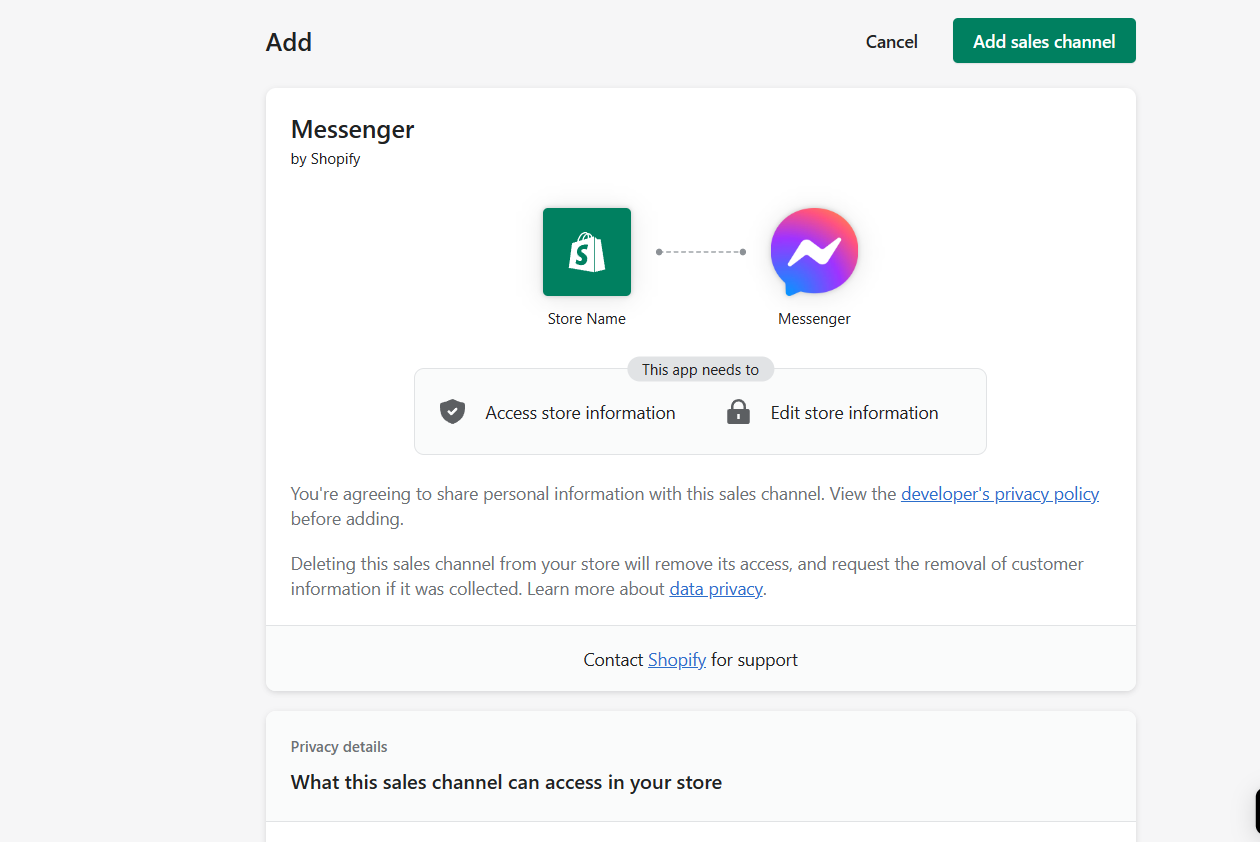
- You will then be redirected to the Shopify website to confirm the installation of the app. NOTE: Installing Shopify Inbox can give them access to customer and store information and edit customer and store information. If you are okay with this, click “Add sales channel” to continue to process.
Setting Up Instagram on Messenger Channel
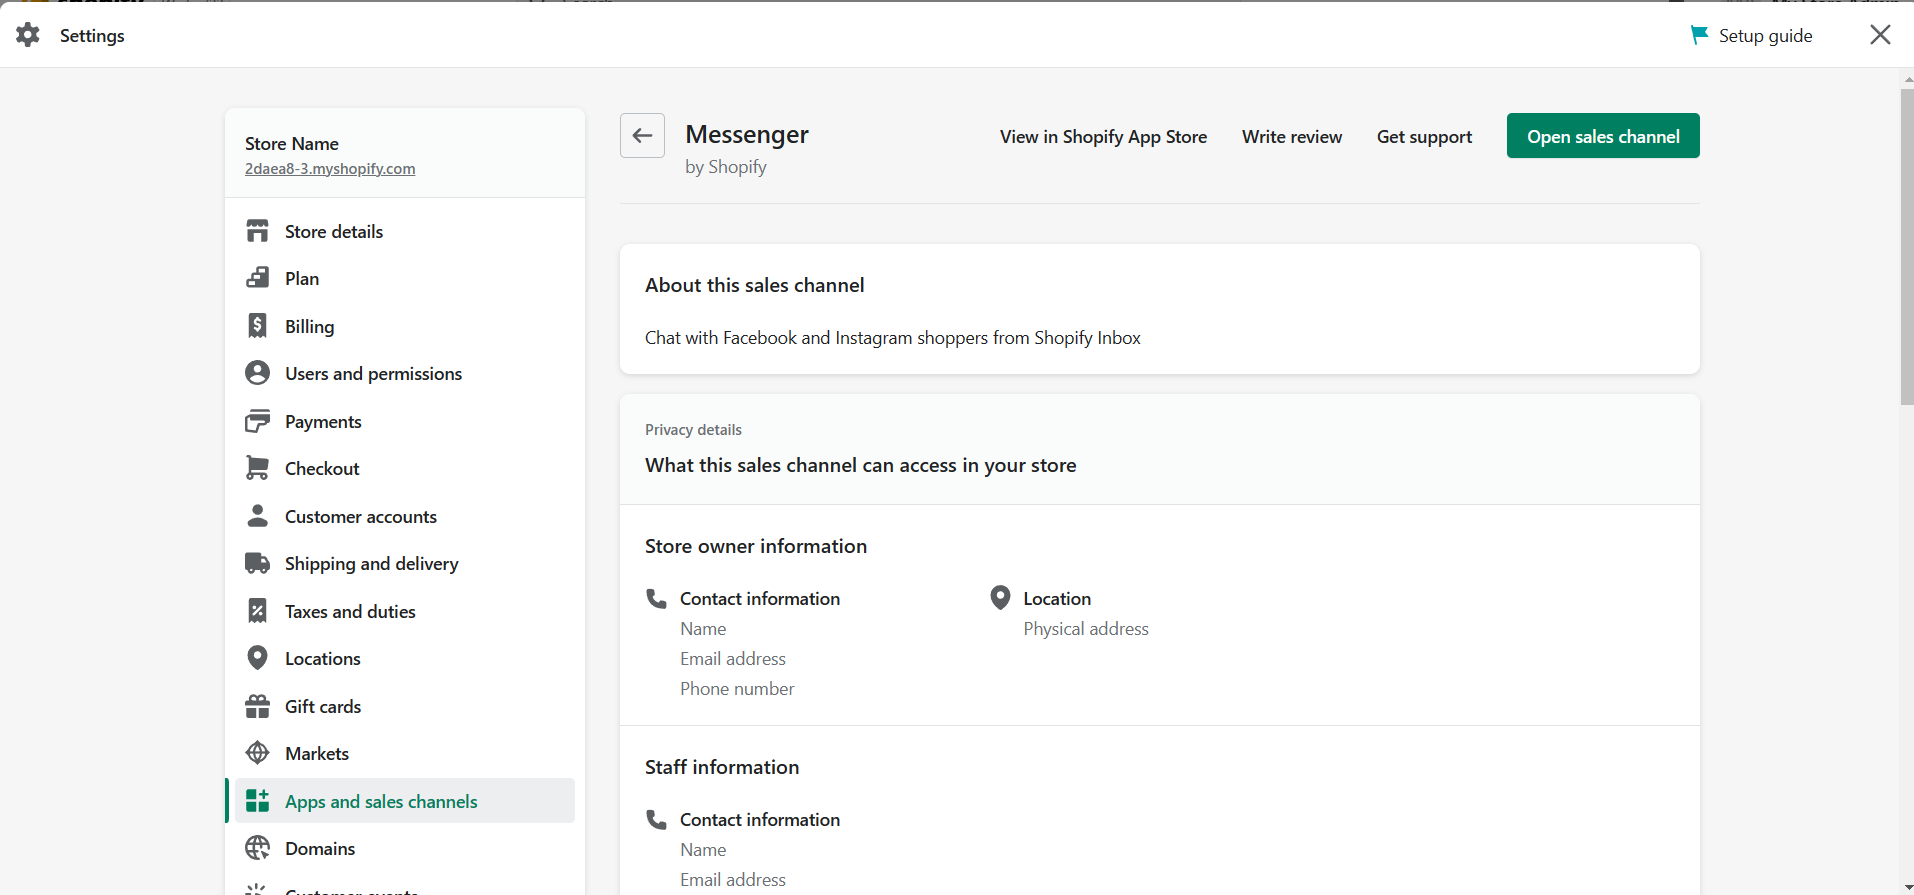
- After installing Shopify Inbox and Messenger Channel, navigate to your Apps and Sales Channels by following Settings > Apps and sales channels. Under Installed apps, click “Messenger”.
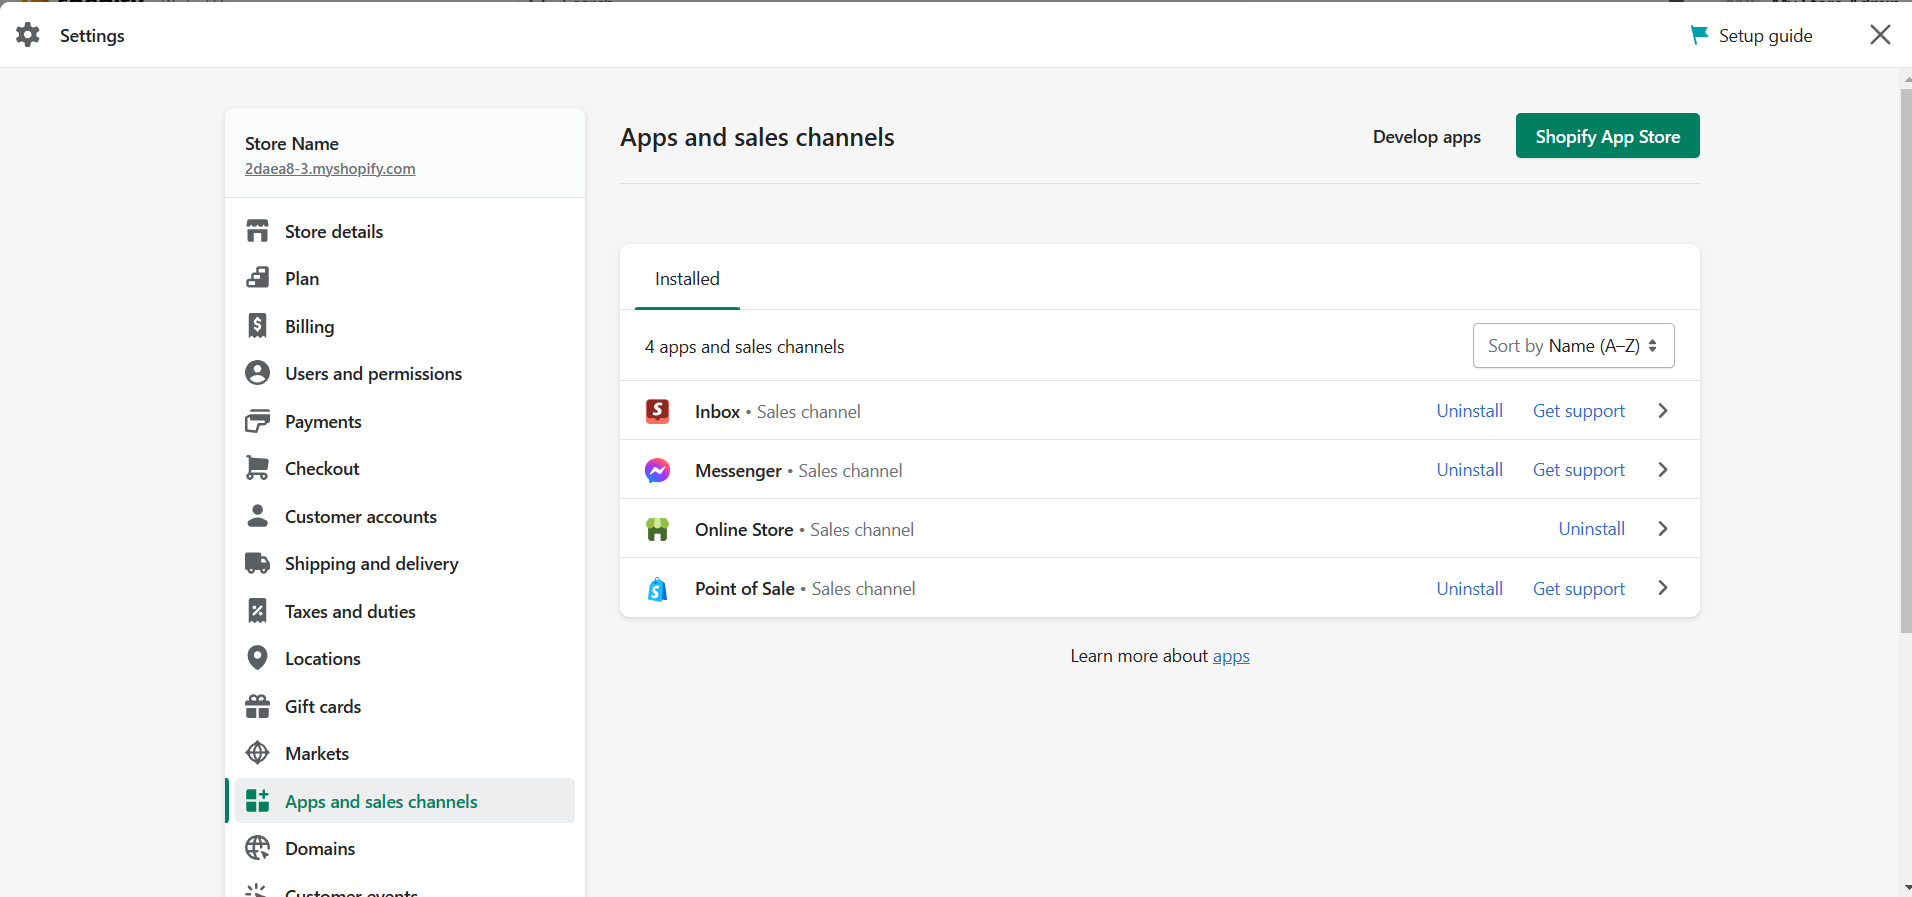
- Click the “Open sales channel” button on the right side of the Messenger channel.
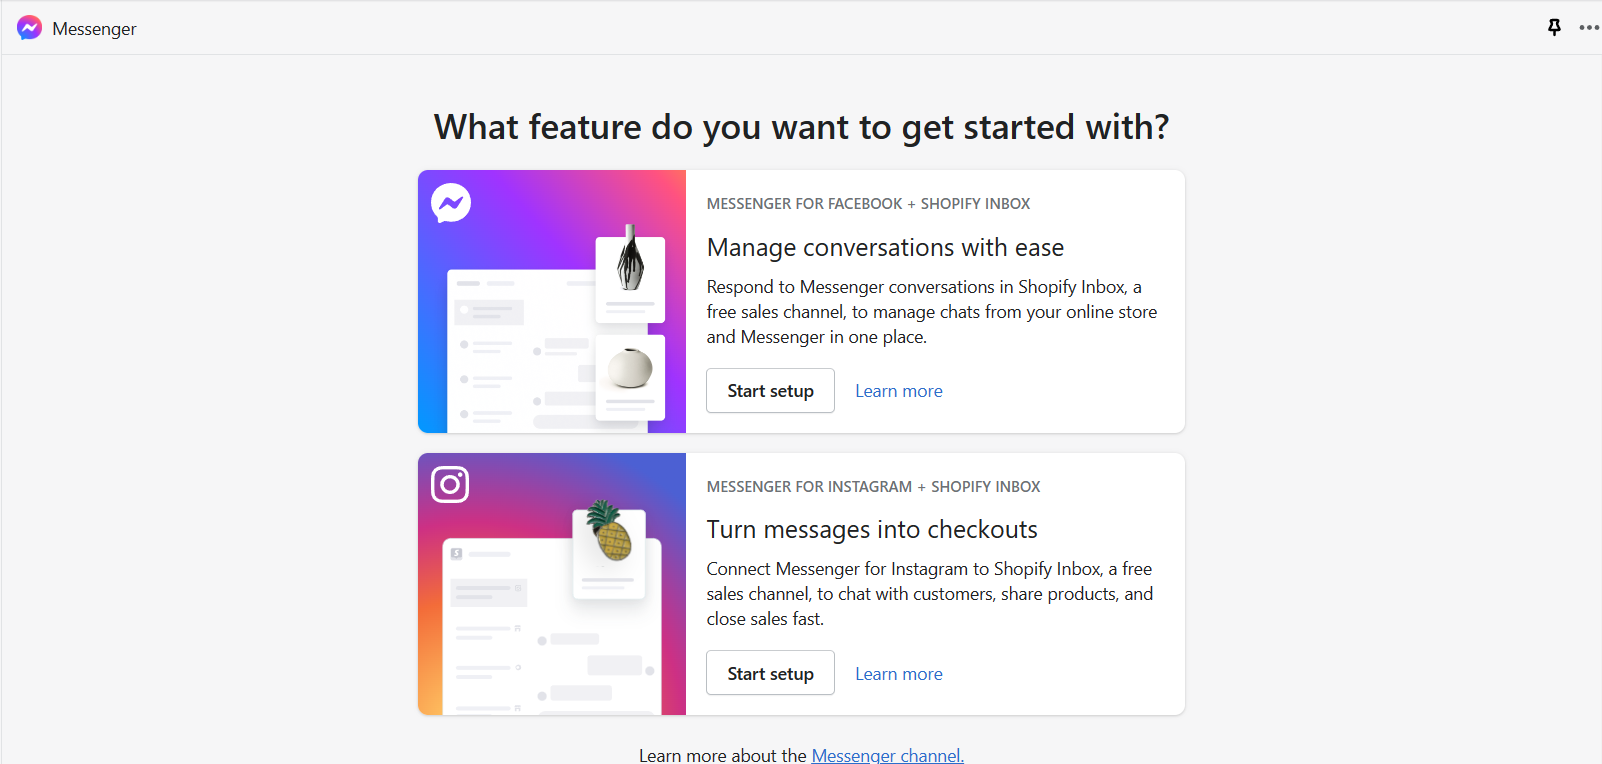
- After opening the Messenger sales channel, you can now start setting it up for use. To do this, click the “Start setup” button under Messenger for Instagram.
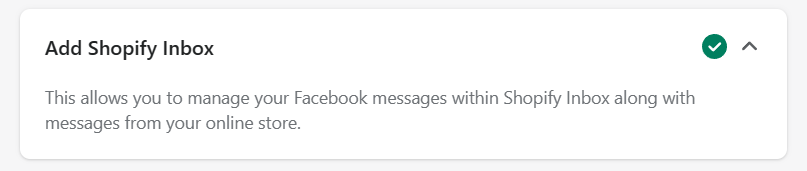
- First step in adding your Instagram to the Messenger channel is to Add the Shopify Inbox channel, which you already did a while ago so it would be checked already and you will be able to proceed to the next step.
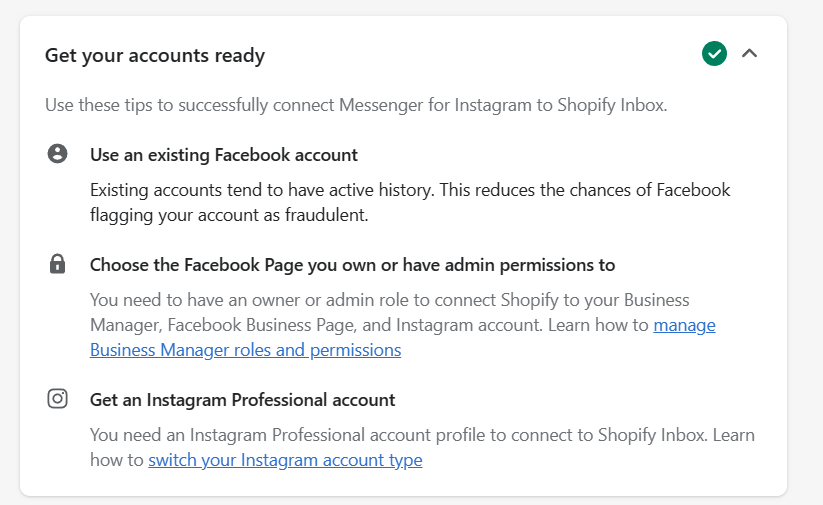
- Next step is to get your accounts ready. To connect Messenger for Instagram, you must use an existing Facebook account, choose the Facebook page that you have admin permissions to, and make a professional Instagram account.
- For starters, you need to connect your Facebook account to get started. To do this, click “Connect”.
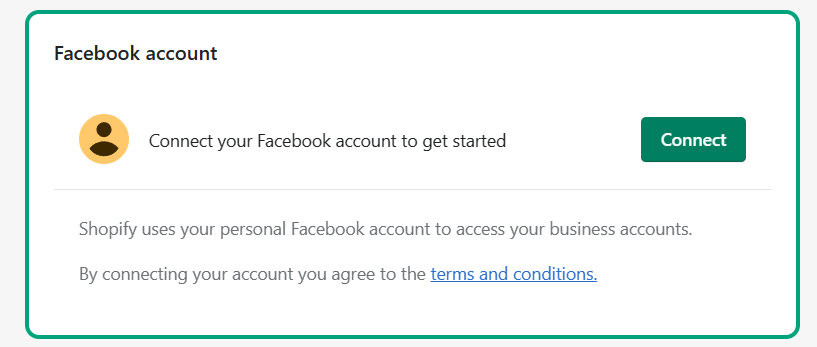
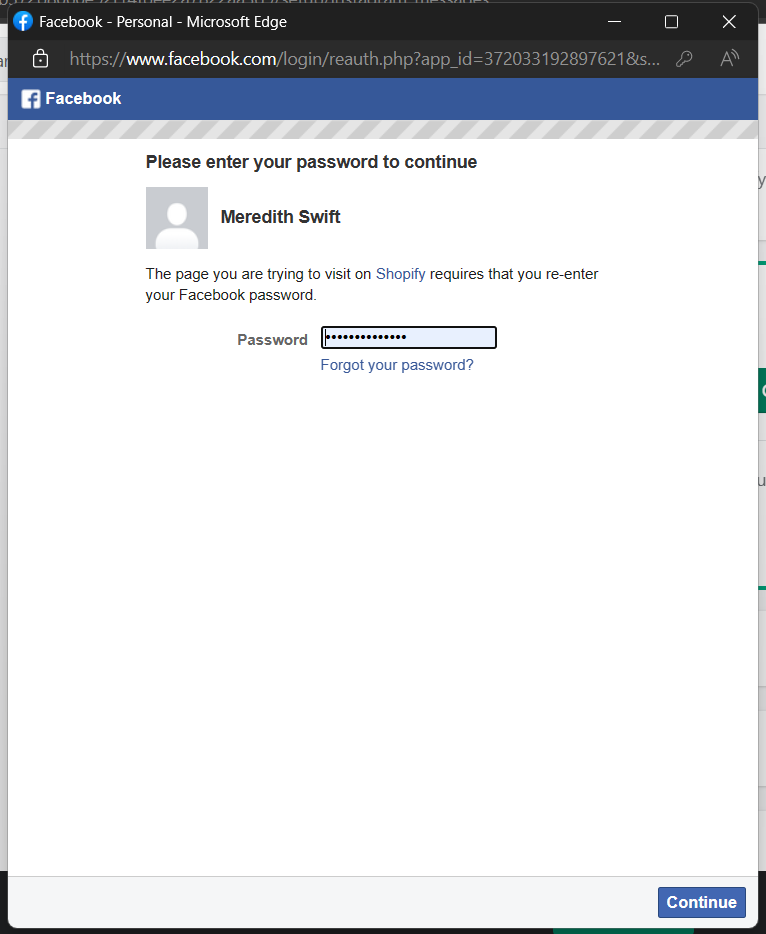
- A pop-up tab will appear, where your currently logged in Facebook account would be displayed. You need to enter your password in the blank field indicated and click the “Continue” button.
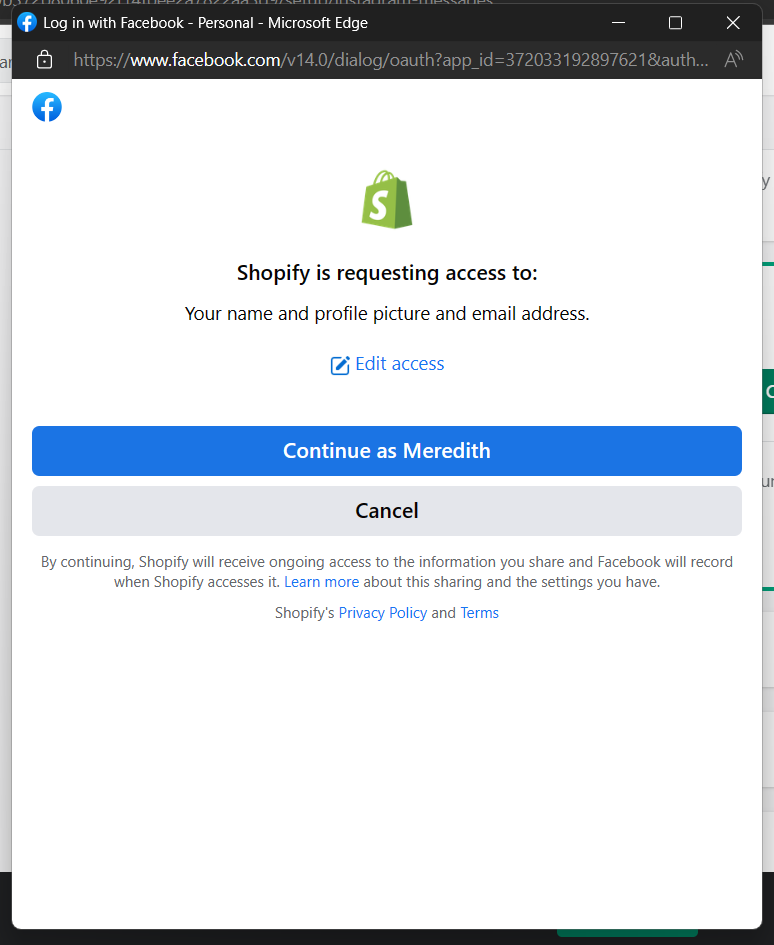
- After clicking the Continue button, Shopify will request access to your name, profile picture, and email address. If you want to allow this, click “Continue as [name]”.
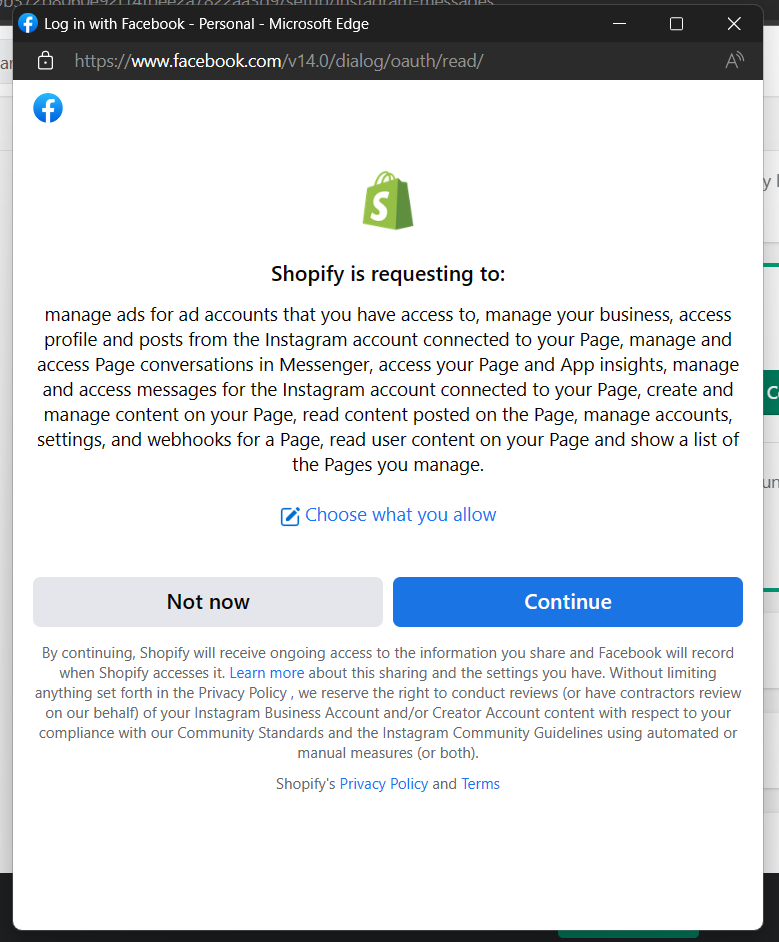
- After continuing, Shopify will provide an informative access description, which would be important to read before continuing to bind your account. Make sure that you agree with the conditions presented so there will be no problem in the future for your business. Click the “Continue” button if you agree with everything that Shopify has stated.
- You have successfully binded your Facebook account to your Messenger for Instagram. If you were done setting up for the Messenger for Facebook, this and other steps would be done already.
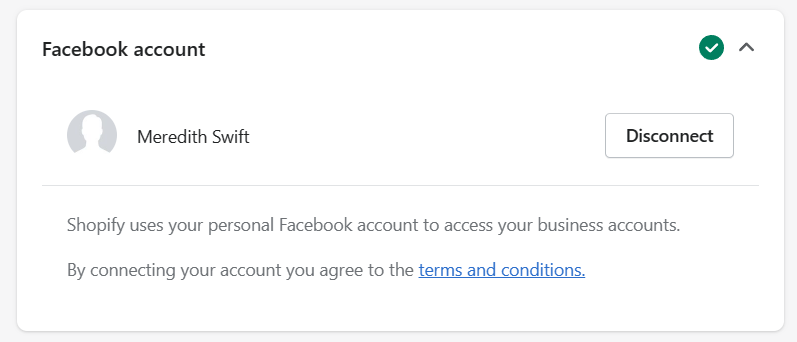
- Next is the Business Manager, which would be automatically registered after you indicated your Facebook account. If you do not have a Business Manager, you need to create one to be able to add Instagram to the Messenger channel. To connect your Business Manager, click “Connect”.
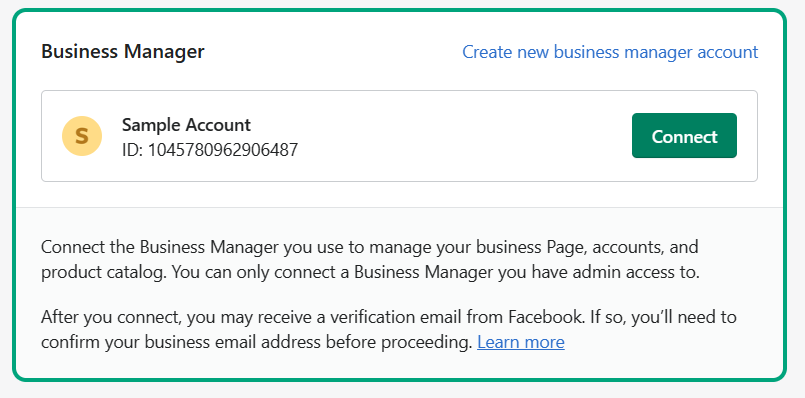
- After you clicked the Connect button, you can now proceed to the next step of the process.
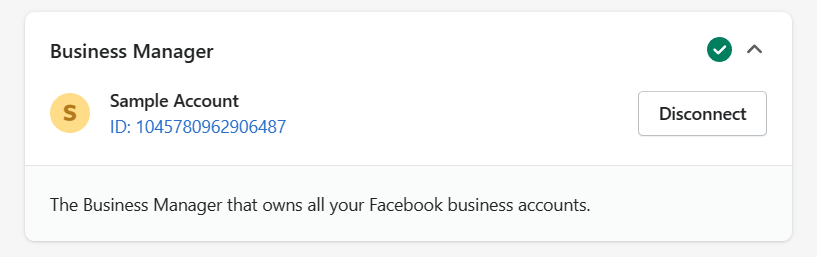
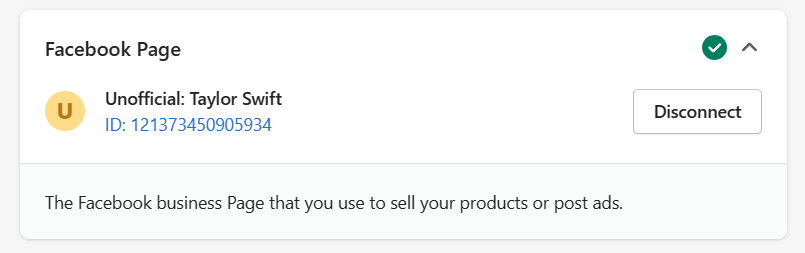
- Next is the Facebook Page. It will also also be automatically registered based on the Facebook account that you have entered a while ago. If you want to connect to a different page, click the “Create new page”. But if the registered Facebook page is correct, then you can just click the “Continue” button.
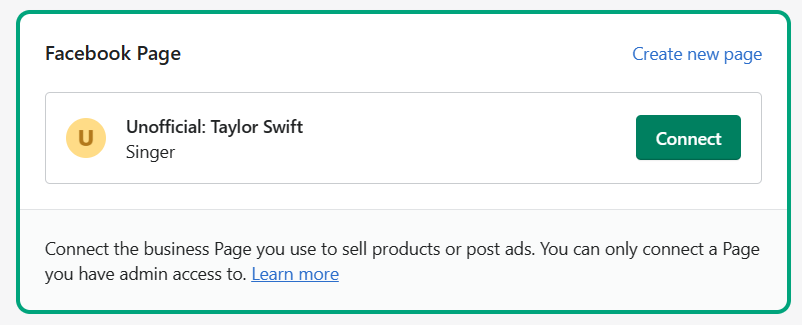
- After connecting, the Connect button will be replaced by a Disconnect button which you can click if you have binded a different Facebook Page and you want to replace it.
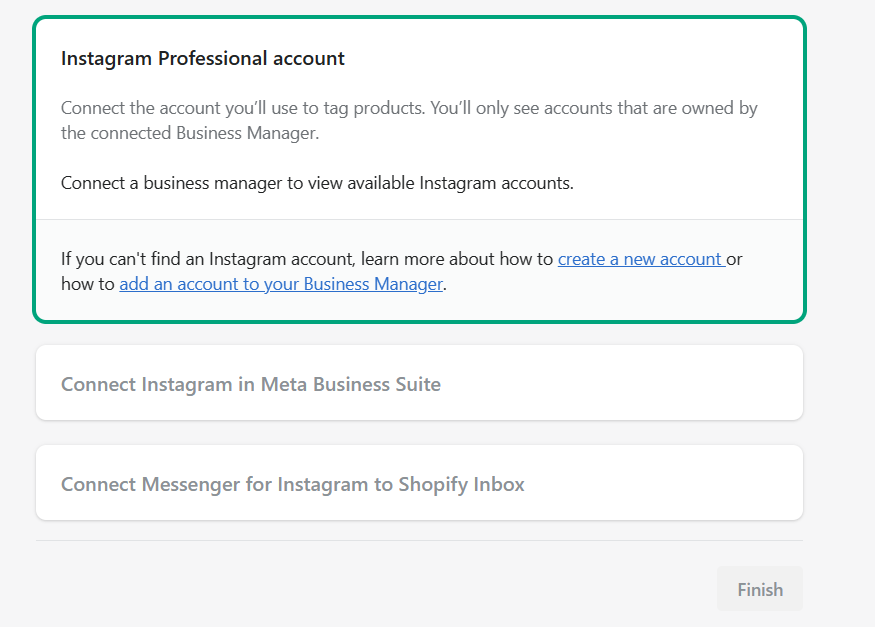
- After setting up your Facebook account and Business Manager, you should be able to link your Instagram Professional account and connect it to the Meta Business Suite by following Step 16.
- Go to Facebook Meta Business Suite and open your Facebook Business Manager account.
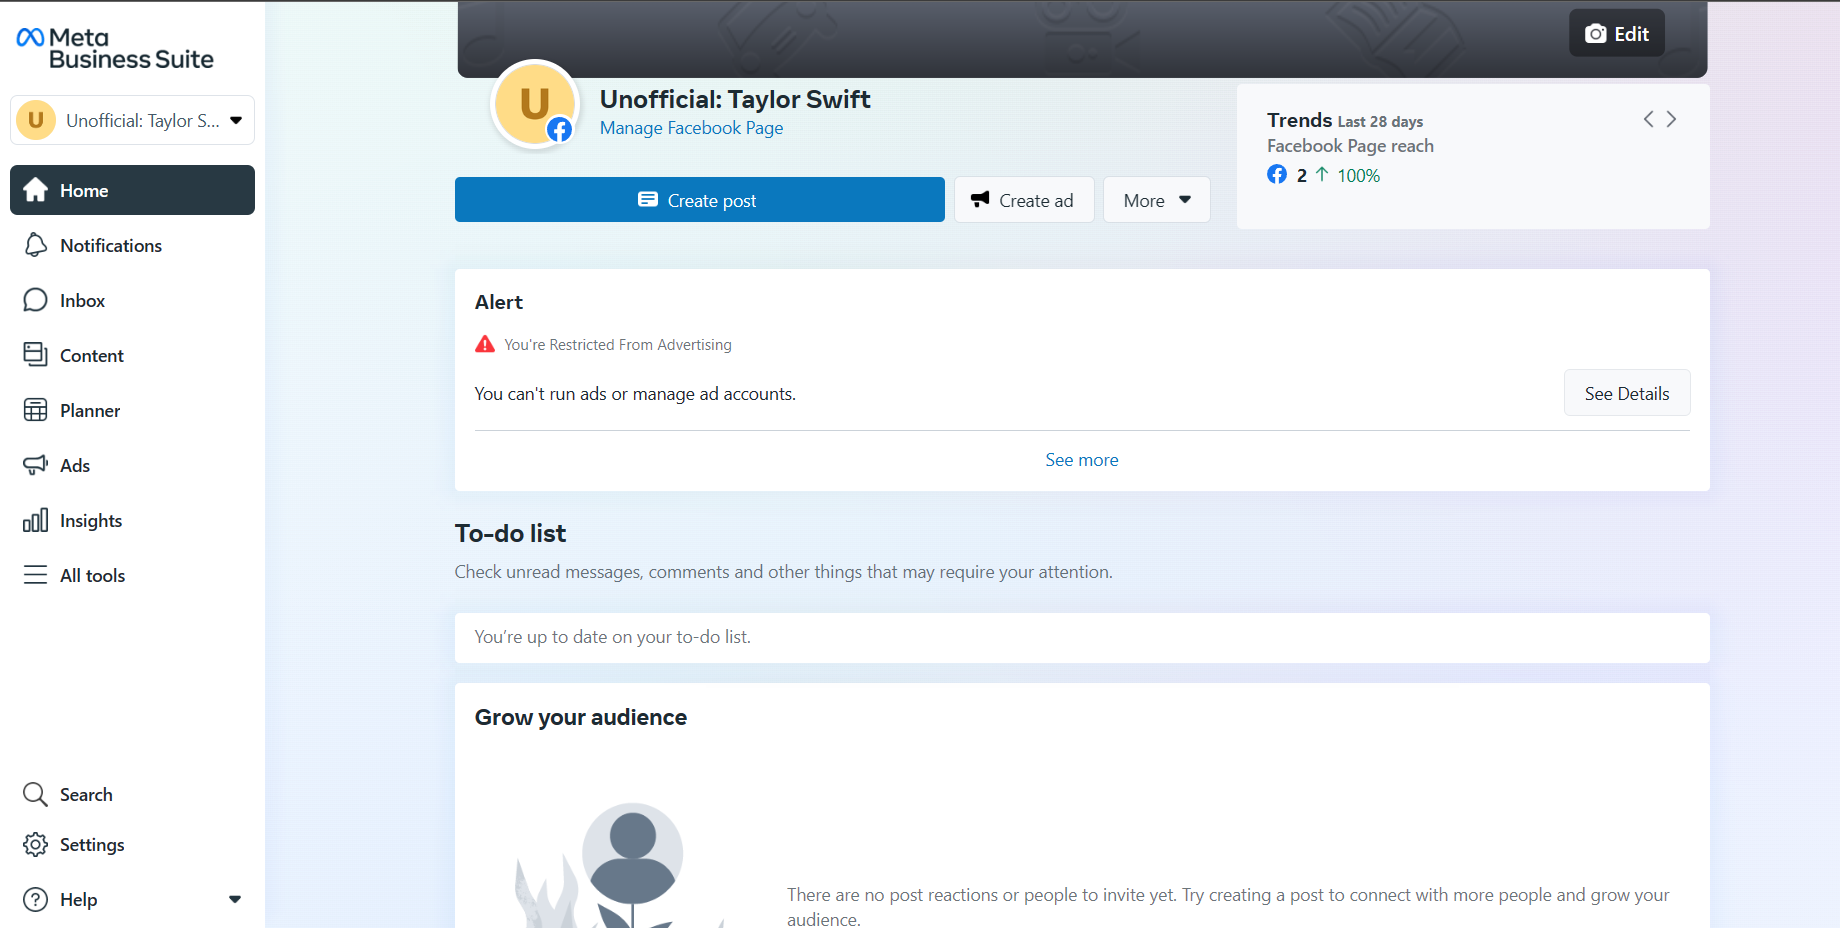
- Click the Settings located on the lower left part of the dashboard.
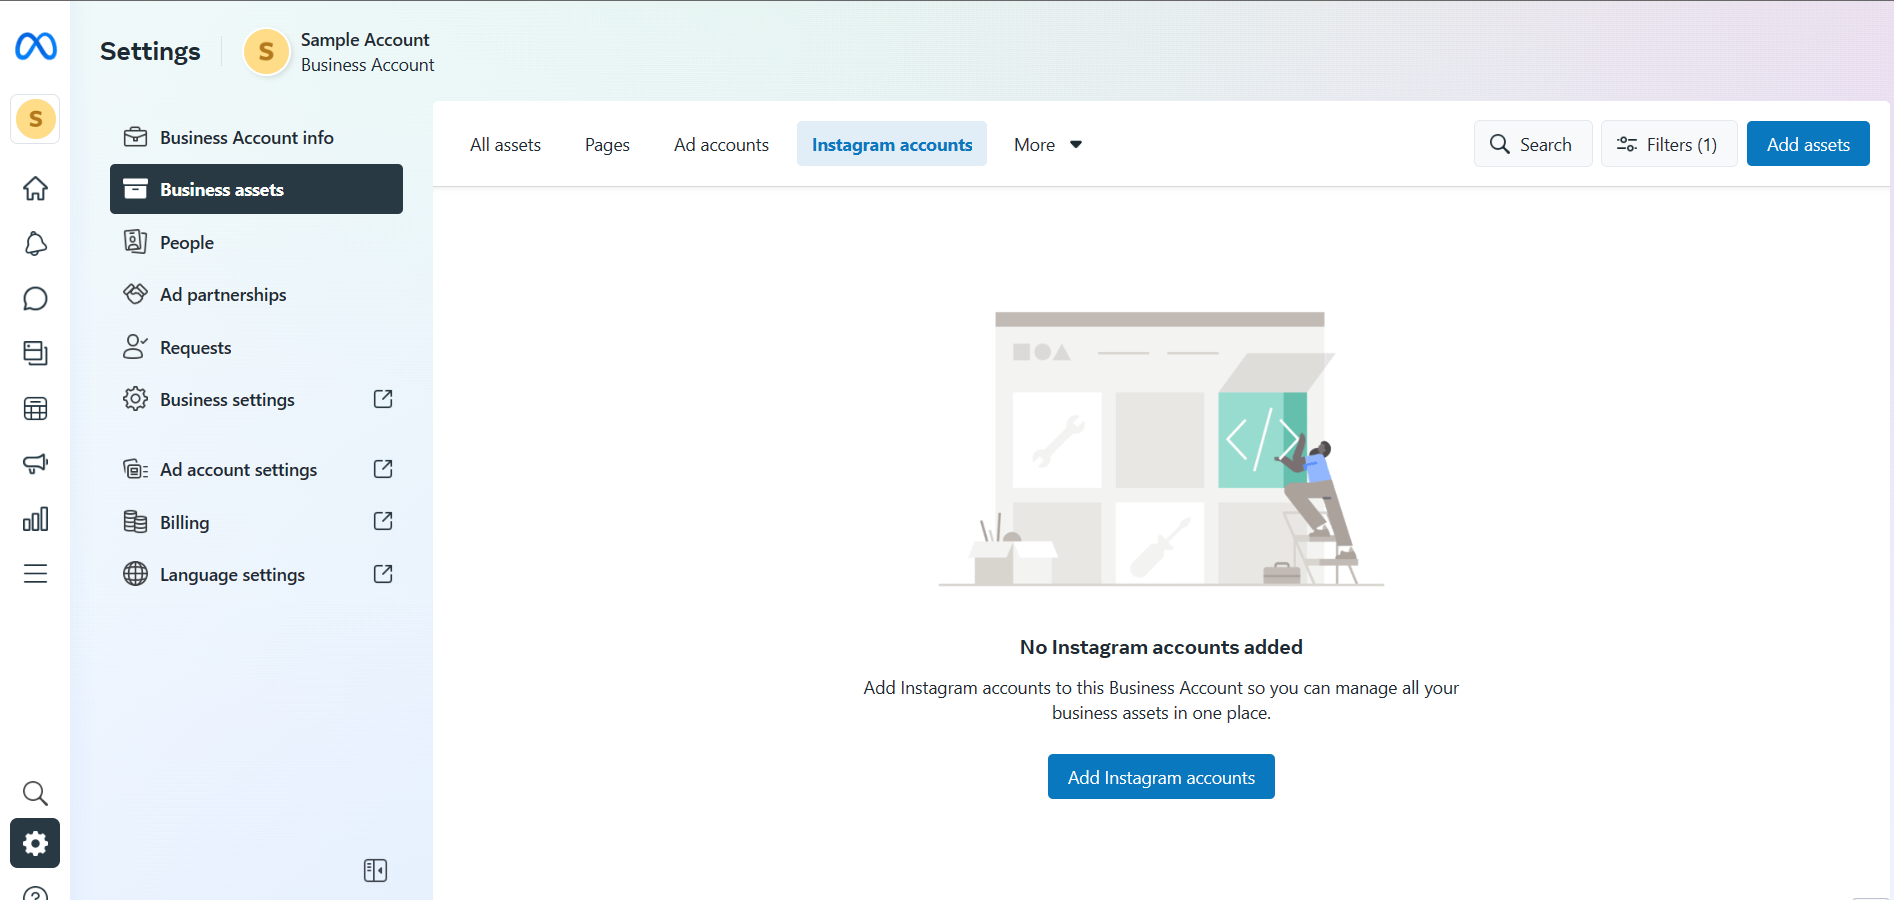
- Go to Business assets and click the Instagram accounts tab.
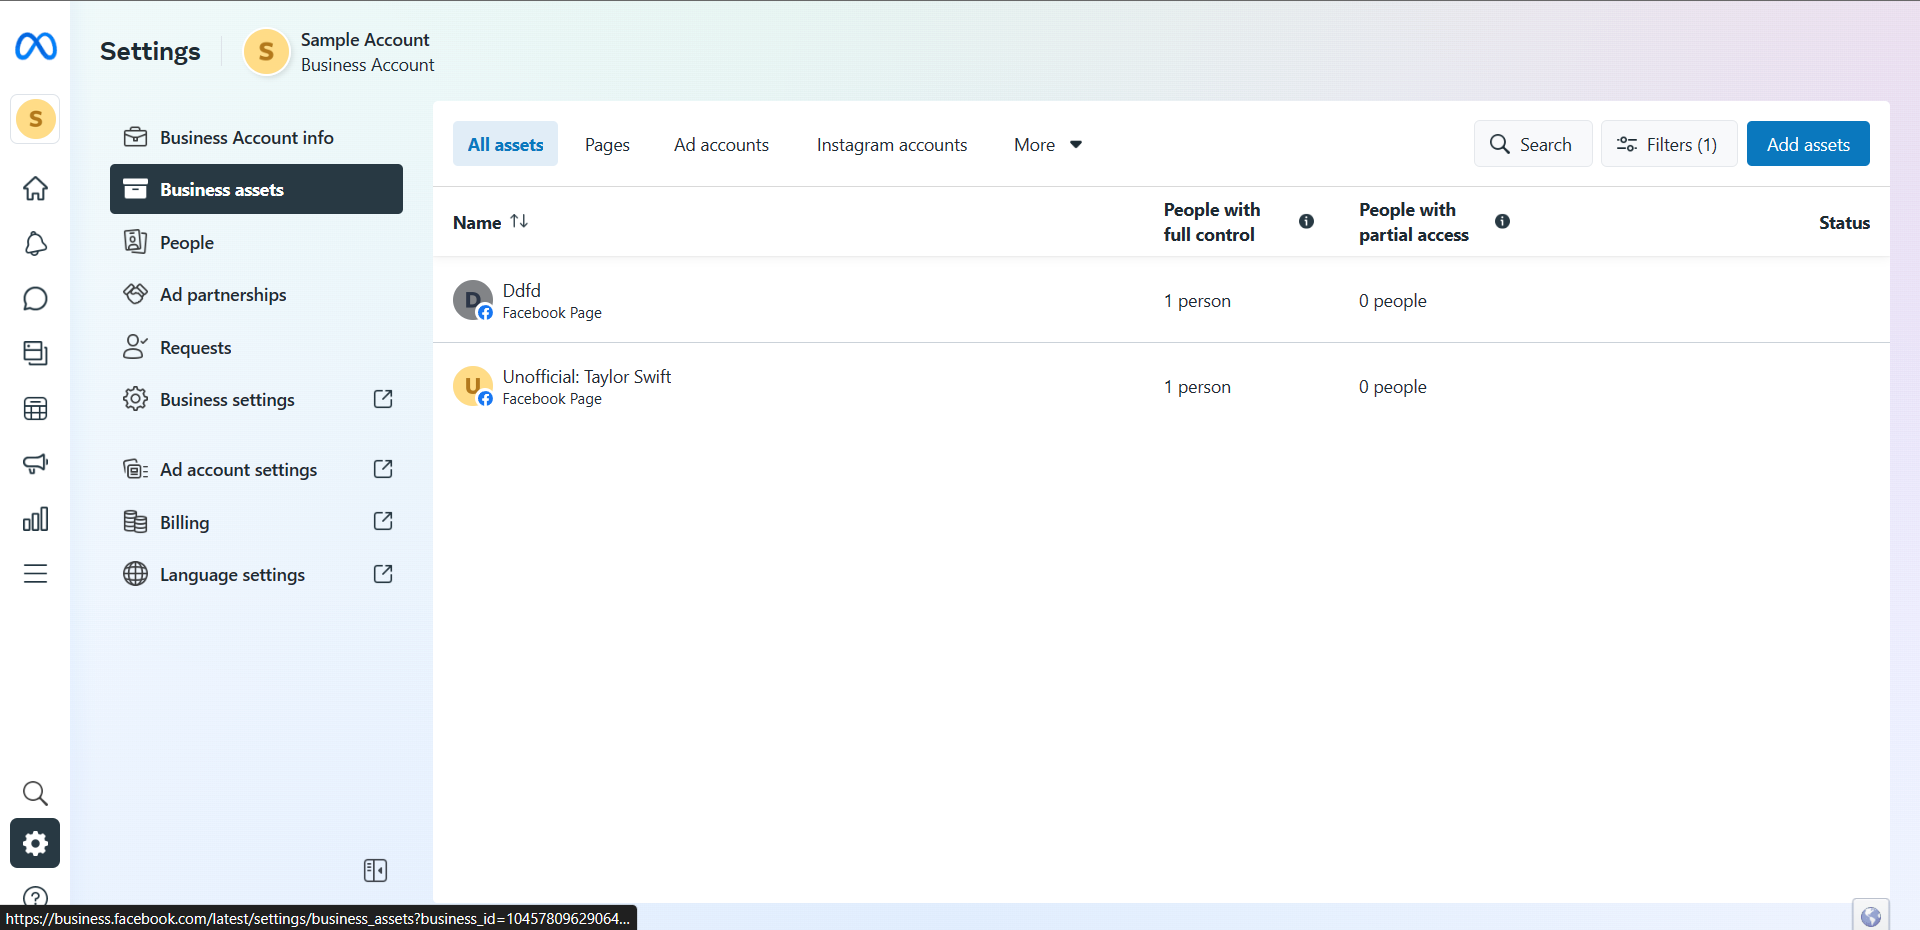
- If you haven’t added any Instagram accounts to your Meta Business Suite, click “Add Instagram accounts”.
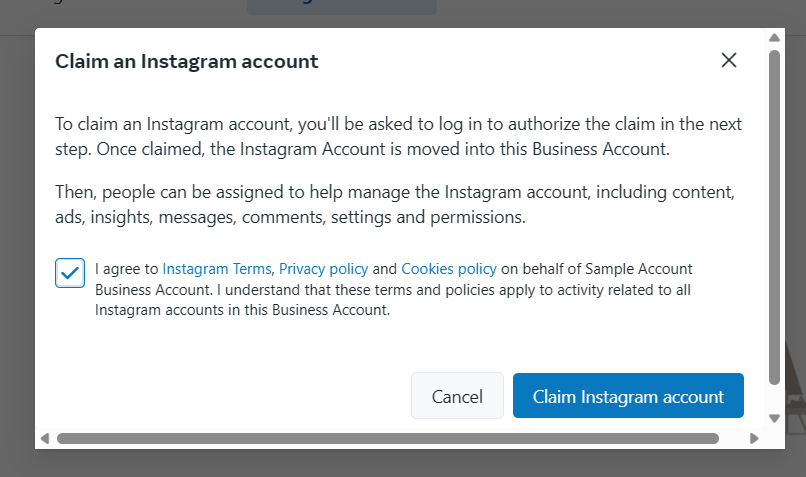
- Click the checkbox after reviewing the Instagram terms, privacy policy, and cookies policy to connect it to the Business Manager of your Facebook account. After this, click “Claim Instagram account”.
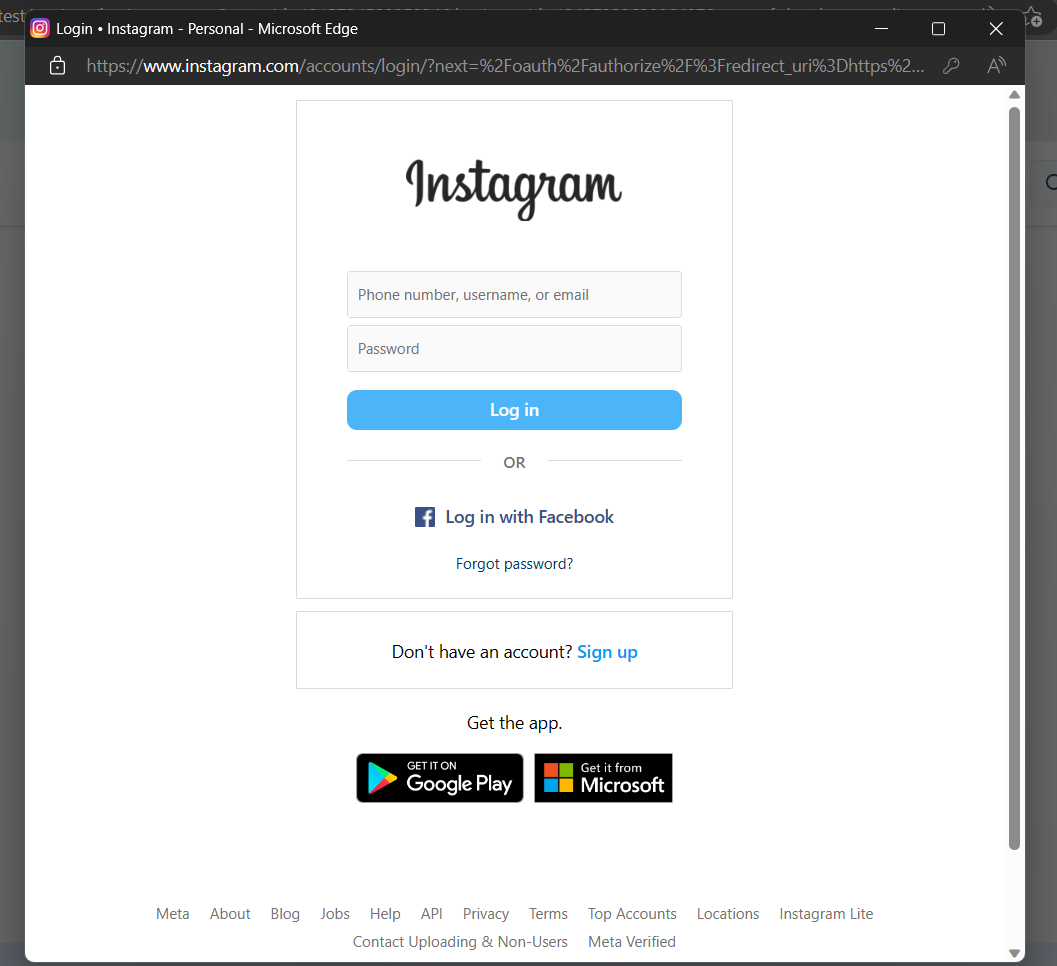
- Log in your professional Instagram account in a new pop-up tab that appeared, which you can do easily by clicking “Log in with Facebook” if you have already binded it beforehand.
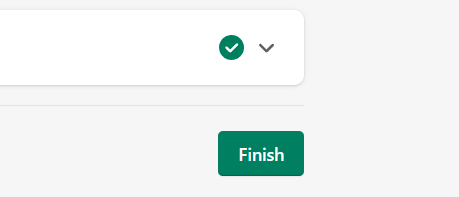
- Click the “Finish” button after successful connection from the Messenger for Instagram to Shopify Inbox.
Conclusion
You’re done! Always remember that Messenger for Instagram is a helpful tool in simplifying the process in messaging your customers, which come from your store account in Instagram and you may also use this to bind in your Messenger for Facebook.
-
You need to have a Shopify account and Shopify App Store to install necessary tools needed to bind you Messenger for Instagram and Shopify Inbox.
-
Shopify Inbox helps with organization of incoming and outcoming messages from other platforms that you have connected to it. This will help to avoid unanswered inquiries about your business and the products and services that you offer.
-
The steps involved in adding your Messenger for Instagram to your Shopify Inbox have some of the steps that were also involved in the Messenger for Facebook, so it is advisable to connect the Messenger for Facebook to the Shopify Inbox first.
-
Make sure that you connect the appropriate accounts for each of the processes so there will be no conflict after setting up the Messenger channel.
-
Complete the necessary steps indicated in the setup for Messenger for Instagram to make use of the features of Shopify Inbox such as managing conversations, modifying chat appearances, and activating automatic messages for your business.