How to Implement Zendesk for Customer Service
To walk you through setting up Zendesk for customer service and implement it in your business.
Prefer a shortcut? 16 free tools do parts of this for you.
Aim: To walk you through setting up Zendesk for customer service and implement it in your business.
Optimal Outcome: To improve customer support system in your business because it has built-in features to create a more responsive service for your customers in terms of inquiries and concerns on your products. Zendesk can make support tasks convenient for your company to retain customers.
What do you need to start: To follow this SOP, you need to have an email account which you will use to create an account in Zendesk. You can also incorporate this software as an app in Shopify.
Why is this SOP Important: Customer Service is the assistance that your business should give your customers to ensure that they have the best experience with your business. To assure that you can give your customers the support that they deserve, you need to understand their needs and apply the greatest quality in your products. This part of the business is essential because when you meet their expectations, more customers will be loyal to your items and keep coming back to buy more.
When and Where to execute: This task is done when you start to sell the items from your business or if your customers grow rapidly in your business. To cater everyone's questions, you need to have a software where you can message them.
Who Should Be Doing This: This should be done by the person-in-charge of customer service such as the customer service representative/specialist.
Customer Service
Unlike before where telephone and SMS are utilized in customer service, customer support is currently provided to a business' client through email and digital media. Answering inquiries is just one part of customer service. You can also promote your items to your customers by emailing them the information that they need to continue their purchase. By doing this, you get to keep your existing customers and attract new ones.
Execution
Resources/Tools & Set up
- Zendesk account
Creating New Support Address
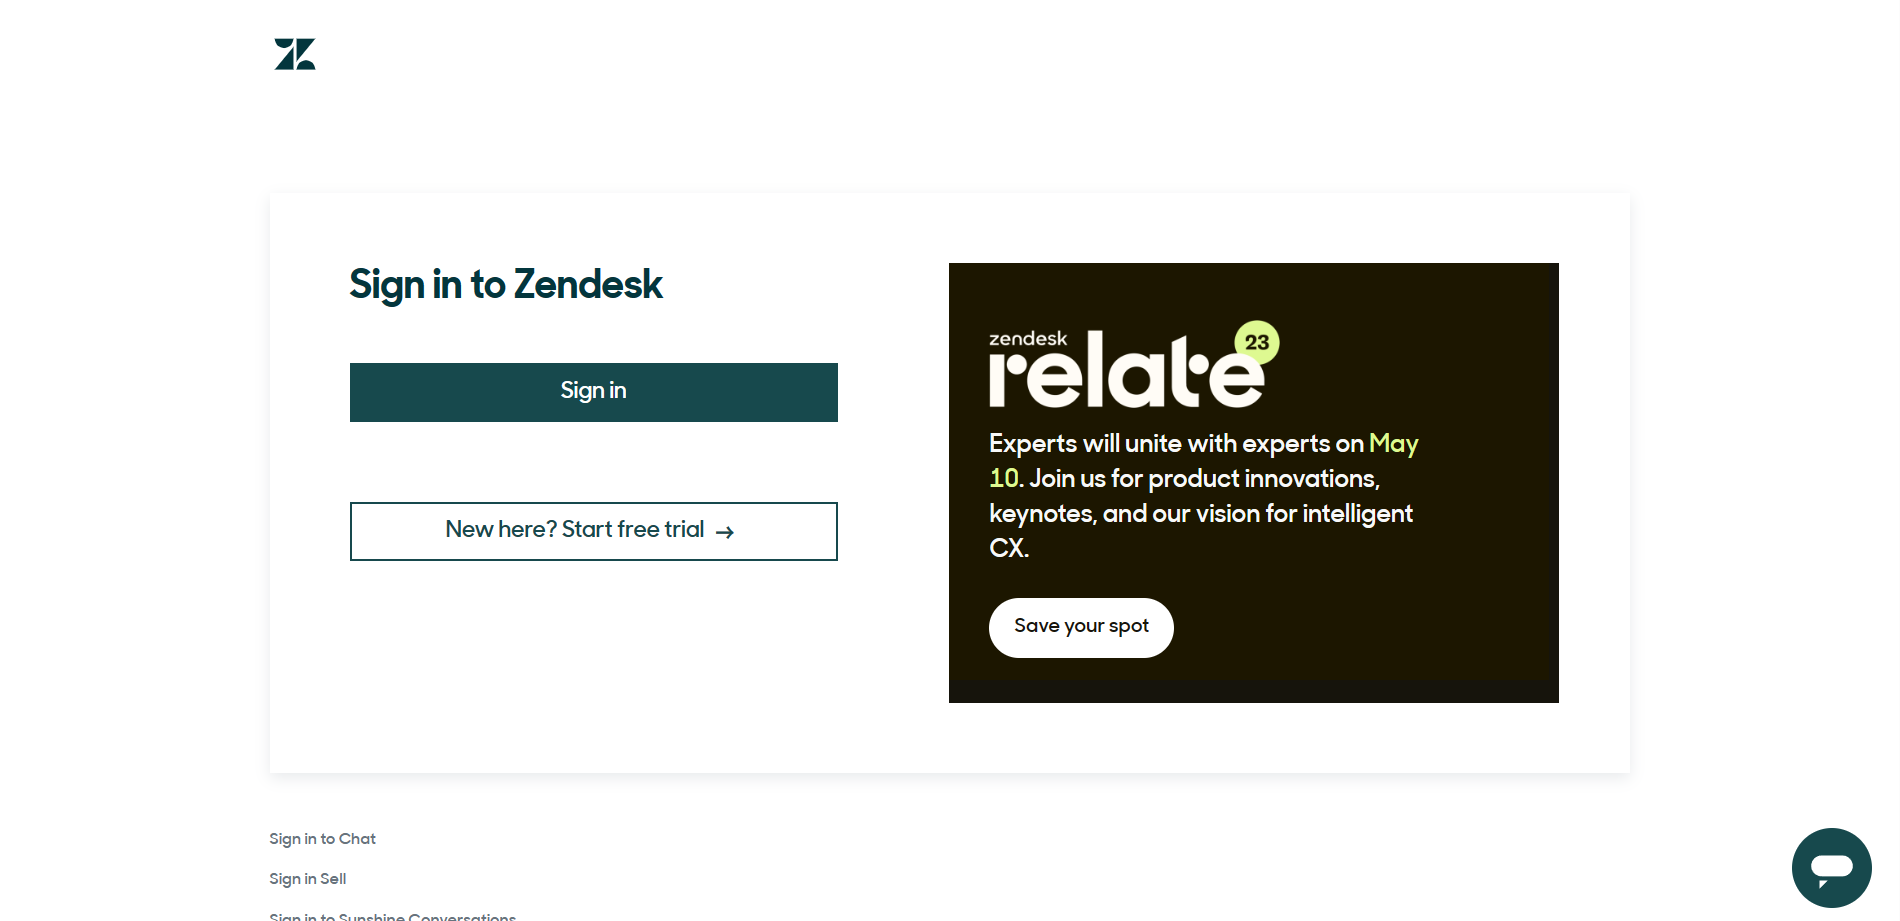
- Log in to your Zendesk account by clicking the “Sign in” button, or sign up for a new account by clicking the “Start free trial” button.
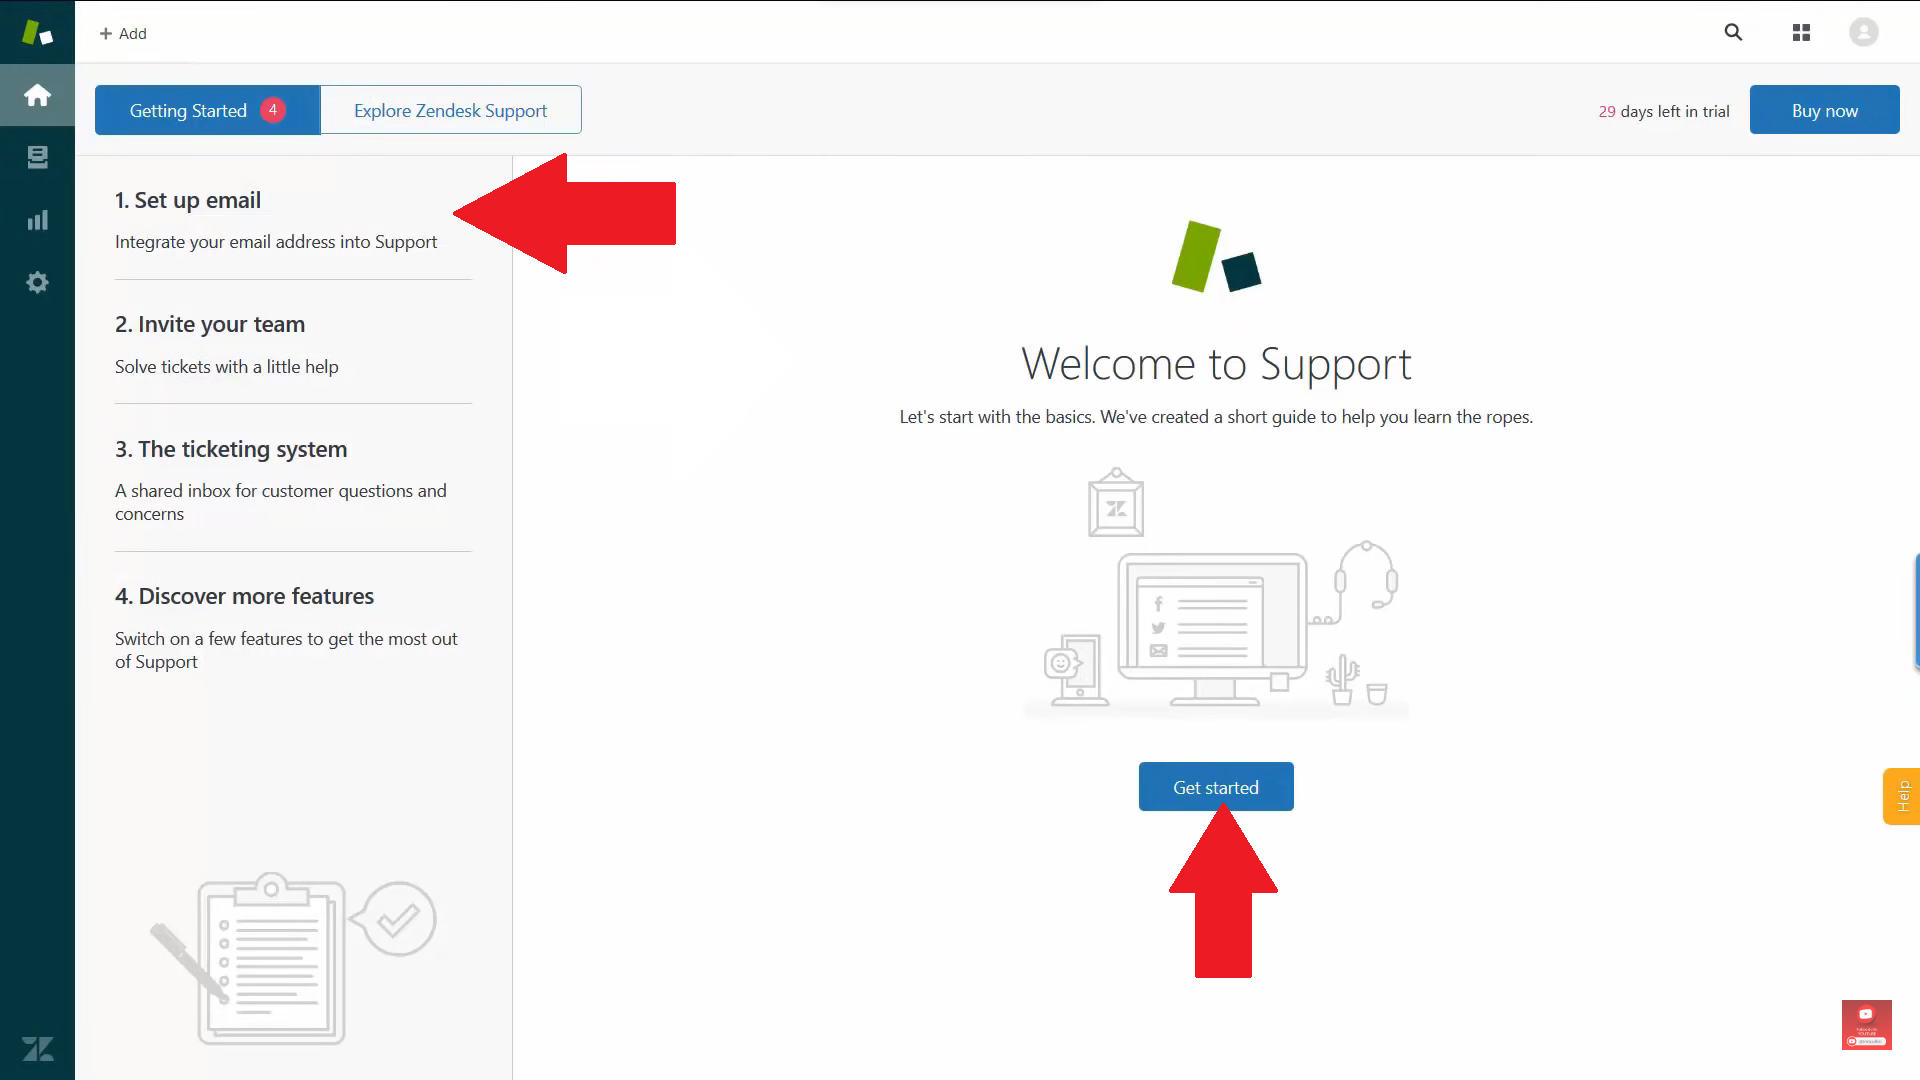
- The first step in getting started is to Set up the email. Since you used your work email in signing up, it will be integrated into your Support. Click “Get Started”.
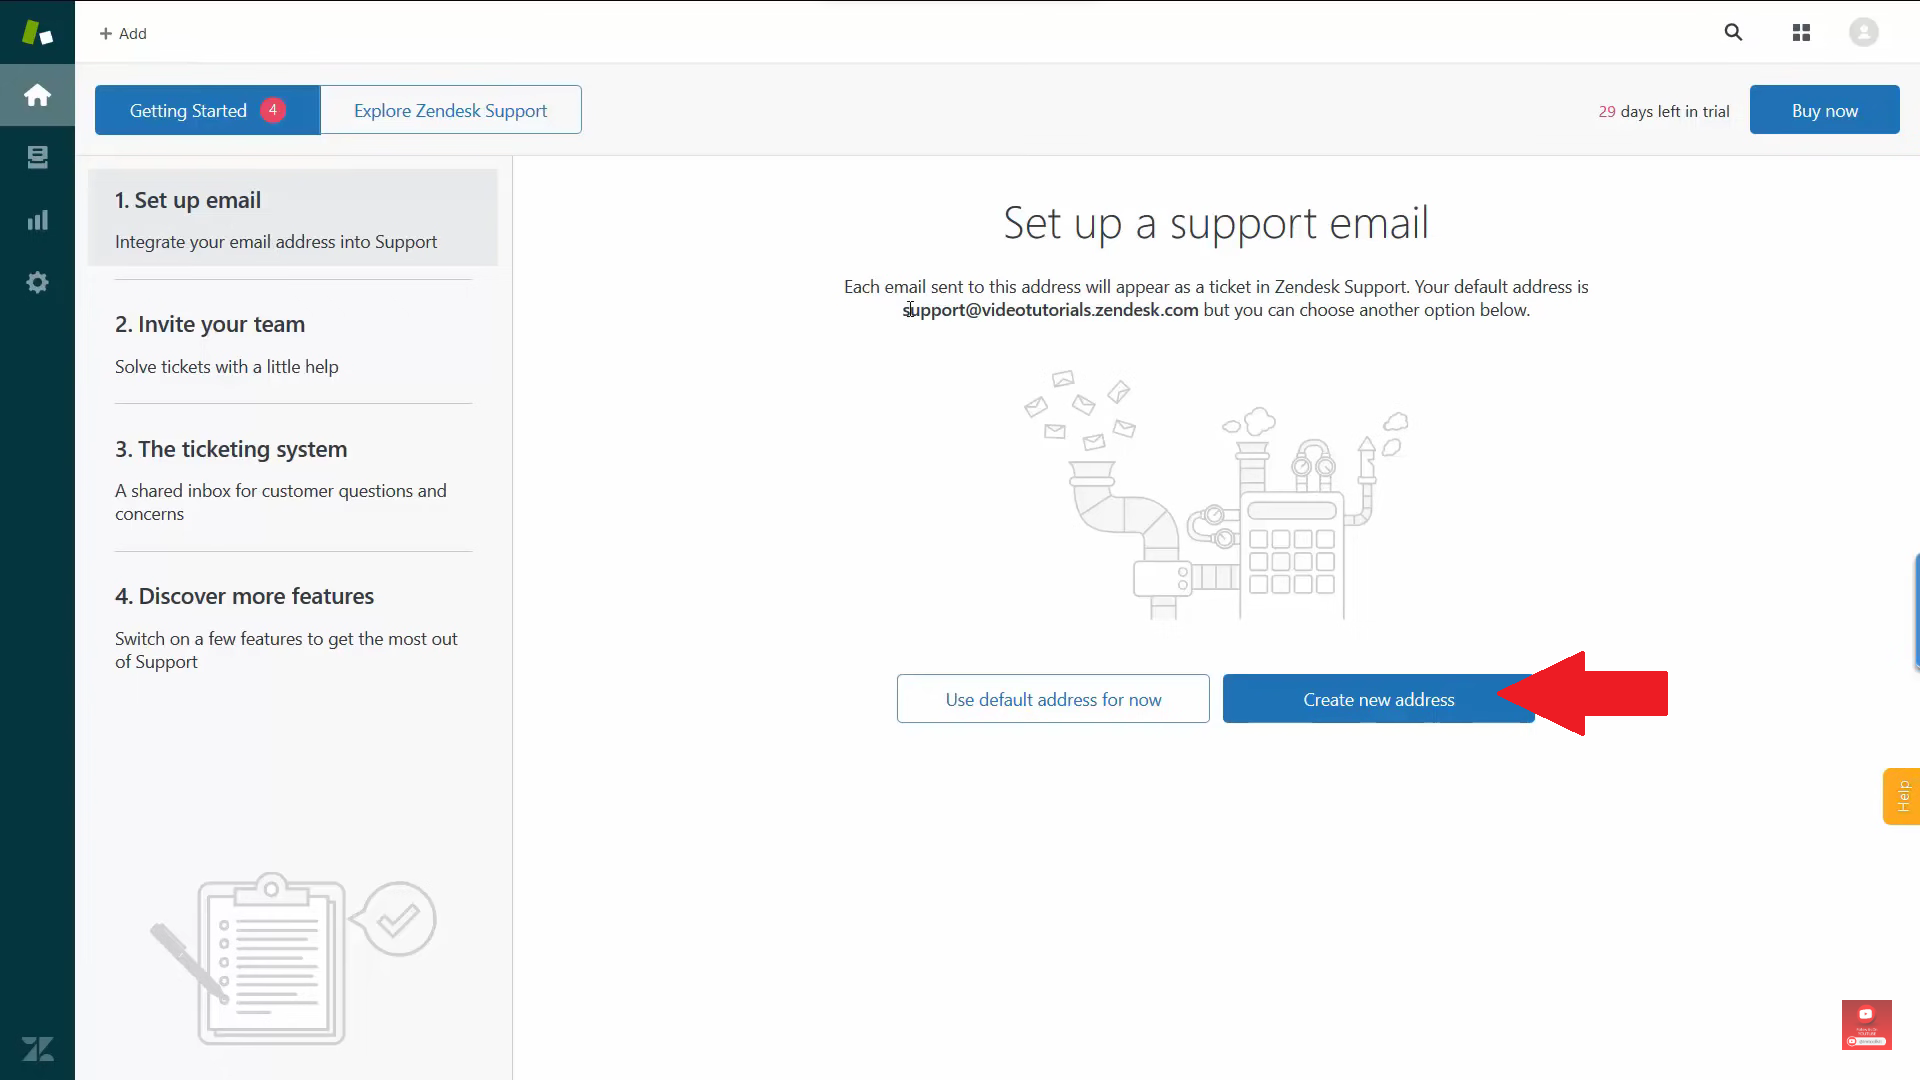
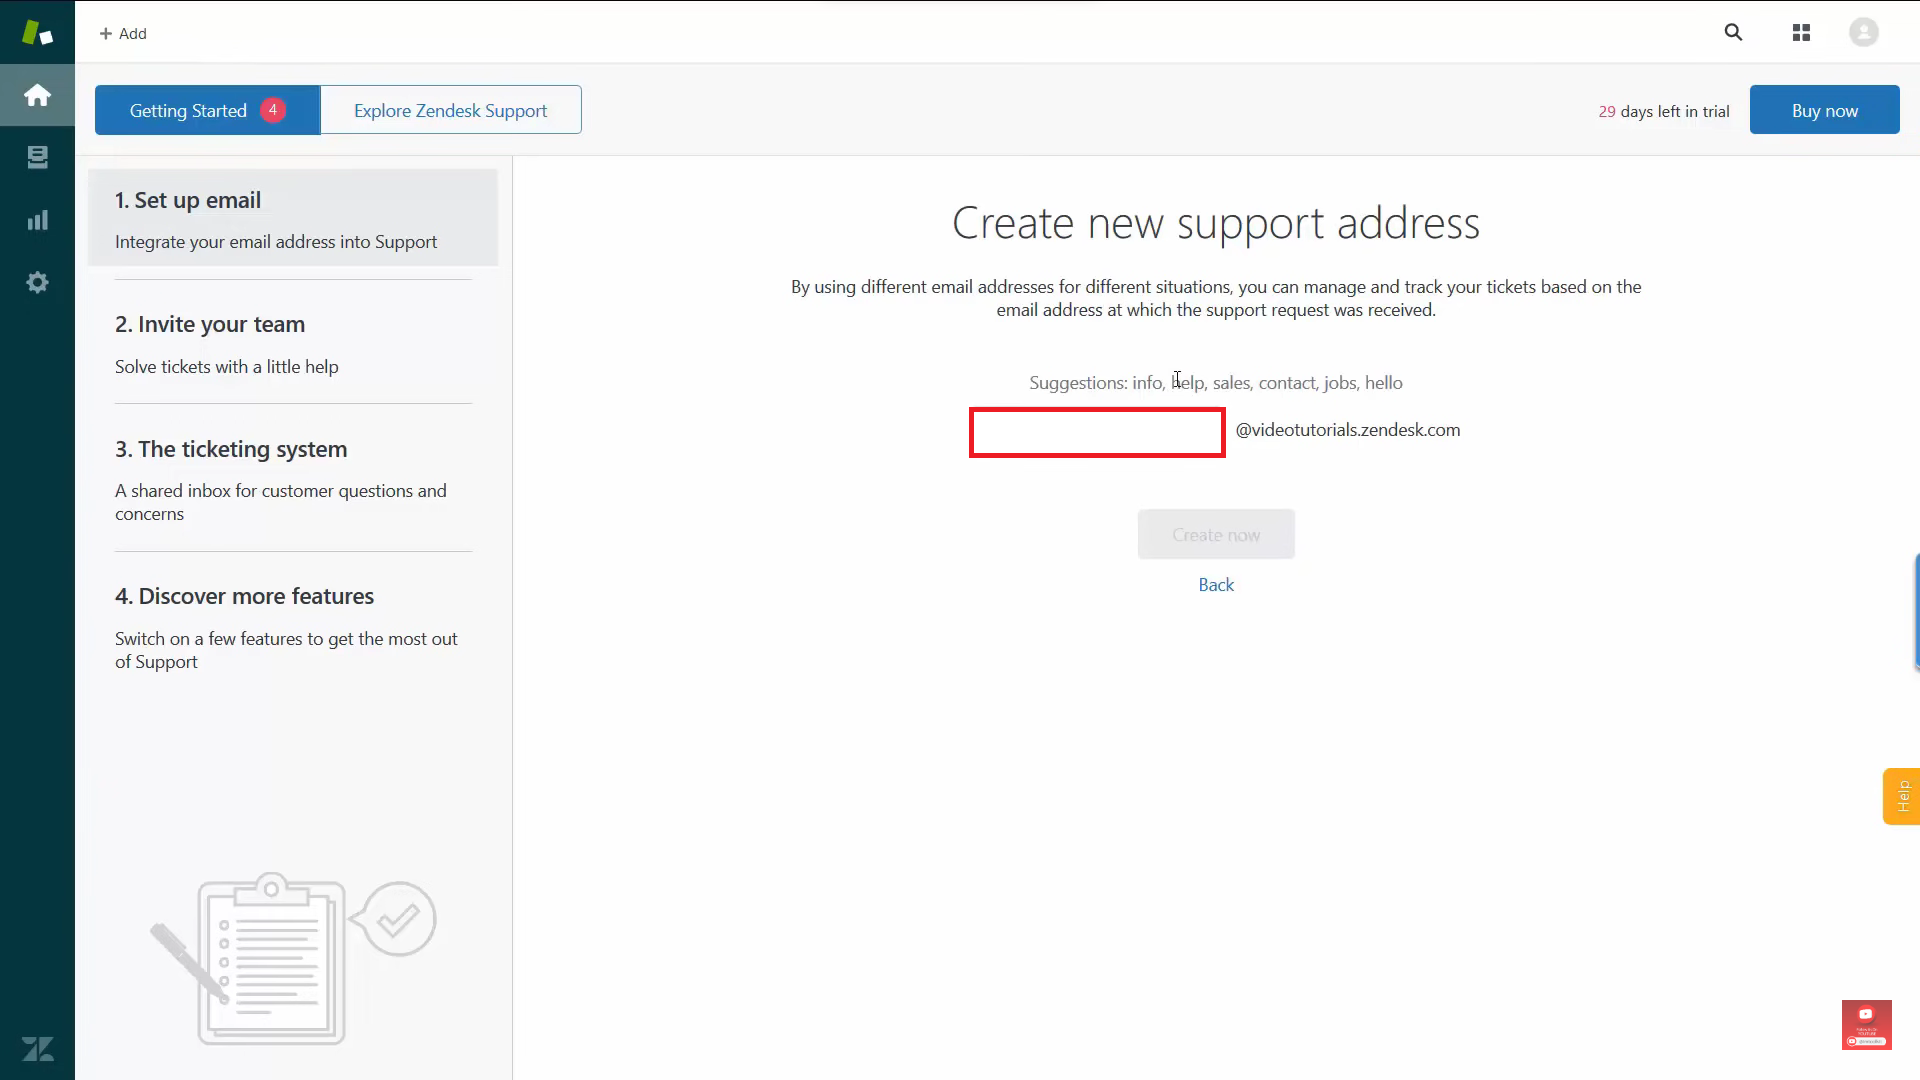
- You can use the default address that Zendesk has made for you which is in the format of support@yourworkemail.com, or you can create a new address which you will replace the “support” with another term. Click the preferred support email address.
- If you opted to create a new address, type the support address in the blank field as indicated below.
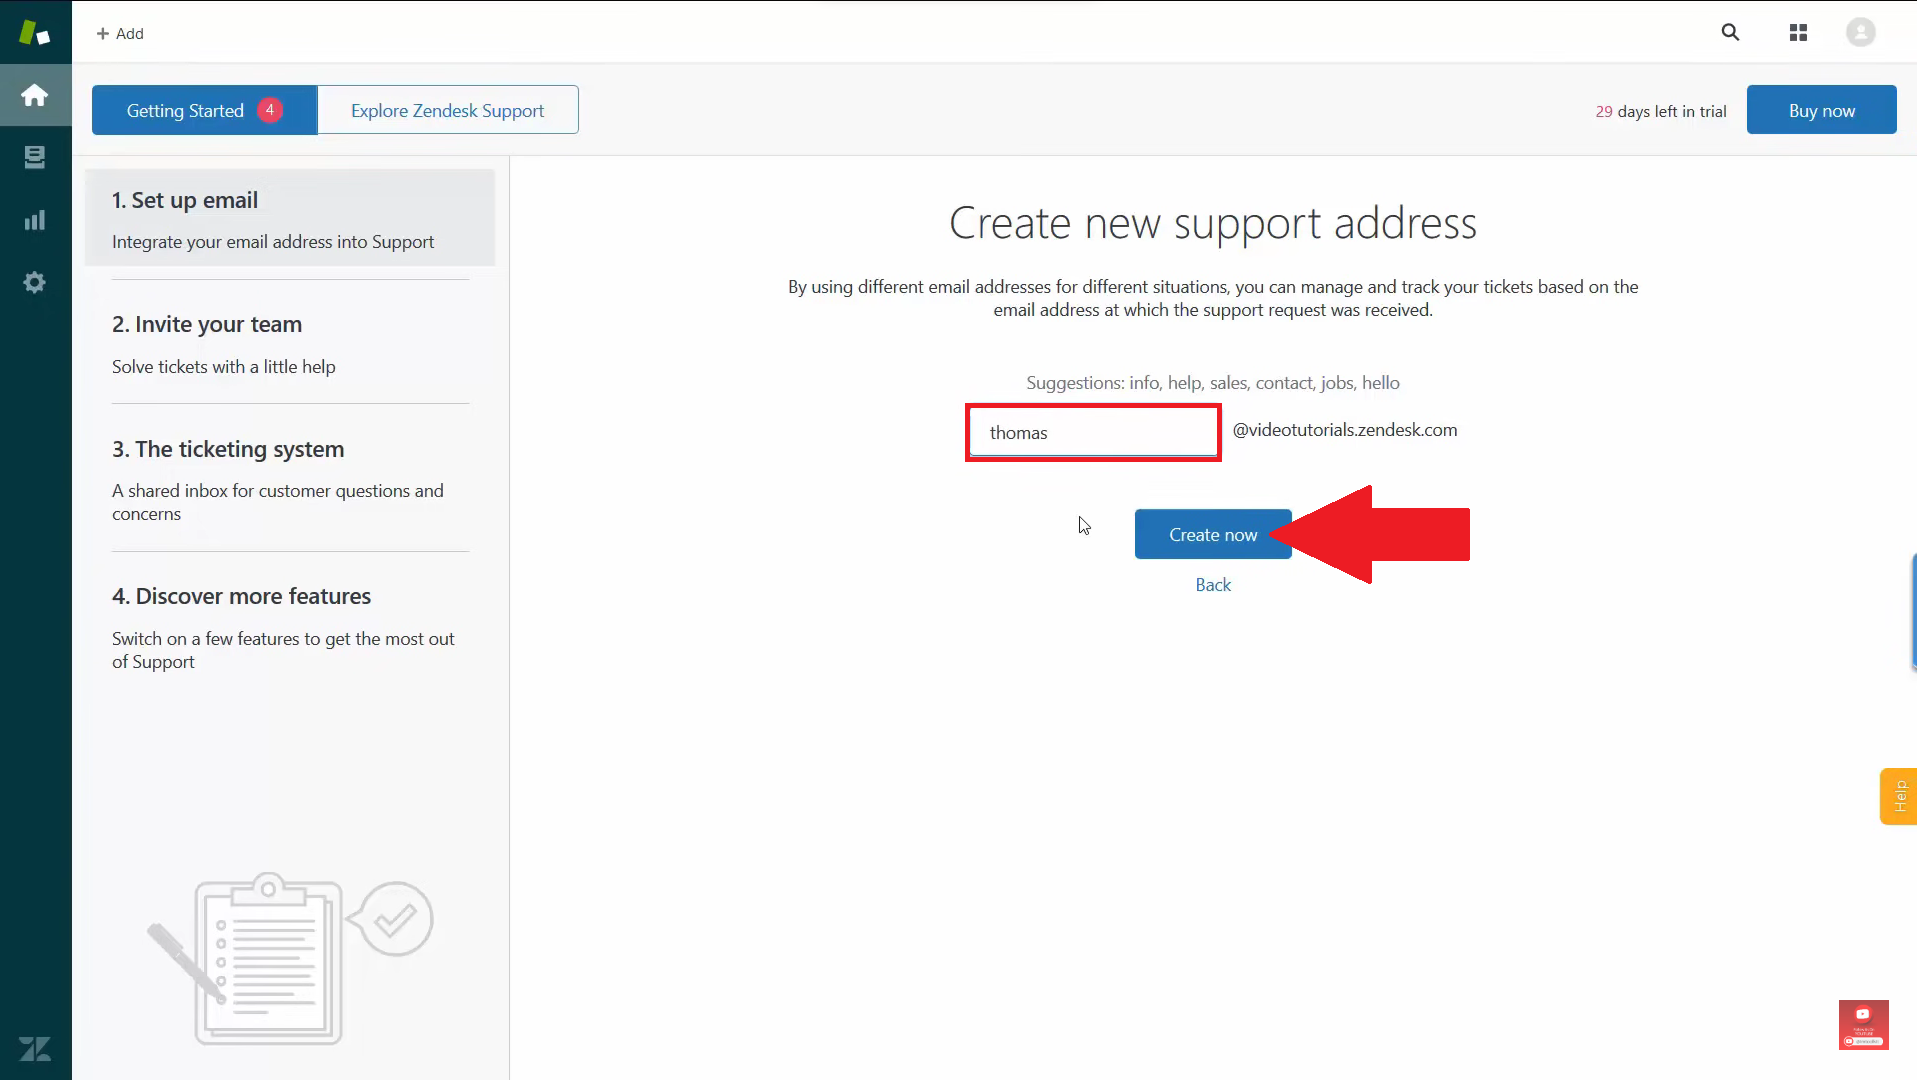
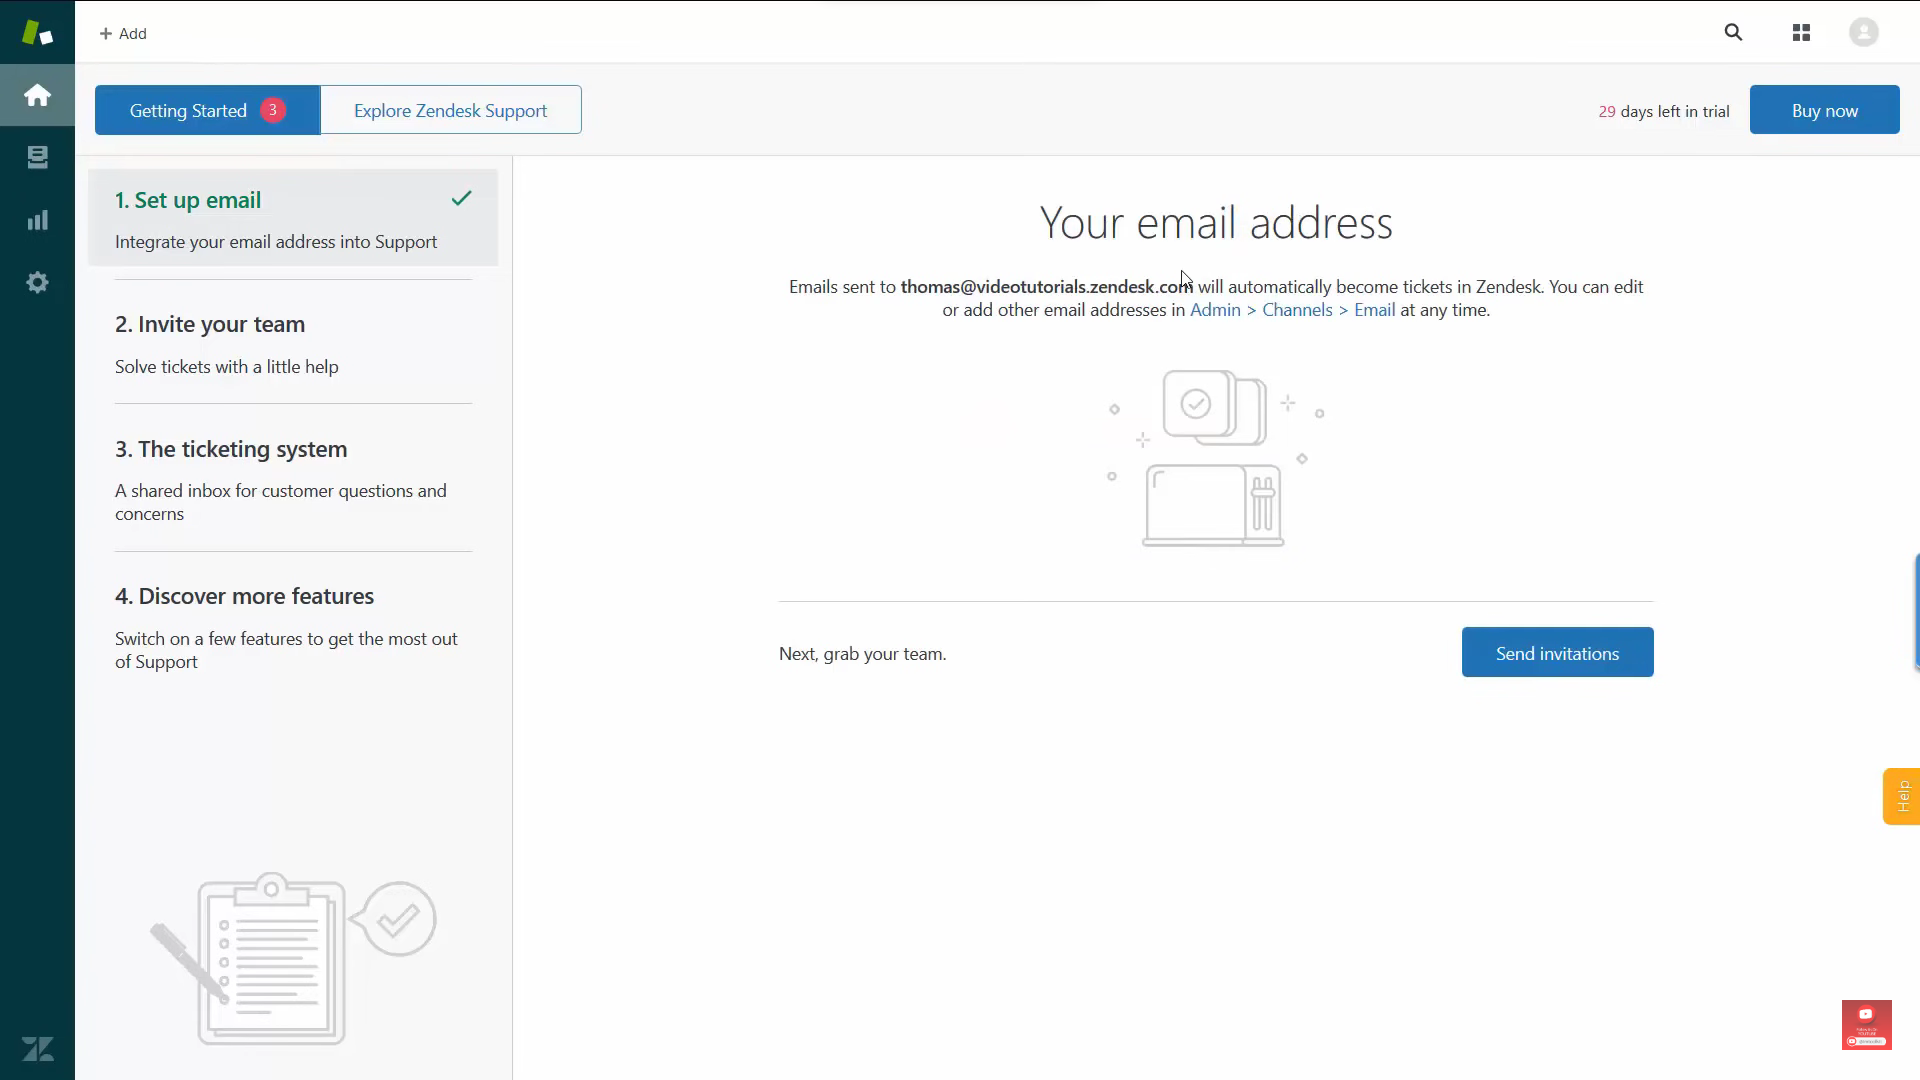
- After indicating the new support address, click the “Create now” button to record it as the support address.
- Setting Up Guide and Help Center
- After finalizing your email address for support services at Zendesk, click the Settings icon at the icon dashboard located on the left side of the website.
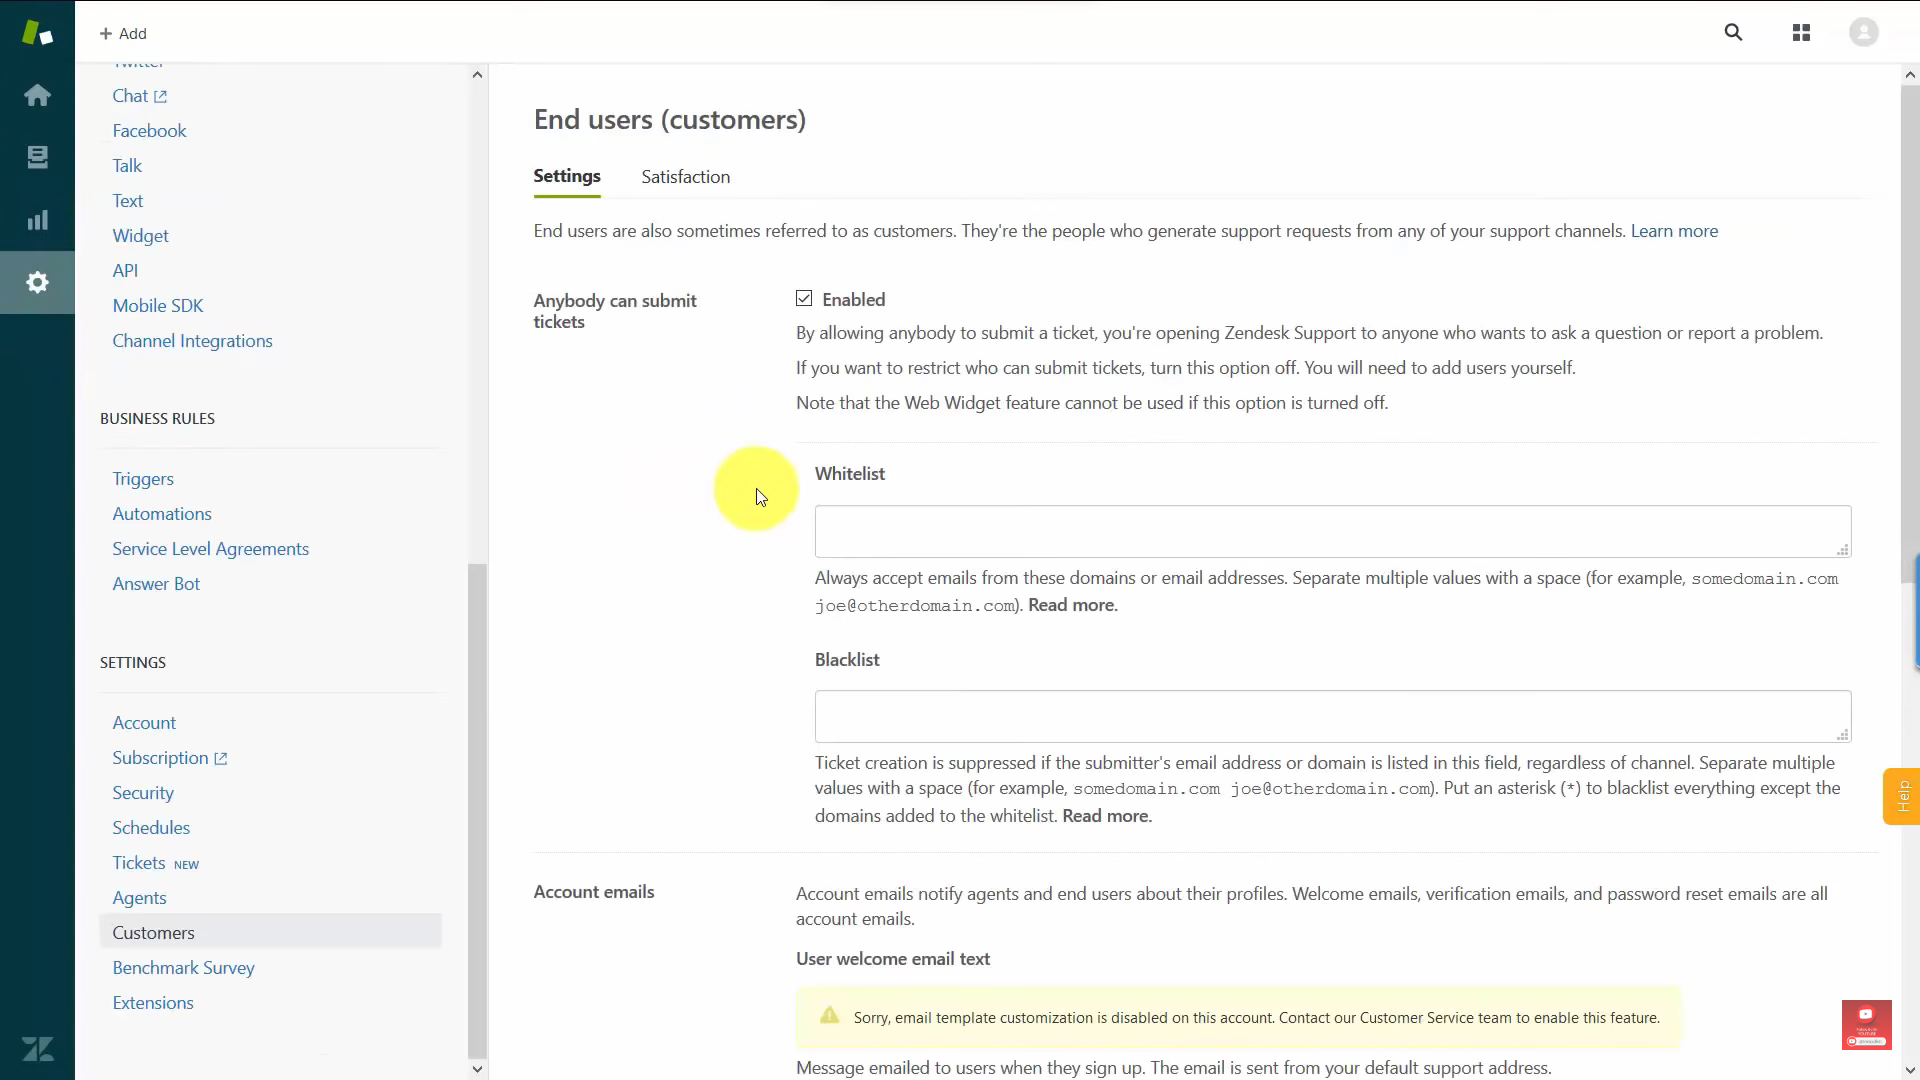
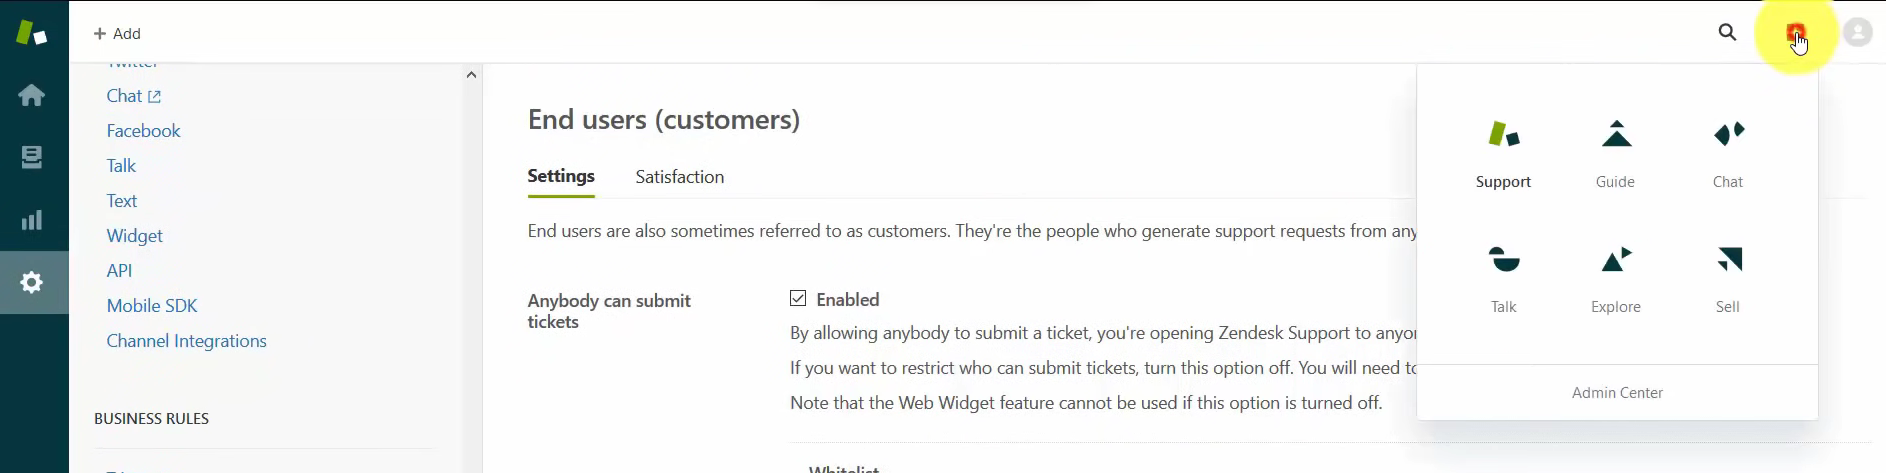
- Go to Customers, and click the Admin Center icon on the upper right, near the profile icon.
- In the Admin Center, click Guide. Guide is where you can activate a Help Center desk that customers can ask their inquiries and concerns about your store website.
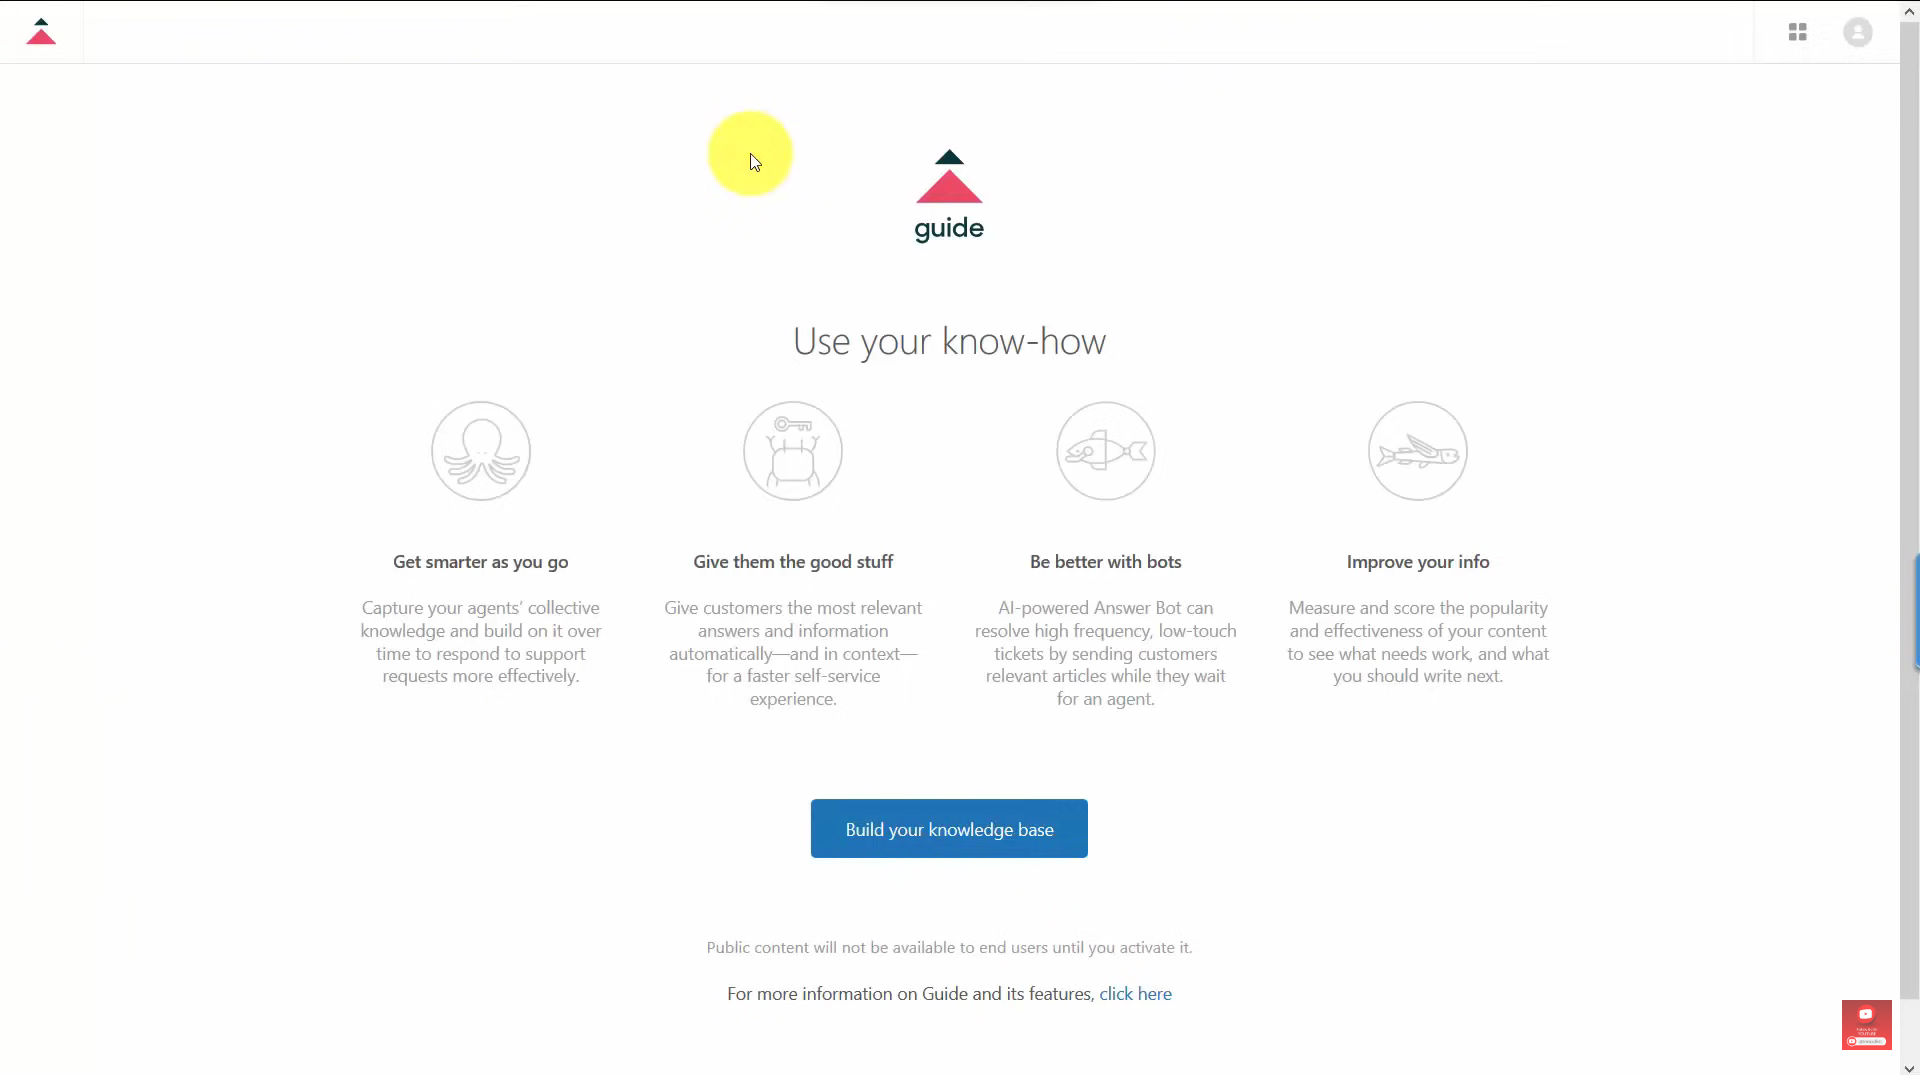
- To modify the settings in your Zendesk Guide, click the “Build your knowledge base” button.
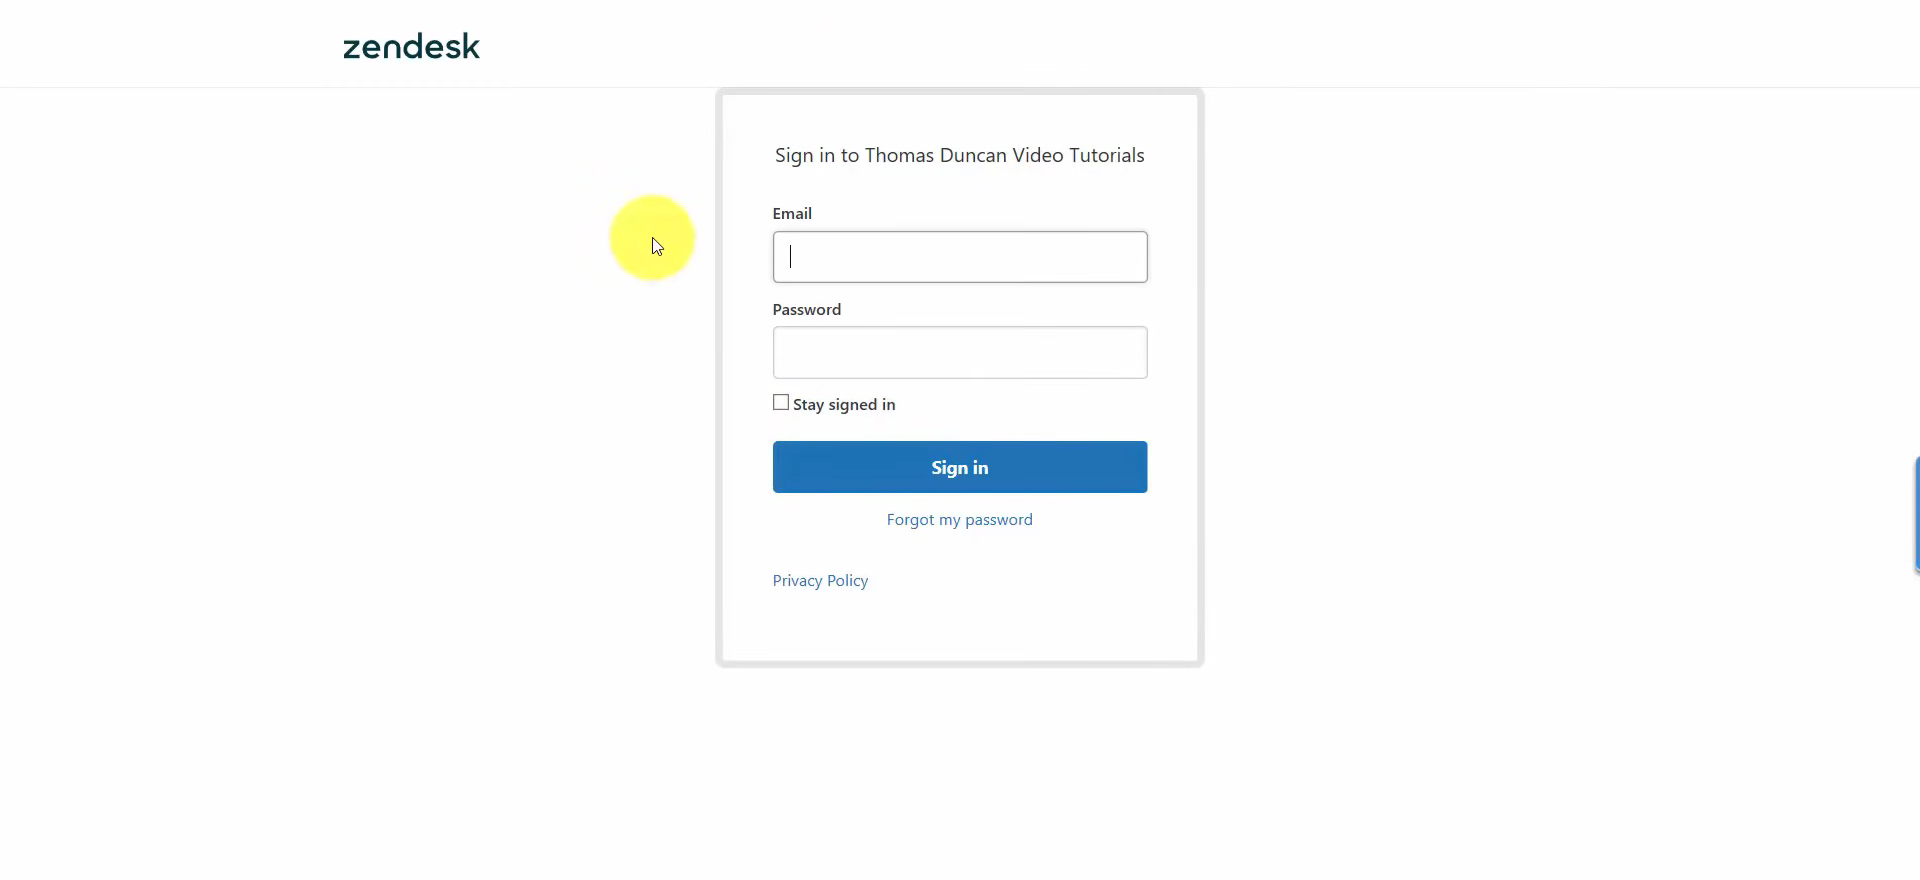
- You need to sign in again using your Email address and Password to change the settings in the Zendesk Guide.
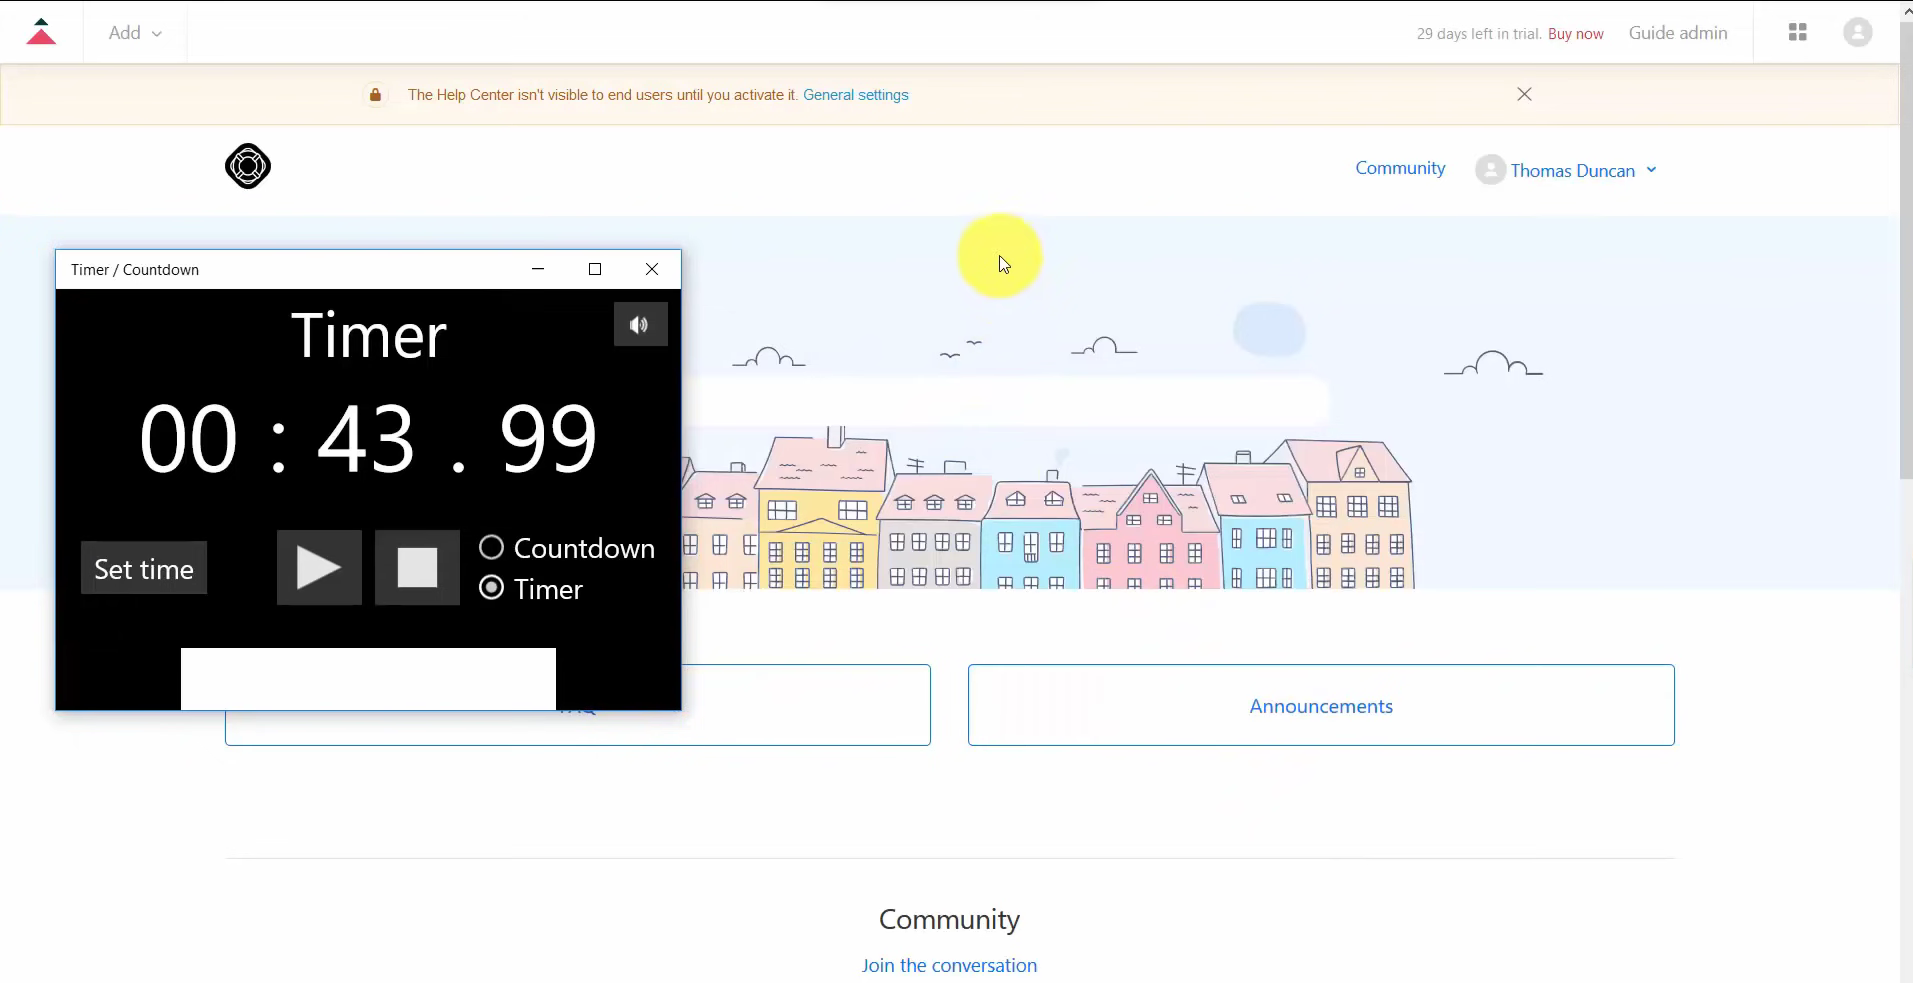
- After navigating to the Guide, you will see a pop up reminder to activate your Help Center if it hasn’t been activated before. Click the “General settings” to activate it and see other settings for the Guide.
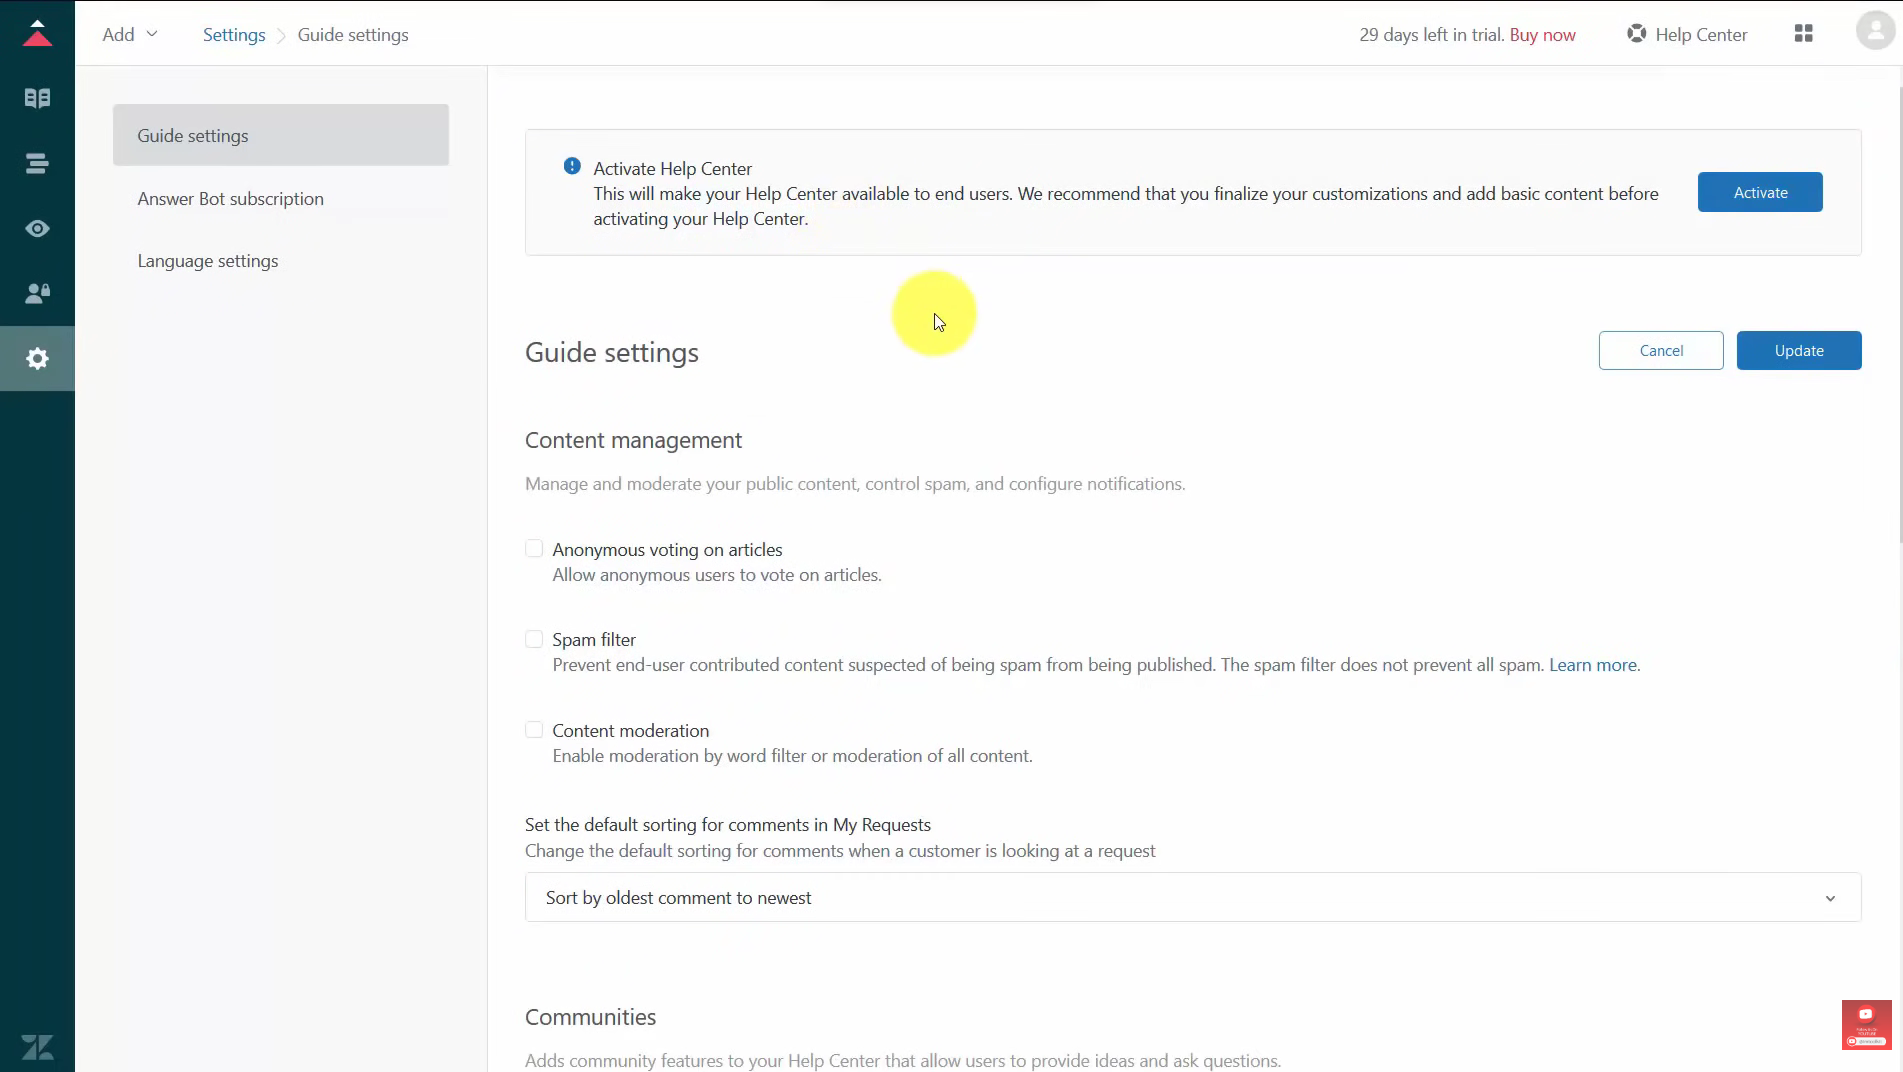
- After navigating to the Guide settings, activate the Help Center by clicking the “Activate” button.
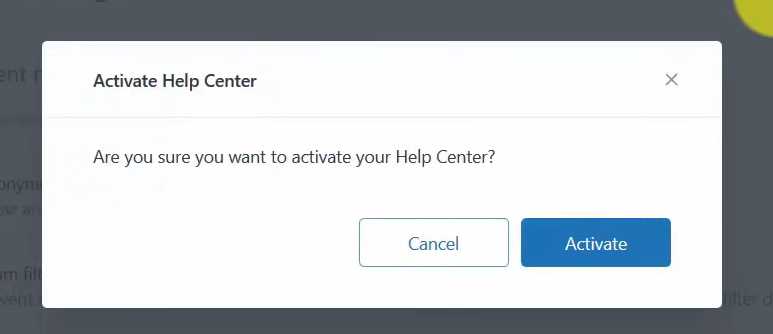
- A new pop-up tab will open to confirm if you want to activate the Help Center. Click the “Activate” button to finalize it.
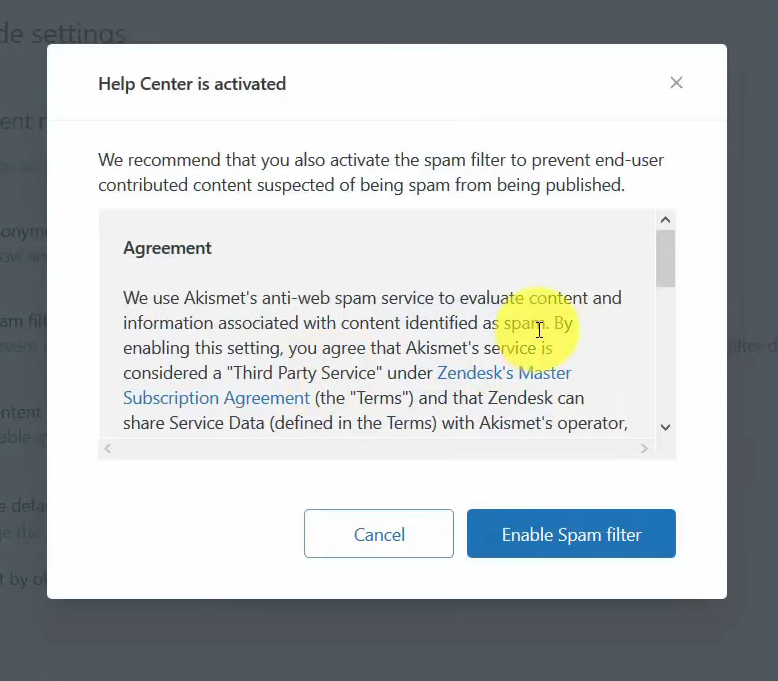
- After the Help Center is activated, there will be a suggestion for Enabling the spam filter. An agreement will be presented to you, and you can review and analyze it so as to not violate any legal laws in utilizing Zendesk. To enable the spam filter, click the “Enable Spam Filter”. If you do not want to enable it, just click “Cancel”.
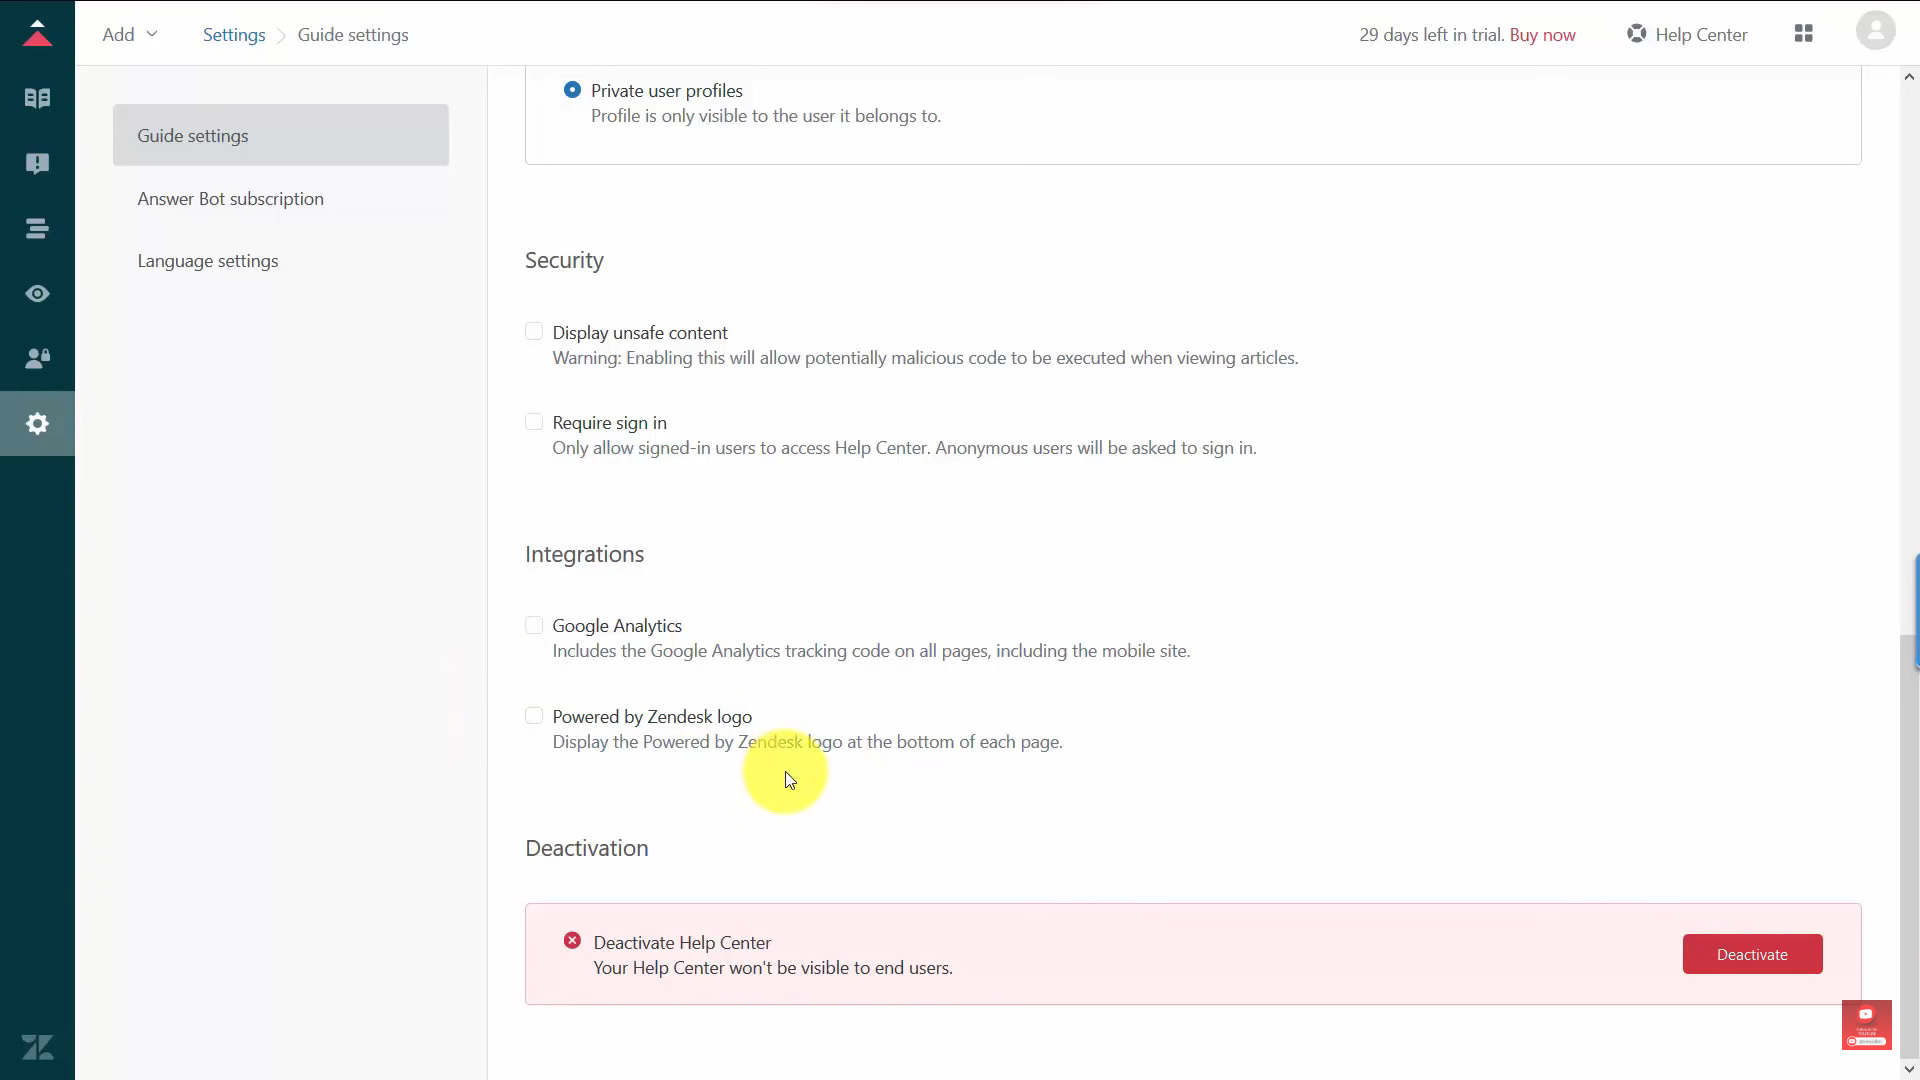
- In the Guide settings, you can add community features to the Help Center to help your customers. Under User profiles, you can choose between Public and Private, where public profiles are exposed to all users and private profiles are anonymous to the others. These settings are available in a checkbox, so check the community features that you want to include to your Help Center.
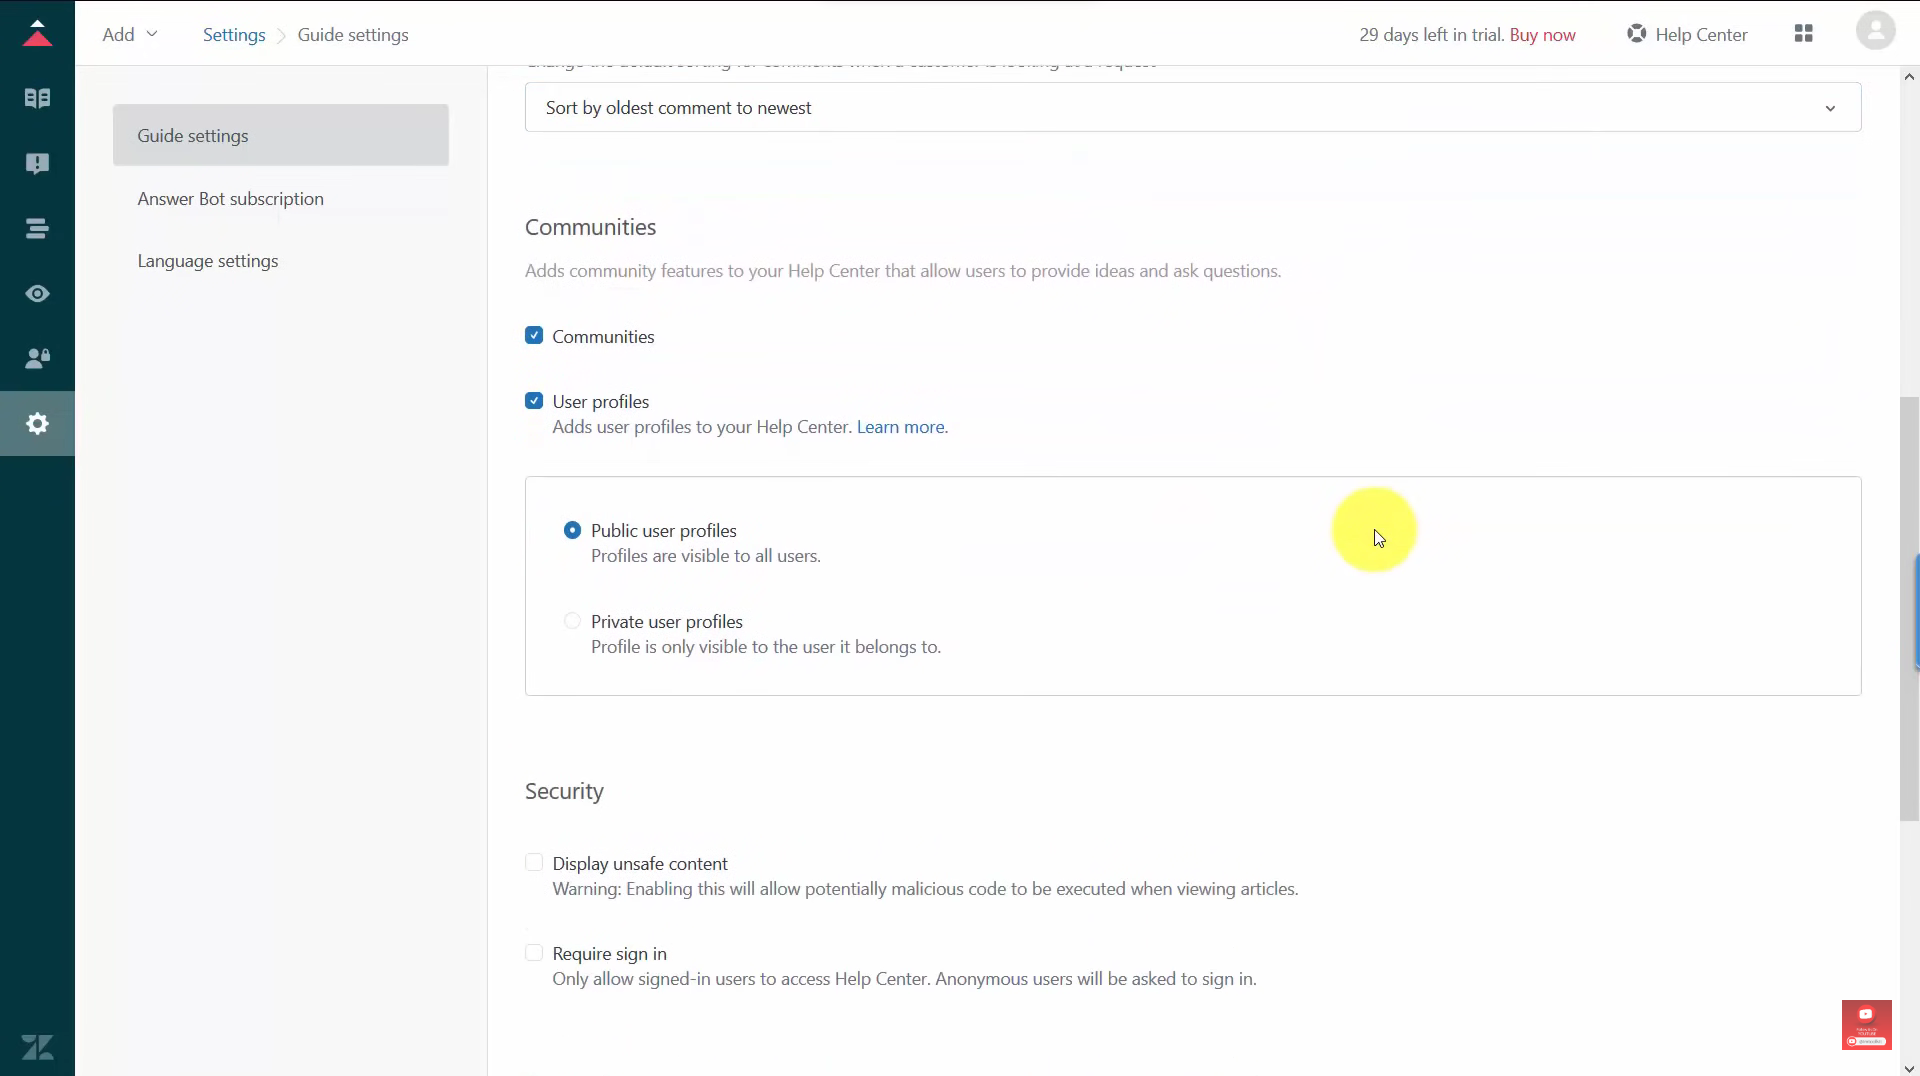
- Under Security settings, you can choose to not display unsafe content and require sign-in on the Help Center. This is to keep the malicious tickets to affect those in the customer support field. You can also integrate Google Analytics and display the Zendesk logo in the Help Center. Check the appropriate boxes if you want to activate the security measures and integrate certain features.
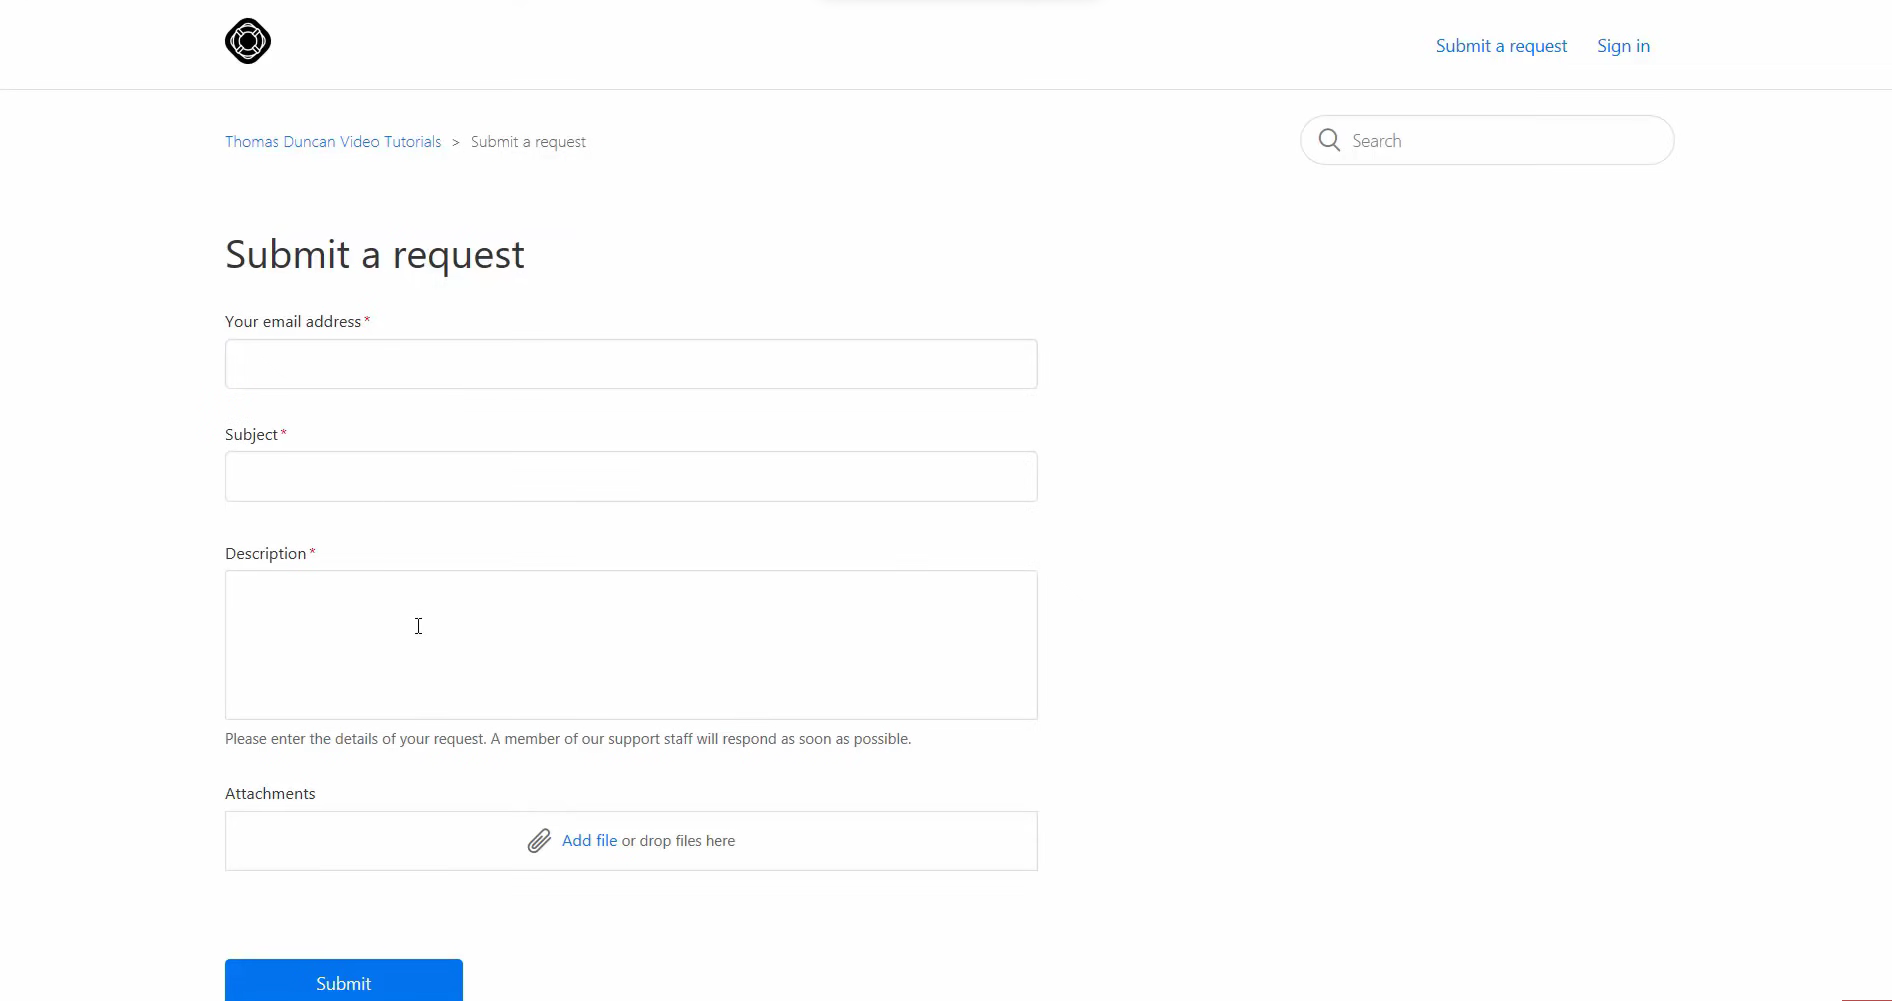
- In your visitors’ view, this will be the Help Center where they will be able to submit tickets involving their concern and questions about your website and products.
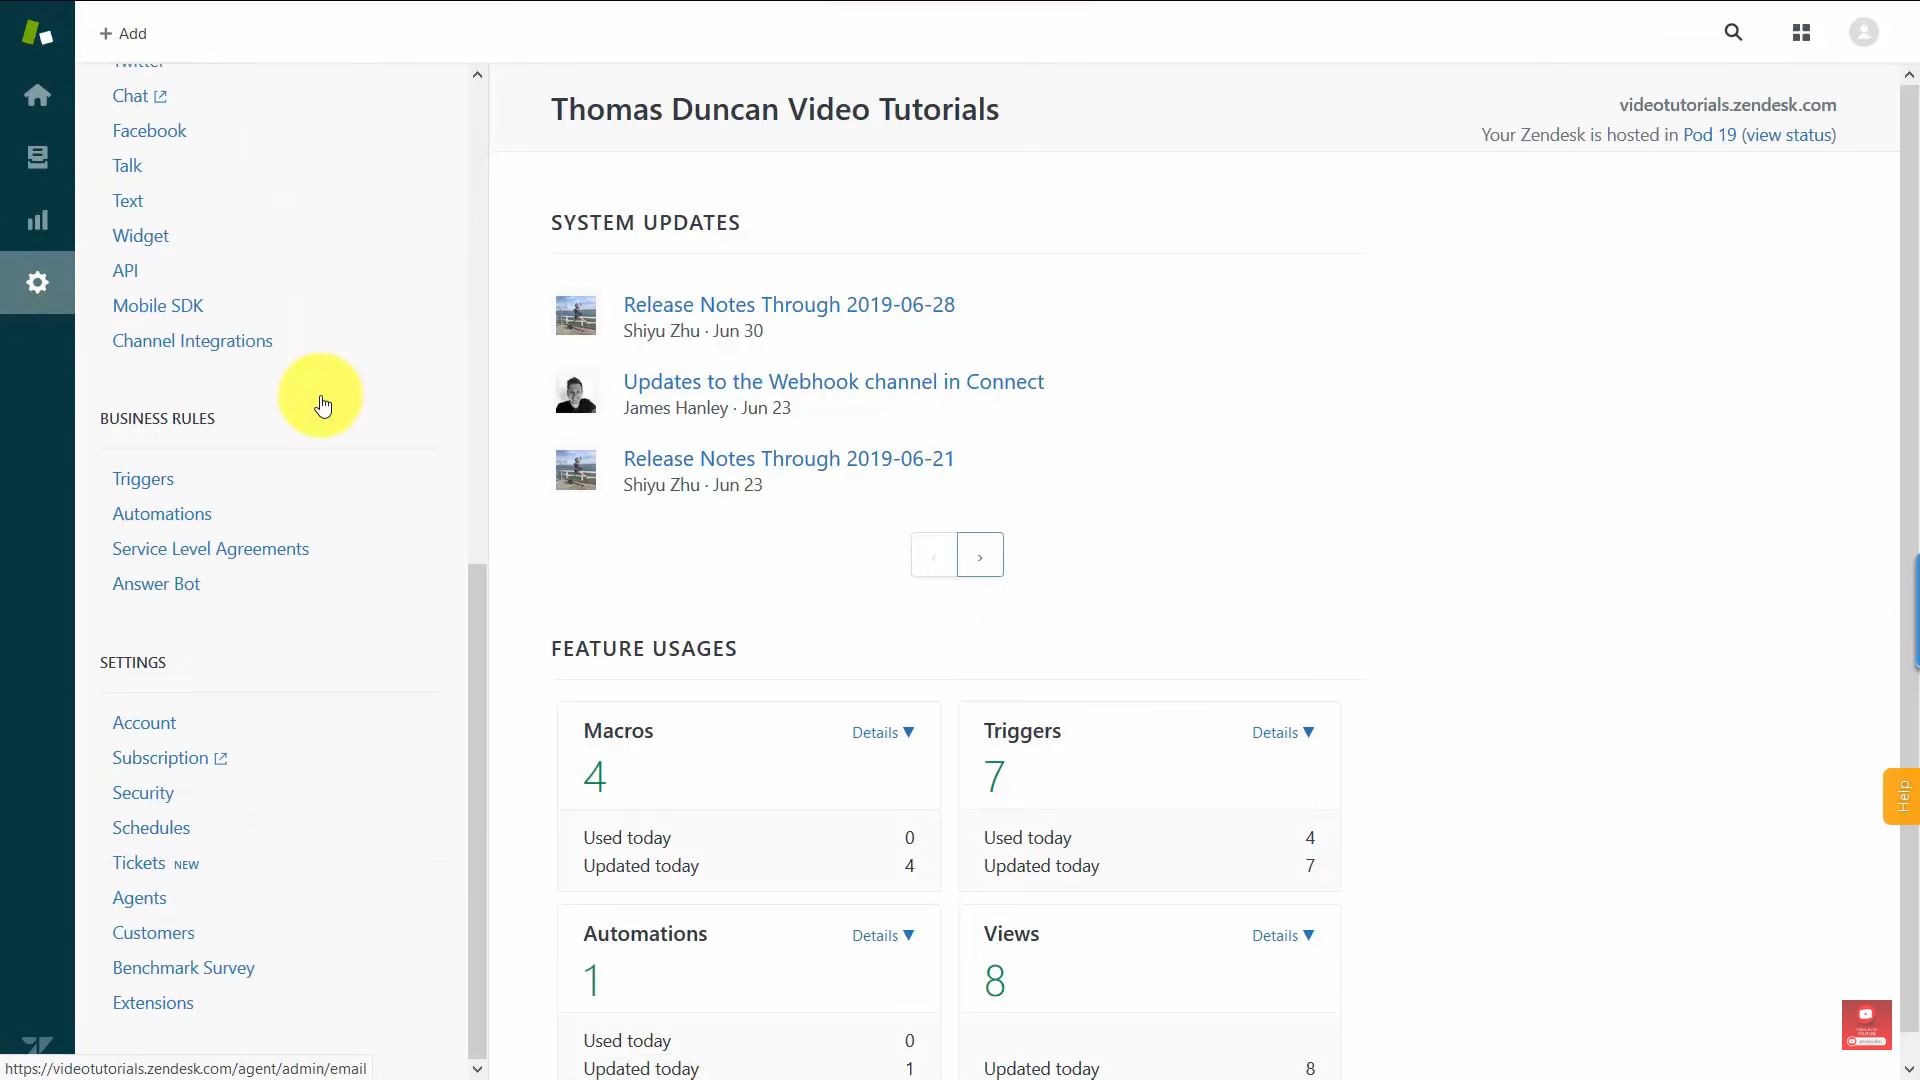
- Modifying Customer Settings
- Under Settings, click “Customers” to view its settings.
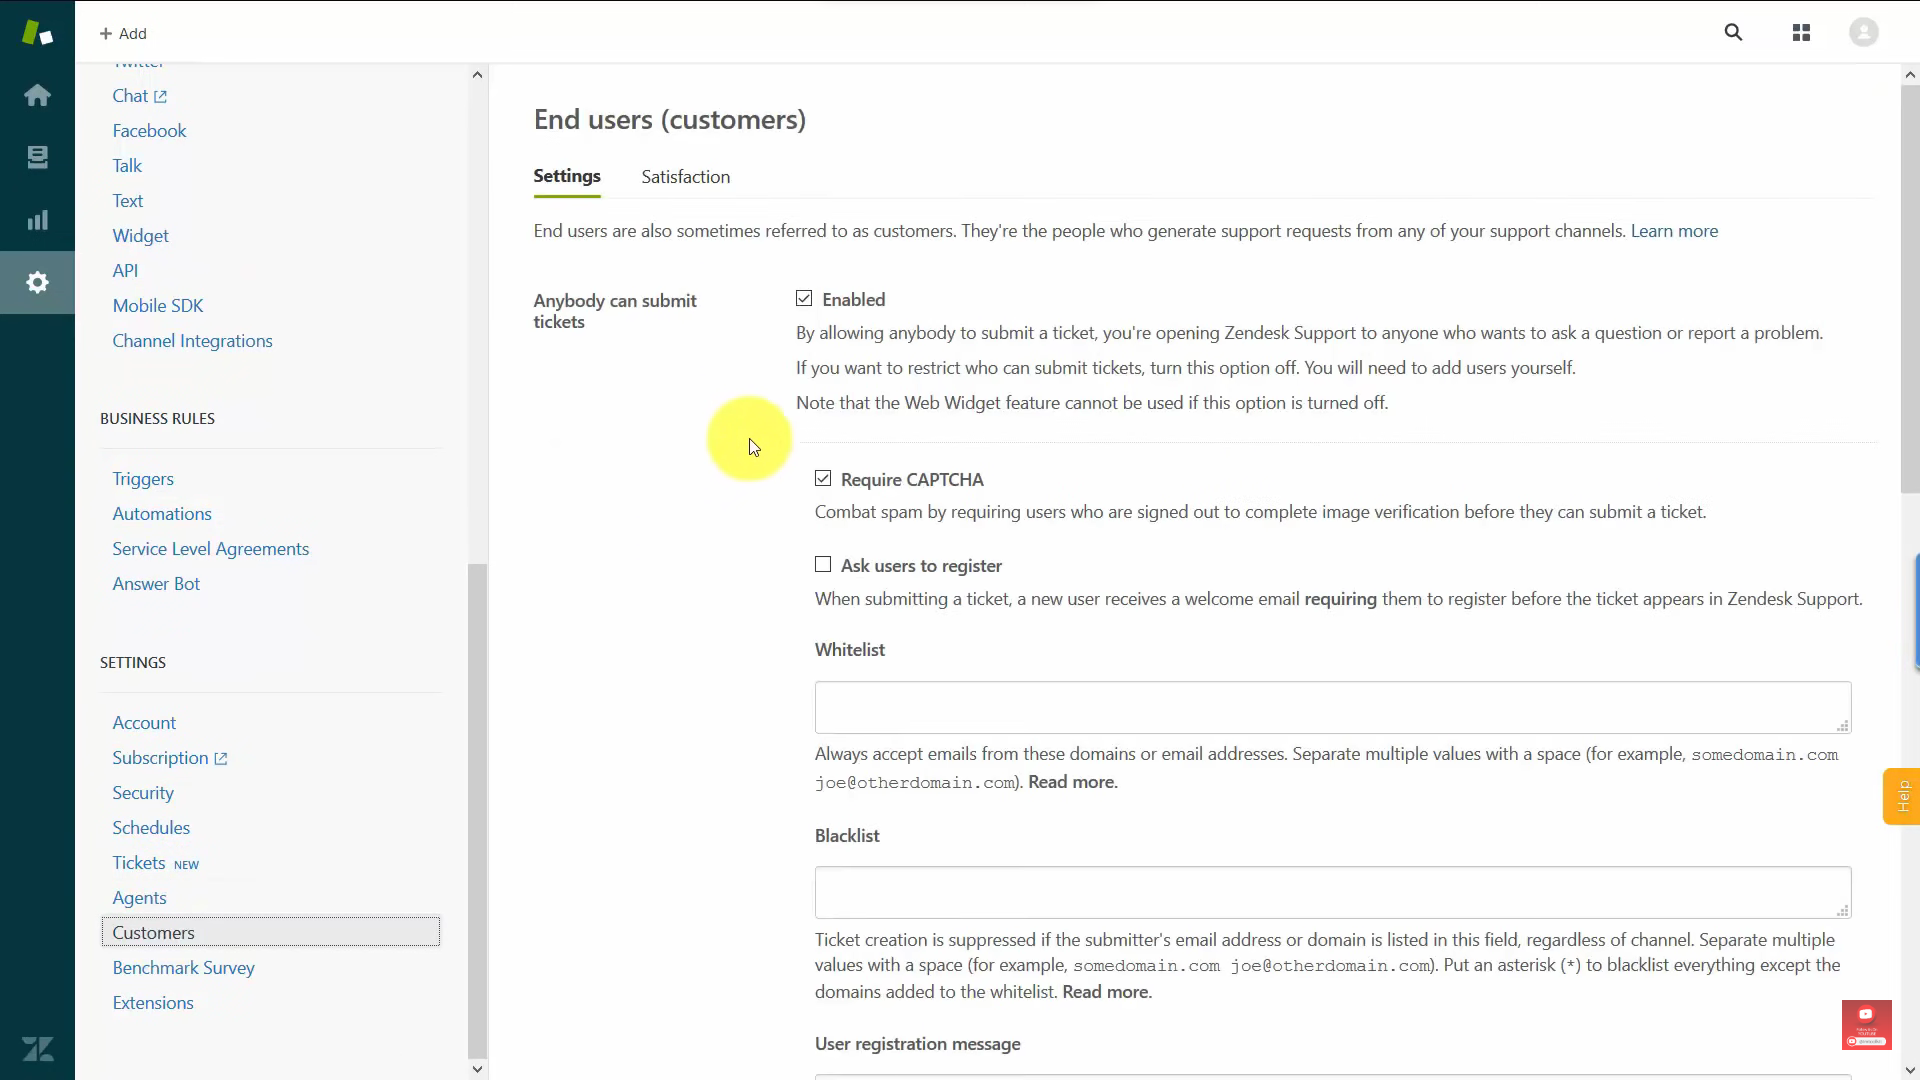
- Under the Settings tab, you can enable or disable the option that “Anyone can submit tickets”. If the checkbox for it is enabled, you are allowing everyone to ask inquiries in your Zendesk Support. If it is disabled, then only people you added can access and ask inquiries. You can also require CAPTCHA on every person to minimize spamming. You can also ask for your customers to register before their ticket is answered by the Help Desk. Lastly, whitelist and blacklist accounts can be indicated in the blank field as shown below.
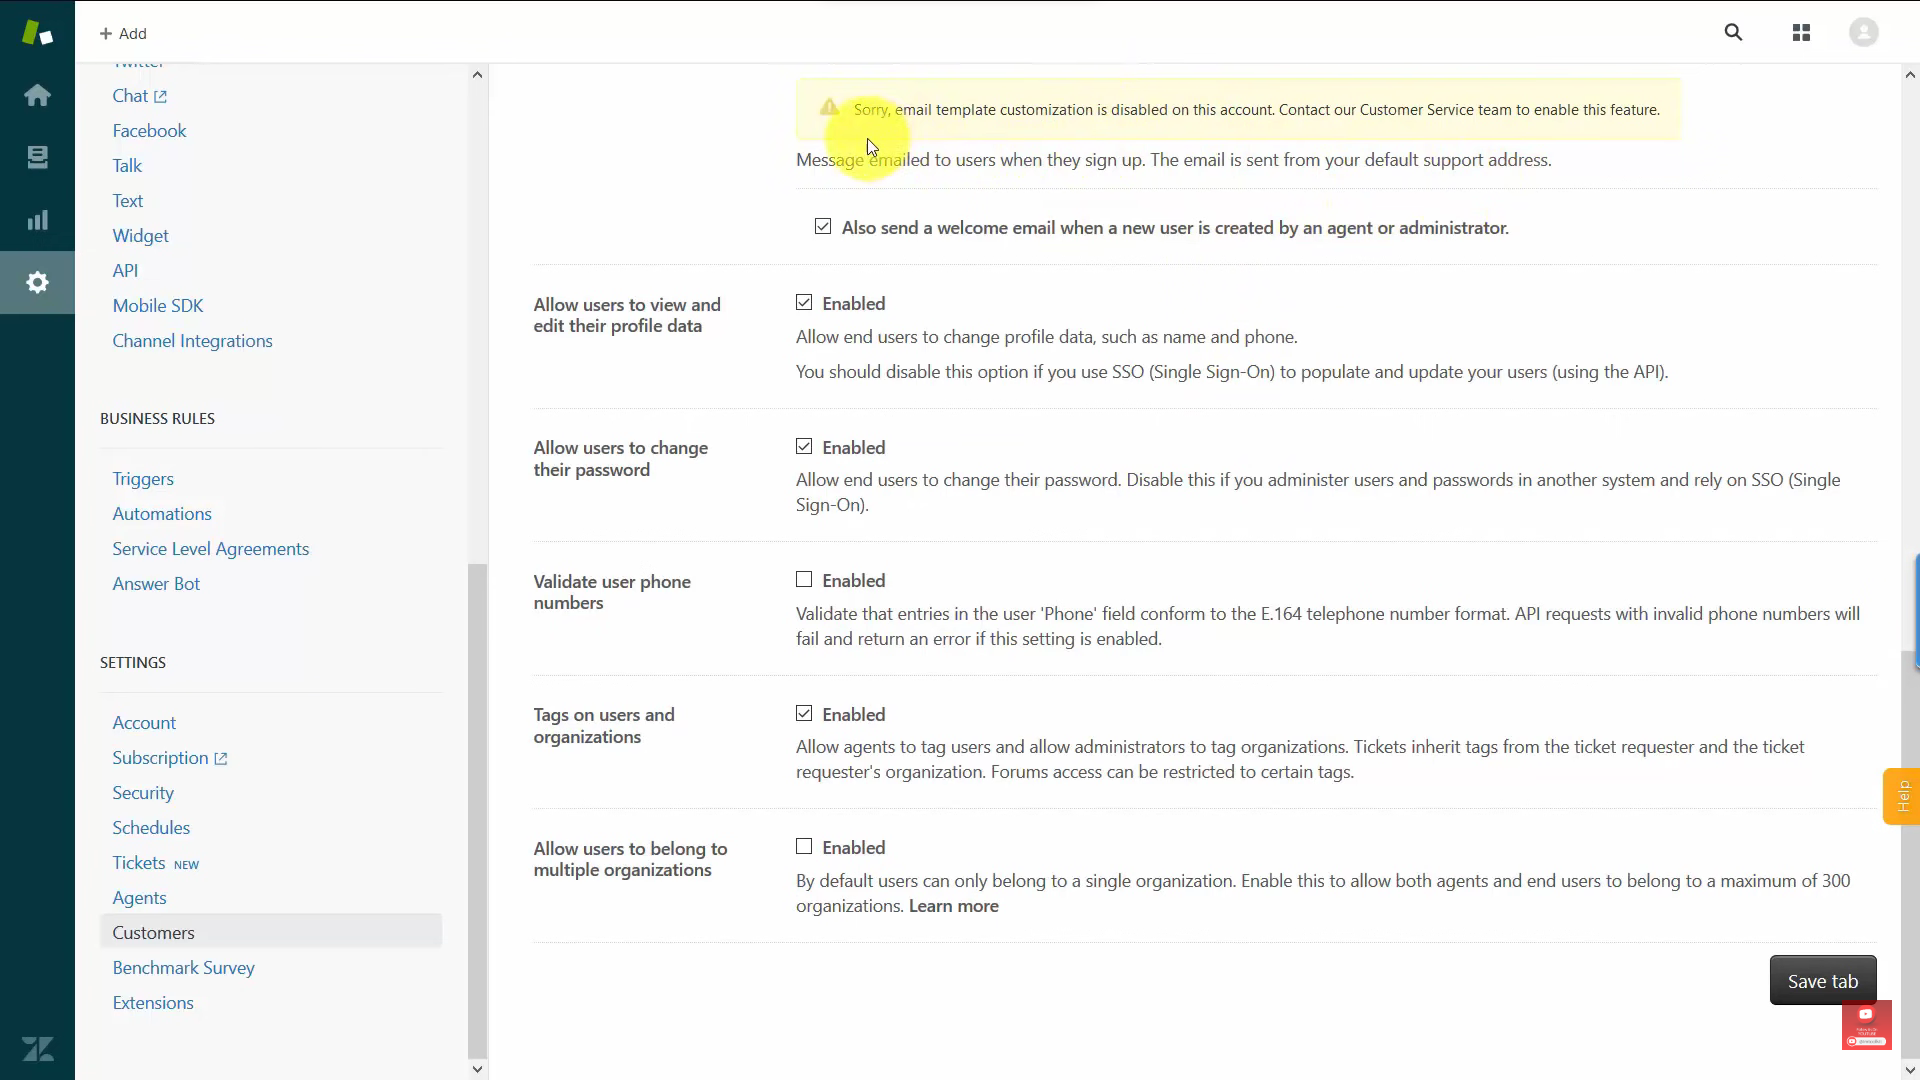
- Scrolling down, there are several things that you can enable under Guide. These are:
-
To allow users to view and edit their profile data
-
To allow users to change their password
-
To validate user phone numbers
-
To allow tags on users and organizations
-
To allow users to belong to multiple organizations
You can check or uncheck the box beside each setting based on your preference. Lastly, click the “Save tab” button after finalizing the settings.
- Modifying Agent Settings
- Under Settings, click “Agents” to view its settings.
- Under the Agents tab, you can modify the signature, ticket deletion settings, and the email forwarding of the ticket coming from your customers. With these features enabled, you allow transparency for both customer and agent who want to resolve the tickets.
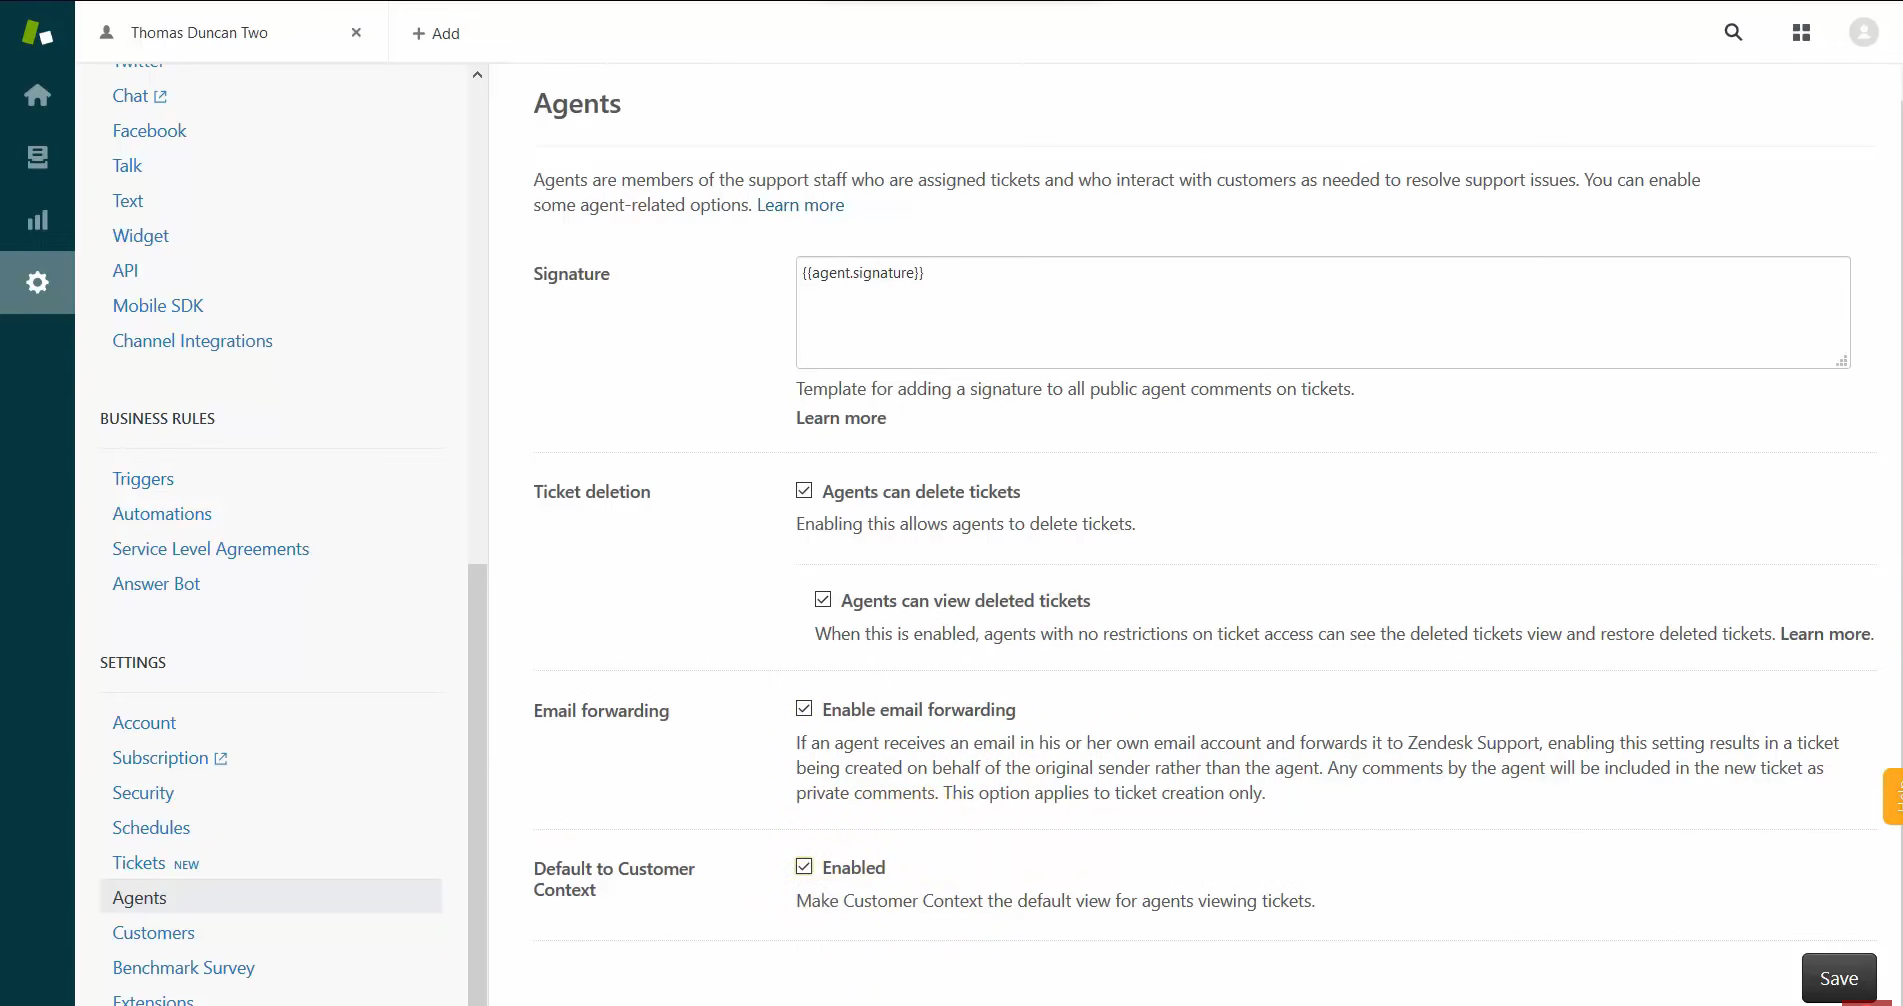
Click the Save button after modifying the settings for the customer support agents.
- Modifying Ticket Settings
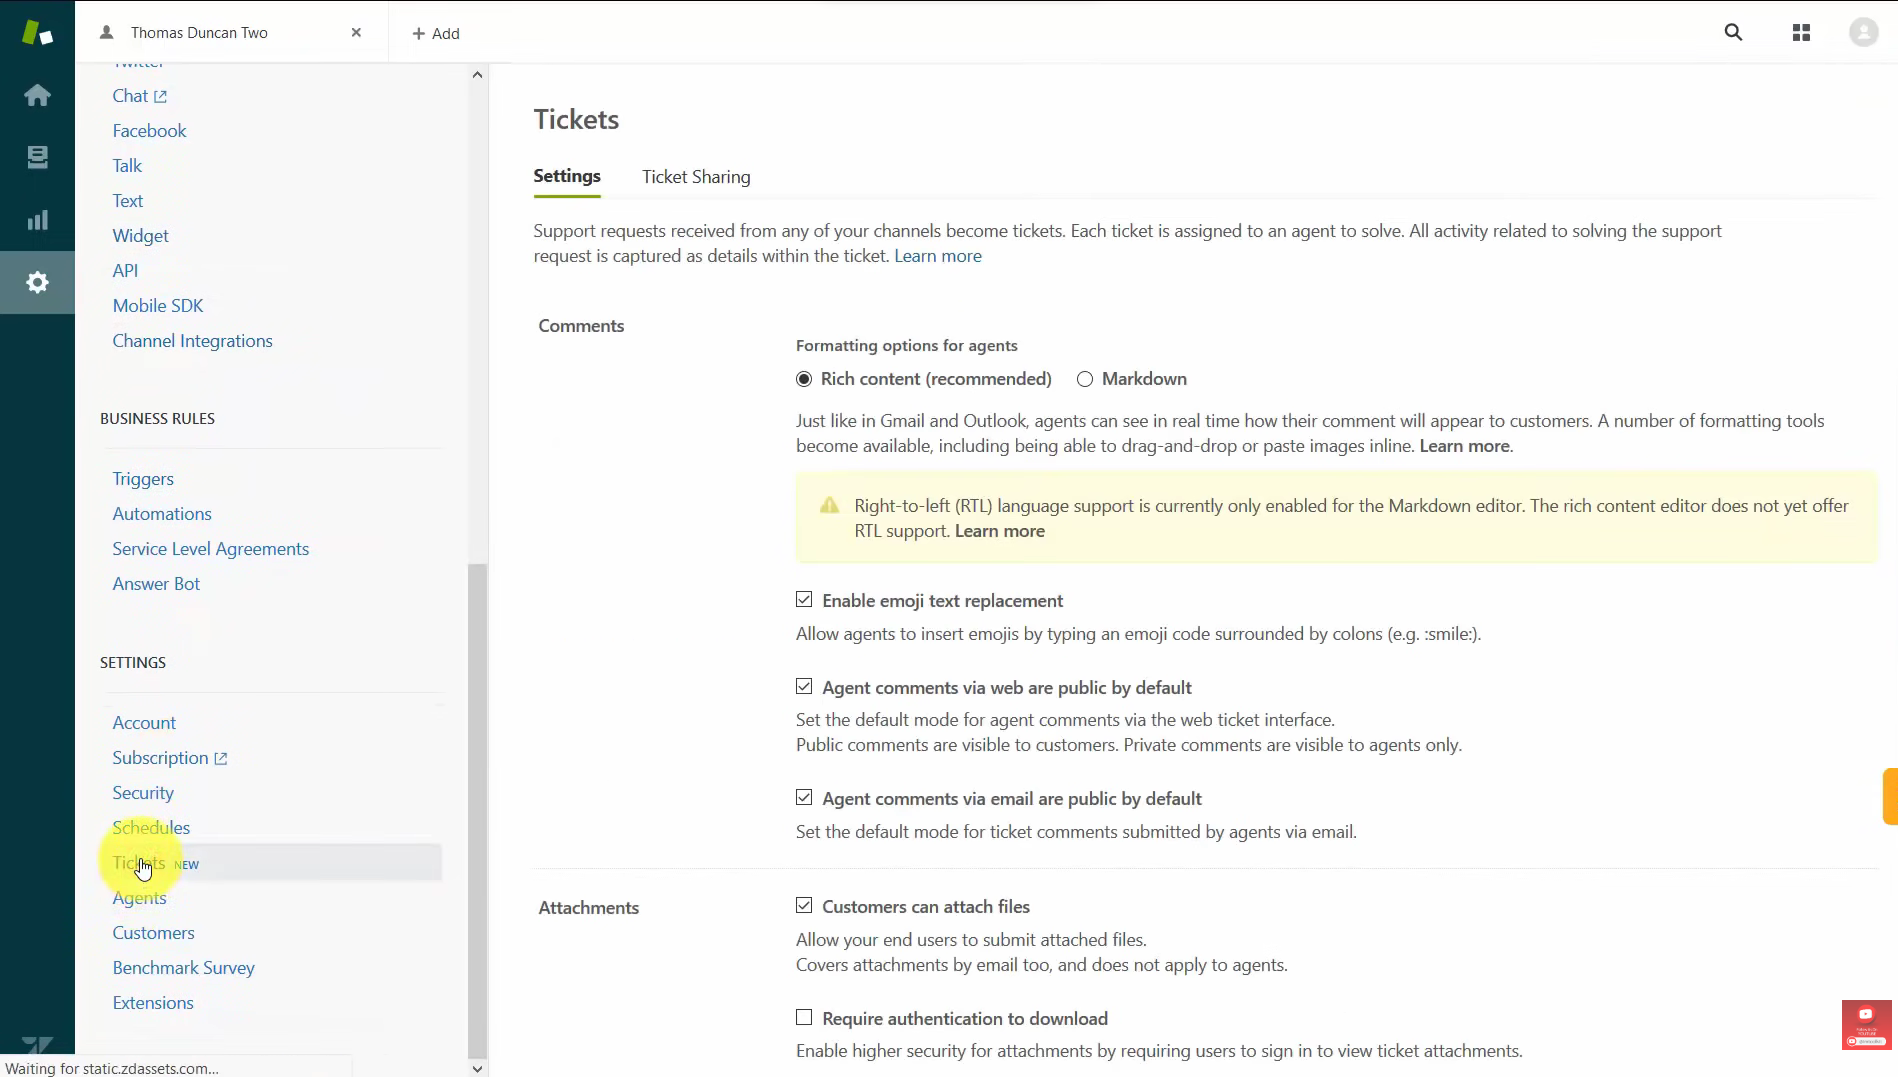
- Under Settings, click “Tickets” to view its settings.
- In the ticket settings, you can modify the features involved in creating a ticket. For comments, rich content is advisable for the formatting options of agents. Through checkbox, you can also enable the emoji text replacement and the destination of comments via web and email can be set as public by default.
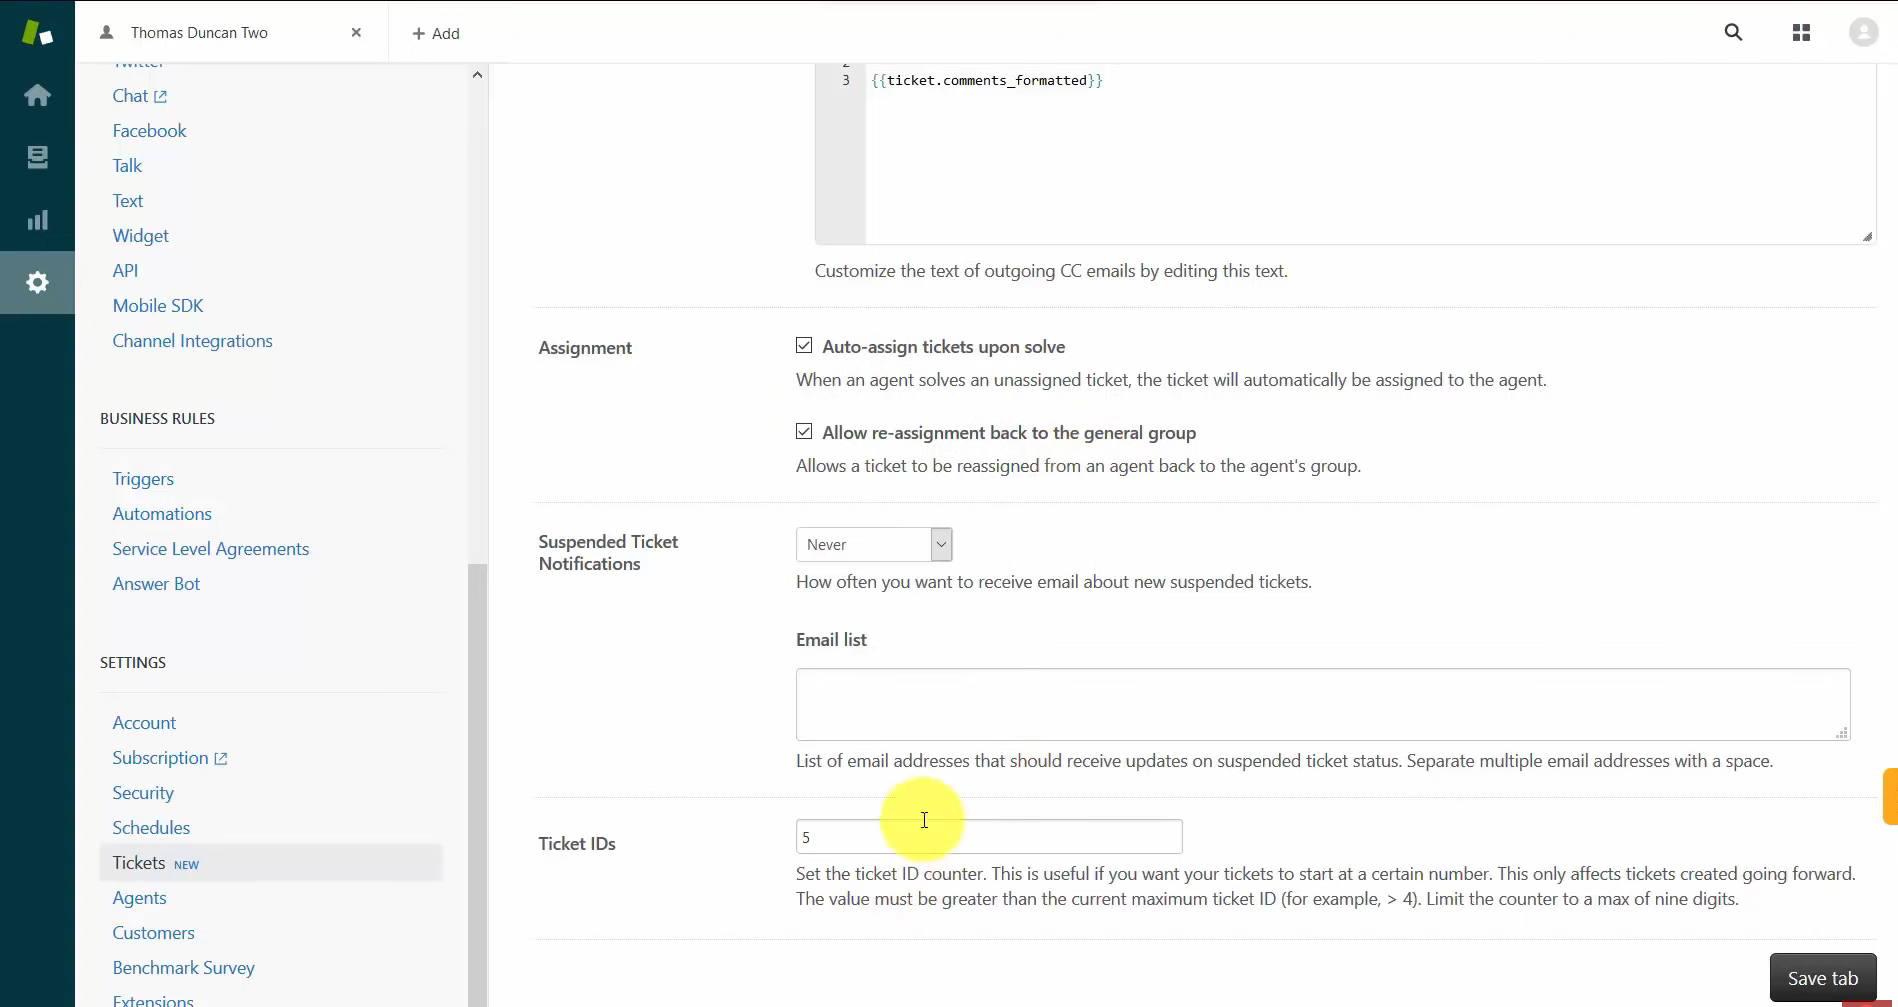
- Lastly, you can auto-assign tickets upon solve and allow reassignment back to the general group. These settings are enabled through a checkbox under the Assignment field of Ticket settings. After finalizing, you can now click the “Save tab” button to finish modifying the Ticket settings.
Conclusion
You’re done! Always remember that to implement Zendesk for customer support, you need to modify and set up the settings and the support email that will be utilized for the incoming tickets from customers and website visitors.
-
You need to have a Zendesk account from your work email to do this task because the work email is necessary in creating the support email address that your agents will be using to communicate with your clients.
-
Activating the Help Center through Guide settings is a beneficial feature in Zendesk because it records expected questions from consumers and it also allows everyone to ask an inquiry by submitting a ticket.
-
Basically, customer settings evolve on the tags and the groupings of the users. If you allow everyone to submit a ticket, then you have to be fully prepared for the amount of inquiries that your website might encounter.
-
Through modification of settings, you can allow the agents to delete and view the deleted tickets. They can also forward emails to Zendesk and record these forwarded emails as coming from the original sender.