How to Build a Customized Knowledge Base with HelpDocs
To create a customized knowledge base using HelpDocs that reflects your brand and provides a user-friendly experience for your customers.
Prefer a shortcut? 16 free tools do parts of this for you.
customization*

Aim: To create a customized knowledge base using HelpDocs that reflects your brand and provides a user-friendly experience for your customers.
Optimal Outcome: A fully functional and branded knowledge base that provides helpful information to your customers and enhances their overall experience with your product or service.
What do you need to start:
-
A HelpDocs account
-
Content for your knowledge base
-
A logo and branding materials
-
Knowledge of HTML and CSS (optional)
Why is this SOP Important: Creating a well-designed and user-friendly knowledge base can greatly enhance your customer support experience, reducing the number of support tickets and providing quick solutions to frequently asked questions.
When and Where to execute: This SOP can be executed anytime and anywhere, as long as you have access to your HelpDocs account and the necessary content and branding materials.
Who Should Be Doing This: The person responsible for creating and maintaining your company's knowledge base.
Step-by-Step Guide:
Set up a HelpDocs account
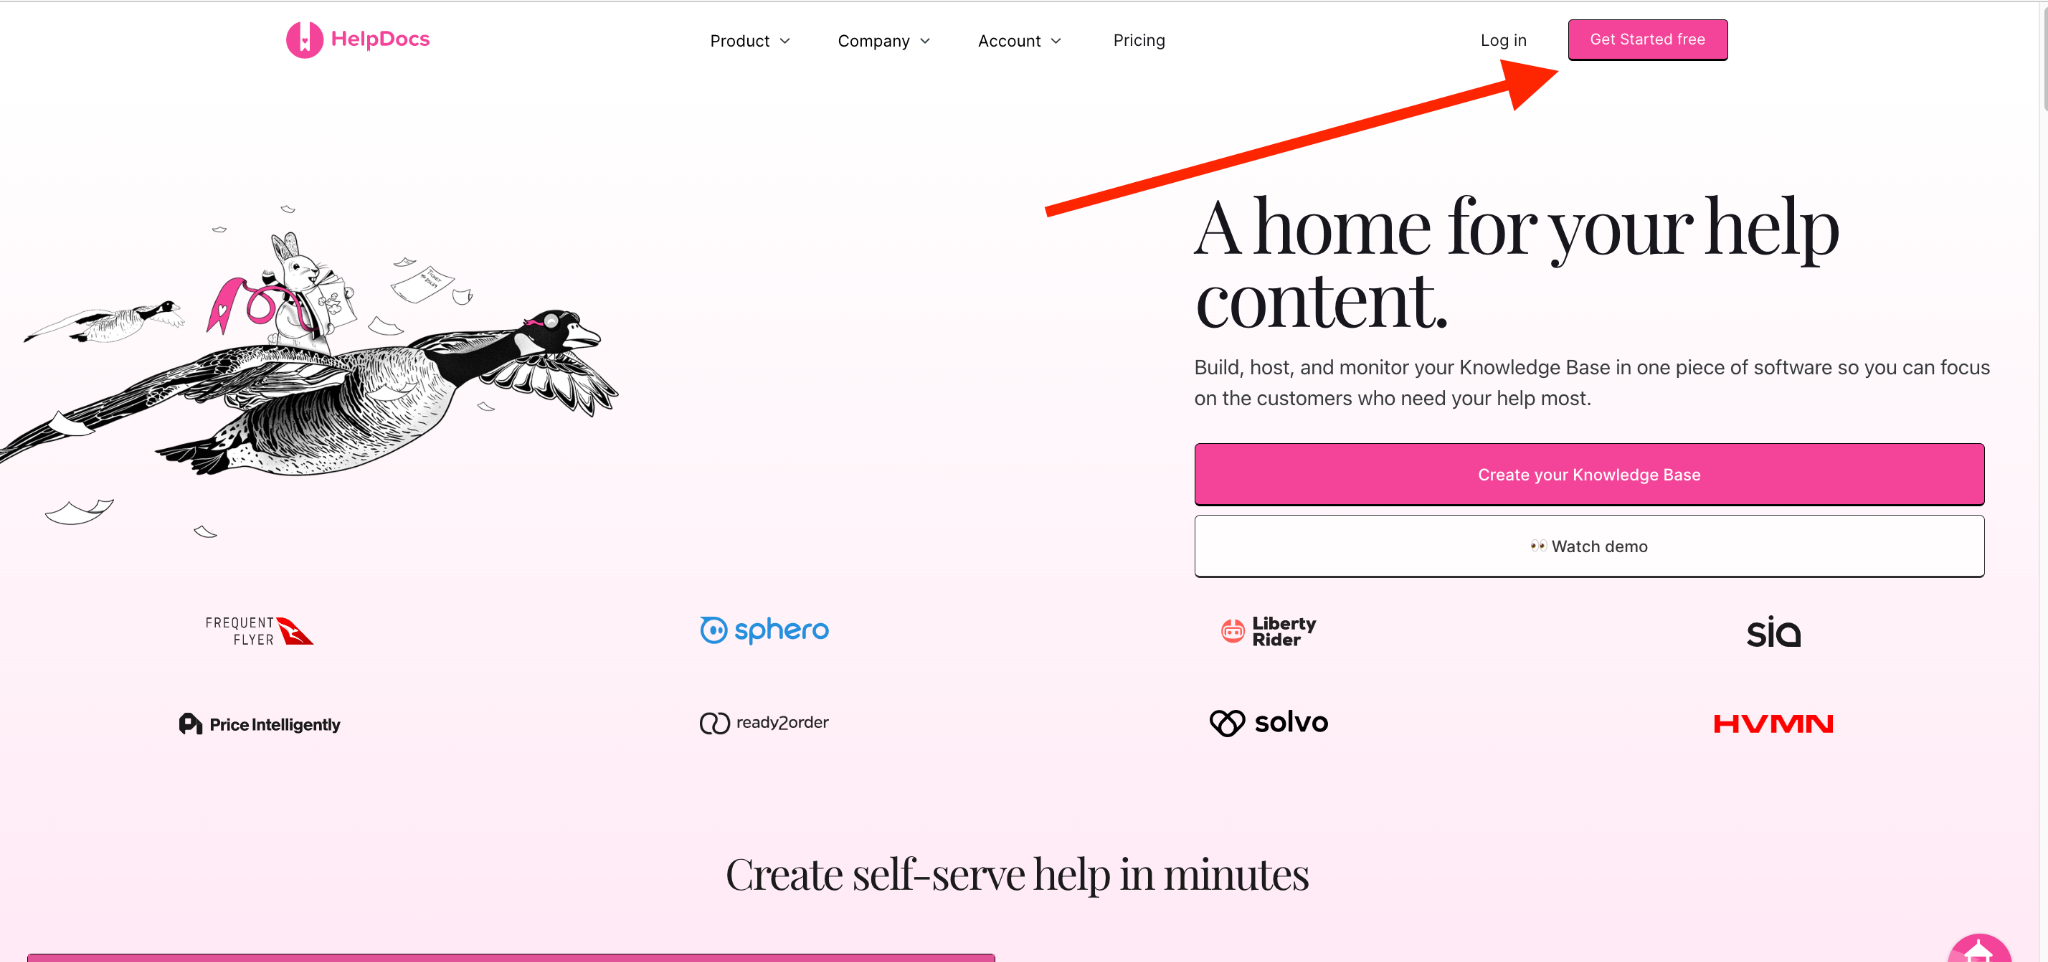
- Go to https://helpdocs.io/ then click Get Started free.
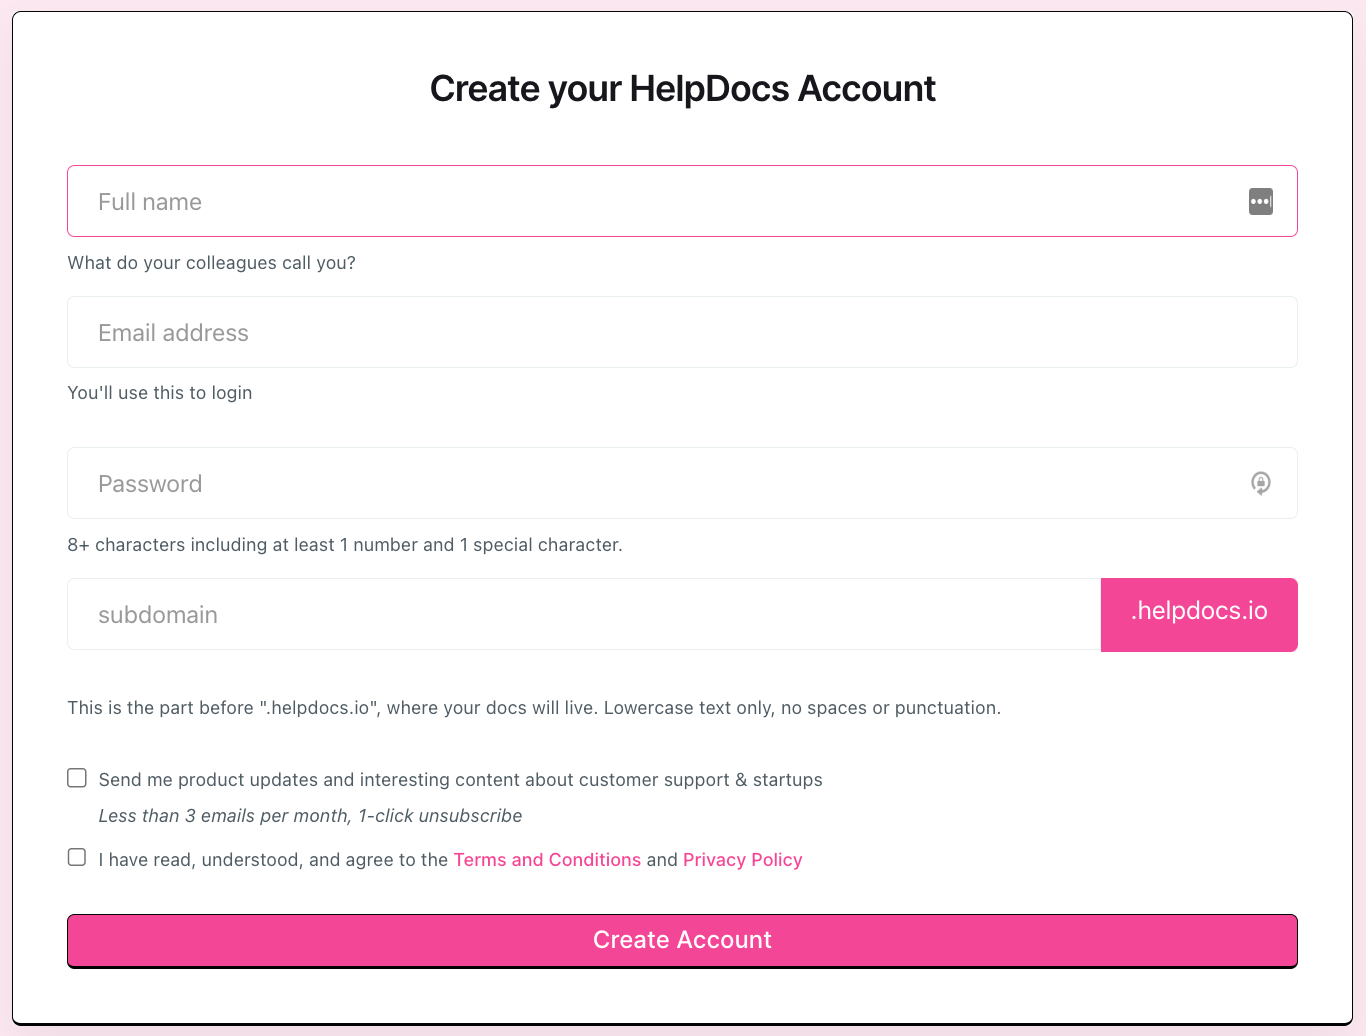
- Fill-out all required fields and click Create Account.
Upload branding assets and customize your knowledge base
-
Log in to your HelpDocs account
-
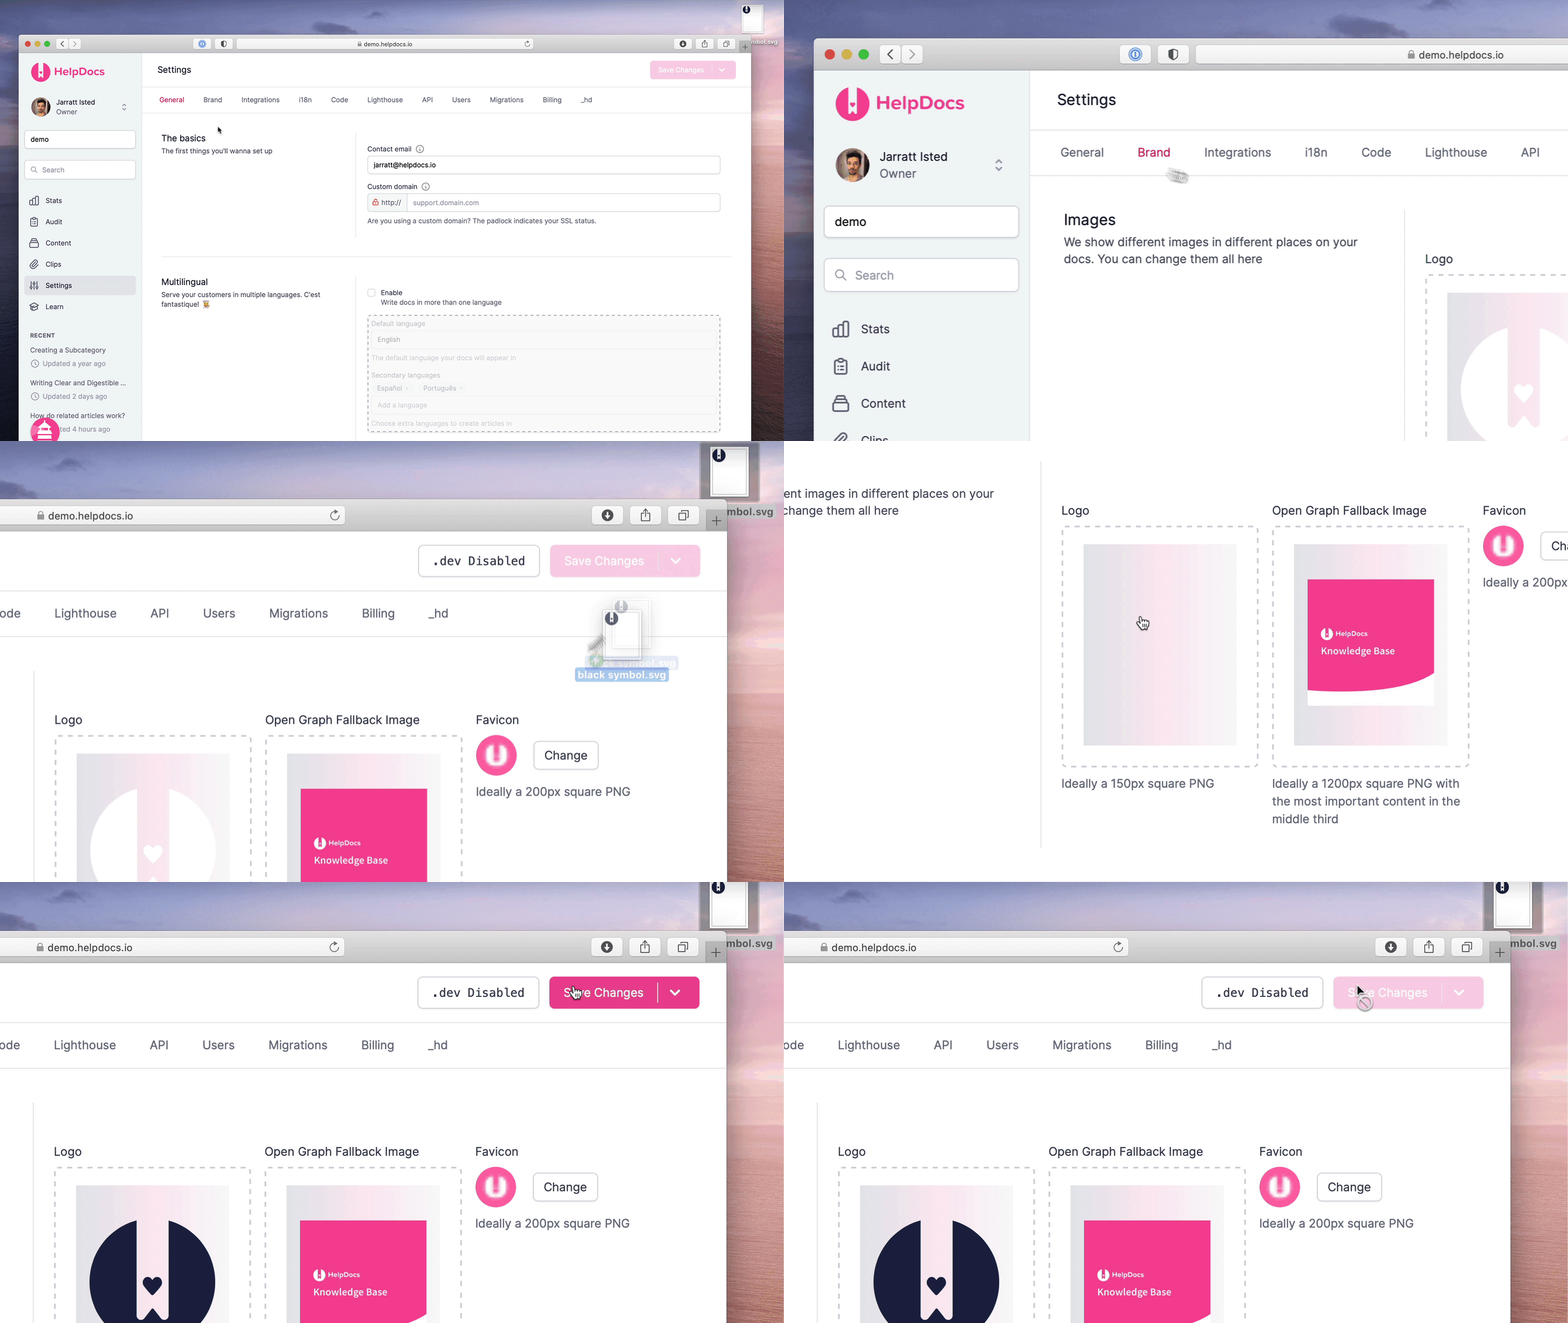
Upload your brand logo
-
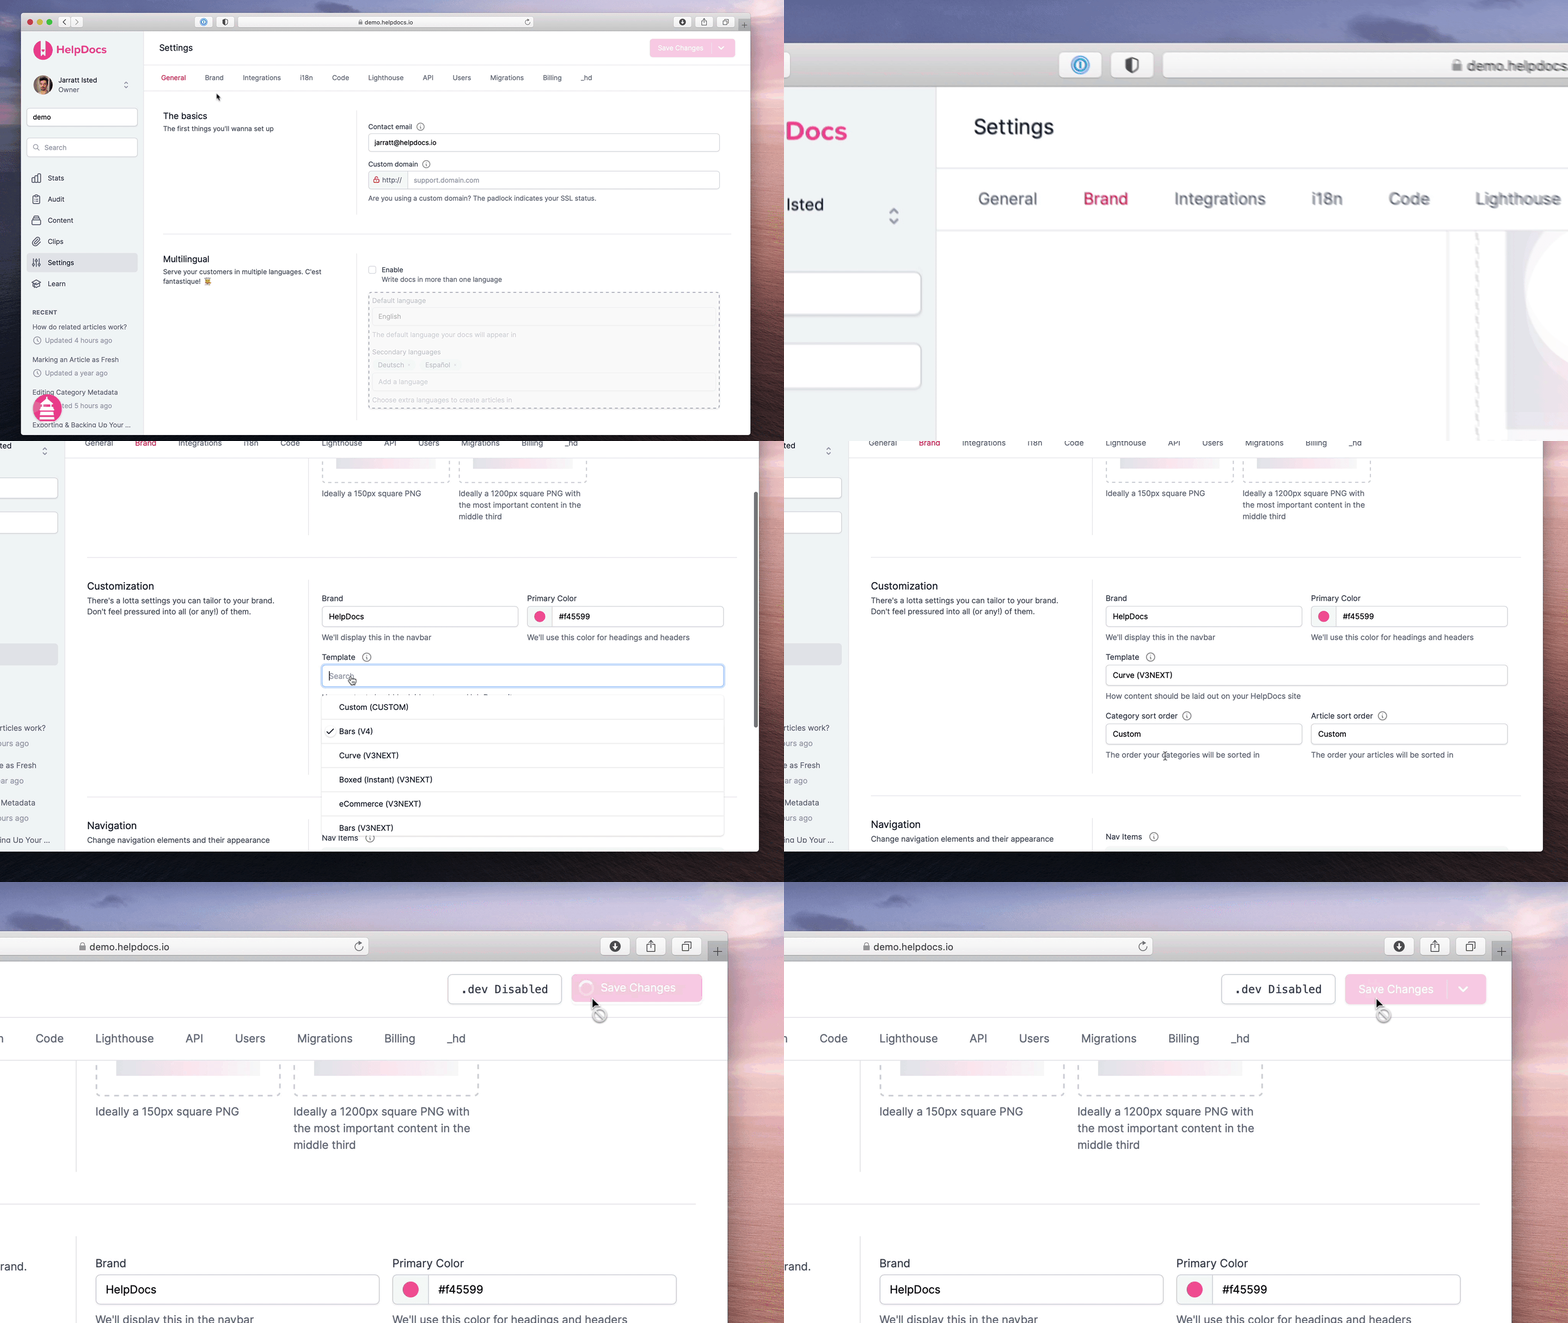
Head over to Settings > Brand
-
Upload your logo
-
Click on the Logo box
-
Or drop an image onto it
-
-
Hit Save Changes
-
-
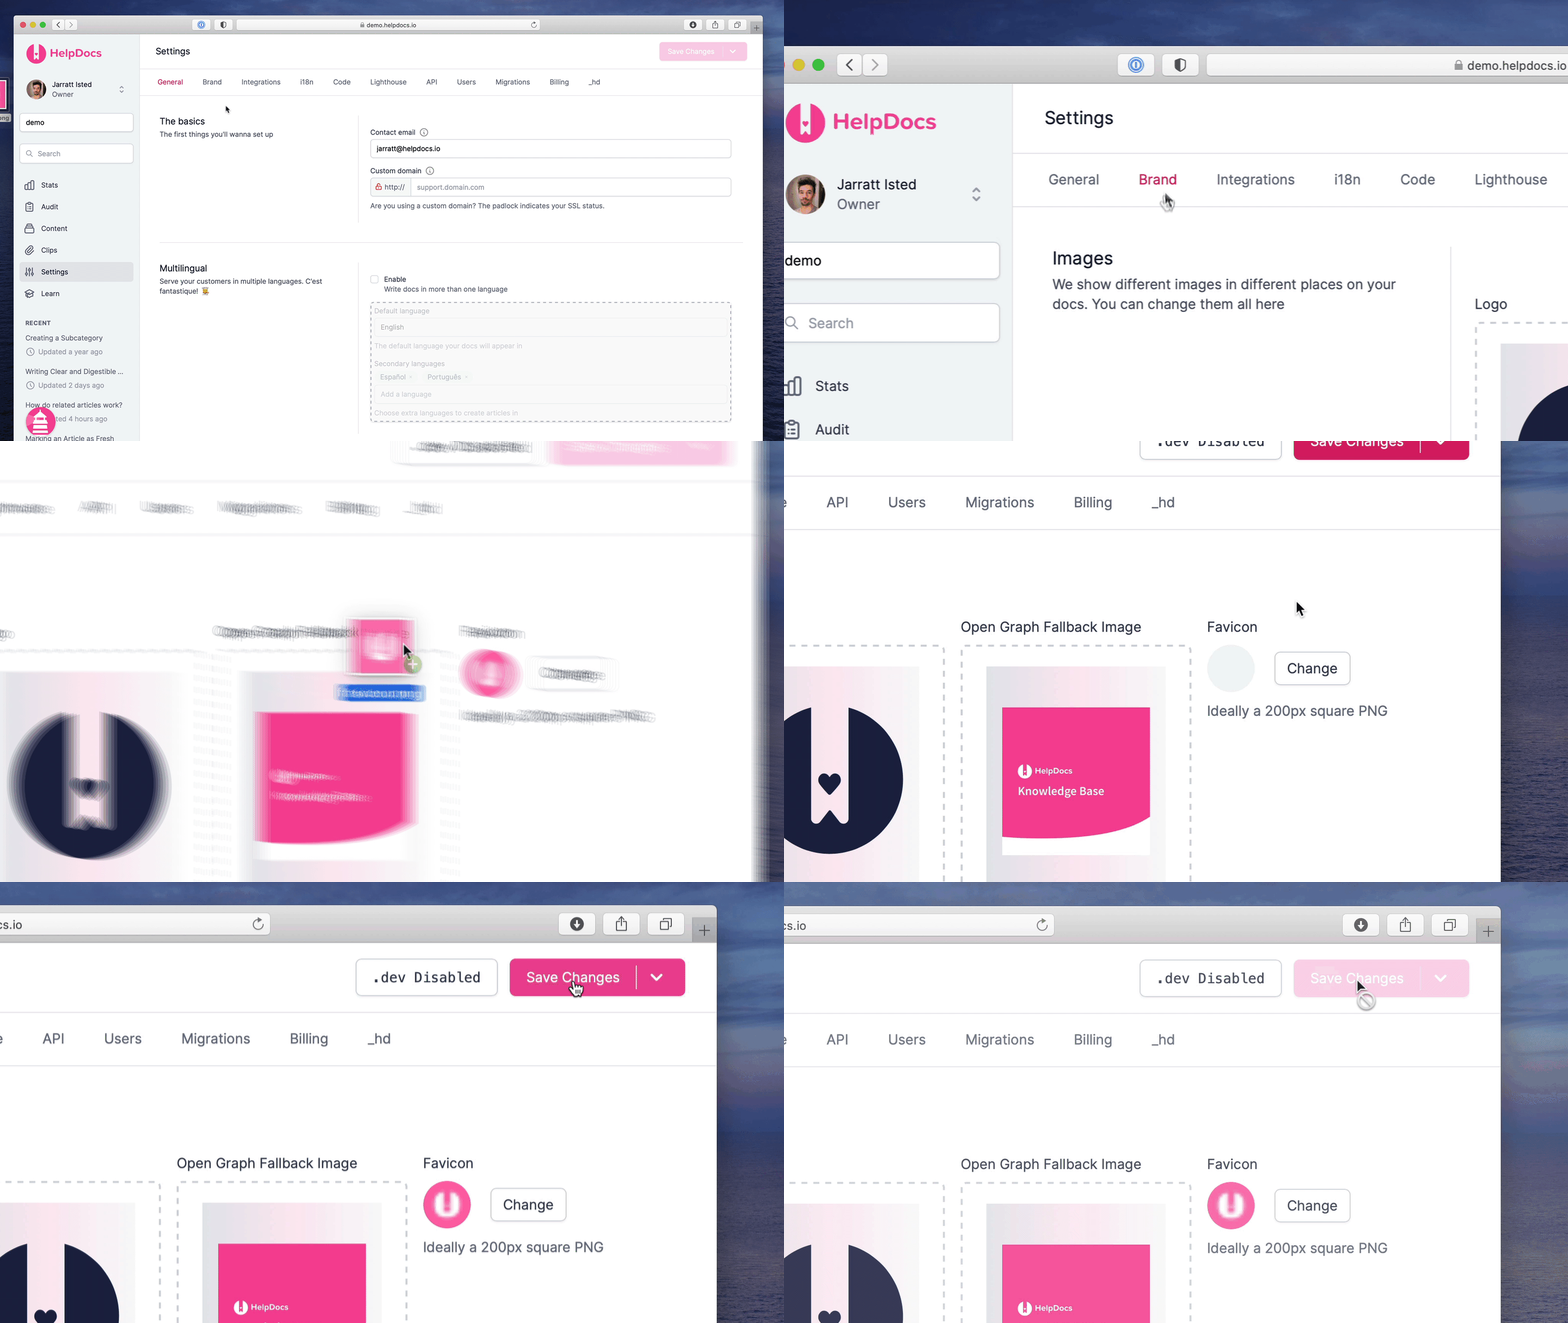
Upload a Custom Favicon
-
Go to Settings > Brand
-
Find the Favicon image dropzone, and click to upload your image (or drop an image inside the frame)
-
Your favicon file will upload to our servers
-
HelpDocs will automatically serve this file to browsers that support it
-
-
Choose a Template
-
Head to Settings > Brand
-
Head to the Customizations section
-
Under Template select the layout you'd like
-
Hit Save Changes
-
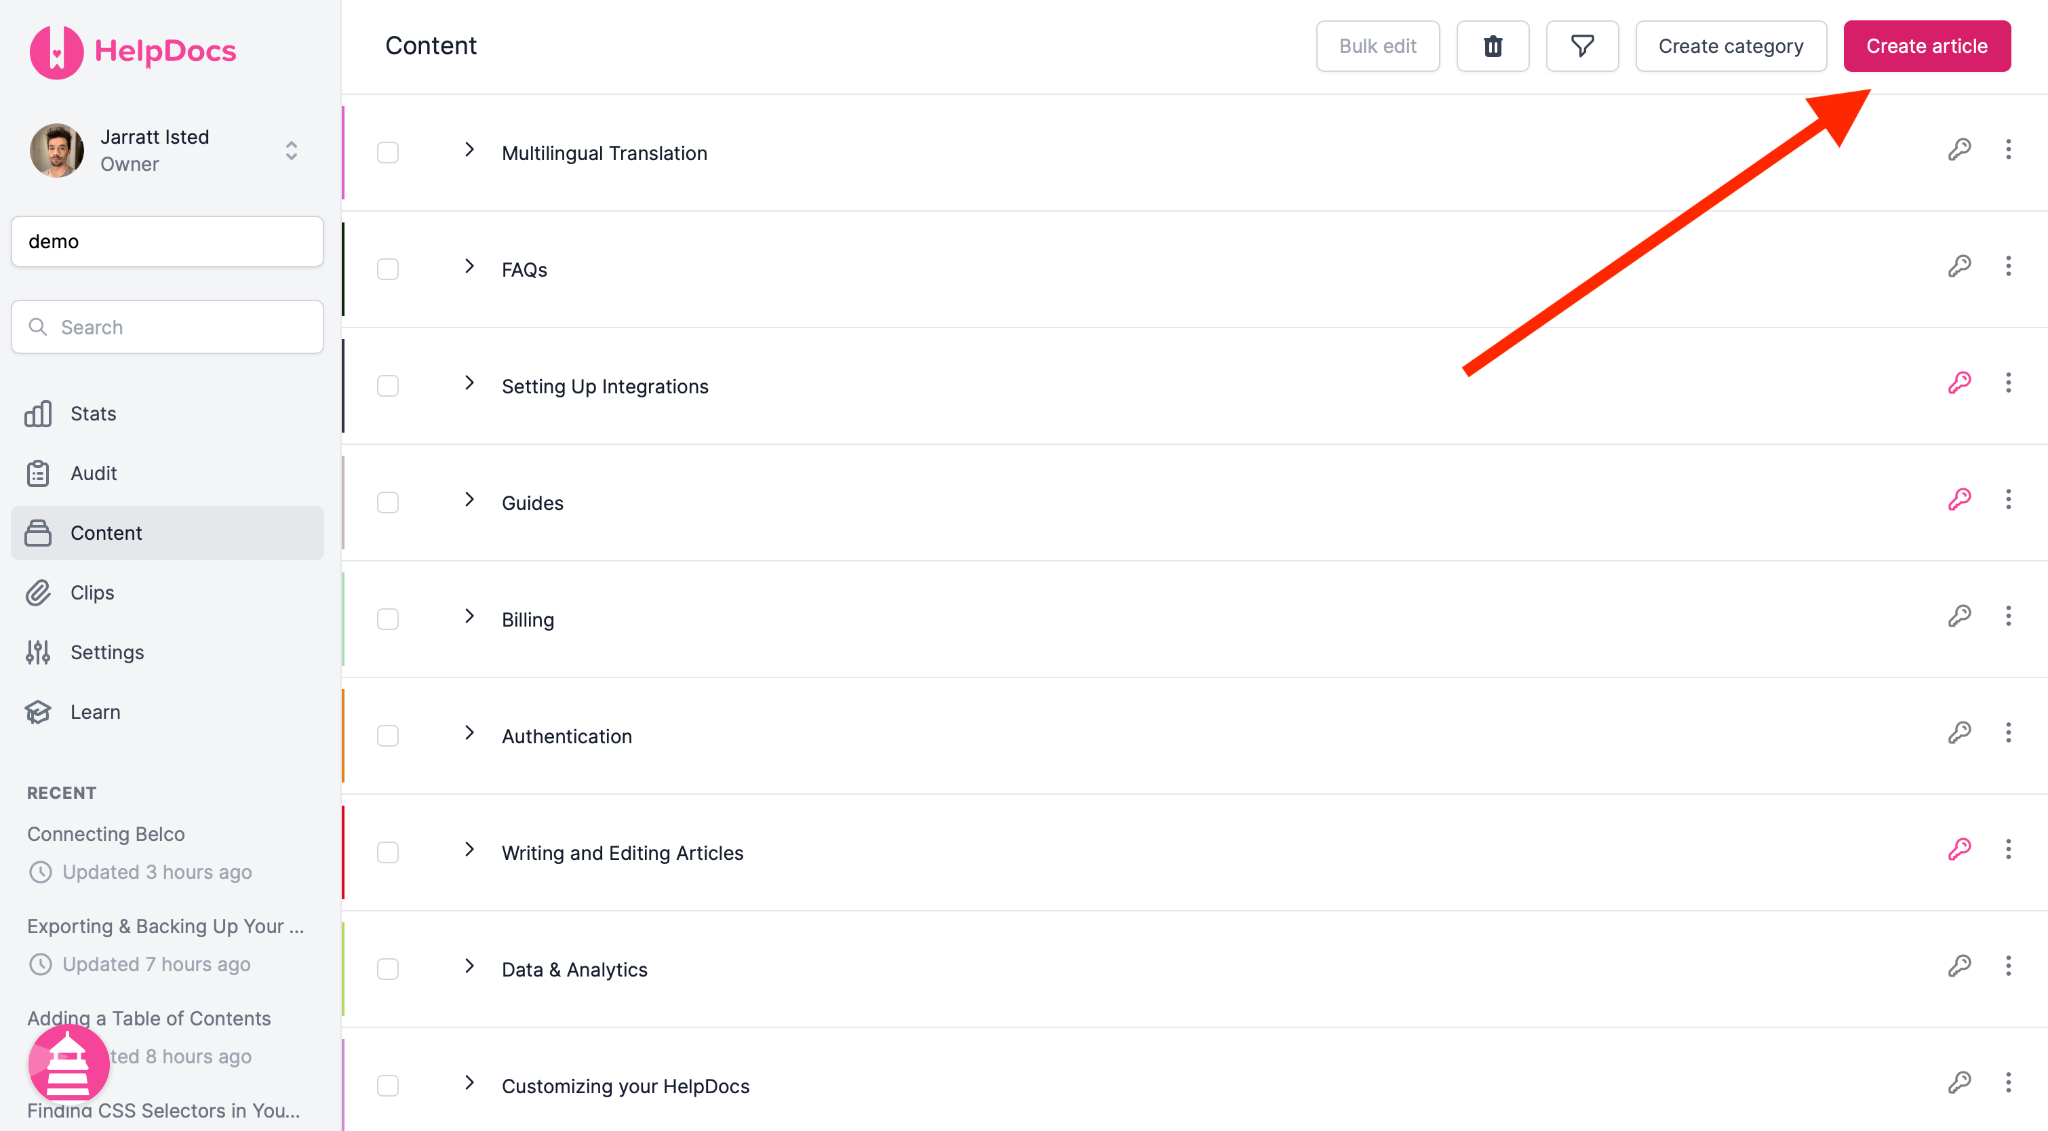
Create your first article
- On your dashboard, navigate to Content then click the "Create article" button.
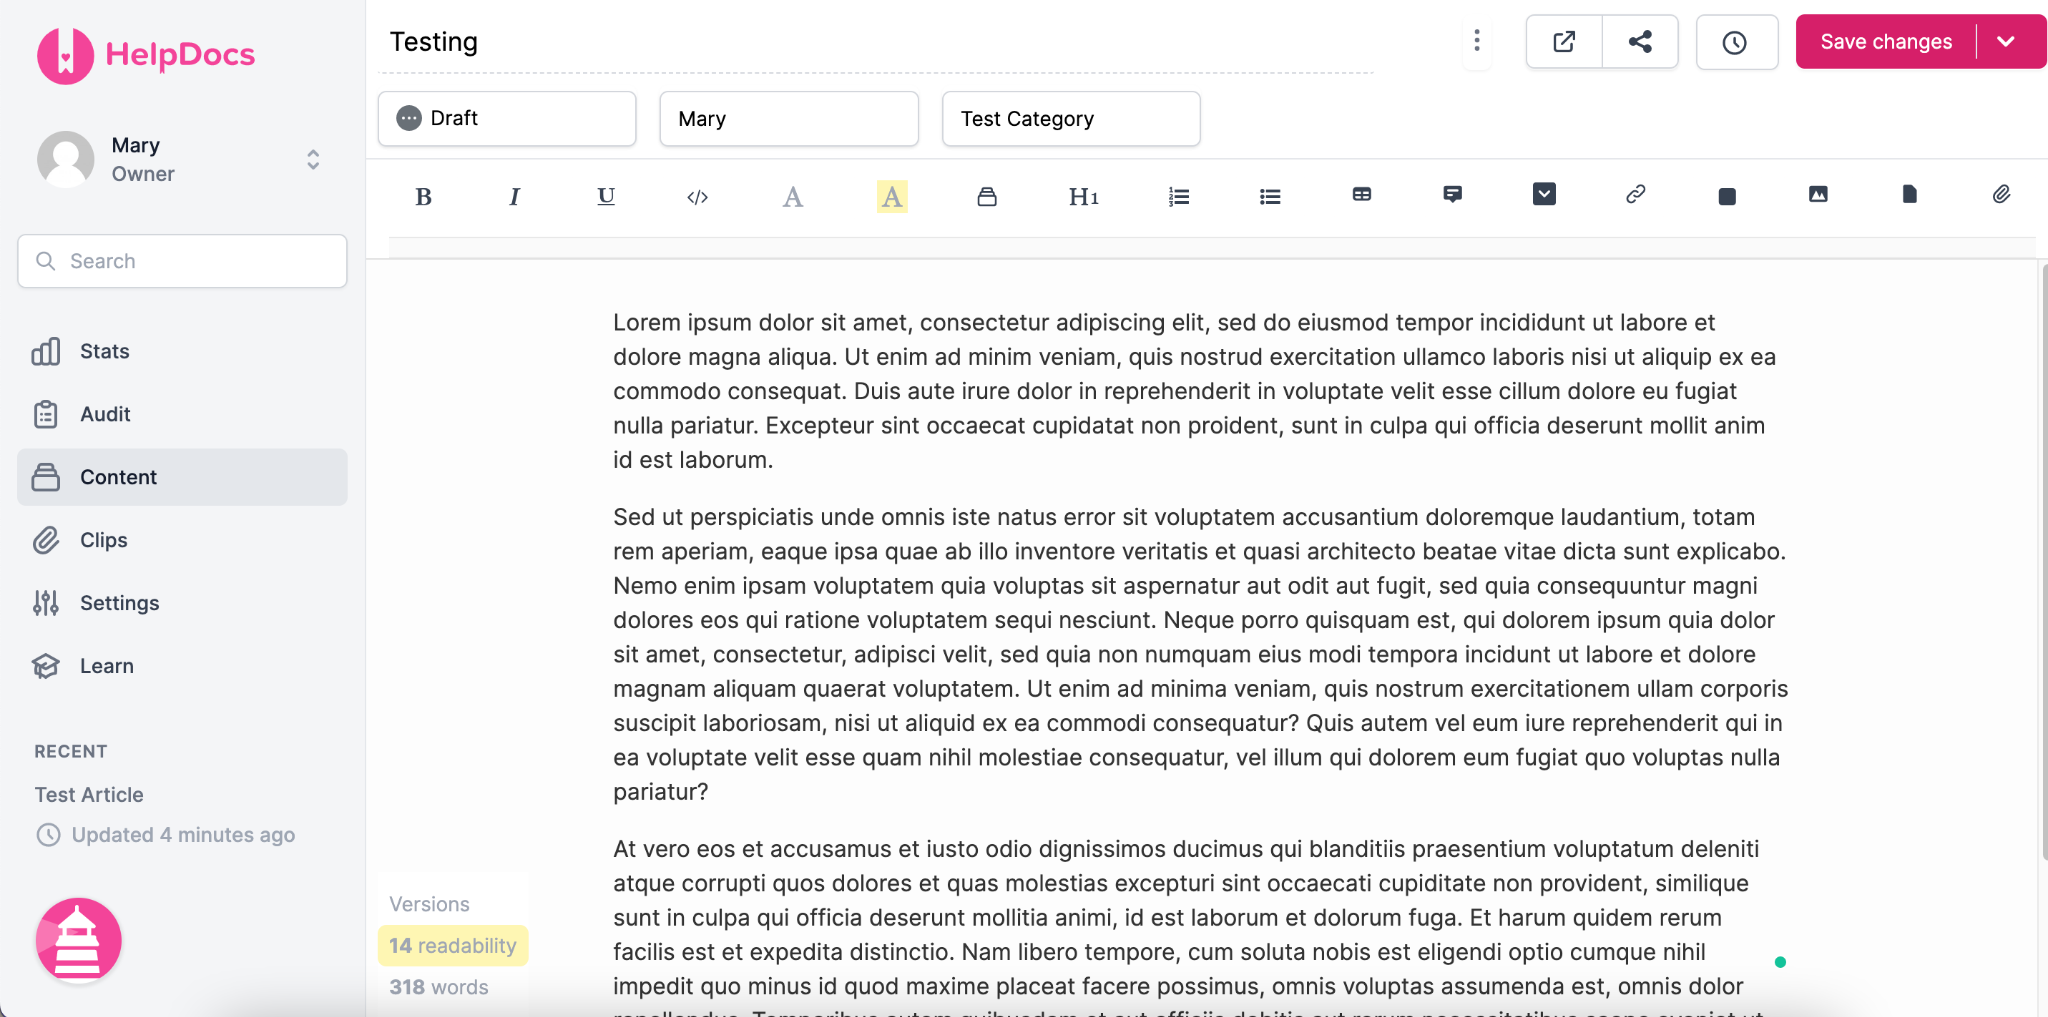
- Give your article a title and add your content using the built-in editor. You can also add images and videos to your articles to make them more engaging. Click Save changes once done.
- Repeat this process as many times as you need to create more articles.
Organize your articles
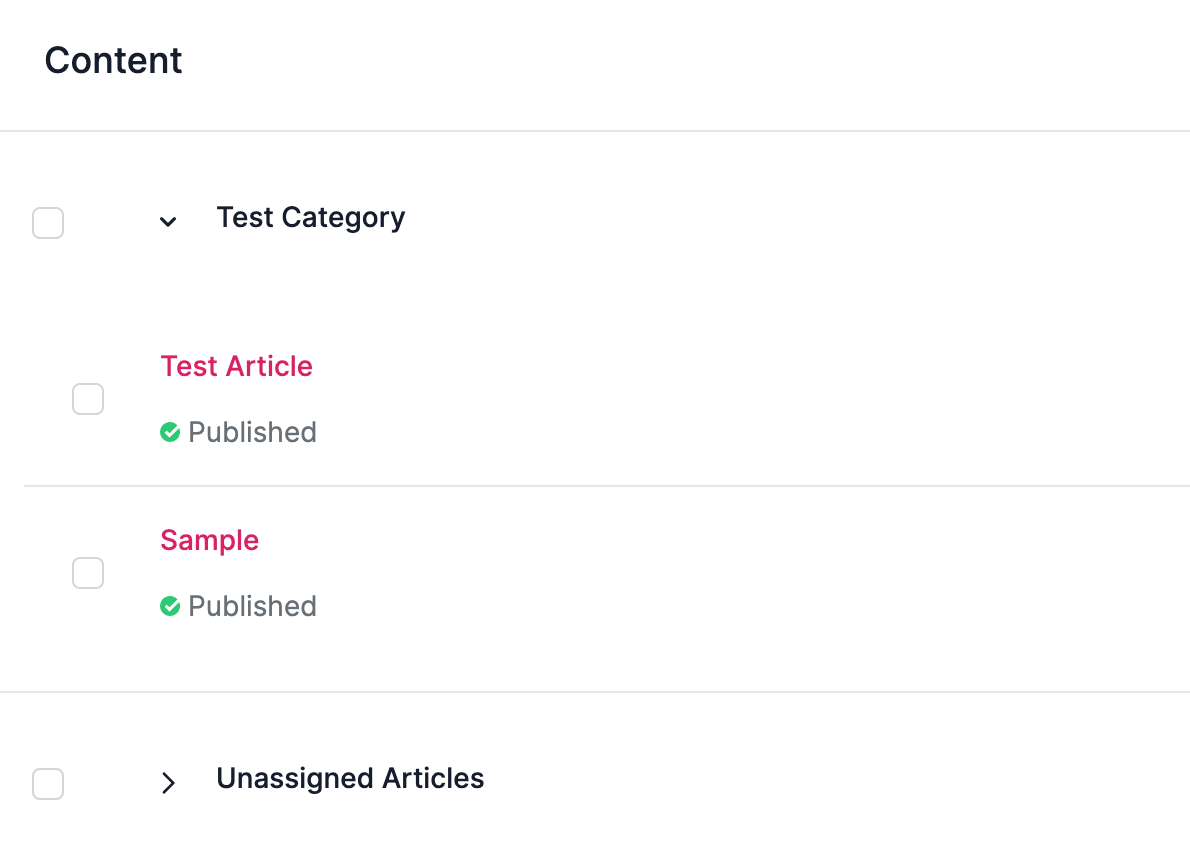
As you add more articles, you may want to organize them into categories and sections. Click on "Create Category" to create new sections or categories.

Then, drag and drop articles into the appropriate section or category.
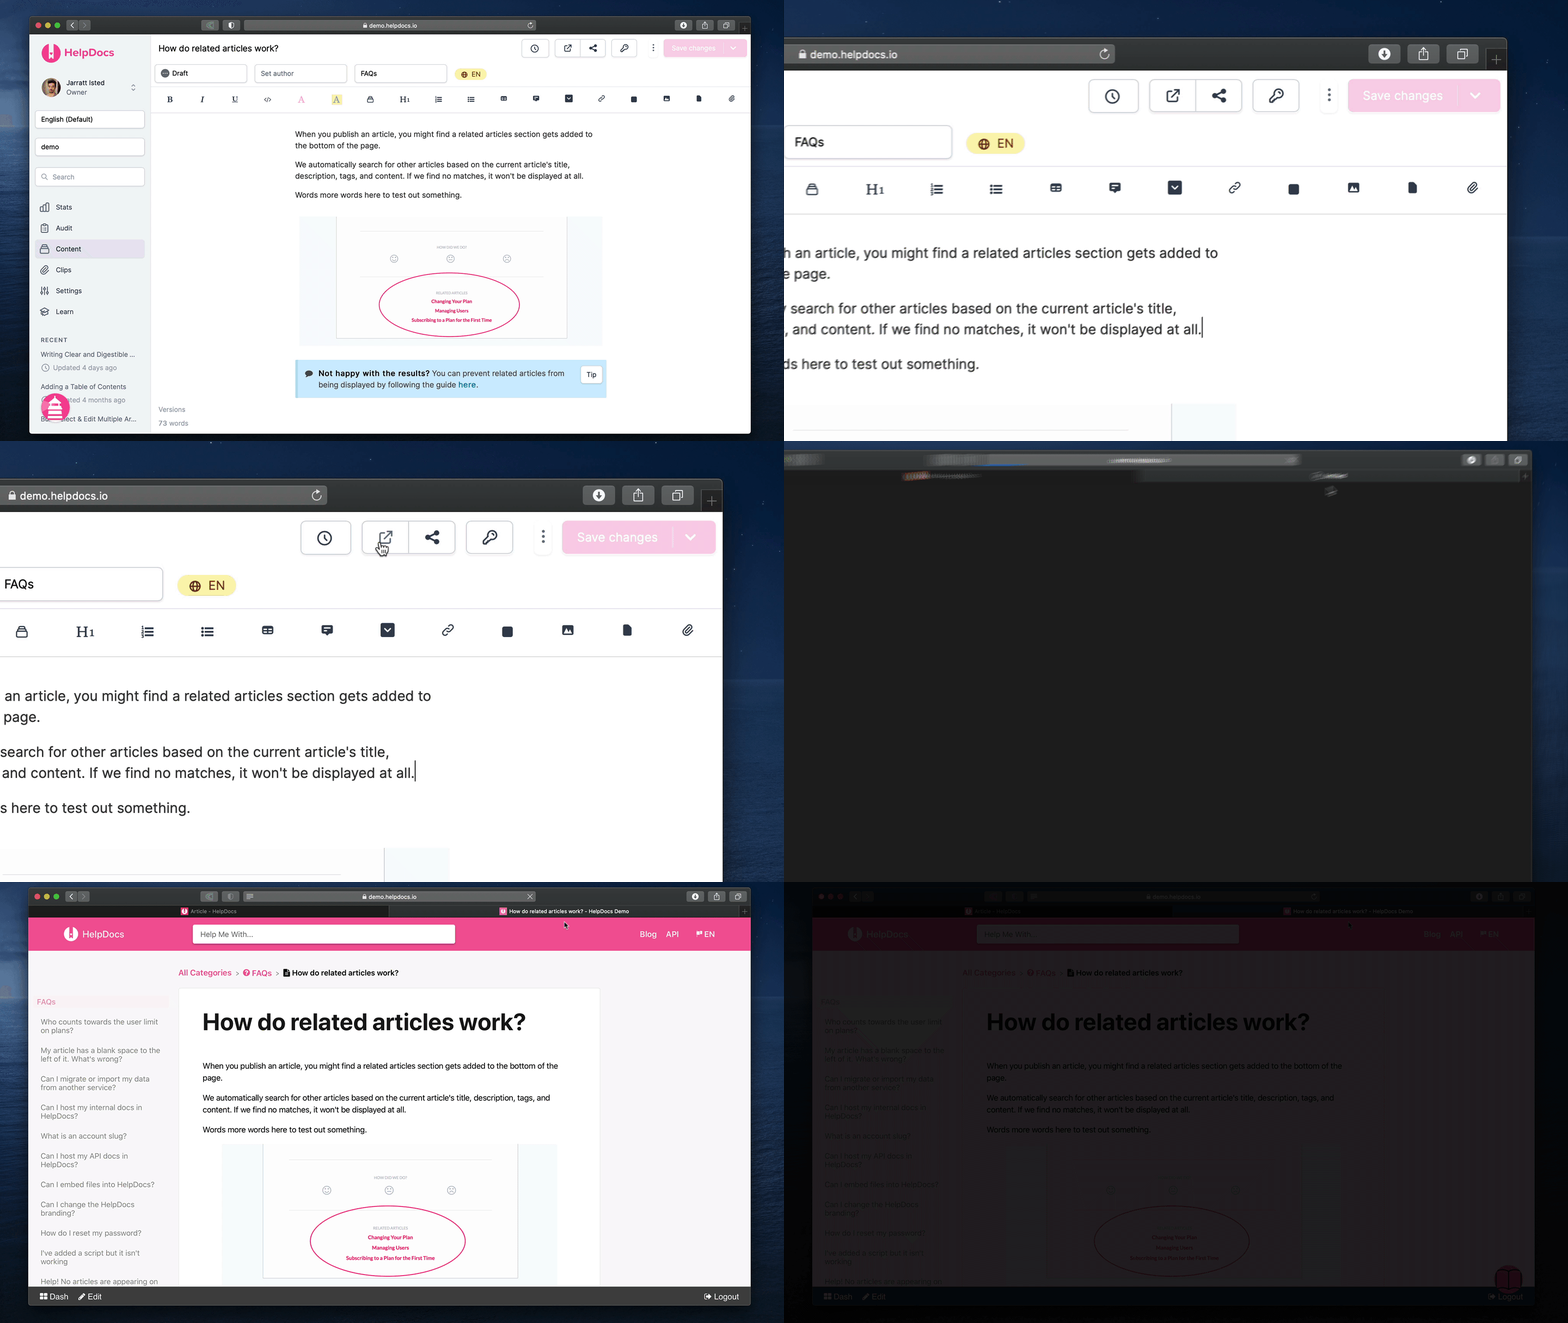
Preview and test your knowledge base
Use the "Preview" button to see how your knowledge base looks and functions. Test your articles and links to make sure they're working as expected. Make any necessary adjustments to your content or customization options.
-
In the article editor make sure you've saved your latest changes.
-
Hit the Preview button in the upper right-hand corner of the article editor.
-
Done! You'll see how your article looks on your HelpDocs.
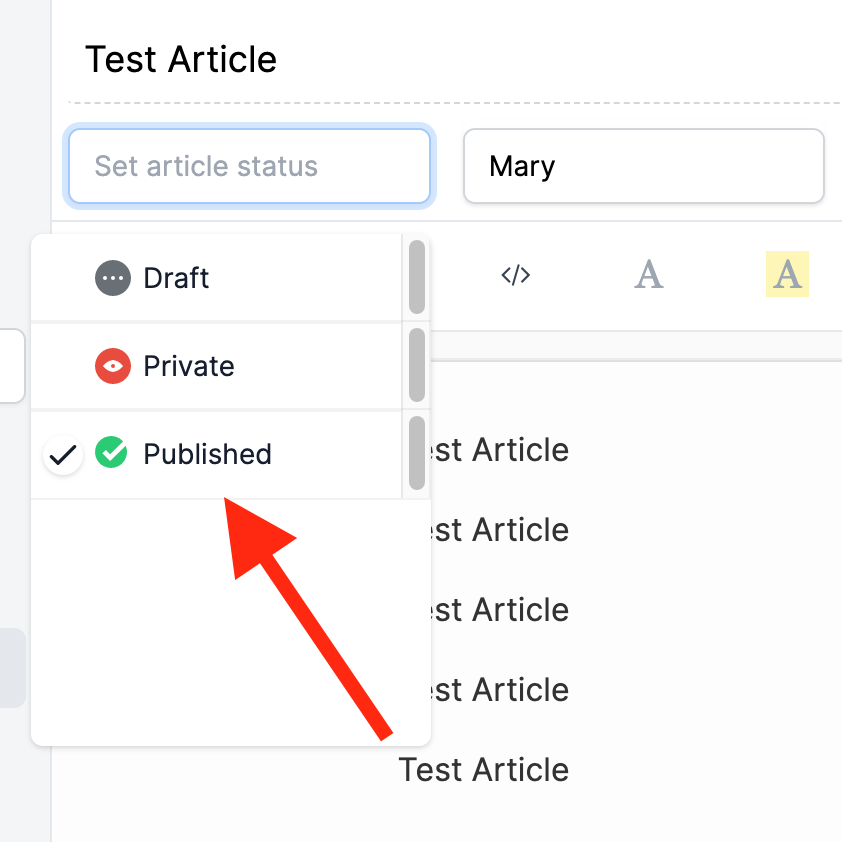
Publish your knowledge base
When you're ready, click on the "Publish" button to make your knowledge base live. You can choose to use a HelpDocs subdomain or use your own custom domain name.
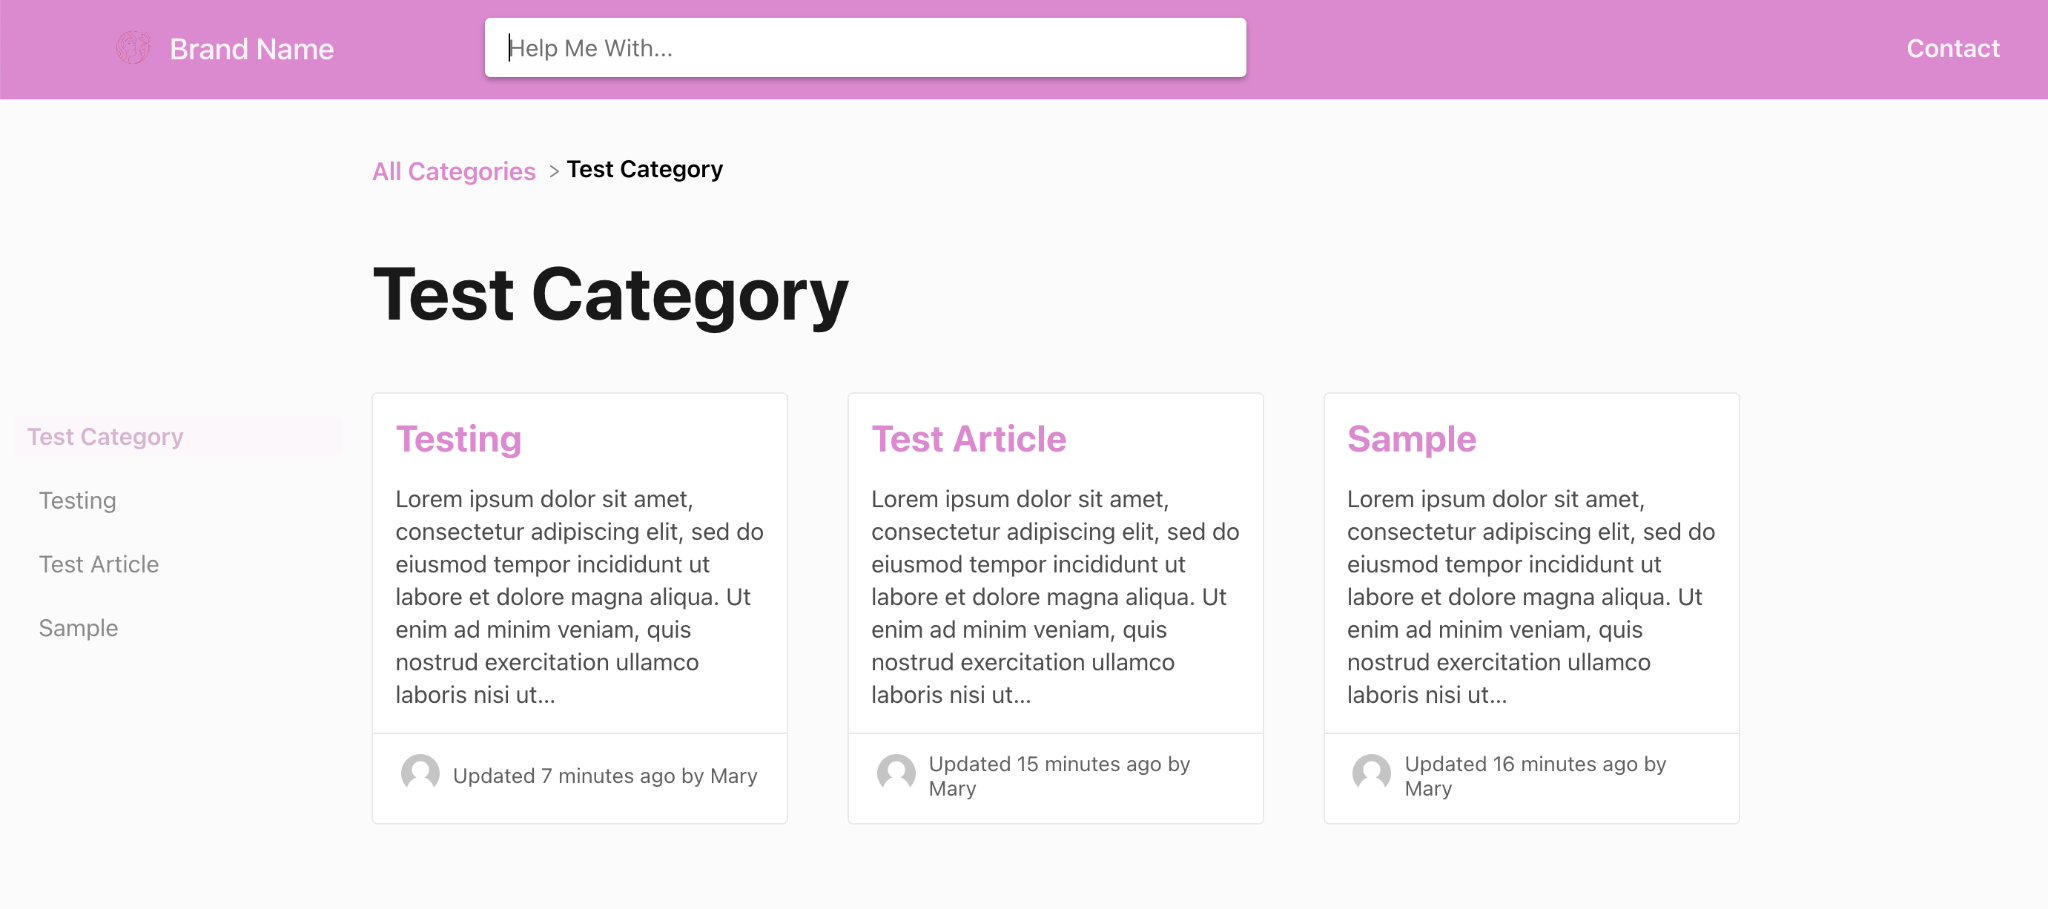
Live Preview
Below is a sample of how your knowledge base can look once everything goes live. Remember, you can customize the favicon, the name of your knowledge base, the template, and the colors.
Conclusion
You’re done!
You've successfully built a customized knowledge base with HelpDocs. Keep your knowledge base up to date and make changes as needed to ensure your customers have access to the most accurate and helpful information.
Execution Checklist:
-
Set up a HelpDocs account
-
Upload branding assets and customize your knowledge base
-
Create your first article
-
Organize your articles
-
Preview and test your knowledge base
-
Publish your knowledge base
-
Live Preview