Set up a proper social markup
The process is intended to create a suitable social markup so that when someone shares a link to your content on social media, it is displayed in a visually pleasing and…
Prefer a shortcut? 16 free tools do parts of this for you.

Aim: The process is intended to create a suitable social markup so that when someone shares a link to your content on social media, it is displayed in a visually pleasing and informative manner.
Optimal Outcome: The major goal of this procedure is to effectively implement proper social markup that can increase the exposure and interaction of your content on social media, resulting in greater traffic to your website.
What do you need to start: You must have a Shopify account to proceed with this process.
Why is this SOP Important: Setting up proper social markup is essential in Shopify because it helps to improve the visibility and appearance of your products when they are shared on social media platforms. When a product is shared on social media, the social markup data is used to create a preview of the product, which includes the product's title, description, image, and URL.
When and Where to execute: Setting up proper social markup in Shopify should be done as soon as possible, preferably during the initial setup of your store or when you're adding new products or content to your store.
Who Should Be Doing This: The responsibility for setting up social markup ultimately falls on the website owner or the team responsible for managing the website's content and technical aspects.
What is social markup?
Social markup, also known as social metadata, is a type of structured data added to a website's HTML code to help social media platforms understand and display the content correctly when it is shared or linked to on their platforms. Social markup includes information such as the title, description, image, and URL of a webpage.
In Shopify, social markup is important because it helps to improve the visibility and appearance of your products and content when they are shared on social media platforms. Proper social markup ensures that when your products or content are shared on social media, they will be displayed in a visually appealing and informative way, which can increase the likelihood of users clicking through to your store and potentially making a purchase.
By implementing social markup in Shopify, you can improve the click-through rate and engagement of your products and content on social media platforms, which can ultimately drive more traffic and sales to your store.
Shopify has built-in social markup features that allow you to easily add social metadata to your store's pages, products, and blog posts. Shopify's theme editor also allows you to customize the social markup data for your store's homepage, collections, products, and blog posts, giving you complete control over how your content appears on social media.
In summary, social markup is a crucial component of social media optimization in Shopify, and it's important to ensure that your store's content is optimized with proper social metadata to improve its visibility and engagement on social media platforms.
Execution
Set up a proper social markup in product
-
Log in to your Shopify Account.
-
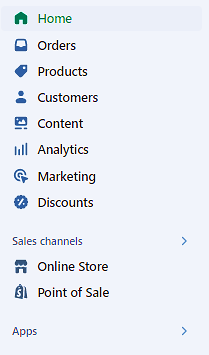
Go to your Shopify admin dashboard and click Online Store in the left-hand menu.
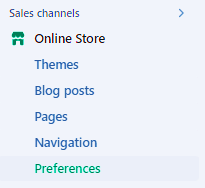
- Click Preferences.
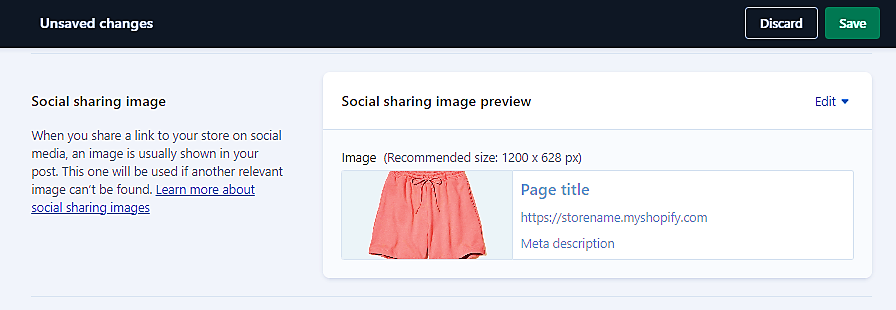
- Scroll down to the "Social media sharing images" section.

- Click on "Add image" to upload a social media sharing image for your store. This image will be displayed when your store's homepage is shared on social media platforms.

- Click Save.
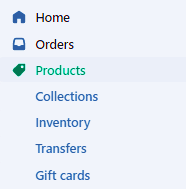
- To set up social markup for your products, go to the product page and click on your chosen product.

- Navigate to the Search engine listing preview section. Click Edit.

- Add a title and description for the product and upload a social media sharing image for the product.
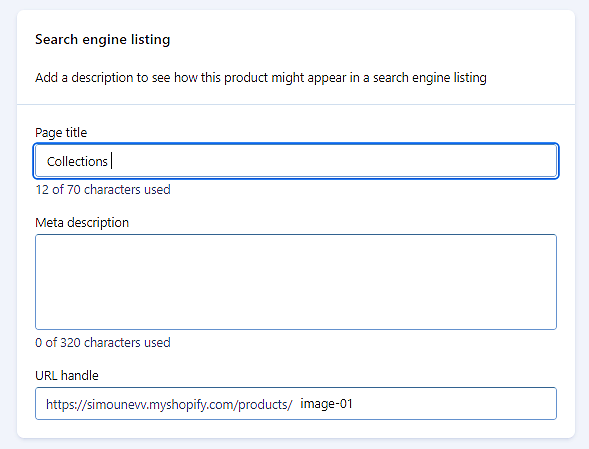
- Click Save.

Set up a proper social markup for blog post
- Navigate to your Shopify admin dashboard and click Online Store > Blog posts.
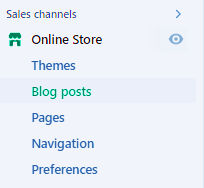
- Click an existing blog post or create new one. In this instance, we're going to create a new blog post.

- Click on Edit website SEO.

- Add a title and description for the blog post and upload a social media sharing image for the blog post.
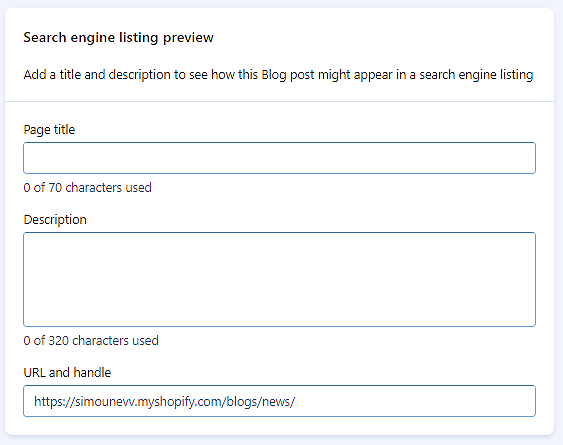
- Click Save.
Set up a proper social markup for your store's homepage, collections, products, and blog posts
- Navigate to your Shopify admin dashboard and click Online Store > Themes.
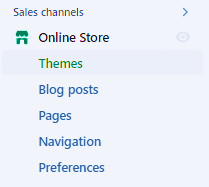
- Select the page you want to customize and click on "Edit code."
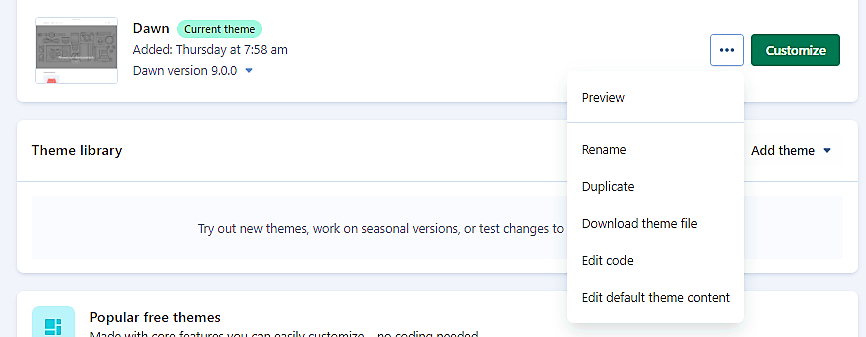
- Locate the folder template where you wish to add proper social markup, such as your store's homepage, collections, goods, and blog entries.

- Add the social markup data, including the title, description, image, and URL, for the page.
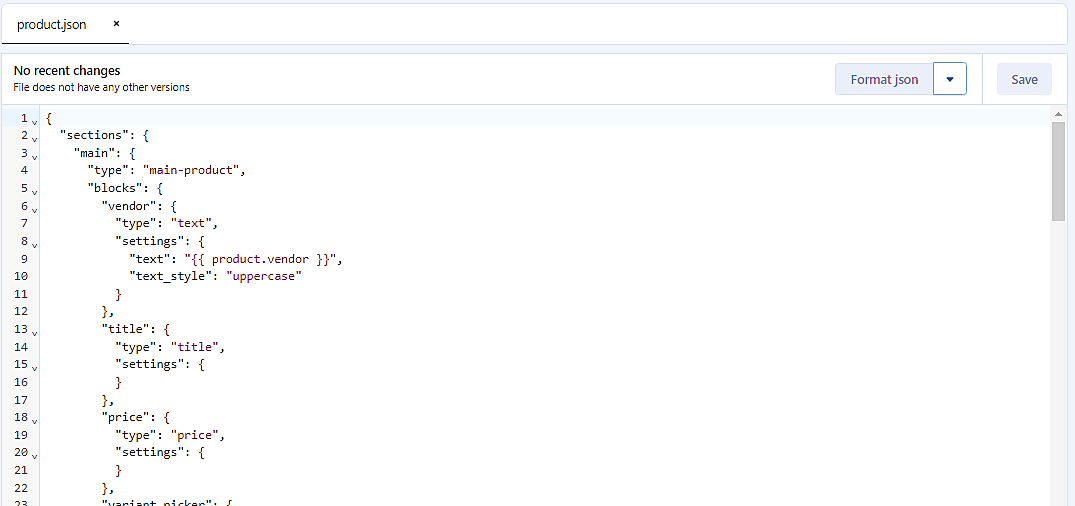
- Save your changes and preview the page to ensure that the social markup is displaying correctly.


Conclusion
You’re done! Always remember that setting up proper social markup in Shopify involves adding social metadata to your store's pages, products, and blog posts, as well as customizing the social markup data in the theme editor. By properly optimizing your store's content with social markup, you can improve the visibility and engagement of your products and content on social media platforms.
When you add social markup data to your Shopify store, it will help to ensure that your products and content are displayed correctly when they are shared on social media platforms, improving the visibility and engagement of your content.
It's a good practice to set up social markup for your store's homepage, collections, products, and blog posts to ensure that all your content is optimized for social media sharing. You can use Shopify's theme editor to customize the social metadata for each page, product, or blog post on your store.
Execution Checklist:
-
Go to your Shopify admin dashboard and click on "Online Store" in the left-hand menu.
-
Click on "Preferences" and scroll down to the "Social media sharing images" section.
-
Click on "Add image" to upload a social media sharing image for your store. This image will be displayed when your store's homepage is shared on social media platforms.
-
To set up social markup for your products, go to the product page and click on "Edit website SEO" under the "Search engine listing preview" section.
-
Add a title and description for the product and upload a social media sharing image for the product.
-
To set up social markup for your blog posts, go to the blog post page and click on "Edit website SEO" under the "Search engine listing preview" section.
-
Add a title and description for the blog post and upload a social media sharing image for the blog post.
-
To customize the social markup data for your store's homepage, collections, products, and blog posts, go to the theme editor in your Shopify admin dashboard.
-
Select the page you want to customize and click on "Edit code."
-
Locate the "head" section of the code and add the social markup data, including the title, description, image, and URL, for the page.
-
Save your changes and preview the page to ensure that the social markup is displaying correctly.